Well, hello again! I’m so glad you’re here! If you keep up with me on Instagram or Facebook, you’ll have seen sneak peeks of this project. Pssst… I’m on Instagram, Pinterest, and Facebook – let’s be friends. It’ll be fun.
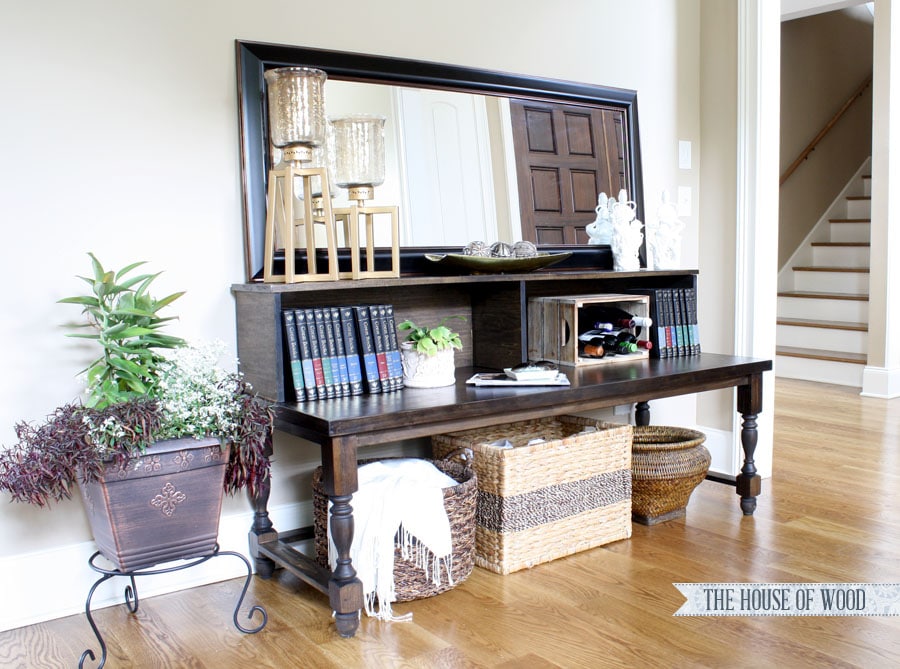
Here’s my newest DIY project, all done and dressed up:
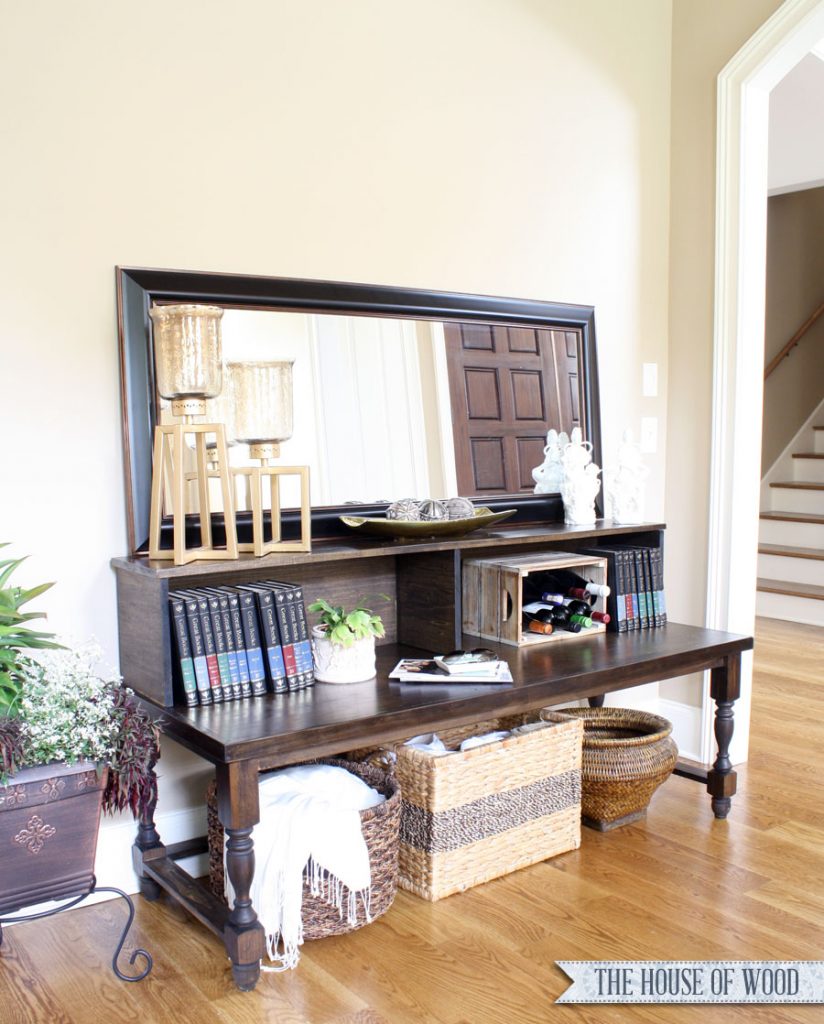
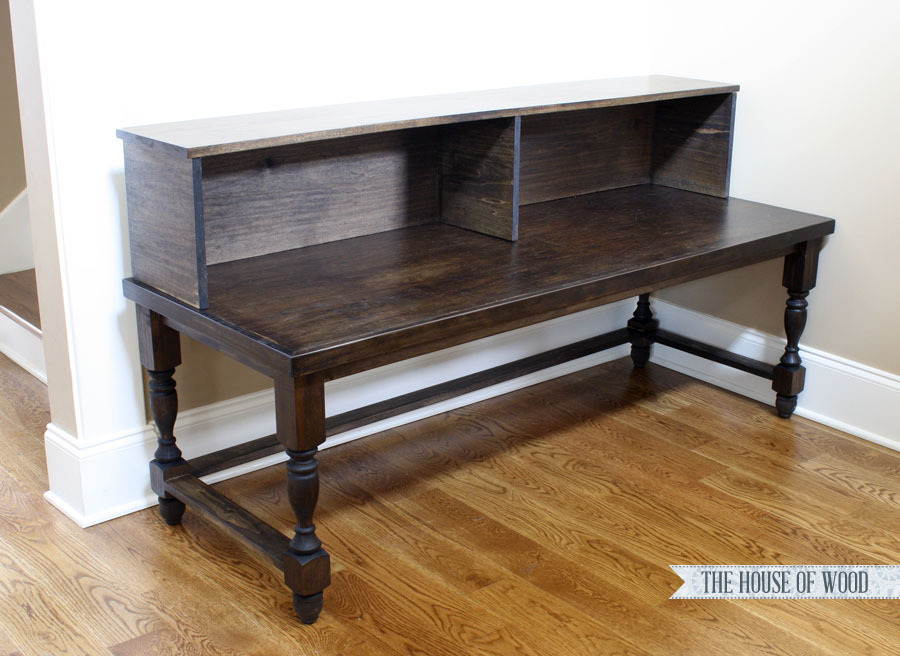
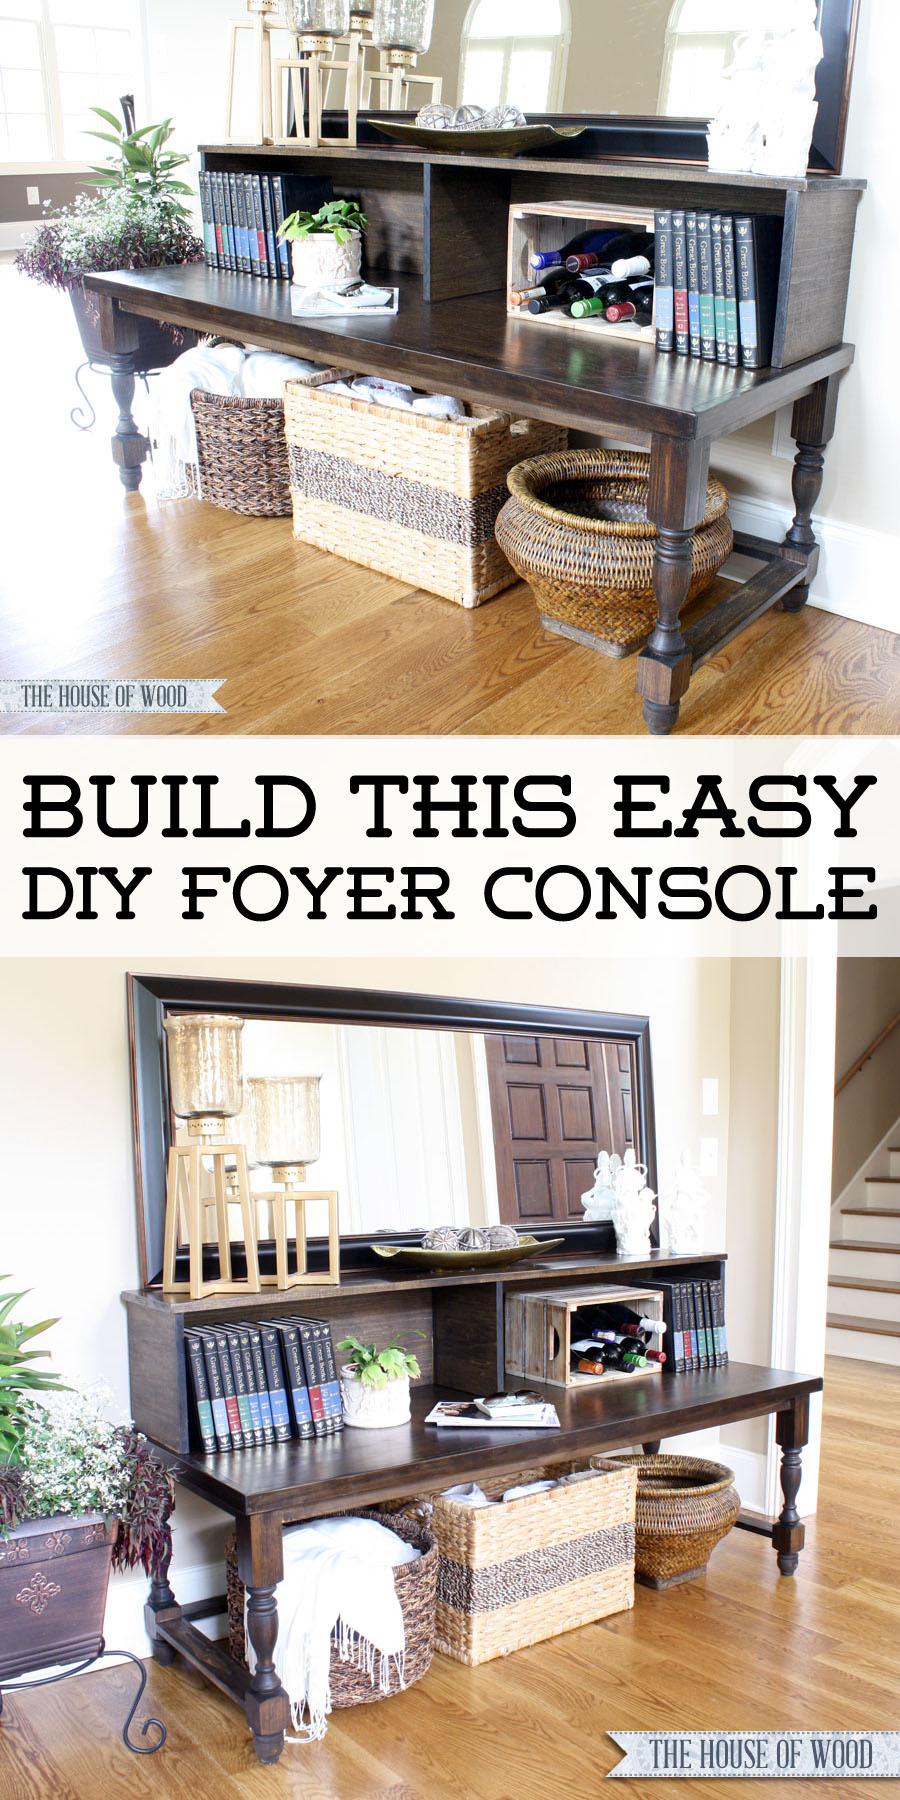
Dang, ain’t she purty? My parents were looking for a table to put in their foyer, so I worked with my good friend, Ana White to bring you brand new plans to build this two-tiered foyer console!
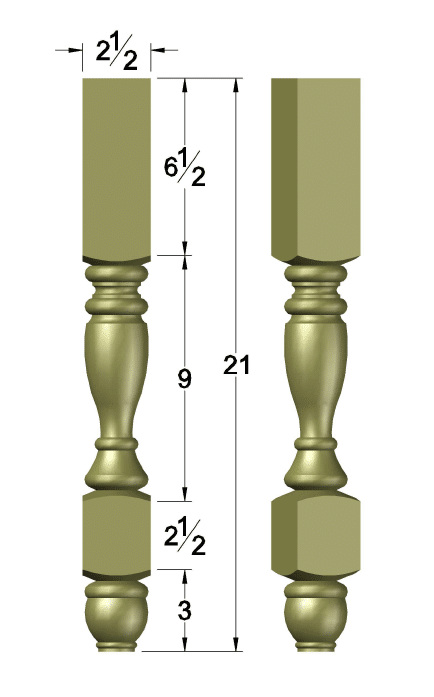
Aren’t you just drooling over those beautiful turned legs? I certainly am! We worked with our friends at Osborne Wood Products to design and create them! They were custom-made for this project but they’re now available on their website. And great news: they are crazy affordable at less than $14 per leg! Shut the front door!
We used the knotty pine selection, but Osborne Wood sells this leg in maple, oak, hickory, cherry… even a rich mahogany.

Okay, so let’s get started! You can download Ana’s plans here.
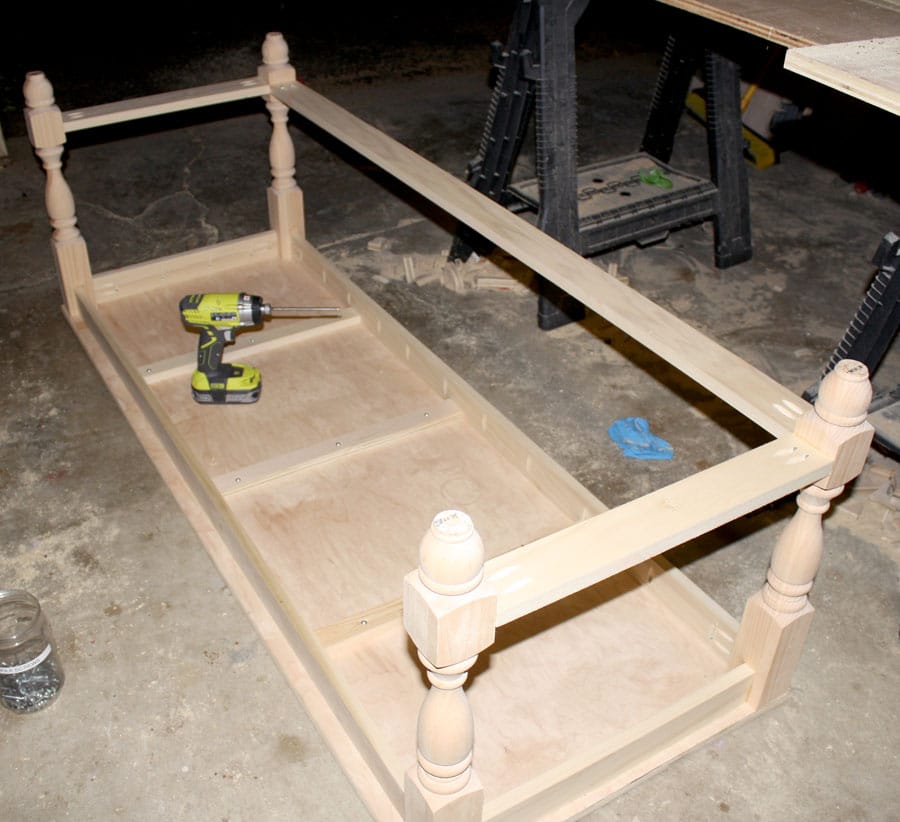
First, I cut my aprons and drilled 3/4″ pocket holes into them to attach them to the legs. Don’t forget to drill 3/4″ pocket holes facing up to attach the table top in later steps.
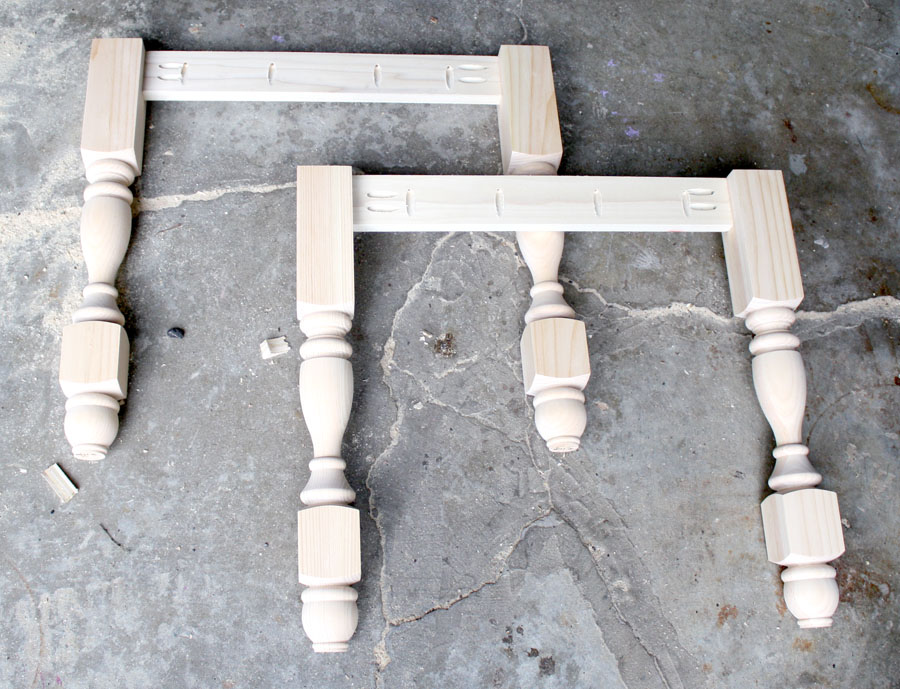
Next, I attached the long aprons to the legs using 1-1/4″ pocket hole screws and wood glue.
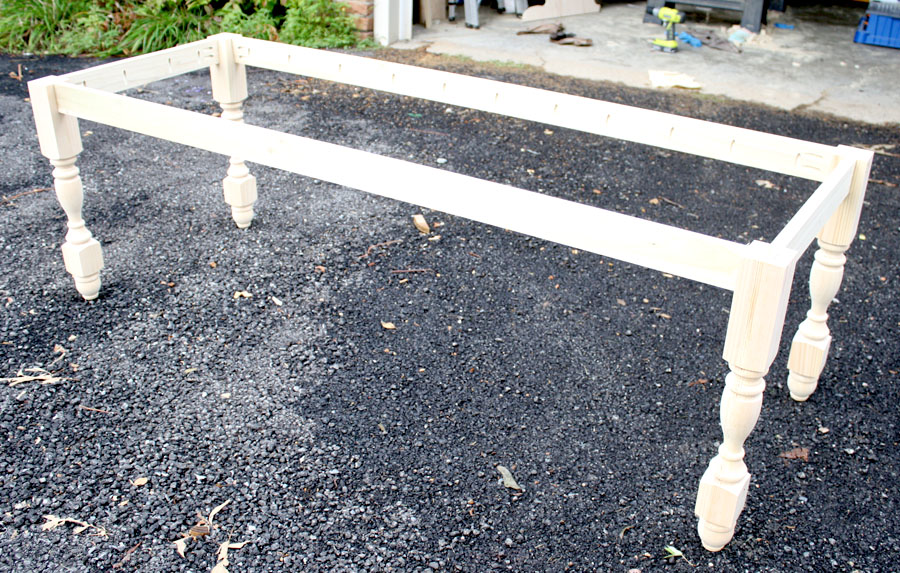
Because of the length of the table, it felt a little flimsy, so I added 3 scrap boards across for added support. Then I attached the stretchers to the stretcher block on the legs:
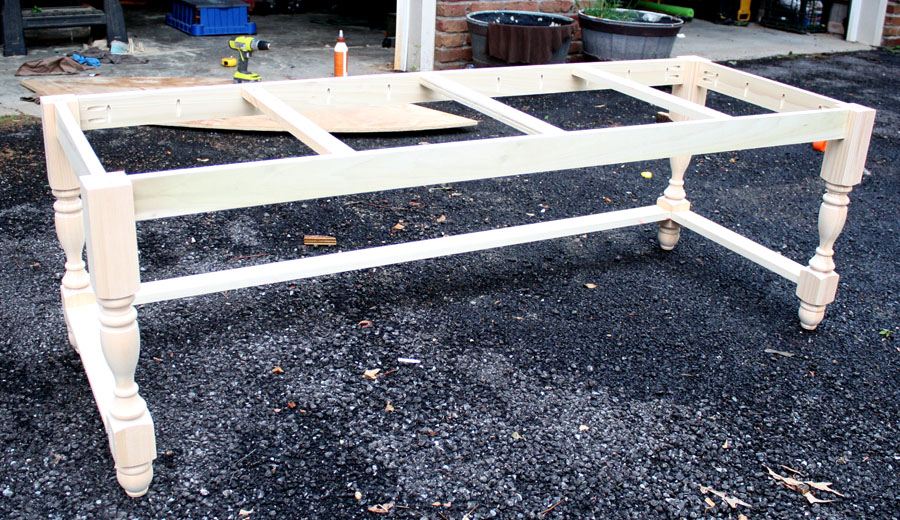
Then I attached the table top by drilling 1-1/4″ pocket hole screws from the aprons into the plywood top. Once again, I used my favorite Purebond Hardwood Plywood in maple for the table top. I love this plywood – it’s so smooth, it takes stain or paint beautifully, and it’s formaldehyde-free. Read about why Purebond Plywood is the healthier alternative here.
I laid the plywood down on my (very uneven) garage floor and positioned the base frame on top of it. Building furniture on a level surface makes everything so much easier and more accurate, so if you, too, are suffering from Uneven Garage Floor Syndrome (or UGFS), don’t be lazy (like me) — lay a piece of plywood down to work on top of, or oh, here’s a thought: use a workbench. Doh!
Note to self: build workbench.
Also, I prefer to use gravity to my advantage and drill downward whenever possible because I am the weakest person living on this earth like to work smarter, not harder. I used wood glue and 1-1/4″ pocket hole screws to attach.
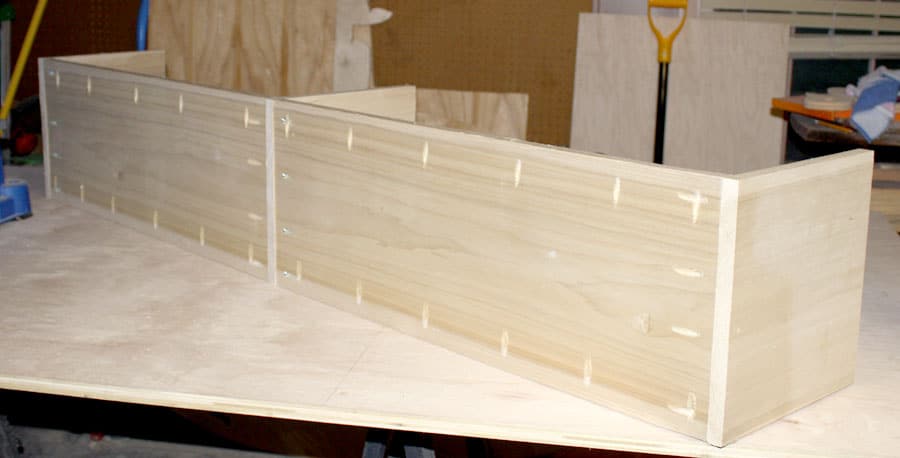
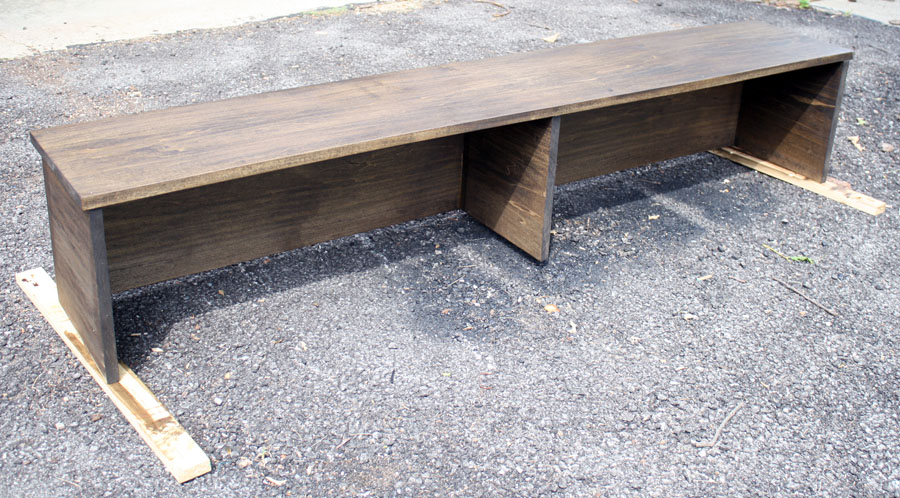
Now that the bottom part is built, it’s time to build the upper tier: the hutch. This part was built out of 1×12 poplar boards. I like using poplar because it’s more of a furniture-grade wood than construction lumber. Less sanding = a happier Jen. The pieces of the hutch are attached with wood glue and 1-1/4″ pocket hole screws.
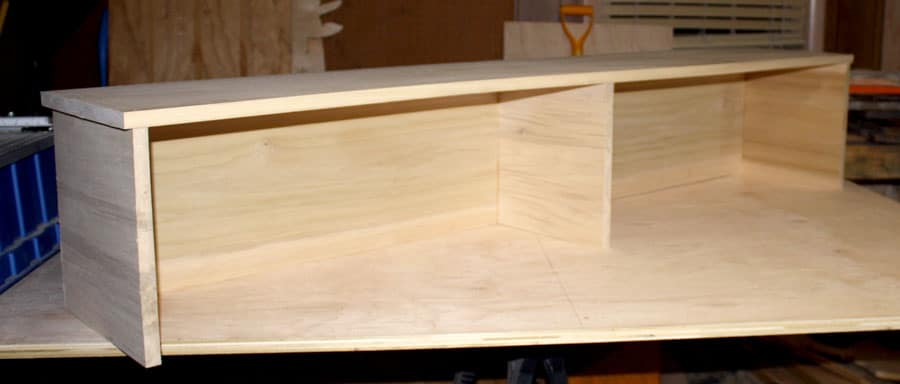
After putting the top on, here’s what the hutch looks like from the front:
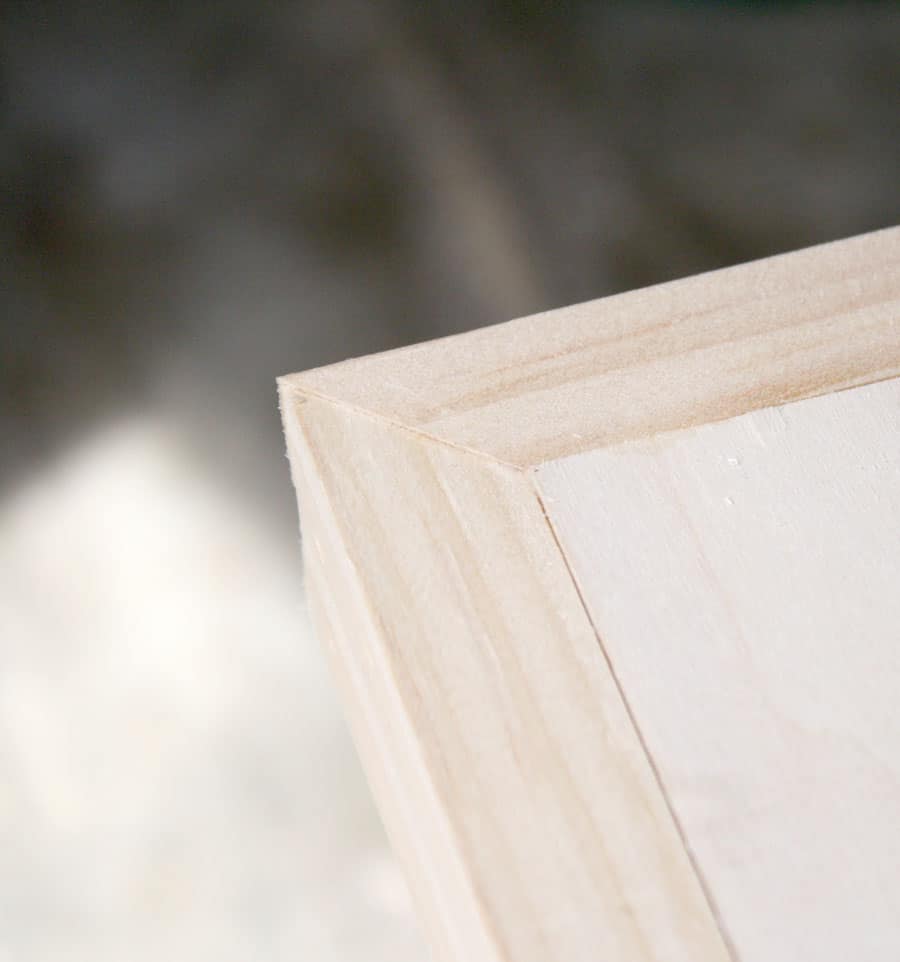
Because the table top is made of plywood, those plywood edges are going to need to be covered up with some trim. I chose to miter the corners of the trim by setting my miter saw at a 45º angle. Look, I’m fancy!
Oh, and be sure to measure twice (or three times, in my case). Take my word for it, or you, too, will be giving yourself a smack down a la Crazy Eyes style as you haul your cranky kiddos back to the lumber store FOR.THE.THIRD.TIME. Seriously, I am not even joking. The peeps at Home Depot were all, “Dang, Girl, you need to put a measuring tape in that cart!” Then I really did go all Crazy Eyes on them and delivered the smack down. Just kidding. They were really nice despite the fact that I need to wear a helmet when I eat.
In other news, Crazy Eyes is one of my favorite characters in Orange Is the New Black. Who’s yours? You know who my least favorite character is? That schmuck Larry, that’s who. Or, Jason Biggs as any character, actually. And Netflix, get on it already. We need a Season 3. Pronto.
After I finally measured correctly and cut my trim to fit, I attached them with wood glue and finish nails. And there’s my new BFF, the Ryobi cordless brad nailer. I love this thing. It’s pretty rad because it’s cordless! No need for a compressor (which I don’t have). Don’t mention my hubby’s sawdust-covered Harley. He’s not too happy about it, so we’ll just pretend like it never happened.
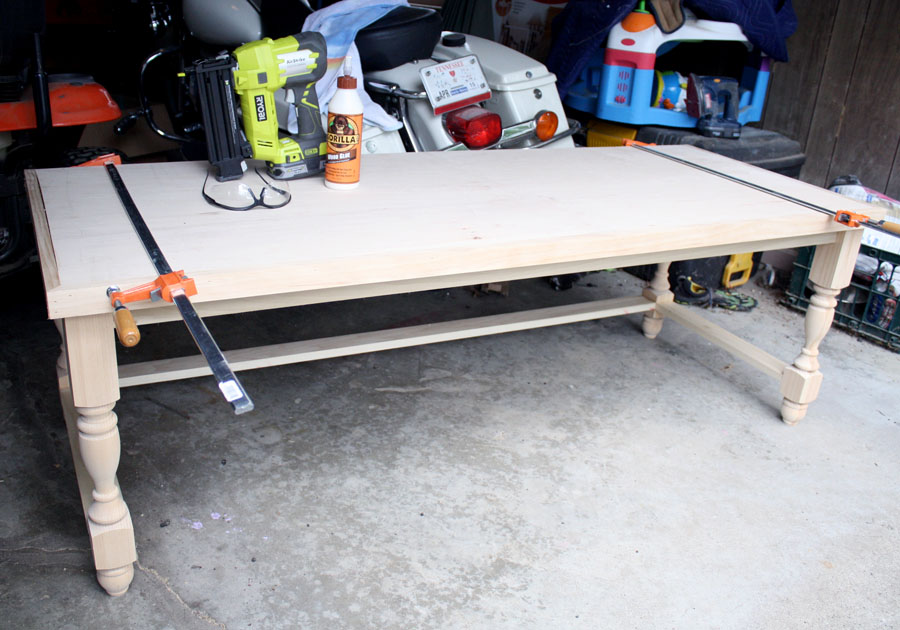
A few days ago, I posted this photo on Instagram and Facebook asking y’all which stain color you liked best. You guys voted for Jacobean, so Jacobean it was. Excellent choice, friends.
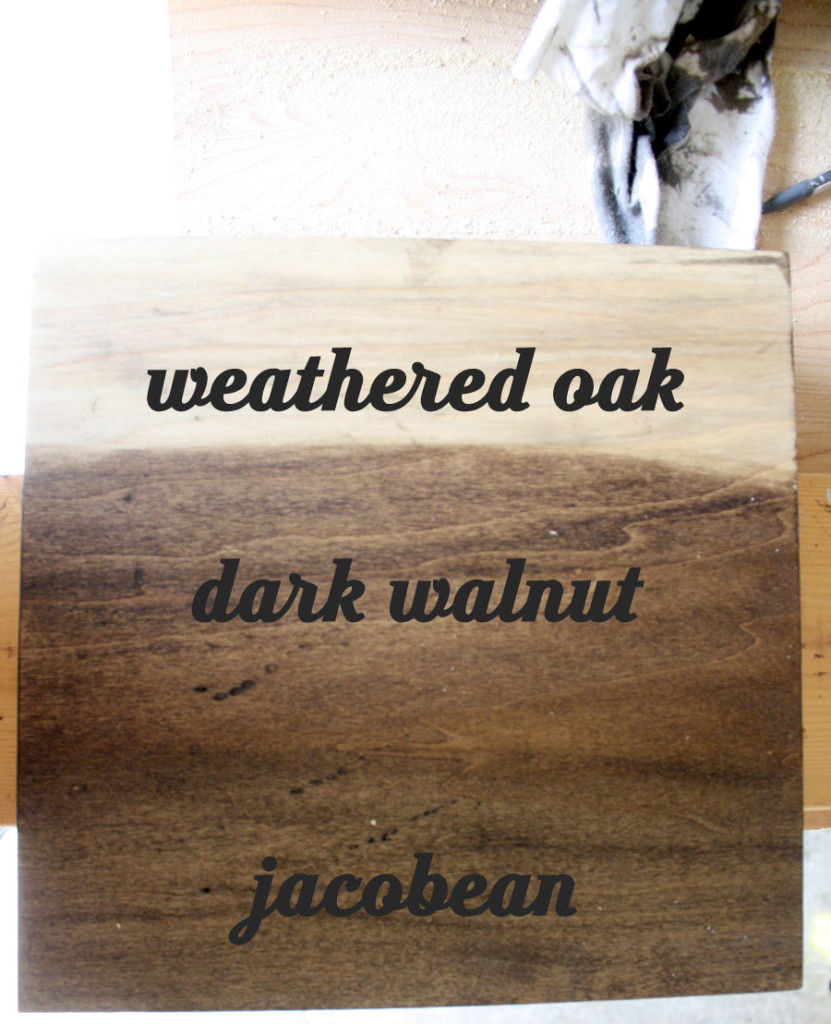
After a quick sanding with 220-grit sandpaper, I stained the hutch and table separately. Then I added three coats of my favorite Minwax Wipe-On Poly, hand-sanding with 400-grit sandpaper in between coats. This step seems to work really well for poplar – some kind of magic happens and the surface becomes silky smooth and delicious.
After everything cured overnight, I attached the hutch to the table top. Those pretty legs make all the difference in the world, don’t you think? Thank you Osborne Wood – you guys really delivered the goods, once again! (Literally. These legs were delivered to my house.)
And now it’s time to put a bunch of crap on it in the name of “styling” and take photos of it. What can I say? I’m a pleaser.
Side note: why my parents would be reading volumes of Britannica Great Books while drinking sparkling Moscato in the foyer is beyond me. I mean, style doesn’t have to make sense, amiright? Vanity before Function! Can I get an Amen?!
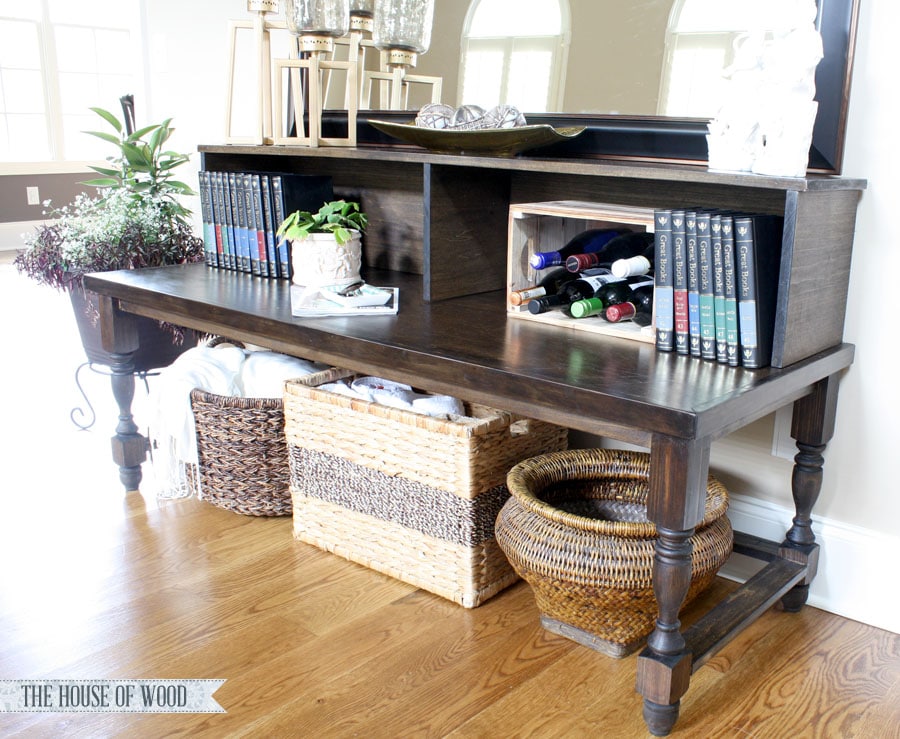
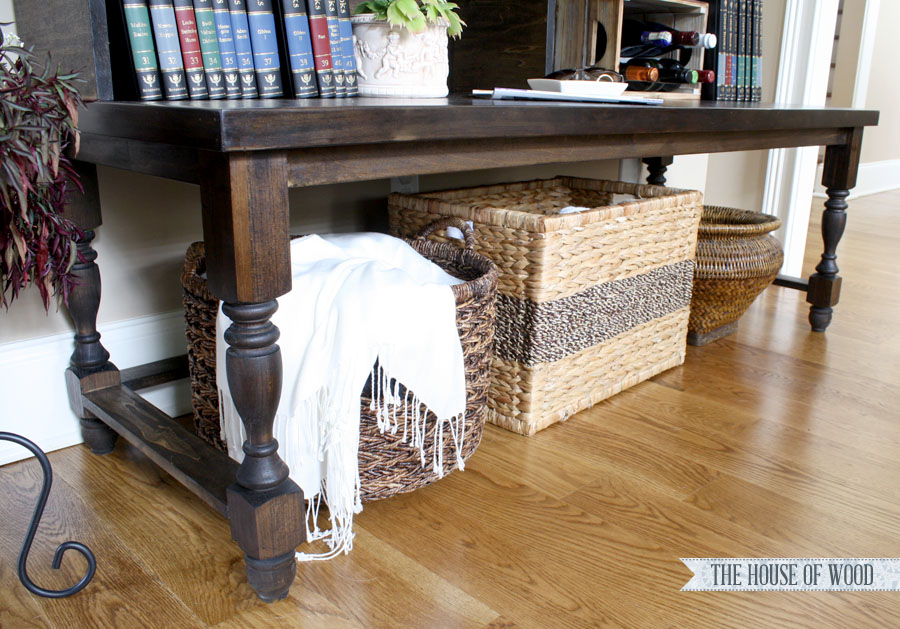

This project took me about four hours (excluding finishing steps and dry times, as well as multiple trips to the Home Depot) to build. Easiest build ever, you guys. And those legs are dang sexy too. Want to build this sexy beast for your space? Ana’s got you covered with free plans right here. Go on, go get your build on!
Disclosure: Osborne Wood provided the turned legs for this project. I was not told what to write or what project to complete; all opinions, ideas, and professions of undying love for their products are completely my own. In other words, you can’t buy my love, people. I do what I want.

Just gorgeous! Thanks for sharing the step-by-step photos.
This is beautiful! Much more hands on than my hands have experience with, but maybe I can con my brother into helping me…Thanks for posting!
Love this! I loved the PB version and was shocked that they quit producing it. But, I like this version better. The legs are lovely. Great job!
Mitered corners are just not that easy to make perfect. Even with the proper tools! I’ve watched all the vids, built a miter sled for my table saw. Mine look great because of wood putty and paint. Great work! Your skills are appreciated.