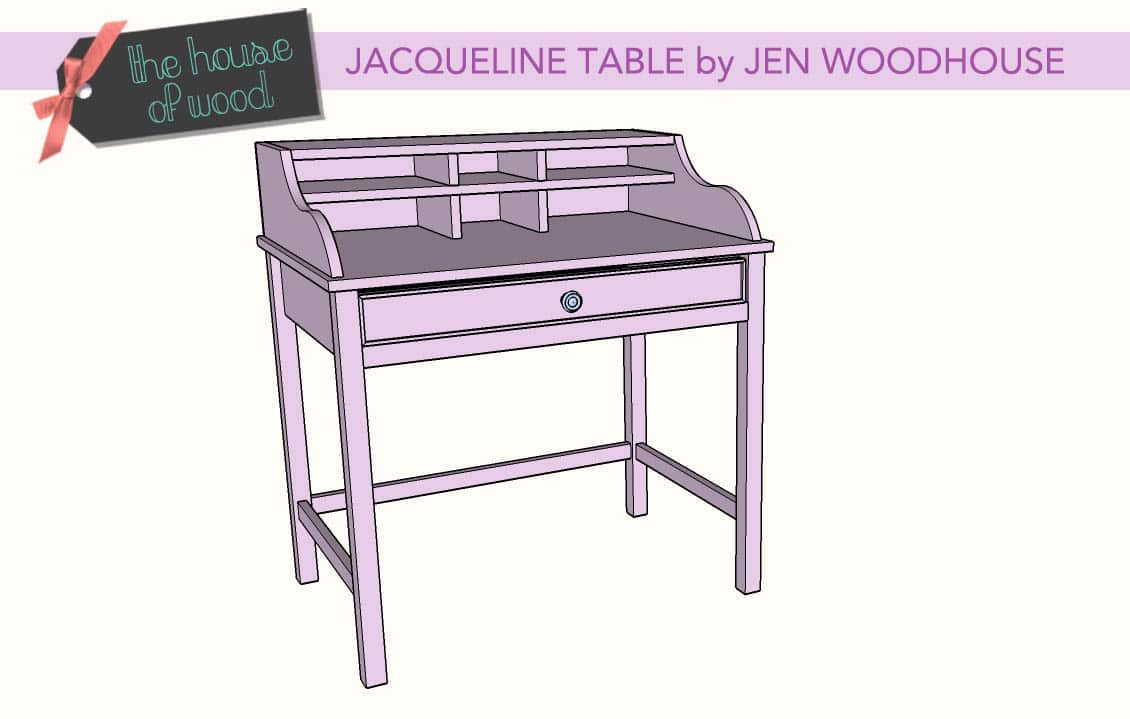
My daughter has been needing a bedside table for her bedroom so I drew up some plans for this adorable Jacqueline table and I’m excited to share them with you today!
*This post contains affiliate links. To read my full disclosure policy, click here.
TOOLS:
- Miter Saw
- Circular Saw
- Jigsaw
- Drill
- Right Angle Drill
- Kreg Jig
- Kreg Rip-Cut
- Hammer or Brad Nailer
- Tape Measure
- Speed square
- Pencil
- Hearing Protection
- Safety Glasses
MATERIALS:
- 1 – Half sheet of 3/4″ plywood
- 1 – Half sheet of 1/4″ plywood
- 2 – 2x2x8′
- 1 – 1x8x6′
- 1 – 1x6x8′
- 1 – 1x4x6′
- 2 – 1x3x6′
- 2 – 1x2x6′
- 6′ of 3/4″ moulding
- 1 – Knob
- 1 – Set of 18″ drawer slides
- 3/4″ Iron-on veneer edging
- 1-1/4″ Pocket hole screws
- 3/4″ Brad nails
- Wood glue
CUT LIST:
- 4 – 2×2 @ 29-1/4″ (legs)
- 2 – 1×6 @ 19-1/2″ (sides)
- 1 – 1×6 @ 30-3/4″ (back)
- 2 – 1×2 @ 30-3/4″ (front trim/back stretcher)
- 2 – 1×2 @ 19-1/2″ (side stretchers)
- 1 – 3/4″ plywood @ 34-3/4″ x 23-1/2″ (top)
Drawer:
- 2 – 1×3 @ 29-1/2″ (front/back)
- 2 – 1×3 @ 17″ (sides)
- 1 – 1/4″ plywood @ 29-1/2″ x 18-1/2″ (bottom)
- 1 – 1×4 @ 30-1/2″ (face)
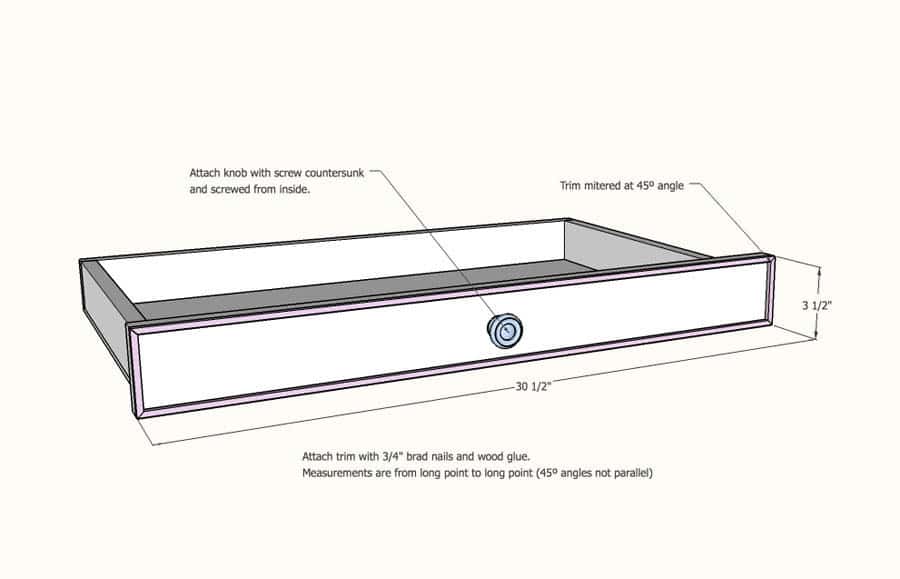
- 2 – 3/4″ moulding @ 30-1/2″ (long point to long point)
- 2 – 3/4″ moulding @ 3-1/2″ (long point to long point)
Hutch:
- 2 – 1×8 @ 22″ (sides)
- 2 – 1×4 @ 9″ (bottom dividers)
- 1 – 3/4″ plywood @ 32-1/4″ x 9″ (shelf)
- 2 – 1×3 @ 9″ (top dividers)
- 1 – 3/4″ plywood @ 32-1/4″ x 9″ (top)
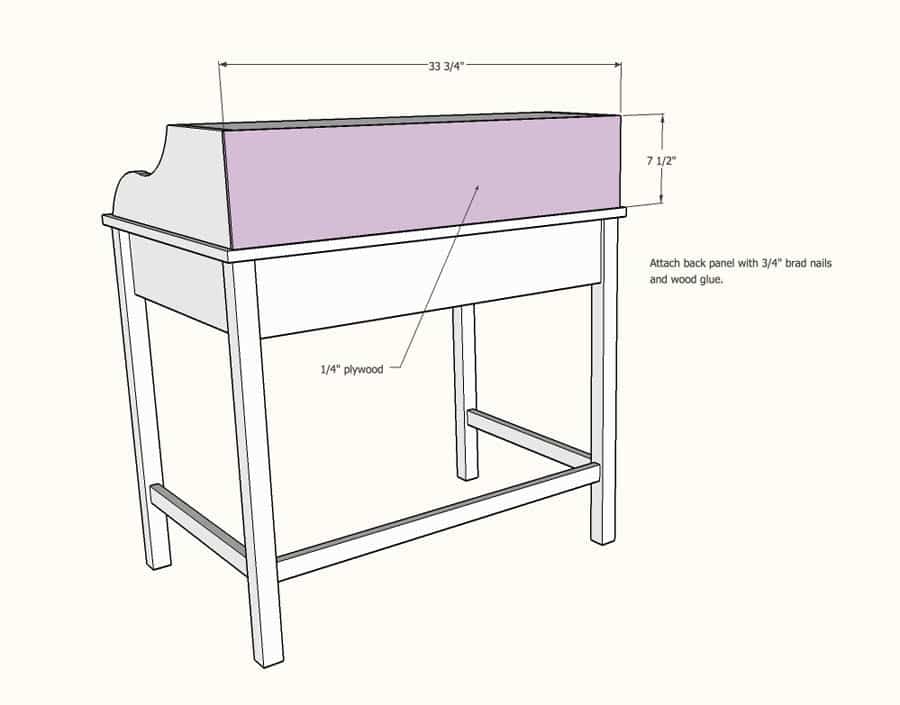
- 1 – 1/4″ plywood @ 33-3/4″ x 7-1/2″ (back)
DIMENSIONS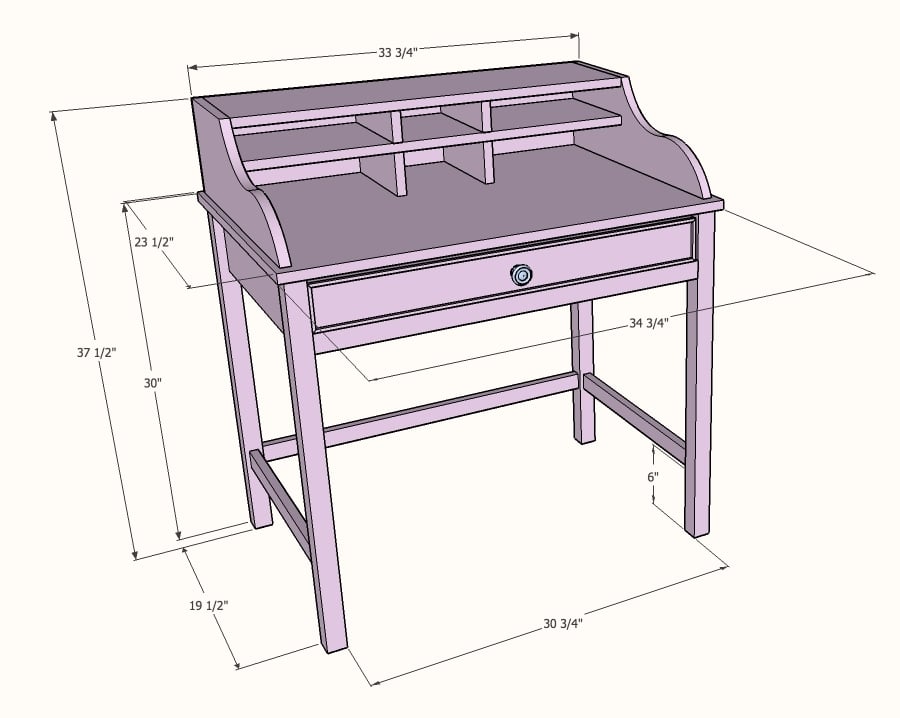
STEP 1: Build sides.
Build the two sides. Attach the 1×6 boards flush to the inside of the legs.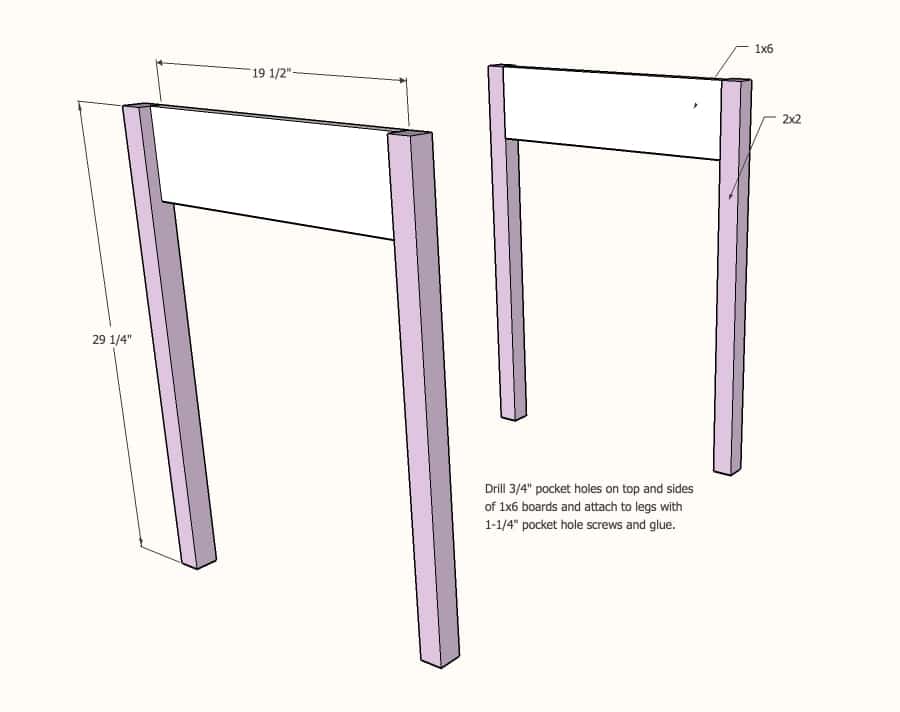
STEP 2: Construct carcass.
The 1×6 back panel is flush to the inside of the legs, while the front 1×2 trim is flush to the outside of them. The stretcher bars on the bottom are centered on the legs.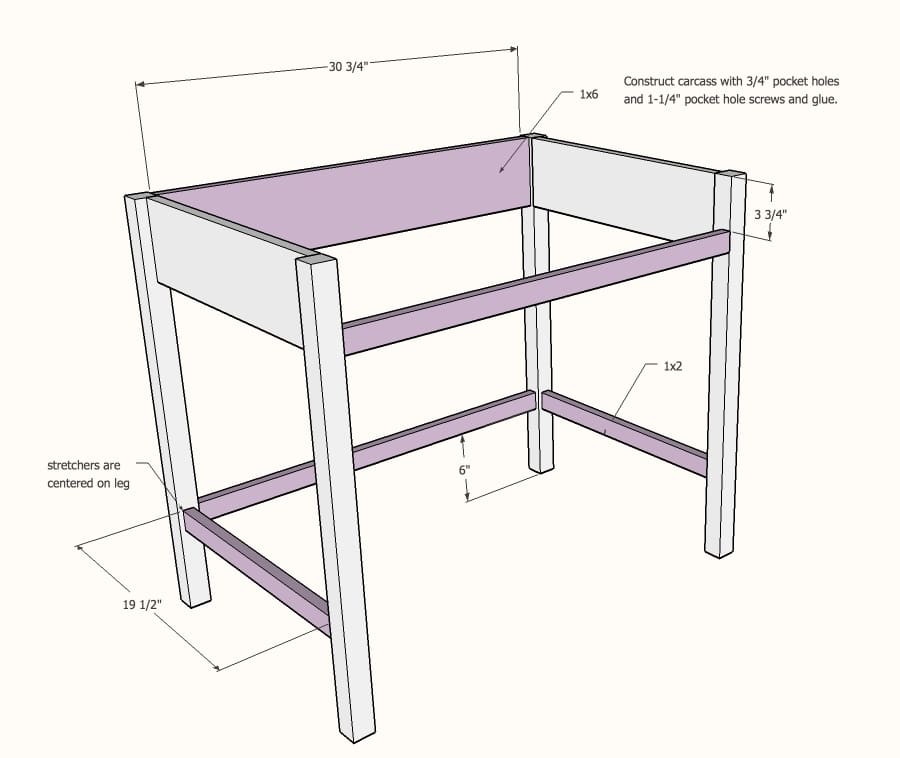
STEP 3: Build drawer box.
These measurements are just a guide. Be sure to measure and build your drawers to fit your opening, to ensure a precise fit. Drill your pocket holes on the outsides of the boards because they will be hidden by the drawer face in the next step. This way, you won’t have pocket holes on the insides of your drawer when you’re done.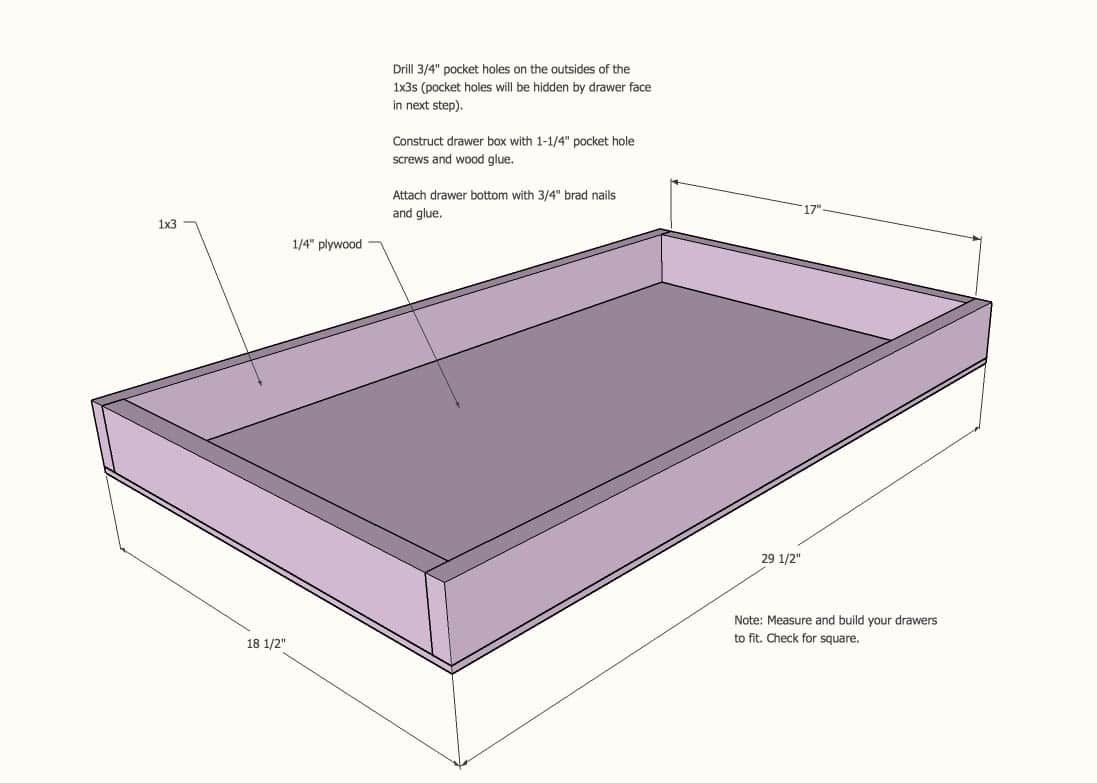
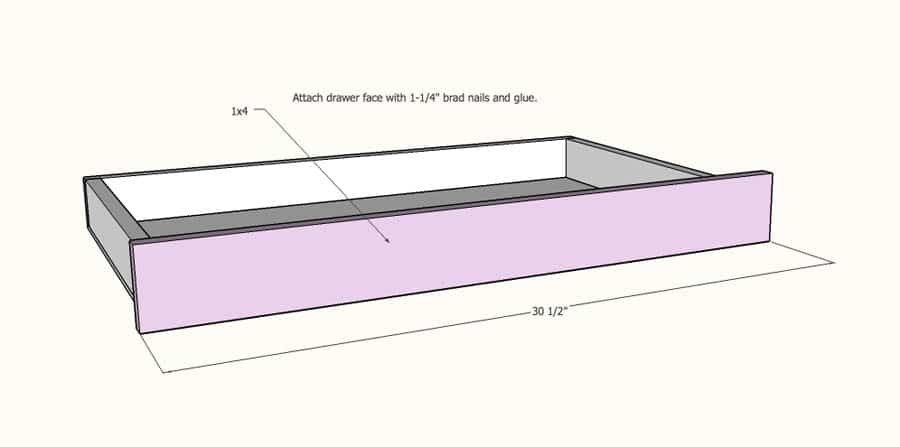
STEP 4: Attach drawer face.
Hammer or shoot the nails in from the inside, so you don’t have nail holes marring the face of the drawer.
STEP 5: Attach drawer trim.
Measure and miter cut the trim and attach to the drawer face with wood glue and 3/4″ brad nails. Also, I usually find that the screw that comes with the knob isn’t long enough, so I have to countersink the pilot hole from the inside, so that the screw will reach the knob.
STEP 6: Install drawer slides.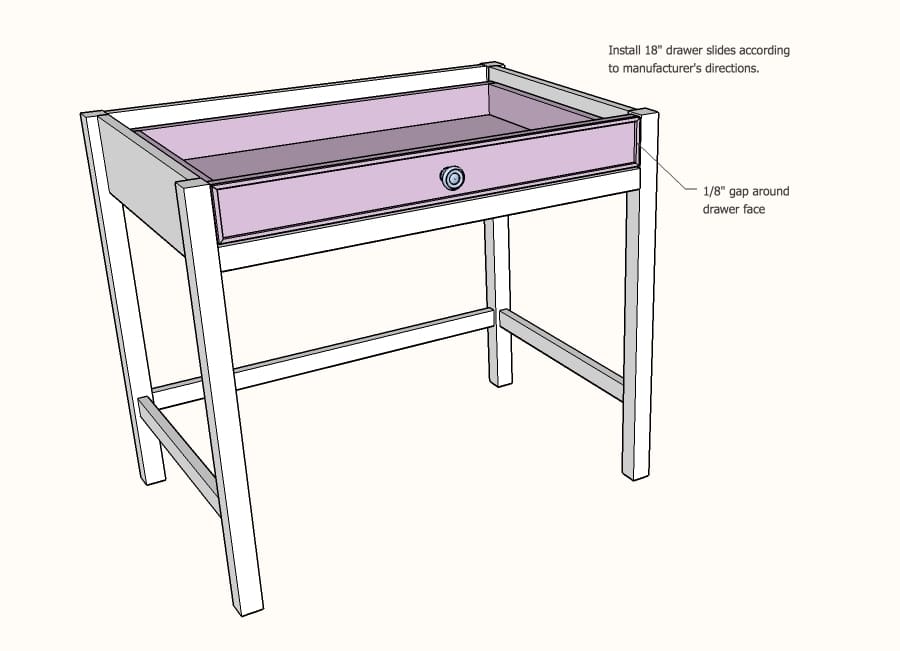
STEP 7: Attach top.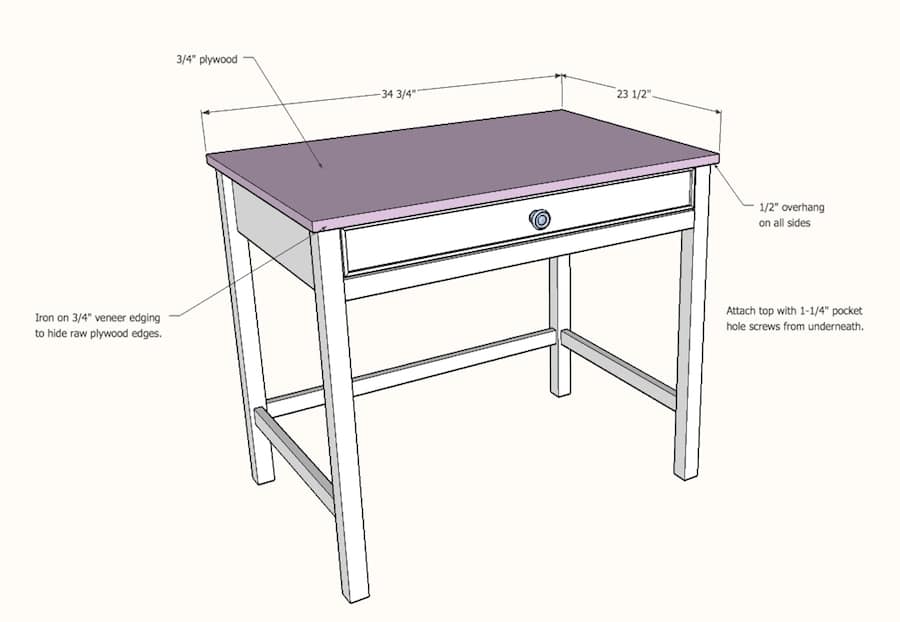
STEP 8: Cut hutch sides.
I recommend sketching out a template on kraft paper so that the hutch sides are identical.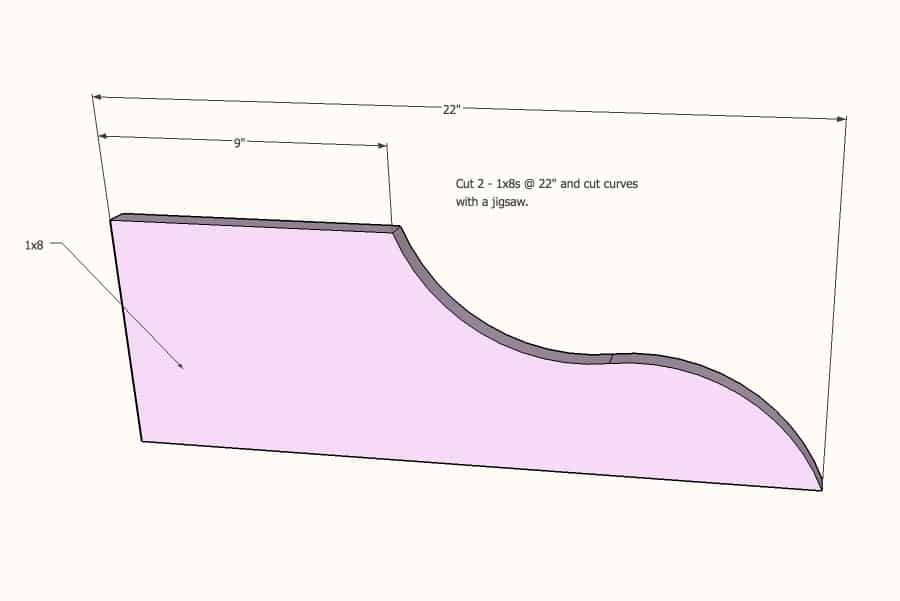
STEP 9: Attach hutch sides.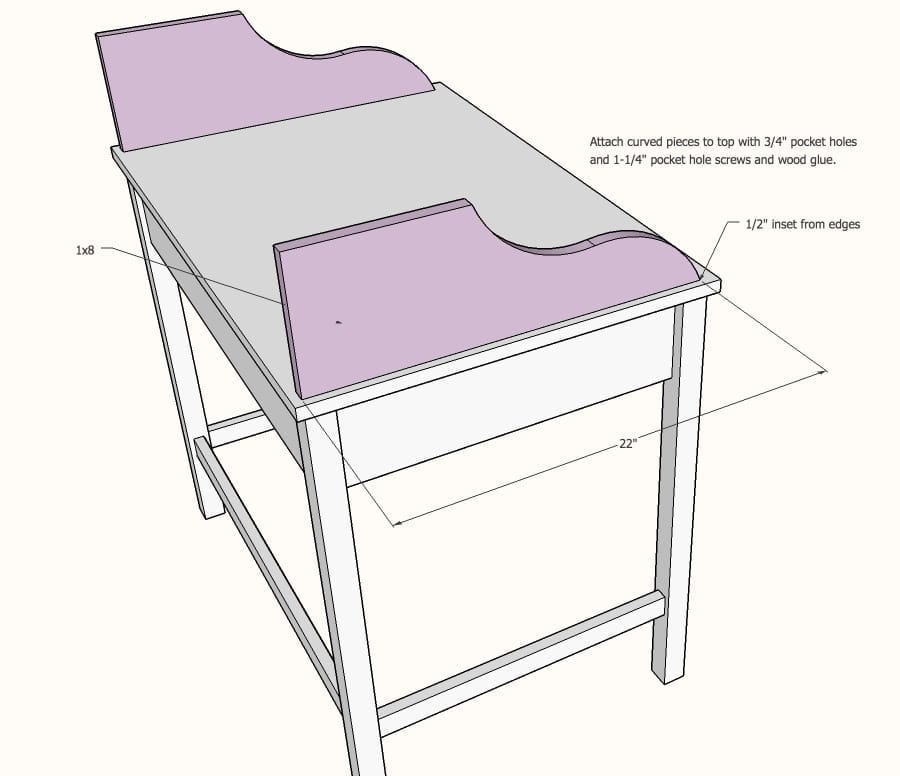
STEP 10: Attach bottom dividers.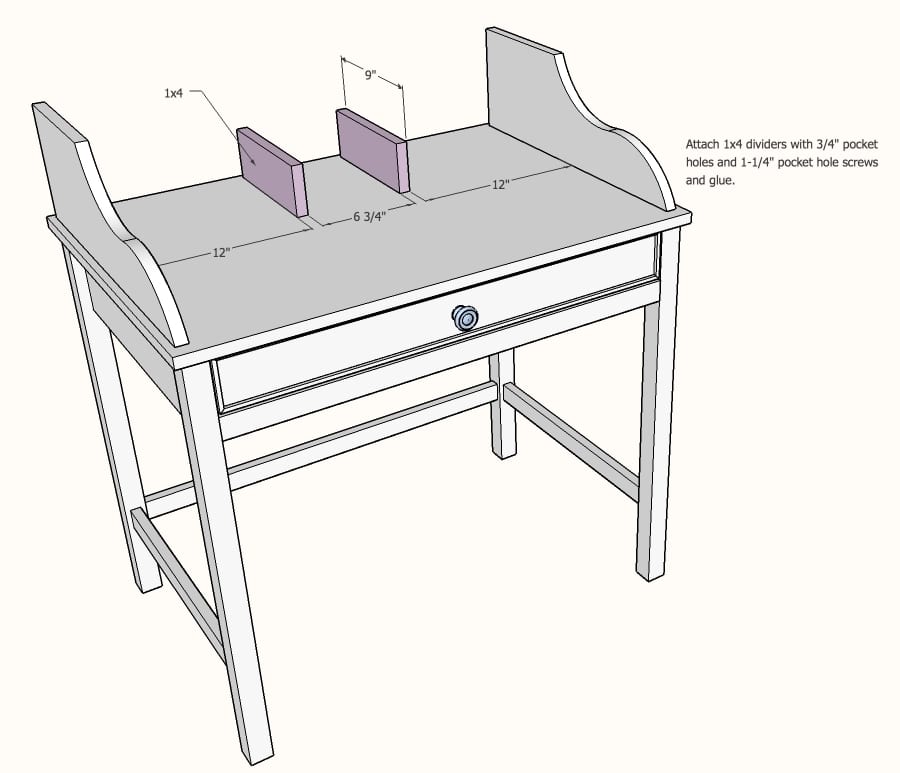
STEP 11: Attach hutch shelf.
A standard drill may not fit in the tight space under the hutch shelf, so a right angle drill is a handy tool to have. 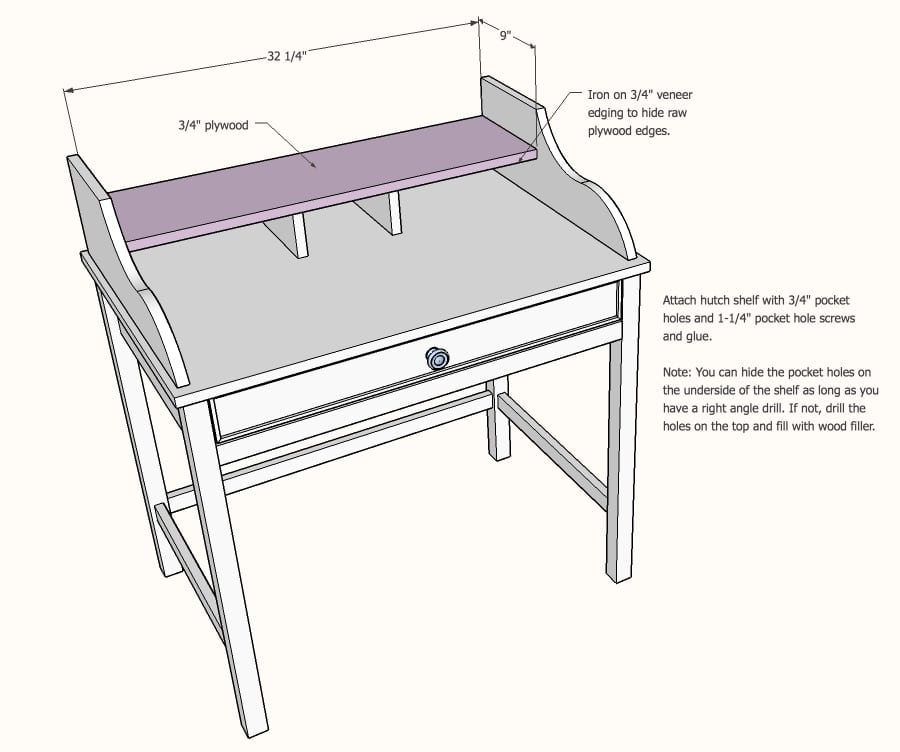
STEP 12: Attach top dividers.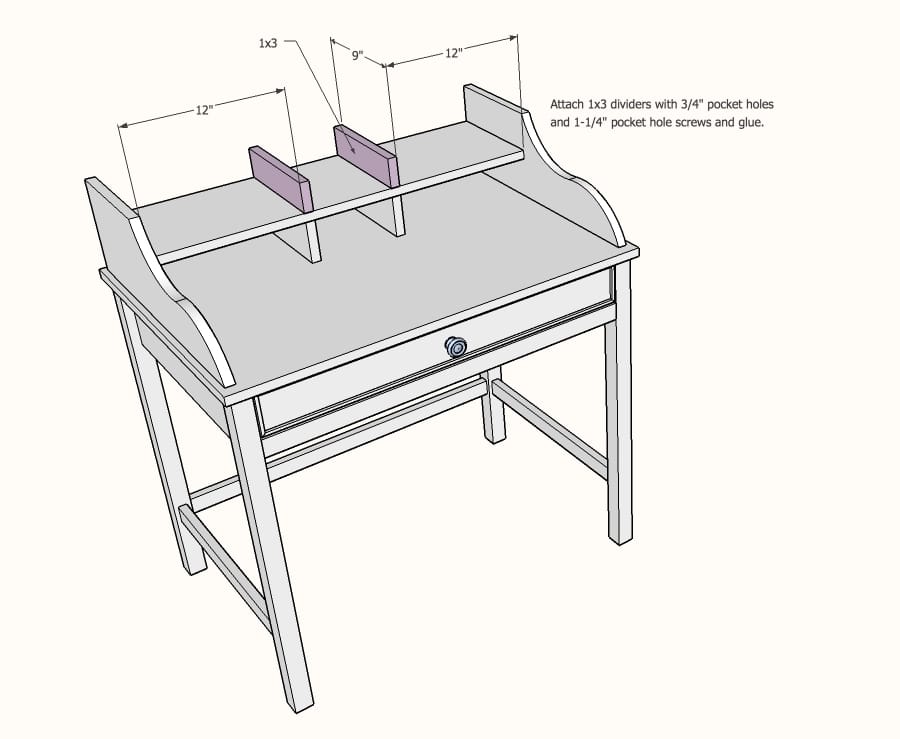
STEP 13: Attach hutch top.
Again, you will have to use a right angle drill if you want to hide the pocket holes underneath the hutch top. If not, drill pocket hole screws on the top and fill the holes with wood filler.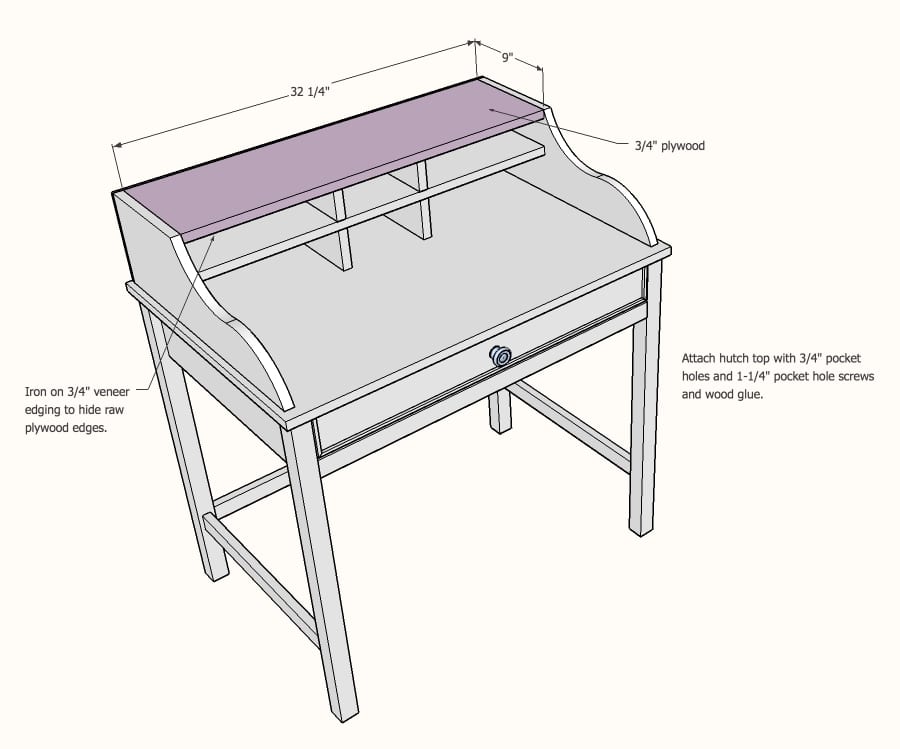
STEP 14: Attach hutch back panel.
If you build this adorable bedside table for yourself, I’d love to see it! Feel free to pin and share this project. Thanks so much for stopping by – happy weekend!
Oh Jen my girls need a place to ‘do their hair’ and this would be perfect since it’s desk height. Nice plans.
My wife has been looking for a desk like this for years. I found this and started building it this past weekend and has been the easiest project I have ever built. I made boxes for the cubby holes and added trim to the top board and it looks great. Now all I have to put the finish on.