You can’t see me, but I’m totally doing a happy dance right now.
What can I say? I’ve got moves like Jagger.
My good friend Jaime from That’s My Letter asked me to collaborate with her on this fun project! She built this ‘bed full of fun’ for her son.
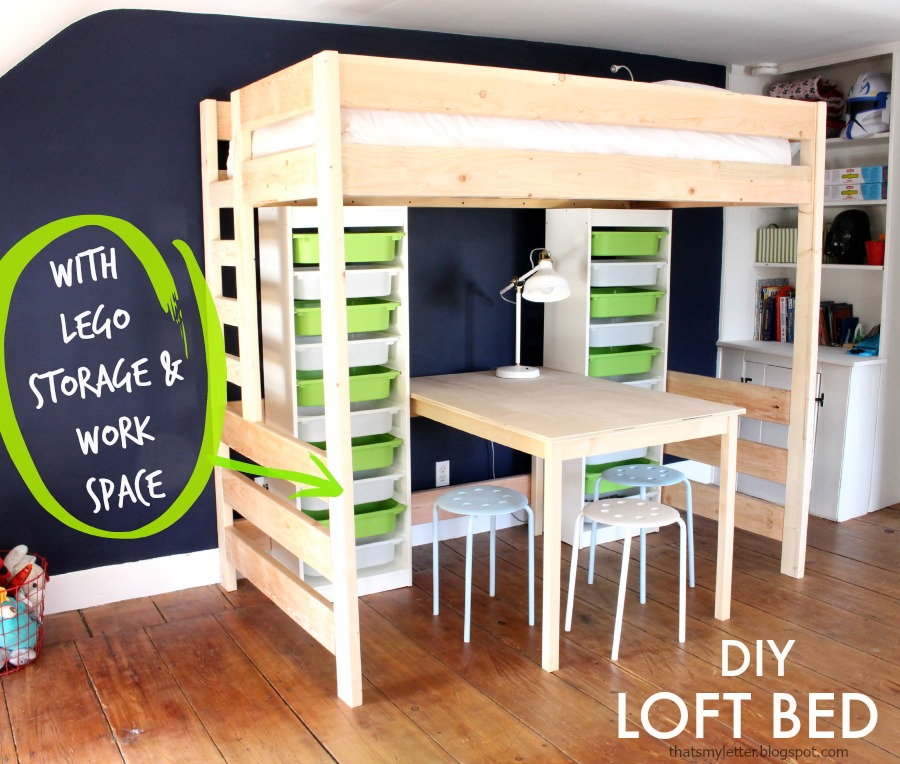
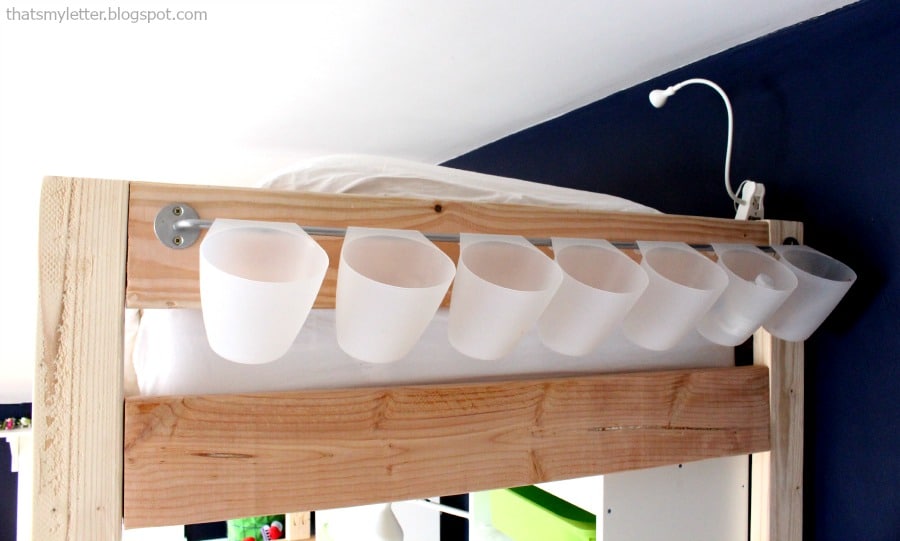
Isn’t it awesome? I mean, check out all that storage and the fun play/work space underneath, not to mention these adorable hanging buckets! Genius.
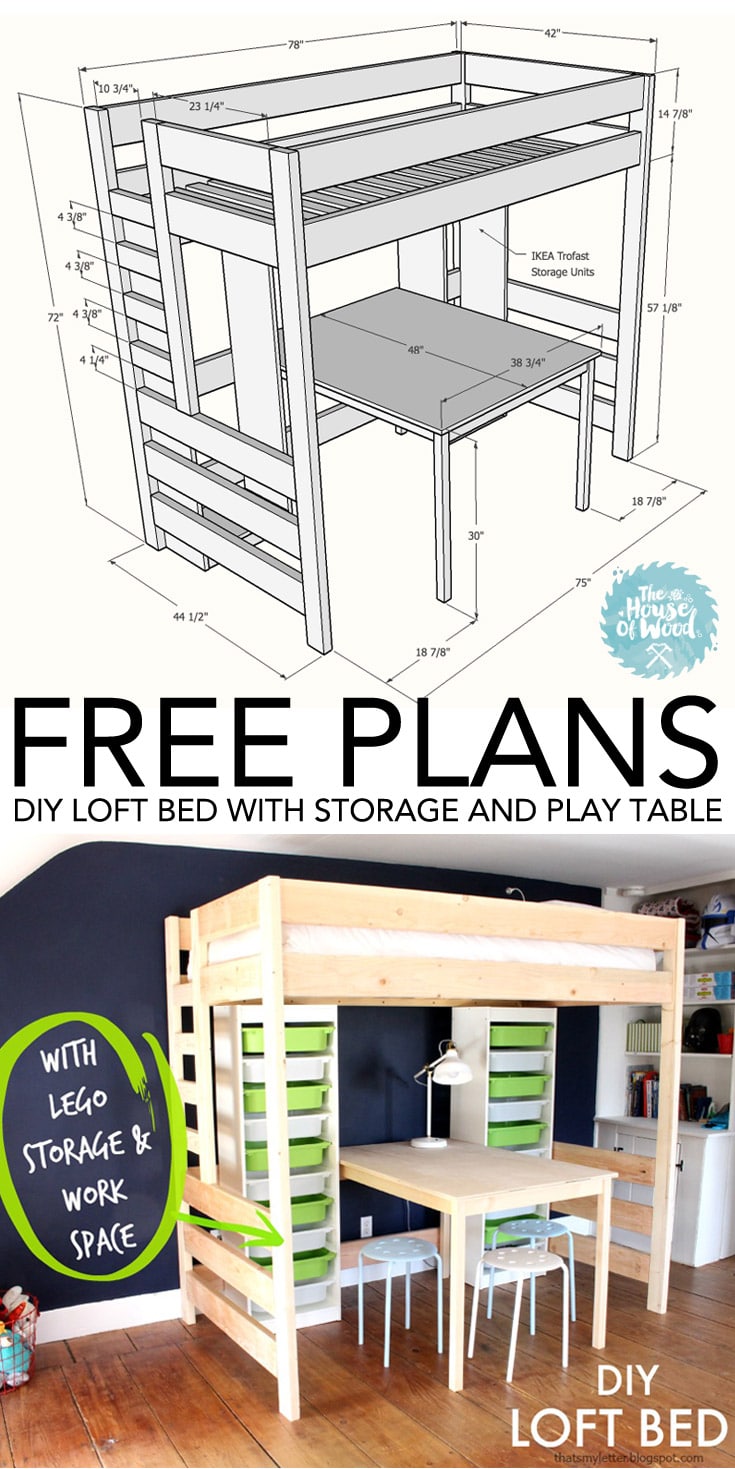
Jaime bought two IKEA Trofast Toy Storage Units and designed the bed around it, incorporating a play table underneath. So much storage and so much fun! She asked me to draw up the plans this build and I’m thrilled to share them with you today!
This loft bed, with all its various pieces and parts, might look a bit intimidating to build, but it’s not. I promise – we’ll break it down for y’all.
2 IKEA Trofast Units + 1 play table + 1 loft bed = childhood of awesomeness.
Hop on over to Jaime’s blog to check out her tutorial along with a lot more photos.
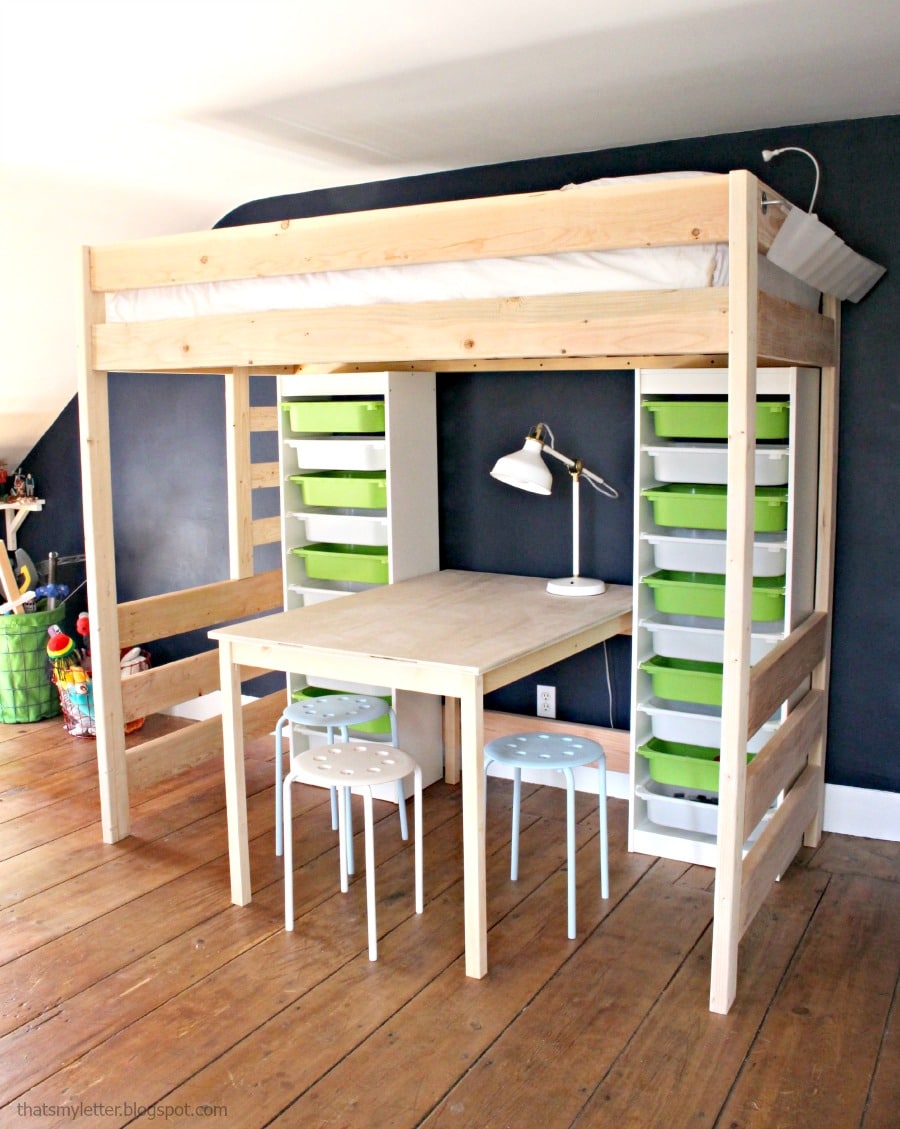
Since 2 IKEA Trofast Storage Units fit under here, first you’ll need to go and get those. Go on, I’ll wait. Don’t forget to try the Swedish meatballs. They’re the bomb. Once you get your flat-packed furniture home, put it together. Done? Great. Oh, and if your mom calls and you tell her you can’t talk right now because you’re building your IKEA furniture, do me a favor and slap yourself. You don’t “build” IKEA furniture. You “assemble” it. But you will “build” this freakin’ fantastic loft bed and play table. Like a boss.
So here’s what the whole shebang will look like:
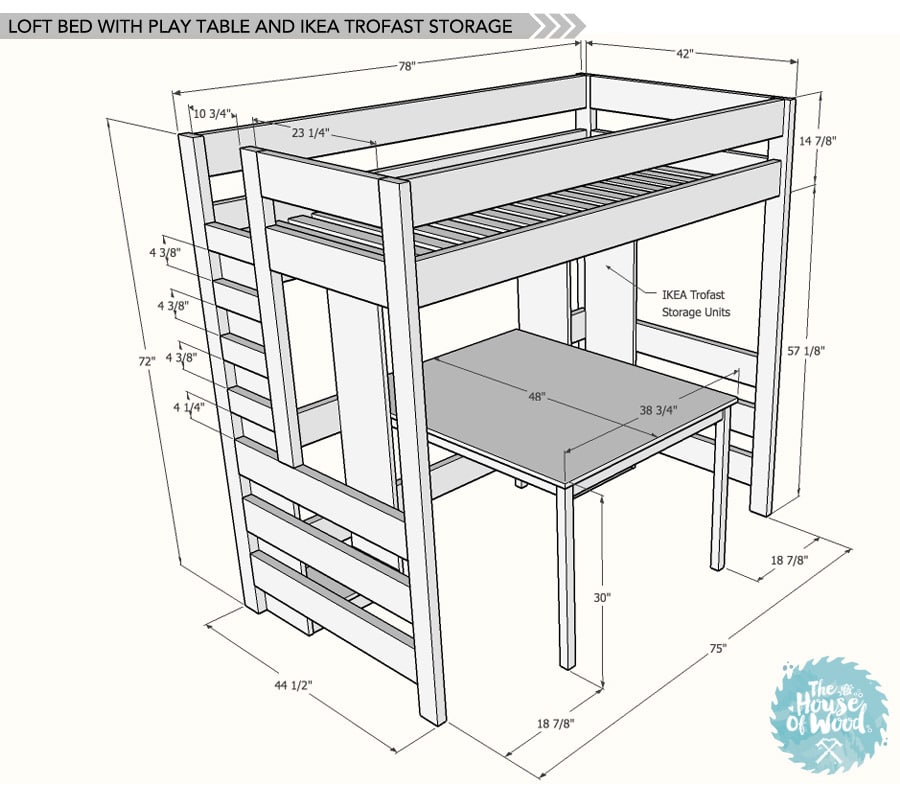
If you happen to build the bed so that it’s up against a wall, Jaime suggests screwing the bed into the wall studs, for added stability. Also, for now, the height of the bed is not an issue for her son, but as he grows bigger, she is considering lowering the bed so that he’ll be able to sit upright in the bed by shortening the legs.
Be sure to check out Jaime’s post here. And you can download the plans, complete with a materials, cut, and tool list here.
Want to pin and share this project? You are awesome and we love you. Feel free to use the image below:
Wanna stay in the loop and see all the sneak peeks? Follow me on Instagram.
I guess sooner or later these buckets will be full with lego pieces. Thanks for sharing, Storage Elm Park Ltd.
What was the cost to build? I am looking to build a loft bed for my 6 year old this summer/early fall and this is PERFECT!
About $150 in lumber, plus the cost of the IKEA Trofast storage units.
i am thinking for my older boy…more headroom in bed…a table with shorter legs underneath for a desk space, and instead of stools and toy storage, fold out lounger-chairs on either side of table to be used as chairs for desk/video games, and as beds for sleepovers…thanks for the inspiration!
I’m wanting to do the same so how would you suggest I go about doing those. You can email me if you wish. My email is [email protected]
Your design has given me an idea which you might develop into another plan which adults in cramped, studio apartments could really use: Take a queen or King size loft bed, build separate bed steps (essentially shelves or drawer-storage you step on ) to go alongside — adults, especially with arthritis can’t do ladders, but they can do staicases — and put an L-shaped breakfast nook under it. (you can buy these nooks as kits, ready made (check dimensions first!) or build your own. sometimes these kitchen nooks have storage under the bench-seats.
The important feature of the bed-staircase is to leave the most convenient shelf-step open (behind the area where the foot-tread is) to put an automatic coffee pot on reachable from the breakfast nook.
The staircase and indeed the breakfast nook can be switched from left to right side orientation, depending on the room set-up. When finished, the bed can be enhanced with a movable add-on shelf on the side of the bed-rail. What would be cool is to have a long section of sliding-door cabinets just under the matress, at the back and above the long section of seating of the breakfast nook. , or build your own. One could keep cups, saucers, etc here– and use 1/2 for a cubby-hole system — perhaps with milk crate or wine-rack units? would enable easy access to silver-ware, rolled up napkins, etc.
This idea would enable an adult to entertain friends in one room without the place being dominated by the bed– essentially you have put the bed above the dining room. You could place the bed-dining nook against a window; or in the middle of a room; or “wall” with plywood the two sides of the unit not adjoining the staircase (cutting a window, if you liked) to make a closed “Booth” as in a diner, — in which case you would suspend a small swag-lamp over the table– .
It could be fun to hang a bamboo- or plastic bead curtain in front of your diner-booth. . . .
i didn’t see a tool list. I’m assuming you used a kreg jig for the pocket screws?
I am curious as to what type of wood you used. It looks like regular pine 2×4’s and 2×6’s.
Hi noob here. You didn’t indicate where to drill the holes? Is it necessary to drill it at an angle same as those in youtube videos? Do I need that tool called a jig?
Thanks