***Are you on Instagram? I am! And I often share sneak peeks of my upcoming projects there, so let’s be friends, it’ll be fun.***
Y’ALL!!! I am SO EXCITED to share my newest build with you! I’m doing a happy dance right now. Be grateful you’re not here to witness mah sexxxy man splits! #namethatmovie #pitchperfect #sorrynotsorry
Now that the weather’s warming up, the building projects are gonna be rolling in and I’m super psyched that we have a brand-spankin’ new plan to share, brought to you by the one and only Ana White! Honestly, I don’t know how she does it in freakin’ ALASKA. Superwoman, she is. I, on the other hand, am a such a wimp when it comes to working in my garage when the temps get anywhere below 40 degrees F, which is why I haven’t done anything productive since, oh, I don’t know, 1983.
But that was then and this is now. Y’all. I built this in about 6 hours! Not even kidding. It was that easy and I’m totally in love with it. This is a great beginner-level build, so if you’re timid about building from scratch and want to try your hand at it (be forewarned: this hobby can be severely addictive), this would be the perfect starter project for you.
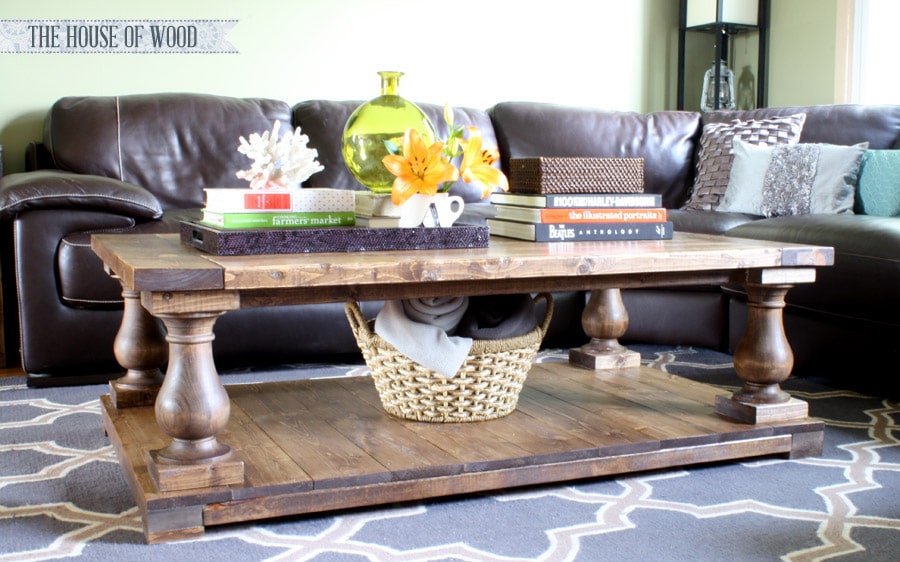
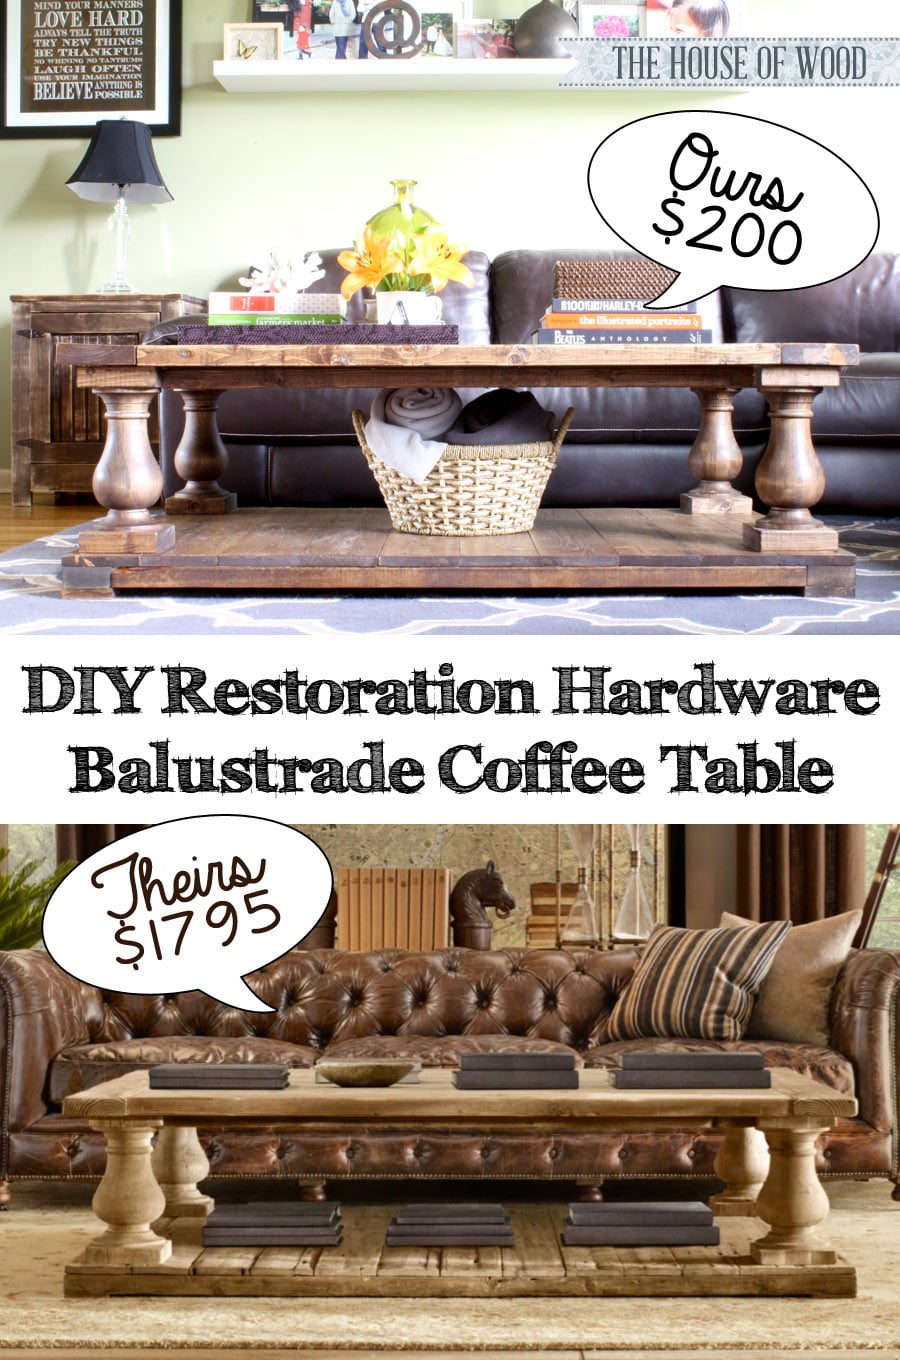
Make your own Restoration Hardware-Inspired Balustrade Coffee Table by clicking here to download the free step-by-step plans.
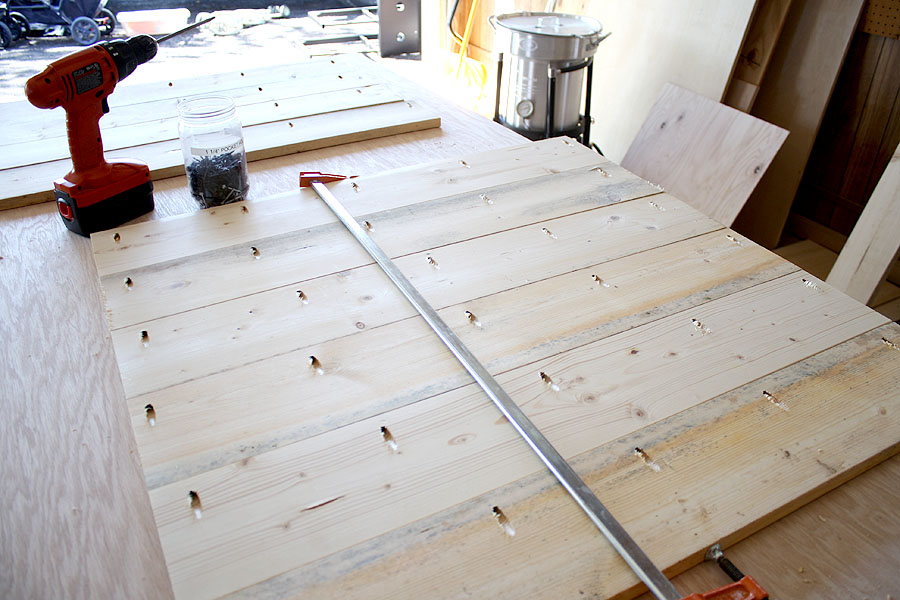
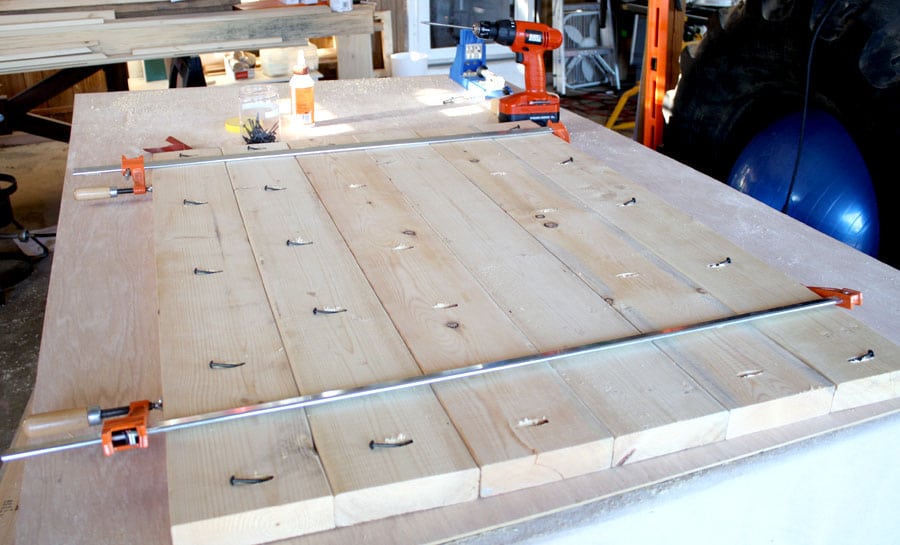
Ana’s plans will have the supply list, as well as exact measurements and directions, so I’ll just share some work-in-progress photos and a helpful tip or two with you. First, I built the bottom shelf by attaching the 1×6 boards with pocket holes and wood glue. I try to make sure I’m working on a level surface so the boards are as straight as possible – it makes it so much easier when it comes time to sand, not to have to sand down inches and inches of uneven boards later.
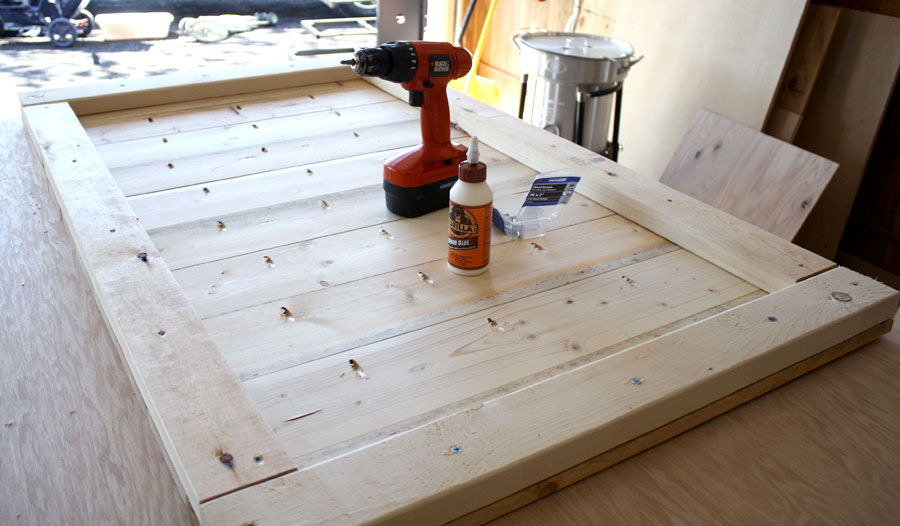
Next, I built a frame around the bottom shelf with some 2x4s and attached block “feet” at the corners (feet not pictured). The bottom is flipped upside down so that all the screw holes are cleverly hidden underneath.
Osborne Wood is the jam, y’all. They created these gorgeous turned legs specifically for this project! And they’re super affordable at less than $30 per leg! I won’t mention how many times I lovingly caressed them during this project. (I lost count.)
The trickiest part of this build was making sure the two end blocks were straight and even on each turned leg. I concocted this little contraption to make sure everything was level, straight, and centered. Yes, I know, I am a genius and you are welcome.
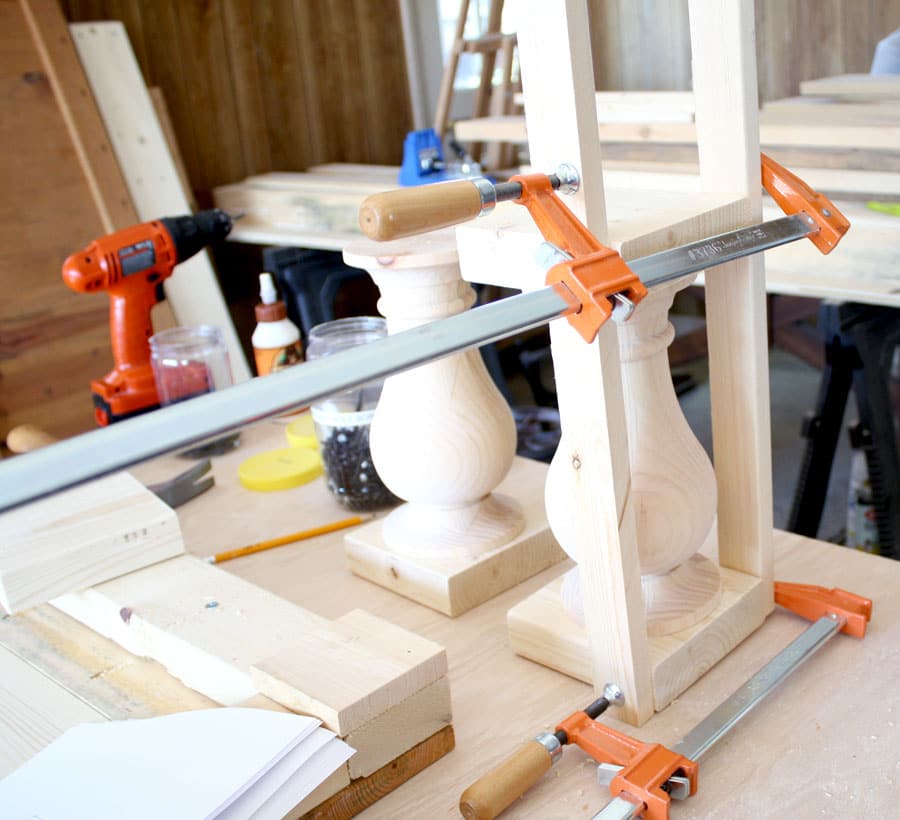
And because this is my idea of working out, I had to throw (not literally) one of my husband’s kettlebells up there for good measure. I just glued the pieces together and waited for the glue to dry before I secured them with screws. One screw through the center of the top and bottom did the trick.
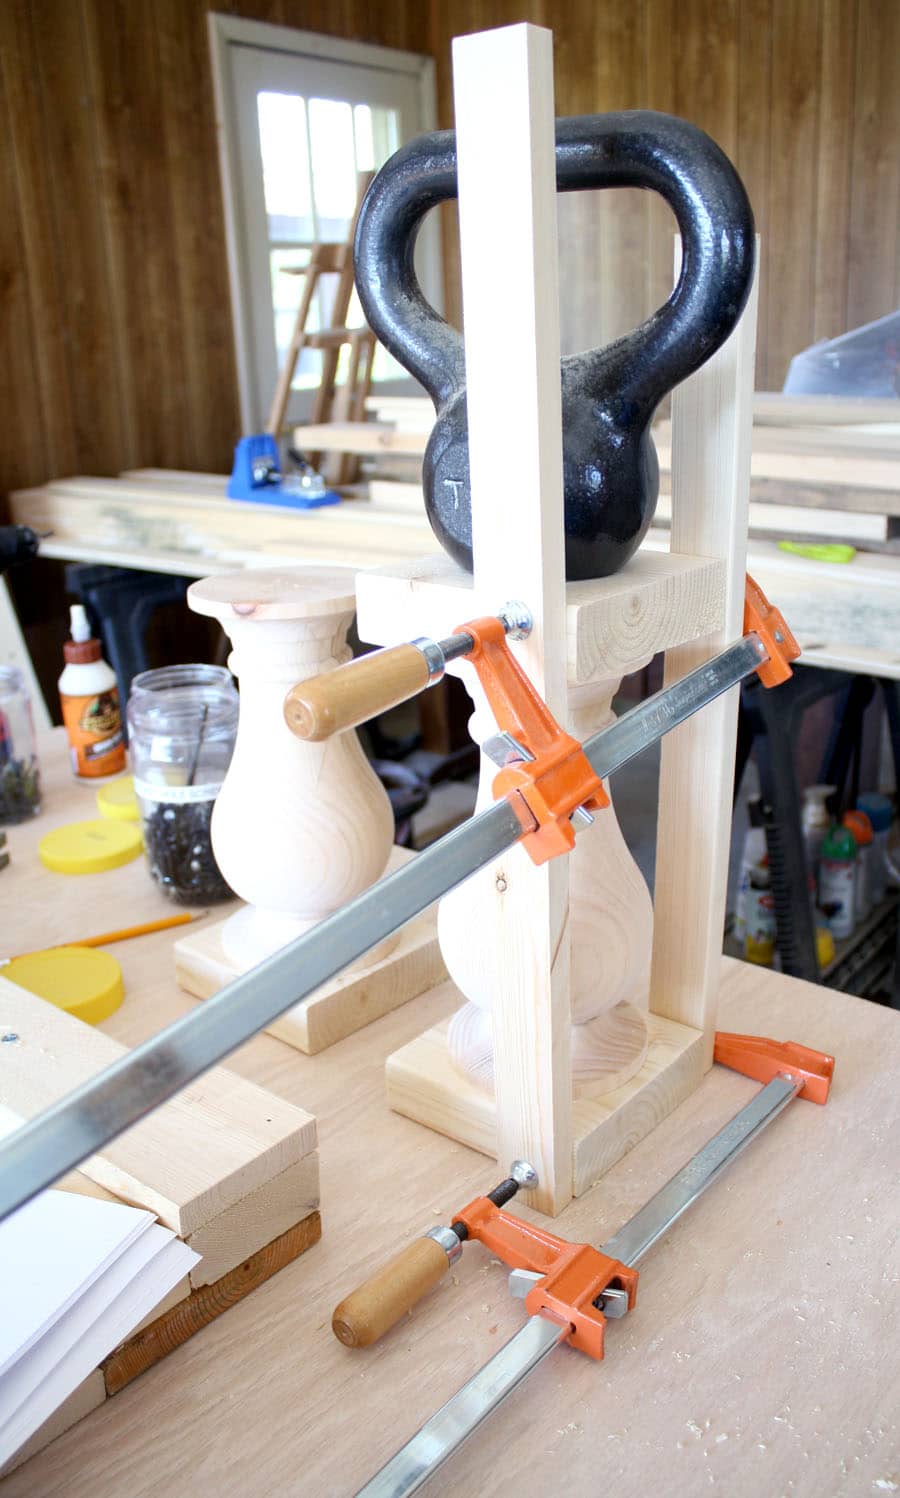
The legs are attached to the base with glue and and were screwed in from underneath. Crossfit, eat your heart out. (Yes, I realize 10 pound kettlebells are far from hardcore. Don’t judge.)
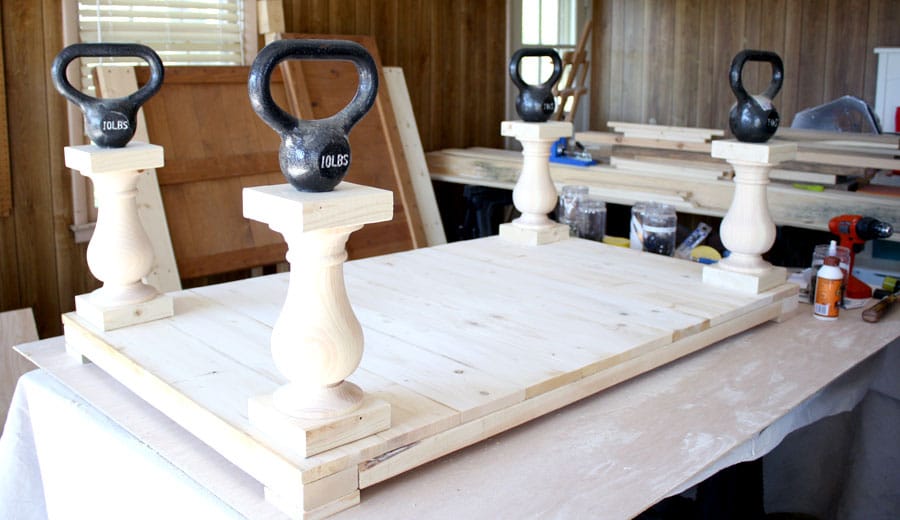
Then I built the tabletop the same way I built the bottom shelf. Clamped, glued and screwed. Shake and bake, Baby, shake and bake!
While there are different schools of thought on whether or not the information below is accurate in regards to reducing the risk of cupping/bowing boards, I usually like to alternate the direction of the end grain pattern like this:
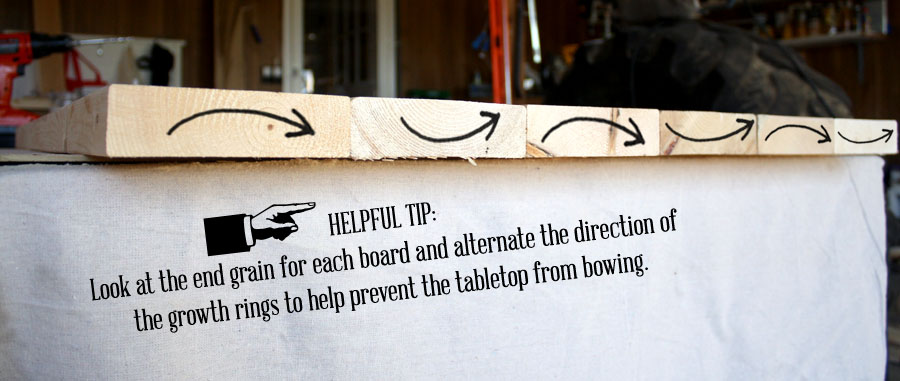
With the builds that I’ve done, I haven’t noticed any cupping or bowing as the wood expands and contracts with the varying temperatures, so I’ll stick to what’s working for me thus far.
After attaching aprons to each leg, I placed the top on and screwed it to the aprons from underneath so that all the hardware stays hidden. And dun dun dunnnnn… we are DONE! See? Didn’t I tell you? Piece of cake, right?
Great. Now I want cake.
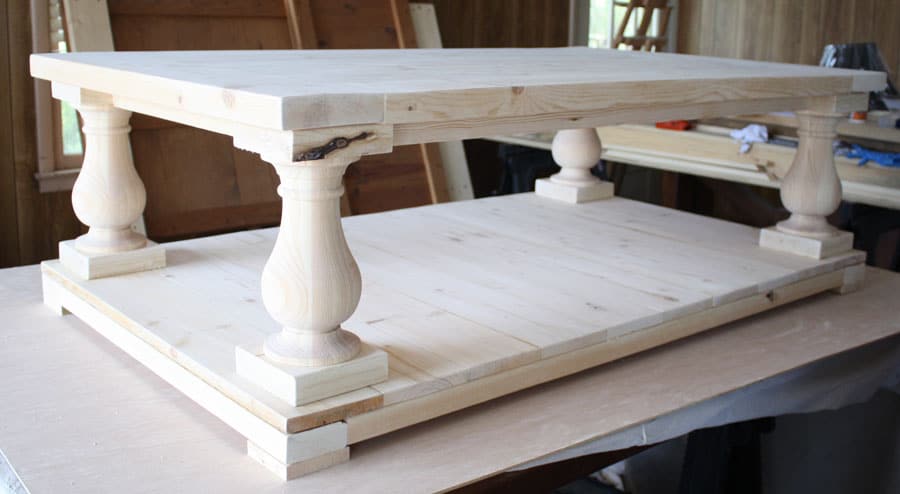
And now here’s the part that feels like it takes me FOR.EV.ARRR to complete: the sanding/finishing process, aka The Bane of My Existence. First, I used my belt sander to sand down the top and bottom shelves so that all the planked boards were perfectly level and smooth. Even though I’d tried my best to get them as flat as possible during the building process, without using an industrial planer, there’s going to be some slight variation from board to board.
You guys. Seriously, belt sanders are NO JOKE. I’m amazed every time I build a planked top, that a belt sander will sand down the boards so evenly that you can easily slide a salt & pepper shaker across the table. I bought my Ryobi belt sander from a pawn shop for $11. Whoop whoop! LOVE it.
After I was satisfied with that, I followed up with my palm sander fitted with 120- then 220-grit sandpaper. Then I vacuumed up the sawdust and wiped everything down with a very slightly damp rag. I stress “very slightly damp” because I wanted to remove the leftover dust and debris, but didn’t want to raise the grain after I’d worked so hard to smooth everything down like buttah.
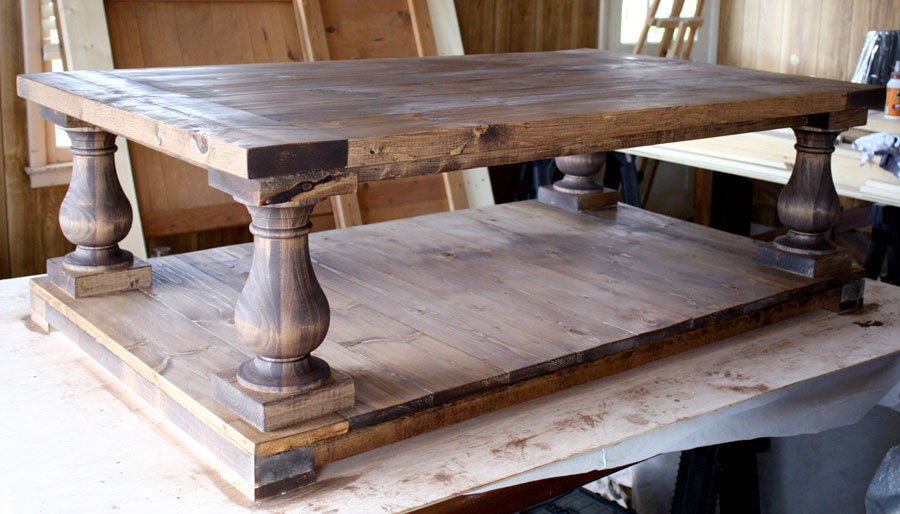
I chose Minwax’s Ultimate Wood Stain in Special Walnut to stain this bad boy. I just took a clean rag, dipped it into the stain, then working in small sections, rubbed it into the wood, in all directions, usually in circular motions until it’s all soaked in. Wax on, wax off, Daniel-son style. #namethatmovie
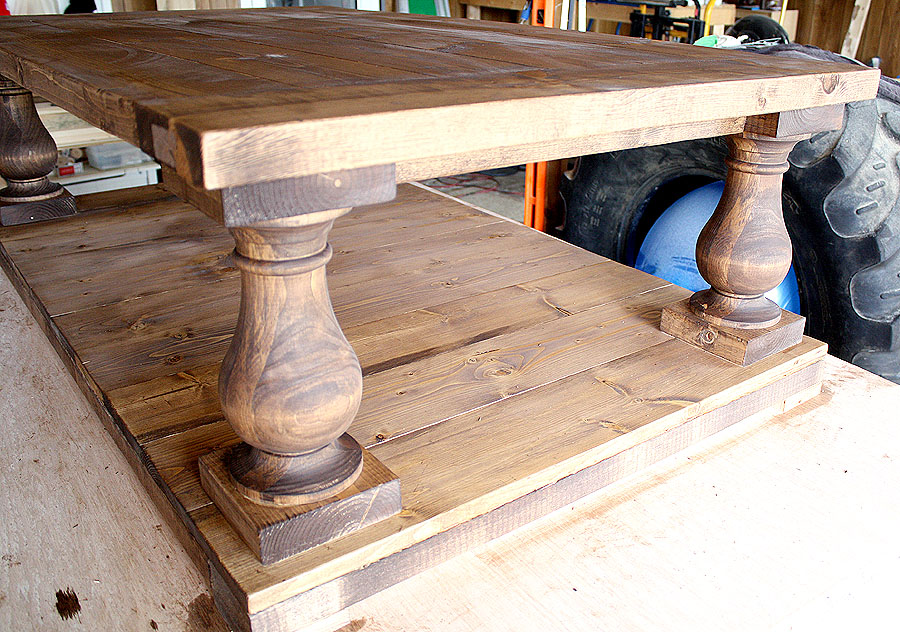
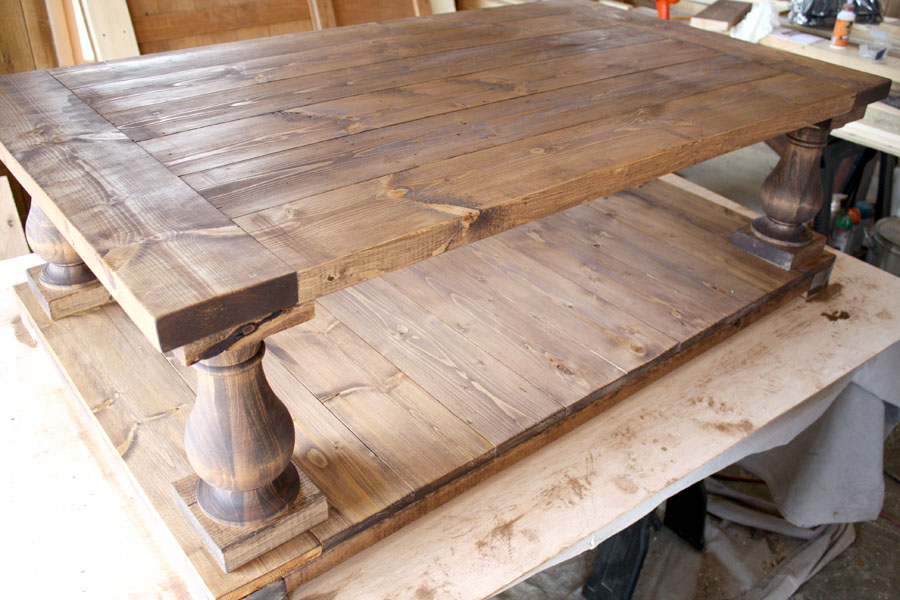
After the stain had a full 8 hours to dry, I tried Minwax’s Wipe-On Poly for the first time ever then kicked myself for not trying it sooner. Hello? Has anyone used this stuff before? It’s magic. You just wipe it on with a rag. No bubbles, drips, or streaks! What! Shut the front door.
Yes, it’s not as durable as regular polyurethane, but after 3 coats, it was more than enough protection for a coffee table. I used a 220-grit sanding block in between each coat. I wouldn’t recommend this stuff for a dining table, or anything that would be used more frequently, but for an occasional table? Abso-freakin-lutely. It was soooo easy to apply and so quick too! Only about 2-3 hours of dry time in between coats. Hallelujah, praise Jesus!
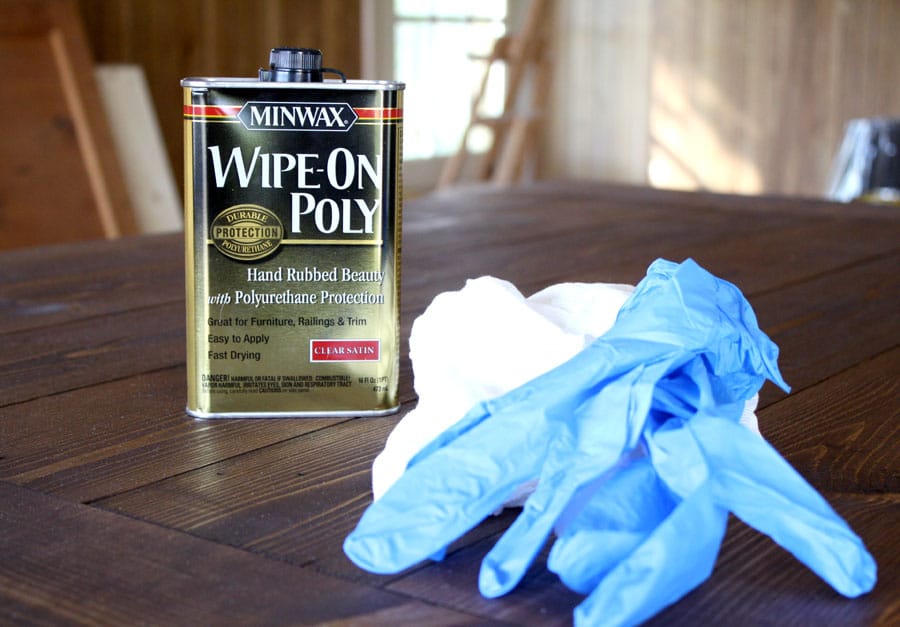
Then, just for kicks (and even more protection, because I’m redundant like that like that), I applied Annie Sloan’s soft wax just on the tabletop so that it felt really soft and smooth to the touch. Love, love, looove that buttery hand-rubbed finish.
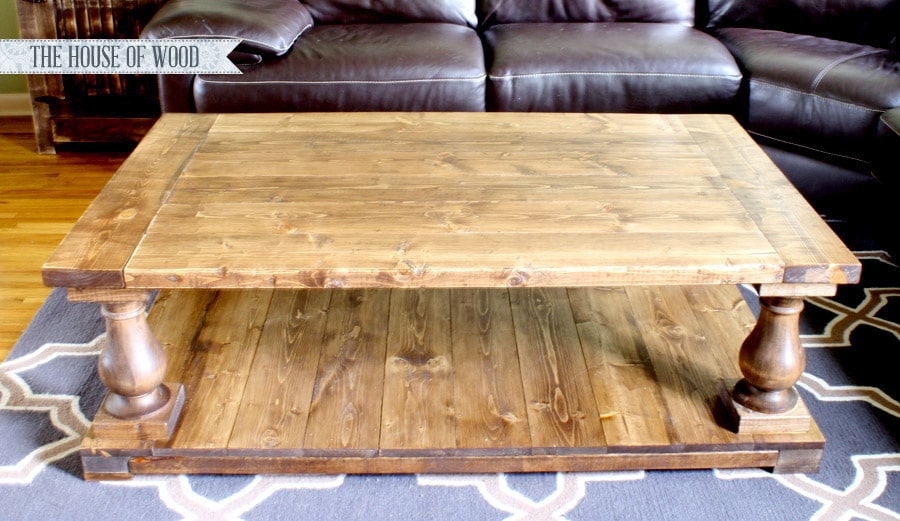
Gahhhh… I am dying over these gorgeous turned legs. Dying. Dyyying. I’m dead.
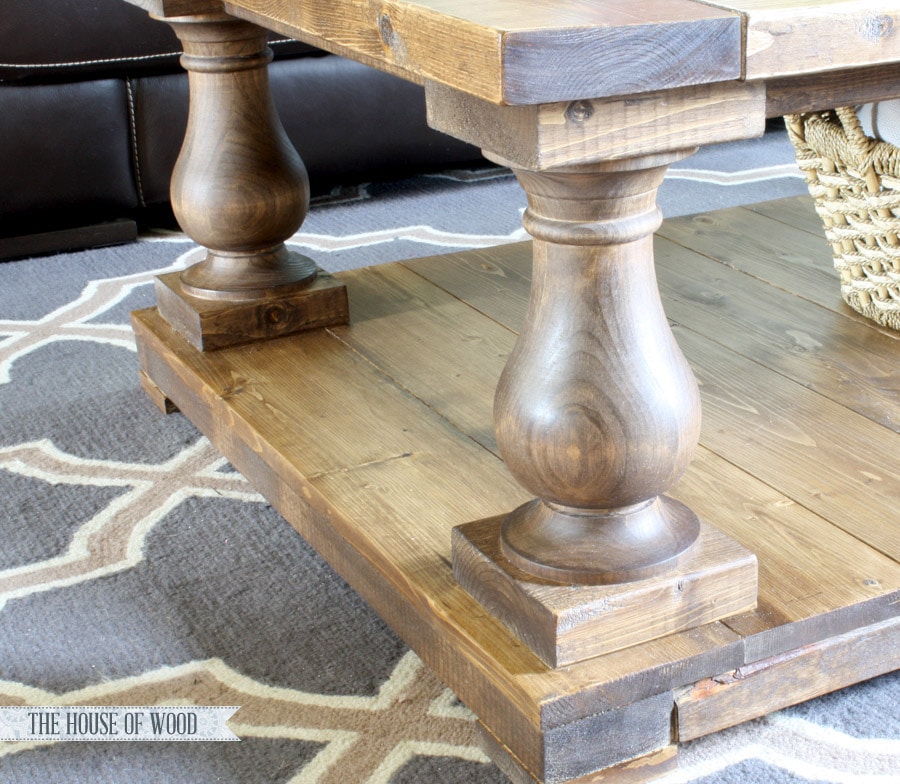
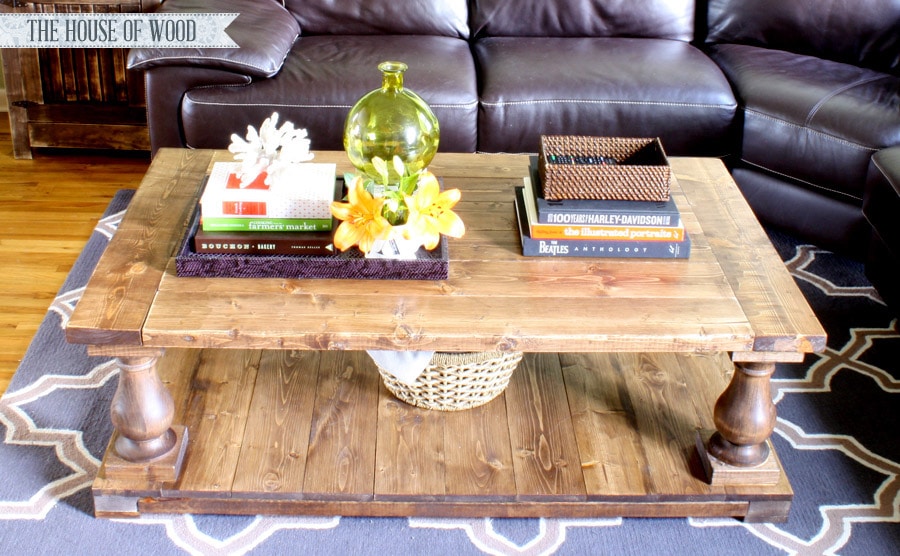
Did you spy that rustic little end table over there? Another Ana White plan, of course! Click here to learn more about that DIY project.
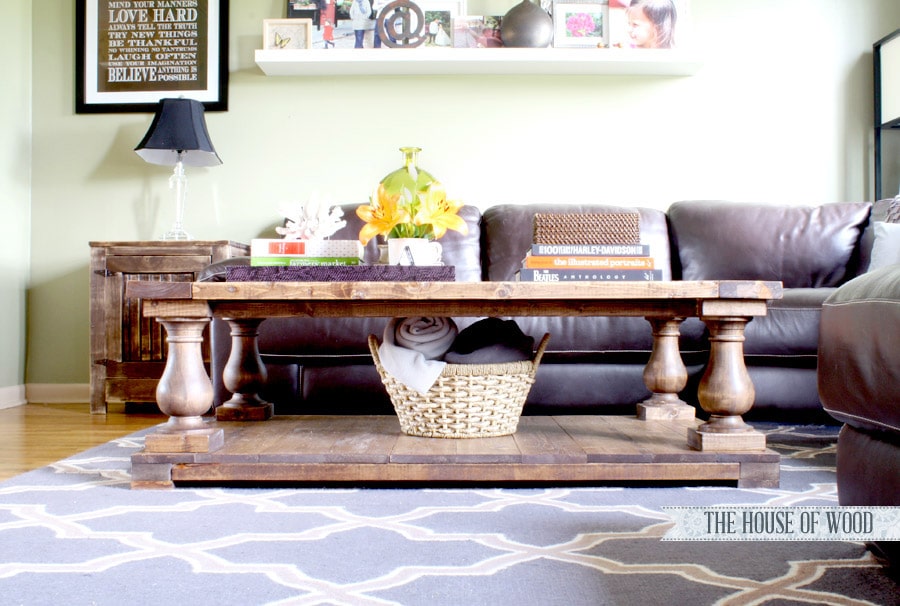
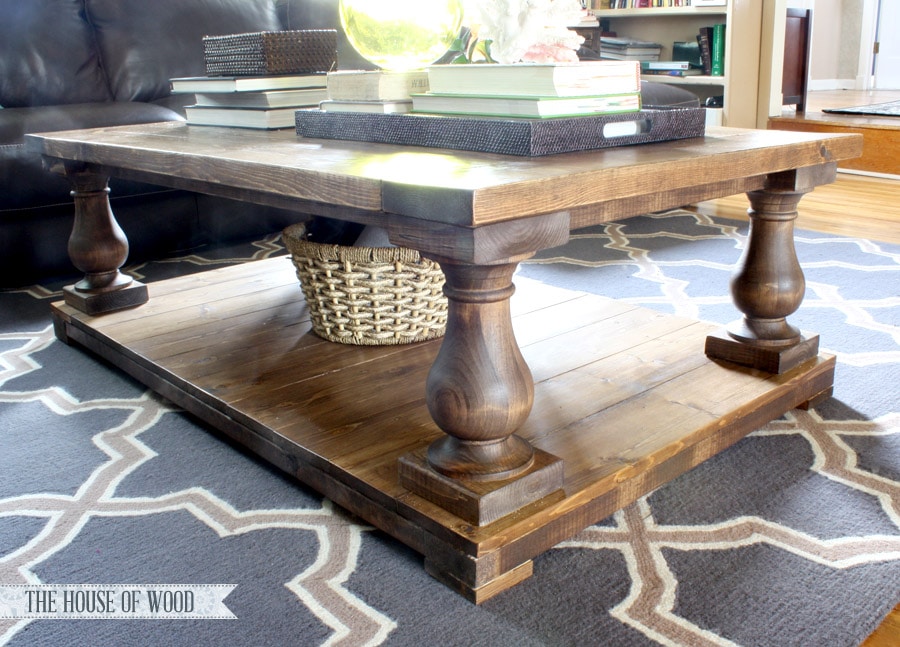
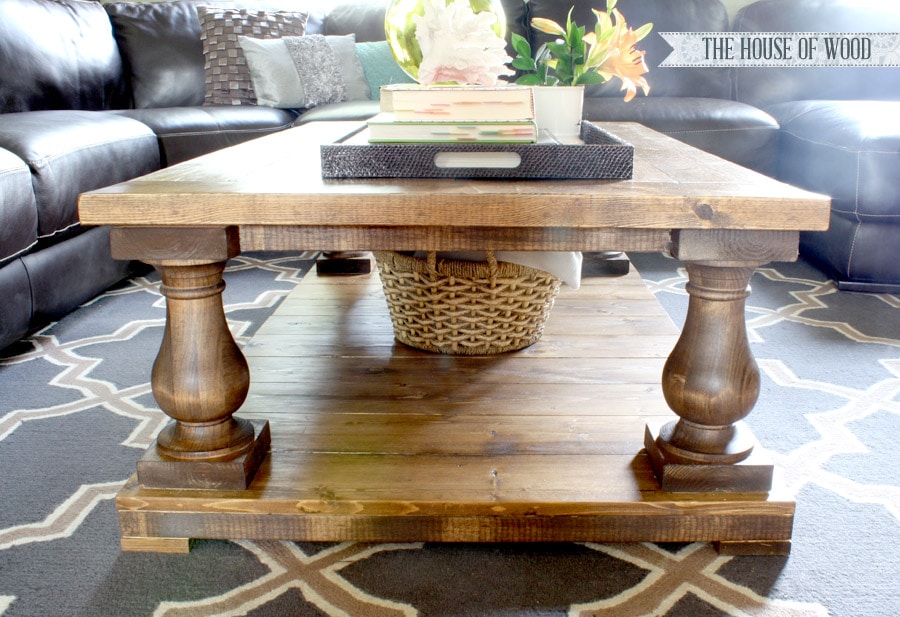
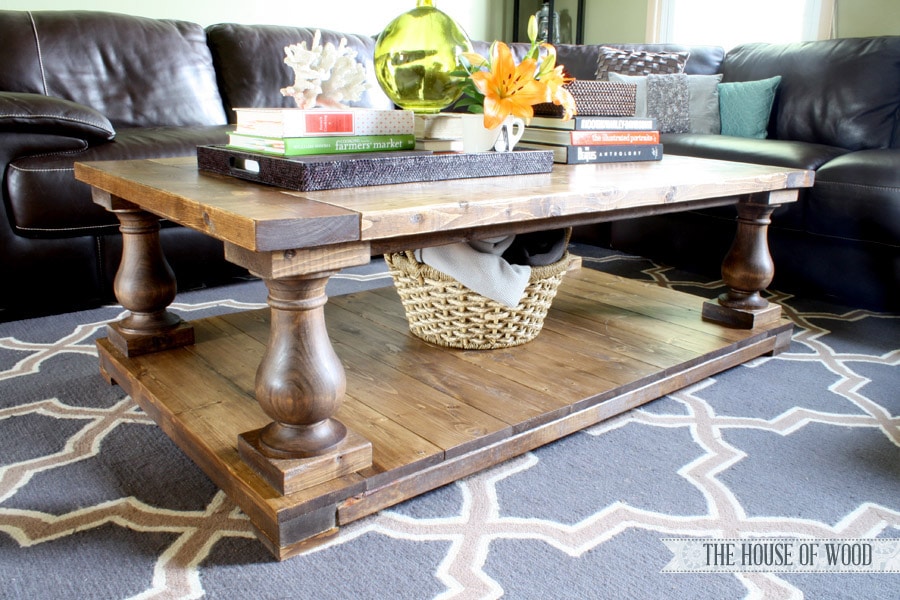
Ahhh… thank you Osborne Wood. I love you. Will you marry me?

So what do you think? Think you can build this for hundreds of dollars less than the Restoration Hardware version? I know you can! Go here for the plans and get ‘er done! And thank you for working with me on this one, Ana! You are the bomb dot com.
Thanks for reading, friends! If you enjoyed this post, feel free to pin and share it! Catch y’all on the flip side. Peace out.
Tools Used:
- Measuring Tape
- Speed Square
- Carpenter’s Pencil
- Saw
- 18v Cordless Drill
- Kreg Jig K4
- Clamps
- Belt Sander
- Palm Sander
Budget Breakdown:
- Lumber: $63
- Osborne Wood Turned Legs: $28.03 each
- Finishing Supplies: $33
- Screws, glue, misc: already owned
Total Cost: $208.12
Beautiful finish! Yours turned out better than the inspiration version.
Thanks so much, Jenny!
I so much understand your issue with working in an unheated garage. I took a break over the winter (I’m in Knoxville) and just recently started back on my big project of building cabinets for my walk-in closet. Just today I made my first-ever cabinet door! 80-degree temps are inspiring!
Nice!
this is gorgeous! such a beautiful table.
Thanks Andrea!
Gorgeous!!! I’m always so in awe when bloggers actually build something – I’m so chicken about that level of hardcore-power-tool-usage! This table is so beautiful!
Thanks, Brynne! And thanks for dropping by!
Great job! If it doesn’t look better than Restoration Hardware, it certainly doesn’t look any less. What is it about musicians and DIY furniture making? 🙂
I’ve made trunks inspired by RH, but that takes forever! No wonder they are expensive.
Thank you, Goran!
I have been looking all over the place for a table similar to the one at restoration hardware but for a fraction of their price. I’m so so glad to have stumbled upon your blog. Your table is just fabulous. I just luv it…i love the finish..i luv everything about it =). Thank you so much for sharing it with us and how it was build. This will be my first project with my hubby.
Thank again!
Yay! Have fun and good luck!
Stunning! Best RH reproduction that I’ve seen! Cool that you are a songwriter! Have you been to any Nashville TV show tapings? Love that show!
Thanks so much, Ameera!
WOW!!! I am in LOVE!! I have loved this table for soooo long but just couldn’t afford the price tag! You did an absolutely AMAZING job creating this knockoff! This is by far my favorite diy piece I have ever seen!! My hats off to you girl!! I already ordered my legs, I just can’t wait to get them in to start building!! If it turns out half as good as yours, I’ll be happy! LOL! Now all I need you to do is convince Osborne Wood to make the console table legs for a ridiculously cheap price just like these!! (O and then I would need you to make the plans to go with them)! Haha! Thank you so much for sharing your creativity and genius with us! I wish you all the best!
That’s awesome, Cara! Can’t wait to see your RH-knockoff coffee table!
I’m in awe of your carpentry skills Jen. I like your table much better than RH’s. Can’t wait to meet you at Haven. I’m just down the road from you in Clarksville!
Hi Kathy! Thanks for the kind words… see ya at Haven!
Oh craptastic!!! The table is gorgeous!’ And you are hilarious with the best sense of humor!!!!!
Best. Compliment. Ever. Thanks Teresa!
Love RH, and love the table! Great work! Where did you get the rug? It would be perfect in our living room!
Amber, the rug is from Overstock!
Hi, this table is amazing!! I have absolutely no skills or tools, but I will try to find someone to build this for me!! I cannot find where you stated the type of wood you used??? Thank you!!
You are truly talented!!!!
Hi Jill,
This is the perfect beginner project – no previous skills required! Tools, however, yeah, you’ll need a few of those. 😉 I used spruce wood and the legs are knotty pine. Good luck and get ‘er done, girl!
Jen,
You said you used spruce boards for the table, but I am having a hard time finding spruce. Do you have any suggestions where I can find spruce or suggest other woods that would give that knotty look.
Thank you!!
Hi Matt,
Spruce is just what was in stock at my local lumber yard. You can use knotty pine as a substitute. Good luck!
Beautiful work, question where do you buy the lumber from and what type are you purchasing, pine/polar etc ?
I used pine and spruce for this table – the legs are from Osborne Wood Products and the rest of the lumber came from a local lumber yard. You can also purchase your lumber from Home Depot or Lowes.
I loved your Tip Me Tuesday link . {thanks girl!}
Would you like Tip Junkie to feature your blog post to over 200,000 creative women? If you upload this blog post into your Tip Junkie craft room using at least 2 images, 2 steps, and blog post URL then I can easily feature it in my RSS feed, home page, and all my social networks instantly. {squealing with delight}
~ Laurie {a.k.a. the Tip Junkie}
http://www.tipjunkie.com/post/how-to-add-a-craft-room-project-on-tip-junkie/
Thanks so much, Laurie! I uploaded it onto Tip Junkie! Yay!
Jen, Love this table. i have wanted since RH got it.. Thank you for getting Ana to construct this with you..I am purchasing the supplies this week. I will be finishing mine in a distressed gray wash though.
Yay! I’d love to see it when you’re done. Let me know if you have any questions. Good luck!
I really love this. May have to show this to my guy. Great job!
Loving this coffee table! You’ve totally inspired me to take this project on! I am very much a beginner to carpentry, but I’m feeling so empowered as I go through the steps, and my coffee table starts to look like a coffee table!!! 🙂
When you did the staining, did you use a pre-treatment on the wood before the actual staining?
Thanks so much for your help!
Thanks for the sweet note, Shelby! No, I didn’t use pre-conditioner on this table. Usually, I would, but this time, I wanted the finish on the table to look as ‘reclaimed’ and ‘imperfect’ as possible. Good luck and happy building!
Stunning! I’m green with envy over here. If I were ever to replace my coffee table, I’d want something just like that.
Where did you purchase the rug underneath? I just repaired all the walls in my house Charcoal by Pantone, but my floors are an imported multi brown tone of Italian tile, this rug would help marry the two colors as the shades are exactly what I’m dealing with! I would be so appreciative to have this info. Thanks in advance. Btw beautiful redo. You are so talented!!
The rug is from Rugs USA, here: http://www.rugsusa.com/rugsusa/rugs/rugs-usa-trellis/charcoal/200HJHK24A-26010.html
Beautiful table! Great work!! Thank so much for share it!!!
Hi! I am not sure if you already received and answered this question, so I apologize for the redundancy…
Did you use Minwax Wood Conditioner before staining it? I read it makes the stain easier to apply, and helps to avoid blotchy spots. Your finish looks so even and smooth. Just curious. My husband just built this gorgeous table (knotty pine), and I don’t want to mess it up!
Thank you,
Luila
Thanks Luila! I’ve used the pre-stain before the past and have been really happy with the results, especially when working with pine or spruce, but for some reason, I didn’t use the pre-stain when finishing this table. Not sure why, but lucky it turned out okay!
This is amazing!!! I tried to makeover a coffee table a while back with paint and decoupage. And it was ok, but I’m a little disappointed in it tbh. This though.. I think I can do this (I took shop in college.. Surely something stuck). =D And it’s so beautiful (and so much cheaper than the RH version). It’s the kind of table that I drool over in people’s houses that are so put together and have gorgeous furnishings everywhere. I’m just now realizing that there’s no reason I can’t make most of that stuff myself thanks to posts like this.
I just placed my order for the coffee table legs off Osborne’s site! Can’t wait for them to get here! I’ll definitely post it on my blog when I’m done and link back here. Thanks to you and Ana for putting these plans together for everybody! A true inspiration!
Great Coffee table! Wife wants me to make one, but I went to Osborne’s and seen they have a few different materials for legs. Which did you use?
I chose the knotty pine species.
What type of wood did you use on both the planks and from Osborne?
Thank you … love this table
Hi Annette,
I used knotty pine for the Osborne legs and douglas fir for the rest. Thanks!
Table is gorgeous! I’m planning on building this but with 12″ boards for the top and 6″ breadboards. Suggestions on how to support these bigger planks?
I am new to DIY and I am planning to buy furniture for my first ever home… Yay!! I found this post and I am absolutely inspired. like everyone else I love love love RH. I am going to give this a try. If mine turns out half as gorgeous as yours I will consider it a success. Thank you for writing such an inspiring post.