Restoration Hardware sells these nightstands for $369 each.
Sigh… aren’t they beautiful? But are they $369 kinds of beautiful? I think not.
So, armed with Ana’s plans, I waddled up and down the vast, intimidating aisles of Lowe’s gathering my supplies. It was the first time I took a trip to Lowe’s to buy lumber without my husband. I was a little apprehensive at first, but once I got there, I felt very empowered. It didn’t hurt that all the friendly, strapping young men working in the lumber department were more than happy to assist me. What a peculiar sight I might have been: imagine 1 tiny Asian girl + 7 months pregnant + pulling a cart full of lumber behind me = strange looks all around. Ha.
I made sure to measure twice before making any cuts (Watson supervises):

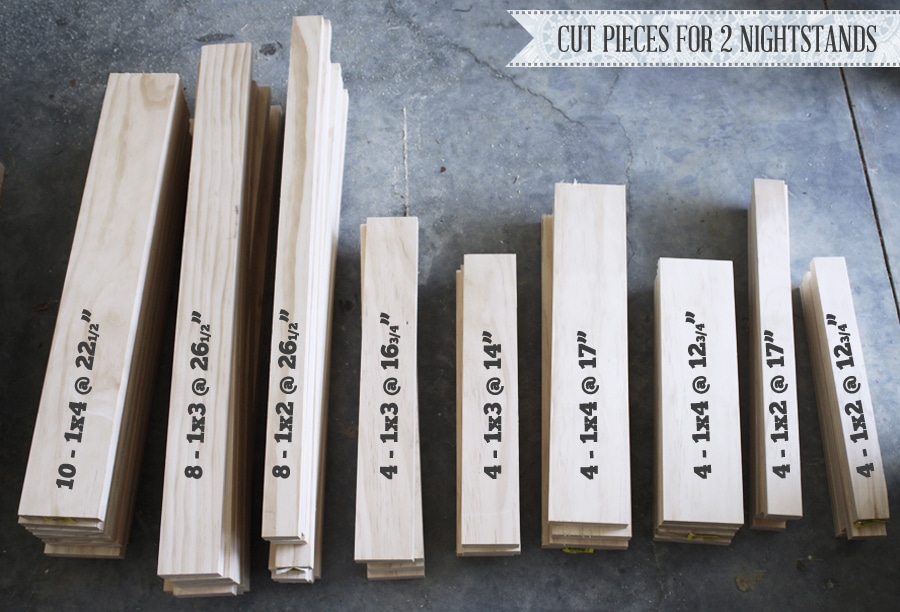
Here are my cut pieces. I doubled what was listed in Ana’s plans for two nightstands. Also, I found that I ended up needing 10 of the 1x4s @ 22 1/2″ (instead of 8) because I used 5 boards for each nightstand top (4 boards didn’t cover the whole top). No idea why my numbers were off…
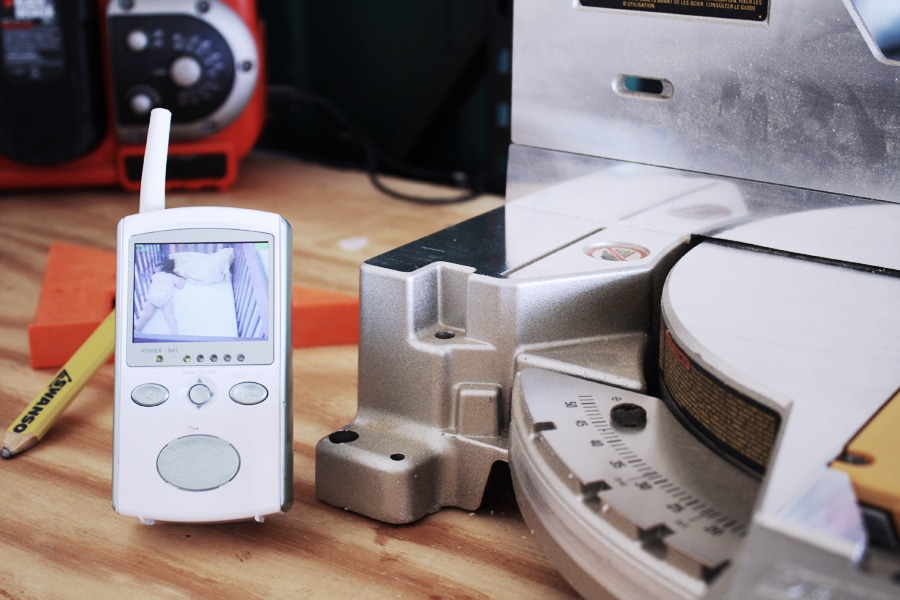
By the way, can I just tell you how much I love my compound miter saw? It was a Mother’s Day gift from the Hubs last year. And look! I was able to get all my cuts done during nap time.
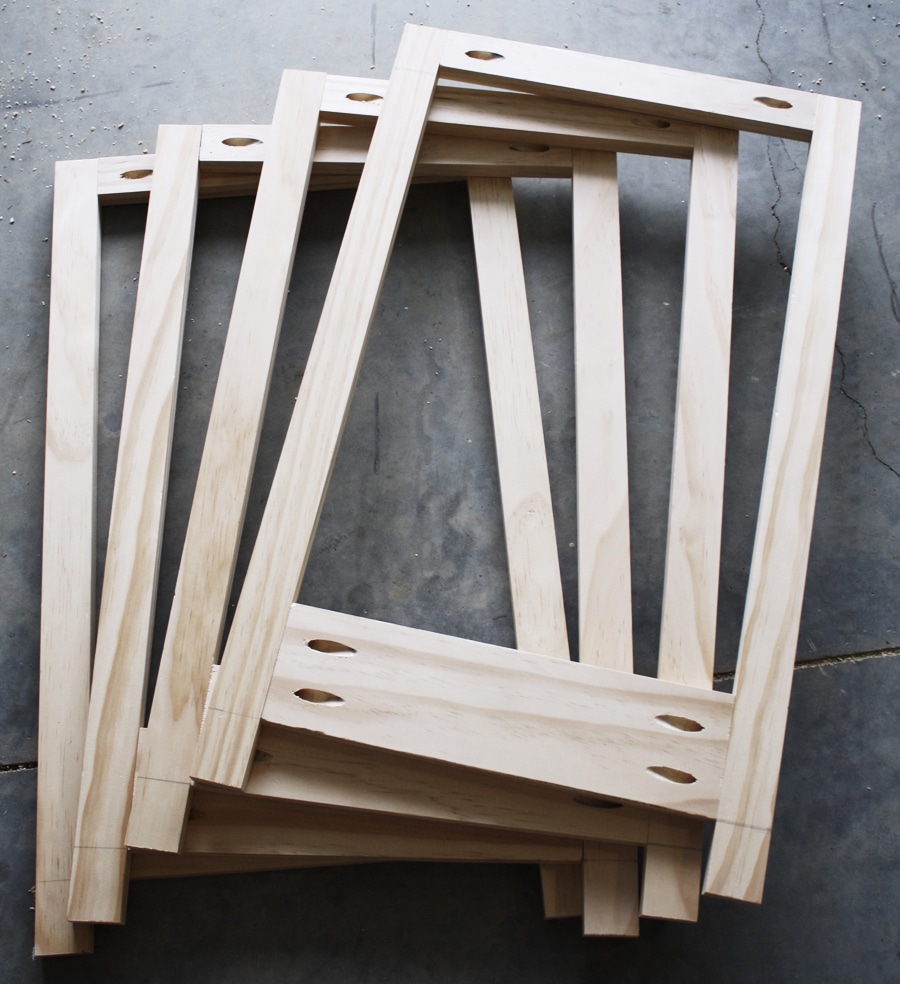
After all my cuts were made, I busted out the trusty Kreg Jig and drilled a few pocket holes in my pieces then joined them together to make the sides, front, and back frames:
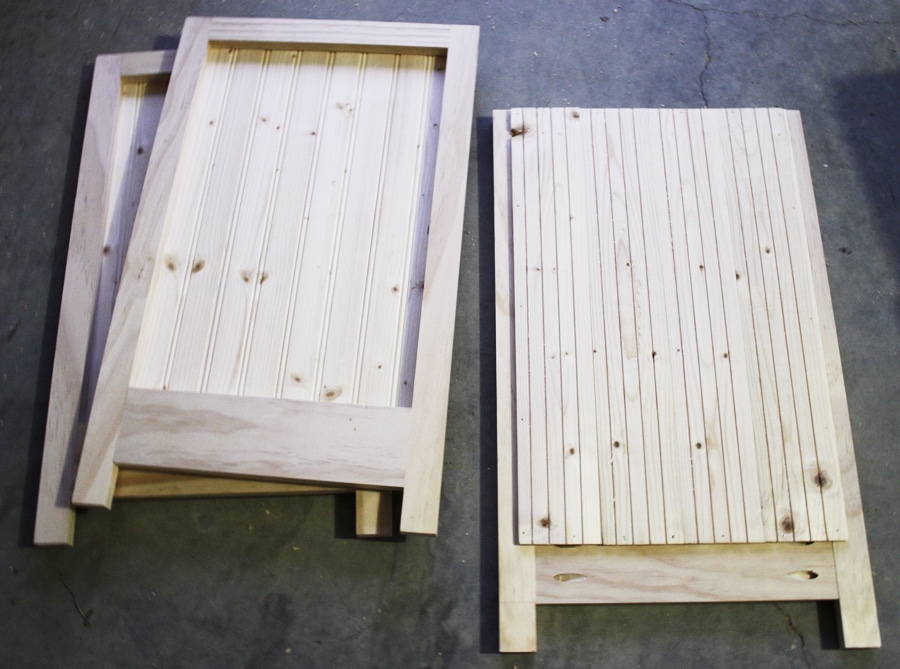
Then after cutting some plank paneling down to size, I nailed them to the insides of the side frames. The frame on the right shows what it looks like from the inside of the nightstand and the frames on the left show the outside. Puuuurty.
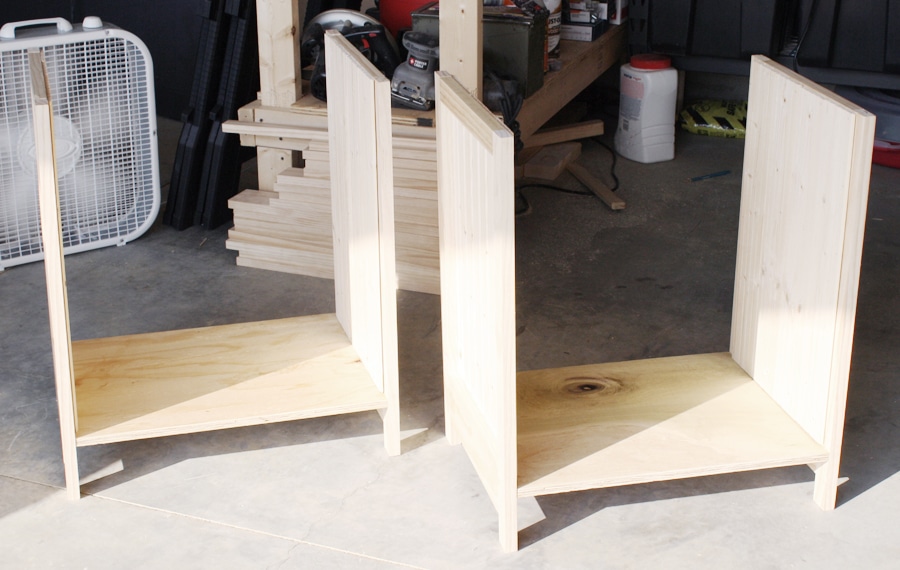
Next I drilled the bottom pieces of plywood to the side frames. Well, hello there, morning laser beam of sunlight shooting directly into my garage making it a sweltering sauna.
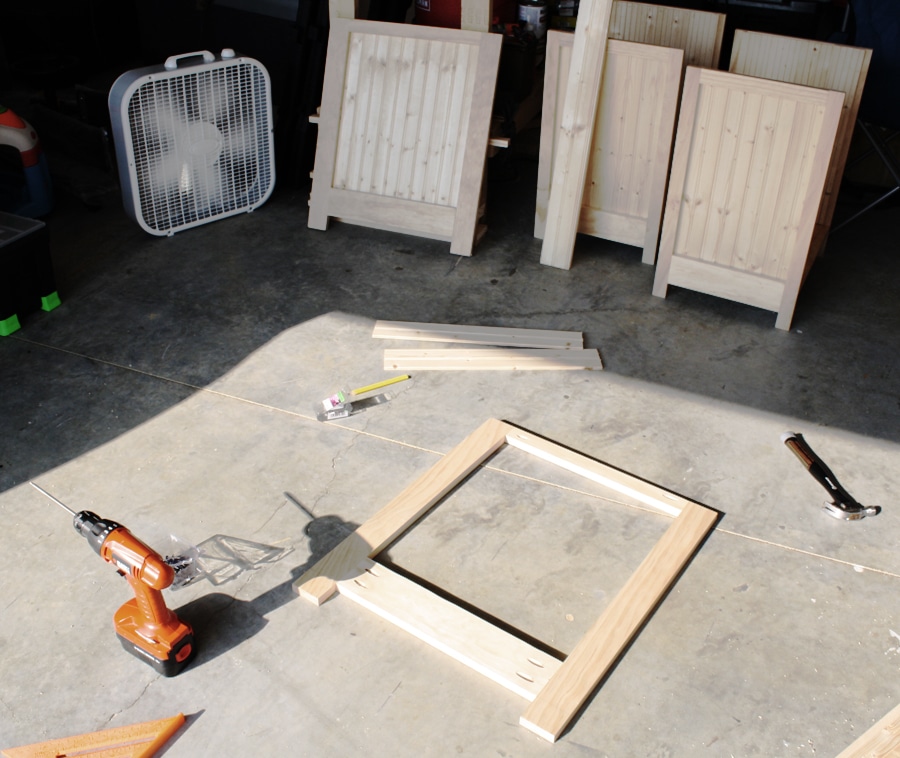
Next, I glued and nailed the front frames on, drilling pocket hole screws in on the bottom shelf. Also, because I’ll be putting these nightstands in a place where the back is exposed, I chose to continue the plank paneling on the back, instead of using a sheet of plywood for the back panel. I think it’ll look more finished that way. Here’s the back frame, ready for the plank paneling:
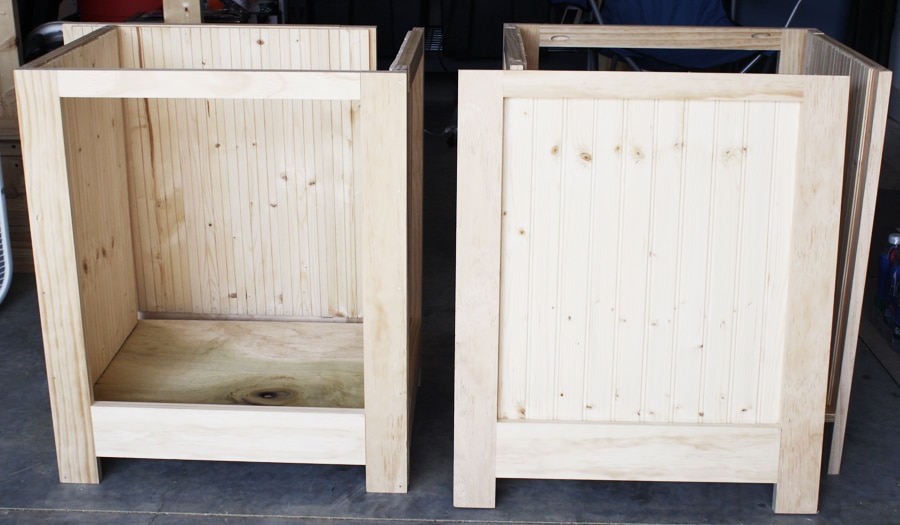
I attached the plank paneling to the back frames just as I did with the side frames (using glue and 3/4″ finish nails). The nightstand on the left shows the inside of the back panel and the one on the right is what it’ll look like from the outside.
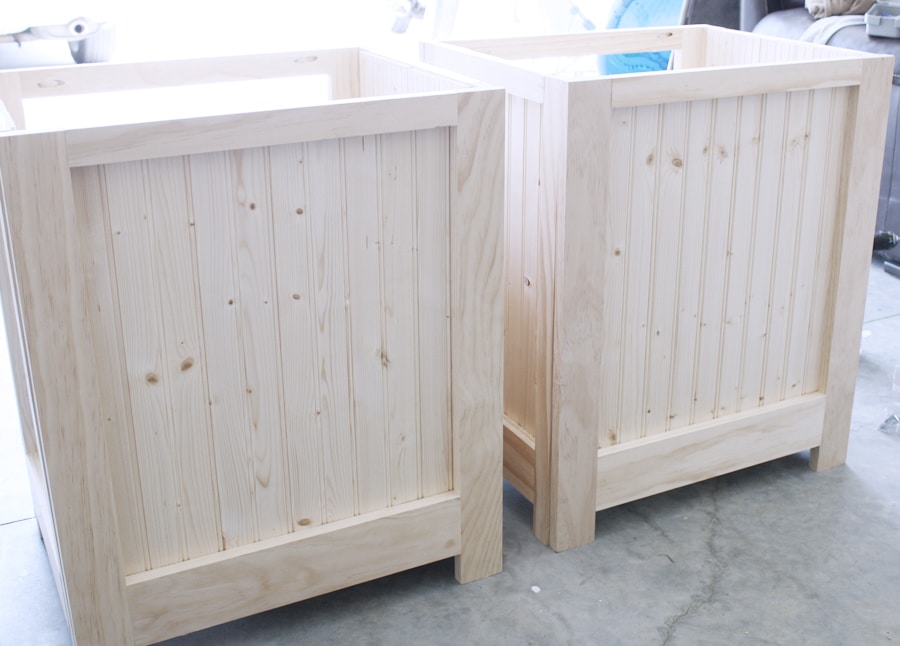
Then I glued and nailed the back frames onto the nightstands, drilling pocket hole screws in at the bottom shelf. Here’s the view from the back (hellllooo, lovely!):
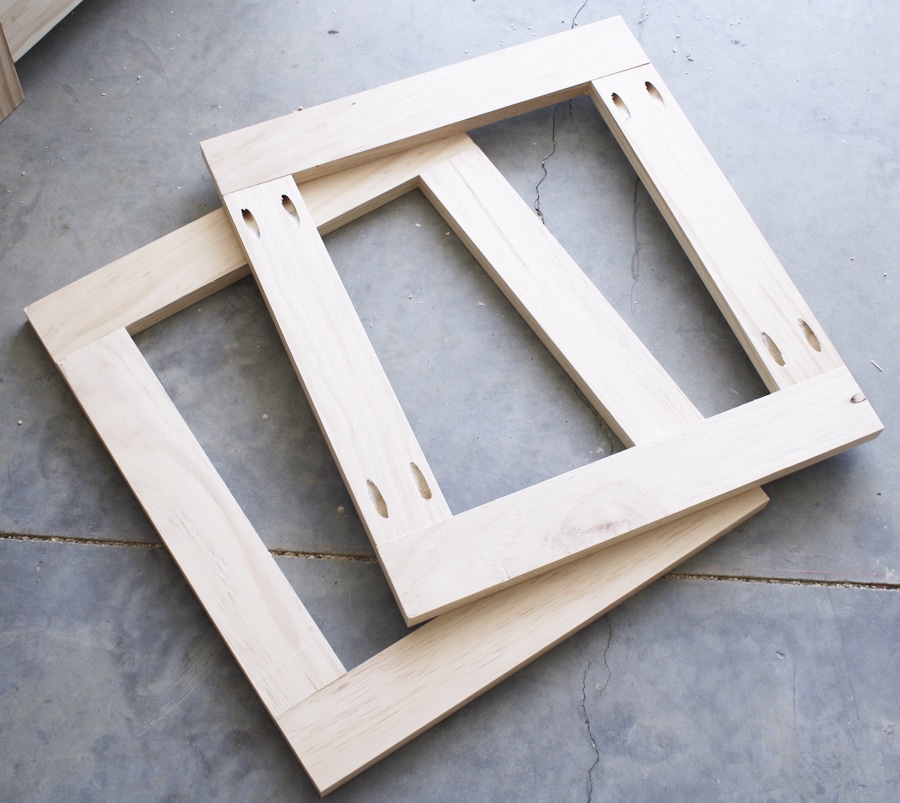
Now to construct the doors. I Kreg Jig’d em up and zipped some screws in:
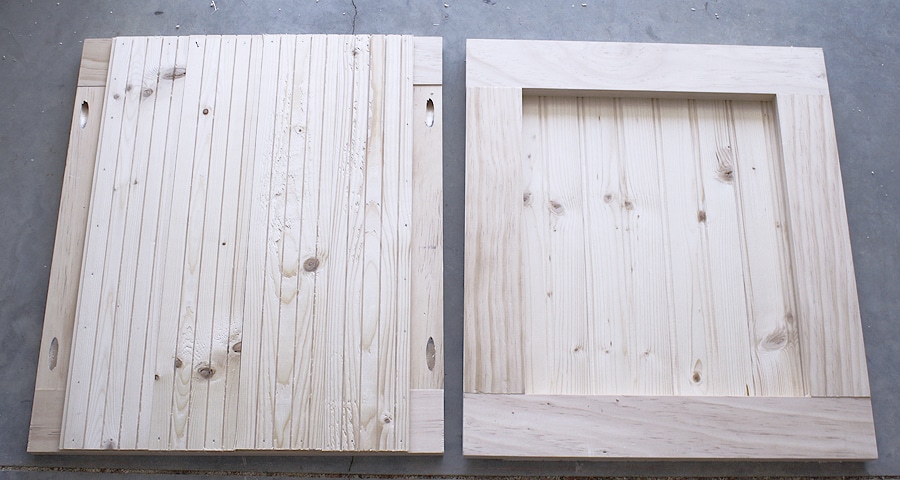
Then added the plank paneling. The door on the left shows the inside, and on the right is what it looks like from the outside:
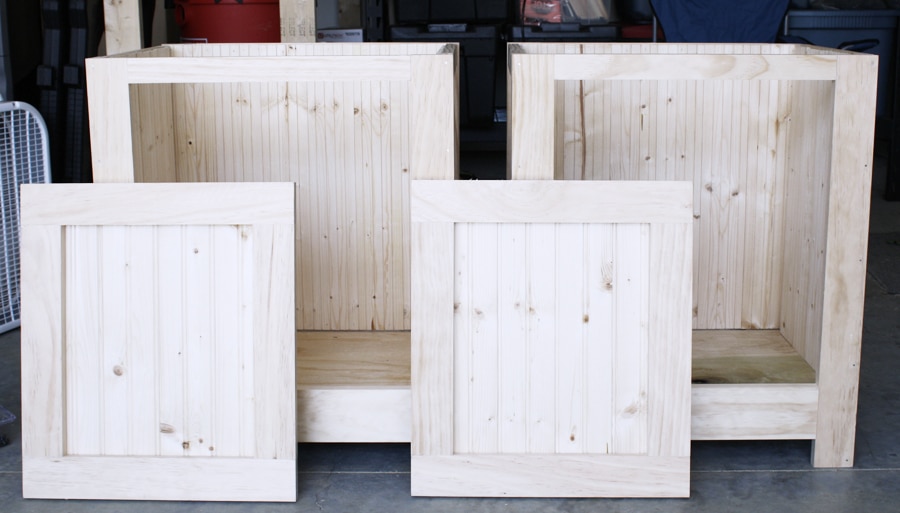
Now they’re ready for their tops!
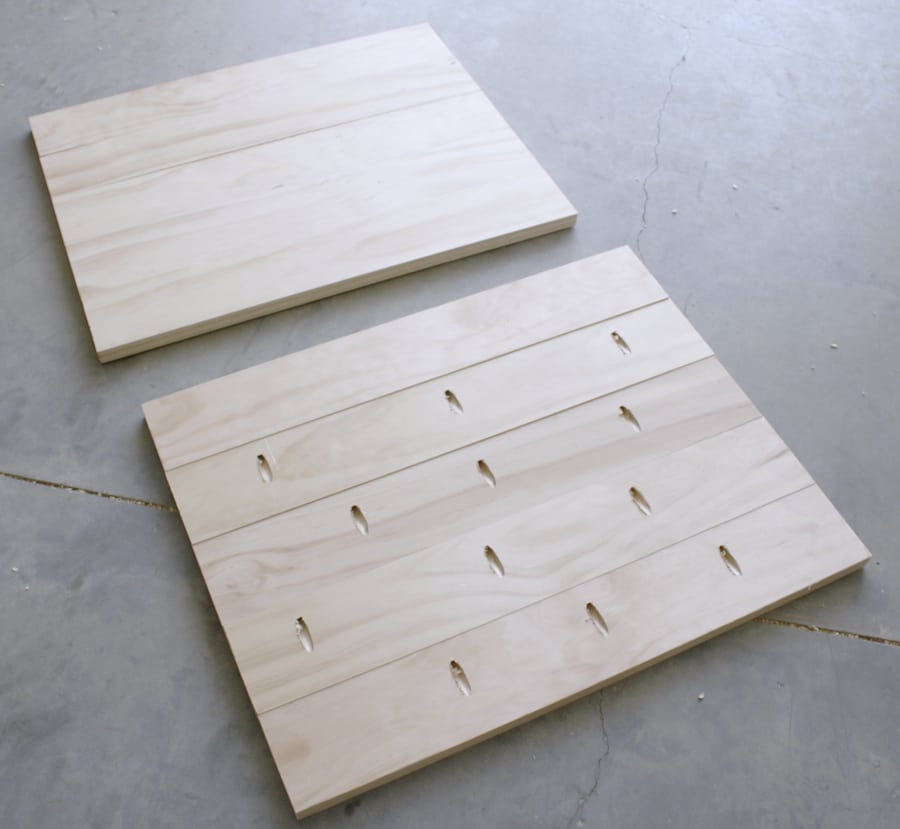
I assembled the top boards by first drilling pocket holes, then joining the boards together, like this:
Then I attached the tops with glue and 1 1/4″ finish nails and gave the 2 pieces a good sanding. After vacuuming all the dust with a shop vac, I wiped the nightstands down with a damp rag to remove any remaining dust and debris.

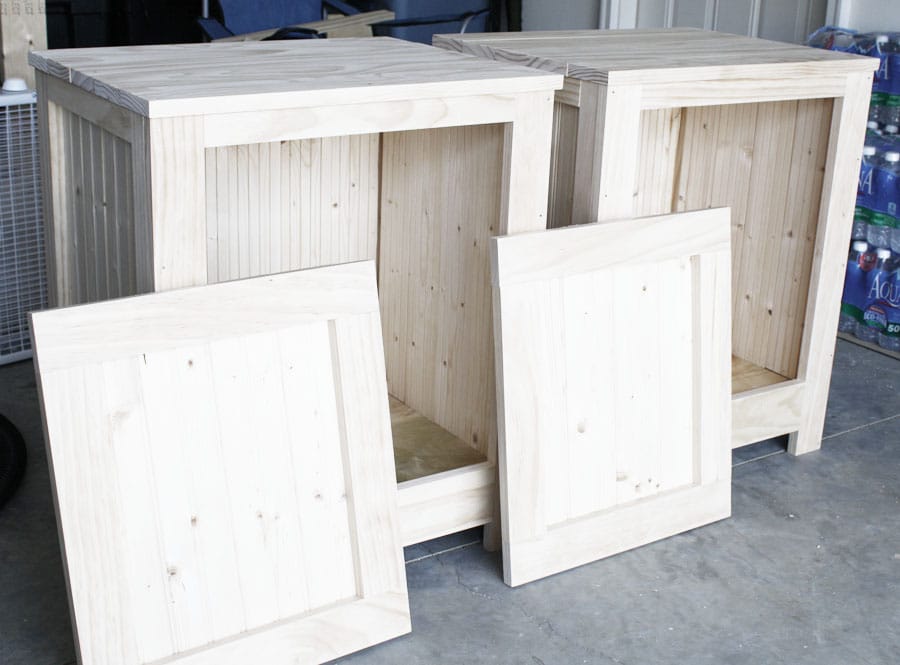
Ahhh… the end is in sight! Here are my lovelies ready to be stained! Aren’t they puuuuurty?
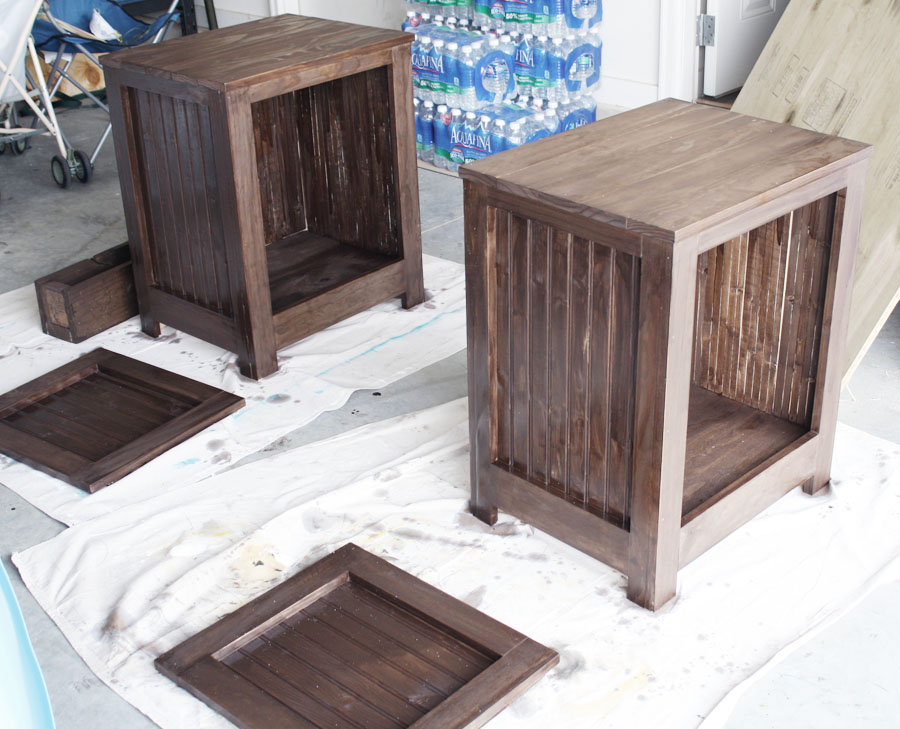
I used Rustoleum’s Ultimate Wood Stain in Dark Walnut. It turned out a little darker than I expected. I probably should have wiped the excess off immediately after, instead of waiting 15-20 minutes like the directions say. This stuff dries in an hour, so after 15-20 minutes passed, it was a bit tacky and more challenging to manipulate. Behold: my embarrassing staining job:
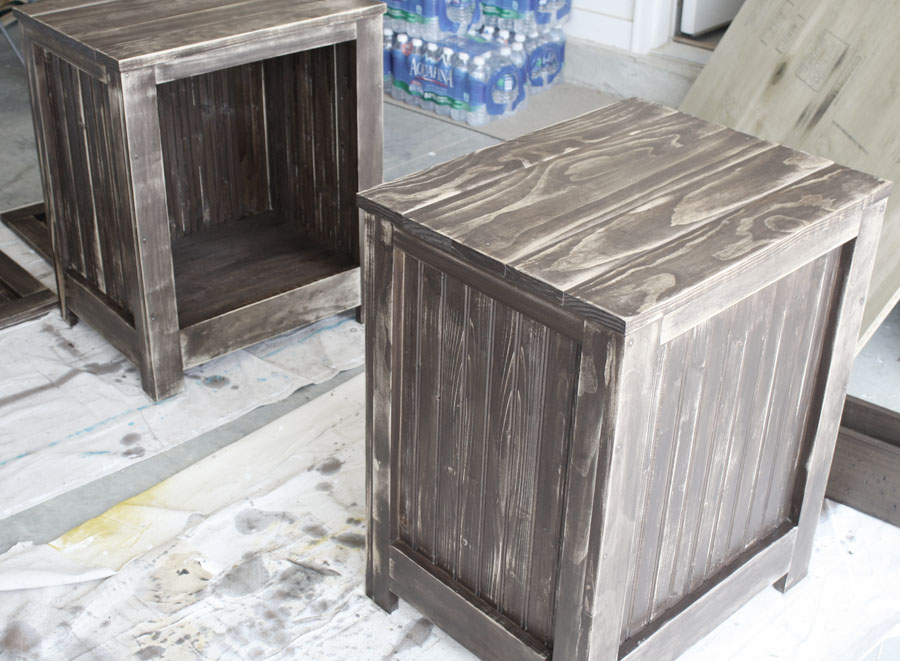
Yuck, with a capital Y, right? So, I fired up my palm sander with 60 grit sandpaper and sanded the stain down, in hopes of improving the finish. This is what I came up with:

I think I kind of like the rustic finish; it looks like reclaimed wood. I think the imperfections look more deliberate and intentional, instead of looking like I let my one-year-old loose with a can of wood stain. The wood felt coarse from the 60 grit sandpaper, so I sanded the surfaces down with a 120 grit sanding block to smooth it all out again and wiped everything down with a damp cloth to remove all the sawdust.
After I brushed 3 coats of polyurethane on, I drilled the sash lifts and strap hinges on the door and attached the doors. It’s easier to drill the hinges on the door first and then drill the door onto the nightstand (take my word for it). I also included a magnetic clasp on the inside so that the doors click and stay shut. And here they are, finished:
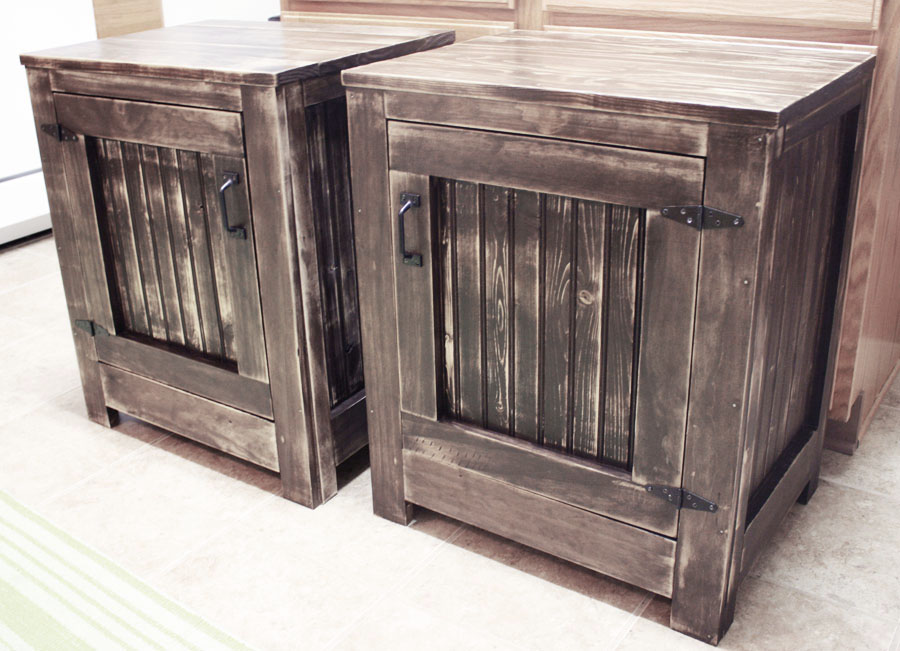
To be honest, I’m not sure how I feel about the finish. I loved these pieces up until I mucked it up with my misuse of stain. I think I’ll refinish them sometime in the future, but for now I’ll wait and see how I feel after we’ve lived with them in our home for awhile. What do you think? Suggestions?
Cost Breakdown:
- Pine lumber: $92.11
- 3 Packages of plank paneling: $29.13
- 2 Sash lifts: $5.02
- 4 Strap hinges: $10.68
- 2 Magnetic clasps: $2.38
- Pocket hole screws: already owned
- Finish nails: already owned
- Rustoleum dark walnut stain: already owned
- Rustoleum polyurethane: already owned
Total cost for 2 nightstands: $139.32 ($69.66/each)
That’s a savings of about $600. Um, yes please. I’ll take it!

I like the design that you are going for. I am trying to do the same for my office with old vintage movies themes.
I just made one as a night stand for my son’s room too! I kind of like them dark and rustic 🙂 Put them with the rest of the furniture in the room and maybe they will feel at home!
Yep… I’ll give them a day or two to cure and then I’ll take some styled photos and see how I feel then. Thanks for the tip!
Found them! You did such a great job on the build! The problem with the stain is the amount of time you left it on. I literally wipe off within 3-5 minutes. This means that you probably need to work one side at a time. BUT, I do think your finish is kind of cool! It looks like you sanded it quite a bit? You could sand it just a bit more with an orbital sander and I think the finish might be really neat. I like different and a bit out of the box at times. I think the finish looks kind of old and shanty… But you are seeing them in person. I do love them though, and you built them perfectly!
I agree… the directions on the can says leave it on 15-20 min before wiping. By that time, it was tacky and almost dry! Next time, I’ll definitely just put it on, then wipe it off. The finish will probably look more even, as a result, too. Thanks for the tips!
We live where it is very hot and humid. I have found that it really works best to wipe it off quickly, if not immediately. When I am working in the winter I can let it sit a bit longer, but I still try to work on small areas and wipe before moving on. I do love them though, and I really think the finish looks very cool!
Good point. When I was working on this project, it was 102 degrees out and VERY humid. I also stained my rustic planter box (http://jenwoodhouse.com/2012/07/10/easy-peasy-rustic-planter-box) at the same time, this time putting it on and then immediately wiping it off and it looks so much better. I think that’s the technique I’m going to have to go with next time. You live and learn. Thanks again for the kind words, inspiration, and encouragement!
I think the look is fabulous by today’s standards and I’m sure your quality is better! What you could have done with the stain is wipe it down with paint thinner. That would work even if it had sat for hours… comes in handy when something calls you away from your project or when a color comes out too dark. It is also the best wipe down after sanding before the finish as water will raise the grain.
Thanks for the tips!
Okay, you are the WOMAN! So impressed! The cabinets are beautiful!! Thank you for sharing. Visiting from Sister’s of the Wild West. Would love it if you would share this at my Make it Pretty Monday party tomorrow at The Dedicated House. http://thededicatedhouse.blogspot.com Wishing you a grand evening. Toodles, Kathryn @TheDedicatedHouse
Will do, Kathryn! Thanks for dropping by!
These look AWESOME! Love them more than RH’s version =)
I am soooo impressed!! These are wonderful and the fact that you made them yourself is amazing to me.
Mary Alice
i personally LOVE the stain – it wasn’t perfect at the start, but sanding them down really did make them look reclaimed and rustic. in fact, if/when i make MINE (because again, you’ve inspired me!), i’ll mess up like you did, only on purpose. 🙂
These are so pretty, I love them! I recently just completed my first furniture project and think I’m not addicted. I’m pretty sure I could use some new nightstands. I will have to remember to pin this tutorial.
http://www.sarahdawndesigns.blogspot.com/2012/07/diy-coffee-table-makeover.html
These are amazing! They look like they cost a fortune. I love the hinges
I like the grey/brown barnboard look, so my method is to apply the stain (I usually wipe it on with a cloth so it isn’t too heavy), then once it’s dry, wipe watered down beige paint over the stain. Again I wipe it on so I can control the thickness. Once that’s dry I apply a coat of wax and buff it. So far I’ve had remarkable success with it.
I really like the sanded look of yours, but if you think it’s too dark you might want to try the watery paint.
Thanks so much for the tip!
I LOVE them! Yours are 100 times better than the Resto ones. In my opinion, the Resto ones look like the Malm set from IKEA. Yours have so much character. Job VERY well done!
Restoration Hardware tables at a fraction of the cost? Yes, please! You rock those tools!
xo,
Shannon
WOAH! These are awesome! Great job! You could definitely try to lighten it up though.. maybe paint it with a very, very thin layer of greyish white. It would definitely still let the stain show through!
Thanks for the tip, I’ll try it!
I love this!! I love it when I find other women who love wood-working as much as me. And very impressive at 7 months pregnant. I’ve been wondering about when I get pregnant again will I keep on wood-working? I think I will, thanks to your fine example! 🙂 And now I am super convinced that I need to buy a Kreg-jig.
Thanks for the kind words, Laura! I see that you’re from TN and have lived in AL too – we have much in common (besides the love for woodworking)! And yes, the Kreg Jig definitely pays for itself easily – get one! You’ll love it.
I found you through MMS’s FFF. These are amazing. They turned out soooooo wonderful. I love the toned down/rustic look they took on when you sanded down the stain. Great job!
Thanks so much, Heather! And thanks for stopping by!
Hey Jen,
This is my first visit. I found you via Roeshel at “The DIY Show Off”.
I think you did one flippin fantastic job on these nightstands.
I am so jealous…… I have wanted a Kreg Jig for years. My dream is to not only make my own night stands, but my own platform bed frame with storage on each long side. My house is so tiny that I need such.
I can’t believe the instructions told you to leave the stain on that long. I started wiping my large entertainment center down as soon as I did one single small side…. you can always recoat again if you want darker. I wanted darker, but was in a rush, so did not do more than I think it was two coats and I am glad now that I stopped. And from what I have seen from surfing the diy sites, your uh oh is very stylish and “in” right now.
Congratulations!!! I think they are fabulous just as they are!
Sheryll & Critters.
Hi Sheryll! Thanks so much for the kind words! I can’t recommend the Kreg Jig enough – it pays for itself ten times over! Definitely get one if you’re going to be building your nightstands, platform bed, and more. Can’t wait to see what you come up with! Good luck and thanks again!
WOW! These are absolutely gorgeous! You did an incredible job.
I am so in love with your nightstands!! I think yours are better than the Restoration Hardware version!
Thanks for linking up – I featured you today! http://www.flamingotoes.com/2012/07/crush-of-the-week-think-pink-features-57/
Wow, thanks so much Bev! And what a great roundup you’ve got there… so lovely to be in these ladies’ company!
I can’t believe you made these from scratch. You are so talented!
Thanks for sharing this at my Make it Pretty Monday party at The Dedicated House. Hope to see your prettiness again on Monday. Toodles, Kathryn @TheDedicatedHouse
Of course! Thanks for having me!
It looks like the antiqued coffee color which I have been trying to find a way to duplicate. I love how they look as is!
Really impressed! Like the nightstands AND the finish! Kudos to you!
What are the dimensions of the top? I am building this, but going to use a piece of antique white marble for the top, and need to know the dimensions. Thanks!
Hi Randy,
The dimensions are 17.5″x22.5″
Hope that helps!
I just got the marble – and it is absolutely perfect – bought it off craigslist for 50$ apiece. I still plan to reduce all dimensions by 3 inches to make it fit our room a bit better – keep an eye out on Anna’s site for my future brag post 🙂
Great site here – Thanks for the inspiration.
Randy
Sounds awesome! Good luck!
This is my next project – but I need to reduce the height by about 3-3.5 inches. Nervous to mess with your plan here, but I am afraid that the current height dimensions would look kind of strange in our room…..Wish me luck
I think they are beautiful! Amazing job! Love that your Rhodesian Ridgeback, Watson, is helping with the project, he is a beautiful dog! I have a Ridgeback Boxer mix and he is very like that, loves to follow me around and “supervise”. Thanks for sharing!
If your stain was oil base you could have used a lightly soaked rag (paint thinner or mineral spirits) and rubbed a lot more of the stain off. If it was an acrylic base stain a water soaked rag would do the job. After the rub-off, let dry and sand smooth, 220 or 320 grit, and apply final finish. If there’s a next time, give this a try.
I like your end result but you have to be please with your work. If you’re not you definitely haven’t ruined them. Just some elbow grease, another stain or paint or just a clear finish and you’ve given them a new face. Experiment of some of your left over scrap if you’re not sure; sort of like measuring twice.
Love you gals with the gumption to DYI and fire-up those power tools.
Thanks for the tips, Bill! I’ll definitely be refinishing them in the future… as soon as I can drum up some motivation!
What is the dimension of the bottom piece of plywood? I didn’t see it in the write up (unless I missed it). Thanks!
You’re right, I just realized they’re missing from the cut pieces photo! Sorry about that! According to Ana’s plans, the bottom piece of plywood should be 20 1/2″ x 15 3/4″. Hope that helps!
Jen,
On my last two projects I used Gel Stain made by General. I found this type of stain easier to use and the results are great.
Great job on your nightstands.
Thanks for the recommendation!
I like yours better than the RH ones – love the stain/finish! Nice work!
I recently refinished a coffee table with Minwax classic gray stain and the turtorial I copied then sanded and added a walnut stain. The finish looks very similar to the Restoration hardware night stands and tables they have. Maybe you could try a gray stain on top of the walnut? I love your night stands, especially the hinges you chose.
Ooooh, send pictures!
Your nightstands tuned out gorgeous and I’ve got this linked to my DIY nightstands post too today, well done!
Thanks so much, Heather!
Hi Jen! Great job on the nightstand build! A tip on the finishing process – if the wood is something like pine or maple or cherry, just laying on the stain will cause “blotchiness”. I think the blotches and uneven colour may have been what bothered you about the staining job. With a wood like pine, you should seal the wood first before staining, using something like a sanding sealer or dewaxed shellac. Check this link for a decent tutorial:
http://www.familyhandyman.com/DIY-Projects/Trim/Staining-Trim/how-to-stain-wood-evenly-without-getting-blotches-and-dark-spots/View-All
Thanks for the suggestions! If I ever get around to refinishing them, I’ll be sure to pre-treat the wood with a wood conditioner or something!
I love the sanded stain – looks more like RH. Thank you so much for the tip, because I am not liking any of finishes, but with sanding, it may be what I am after. Great job!!
I love the nightstand! Have you thought of using Annie Sloan chalk paint? I think the French Linen paint color might give you the look you are going for.
You totally read my mind. I was thinking of going exactly that route! I have the French Linen chalk paint just waiting to be cracked open. The hubby says he likes the finish the way it is, though. :-/
You have a great idea, I think I’ll try to make a couple of these. I like your big brown helper, mine is a cat.
I love the finish!! I opened the link to your blog in hopes of finding out how you did it 🙂
Where in the world can I buy black strap hinges?? I’ve looked in all major hardware store in my town., no luck online either.
If I remember correctly, I think they were chrome and I spray painted them. Hope it helps!
Great job!!! I am very impressed that you made them. I am a coward to attempt to build something.
I love the finish!!! We actually made a coffee table & the stain was a bit darker than I wanted so I actually attacked mine with the sander once the stain dried & it gave the rustic worn look that I am in love with. We plan on building some of these night stands soon & I am super excited to get started.
Hi Jen! Any reason why you didn’t use Kreg pocket-holes to attach sides to front and back instead of using nails from the front?
Hi Larry,
I’m not sure, but that sounds like it would work beautifully!
Hi Jen! I made a single night stand using basically your design except I didn’t use any nails all pocket holes. Where you use 1 X 2 I used 1 X 3 (needed for pocket holes). 1 X 2 too narrow for pocket holes. I also added a shelf inside. I also used pocket holes to attach top. I used Minwax Early American stain. Just finished adding Polyurethane. Only thing left to do is install hardware. Sorry now I didn’t make 2 of them. Your instructions were great help, thanks again.
Correction! I did use 3/4 nails (nail gun) to attach the panels! 🙂
Great to hear! I’d love to see a pic, if you have one!
Not sure how to attach the pic. Tried copy and paste to the comment but didn’t work. Any suggestions? 🙂
I need to re-read the plan but do you know how big the back panel was? The plan said the back panel was optional …!?! I need a back panel. I guess I should bust out my adding skills. BTW, thanks for the heads up on the extra 1×4 @ 22 1/2″
Hi Kathleen!
Yes, building the back side is optional… it just means that when you open up the cabinet, you’ll see the wall behind it. But you wouldn’t notice that it’s missing a back, unless you opened up the door and peeked into the cabinet.
I didn’t use plywood for the back side. Because I planned on placing the nightstands where the back would’ve been in plain sight, I opted to continue the plank paneling all the way around, so that instead of seeing a piece of plywood back there, the back would look more finished and match the other three sides. If you’d like to go this route, just build a frame like the front frame and attach the plank paneling to that.
If you’d like to use a piece of plywood for the back side, though, another option would be to build the three sides, then measure the height and width and cut the plywood to fit. I often cut as I go to ensure that no lumber is wasted and that my measurements are precise. Then just attach the plywood back with glue and finish nails.
Hope that helps!
Did you ever re-stain these. I guess the question is more, does sanding and re-staining work if you hate the color? I stained these aged oak but my husband wants dark dark dark so I put dark walnut on top but now it looks yellowish and not a color I am going for…
No, I never did. The hubs actually liked it this way, so I kept it. Yes, you can definitely sand and re-stain if you hate the color! My suggestion would be to sand it down to raw wood, if possible, then re-stain it to the dark color you’re looking for. Good luck!
It’s nearly impossible to find knowledgeable people about this topic, but you sound like you know what
you’re talking about! Thanks
I love this! These are going to be perfect for my guest bedroom, i’m hoping that you could provide the plans for the project though, the link below is not working:
http://ana-white.com/2012/02/plans/kentwood-nightstands-or-end-tables
THANKS!
Sorry to hear the link isn’t working for you – I just checked it and it’s working for me: http://ana-white.com/2012/02/plans/kentwood-nightstands-or-end-tables
http://ana-white.com/2015/02/DIY_furniture/nightstand
thanks for the tips! I used your basic designs and added a drawer!
Love the barn door. I am fascinated by the industrial look and then when you put it with a little country it really is awesome. Thank for sharing.
I actually love the finish on these! Gonna have a bash at this Myers with my handmade dining table
They turned out gorgeous! Love them, love the distressed and rustic look