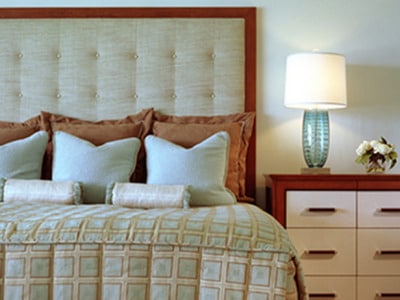
I’ve been lusting after upholstered headboards lately and have fallen in love with so many different kinds, whether they’re plain jane, trimmed in nail heads, or tufted. This Pottery Barn Jameson bed looks like it would be a cozy one to cuddle up to, but the $899 price tag leaves me out in the cold: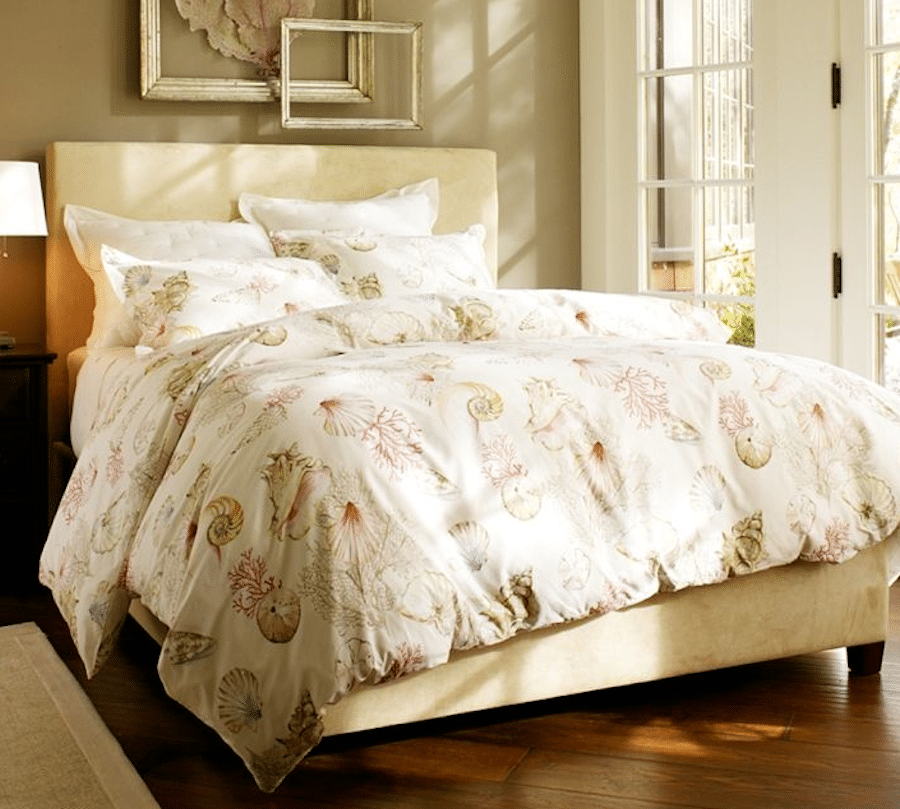
Oh, but don’t you just love those crisp, classic lines?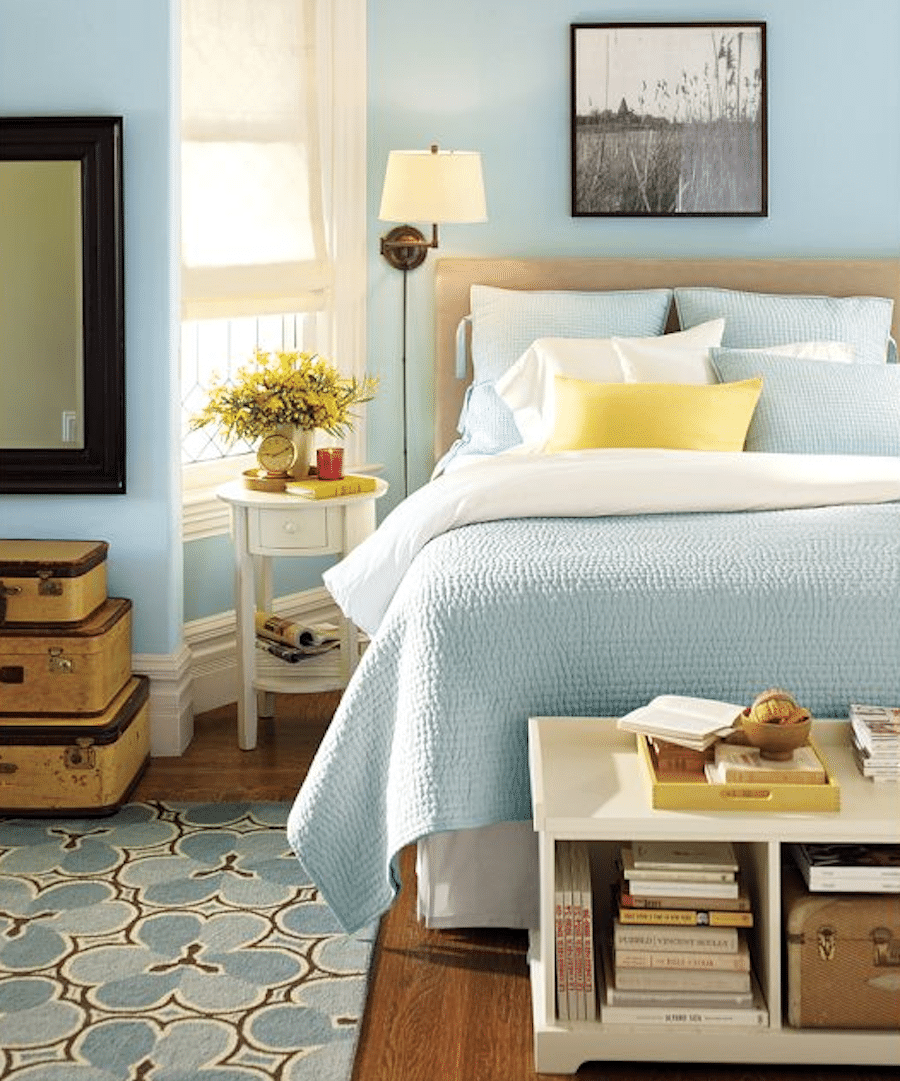
And I’ve been madly in love with this bed from Crate & Barrel for ages, but just can’t justify the not-so-lovely $1,799 price tag: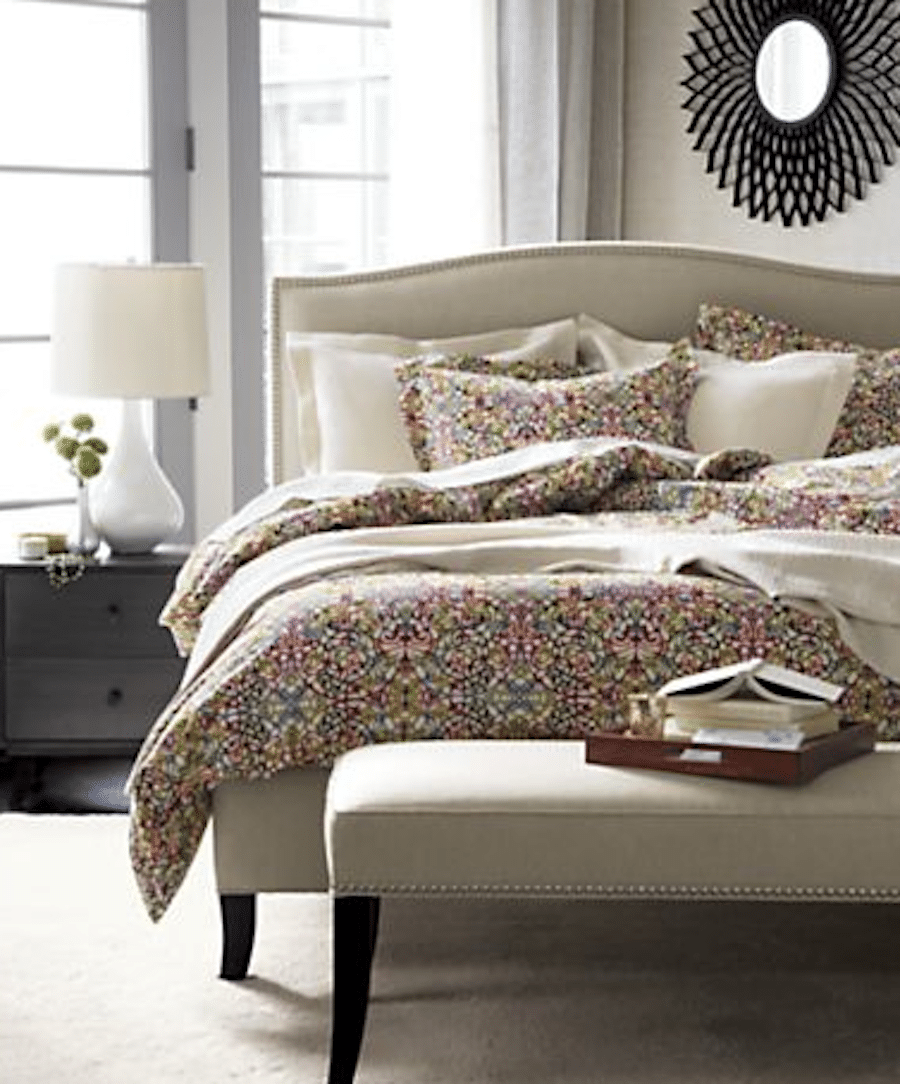
How much do I love love LOVE that nailhead trim and subtle feminine silhouette? Gah, it kills me, it’s so elegant.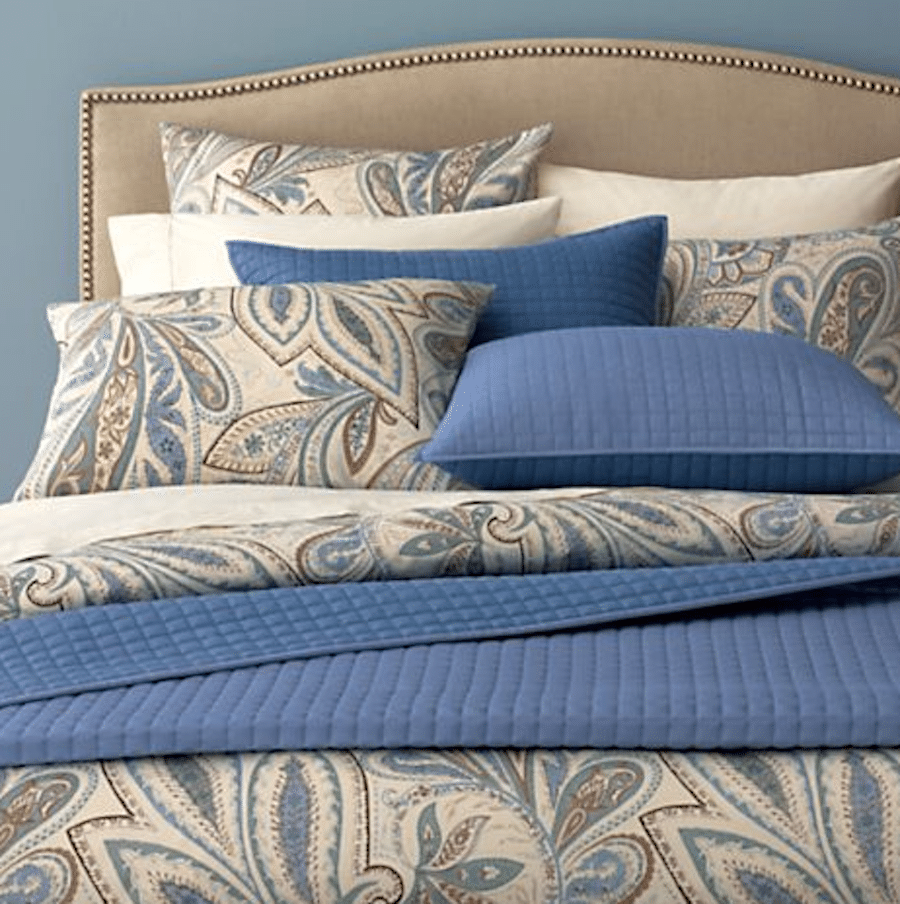
And of course, because Jonathan Adler can do no wrong by me, this Woodhouse bed is fit for a queen (after all, it has my name written all over it!), and also sports the appropriate cost at a whopping $3,200 (seriously, guys, I just swallowed my tongue over here):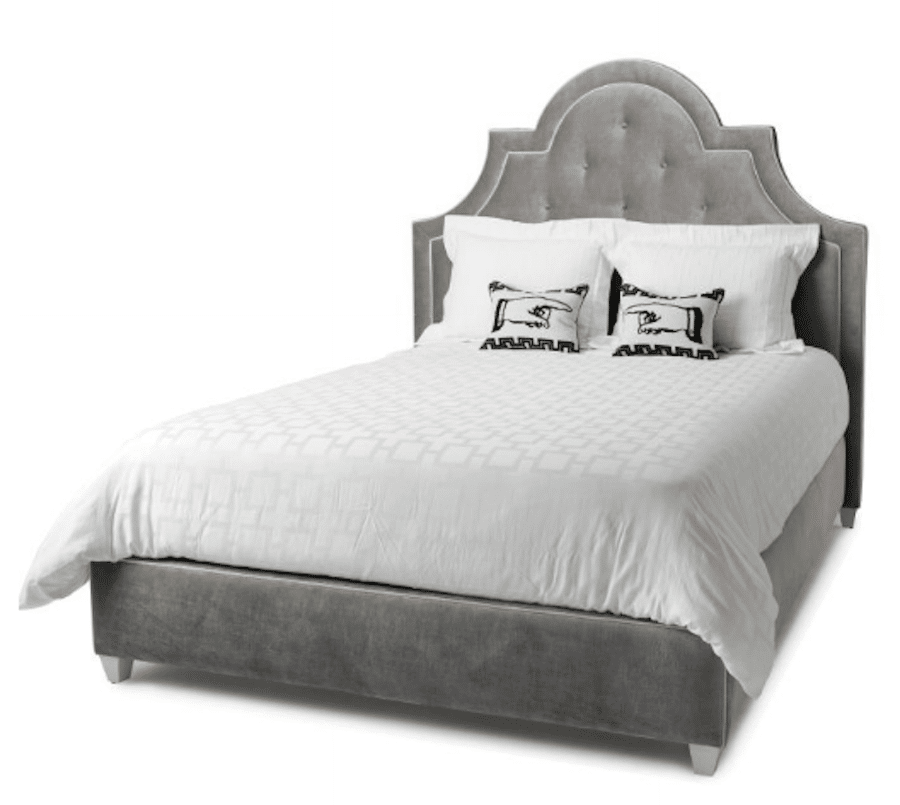
Which brings me to my latest project: to DIY my own upholstered headboard. That way, I can choose my own fabric, silhouette, and plain/tufting/nail head details. Google is your friend, folks and it hasn’t let me down yet, so that was the natural course of action. It’s staggering the amount of information available on how to DIY your own upholstered headboard!
First, I measured the width of our bed, allowing for a few inches of overhang on each side. Then I had to decide how far down I wanted the headboard to go. Should it rest on the floor, be bolted to the bed frame, or hang on the wall? I decided that nailing the headboard to the wall would be the most economical choice, since the board wouldn’t have to reach all the way down to the floor. The bottom part of the headboard would be hidden by the bed anyway, so it would take less materials all the way around. Less materials = less cost. Sign me up (I know, I’m cheap)!
And because I’m the kind of person who needs to physically visualize things, I just slapped some painter’s tape up on the wall to outline my measurements (don’t look too closely; I was too lazy to use a level):
(And yes, that’s a Glock pistol on the nightstand. What can I say? Husband is a gun-toting Libertarian, but we’ll save that for another post):
After borrowing a few swatches from the fabric store, it was decision-making time. I’ve long had a love affair with the color grey, and here are the final contenders: a soft, plushy charcoal microsuede, a silk Dupioni-like fabric in steely grey with a black velvet floral design, and a sturdy, slate grey canvas:
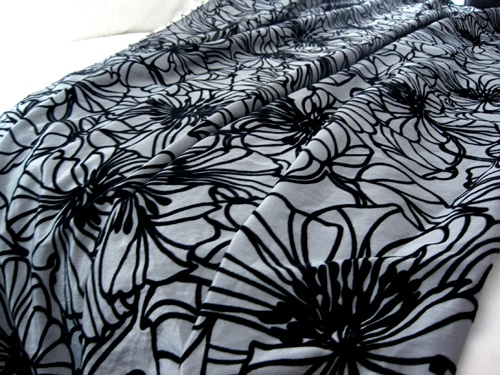
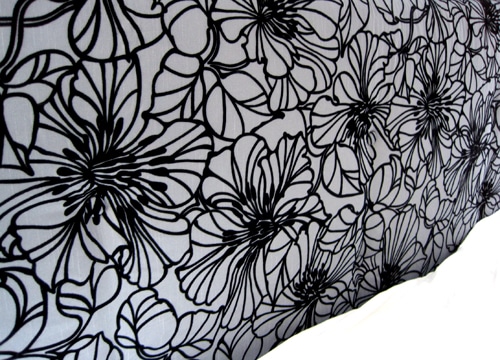
Surprisingly, Hubby and I came to a unanimous decision (and I was super thrilled that he didn’t think it looked too girly!)… we went for the ‘wow’ factor with the floral fabric, called Alexa Peacock. Unfortunately, the store didn’t carry the fabric in stock, so I had to special order it. It was regularly priced at $39.99/yard, but I happened to catch it on sale for $19.99/yard. Yes, please! And after a few days of impatiently waiting, it has arrived!
Gah, will you just look at those yards and yards of shimmery, gorgeous fabric? I love it so much, it makes me want to roll around naked in it (but again, we’ll save that for another post).
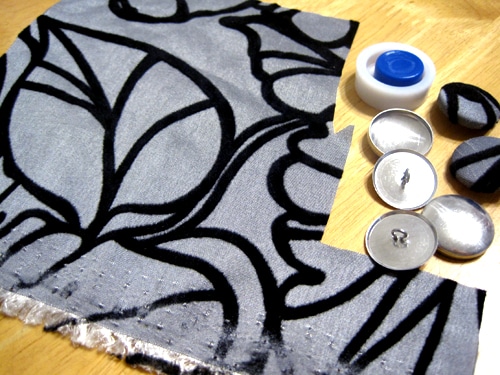
As much as I prefer headboards with nail head trim over those that are tufted, I don’t think nail head trim and this fabric go well together. So tufting is an option. Leaving it plain may also work, but juuuuust in case I change my mind (as I often do), I went ahead and picked up a button-covering kit:
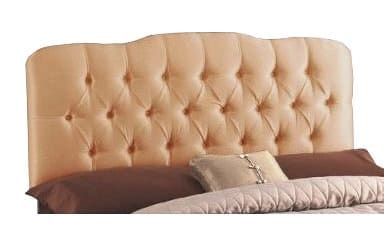
As if I don’t already have a hard enough time making decisions, there are several different tufting patterns out there. Great. More choices to confuse my preggo brain. Do I want a diamond pattern like this one:
Or a grid pattern like this one:
Decisions, decisions! So naturally, when I can’t make a decision (and I tend to obsess over the tiniest detail, much to the chagrin of my husband), I call in “The One Who Wears the Pants” (or more appropriately, “The One Who Wears the Pants When His Wife Allows Him To”). He voted Grid and decided three rows of 4 buttons would look best. He has spoken, and so it came to be.
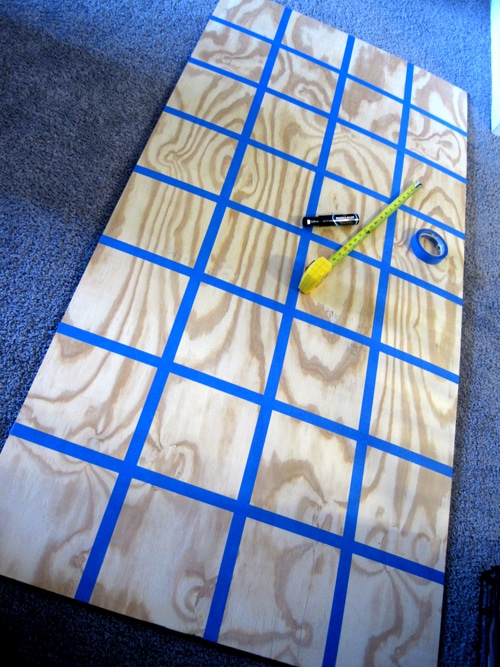
We had a 1/4″ sheet of 4×8 plywood cut down to 77″ x 36″ to accommodate our king-sized bed (Home Depot and Lowes will both make cuts for free). I measured the plywood and used painter’s tape to divide the sections evenly, then drilled a hole where the buttons would be. By the way, I felt very clever for dreaming up the painter’s tape idea instead of drawing a mess all over the board with my sharpie. If any lines looked ‘off,’ I simply lifted the tape and moved it around.
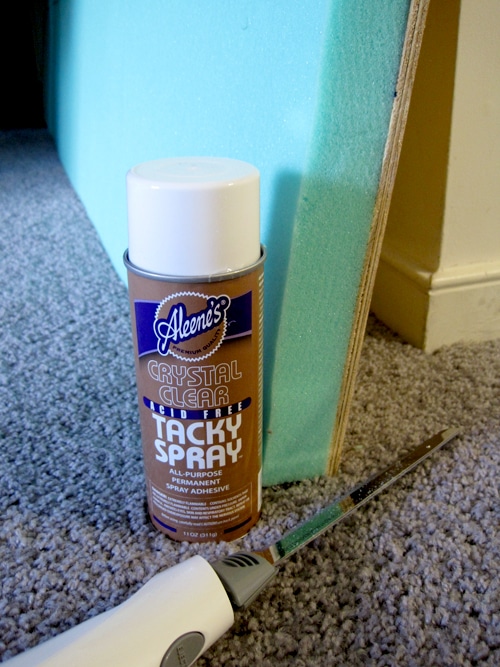
I had to purchase 5 yards of the 2″ high density foam because they’re only available in 24″ widths and I had to piece it together to fill the entire headboard. Then, I adhered the foam to the plywood by way of spray adhesive, then cut any excess off with an electric knife so that the edge of the foam and the plywood would be flush.
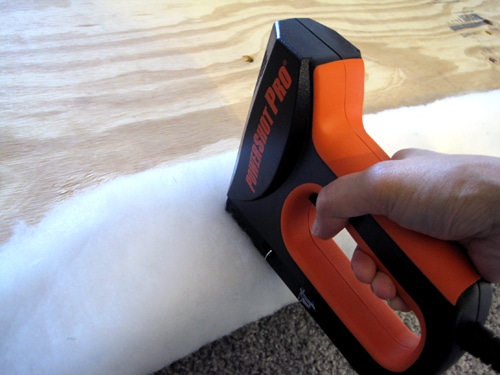
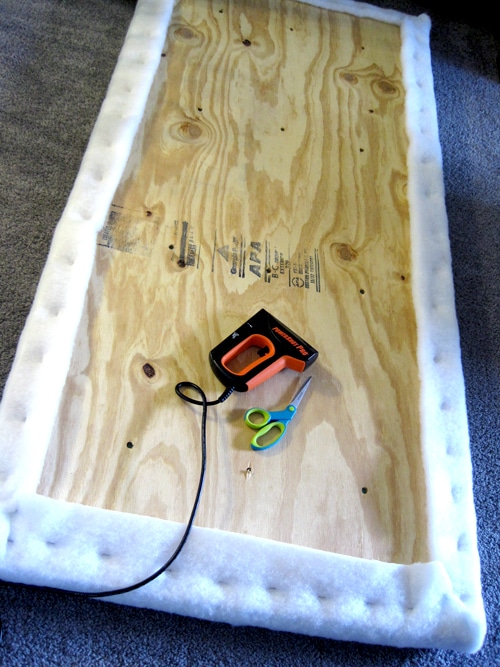
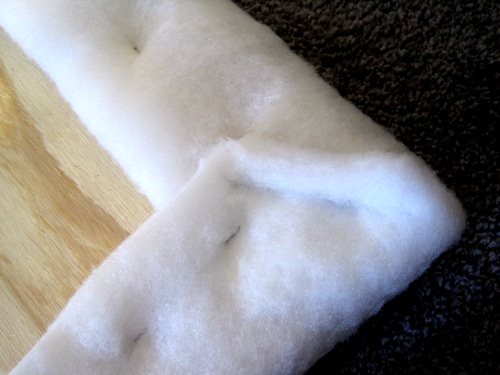
I laid the batting down on the floor, then laid the plywood on top of that (foam side down). Then, pulling the batting taut, I stapled it to the back of the plywood, starting from the center of each side, working my way out. By the way, the electric staple gun was my saving grace because I am a tiny weakling who is incapable of operating a manual one.
I should also mention, if you have a 4-month old very curious puppy, you should occupy him by filling his bone with peanut butter, otherwise, he will eat your batting. If you look closely, you might see bite-sized chunks of batting missing here and there.
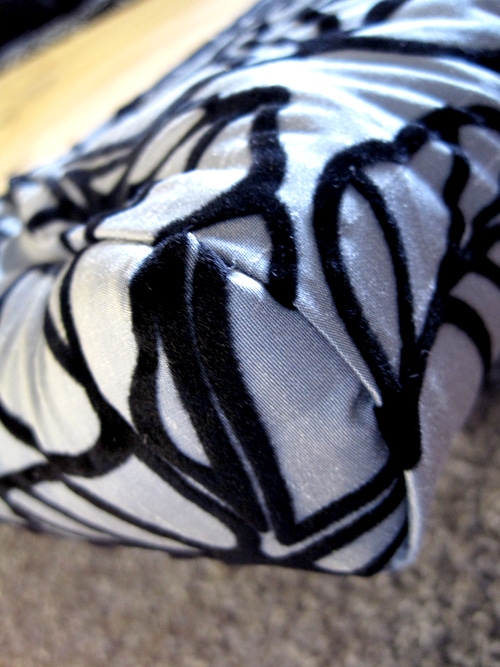
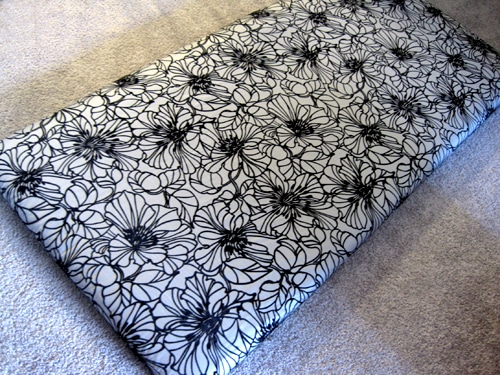
Then, I quickly ran a warm iron over my fabric to remove any wrinkles and laid it out on the floor. I laid the plywood on top of that (batting side down), pulled the fabric taut and stapled it to the back, working from the center to the edges, just like I’d done with the layer of batting. You could probably staple the batting and the fabric all in one go, but because I am overly-cautious, I stapled them separately. Then I spent waaaaay too much time folding each of the corners neatly before I stapled them down (I told you, I obsess over the tiniest detail. I mean, is there more to life than hospital corners? I think not).
Then, I took a step back to admire my work. Does it look fine the way it is? Would it look better with buttons? Hmmm… I think tufting would be a subtle, but finishing touch, don’t you?
Onward! Before you begin the tufting part, do yourself a favor and get an upholstery needle. Trying to push a standard-sized needle through about 4 inches of fluffy stuff doesn’t work all too well. Ahem… not that I’m speaking from experience.
Anyway, I threaded the (upholstery) needle with black upholstery thread and pushed it through a drill hole, from the back to the front. Then slid the button onto the thread, and ran it back through from the front to the back. I gently pulled the thread taut to create a tufted look, then secured the loose ends to the back of the board with my staple gun. I repeated this until I had three rows of 4 buttons.
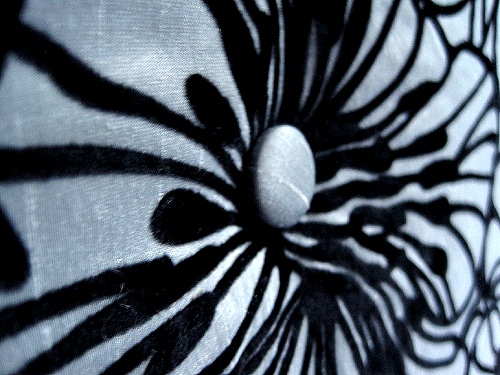
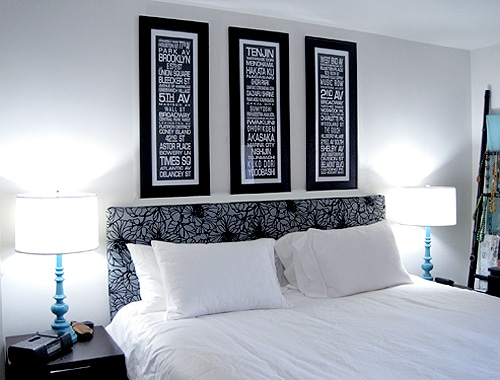
Turns out, the buttons get totally lost in the busy pattern. Well, that was time not well spent. It adds a very subtle dimension and texture, but not enough to make a statement or anything. Maybe I should have used solid-colored buttons instead… oh well. You live, you learn. Can you find the buttons?
Now we hang! We chose to use a metal french cleat capable of holding 200 lbs. of weight (overkill anyone?). Basically, it comes in two parts: one that you screw into a stud in the wall, and the other that you screw into whatever it is you’re hanging. One part sits into the other for a secure fit. And look! I’m using a level this time!
And just for kicks, here’s a moody, Instagram-y shot of our sweet bed:
Sweet dreams!










Jen, Love the step-by-step instructions. Thanks! When we get back to the States I’m going to contact you for consulting work 🙂 I love the pictures of your growing sushi roll. Congrats on everything going on in your life right now.
You’re so sweet, Nicole! Thank you!
Fabulous! Great job. I was going to add a comment about attaching the metal "Hangman" hanging system and then, blam! there it was in the photo. I did a three panel hanging headboard for a column I write for The Indianapolis Star and used the 6" metal plate system. I owned my own upholstery studio for fifteen years and now teach DIY Upholstery. Your headboard looks Wunderbar! I like the dimension you got from the buttons.
Thanks, Shelly. Unfortunately, in real life, the buttons don’t really make much difference. Oh, well. You live and learn!
Your headboard turned out great! And the instructions are super helpful…I might have to try this myself!
Absolutely! Please do! And come back and share the fruits of your labor!
This is such a greay DIY project with such a beautiful result! I just found your blog and now it’s one of my favorites!
Welcome, Sarah! And thanks for stopping by!
Just discovered your blog through designsponge and I’m so inspired! I love your DIY solutions to creating lovely rooms on a budget. I’ve got a heinous lamp I need to paint and have been contemplating making a headboard. I’ll definitely be back to reference your directions.
Take Care!
LB
Great! Can’t wait to see what you come up with!
Wow, I found your blog via Design Sponge and I am in love! This project is amazing, I couldn’t do it myself. I think it was a good idea to do the buttons, because up close you can admire details like that. It’s perfect!!
Thanks so much, Sara. And yes you can! It was super easy. Go for it!
I'm stopping by from Young House Love. Thanks so much for this step-by-step – I've been wanting to do this forever, and I think your beautiful new headboard has given me the last bit of motivation I needed. Love your blog!
Awesome! Good luck!
Love the headboard – but please, please convince your dear husband to get rid of the gun before the baby is mobile. You can't have a gun accident if you don't have a gun.
Susan,
That’s a losing battle, I’m afraid. Husband has A LOT of firearms and has no plans to get rid of them. However, he keeps them safely locked away in his gun safe (yes, he actually has a GUN SAFE. It’s bigger than me). He will, however, be storing ALL the guns behind locked doors once the Eggroll comes along (including the one on the nightstand)!
Hi! Came over from YHL. LOVE THIS HEADBOARD!! Great JOB!
I love the tufted buttons, but I do see what you mean about them getting lost,
did you consider doing them in a pop of color, like the blue of the lamp. That would
be fun. I think its gorgeous the way it is too!
Checking this out via Young House Love. What a great tutorial, love the photos. I have been wanting to try a DIY headboard for awhile and yours is lovely! Have you noticed a plastic or chemical smell from the foam at all?
Robin,
No, I didn’t notice any smell from the foam. I was concerned the plywood might have a smell, but it didn’t either, so all is good!
I really love this headboard and I have also been lusting for one of the fabric type headboards. I am currently in a Tempurpedic King size bed with no headboard. Hate it
Wow! That headboard is lovely…the fabric…swoon. But, I must inquire as to where you got THOSE LAMPS? Unbelieveable–please share!
Elizabeth,
Those were $10 thrift store brass lamps that I revamped with a bit of spray paint!
This is awesome! I was mentally making a plan to execute making my own headboard and this is really helpful, especially how you attached it to the wall! That is brilliant! Thanks for sharing.
Thanks for this tutorial! I've been wanting to make one of these, and you got my courage up a bit more.
Jen, I love this post!
I own a cream-colored fabric headboard that I have re-covered many times in different fabrics for different rooms. I love the versatility! Most recently I've been struggling to find a fabric that is cozy, comfy and not too feminine for MY military husband. I think the fabric you picked is just a perfect compromise! Thanks for the inspiration!
And as another military wife who is expecting our first child next year, I completely understand the gun-crazy-husband! To add to it, we also live out in the country. My husband grew up always knowing there was a shotgun or rifle in every closet (and used to shoot squirrels (we live on a nut farm) out the bathroom window!). I gave up on fighting that losing battle, but have recently convinced him that a gun safe is the best option.
He believes the best way to keep your kids safe around guns (because somewhere, sometime, they will come into contact with one) is to limit the danger and teach them the rules early and often. This is what my husband grew up with (as well as 2 younger siblings and 7 cousins, all who learned to handle guns with no accidents ), and what we will do with our own children.
Congratulations on your little eggroll, and your new home! I cannot wait to "meet: her!!
Julia,
I couldn’t agree with you more. What do we do to take the mystery and fear out of something? We research and learn about it. We plan on educating our kid(s) on how to be responsible around firearms and teach them the importance of gun safety. Education is key.
Thanks for the kind words!
What a great job! I love the fabric choice. I made one of these myself, however I need to add buttons! Thanks for the tutorial, and I love the french cleat idea. Thanks for sharing.
Beautiful headboard and perfect instructions (which is great since I've been meaning to make a headboard for awhile)!
I love the artwork above the bed! Where is it from?
Taylor,
I created the artwork myself and sell them in my Etsy shop: http://www.etsy.com/shop/jenwoodhouse – they’re fully customizable!
G-O-R-G-E-O-U-S!!!!
Shannon
http://www.akadesign.ca
LOVE this! I have been dying to make one for ages! My little "eggroll" is 15 months now, and there hasn't been much time for projects… now I can't wait to get started again. BTW, I found you throughYoungHouseLove. Can't wait to try this out…. your instructions were great.
LOVE the headboard and the detailed instructions…thank you! One thought: I know that you prefer the orderly pattern of the grid or diamond pattern tufts, but your fabric also lends itself to a more random pattern of button tufts at the centers of each of the flowers. Definitely more difficult to execute, but a creative option as well.
lovely! one quick question… can you see where the headboard "ends" near the bottom? in the pictures your bedding seems to block any view of the headboard just ending… i hope this makes sense! i would love to do this, but the idea of a floating headboard that has an obvious bottom part in the middle of the wall instead of down near the floor drives me crazy!
Anna,
The headboard reaches down to the bottom of the box spring, so you can’t see the bottom part, even without the bedding. You can even choose to make the headboard reach all the way down to the floor, if you’d like. We decided that the bottom of the box spring was low enough, since you can’t see it anyway… and we saved ourselves some extra money and materials!
Ok, that is just fan-frickin-tabulous! Thanks for sharing!
Just stumbled across your tutorial and blog, and I'm already a fan! The headboard looks pretty amazing — can't wait to wander around the rest of your blog. Cheers!
GORGEOUS!!! I was wondering where I could find the fabric at? Can I order it from online?
Esse,
I special-ordered the fabric from Joann’s. It’s called “Alexa Peacock.”
Wow-great job with the headboard, I love it! Now I can make one myself, thanks.
Awesome! I’d love to see it when you’re done!
Just beautiful! Elegant, refined and I love it! You rock!
Hi there,
I love your website and your projects. Seeing your work, makes me think I can maybe do it myself. I will give it a shot at least. Inspiring. Do you remember the name of the patterned grey fabric you used for the headboard? Thanks a lot.
Carmen,
The name of the fabric is “Alexa Peacock”… it was a special-order from Joanne’s. And you CAN do it! It’s super easy and takes no creative talent whatsoever! Good luck!
Quick one, do you remember whether it was under upholstery fabric or regular fabric? Thanks a lot!
Carmen,
It’s definitely upholstery-grade fabric and it comes on a 56″ bolt. Not only does it need to be strong enough to handle all the pulling and staples, it needs to be durable enough to hold up to daily wear and tear. Hope that helps!
Fellow bumpie who loves your blog. I just convinced DH to try making a similar headboard. Once he saw yours, he agreed. Thanks for the awesome instructions. We also plan to try the DIY artwork too. Sheer genius you are. Hope you are enjoying maternity leave!
Where o where did you get that fabulous fabric? I have fallen in love and nothing else will do:)
Rachel,
I special-ordered it from Joann’s – it’s called “Alexa Peacock” and it’s in their home decor section.
Great tutorial and I like how your headboard turned out. I linked it to my "headboards – upholstered" project post too!
Gorgeous work!!
You are clever. And funny! I love your writing!
Thanks for the great idea!
Aw, shucks, thanks!
Hi, I just wanted to let you know that I used your step-by-step instructions to make my own headboard yesterday. It turned out perfectly. Thanks so much!
That’s awesome, Mel! Please share!
Great tutorial, I love your finished look! I was making notes throughout the entire post 🙂 I hadn't thought about simply hanging the headboard, I was wondering how I'd make some little legs but this seems much easier.
Just came across this blog while looking for a cheaper version of Crate & Barrels Colette bed and let me tell ya…I'm SOOO dang excited to do this!!!, Thank you so much for the very simple, step by step instructions, it is very helpful. Chic bedroom coming up!! 🙂
Good luck, Marcelle! I’d love to see the results… come back and post a link when you’re done!
Hi Jen! Your tutorial was one of the first that I bookmarked a long time ago! I finally created my headboard.. it's not complete yet– still need to choose a fabric. The only french cleats at Home Depot were the same ones that you used. However, the sales guy suggested I buy 2. At $14.97, I'd prefer to return one if I don't need to use two. It looks like you only used 1.. and yours looks to be a king size headboard. Mine is only a queen sized one. Should I return the 2nd one? Is 1 enough?
Thanks!
Zoua,
You’re right: it’s a king-sized headboard and I only used 1 cleat.
That looks great! Looking to take on a similar project in a couple months when we move into our new house. I'll have to bookmark for future reference. Oh, and my dog tries to eat the batting around my couch cushions when I take the covers off to wash them! So strange!
i know i'm a little late, but i adore this fabric… is it possible that you can you share where you found this pattern?? thanks!!
Kim,
I special-ordered it from Joann’s. It’s a home decor fabric called ‘Alexa Peacock.’
I've been wanting a headboard for years but didn't want to shell out the $$ and never even considered making one myself (I'm not very crafty), but thanks to your awesome instructions I made one yesterday! The hardest part was picking the fabric 🙂
Anna,
That’s so great to hear! I’d love to see pics!
Love the headboard! Where would I go to get directions to do the nailhead trim?
Cathy,
Here are just a couple of links I found when I did a quick search on Google:
http://isabellaandmaxrooms.blogspot.com/2010/10/adding-nail-head-trim-to-upholstered.html
http://www.prettyhandygirl.com/2010/06/adding-nail-head-trim-give-me-some.html
Good luck!
Hi,
This is so pretty and I've been trying to find headboard ideas for over a year! So glad I found your blog! After trying to get all the materials needed today I ran into trouble with the fabric. Come to find out the fabric is called Alexa Shadow. I ordered it online for $15 per yard. I can't wait for it to get here! I hope mine looks 1/2 as good as yours. Thanks for sharing your craftiness!
Wendy
Can’t wait to see the results, Wendy.
The fabric I chose was called ‘Alexa Peacock.’
FABULOUS! I can't wait to make this! Do you need the buttons or is it purely decorative? I can see that being an issue as I make it lol BTW I pinned this on Pinterest as I think it will be a HUGE hit <3 Thank you for sharing.
-Megan
Megan,
No, the buttons aren’t functional at all! They’re purely for aesthetics. I can’t resist a good piece of tufted furniture.
Thank you so much for such good step by step instructions. I bought a house and am dying to make it look fabulous.
Excellent blog, as well as your equally excellent tufting instructions. I’ve recently revised my interior design from very modern, and have fallen in love with Hollywood Regency which bridges the modern pieces with the softer lines that Regency offers. I was wondering if I could have a settee tufted even though it wasn’t when I purchased the piece. Any info would be helpful. BTW, I’m a guy, and I don’t find your style overly feminine at all. The headboard is beautiful. Thanks again!
Richie,
I don’t see why you couldn’t tuft your settee… even easier if you’re reupholstering it. Just ask the reupholstery tech to add tufting details to your settee. I bet it’ll look fabulous. Good luck!
Thank you so much! Me and my husband did our own today thanks to your step by step instructions! We love it
Awesome! I’d love to see it!
This looks so gorgeous – the fabric – the subway art – love the whole thing
I’m your newest follower- would love to have you visit and follow back
🙂
Welcome Suzan! Thanks for sharing your blog… you’ve revamped A LOT of pieces, I’m impressed! And subway art on furniture? Love it. Thanks so much for stopping by!
thank you for such lovely inspiration! found you at MMS’s link party, always a favorite!
hope you can swing by:
http://hellolovelyinc.blogspot.com/2012/07/summer-sale-giveaway.html
smiles to you.
michele
Your style is unique compared to other people I have read stuff from.
I appreciate you for posting when you’ve got the opportunity, Guess I will just bookmark this web site.
Thanks for your marvelous posting! I certainly enjoyed reading it, you’re
a great author.I will remember to bookmark your blog and will often come back from now
on. I want to encourage you to continue your great job,
have a nice day!