Hi friends! If you follow me on Instagram or Facebook, then you’ll be familiar with a new series I recently started called “Buy It or Build It?” Every week, I post different furniture pieces and ask my Instagram and Facebook friends: Would you Buy It or Build It? If the majority vote is to Build It! and at least one person takes on the challenge, then I draw up the building plans. Sounds like a fun challenge, right?
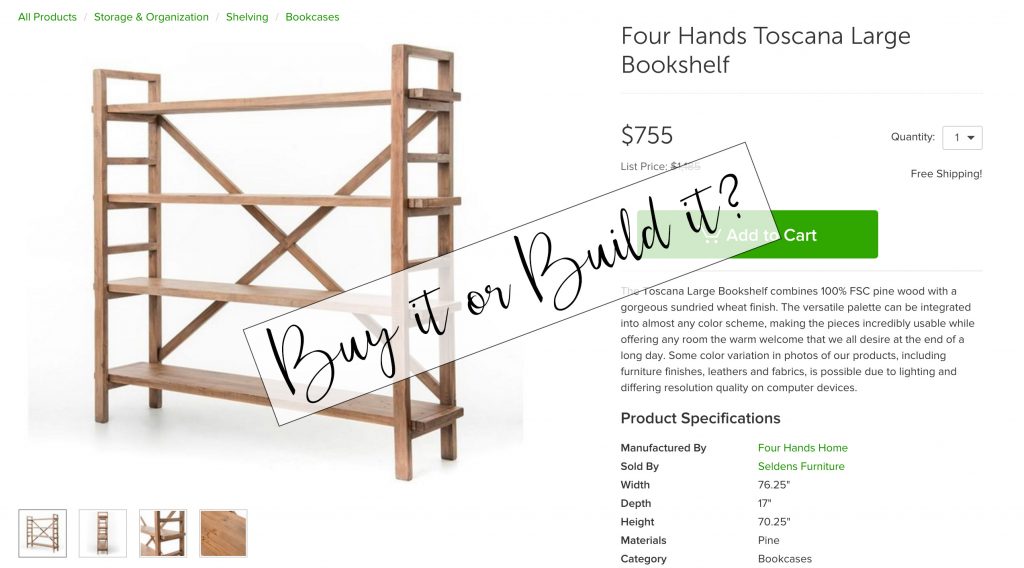
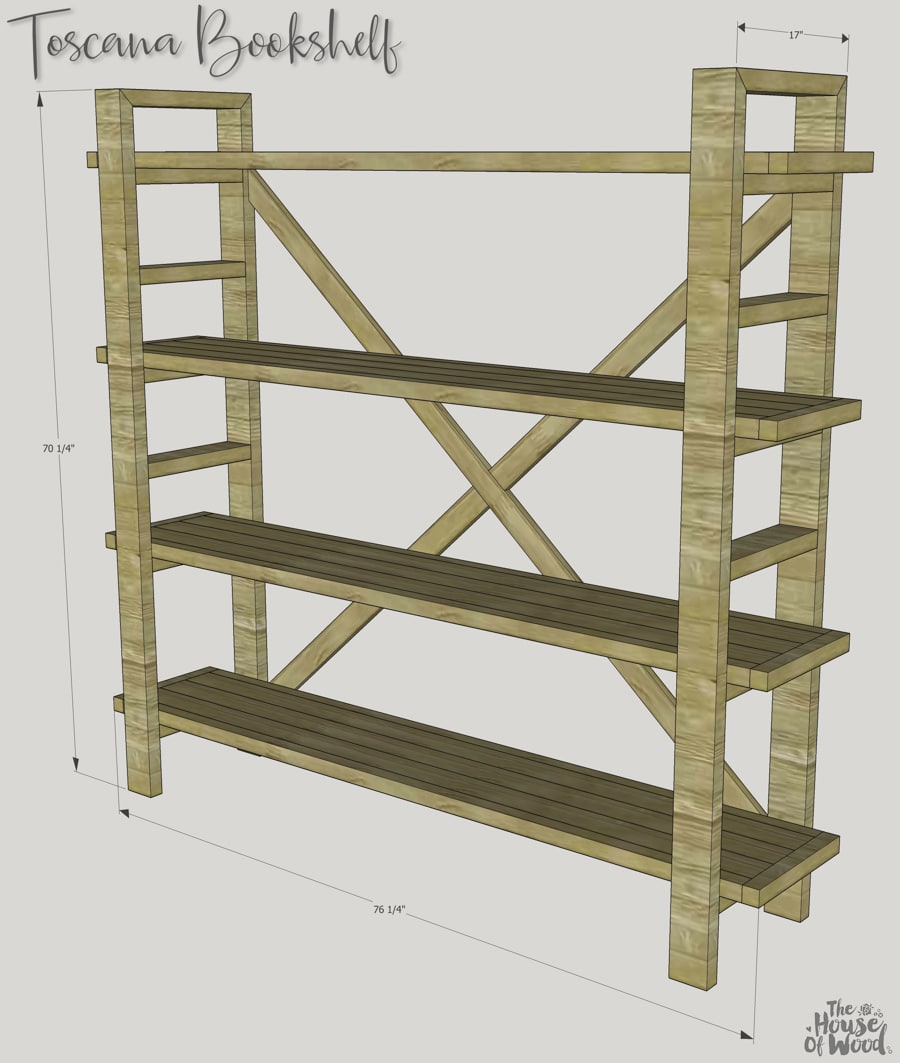
So here was our first contender: the Toscana Bookshelf. It’s beautiful, right? But is it worth almost 800 bucks?!
I’m excited to share the very first Buy It or Build It project! This gorgeous bookshelf was built by my Instagram friend, Laura @semi_domestic. Didn’t she do an amazing job? I’m drooling over it. And Laura says it only cost $80 to build – can you believe that? At the store-bought price of $755, you could build several of these bookshelves!
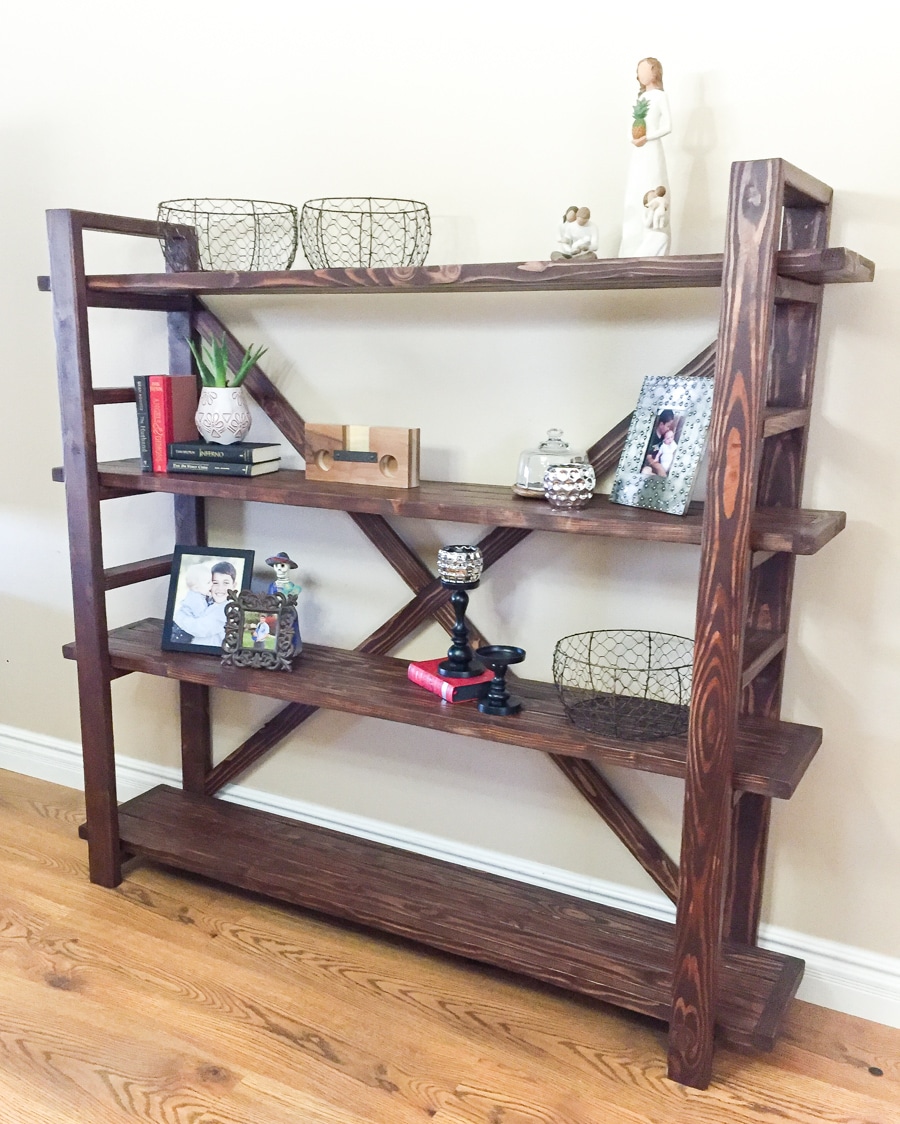
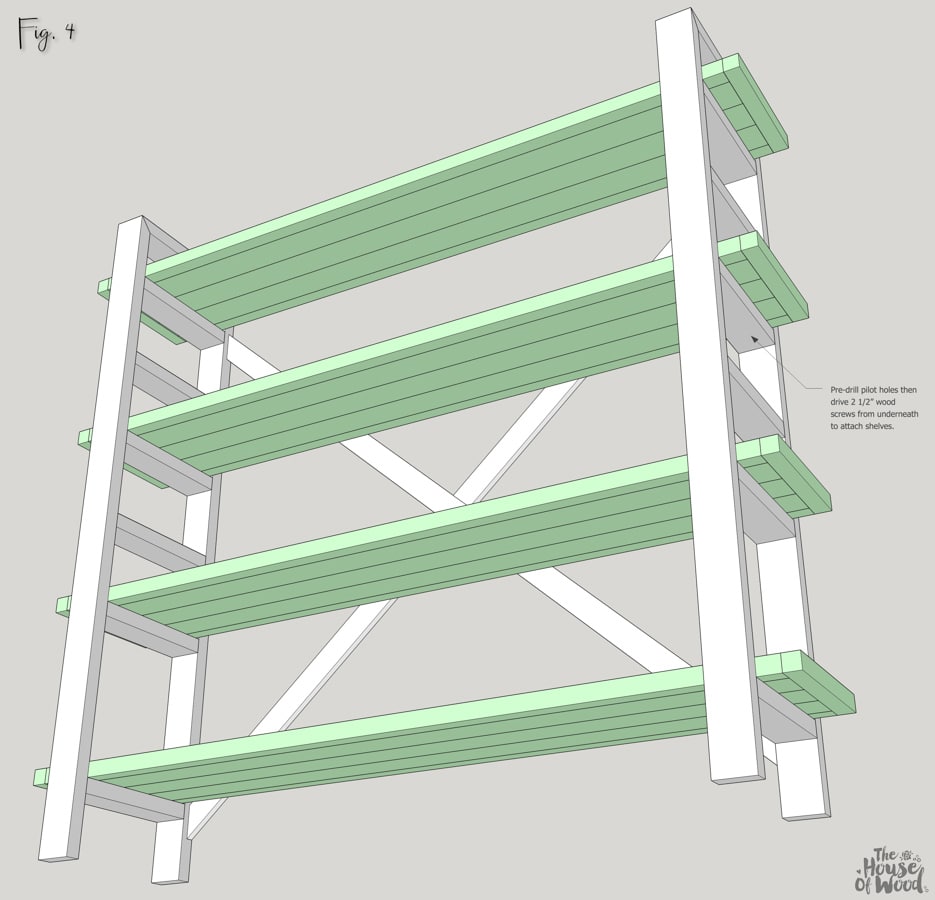
Laura recommends attaching the shelves before moving the bookshelf, otherwise, you’ll run the risk of the X-pieces breaking because they’re not strong enough to support the entire weight of the bookshelf. The shelves will add a lot more stability and strength to the entire piece.
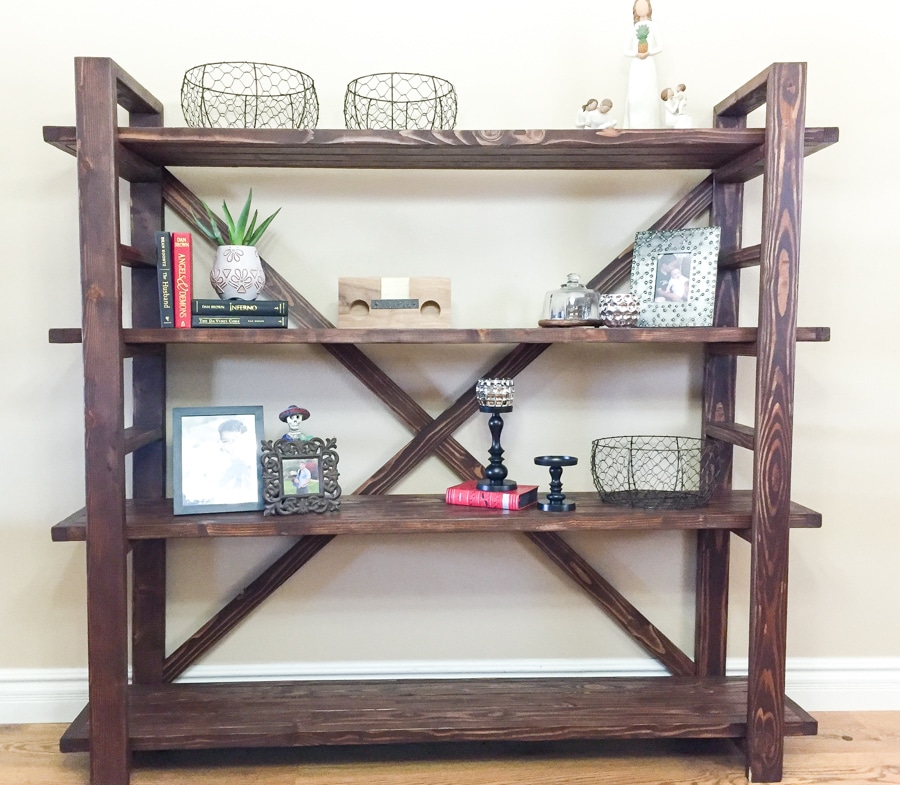
So are you ready to build your own Toscana Bookshelf?
CLICK HERE TO DOWNLOAD THE PDF PLANS FOR THE TOSCANA BOOKSHELF.
*This post contains affiliate links. To read my full disclosure policy, please click here.
- 18 – 2x4x8′
- 10 – 2x2x8′
- 2 – 1x3x8′
- 2-1/2″, 1-1/2″, and 1-1/4″ Pocket Hole Screws
- 2-1/2″ and 1-1/4″ Wood Screws
- Wood Glue
Tools:
- Tape Measure
- Pencil
- Speed Square
- Miter Saw
- Kreg Jig
- Drill
- Safety Glasses
- Hearing Protection
Cut List:
- 12 – 2×4 @ 14″ (shelf supports)
- 2 – 2×4 @ 17″ (ends mitered at 45º not parallel)
- 4 – 2×4 @ 70-1/4″ (legs)
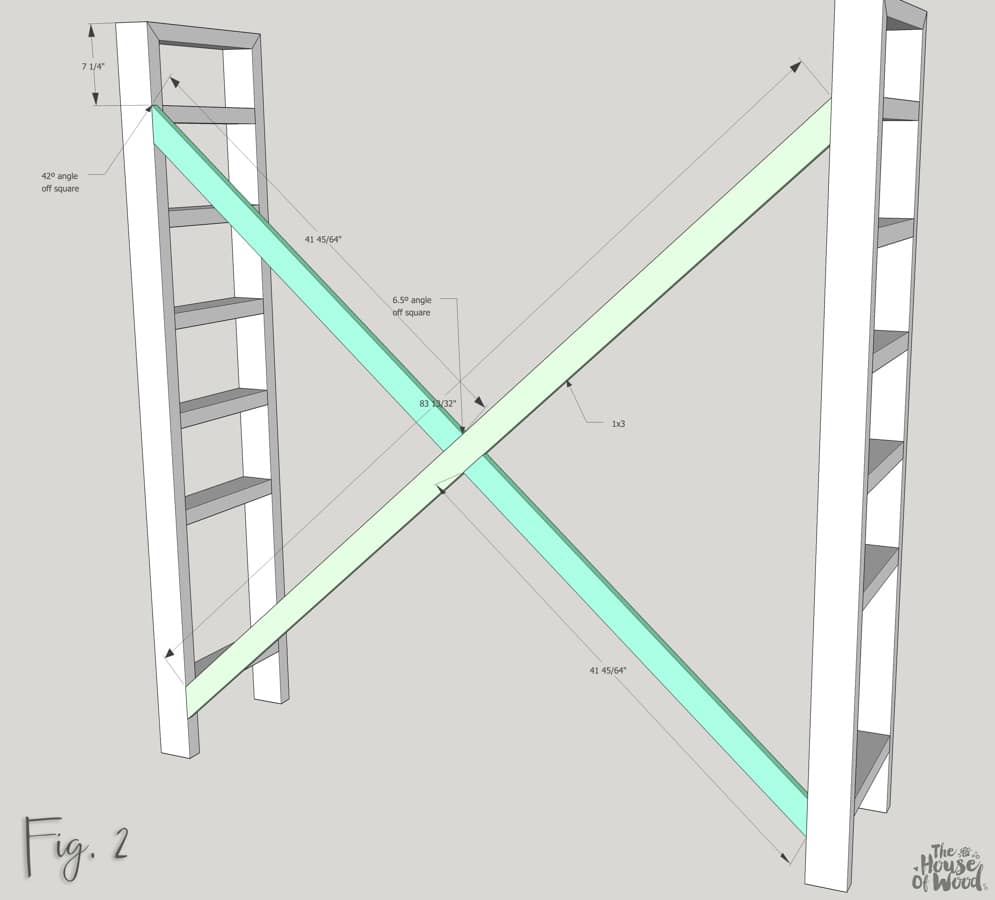
- 1 – 1×3 @ ~83-13/32″ (long X piece)*
- 2 – 1×3 @ ~41-45/64″ (short X pieces)*
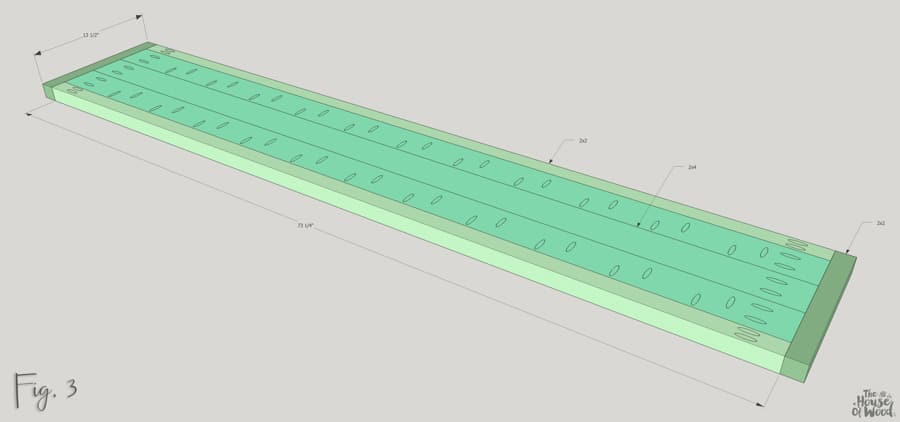
- 8 – 2×2 @ 13-1/2″ (shelf breadboards)
- 8 – 2×2 @ 73-1/4″ (shelf outer boards)
- 12 – 2×4 @ 73-1/4″ (shelf inner boards)
*Tip: for the angled X pieces, I recommend measuring, marking, and cutting according to your space to ensure the most precise fit. Use these measurements and angles as a guide only.
Step 1:
Build the two sides. Cut the top ends of the legs and each end of the top rungs at a 45º angle, not parallel. Drill 1-½” pocket holes and attach the top rung to the legs with 1-½” pocket hole screws and wood glue. Alternately, if you do not have a pocket hole jig, pre-drill pilot holes and construct the frame with wood screws and wood glue. You may wish to use a countersink drill bit to countersink the pilot holes so that the screw heads sit beneath the surface of the wood, so you can later fill with wood putty or plugs to hide the screw heads. Attach the 14” shelf supports with 1-½” pocket holes and 2-½” pocket hole screws.
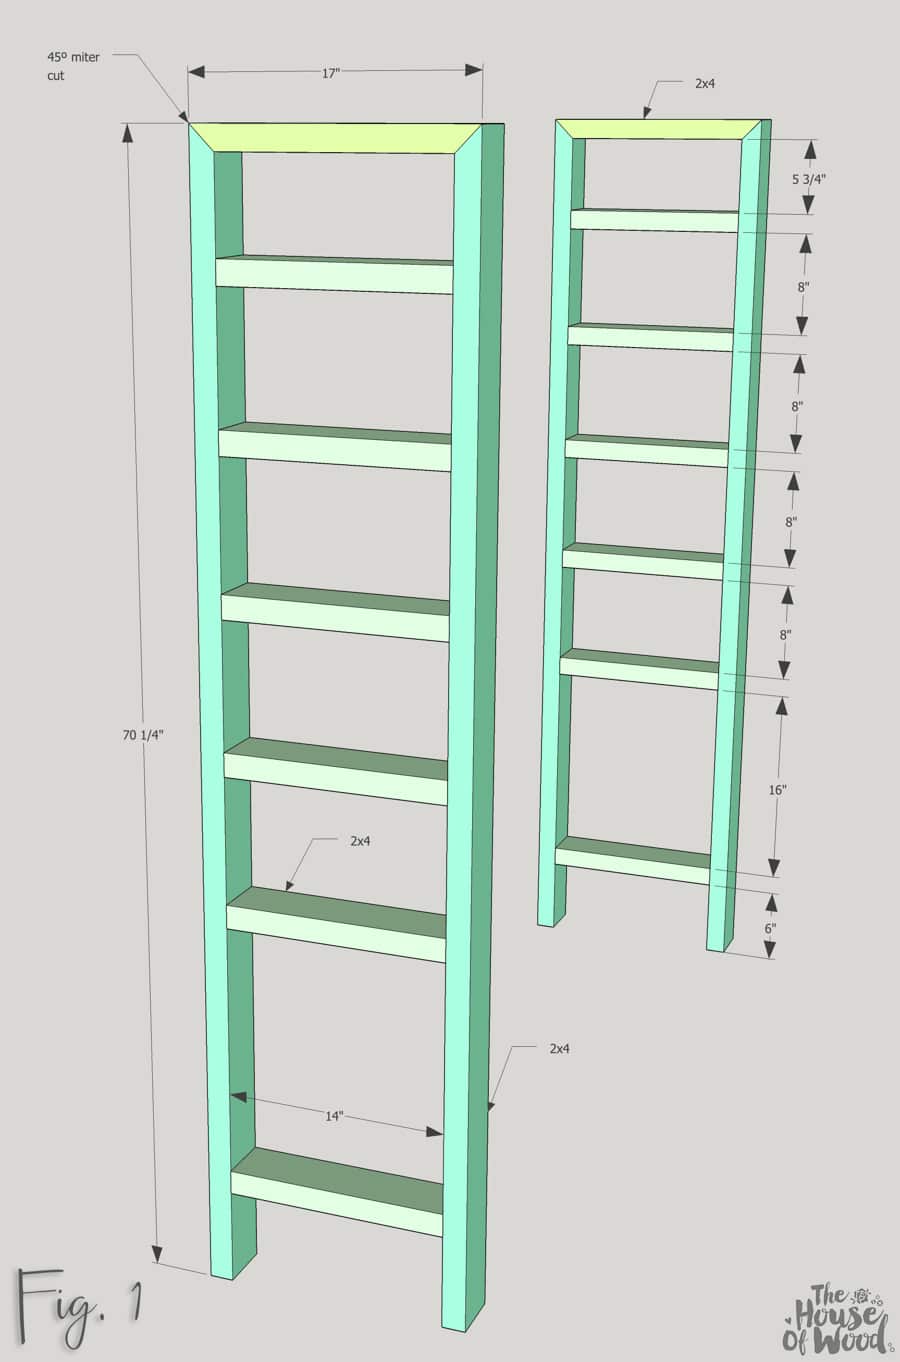
STEP 2:
Set the miter saw to the appropriate angles and cut the X pieces as shown. Drill ¾” pocket holes into the ends of the 1x3s and construct the X with 1-¼” pocket hole screws and wood glue. Attach the constructed X to the sides with 1-¼” pocket hole screws and wood glue. Alternately, you may opt to do a half lap joint for the X pieces.
STEP 3:
Build the shelves. Drill 1-½” pocket holes into the boards as shown and join with 2-½” pocket hole screws and wood glue.
STEP 4:
Install the shelves. Pre-drill pilot holes into the underside of the shelf supports and attach the shelves with 2-½” wood screws, driven from underneath. Use wood glue to reinforce the joint.
Many thanks to Laura @semi_domestic for taking on the very first Buy It or Build It challenge – you rocked this build! I think I just might have to build one for myself!
Be sure to follow me on Instagram and Facebook to keep up with upcoming Buy It or Build It challenges. Have a great week friends – now go make some sawdust!
Great plans! The shelf turned out so great!
Love this! Going to be my next build 🙂
amazing blog love it all!
Did you stain and finish the wood before building or do it all after building?
Hi Nathaly, I usually stain and finish after building.
What are the dimensions for the smaller more narrow version? I cannot find it on your IG or FB account? The larger version would be too big for my house. Please please post the measurements for the smaller shelving unit !!!!!!!! Thanks !
What kind of wood did you use?