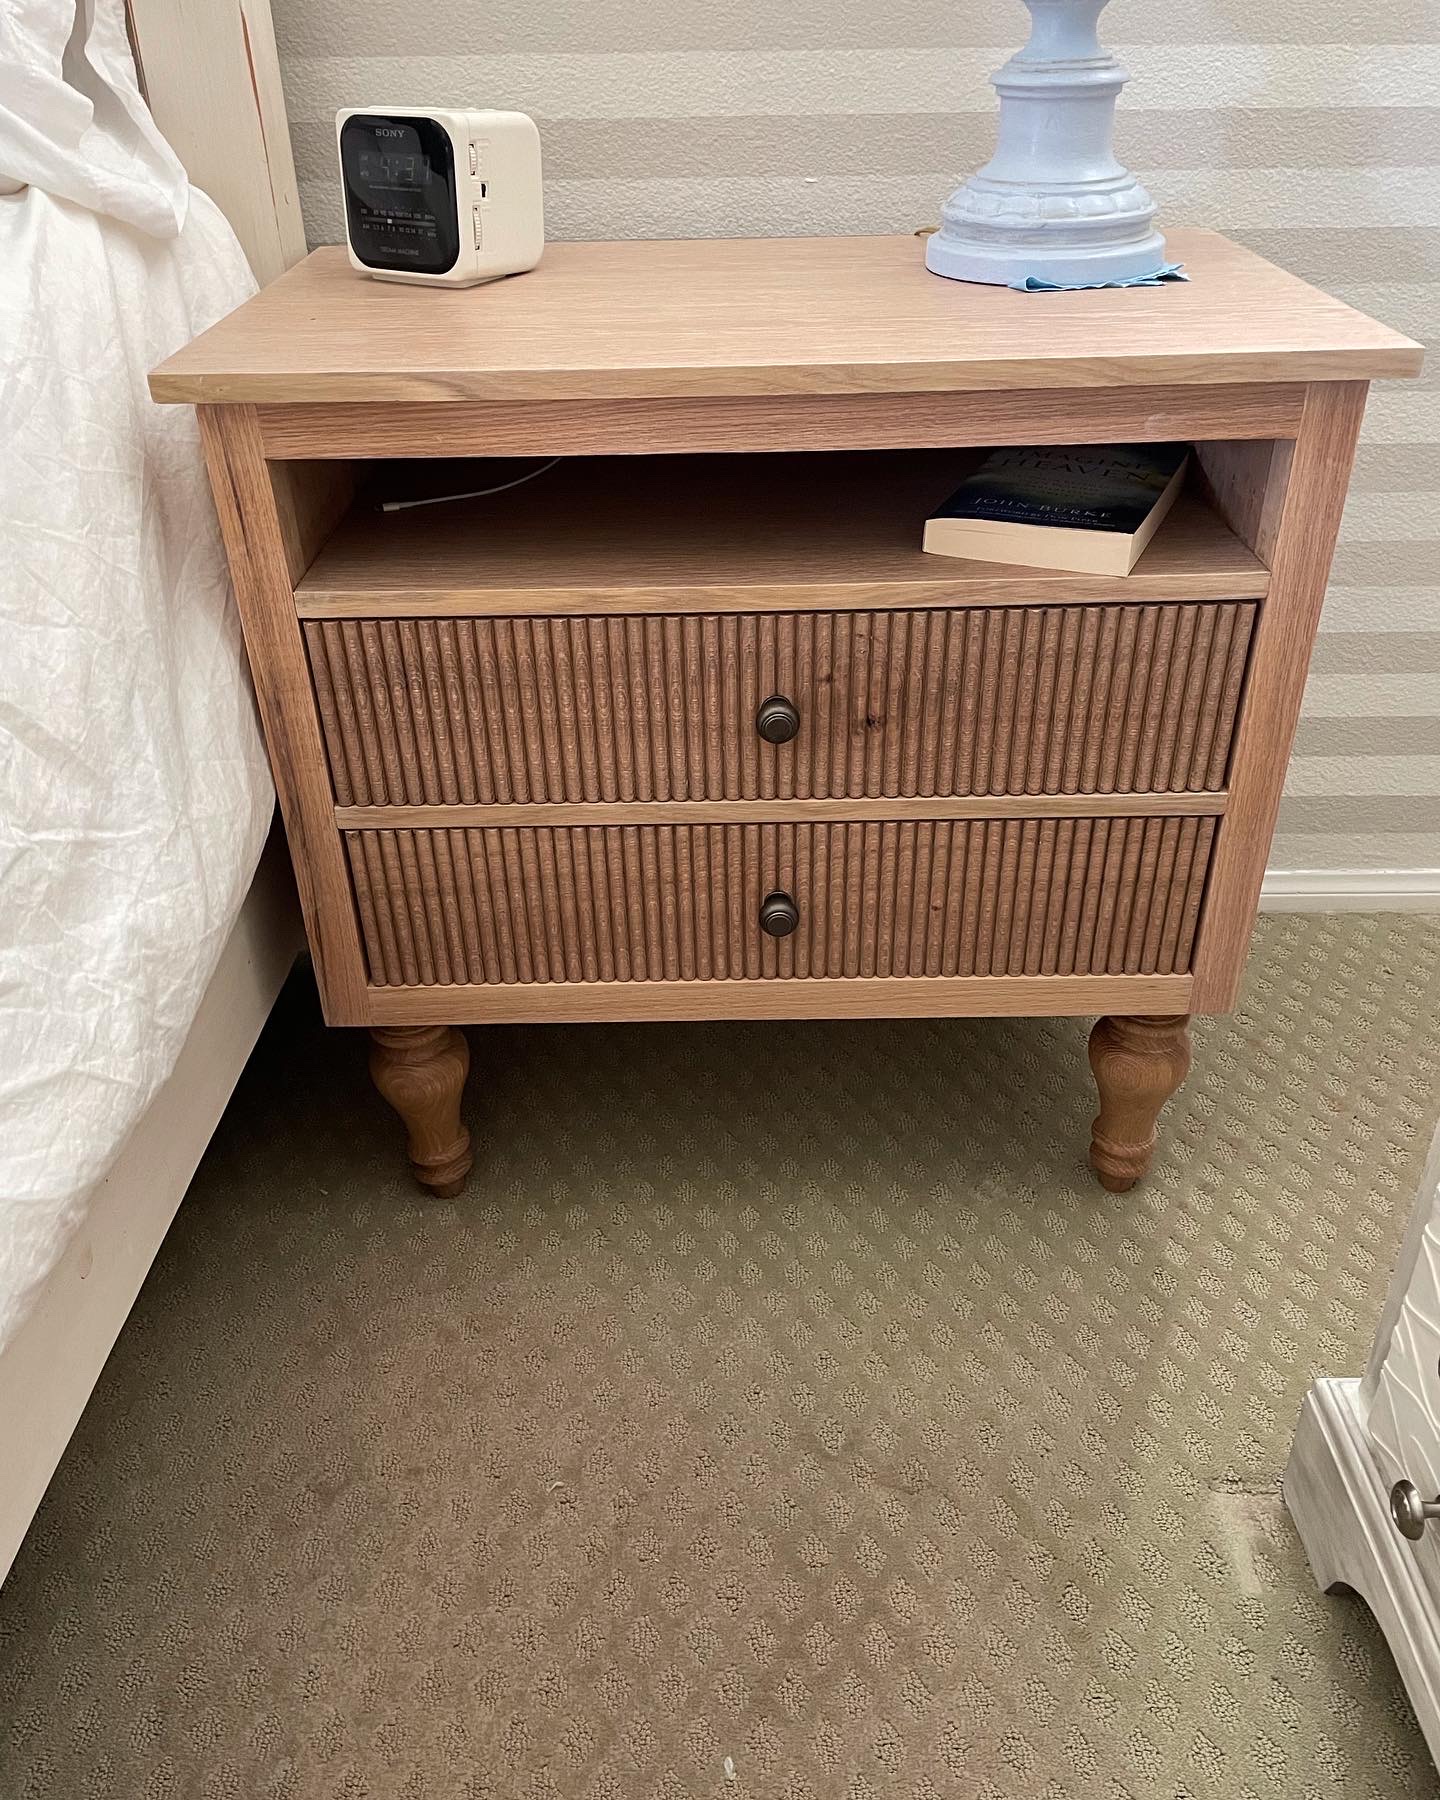
Submitted by Beth Ng
Estimated Cost: $900 for two
JenWoodhouse.com Plan Used: DIY White Oak Nightstands
About the Project:
I repainted my bedroom and while moving the furniture back into the room, we broke the leg on one of our old nightstands. I was that years old when I decided that my soon-to-be sophomore in college daughter, moving into her own apartment, could have the nightstand with the broken leg (after we glued it back together) and we were old enough to have matching, nice nightstands. So I started looking online at nightstands. It didn’t take long before Jen’s plans for the white oak nightstands popped up and I was instantly obsessed. They were gorgeous, unusual and no one, ok hardly anyone, would have them. My husband (Chuck) and I have fairly good woodworking skills and decent tools, but not great ones. So I enlisted the help of our friend, Phil, who has amazing tools, is retired and was willing to help us with this project. He was so excited that he even bought more tools that he thought we might need.
The materials list and cut list were good so Chuck and I headed to the fancy lumber yard. We were able to get the 3/4″ and 1/4″ white oak plywood and the 1×7 white oak lumber but were unable to find the 2×2 squares for the rails and stiles. They had 2.5×2.5, but they were very expensive so we left, hoping we’d be able to find the 2×2’s somewhere else. I’m in southern Cal and NO ONE had the 2×2’s in white oak, so we settled for red oak, which was available at Home Depot. It took me going to 4 or 5 stores to get as many as we needed because what they had were 3′ long pieces. Those worked with only a tiny bit of waste.
Next we headed to Phil’s house to start. On Day 1, we got the two boxes built. We also cut the drawer fronts to length + 2″ to prepare them for the CNC machine. Phil doesn’t have a CNC machine (well, he might have one now!), nor do I, so I packed them in my suitcase and took them to South Carolina. Yes, I probably could’ve found someone to do them here locally, but we already had a trip planned to see family AND my sister has a CNC machine! I needed to take the biggest suitcase I had and stand the pieces up on edge, diagonally, in the suitcase for them to fit. Then I just put a couple of pairs of shorts, a couple of t-shirts and shoes around them.
Fast forward to SC – my sister programmed the cuts and even programmed the peaks and valleys so that the finished measurement of 25-1/4″ would land in two valleys. While in SC, I also ordered the legs from Timberwolf Forest – talked to Christy – she was super helpful! They took a couple of weeks to arrive here in Cali but they were SOOOOO worth the wait. They’re gorgeous. We brought the drawer fronts back, still at about 27″ long and then cut the length and width to exact measurements at Phil’s.
Day 2 at Phil’s consisted of making the drawer boxes. We used the remaining plywood to make the drawer boxes rather than spending another small fortune on the white oak lumber. We had to use a scrap piece of 1/2″ plywood and glue the 1/4″ white oak plywood to it for a couple of the pieces, but otherwise we got most of the pieces out of the remainder of the 3/4″ plywood. I found the white oak edge tape at Rockler and edged all the necessary edges. Mid-afternoon, we started on the drawer glides. We did not use soft close, just nice full extension glides. It was here that we discovered that there was a slight difference in measurements of the inside of the box and the size that we had made the drawer boxes, but it was taken care of by shimming the glides. Another friend (Rick) came by to check on our progress and said something like “you know, you can pry that little flap on the glide out if you need to shim it”, but he didn’t explain further so Phil and hubby started in on the first glide, using washers to shim. What a pain! They struggled for a few hours with the washer shim method before we called it a day, having completed just one glide. That night, Rick sent me a video showing the method of prying the flap on the glide out for easy shimming. It made the next 3 drawers go so much faster the next day.
I used Rubio Monocoat 2c in 5% white for the finish. Applied this to all parts of the nightstands and to the legs when they arrived Monday. Then upstairs they went into my newly painted, newly decorated bedroom and I could not be more pleased!
Analysis – this project is doable with the right tools. It is not an easy DIY project, but Jen’s plans made it very straightforward. It took us 3 full days plus a few hours on the CNC machine. We learned a lot and could definitely do the next ones much faster.
Leave a Reply