Welcome to the next installment of our DIY Mudroom Lockers Series! In this project, we’re transforming our ex-pantry closet into a custom, built-in mudroom locker system – a functional drop zone that conquers clutter from coats, bags, shoes, and everyday essentials. Whether you’re looking for mudroom locker ideas, building tips, or inspiration for your own home, you’re in the right place.
This week, we made major progress: the cabinet carcasses are now permanently installed in the closet. Installing three large DIY mudroom lockers in an existing (and not perfectly square) space proved to be more challenging than expected, but the results are worth the effort!
If you missed the previous posts in this series, you can catch up here:
Part 5: Installing the Cabinets + Building the Face Frame (you’re here!)
Installing the Mudroom Locker Cabinets
Because houses and walls are rarely perfectly straight, level, or square, our main goal was to install the cabinets plumb, level, and square relative to each other. That way, the entire unit functions and looks like one seamless built-in.
We spent nearly two hours installing the first cabinet, carefully shimming and adjusting until it was perfectly positioned. The first cabinet always takes the longest because it becomes the reference point for everything that follows.
When installing built-ins like these, you never want to build off something that’s even slightly off because those small discrepancies only compound with every cabinet that follows. Seriously. Future-You will thank Present-You for sweating the details now (and your sanity will remain mostly intact).
Setting the First Cabinet
To install the first locker cabinet, we placed it in position and began adjusting it using shims. We checked the cabinet on three different planes:
plumb front-to-back
plumb side-to-side
level top-to-bottom
square within the opening
Shims are essential when installing cabinetry in an existing space. Floors and walls are almost never perfect, so shims allow you to make small adjustments until the cabinet sits exactly where it needs to.
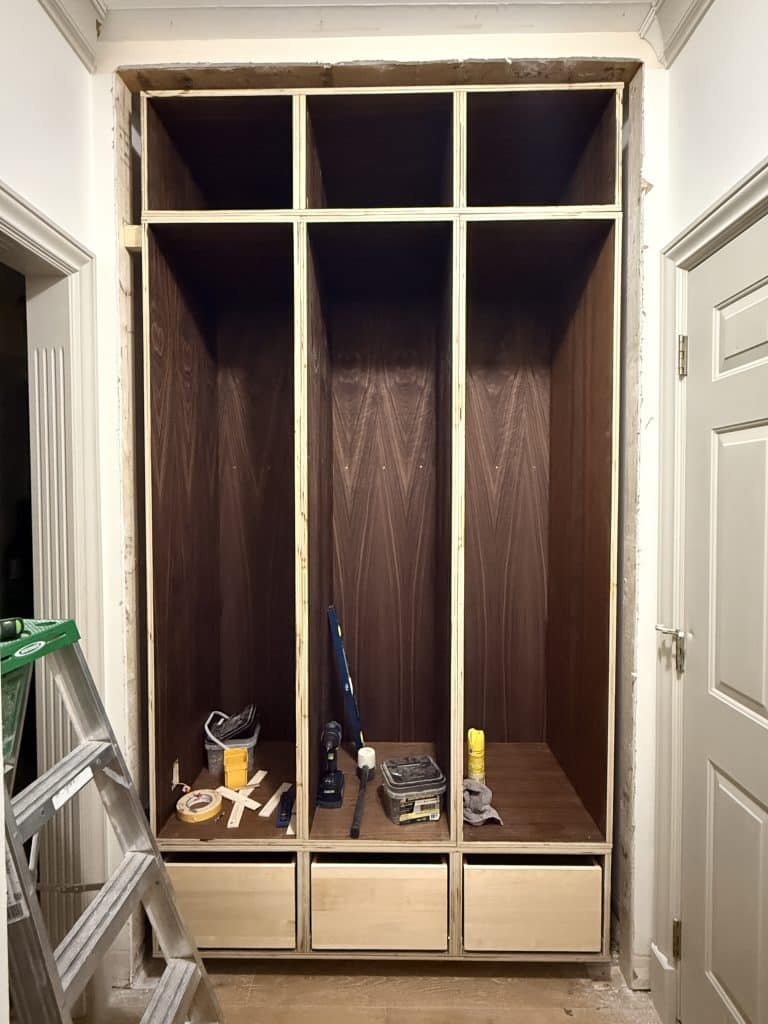
Once the first cabinet was positioned correctly, we secured it by driving screws through the back panel and into the wall studs. We also secured the locker cabinets to the drawer base below. This locked the cabinet in place and gave us a solid foundation for installing the remaining lockers.
Installing the Remaining Lockers
Once the first cabinet was perfectly set, the remaining two cabinets were installed much faster. We placed the second cabinet next to the first, checked the alignment, and secured it to the wall studs, just as we did with the first one. We also screwed the second locker to the drawer base and to the first cabinet.
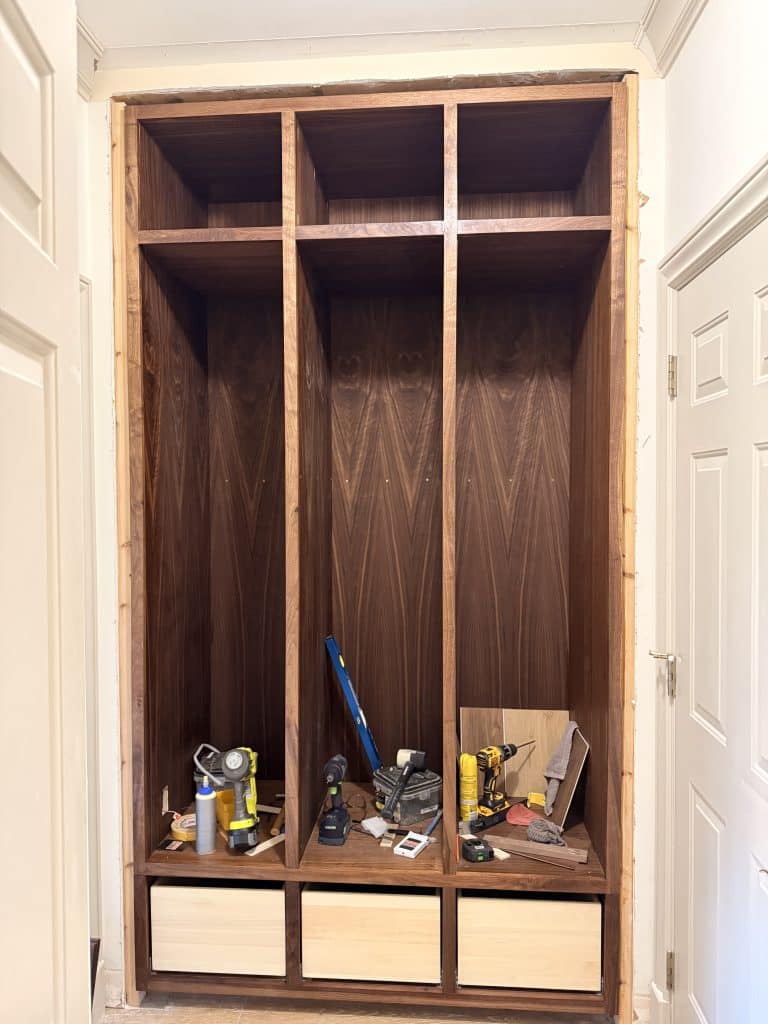
The third locker was a bit more challenging because we were now dealing with limited space. We repeated the same process and secured everything with screws. This effectively turns the three separate boxes into one solid built-in unit. By the time we finished, the cabinets were plumb, level, aligned, and securely anchored to the studs.
What If Your Mudroom Locker Cabinets Aren’t Perfect?
Even after careful installation, it’s normal for things not to be absolutely perfect. When installing cabinetry inside an existing opening, there will almost always be minor gaps or slight variations. Fortunately, cabinetry is designed with this in mind.
The face frame and trim pieces that come later will conceal those small imperfections and visually tie everything together into a polished, professional-looking built-in mudroom locker system.
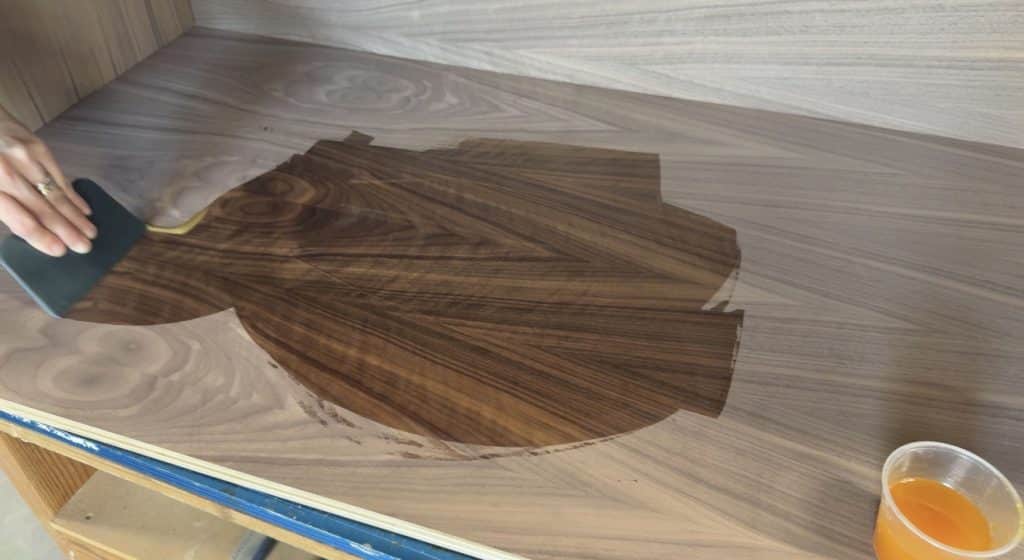
If you’ve followed my projects for a while, you know Rubio is my favorite finish for interior woodworking. It’s ridiculously easy to apply, durable, and so beautiful. And, this may sound weird, but it even smells good! Unlike traditional finishes that require multiple coats, Rubio Monocoat (mono coat = one coat, get it?) protects the wood in a single application via some wizard-level molecular bonding. Science!
The finishing process is simple:
Sand the wood thoroughly to 120 grit.
Mix the oil and accelerator (3:1 ratio – 3 parts oil, 1 part accelerator)
Spread a thin coat and allow the wood to absorb it for a few minutes.
Since mudrooms see a lot of daily wear and tear, having a durable finish on these locker cabinets was important.
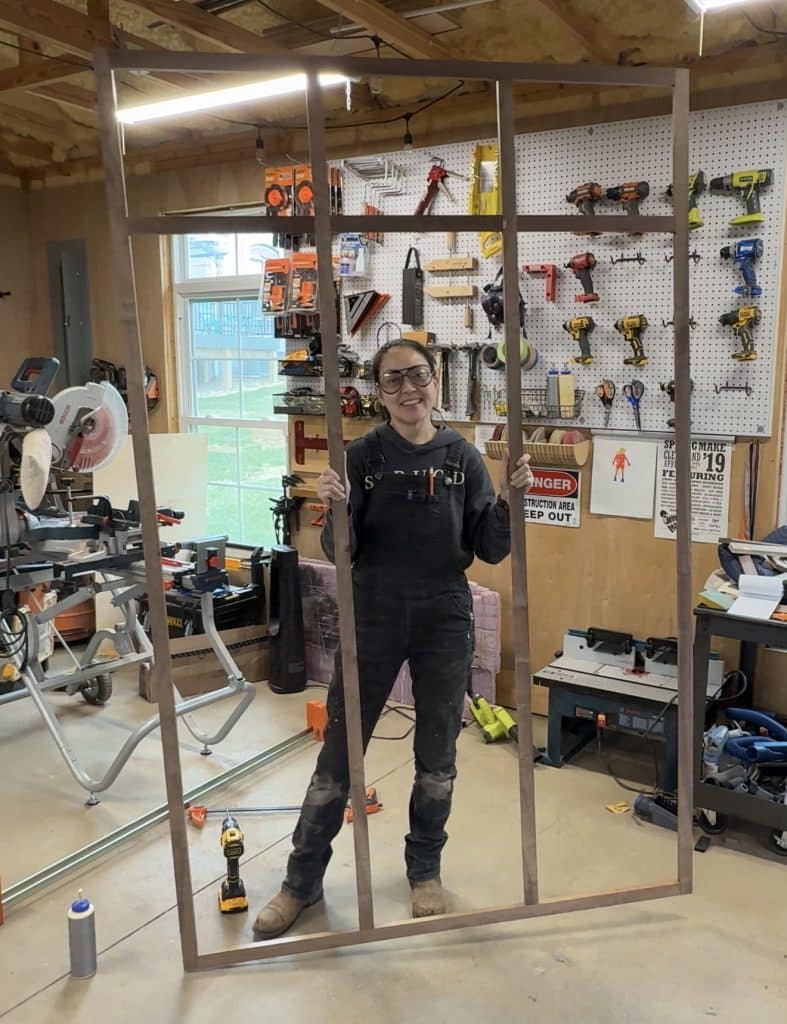
Building and Attaching the Face Frame
With the locker cabinets installed, the next step was to build the face frame. A face frame serves several important purposes in cabinetry: it ties all the cabinets together into a cohesive unit, strengthens the front of the carcasses, hides minor inconsistencies between cabinets, and creates a clean, finished look for the doors and drawers.
We built the face frame from solid wood, cutting the vertical stiles and horizontal rails to size before assembling everything. For joinery, we kept things simple, using pocket screws and wood glue to assemble the frame. This method is quick, strong, and ideal for face-frame construction.
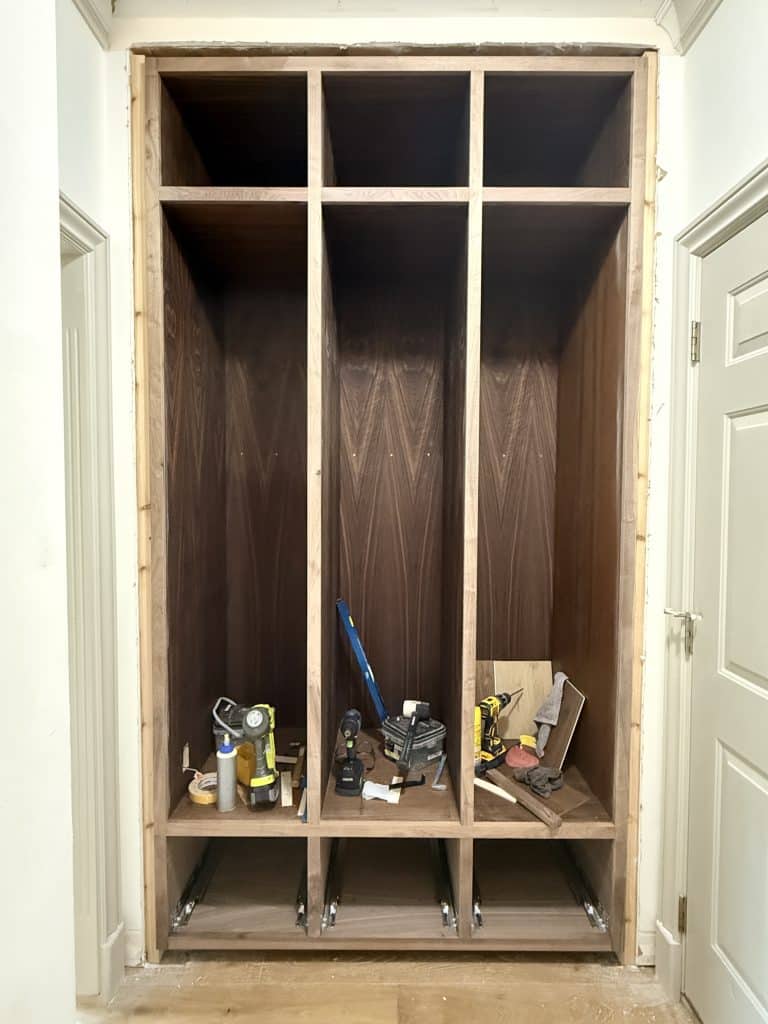
Once the frame was assembled, we carefully positioned it on the front of the cabinets and attached it with brad nails and wood glue. Since the cabinets were already plumb and level (hallelujah), the face frame fit perfectly and instantly leveled up the whole look.
I mean, it makes such a difference, right?! Suddenly, the lockers went from “hey, did you build that in your garage?” to “whoa, is this a custom built-in from a fancy showroom?” Here’s a side-by-side comparison:
Making the Drawer Fronts
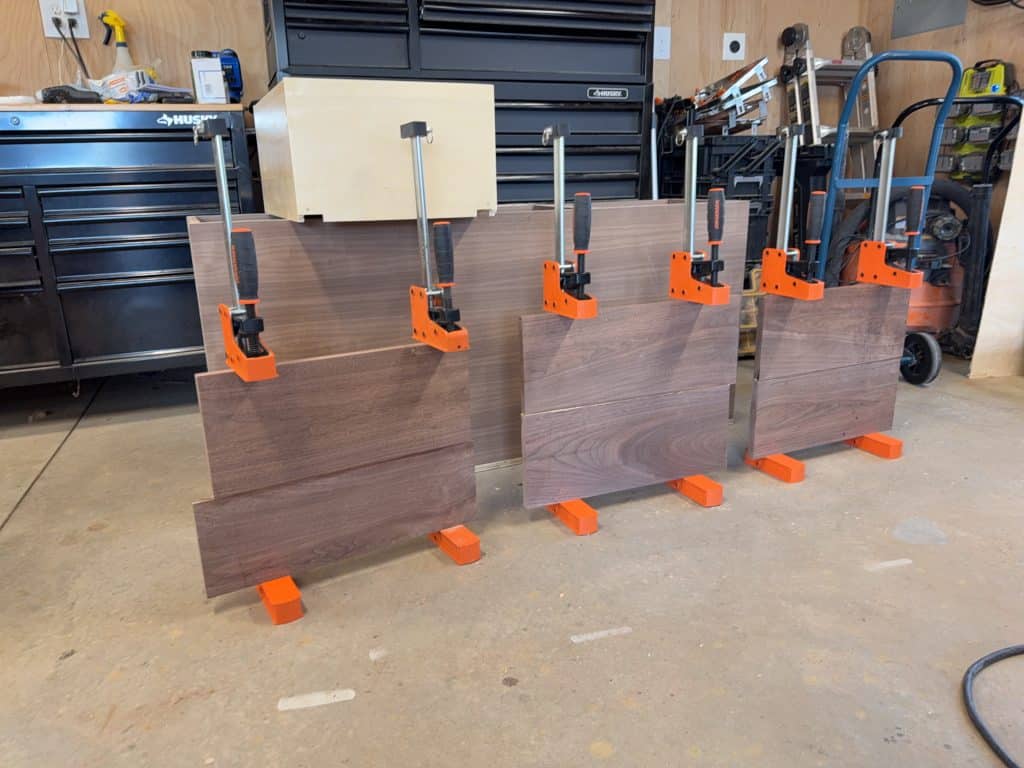
Next, I turned my attention to the drawer fronts. The boards I had on hand weren’t quite wide enough for the drawer fronts I needed, so I glued up a couple to create wider panels. This technique is called a panel glue-up, where boards are joined edge-to-edge to create a wider panel.
After squaring up the edges for a tight seam, I applied wood glue along the edges and clamped the boards together. Once the glue cures, the panel becomes a single solid piece of wood that can be milled and cut to size. These glued-up panels will be cut down into drawer fronts, with routed edges to fancy them up a bit. (Confession: I still haven’t decided on the final edge profile. Stay tuned for a dramatic router bit reveal!)
Building the Mudroom Locker Doors
With the cabinets installed and finished, it was finally time to start building the locker doors, cabinet doors, and drawer fronts. Each door consists of five main components: two stiles (vertical parts), two rails (horizontal parts), and a floating center panel. The center panel sits within grooves cut into the rails and stiles, allowing the wood to expand and contract naturally with seasonal changes. This type of construction has been used in cabinetry for centuries because it’s strong, stable, and durable.
Milling the Door Parts
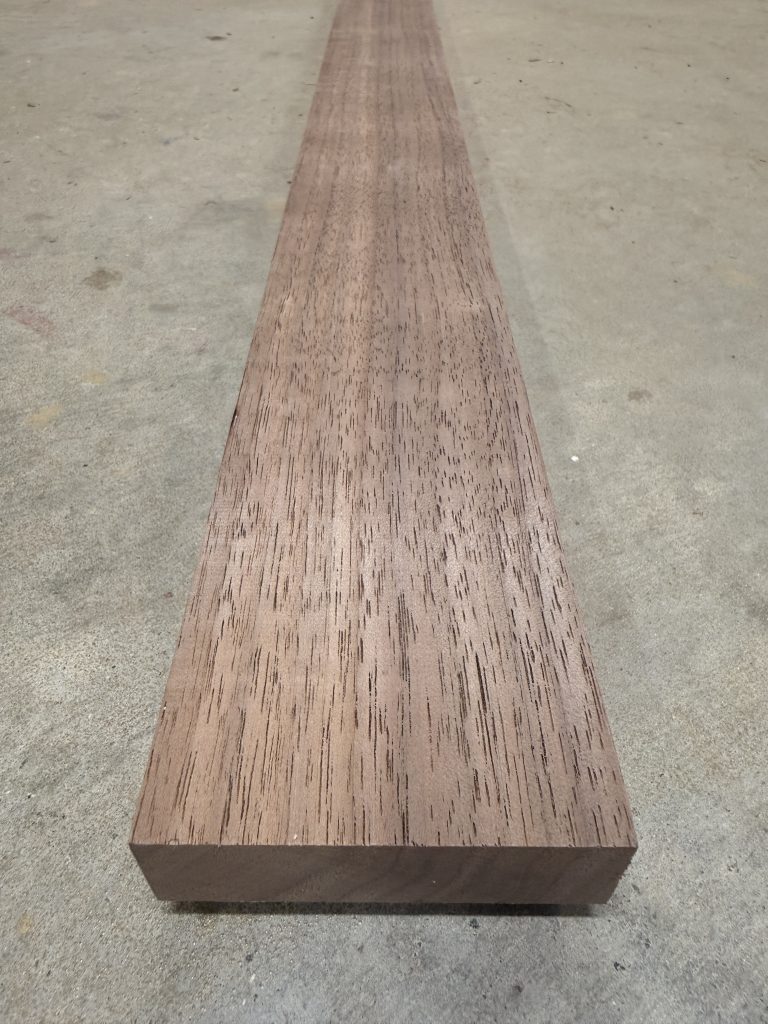
To build the doors, we milled the rails and stiles from solid black walnut. Each board needed to be flat, straight, square, and consistent in thickness. For the tall vertical stiles, I specifically chose quarter-sawn walnut, which is more stable than plain-sawn lumber, especially for long, narrow pieces like these. The remaining parts, including the rails and shorter stiles, are plain-sawn walnut. Using quarter-sawn for the long stiles helps prevent warping and keeps the locker doors looking sharp for years to come.
Once the boards were milled to size, we cut grooves along the inside edges of the rails and stiles to hold the center panels. Then, we cut tenons on the ends of the rails so they would fit into the grooves in the stiles, creating a strong mechanical joint.
This classic rail-and-stile joinery keeps cabinet doors rigid while still allowing the panel to float inside the frame. That means no cracked panels when the humidity swings, and you get to show off your woodworking prowess at family gatherings. Win-win!
What’s Next?
Now that the face frame is installed, I’ll take my measurements and then assemble and install the inset doors. This is the part that intimidates me the most because inset doors can be very tricky to install perfectly, where there’s an exact 1/16″ reveal around all four sides. In the next post, we’ll assemble the inset doors and dial in the reveals – one of the most precise (and nerve-wracking) parts of the build. Wish us luck!
Mudroom Locker FAQ
Q: What’s the best wood for mudroom lockers? A: I recommend hardwood plywood for the carcasses, and hardwoods like walnut, maple, or oak for face frames, doors, and trim. For long, vertical pieces (like tall door stiles), quarter-sawn lumber resists warping better than plain-sawn.
Q: How do I finish and maintain the wood? A: I love Rubio Monocoat Oil Plus 2C for a durable, easy-to-apply finish. Dust regularly and touch up as needed to keep your lockers looking their best.
Q: Any tips for installing in a not-so-square closet? A: Shim, check for level and plumb constantly, and don’t rush. Face frames and trim can hide small gaps or imperfections.
Pro Tips for Building Mudroom Lockers
Measure twice, cut once (and then check again – walls are sneaky!)
Start your install with the most visible cabinet for the best first impression.
Use quarter-sawn lumber for long stiles to help prevent warping.
Face frames and trim are your best friends for hiding less-than-perfect edges.
Be sure to dry-fit everything before final installation.
When in doubt, add more shims.
Have snacks and a good playlist or podcast on hand. Trust me.
Let’s Connect!
Have you built your own mudroom lockers, or are you planning to? Share your progress, questions, or tips in the comments below – I’d love to cheer you on! And tag me on Instagram (@jenwoodhouse) so I can see your creations and potentially feature them in my stories. Questions? Drop them below, and I’ll help however I can!
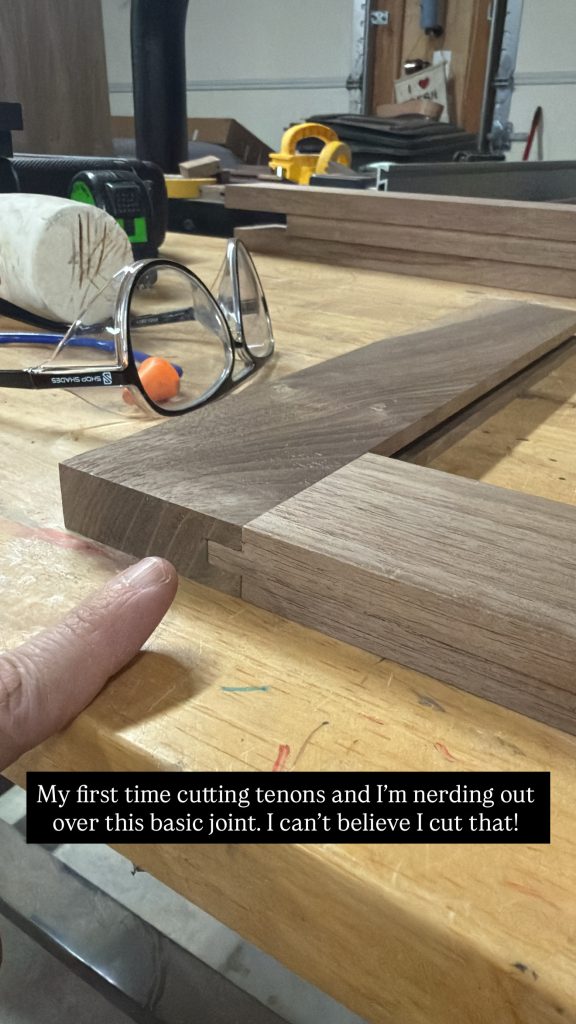


whoa…those are amazing! The tenons joints look awesome; I haven’t tried to cut any of those yet. Great job!! Jeff
Thanks, Jeff! I’m learning so much from this project!