Welcome to the sixth installment of our DIY Mudroom Lockers Series! In this project, we’re transforming our ex-pantry closet into a custom, built-in mudroom locker system – a functional drop zone that conquers clutter from coats, bags, shoes, and everyday essentials.
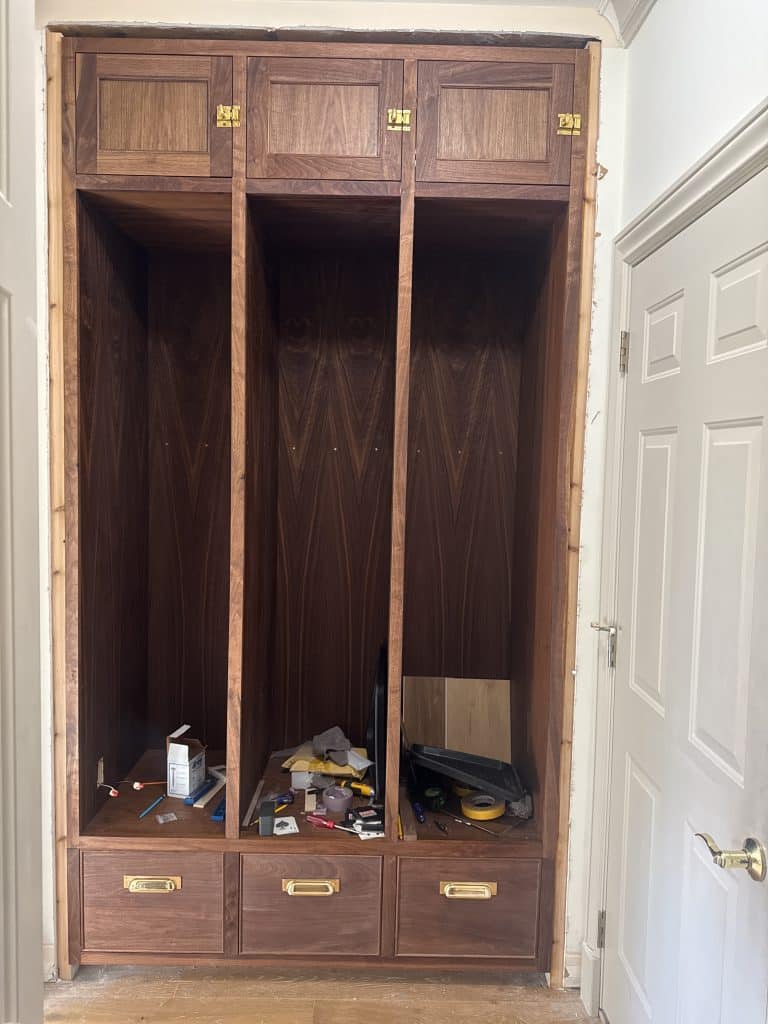
This is the stage where everything finally comes together, and where patience is tested more than ever. Up until now, we’ve been focused on structure: cabinet carcasses, face frames, and overall layout. In this phase, we shifted into the meticulous details that truly define a finished, custom look.
Rather than opting for standard shaker doors and flat-slab drawer fronts, we made our own custom trim by routing a beaded profile into solid walnut. Next came one of the most demanding parts of the build: installing inset doors and drawers and dialing in those tight, even reveals.
If you missed the previous posts in this series, you can catch up here:
From the start, I knew I didn’t want basic shaker doors or slab drawer fronts. I wanted something more custom, more furniture-like, and a little more traditional.
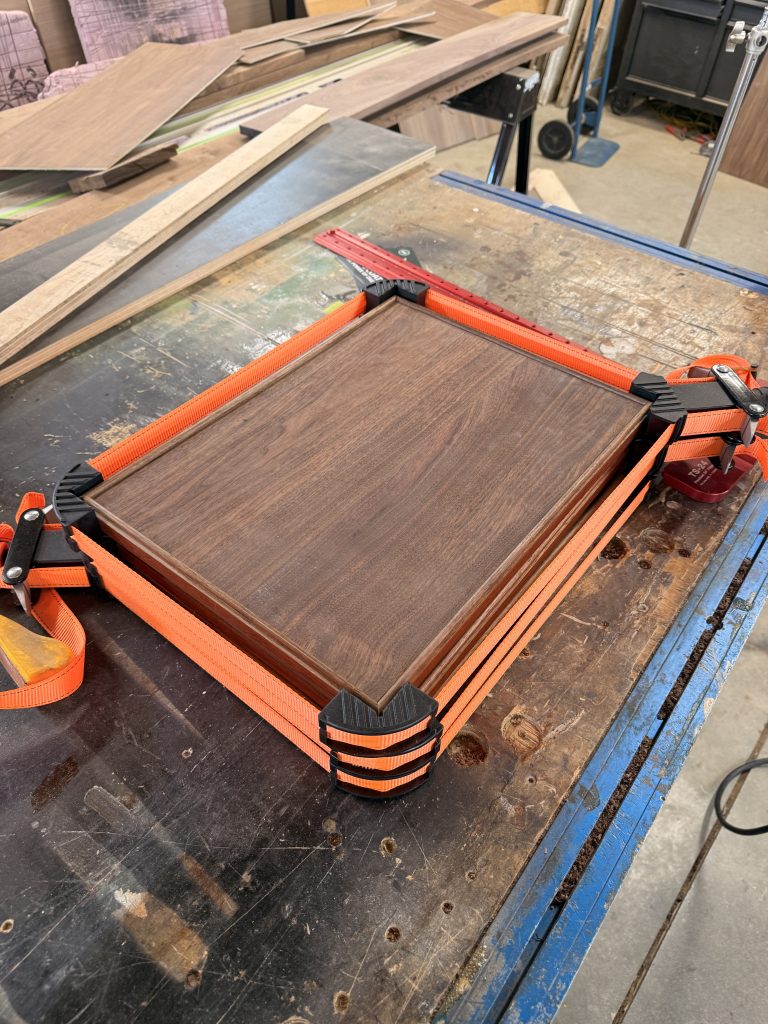
So instead of building that detail into the door frames themselves, we made our own trim from solid walnut. Using a beaded router bit, we milled thin strips, mitered each corner, and carefully attached them to the doors and drawer fronts.
This subtle detail adds depth and refinement without competing with the walnut grain or brass mesh panels. Here are the three drawer fronts with the applied molding, in clamps while the glue dries. By the way, this band clamp is super useful if you make picture frames or similar things.
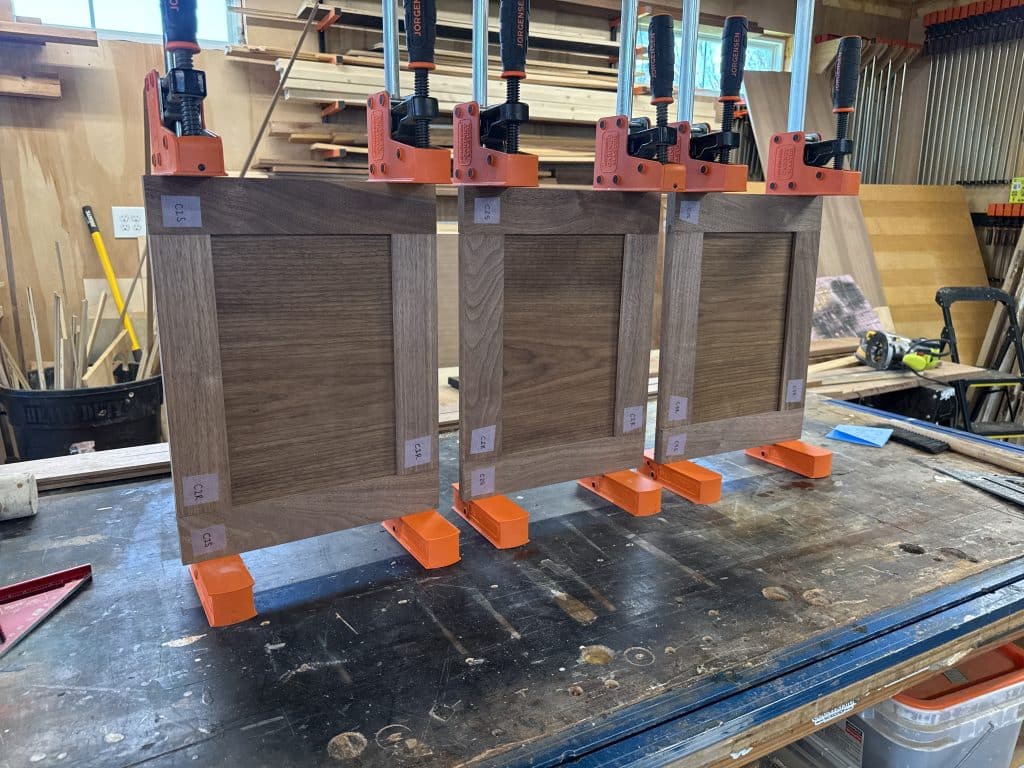
And here are the upper cabinet doors, assembled and glued up, waiting to be installed. These doors do not have the beaded trim yet.
Installing the Upper Cabinet Doors
With the trim complete, it was time to install the upper cabinet doors. We’re using inset doors with concealed soft-close hinges, which means every measurement has to be extremely precise. Unlike overlay doors, inset doors sit inside the face frame opening, so even the smallest inconsistencies are noticeable.
We installed the hinges on the doors first, then mounted them to the cabinet boxes.
From there… it was all about adjustments.
The Reality of Inset Door Reveals
Let’s talk about reveals and how meticulous you have to be to achieve tight, even reveals around inset doors and drawers. Our goal was to achieve a consistent, even reveal around each door. We ended up with a reveal of less than 1/16″, which is honestly tighter than we originally planned.
We installed, adjusted, stepped back, tweaked again, and repeated that process over and over until everything was as aligned as we could get it. While it’s not absolutely perfect, it’s as close as we could realistically get – and visually, it looks clean and consistent. I just have to remind myself not to look too closely – I tend to zero in on the flaws and forget to give myself enough grace.
Fine-Tuning with Adjustable Hardware
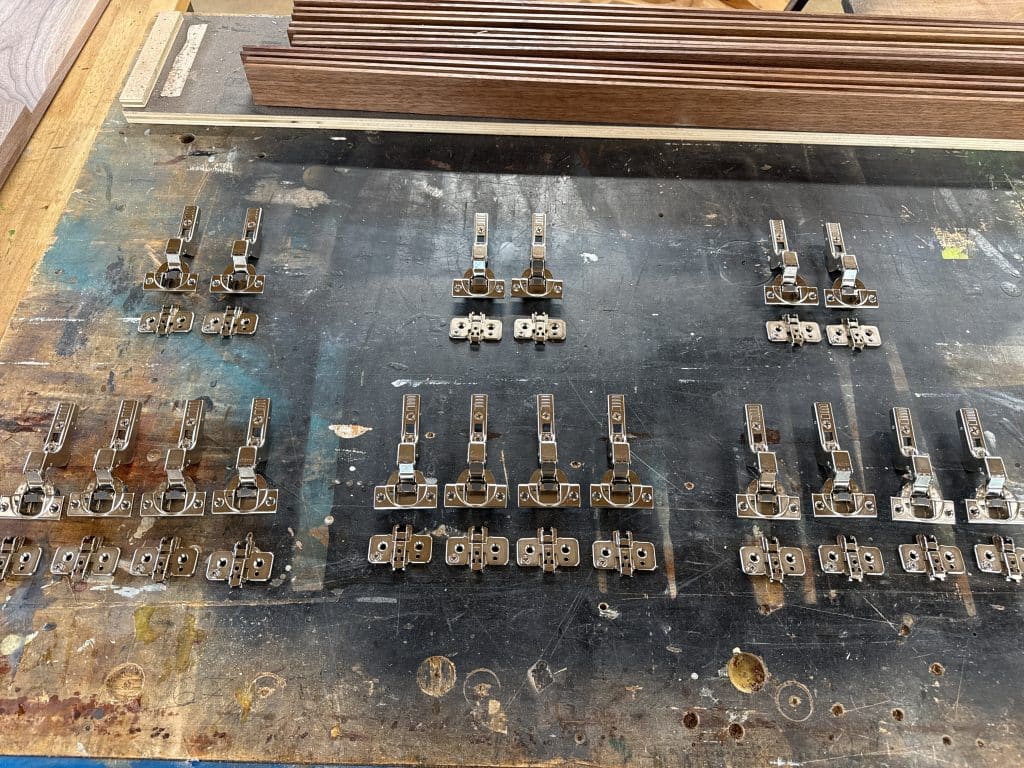
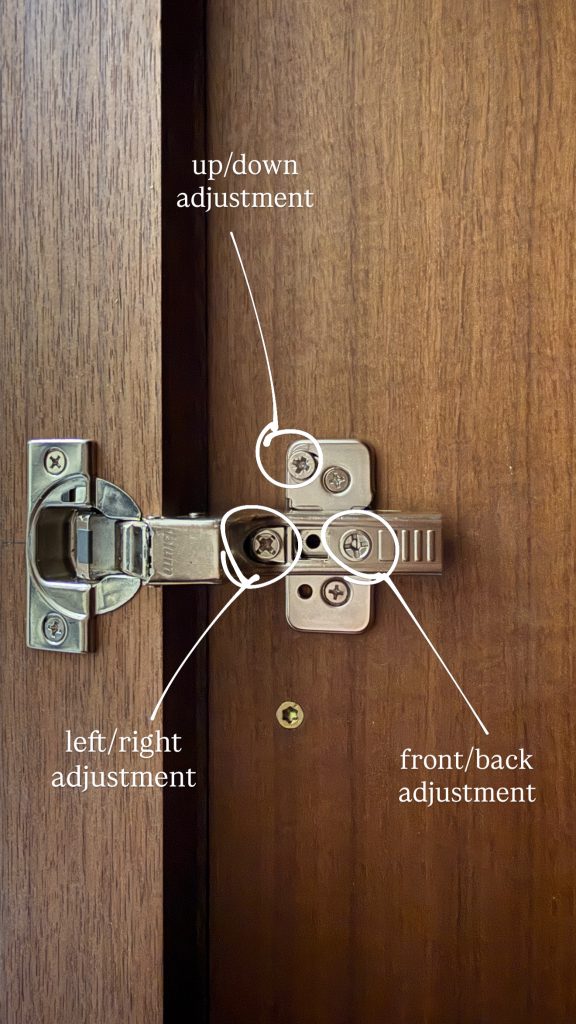
One thing that made this process much more manageable was using adjustable hardware. We used these cabinet hinges – they’re soft-closing, concealed for frameless cabinets with inset doors.
These hinges allow for:
up/down adjustment
left/right adjustment
forward/backward (depth) adjustment
The drawer slides are adjustable too, allowing us to fine-tune the position of the drawer boxes so they align perfectly with the fronts. That flexibility is a lifesaver when working with inset cabinetry.
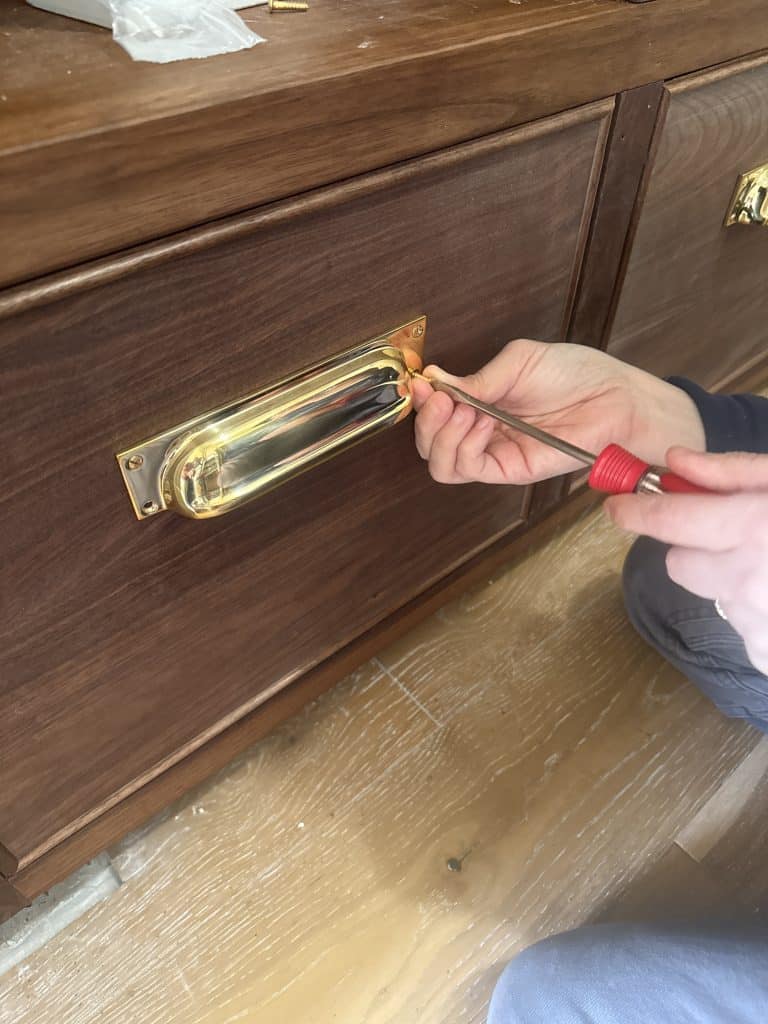
Installing the Drawer Fronts
Once the upper doors were installed, we moved on to the drawer fronts. These were cut to size, finished with the same custom beaded trim, and carefully aligned for consistent spacing.
To install them, we:
Pre-drilled holes on the front of the drawer face for the bin pulls – this is so we can temporarily attach the drawer face to the drawer box.
Then we positioned the drawer fronts visually for even reveals using playing cards as spacers.
Screwed the drawer face on using the pre-drilled holes.
Opened the drawer, pre-drilled four holes inside the drawer, then screwed the drawer face on from the inside.
Finally, we unscrewed the front temporary screws and attached the bin pulls.
Just like the doors, this step required patience and plenty of small adjustments to get everything lined up just right.
A Note on Tight Reveals (and Wood Movement)
With reveals this tight, one thing to keep in mind is seasonal wood movement. Right now, everything is aligned nicely, but as humidity changes, the wood will likely shift slightly. The good news is that the adjustable hinges and drawer slides allow us to make small tweaks if needed down the road.
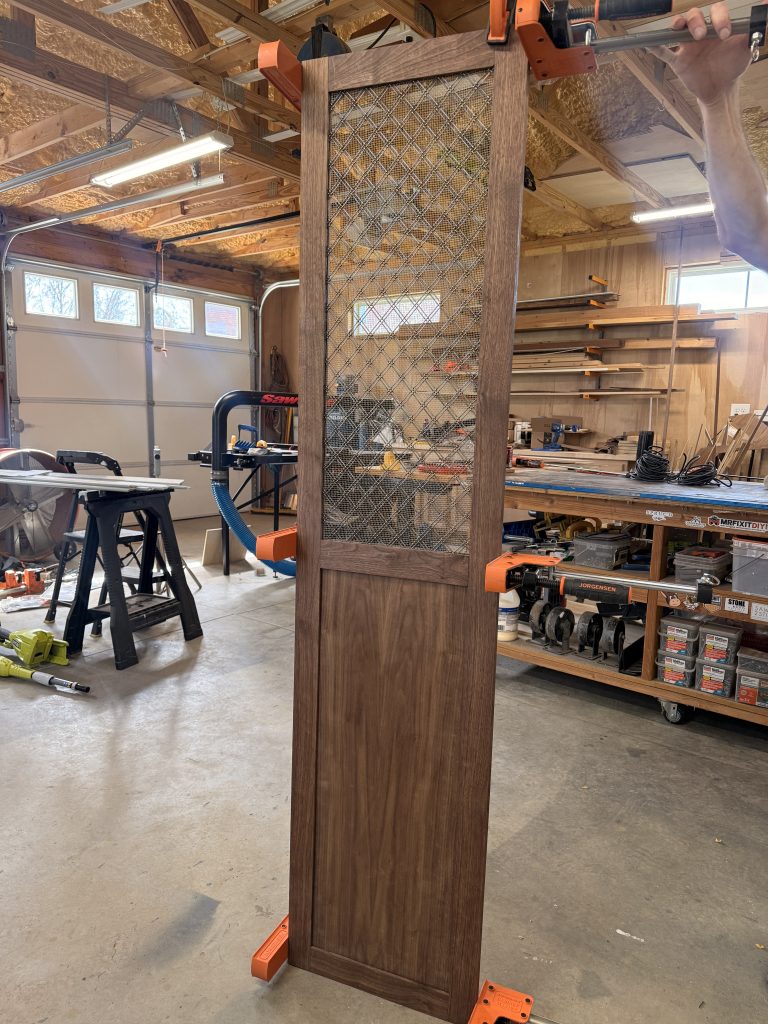
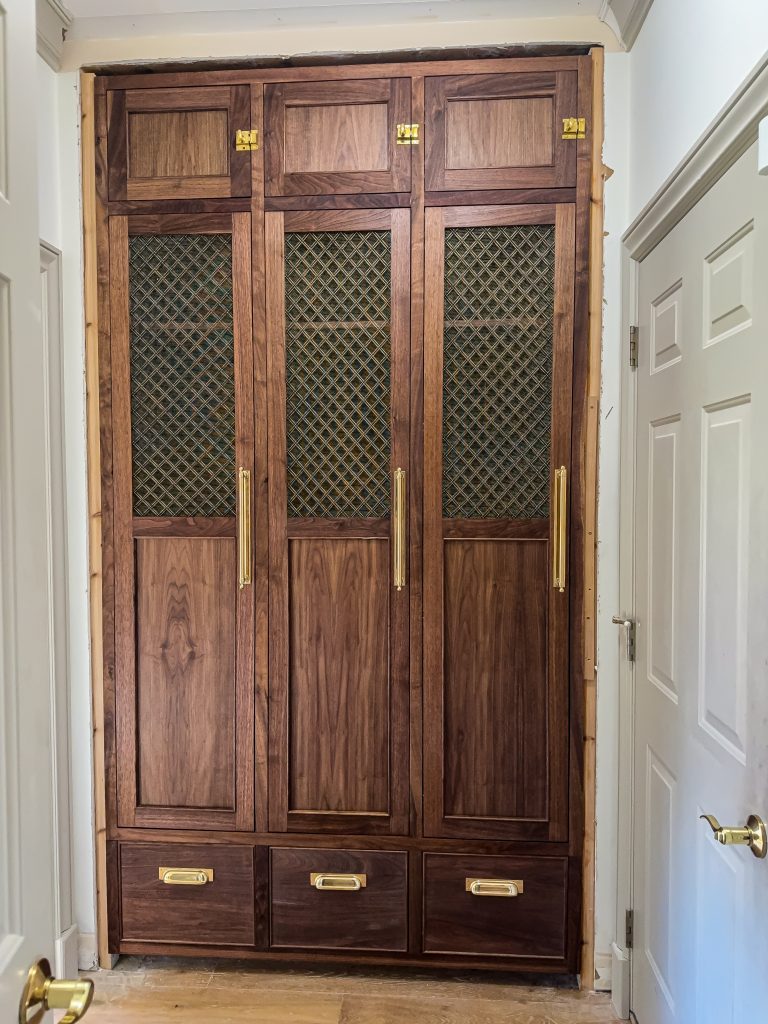
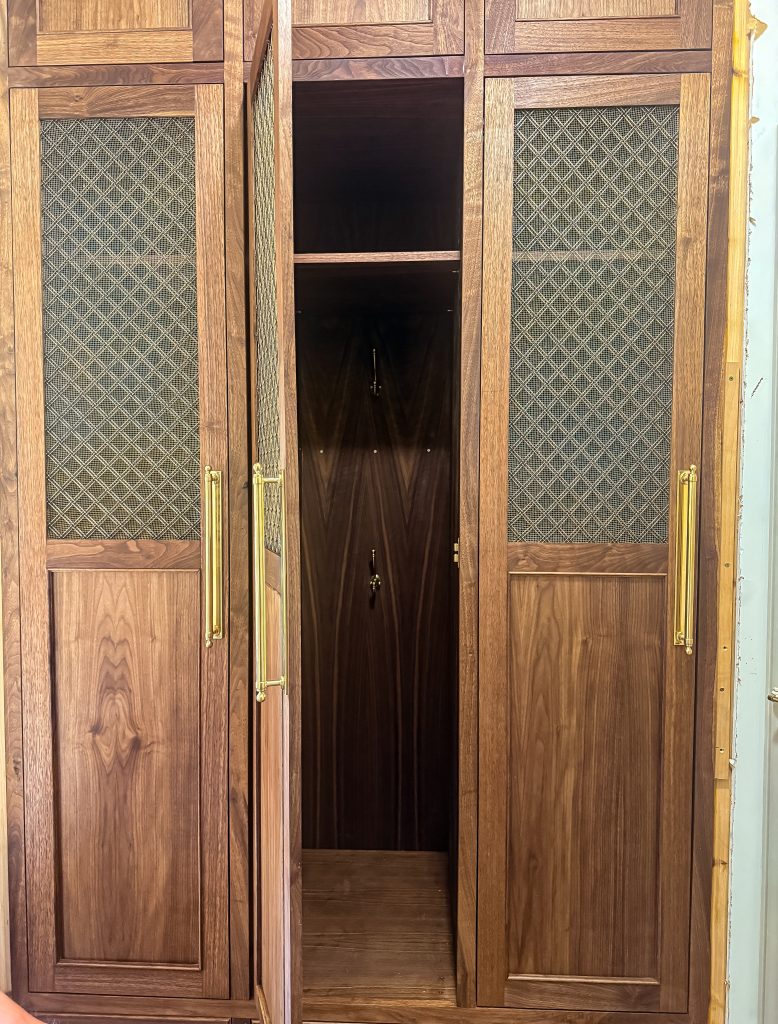
Assembling and Installing the Locker Doors
Now that the upper cabinet doors and drawer fronts were installed, it was time to assemble the locker doors. I saved this part for last because it was the most intimidating to me. This is where we used the quarter-sawn walnut boards – for the tall stiles. We chose quarter-sawn for this particular part because it’s more stable than plain-sawn. When you have really long stiles like these, any small wood movement is more noticeable, so we needed these boards to stay as straight as possible.
We installed the hinges, hung the locker doors, and stepped back and… honestly, the reveals were pretty darn close. We only had to adjust it a little bit – which surprised me! I was dreading the worst, and it actually turned out better than I expected. Finally, we installed the coat hooks and locker door pulls, added an adjustable shelf inside the lockers, and that was that – the most intimidating part of this project was over!
What’s Next
We’re in the homestretch now. Now that the inset cabinet doors and drawers are installed, it’s time for the final finishing touches: trim and crown molding, and adding clever organizational features. I can’t wait to style and photograph this bad boy and start using all that functional space. Stay tuned for the final reveal!
Mudroom Locker FAQ
Q: Are inset doors harder to install than overlay doors? A: Yes! Inset doors require more precision and adjustment, but they offer a more custom, high-end look (in my opinion).
Q: What’s a typical reveal for inset cabinetry? A: Typically 1/16″ – 3/32″. Ours came in just under 1/16″, which is tighter than I planned.
Q: Do I need adjustable hinges and drawer slides? A: Highly recommended! They make fine-tuning alignment much easier.
Let’s Connect!
Have you built your own mudroom lockers, or are you planning to? Share your progress, questions, or tips in the comments below – I’d love to cheer you on! And tag me on Instagram (@jenwoodhouse) so I can see your creations and potentially feature them in my stories. Questions? Drop them below, and I’ll help however I can!
wow! The doors look really good, I haven’t tried making my own trim yet, but I will now for sure lol. The tall doors are pretty awesome! When you have friends and family over, they are going to be sooooooo jealous lol!! Have a great day, Jeff


wow! The doors look really good, I haven’t tried making my own trim yet, but I will now for sure lol. The tall doors are pretty awesome! When you have friends and family over, they are going to be sooooooo jealous lol!! Have a great day, Jeff