Build this beautiful DIY dining table with angled trestle legs.

*This post contains affiliate links.
MATERIALS:
- (4) 2 x 4 x 8 Ft. Boards
- (1) 2 x 2 x 6 Ft. Board
- (5) 1 x 8 x 6 Ft. Boards
- (3) 1 x 3 x 6 Ft. Boards
- 2 1/2-inch Pocket Screws
- 2 1/2-inch and 2-inch Wood Screws
- 1 1/4-inch Brad Nails
- Parallel Bar Clamps
- Wood Glue
TOOLS:
- Tape Measure
- Carpenter’s Square
- Cordless Drill/Driver
- Circular Saw
- Table Saw
- Pocket Hole Jig
- Cordless Pneumatic Brad Nailer
CUT LIST:
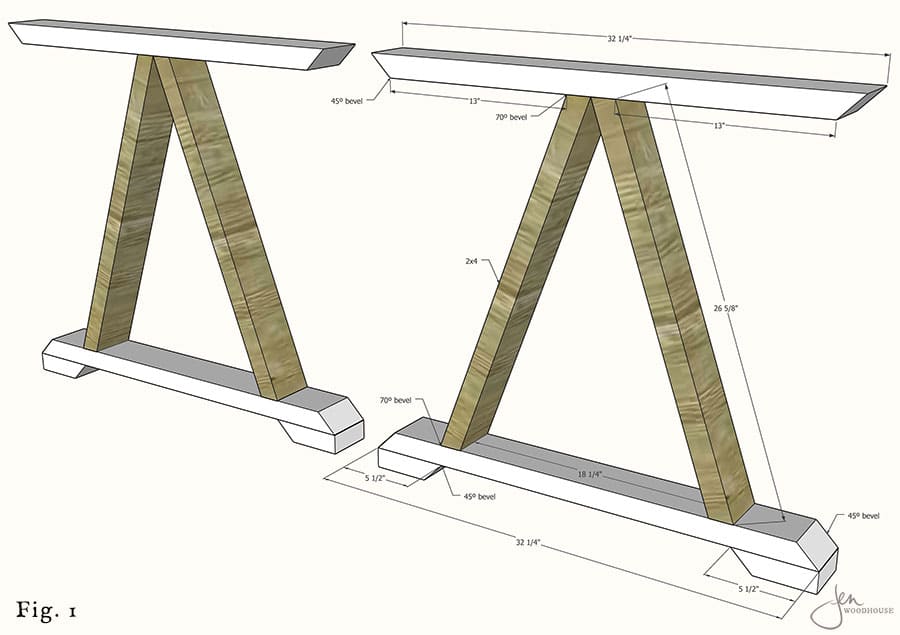
- (4) 2×4 @ 32 ¼ inches, ends cut at 45º bevel, not parallel (top and bottom of legs)
- (4) 2×4 @ 26 5/8 inches, ends cut at 70º bevel, parallel (angled “A” boards)
- (4) 2×4 @ 5 ½ inches, one end cut at 45º bevel (feet)
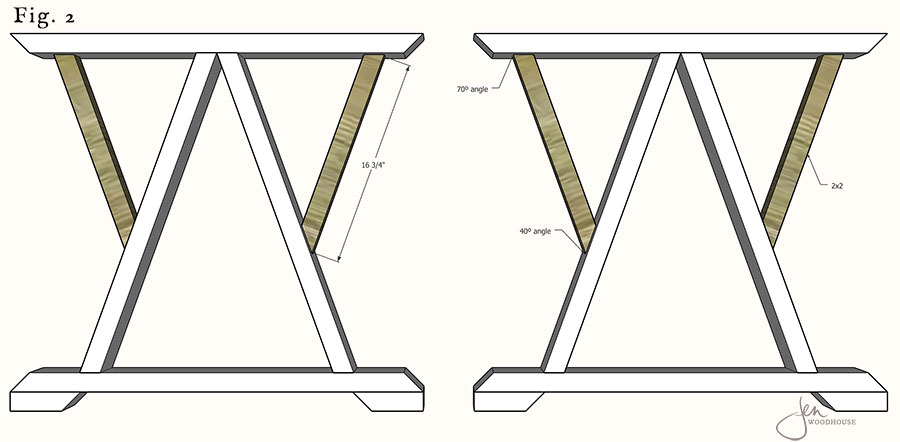
- (4) 2×2 @ 16 ¾ inches, cut one end to 70º and other end to 40º bevel (braces)
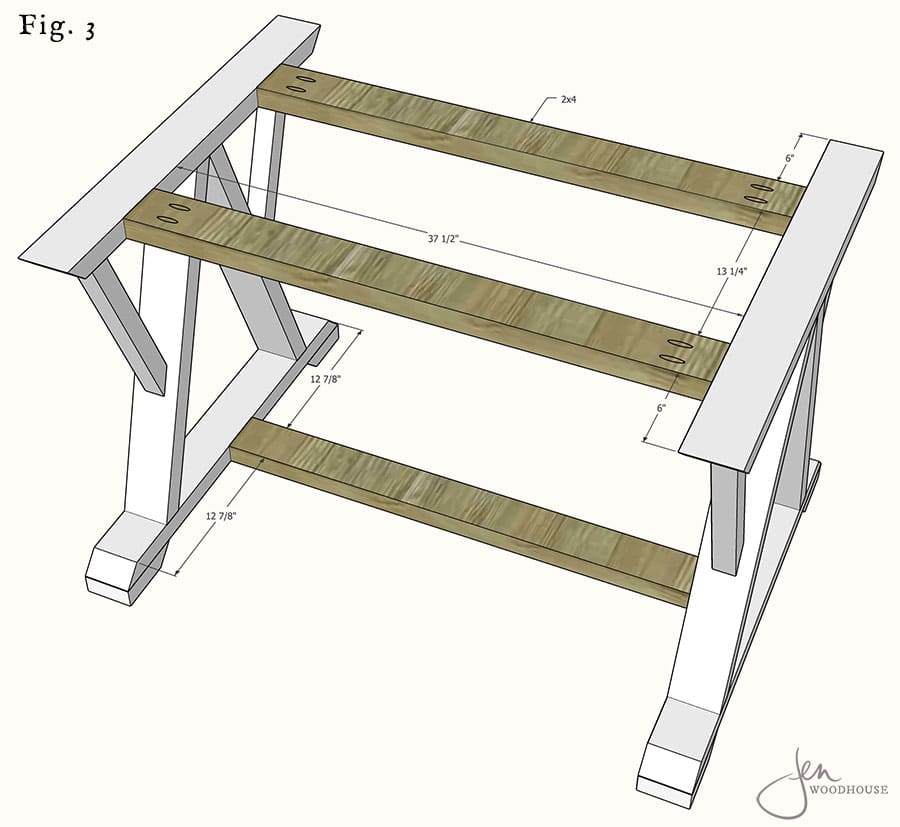
- (3) 2×4 @ 37 ½ inches (runners)
- (5) 1×8 @ 66 inches, see diagram for angled cuts (table top)
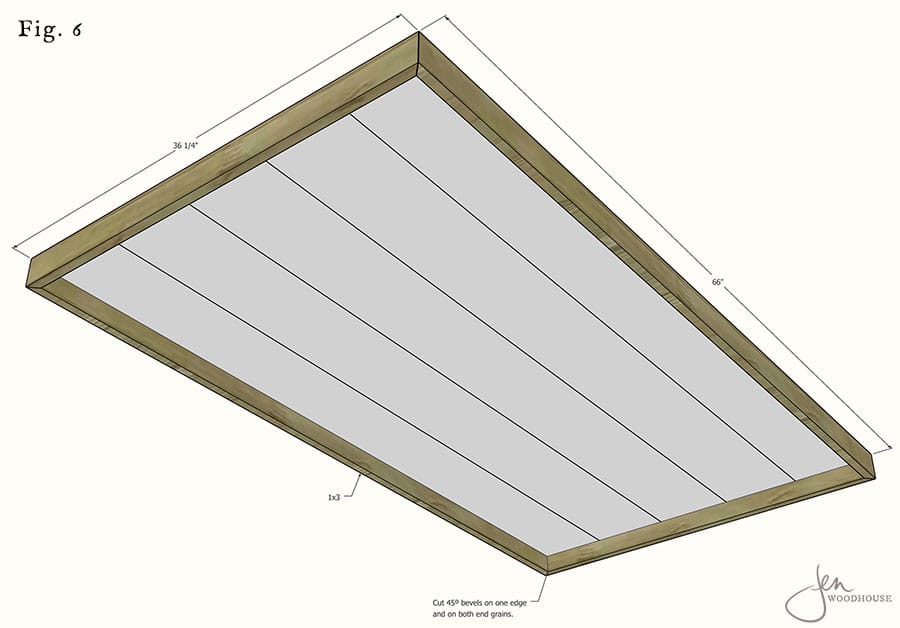
- (2) 1×3 @ 66 inches, see diagram for angled cuts (long sides of table top perimeter)
- (2) 1×3 @ 36 ¼ inches, see diagram for angled cuts (short sides of table top perimeter)
STEP 1 – BUILD THE LEGS
Measure, mark, and cut 2×4 boards to length as shown. The tops, bottoms, and feet are all cut at a 45º bevel. The angled “A” boards are cut at a 70º bevel. It’s best to cut these angles slightly long and shave off a bit at a time for the tightest fit. We call it “sneaking up on the cut.” Pre-drill pilot holes and use 2-inch wood screws and wood glue to attach.
STEP 2 – ADD THE BRACES
Measure, mark, and cut 2×2 braces to length. Note the different angles on each end. Again, I recommend cutting slightly long and shaving off a bit at a time for the tightest fit. Pre-drill pilot holes and attach braces to legs with 2-inch wood screws and wood glue. Countersink the screw heads so that you can cover them with wood filler or dowel buttons later on.
STEP 3 – ATTACH THE RUNNERS
Measure, mark, and cut the 2×4 runners to length. Drill 1 ½-inch pocket holes and attach as shown with 2 ½-inch pocket screws and wood glue.
STEP 4 – CUT THE CENTER TABLE TOP BOARDS
Measure, mark, and cut the 3 inner 1×8 boards to length. Edge-join the three boards together with biscuits (optional: to help with alignment) and wood glue. Clamp and allow to dry.
STEP 5 – CUT AND ADD THE OUTER TABLE TOP BOARDS
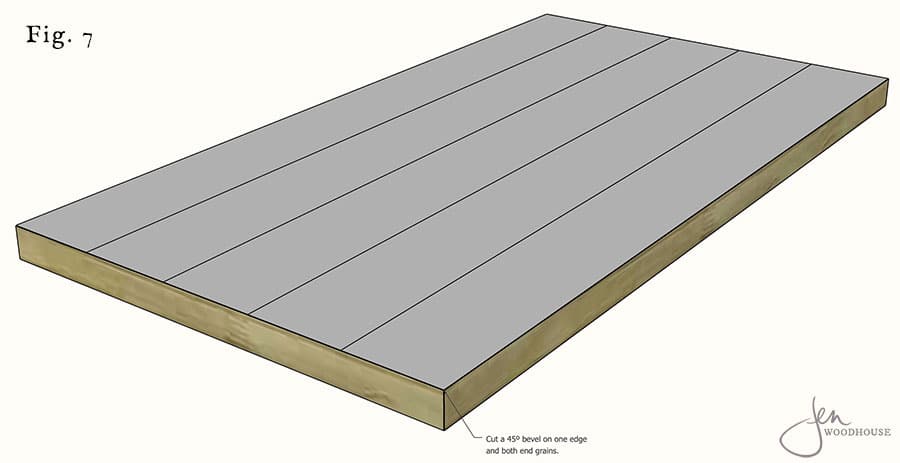
Measure, mark, and cut the 2 outer 1×8 boards to length. Cut the outer edge of both boards to a 45º bevel. Edge-join the outer boards to the tabletop. Clamp and allow to dry. Once dry, cut the short sides of the table top to a 45º bevel (end grains of all 5 boards).
STEP 6 – ADD THE PERIMETER
Measure, mark, and cut the 1×3 perimeter boards to length. Cut 45º bevels on one edge and both ends on all 4 boards.
STEP 7 – ATTACH THE PERIMETER
Attach the 1×3 perimeter boards to the table top with 1 ¼-inch brad nails and wood glue.
STEP 8 – ATTACH THE BASE
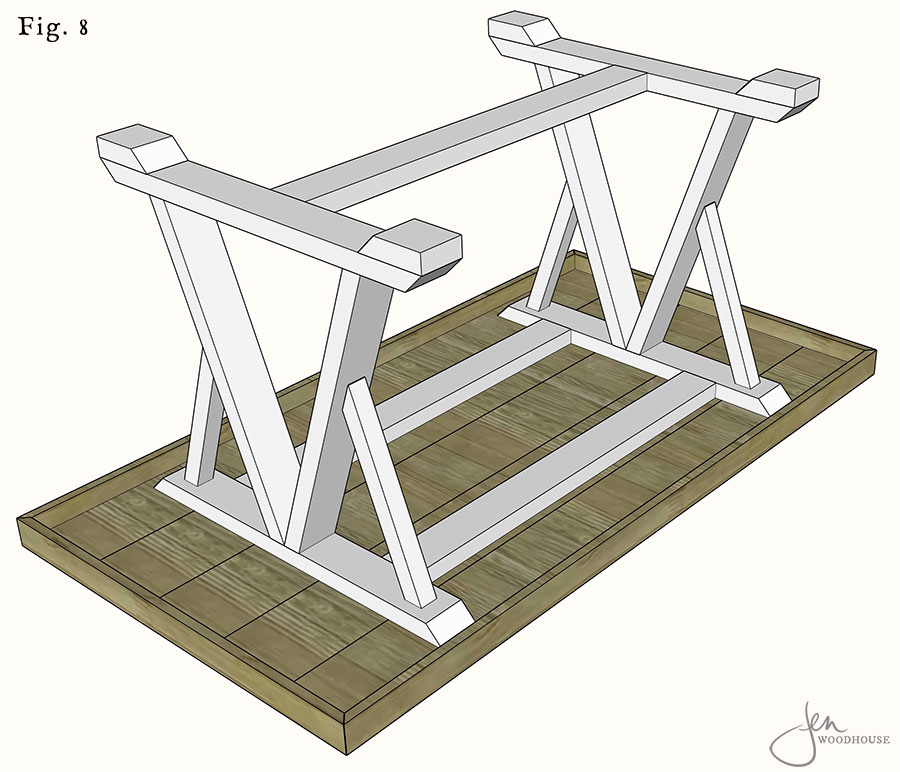
Lay a drop cloth on the ground and place the table top on it, with the top facing down. Flip the base upside down and center it over the table top. Pre-drill pilot holes and attach the base to top with 2-inch wood screws. You may opt to use Z clips or metal figure 8 fasteners instead.
Sand, stain and/or paint, and finish as desired.


What type of wood and stain did you use for this project?
I Love the look of it so I don’t want to guess and have it come out differently.
Thank you!!
Could you make this longer? How would you modify the supports? Thanks – great plans!
According to the plans, the table legs are cot to a 70 and 40 degree bevel… however, that angle does not correspond to the drawing. The drawing is clearly not a 70 degree cut…. Did you mean something else perhaps?!?!
Same here! 70 degrees is not even close I cut mine at 25 degrees instead.