Disclaimer: While I’ve made every effort to create these plans so that they “work” in theory, they have not been physically built yet, so they are not 100% tried-and-true. There may be some hiccups along the way, so please use these plans at your own risk! And if you do happen to build something from my unpublished plan library, please let me know! Tag #jenwoodhouse on social media for a chance to be featured on our social media accounts. I’d love to know how these plans worked out for you or if there are any modifications/revisions I should make for future builders. Please follow all tool safety guidelines. Be safe, have fun, and happy building!
*This post contains affiliate links.
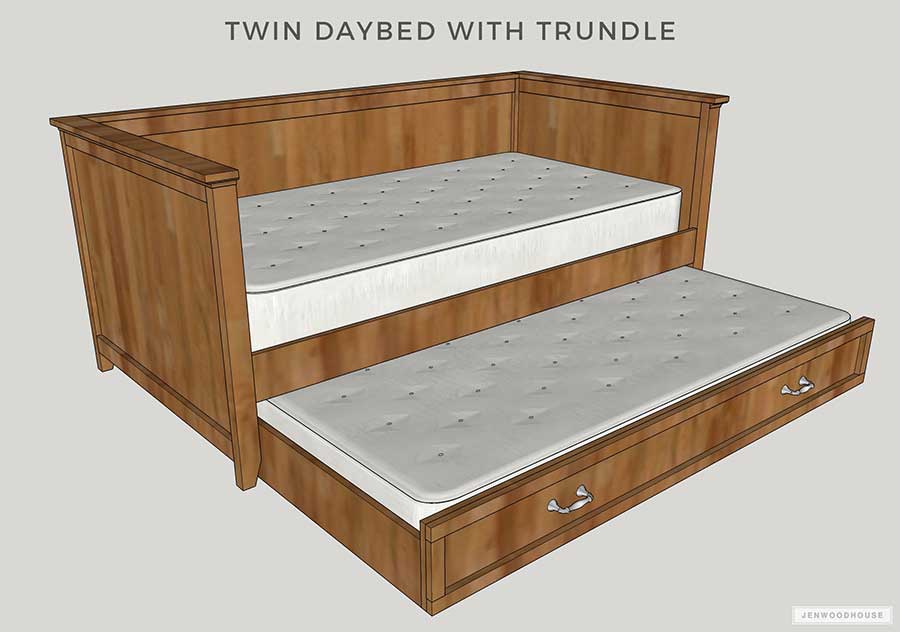
***The plans below are for the Twin Trundle Bed.
The coordinating Twin Daybed Plans can be found HERE.***
Materials:
- (1) 4 Ft. x 8 Ft. Sheet of 3/4-inch Plywood
- (2) 1 x 8 x 8 Ft. Boards
- (1) 1 x 10 x 8 Ft. Boards
- (2) 1 x 2 x 8 Ft. Boards
- (2) Drawer Pulls
- (6) 2-inch Rigid Casters
- 1 1/4-inch Pocket Screws
- 1 1/4-inch Brad Nails
- Wood Glue
- Wood Filler
Tools:
- Tape Measure
- Pencil
- Carpenter’s Square
- Cordless Drill/Driver
- Circular Saw
- Pocket Hole Jig
- Brad Nailer or Hammer
- Safety Glasses
- Hearing Protection
- Dust Mask
Cut List:
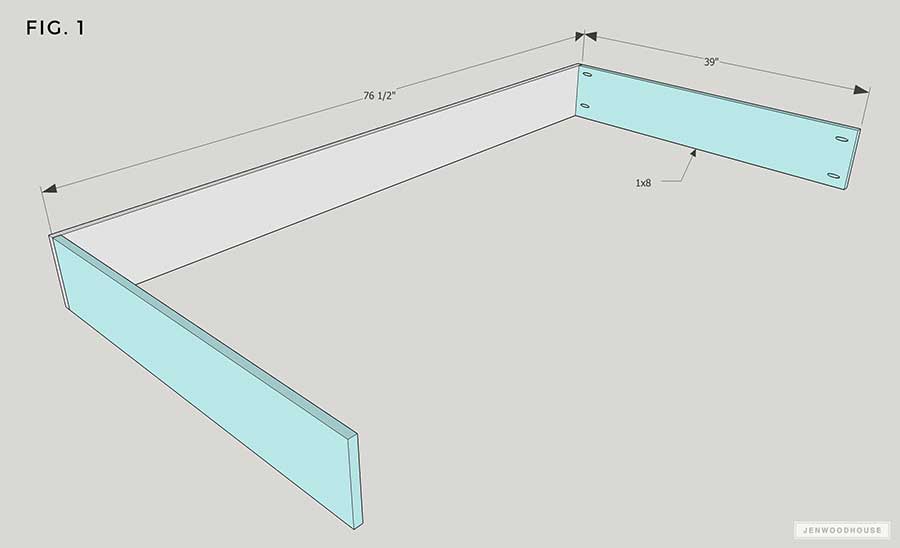
- (2) 1×8 @ 39 inches (trundle sides)
- (1) 1×8 @ 76 1/2 inches (trundle back)
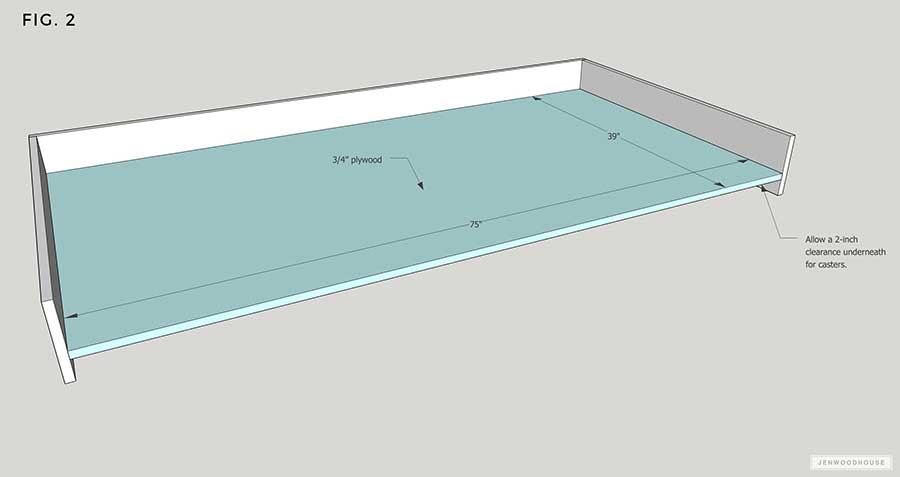
- (1) 3/4-inch plywood @ 75 inches x 39 inches (trundle bottom)
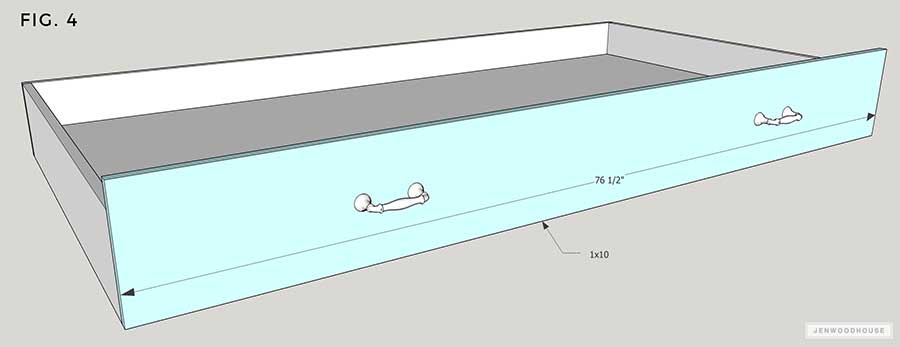
- (1) 1×10 @ 76 1/2 inches (trundle drawer face)
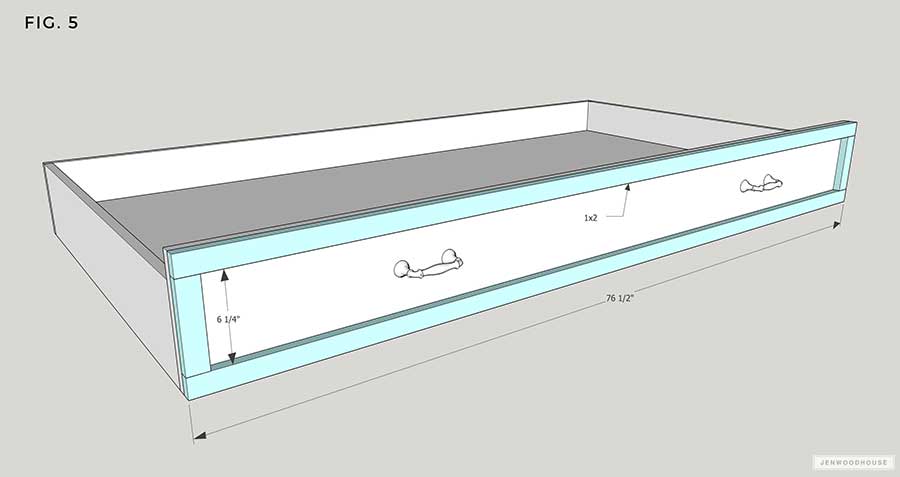
- (2) 1×2 @ 76 1/2 inches (trundle drawer face trim)
- (2) 1×2 @ 6 1/4 inches (trundle drawer face trim)
*Note Trundle mattresses are typically thinner than standard twin mattresses, so you’ll want to measure the thickness of your mattress and build your trundle box accordingly. The trundle needs to be low enough to fit under the 10-inch clearance of the daybed, but still allow for space underneath for the casters.

Step 1 – Build Three Sides of the Trundle Box
Measure, mark, and cut 1×8 boards to length. Drill 3/4-inch pocket holes into the ends of the sides as shown and attach the sides to the back with 1 1/4-inch pocket screws and wood glue.

Step 2 – Attach the bottom
Measure, mark, and cut 3/4-inch plywood to size. Drill 3/4-inch pocket holes around all four edges of the plywood and attach the back and sides with 1 1/4-inch pocket screws and wood glue. Be sure to position the plywood panel 2 inches from the bottom to allow for clearance underneath for the 2-inch casters.

Step 3 – Install the casters
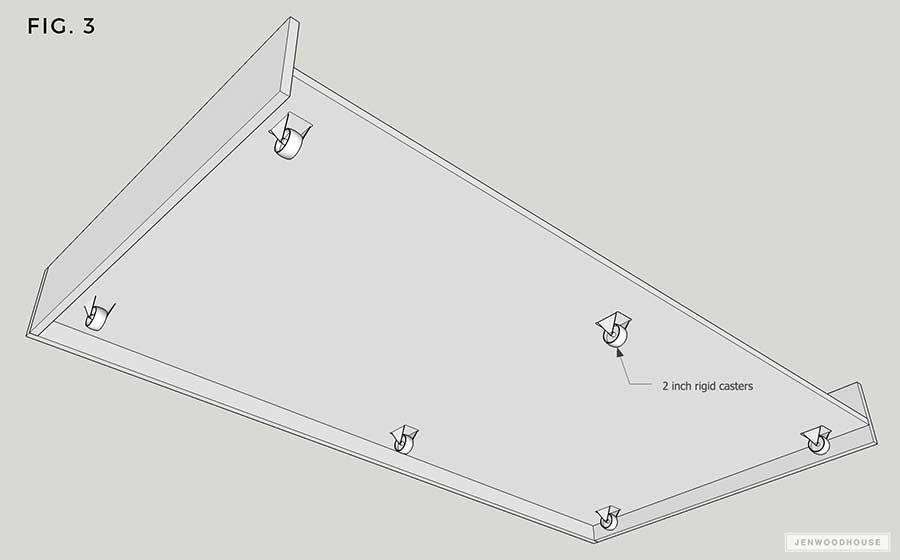
Screw on 2-inch rigid casters as shown.

Step 4 – Add the drawer face
Measure, mark, and cut 1×10 board to length. Attach to the trundle box with 1 1/4-inch pocket screws and wood glue. Install the drawer pulls.

Step 5 – Attach drawer face trim
Measure, mark, and cut 1×2 boards to length. Attach to the drawer face with 1 1/4-inch brad nails and wood glue.
Fill all holes with wood filler, sand, stain and/or paint, and finish as desired.
What about the plans to the upper bed.? Trying to combine kids as we have another one on the way that needs her own room.
Hi Mike,
The plans for the twin bed are linked in the post. Here they are again: https://jenwoodhouse.com/twin-daybed-plans/
Thanks!
This is really nice…can I please get the plans for the daybed.
Thanks
What kind of handles did you use, just regular cabinet/drawer pulls? Are they strong enough to pulls the plywood, etc? Thanks!