Welcome to the final installment of our DIY Mudroom Lockers Series! In this comprehensive guide, discover how we transformed our ex-pantry closet into custom, built-in mudroom lockers – a stylish, functional drop zone designed to keep clutter from coats, bags, shoes, and everyday essentials at bay. Whether you’re searching for mudroom locker ideas, organization tips, or a step-by-step DIY tutorial, this post has you covered.
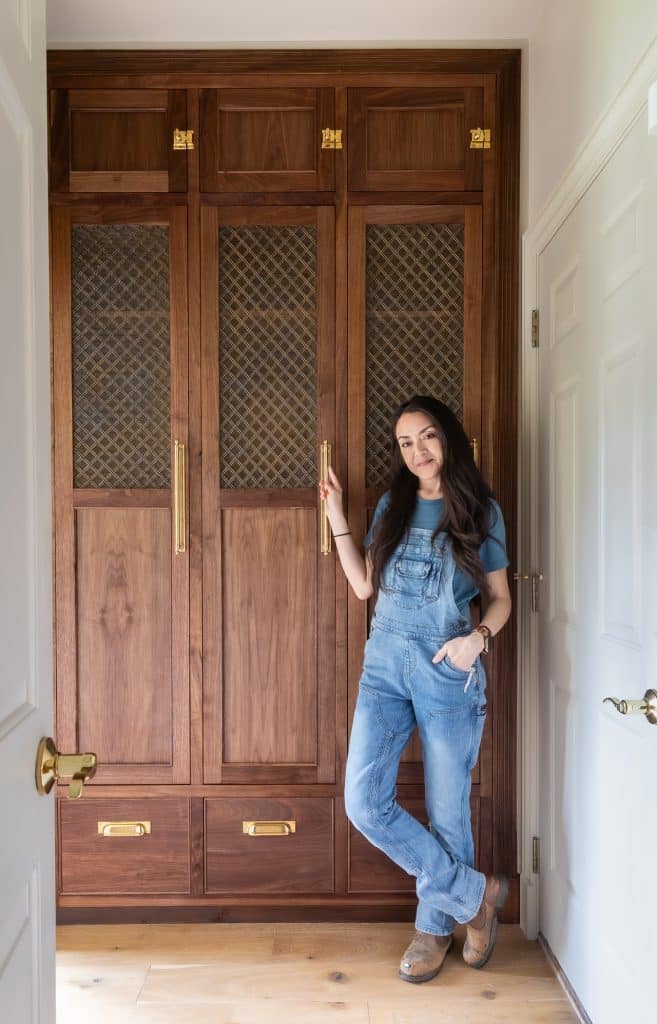
This is it. This is the moment we’ve all been waiting (and working so hard) for! Man, I learned a ton on this build and am a better carpenter for it. This journey has taught me new carpentry skills, refined my building techniques, and shown just how transformative a mudroom makeover can be. After weeks of milling, building, installing, adjusting, problem-solving, and fine-tuning, our custom black walnut DIY mudroom lockers are finally complete!
If you missed the previous posts in this series, you can catch up here:
Part 7: Finishing Touches and Final Reveal (you’re here!)
*All materials, tools, and supplies we used for this DIY Mudroom Locker project are linked at the end of this post.
Where We Started…
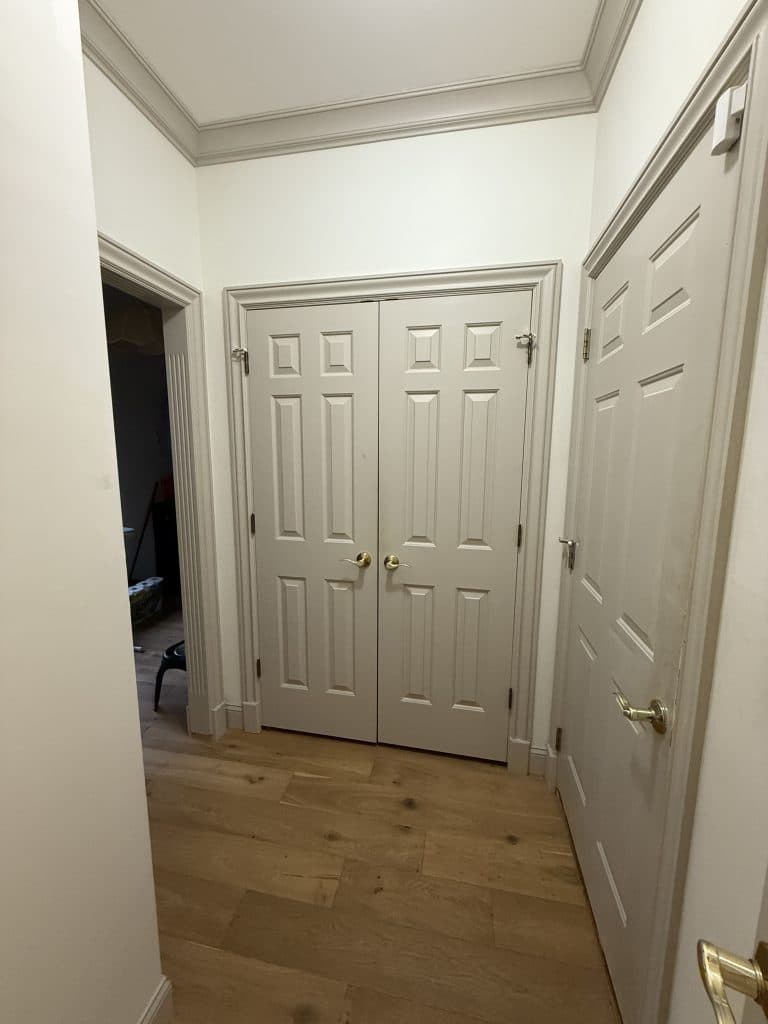
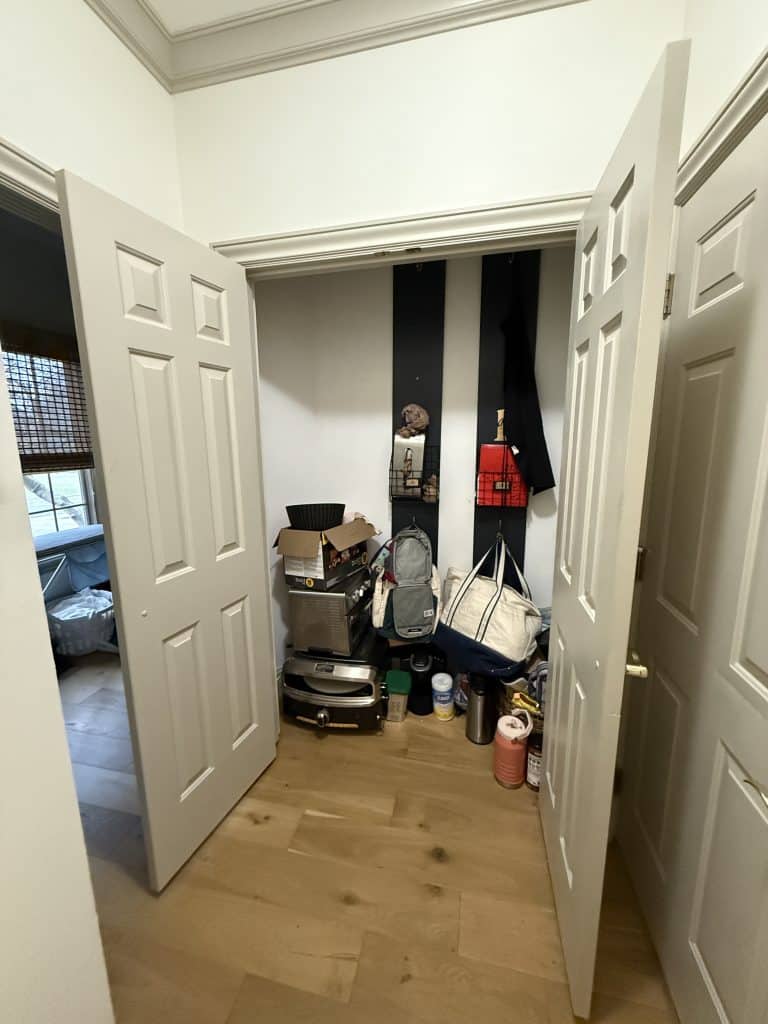
Before you skip ahead to the finished photos of this mudroom locker project, let’s quickly rewind to see where we started: a dysfunctional, inefficient, and uninspiring closet space that was begging for a functional upgrade.
BeforeBefore
Finishing Touches: Trim and Organization
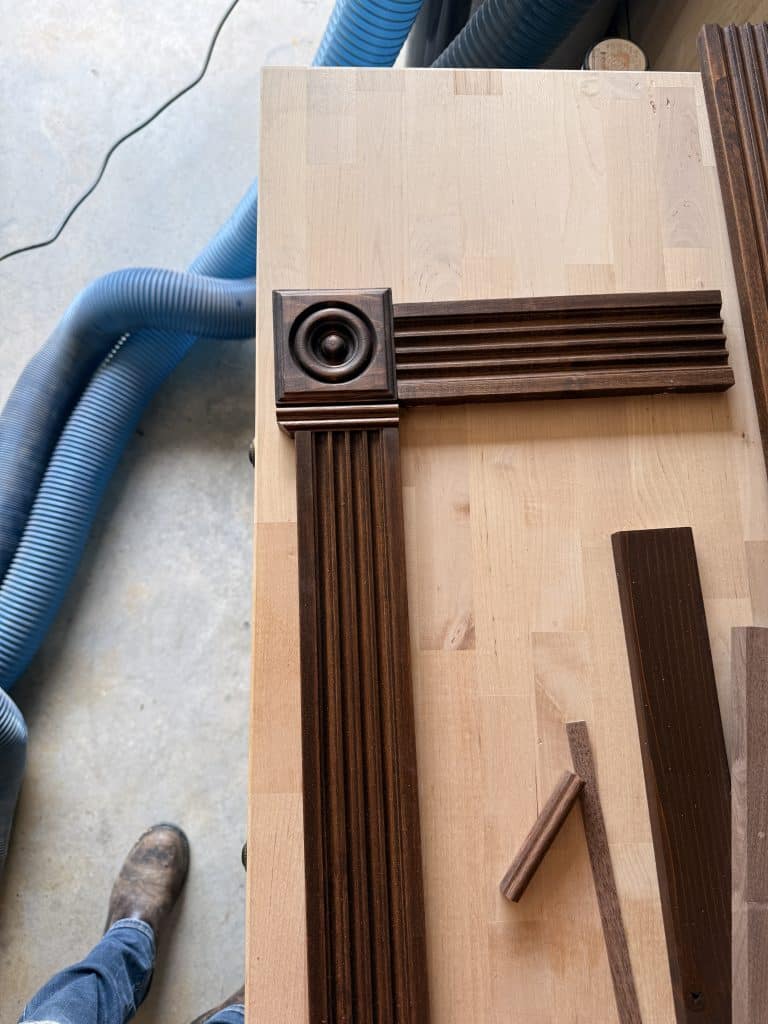
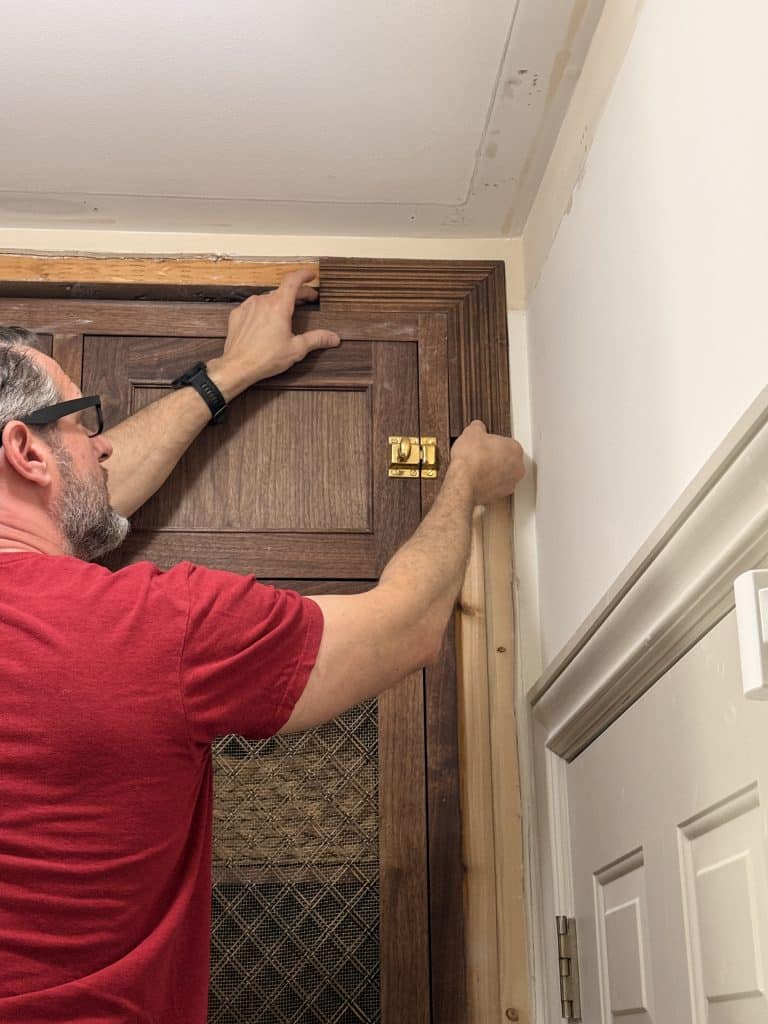
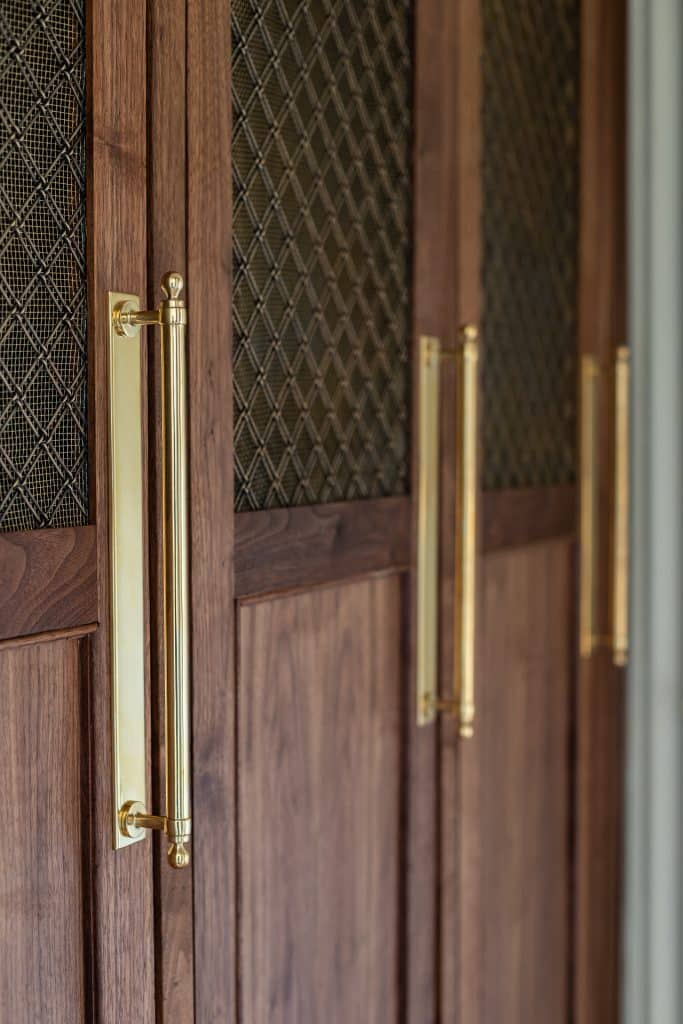
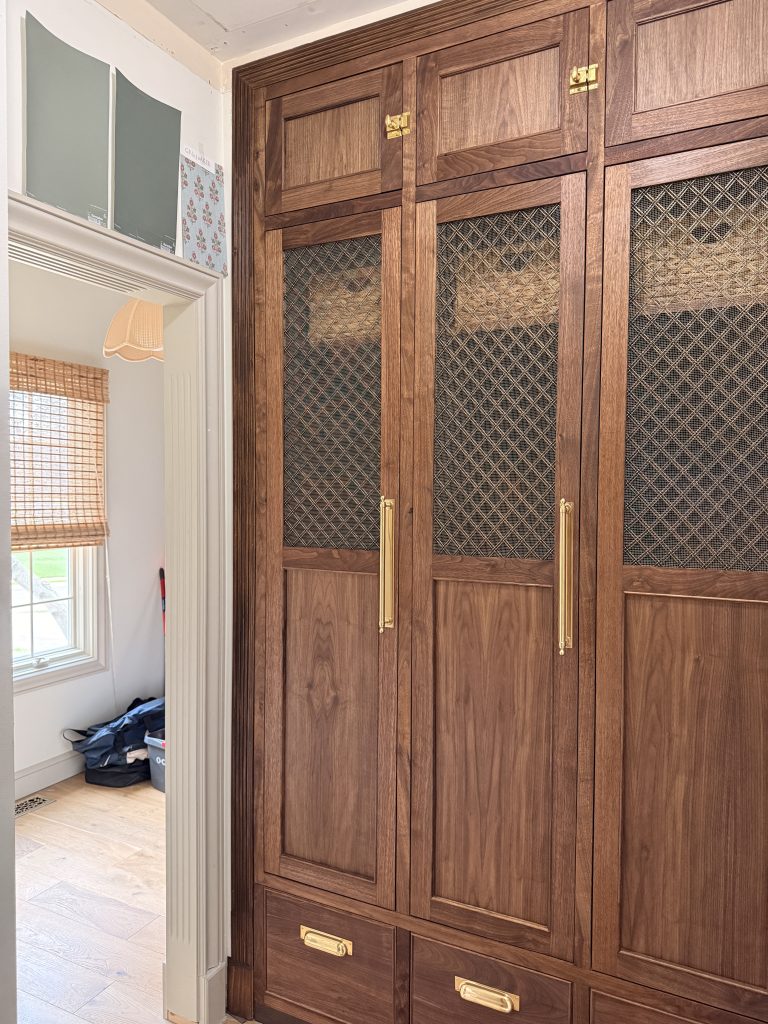
Adam and I went back and forth on how to trim out the mudroom locker cabinets. He suggested we use rosettes, and I wanted a cleaner look with the mitered trim. In the end, we both agreed to nix the rosettes and go with a simple mitered casing (big surprise… happy wife and all that).
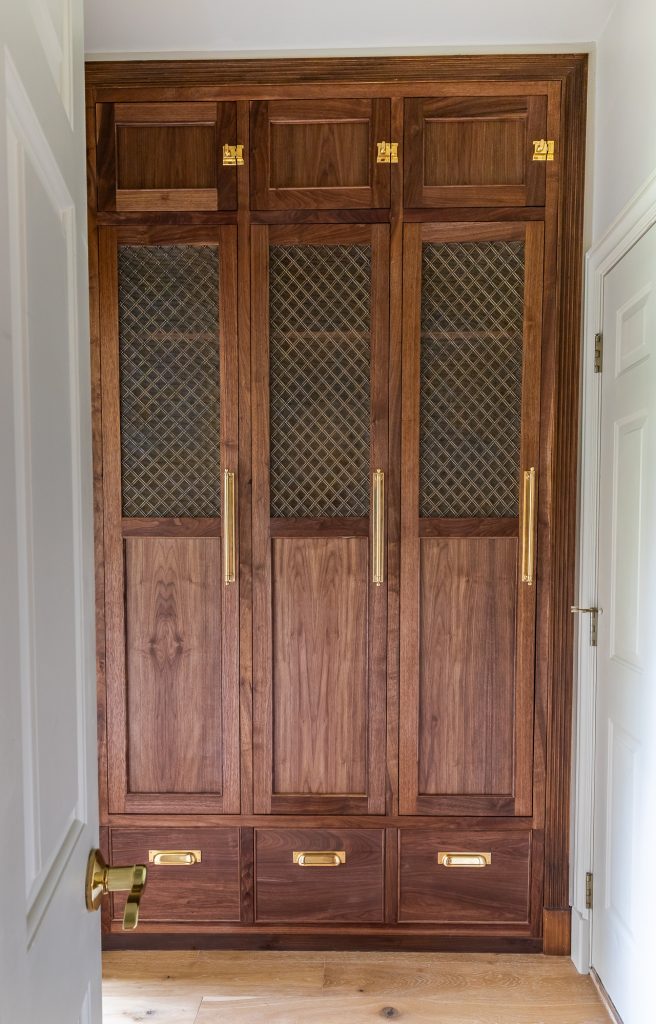
The Final Reveal
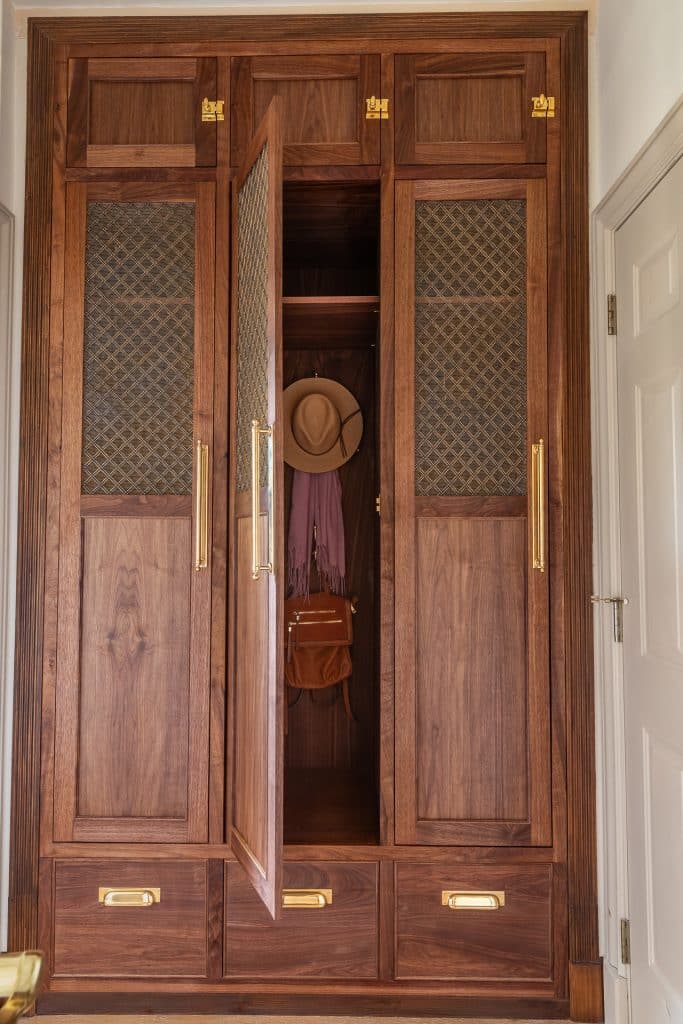
We still need to touch up a few drywall and paint spots, but the mudroom lockers themselves are complete and fully functional. The transformation is already making a huge difference in our daily routine and home organization.
Ceilings: 9 feet high Mudroom: 63″ wide x 41″ deep (not including the cabinetry, which goes back 24 inches deep) Upper Cabinet: 16 1/2″ wide x 12 1/2″ high x 24″ deep Locker: 18″ wide x 71 1/4″ high x 24″ deep Drawer: 16 1/2″ wide x 12 1/8″ high x 24″ deep
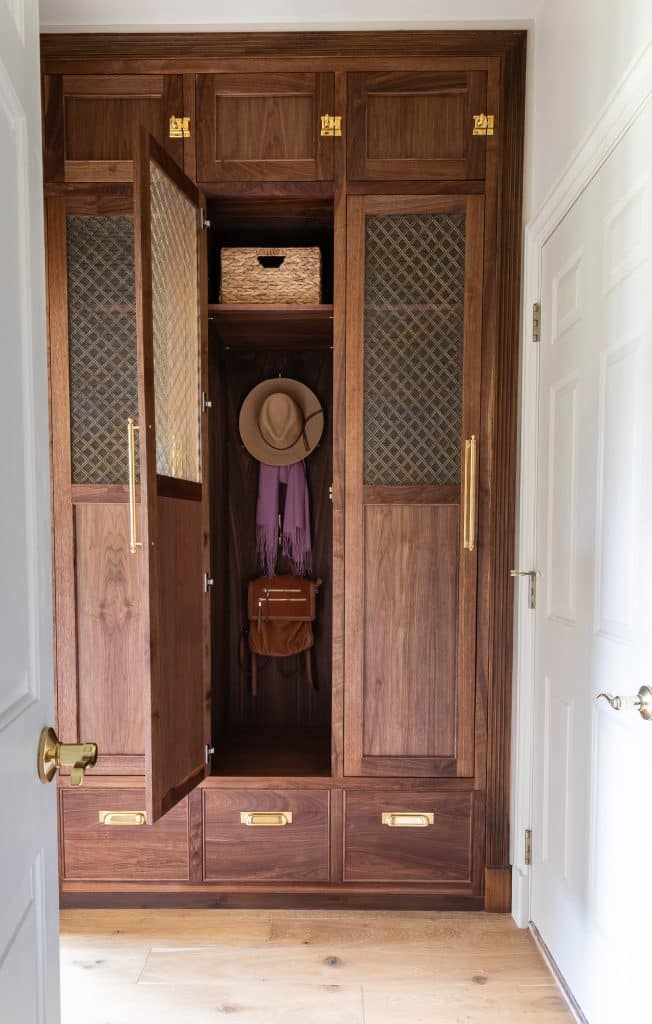
Smart Storage Ideas and Clever Mudroom Organization Features
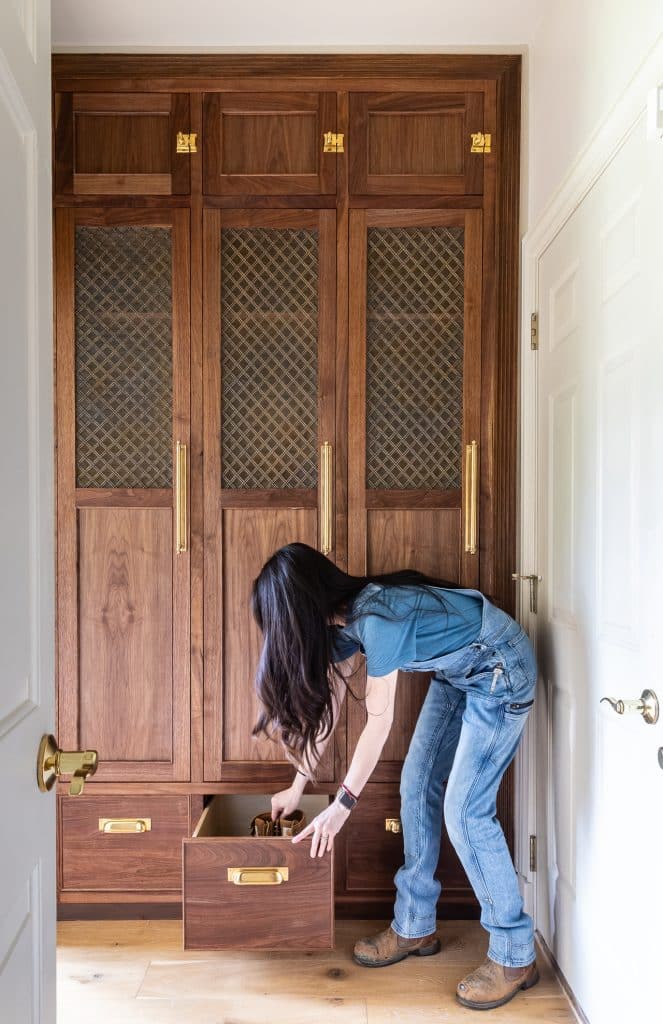
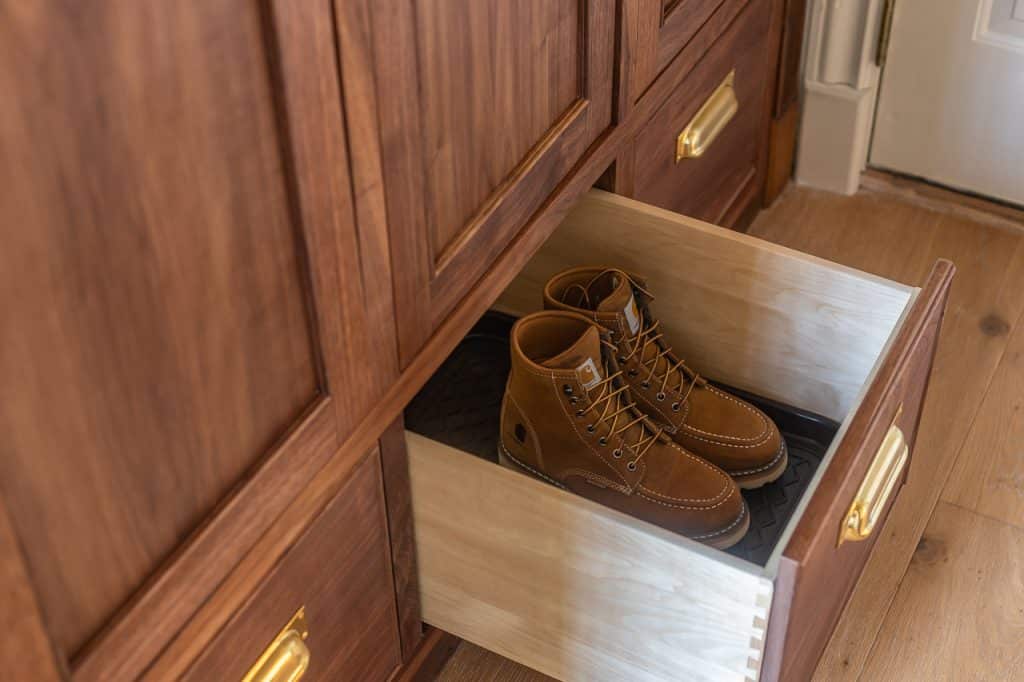
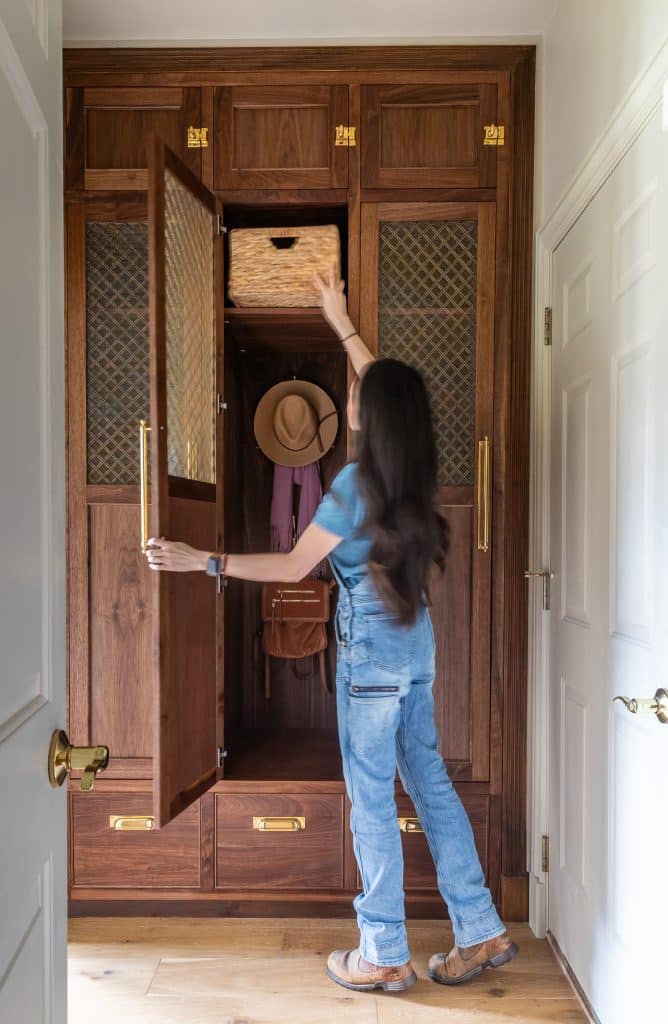
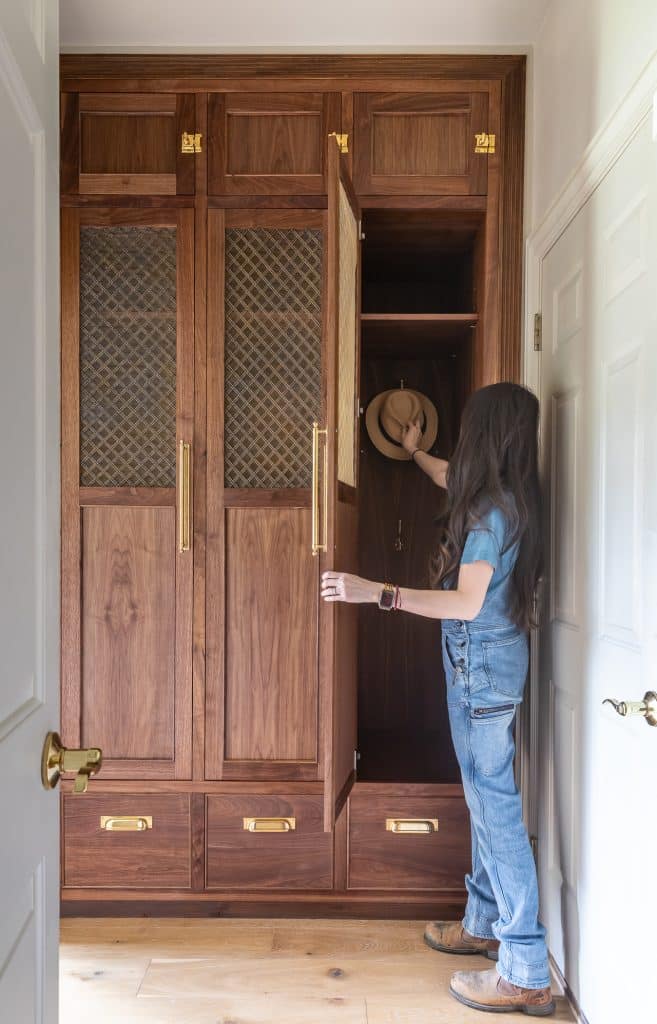
The upper cabinets provide storage for less-frequently used items, such as overstock supplies (paper towels, toilet paper, light bulbs, etc.), while the deep drawers below are perfect for organizing shoes. Pro tip: Place a boot tray at the bottom of your drawer to protect it from muddy or snowy boots! The lockers themselves are ideal for hanging bags, backpacks, jackets, coats, and sports gear, keeping everything organized and easy to access.
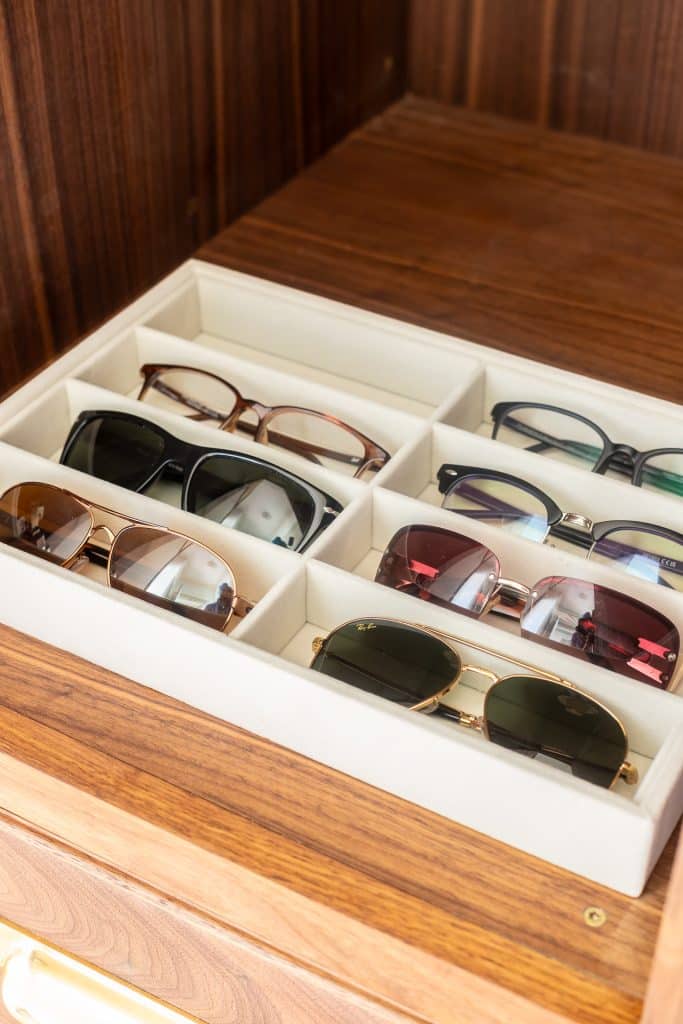
And I kind of love this velvet sunglasses organizer. We also relocated the existing outlet inside the left locker – perfect for charging devices, adding even more functionality to this mudroom locker system.
And of course, we all love a good side-by-side before & after comparison:
What I Learned From This Mudroom Locker Build
This build taught me the importance of thorough planning, patience, and adaptability. I picked up valuable carpentry skills like precise cabinet-making, custom hardware installation, and maximizing every inch of storage space. There were plenty of problem-solving moments, from dealing with uneven walls to sourcing the right walnut boards for those extra-long locker doors.
Investing time in the design phase and double-checking all measurements saved me a lot of headaches down the line. I also learned that having the right tools on hand makes a world of difference: my SawStop Professional Cabinet Saw was an absolute game-changer for this project.
This project took longer than expected, but the result is so worth it. The mudroom lockers have transformed our daily routine, making our entryway more organized and our home less cluttered. My advice for anyone considering a similar project: take your time, expect surprises, and focus on solutions that fit your household’s unique needs. Every challenge is a learning opportunity, and the end result is incredibly rewarding!
Would I Do Anything Differently in My Mudroom Locker Project?
So… remember my original design board? I thought I wanted wallpaper in this room, but now that I see the mudroom lockers in place, I’m second-guessing my original design. I’m not fully convinced this particular wallpaper pattern fits the vibe in here. The black walnut is rich and refined, and I’m afraid the wallpaper will make the room look more juvenile. So many decisions, and at this point, my brain doesn’t have the bandwidth to make clear decisions. Thoughts?
If you’ve been following along with this custom DIY mudroom locker series – thank you, I’m glad you’re here! And if you’re planning your own mudroom project, I’d love to hear about it. Leave a comment below or tag me on Instagram (@jenwoodhouse) so I can see what you’re building!
Mudroom Locker FAQ: Common Questions Answered
Q: Why did you build these mudroom lockers instead of buying them? A: I wanted a fully custom fit for this space, higher-end materials (walnut and brass mesh), and design flexibility that you just don’t get with store-bought units. By building these mudroom cabinets ourselves, we were able to control the design, choose the materials, and create something truly one-of-a-kind.
Q: How much did this project cost? A: Costs will vary depending on what materials you choose (wood species), availability, and region. For rough cut 4/4 kiln-dried black walnut in my area, my lumber cost was approximately $1,200. The three drawer boxes were approximately $400, and the hardware (drawer slides and hinges, not including brass pulls, latches, and hooks) was about $245. Total estimate: under $2,000! This project could have easily been five figures if we had hired a contractor.
Q: How long did this entire project take? A: If you’re solely focused on this project, I’d guesstimate you could knock it out in a couple of weeks from start to finish. For us, it took closer to two months because our process is much more involved. I start with a general design plan, but there are always pivots and problem-solving as we go. I’m essentially figuring out the best process in real time before turning it into a tutorial (I like to say I make all the mistakes so you don’t have to). On top of that, creating content adds a significant amount of time – filming multiple angles and multiple takes, capturing photos, and documenting each step for both video and blog. Even the PDF plans themselves go through multiple revisions before they’re published.
Q: Is this project beginner-friendly? A: This is an intermediate to advanced-level project, especially because of the inset doors and custom milling – but don’t let that intimidate you. Many parts of this project can be simplified and are very doable if you break them down step by step.
Q: Why did you choose walnut? A: Walnut is my favorite wood species to work with! It’s rich, beautiful, durable, and easy to build with. If you want that custom, heirloom-quality look, walnut is hard to beat.
Q: Where did you get the black walnut plywood? A: PureBond® Hardwood Plywood, of course! We’re so grateful to have them as a sponsor and partner in this project – we couldn’t have done this project without them. PureBond is sold at various stores, and people can buy a wide range of panel options (species and thicknesses) through The Home Depot store’s Pro Desk. Ask for Columbia Forest Products in the Quote Center. Many options are also available online at homedepot.com, delivered in 2-3 days!
Q: Where do you find the best sources for lumber? A: Local lumberyards almost always stock better quality wood at more reasonable prices than the big box stores. Plus, the staff actually knows about wood and can help you find exactly what you need. I usually start by searching online for “local lumberyard near me,” “hardwood lumber,” or “cabinet-grade hardwood supplier.” Look for kiln-dried lumber (ideally 6-8% moisture for indoor projects). Build a relationship with your lumberyard – they’ll often give you access to better wood or allow you to hand-pick boards.
Q: Could this be built with lower-cost materials? A: Absolutely! Pine, poplar, maple, and oak are often less expensive than walnut. And if you wanted painted cabinets, even better – you could use paint-grade materials like plywood or MDF. The structure of the project – the cabinet boxes, layout, and overall design – stays exactly the same.
Q: Why did you choose inset doors instead of overlay? A: I must be a glutton for punishment. Just kidding. I prefer the clean, high-end look of inset doors and think they have a level of precision and craftsmanship that really elevates the entire piece. I wanted to challenge myself and grow my carpentry skills. Overlay doors are more forgiving and a great option if you want a simpler, more beginner-friendly approach.
Q: What finish did you use and why? A: I used my favorite hardwood oil finish, Rubio Monocoat Oil Plus 2C in Pure. Black walnut + Rubio Monocoat is always a winning combo because it enhances the natural color and woodgrain while still offering durable protection. The application is foolproof too – just one coat, and you’re done.
Q: What do you store in each locker? A: We store everyday items like shoes, backpacks, jackets, and anything we might need as we’re heading out the door. The upper cabinets are great for less-frequently used items and for stockpiling things like paper towels and toilet paper. There is so much more functional space now, and I am absolutely giddy about it. There is also a power outlet in the first locker, so we can charge our devices.
Q: What would you change or do differently now that the project is complete? A: I’m always learning with every project I take on. A lot of what I do is figuring out the best process as I go, so naturally, I refine things after seeing it all come together. If I wanted to make this project easier, I would have most likely purchased pre-fab locker and cabinet doors with the overlay option. Also, the long 71-inch stiles on the locker doors were tricky to source (quarter-sawn walnut), mill, construct, and install.
Q: What was the most challenging part of this project? A: The most challenging part wasn’t just the physical build – it was all the mental load behind it. There’s so much that goes into a project like this beyond just cutting and assembling wood. I’m constantly thinking through every detail from start to finish – designing, problem-solving, making decisions, and second-guessing those decisions along the way. A big part of it is anticipating issues before they happen, and the reality is, you don’t always know what you don’t know. Those unknowns can absolutely impact the final result, so there’s a lot of mental energy spent trying to think a few steps ahead at all times. But that’s also part of the process – working through it all is what allows me to turn it into a clear, step-by-step tutorial afterward. One of my favorite pastimes is problem-solving, but my brain was definitely exhausted by the end!
Source List:
*This may seem like a large laundry list of tools and supplies; however, many of them are marked with an asterisk to denote that they are not necessary, but “nice-to-haves.” And if you’re not milling your own lumber, you won’t need a jointer or thickness planer.
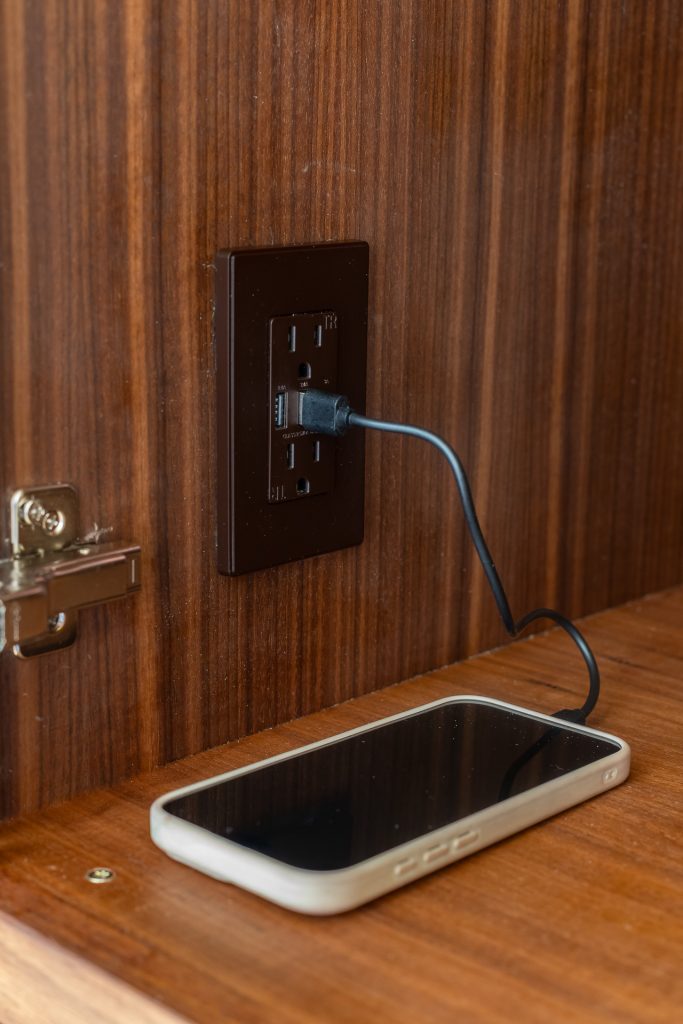


wow, stunning!!! I’m blown away, this is such a big improvement. The sunglass storage and a phone charging outlet, gosh I’m sooooo jealous hahaha
Beautiful!