*This post is sponsored by The Home Depot.
Hello friends! It’s the most wonderful time of the year: gift-giving season! Gift cards are the perfect gift for those hard-to-shop-for folks on your Christmas list. Oh, you know the ones. The picky ones. The judgy ones. The ones who already have everything, so what could you possibly get them that doesn’t make you look like you’re a person of questionable life choices?!
And when you hand them the gift card, the presentation is all “womp womp… here’s your dumb gift card because I couldn’t think of anything else to get you, nor was I creative in the delivery of said gift card.”
I mean, do you wrap the gift card? That seems silly and ineffective. How many times have you received a gift-wrapped gift card and were like, ‘omg, what is it? Is it a bicycle? Is it a unicorn? Did you seriously get me a unicorn?!’
Nope. Sad face.
Congratulations.
You have failed at life.
Although receiving a gift card for a unicorn would be dope. Where would you redeem that? Unicorns are supposedly immortal, right? Would that gift card have an expiration date?
Ermahgerd you guys. I just squirreled.
My apologies.
Anyhoo… if you know anything about me, you know that I believe that presentation is everything, even more so this time of year. So, instead of just stuffing the gift card down their throat stocking, you’re going to rock this gift card presentation thing and I’m going to show you how.
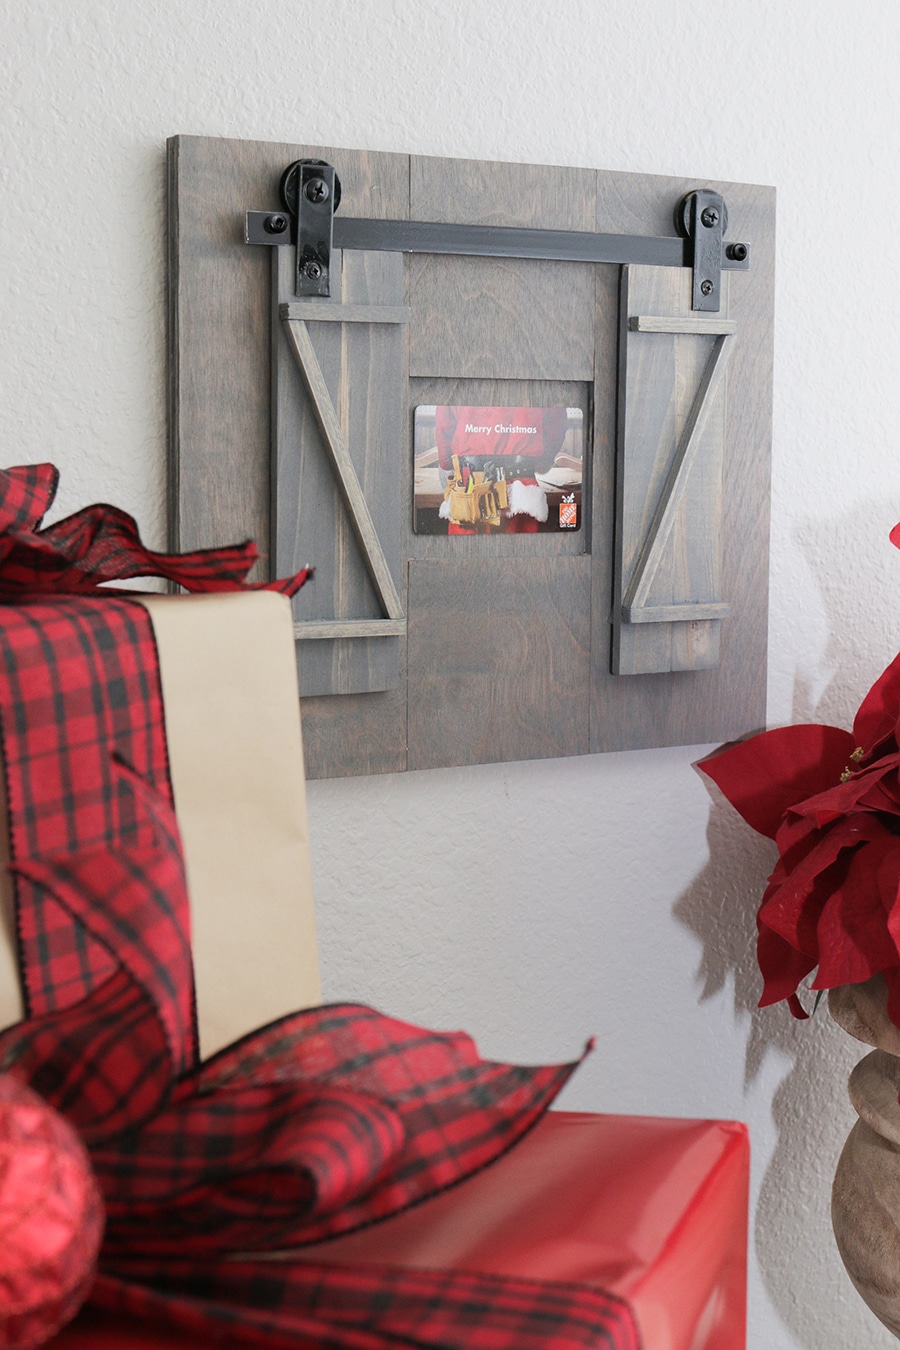
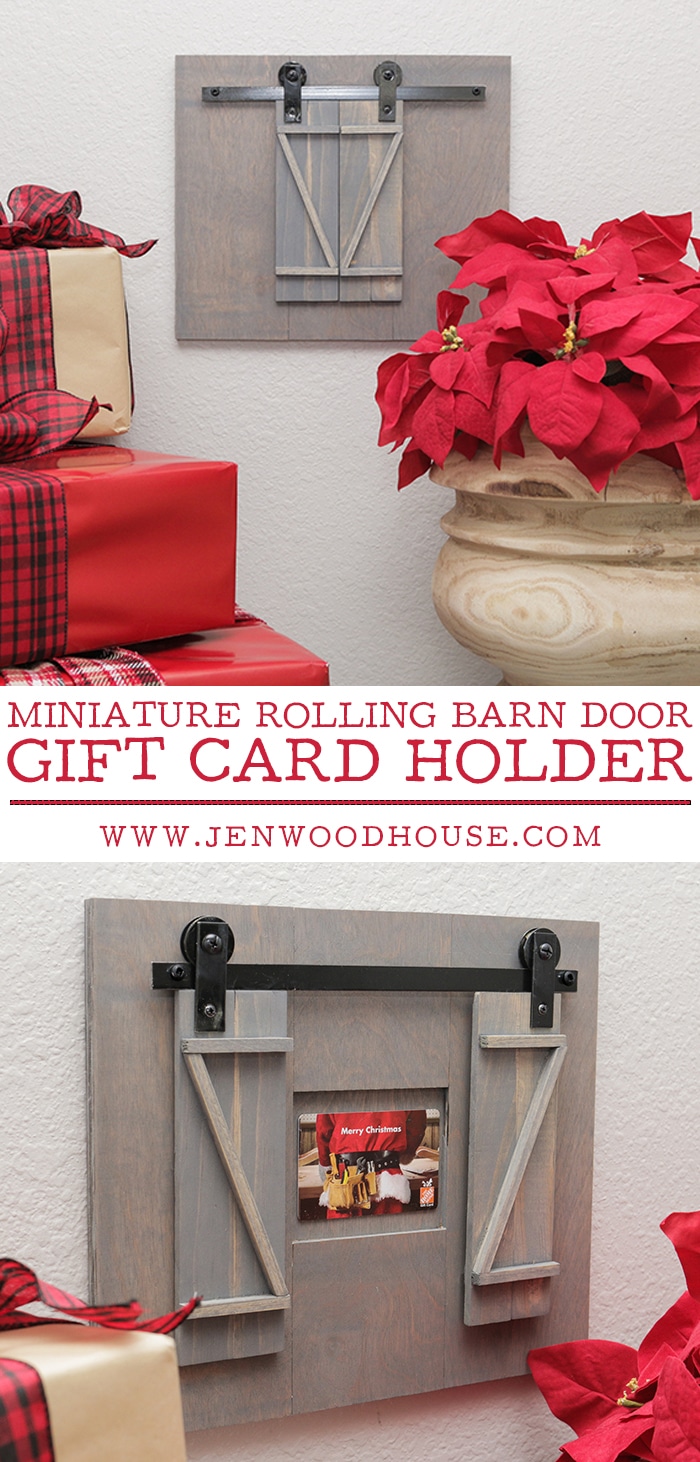
I have four words for you: miniature. rolling. barn. door.
Alright, let’s do this.
Step 1: Purchase gift cards. The Home Depot has a ton of fun new festive designs. Click the link below to take a peek. And if none of those ready-made designs are your bag, you can even design your own gift card! What. Bananas!
Click here to mail or email a gift card today
Step 2: Wander aimlessly around The Home Depot until inspiration strikes. Because, how in the world are you going to build a miniature rolling barn door? What materials are you going to use? It’s not like we have Wonka Vision, friends, so we’re gonna have to MacGyver the crap out of this.
Step 3: Look completely lost so that several Home Depot employees ask if you need help.
Me? Do I need help?
More than you know, brother, more than you know.
Enter friendly, neighborhood Home Depot employee, Lee.
Lee: Ma’am, can I help you find something?
Me: Yes, but I don’t know what I’m looking for…
Lee: ??? (a look of bewilderment)
I then explained to him what I was trying to build and he replied, “Oh, so you don’t really have a plan then. You’re just making this up as you go along.”
Yup. Exactly, Lee. Congratulations. You didn’t know you were signing up for this nut job when you asked if I needed help, didja? Bless your heart.
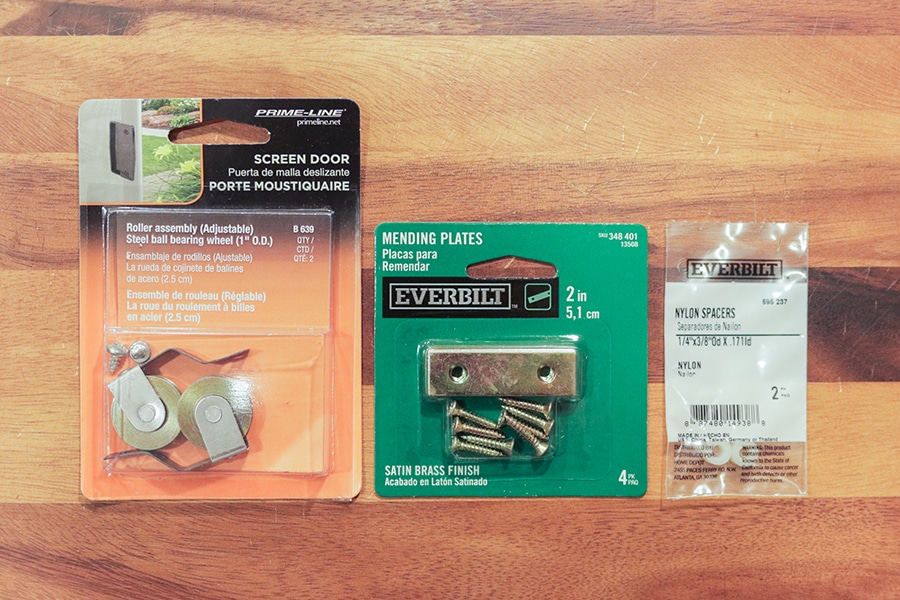
Lee was super helpful though – we put our heads together and found our way to the shower and screen door hardware, where there was a plethora of tiny wheels. Yes! Exactly what I was looking for! Thank you for reading my mind, Lee. You are the bomb dot com, good Sir.
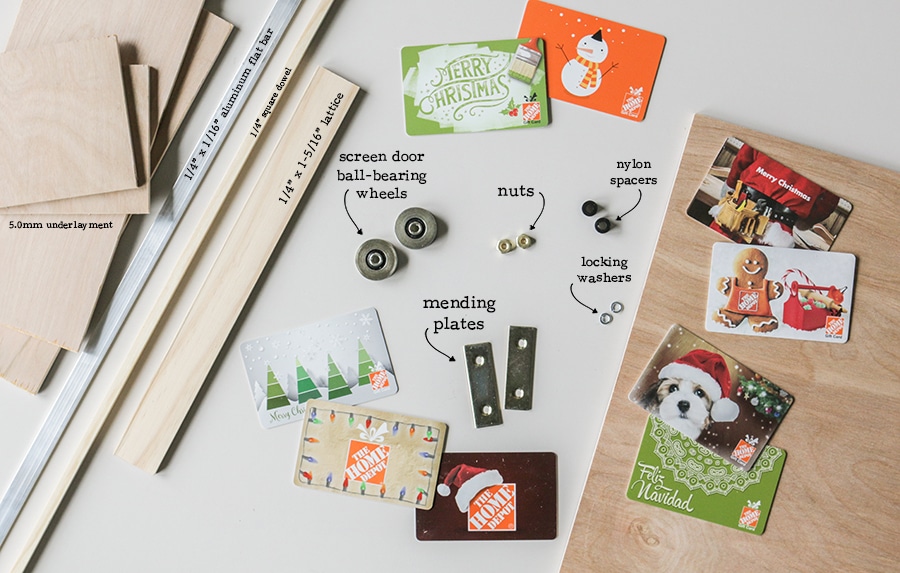
Step 4: Gather materials. Approximate cost: $20.00
Miniature Rolling Barn Door Hardware:
- (1) 1/2″ x 1/16″ x 36″ Aluminum flat bar
- (2) screen door ball-bearing wheels (I couldn’t find a link for you, but I found these across from the rope and chain aisle.)
- (2) 2″ mending plates
- (2) nuts
- (2) locking washers
- (2) 1/4″ x 3/8″ nylon spacers
Miniature Rolling Barn Door Materials:
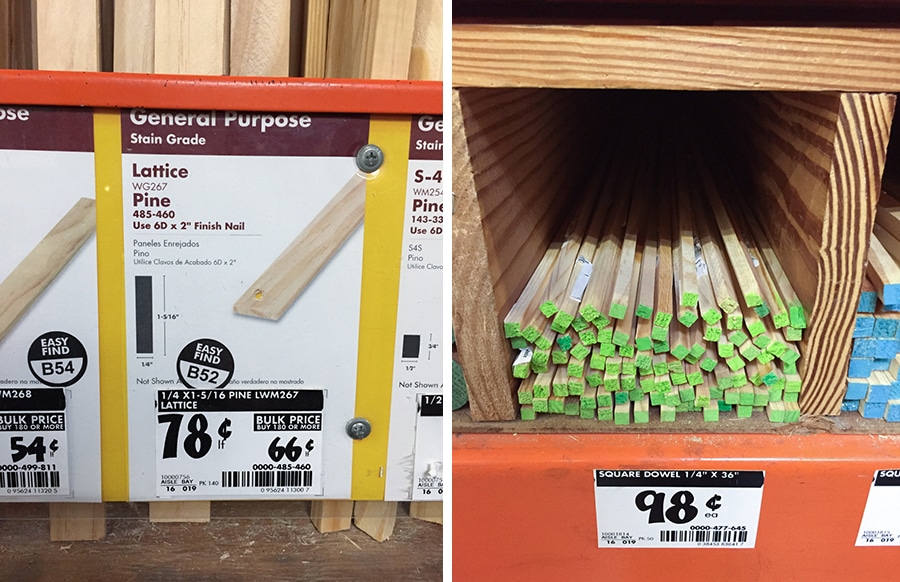
- (4) 1/4″ lattice @ 7″ long (you can also use paint sticks!)
- (4) 1/4″ square dowels @ 2-1/4″
- (2) 1/4″ square dowels @ 5″
Frame Materials:
- (1) 5.0mm underlayment @ 11-3/4″ x 10″ (back)
- (2) 5.0mm underlayment @ 10″ x 4″ (sides)
- (2) 5.0mm underlayment @ 3-3/4″ x 3-1/2″ (top/bottom)
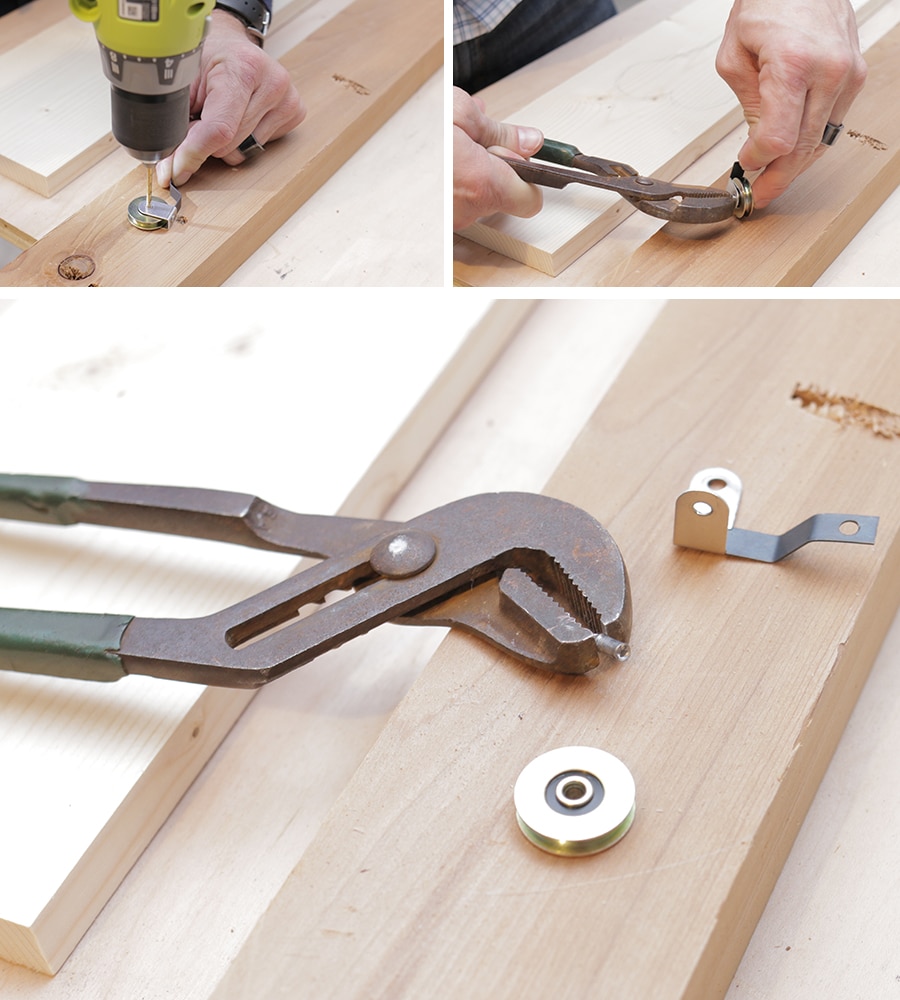
Step 5: Disassemble the screen door wheel. We want to use just the grooved wheel part, so we’ll need to take the other stuff off. Use a drill bit that will fit inside the rivet to push the rivet out. Then use pliers to pull the pieces apart. Discard everything but the wheel.
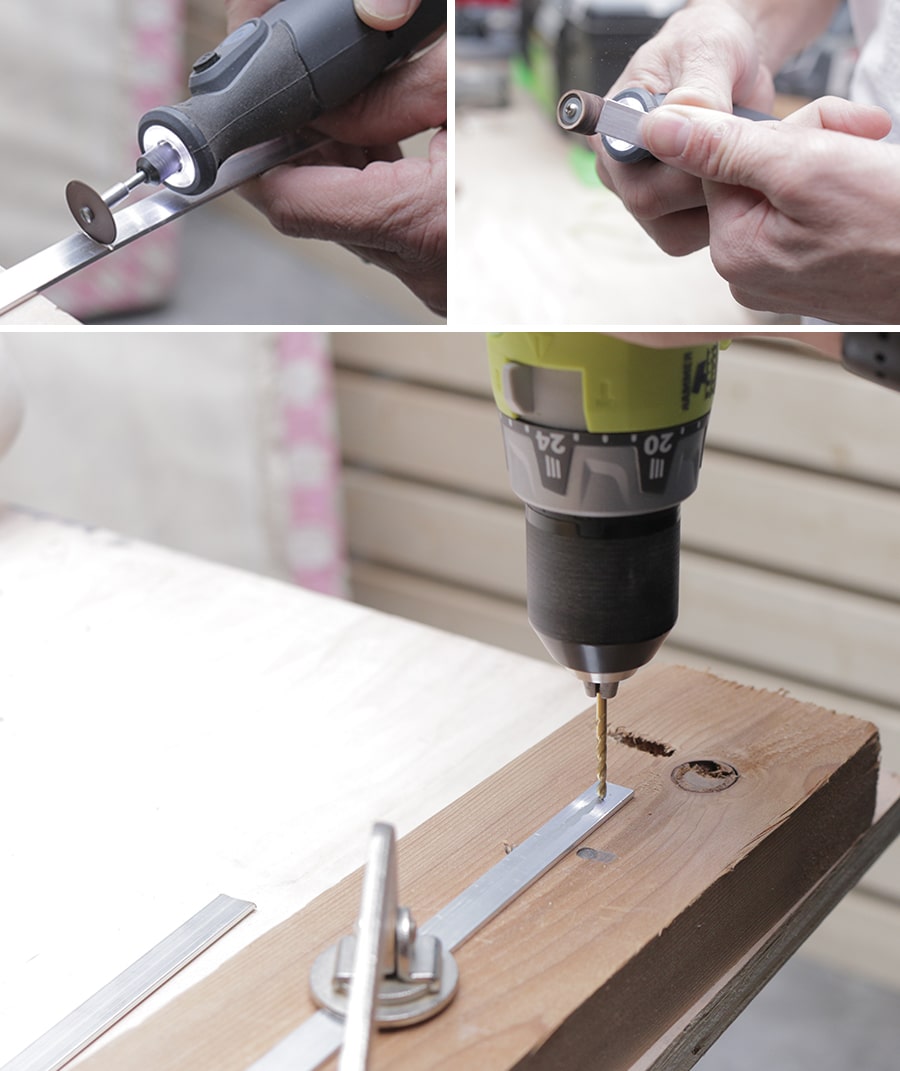
Step 6: Make the track bar. Measure and mark 10 inches on the aluminum flat bar. Use a Dremel rotary tool to cut to length. If you don’t have a rotary tool, no worries – you can use a good ol’ fashioned hacksaw and some elbow grease if you have to. This aluminum bar is thin enough that it won’t be too difficult to cut through.
Sand down any sharp edges and then drill a couple holes at each end. You’ll need to sand down the holes too because the drill will bring up shards. Sand ’em flat so you don’t shred your fingers. These holes will be to attach the nylon spacers later and give some clearance on the track bar so that the grooved wheels will roll easily along the track.
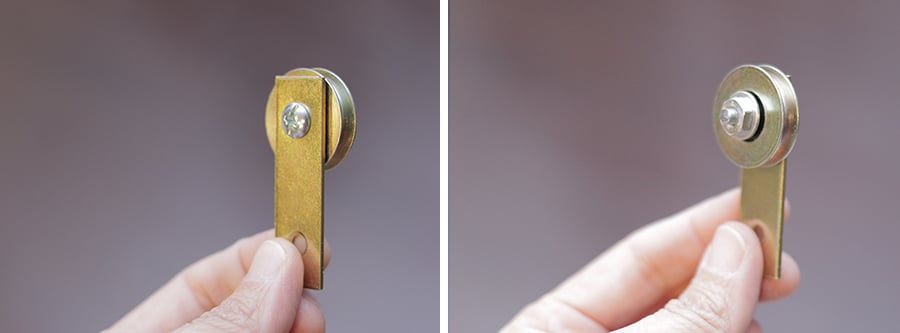
Step 7: Assemble the wheels. Here’s what it’ll look like. Screw the mending plate to the wheel with a machine screw, then place a locking washer and nut on the other side. I didn’t have the right size machine screw on-hand, so I just used the cut-off wheel on the Dremel to cut off the excess. You can also use bolt cutters if you have them. Then, this whole thing will be attached to the barn door with another screw at the bottom of the mending plate.
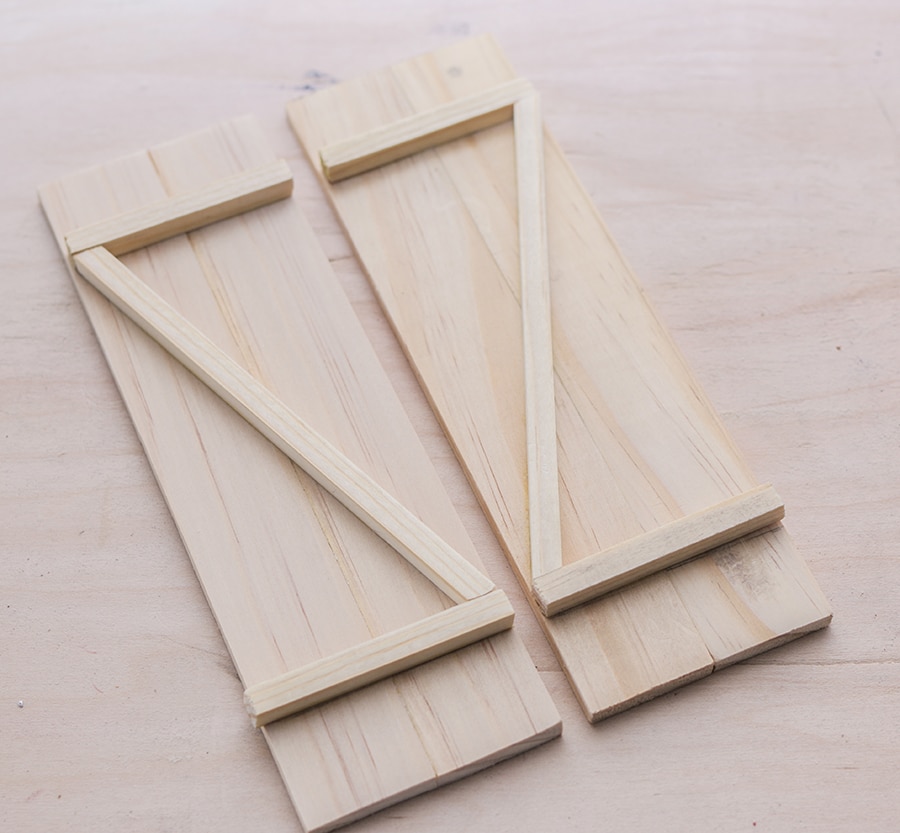
Measure, mark, and cut the square dowels and attach them to the lattice with wood glue. For the angled pieces, it’s best to just hold it in place, then mark it and cut it to fit the angle. I recommend cutting them slightly longer and then just shaving or sanding a little off at a time to get a snug fit. I used a small coping saw to cut the dowels.
Pre-drill a pilot hole and attach the hardware to the door. Be sure to place the hardware on the door so that you have enough clearance for the track.
Step 9: Make the back frame. I wanted the gift card to sit in a recess so that when you open the barn doors, it reveals the gift card underneath. This is what the underlayment is for. I cut a piece for the backing, then framed it out with more underlayment, attaching it with glue. Then, I glued the nylon spacers in place, pre-drilled pilot holes for the screws, then screwed the track bar on top of the spacers.
Hang the barn doors up and use a glue dot to hold the gift card in place.
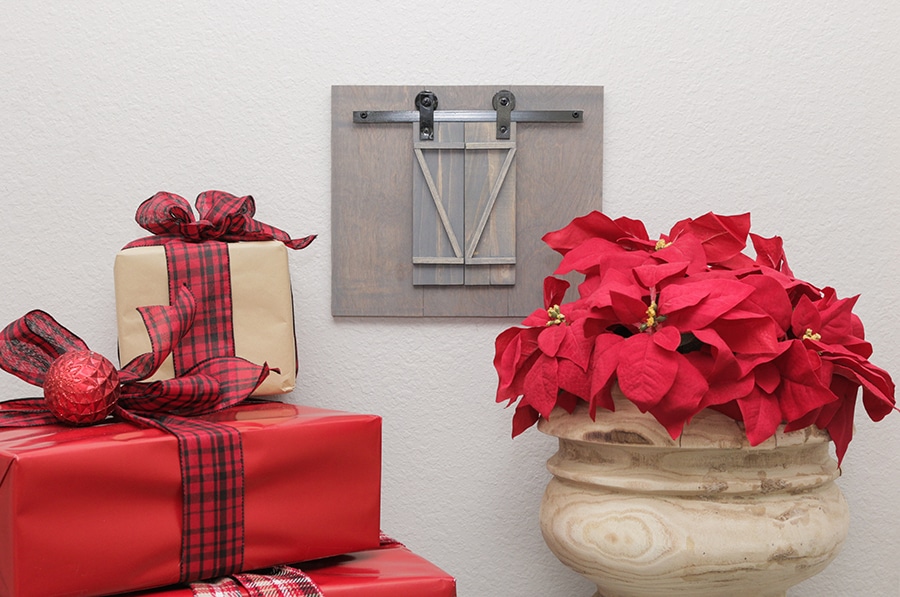
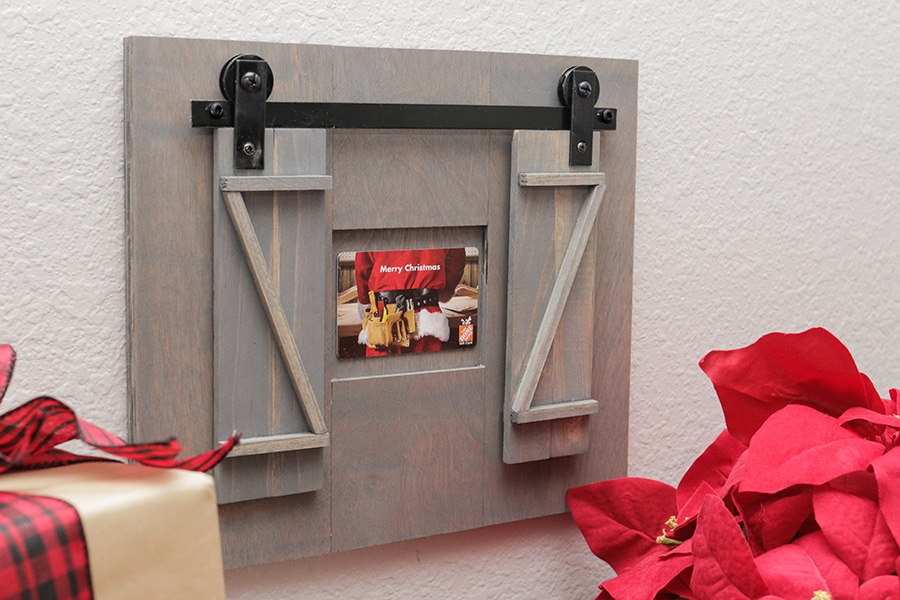
See now? You will never give a gift card in shame again. You are welcome.
Step 10: Present your gift card like a boss; succeed in life.
Be sure to PIN IT so you don’t forget it!
Want to see even more creative ways to give a gift card? Check out how my blogger friends made their DIY gift card holders!
- Ciburbanity
- DIY Huntress
- That’s My Letter
- Just Destiny Mag
- Sawdust 2 Stitches
- My Sweet Savannah
- Look Linger Love
- Finding Silver Pennies
- Love & Renovations
- Petite Party Studio
- Classy Clutter
- Mr. Buildit
- Proper
- All Things Thrifty
*I acknowledge that The Home Depot is partnering with me to participate in this Holiday Gift Card Program (the “Program”). As a part of the Program, I am receiving compensation in the form of products and services, for the purpose of promoting The Home Depot. All expressed opinions and experiences are my own words. My post complies with the Word Of Mouth Marketing Association (WOMMA) Ethics Code and applicable Federal Trade Commission guidelines. This post contains affiliate links.



![EPIC Woodhouse Christmas Vacation! [2023] EPIC Woodhouse Christmas Vacation! [2023]](https://jenwoodhouse.com/wp-content/uploads/2024/07/image-11-400x400.png)
I cannot handle this. 🙂 Only you could pull this off!! AMAZING!
Thanks so much friend!
Do you have an approximate cost of how much this was to make?
The materials for this mini barn door cost about $20.
I love this idea so much!!! I wish someone would make it for me! LOL! Guess I’ll have to make it for myself! Thanks for the inspiration!!!!
I don’t know how you come up with your ideas, but they rock. I’m totally doing this one today. You are amaaaazing!
Thanks for the kind words, Sarah – likewise! I LOVE your projects!
This stuff are amazing! I now have a new gift idea for the upcoming event.. thanks a lot!
The barn frame was absolutely amazing. It would also look better if you add a glass to frame the picture to preserve it..but overall, the aesthetic value of the craft is priceless!
Me encanto la puerta de granero, bien ilustrada, con los materiales y la realización paso a paso. EXCELENTE !!!