Welcome back to our Built-In Mudroom Locker Project! We’re in the midst of transforming an awkward, dysfunctional closet into custom mudroom lockers with upper cabinets and bottom drawers, and today is Demo Day! If you missed the previous posts in this series, you can catch up here:
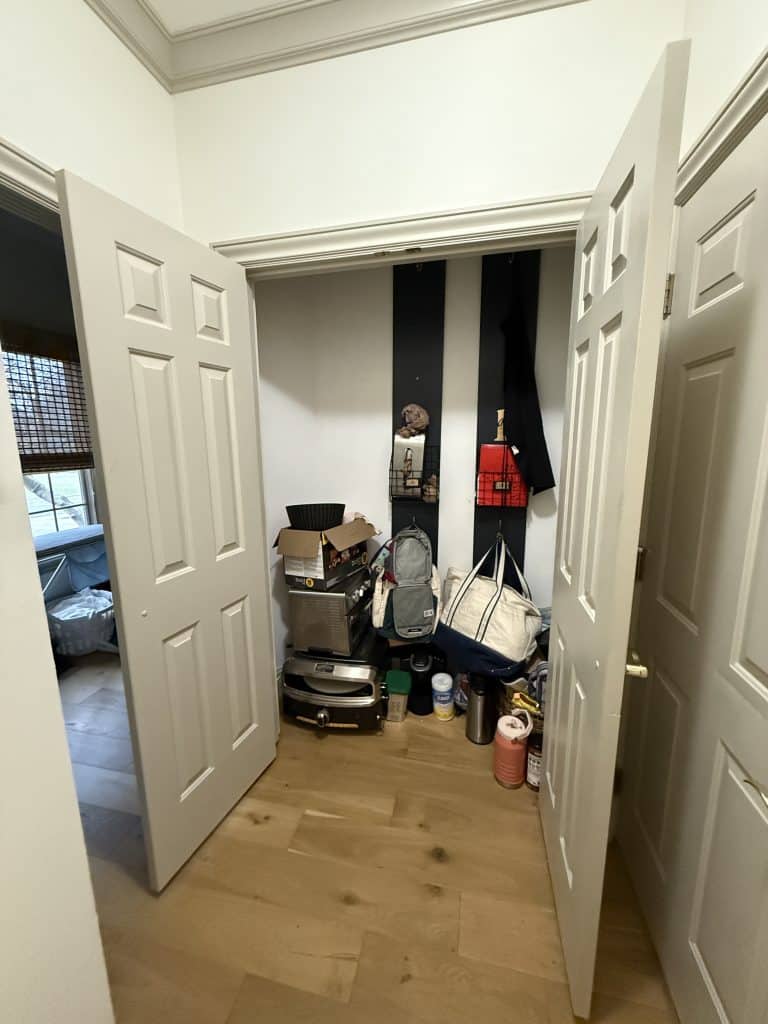
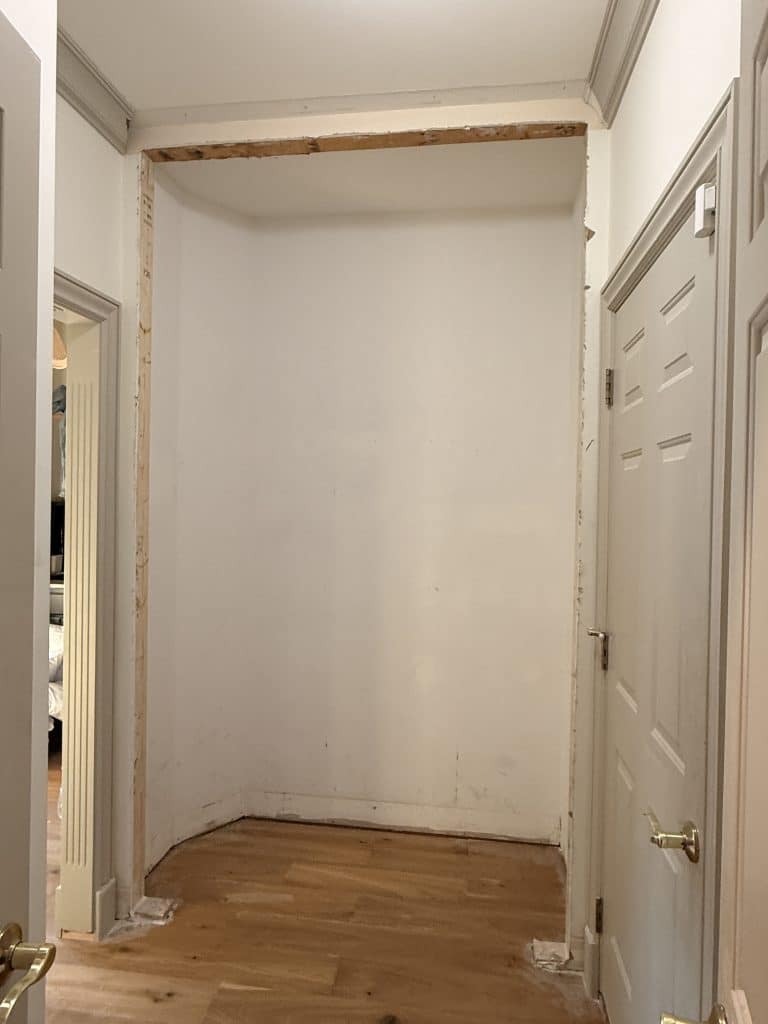
Adam loves Demo Day – his childhood nickname was “Wrecker” after all. Demo day is one of the most important steps in any built-in remodel. We first removed the doors, door trim, and jamb, and cut into the drywall to see exactly what we were working with. This helped us answer a few key questions:
Is the wall load-bearing?
How is the opening actually framed?
Do the existing dimensions support the design I planned?
Is This Wall Load-Bearing?
Before we could safely remove any existing framing, we needed to determine if this wall was load-bearing. Adam climbed into the attic to check the joists above the opening and discovered they ran parallel to the wall, a good indication that the wall is not load-bearing. Even still, you should never guess when it comes to structural changes, so we called in our trusted framer to get his professional opinion and expertise.
Fortunately, he confirmed our suspicion: that the wall was not load-bearing. That meant we could safely remove the header and jack studs to make the opening bigger. This gave us peace of mind and let us move forward with confidence. When you’re working with framing, double-checking with a pro can save you a lot of trouble later.
Why We Needed To Increase the Size of the Opening
The opening originally measured about 50 inches wide. On paper, that seemed fine, but in real life, notsomuch.
Several months ago, I ordered the drawer boxes for the lockers, each one measuring 16 inches wide, with 3 drawers planned across the base. Three drawers alone total 48 inches, and once you factor in the clearance needed for the drawer slides, cabinet side panels, and trim pieces, the math was no longer mathing.
If we left the opening as-is, the drawers wouldn’t fit, and I wasn’t about to cut those beautiful dovetailed drawers down, nor was I willing to eat the cost and purchase more drawers that were the correct size. So, widening the opening it is! I was actually grateful for this happy accident because that meant I had a little more wiggle room when it comes time to install the cabinets – and wiggle room is always a good thing.
Removing the Old Framing and Increasing the Size of the Opening
Once we knew the wall wasn’t load-bearing, we had the green light to take the wall all the way up to the ceiling. Adam cut more of the drywall and removed the jack studs, cripple studs, and header. Then we rebuilt the framing, adding new king studs in the new position.
Now, the opening measures almost 59 inches wide, which gives us plenty of space for all 3 drawers, slides, and trim to work together, plus a little wiggle room, just for good measure. Huzzah!
We also had to address the angled back wall. To maximize space and simplify our build, we cut into the angled section and squared off the back wall.
There was also an existing outlet on the left side, so we moved it to its new home inside the left locker. I didn’t want to lose this capability, and having an outlet to charge our devices (or a stick vacuum) will be very useful!
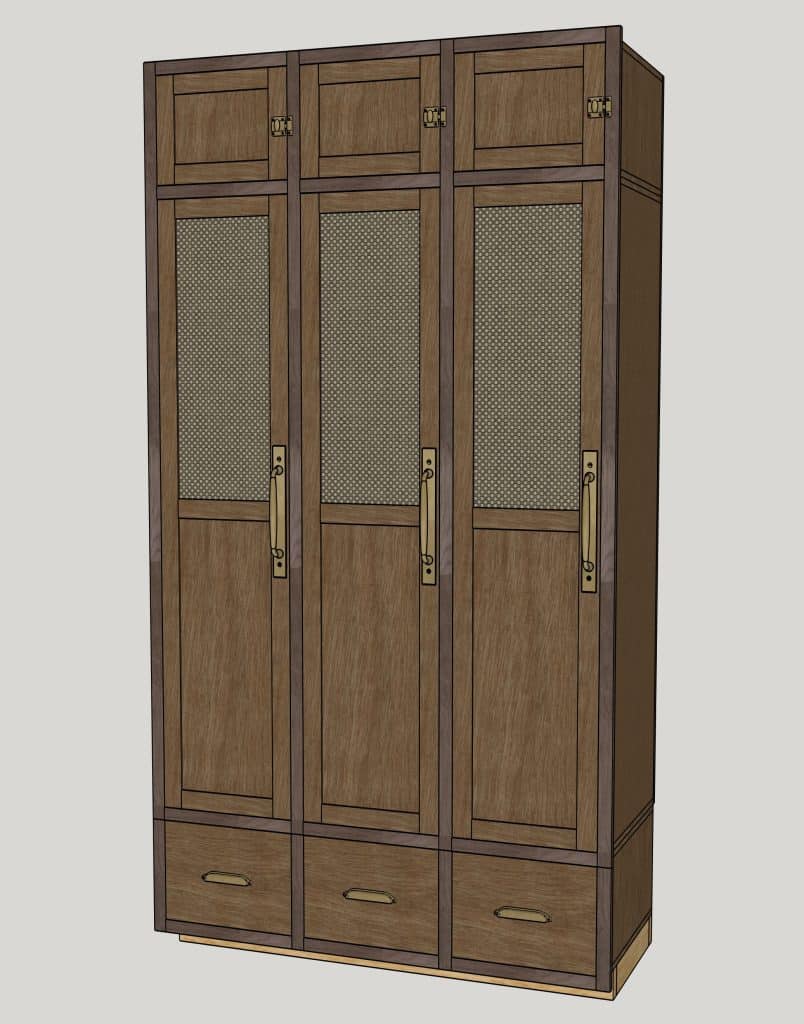
Revising the Plans
With the new dimensions, I tweaked the locker plans to fit the space. My plan is to build the carcasses in my workshop separately (drawer base, lockers, and upper cabinets), then install them into the space one by one. This will allow for better precision, cleaner joinery, and fewer surprises during installation (we hope).
What’s Next
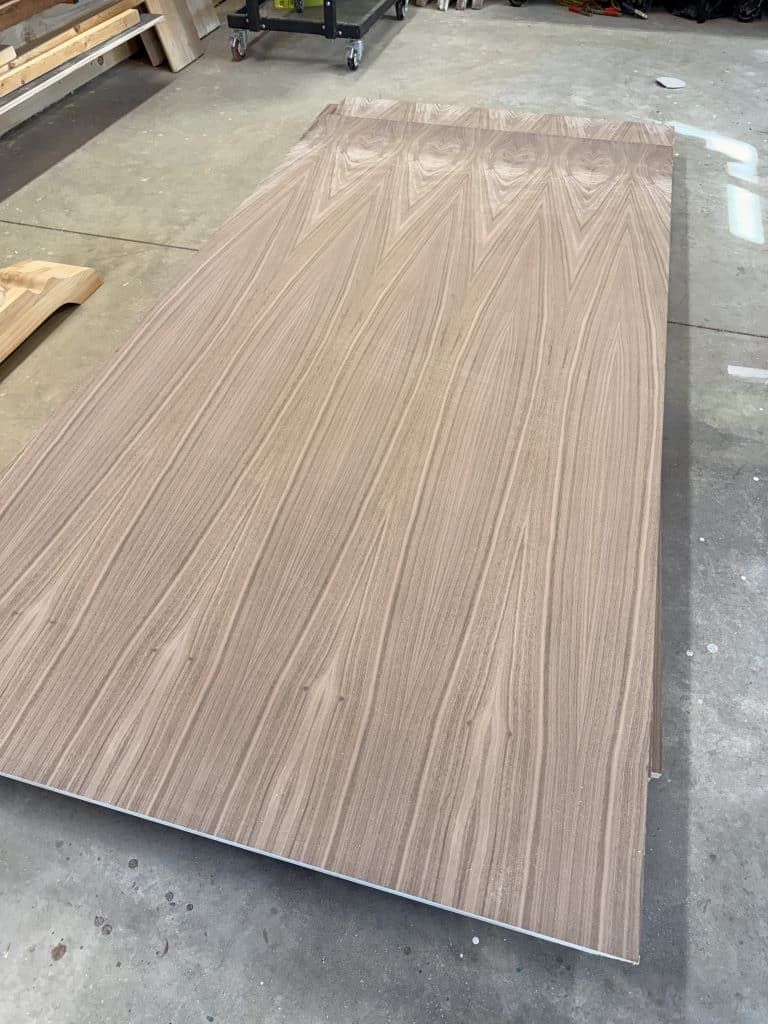
With the opening reframed and plans finalized, we can finally get into cabinet construction! I can’t wait to break down this beautiful PureBond® walnut plywood and start building the carcasses for the lockers, drawers, and upper cabinets! Stay tuned… It’s about to get good.


It looks so much better with the opening bigger, so far so good right lol, thanks Jeff
Glad you think so, Jeff! I agree, however, my husband, Adam, takes some convincing to get on board with my crazy ideas… ha!