Hello and happy Monday! I’m back with a new DIY furniture project to share with you all! My dad needed a place to set his printer, so I called on my lovely friend, Ana White to help me design plans for a printer table that would complement his existing desk.
This was my dad’s current printer table situation:
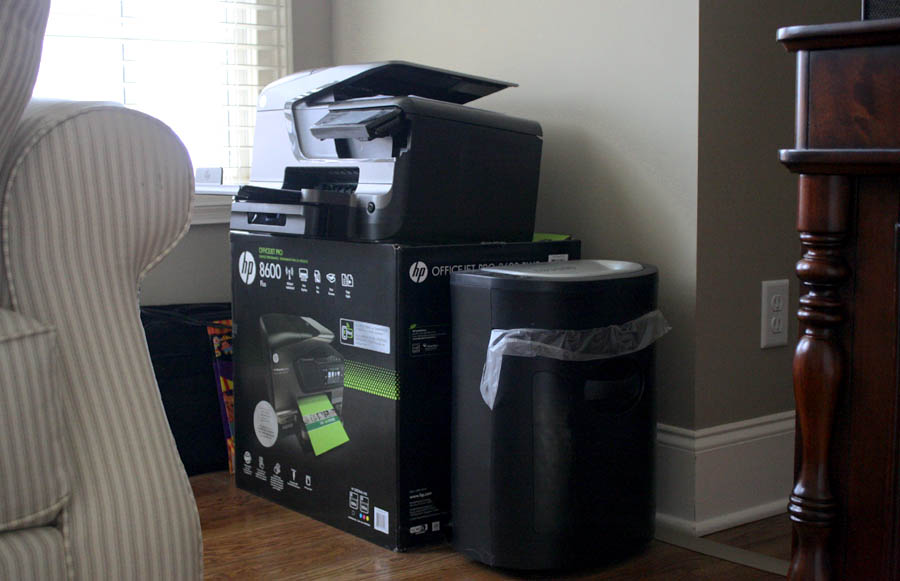 Um. Yeeeeeeah.
UNACCEPTABLE.
Especially for a guy
who has a daughter
who builds furniture.
Amiright?
Our conversation went a little like this:
Dad: Hey, look at my new printer.
Me: *blink blink* Dad, you always put everyone else’s needs before your own, you never ask for anything, and I love you for that, but um, have you met me? I kind of have this thing, where I build stuff. Can I help you with this whole situation?
Dad: Okay, that’s cool.
God love him.
So here’s what we came up with:
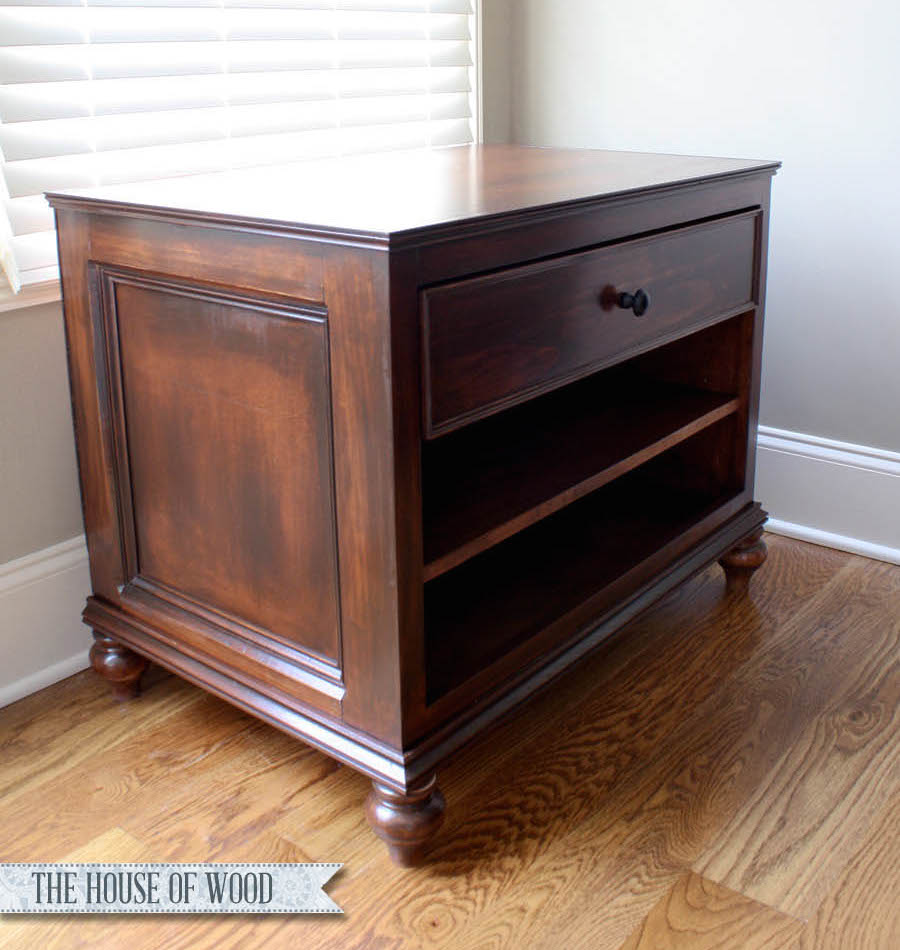
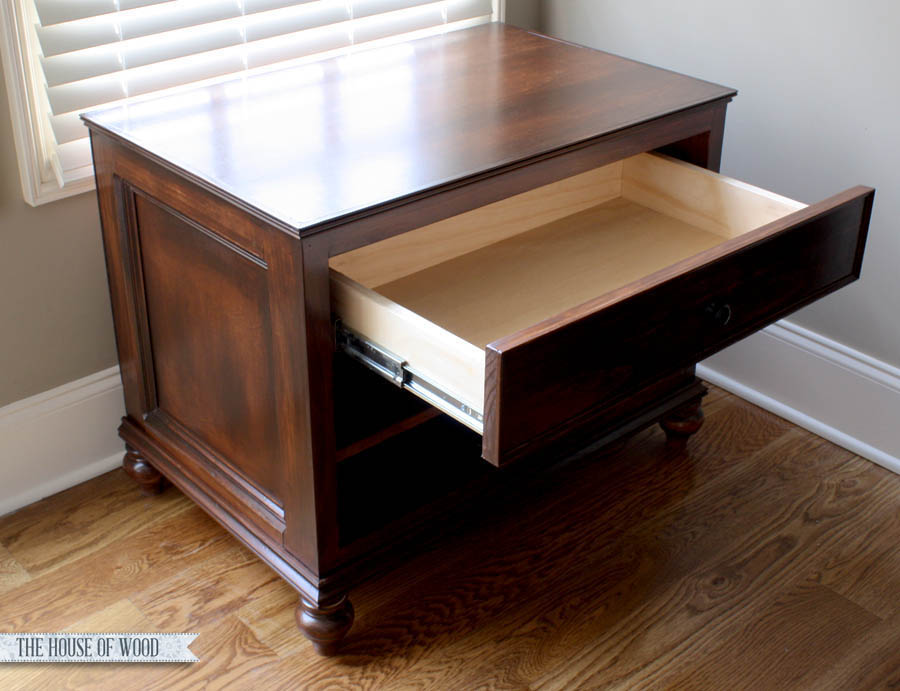
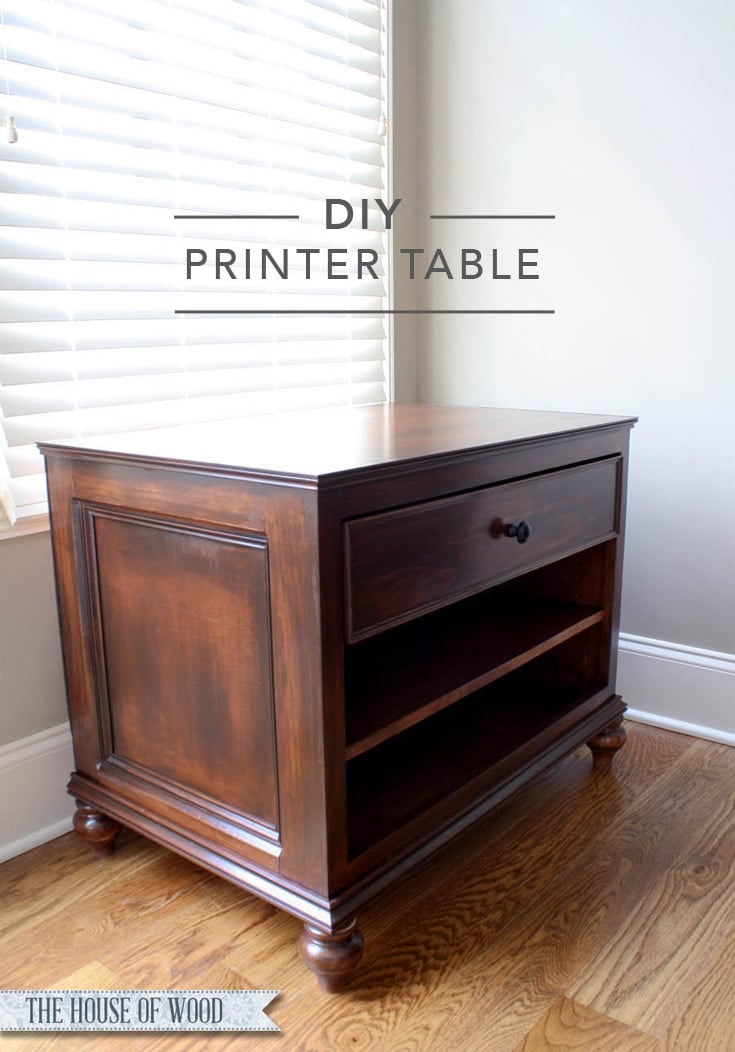
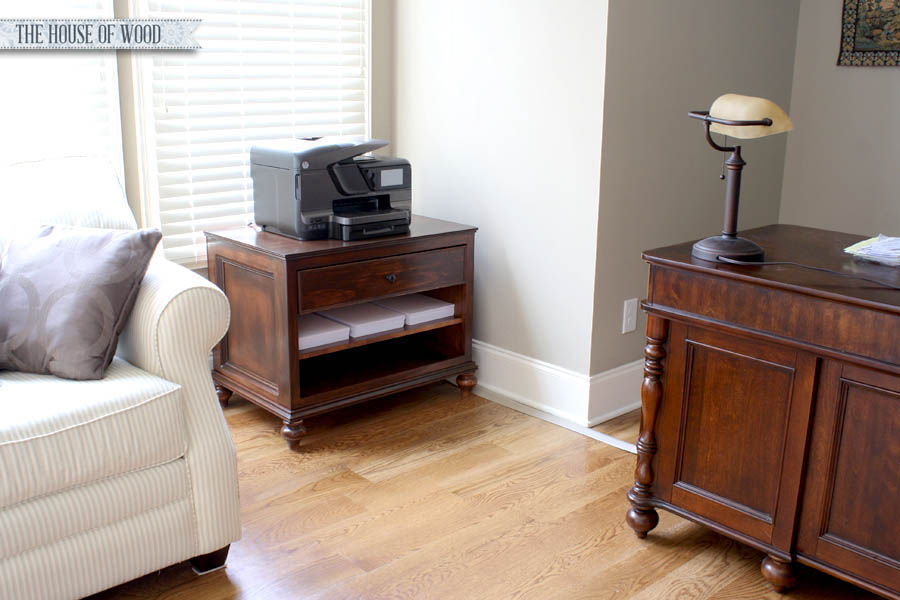 A step up from the ole cardboard box, right? The challenge was to design a table that complemented my dad’s existing desk and I think we pretty much nailed it! Though the two furniture pieces don’t match exactly, they look like they still belong together. And of course, with every build I do, I think that it’s my best work and favorite piece. That’s progress for you. Or a fickle mind. Tomayto, tomahto.
I’d say this is a more intermediate build only because of the extra trim work details, but you can easily turn this into a beginner project if you leave out all the decorative trim.
You can download the plans for this printer table here.
*Update: The finishing tutorial for this printer table can be found here.
*This post contains affiliate links. To read my full disclosure policy, click here.
Okay, so let’s get started, shall we?
1. Build the Carcass
First, drill 3/4″ pocket holes on the underside of the bottom board and attach the two sides with 1-1/4″ pocket hole screws. As always, I used my favorite plywood, Purebond Hardwood Plywood. It’s available exclusively at The Home Depot. Not only is it the prettiest plywood I’ve ever seen, but it’s formaldehyde-free and made here in North America. Read about why Purebond Plywood is the healthier alternative here and why I’ve taken the Purebond Pledge.

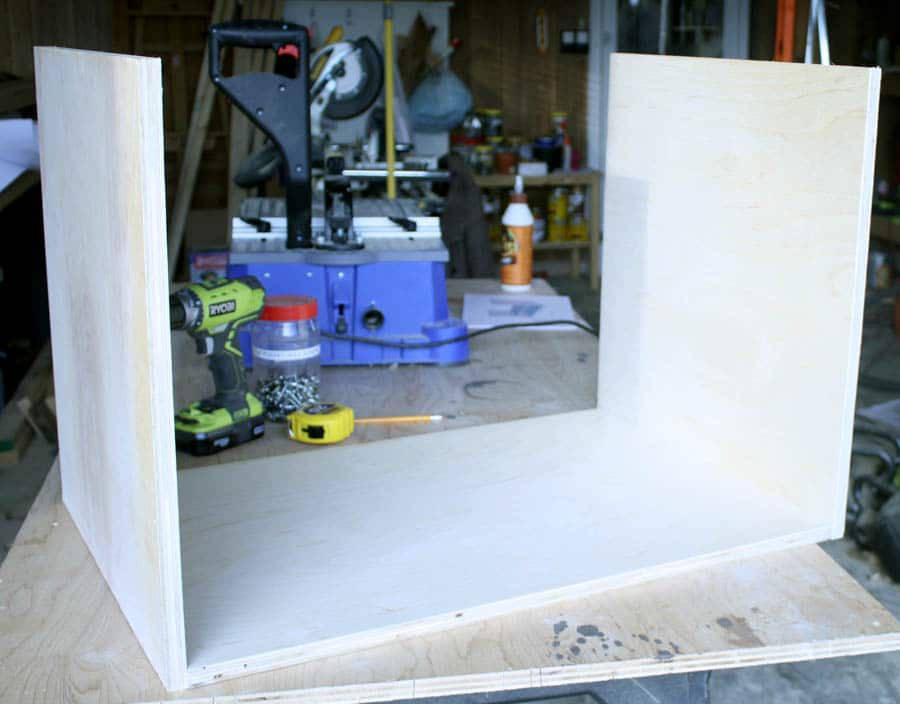 I wanted to give my dad an adjustable shelf, so I used the nifty Kreg shelf pin jig that came with the Kreg DIY Project Kit. This jig makes it easy to drill straight and evenly spaced holes for the adjustable shelf pins. I used a scrap 1×4 board as a spacer for the bottom.
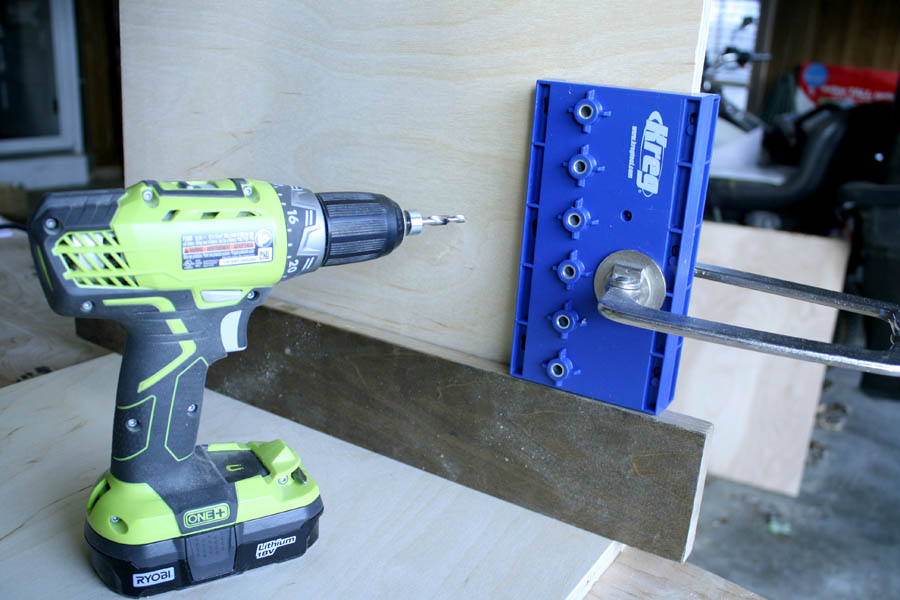 Look how profesh! I drilled the shelf pin holes on each side.
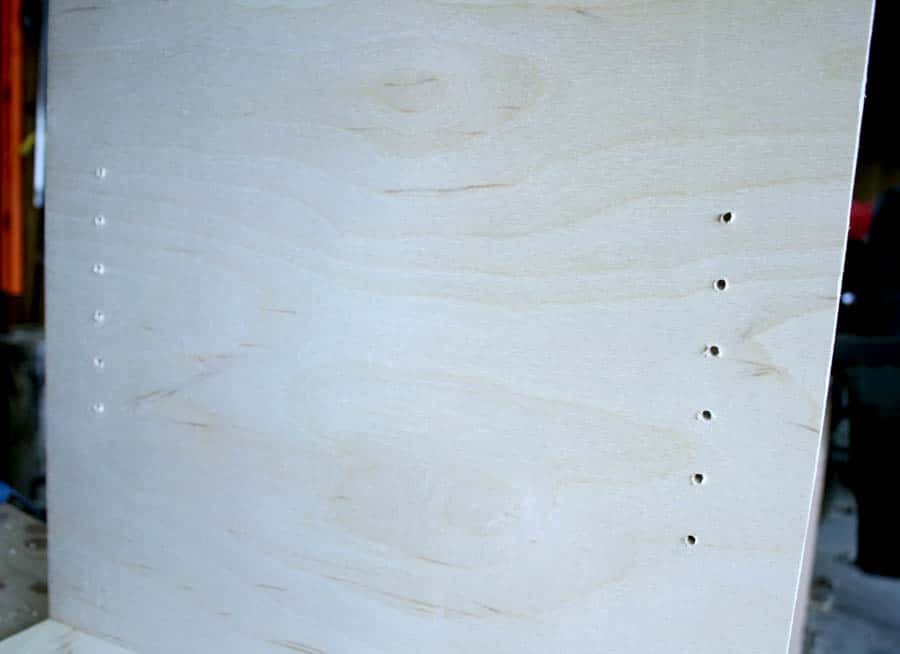 2. Route the Trim
Now here’s where it can get a little tricky. Because I wanted the inside edges of the 1×3 trim to graduate to the thinner moulding, I used a 45º angle bit on my table router and routed the edges of the 1×3 boards. But because it would be a frame, I couldn’t route the entire edge of the vertical trim pieces. After a few practice runs on scrap wood, I finally figured out the correct length (16″) to route the vertical pieces so that everything lined up when assembled. It’ll make sense in a minute (I hope).
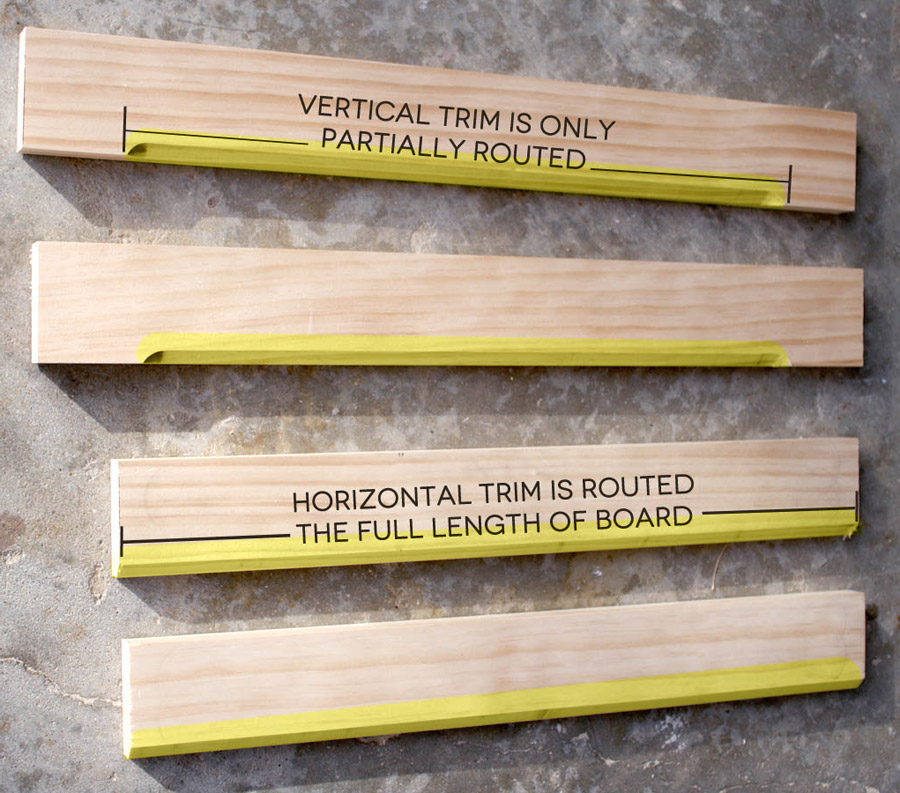 In the highlighted photo above, see how the two 1×3 boards on the top are partially routed? Those pieces couldn’t be routed all the way to the edge because there would be a gap where the horizontal pieces met. By partially routing those boards at 16″, all four of the routed edges line up when the frame is assembled. The other two boards (on the bottom) are routed the entire length of the board. Hope that made sense!
I wonder if it would have worked if I built the frame first and then hand-routed the inside edges… ? Knowing me, I probably made things more difficult than they needed to be. Let me know if you come up with a better, more efficient way of accomplishing this. At any rate, after a bit of brain power and a little trial and error, I got the routed edges to line up perfectly! Here is the front view of the trim:
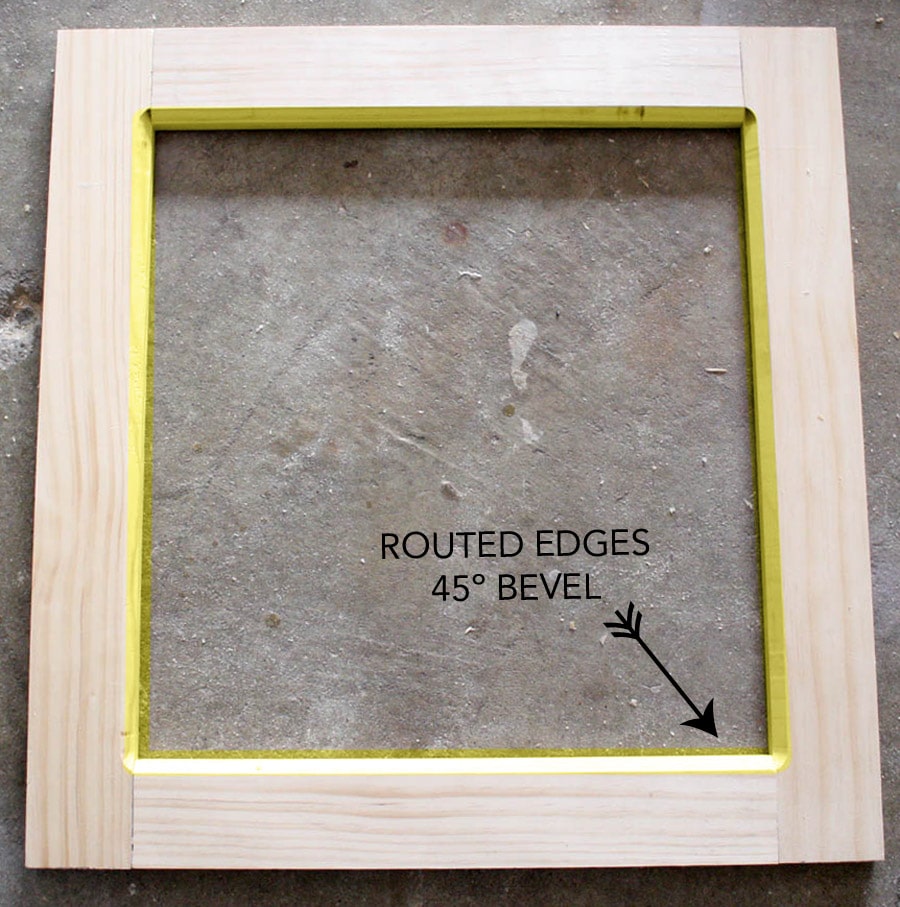 And here is the back view, attached with 1-1/4″ pocket hole screws.
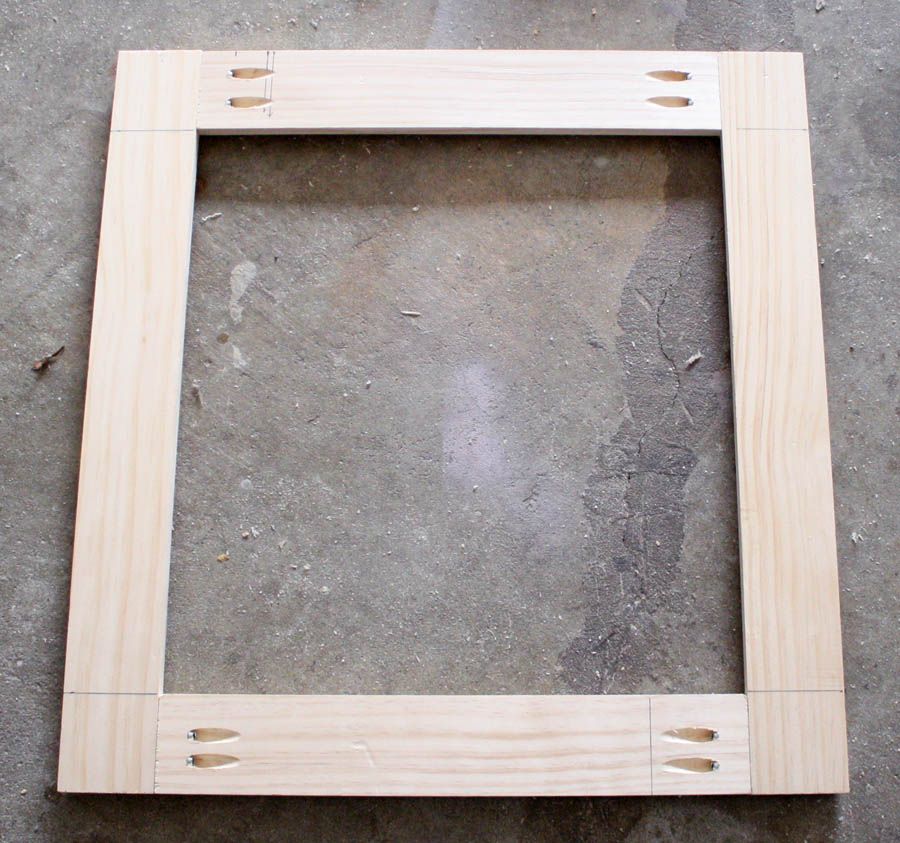 Then I glued and nailed the 1×3 trim to the sides with 1-1/4″ brad nails. After that, I measured and miter-cut the smaller trim and attached it with 3/4″ brad nails and wood glue.
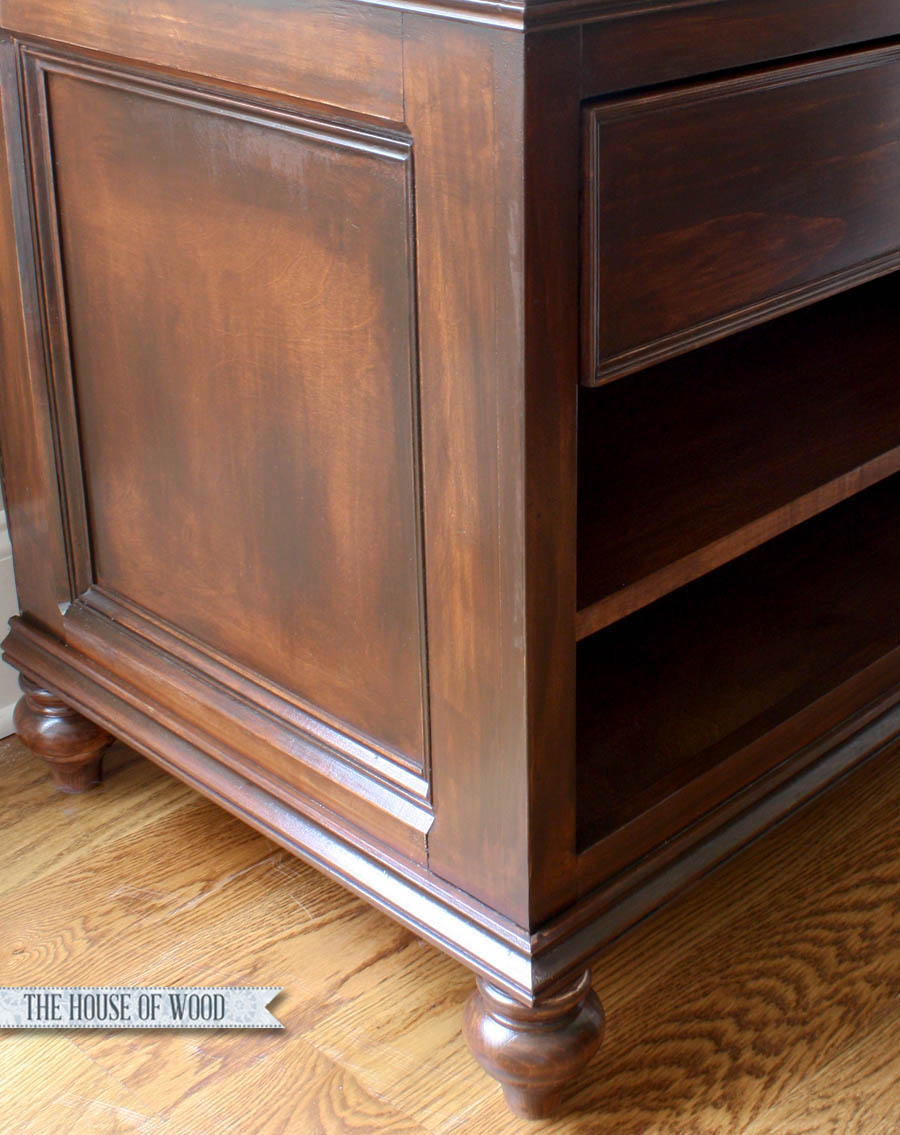
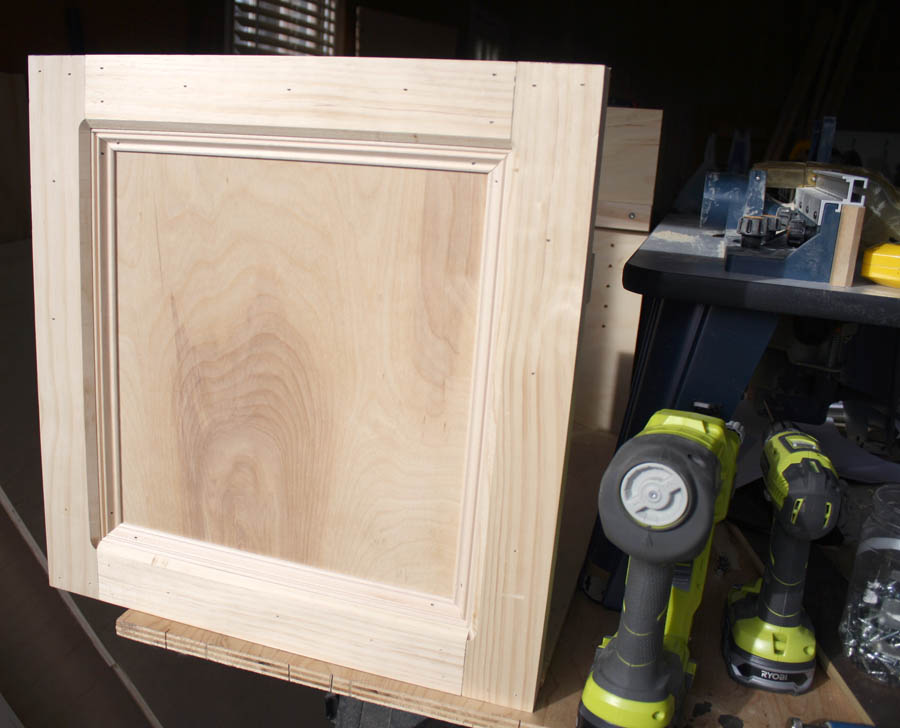 Here is a closeup of the trim work. I love the look of the recessed moulding. The devil’s in the details, don’t you think?
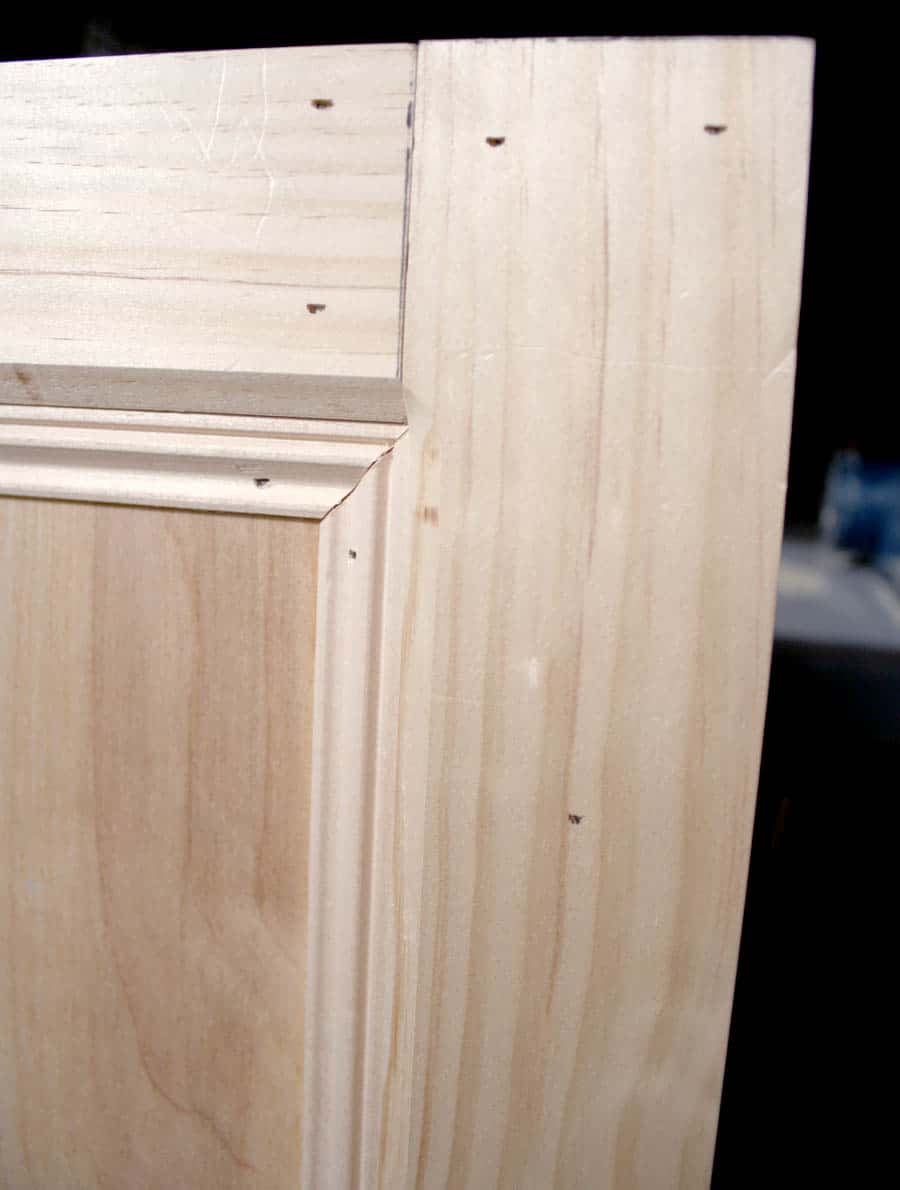 After both side panels were trimmed out, I built the face frame and assembled it with 1-1/4″ pocket hole screws then attached it to the front of the carcass with wood glue and 1-1/4″ brad nails. The face frame hides the raw plywood edges nicely.
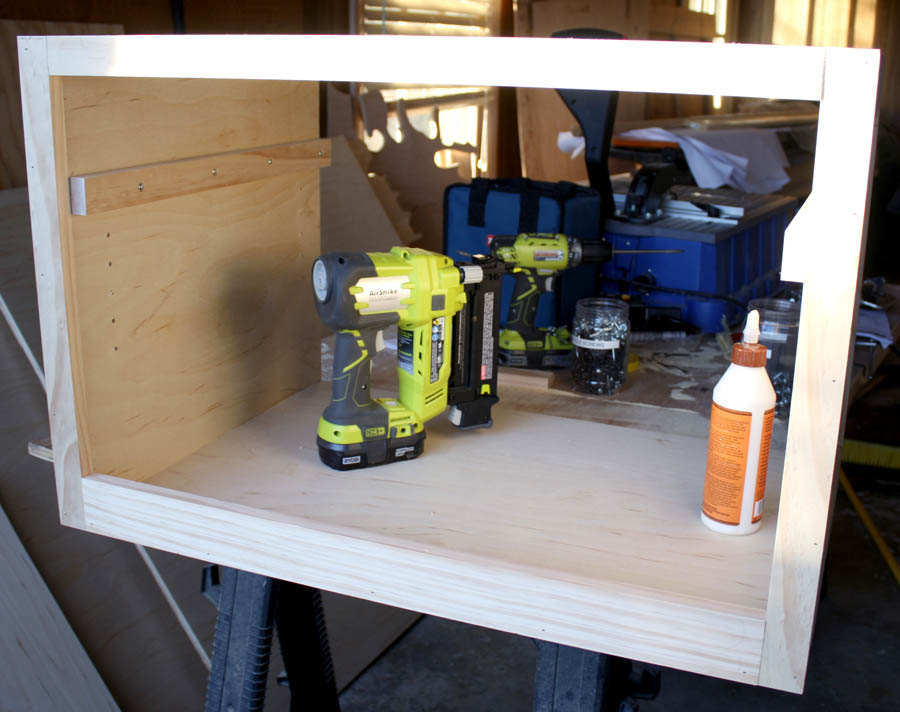 3. Install the Drawer Slides
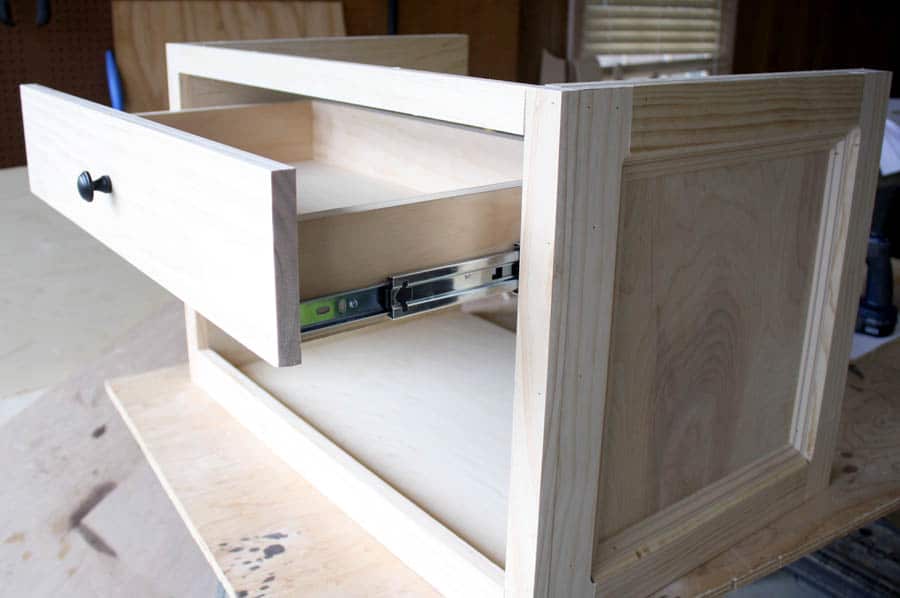
These are the drawer slides I used. Following the installation instructions that came with the slides, I aligned the cabinet member slide to the front edge of the drawer cleat and attached it with the screws included in the package. Then I attached the drawer member slide to the drawer. Be sure to measure the opening of your drawer space and build your drawers to fit, rather than just going on plan measurements, for precision. You know, if you’re into that sort of thing.
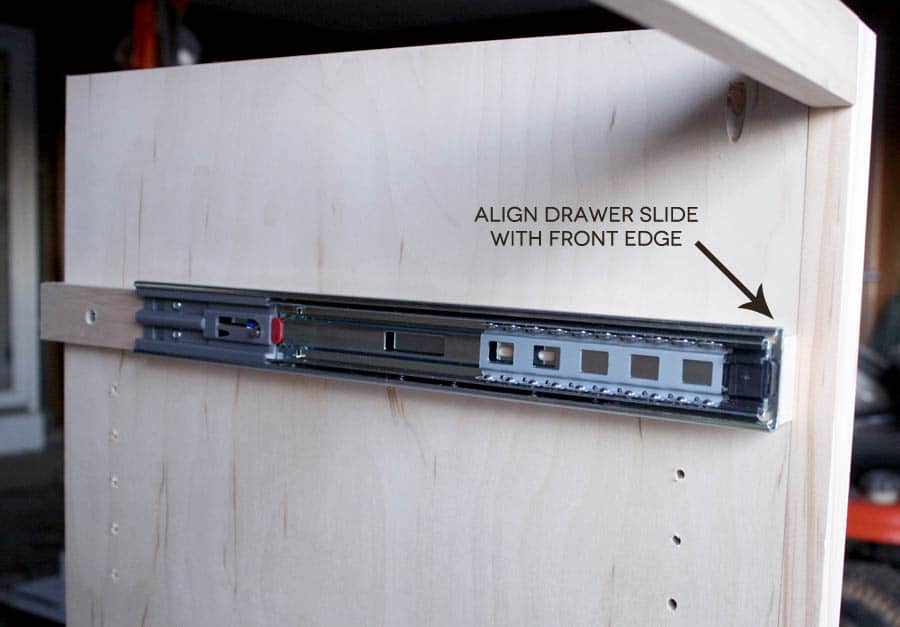
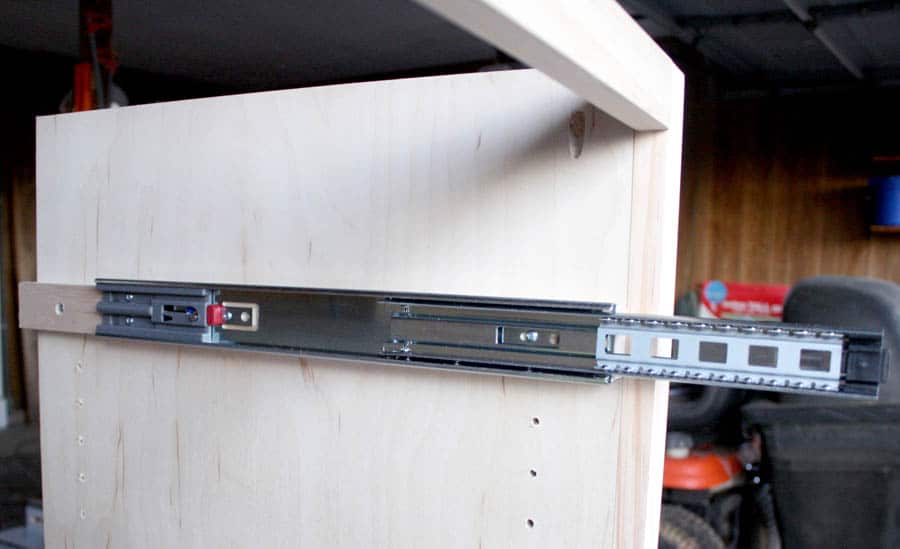 Hallelujah, praise the Lord! The drawer is square, fits perfectly, and is installed properly! If you can’t tell, building drawers has long been a source of anxiety for me, but I’m getting better at it! Practice makes perfect.
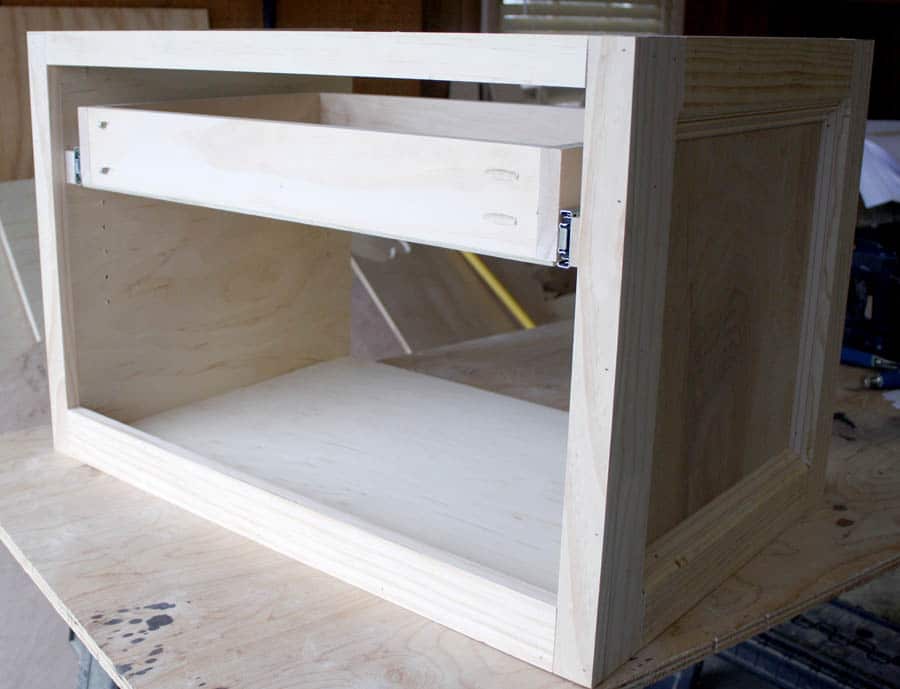 Ah, the sweet, sweet smell of success! Just give me a minute to relish in this moment, would you?
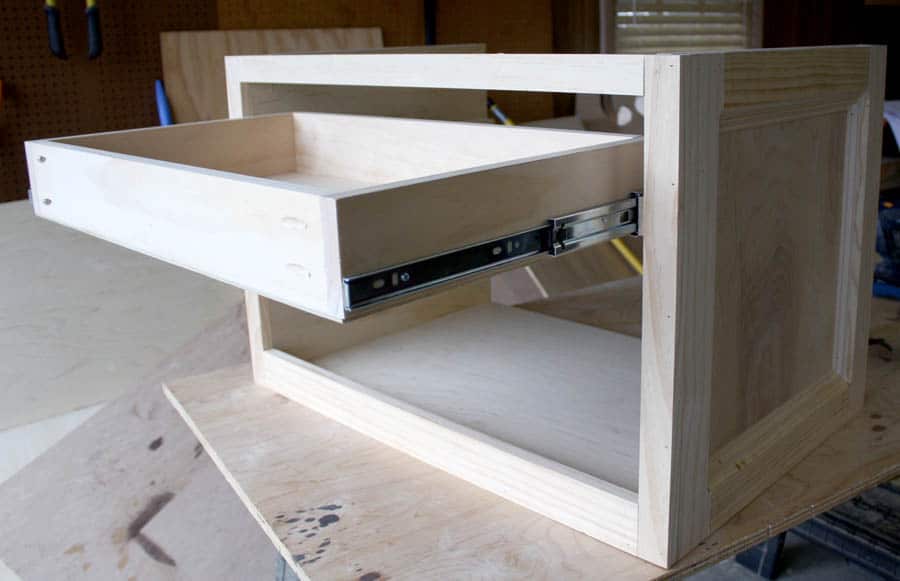 Okay, I’m done.
Next, I attached the drawer face with some brad nails and glue, and installed the knob. The screw that came with the knob wasn’t quite long enough to reach to the other side, so I countersunk the hole on the inside of the drawer so that the screw would reach the knob.
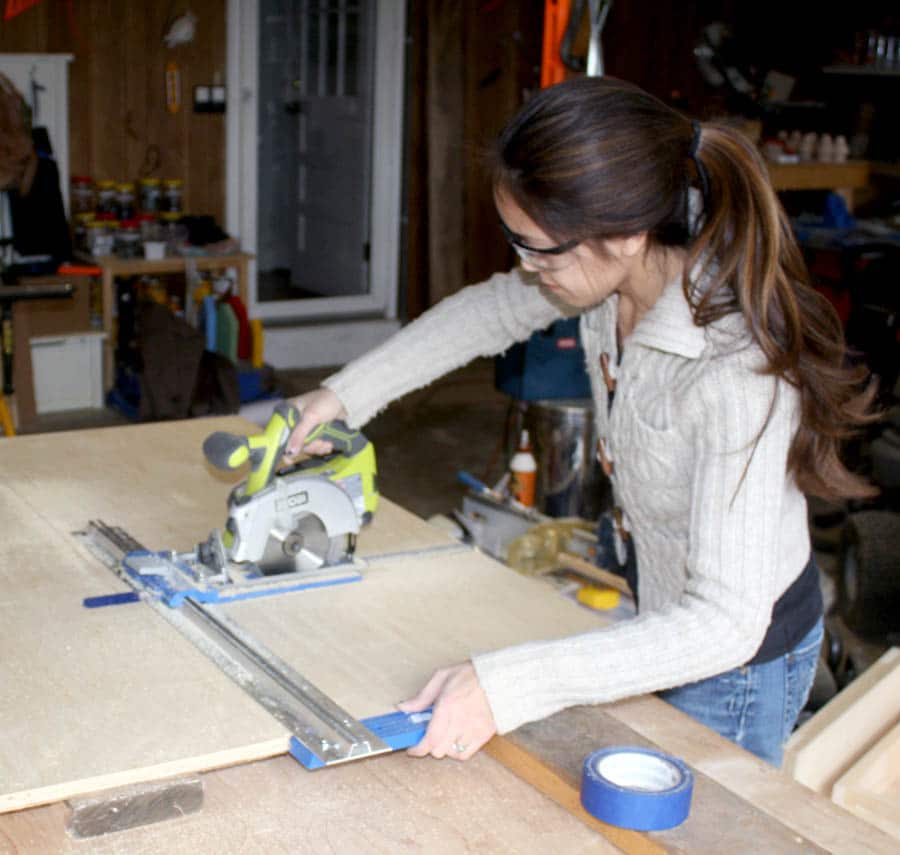
 I finally used my Kreg Rip-Cut for this project. It had been collecting sawdust in my garage for months because I was too lazy to figure out how to use it. Basically, it attaches onto your circular saw and provides a straight edge guide so that you can cut or rip lumber in a straight line. Cutting plywood down to size with this thing is easy as pie.
Great. Now I want pie. And how funny would it be if I sliced my pie with my circular saw? Not funny at all, actually. Messy. Very messy. And dangerous. Honestly, what kind of crazy person do you think I am?!
Disclaimer: circular saws are not meant to cut food products. Please do so at your own risk. Then take photos and send them to me. I need a good laugh every now and then.
Amendment: Please disregard that last paragraph. I really can’t afford to be sued over such ridiculousness.
 Okay then. Moving on.
Here are a couple tips to help minimize tear-out on your plywood edges: first, you’ll want to use a blade that is specifically made for cutting plywood. The more teeth on the blade, the finer the cut. Also, tape along the line where you’re going to make your cut and it can help hold the fibers together long enough for the blade to pass through cleanly.
After cutting the top out of the plywood, I attached it with glue and brad nails. Pocket hole joinery underneath would also work well here. Then I added some decorative moulding around the top and bottom edges, as well as around the drawer face, just to church it up a bit.
4. Attach the Bun Feet
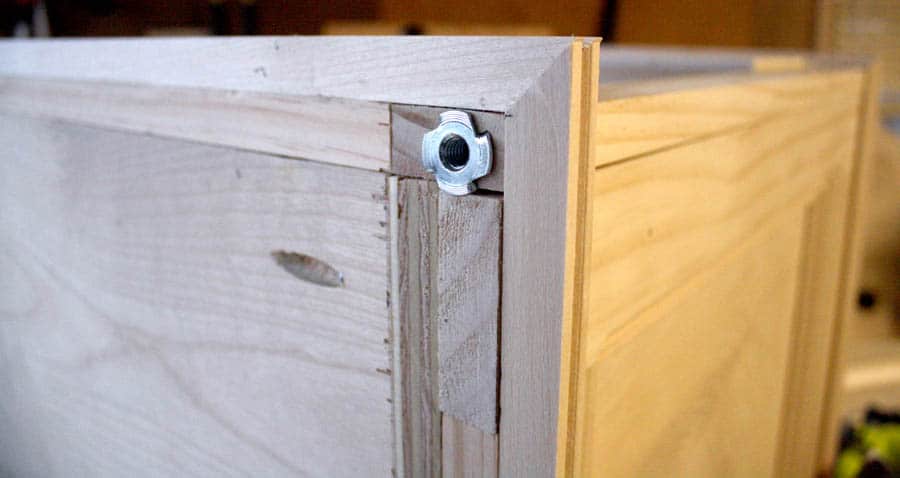
Using these thingamajiggys called “hanger bolts” and “tee nuts”, I was able to attach the Osborne Wood bun feet to the bottom of the printer table. First, I drilled a pilot hole into the top of each foot. A drill press would be the ideal tool to use here, to assure that your pilot hole is perfectly perpendicular.
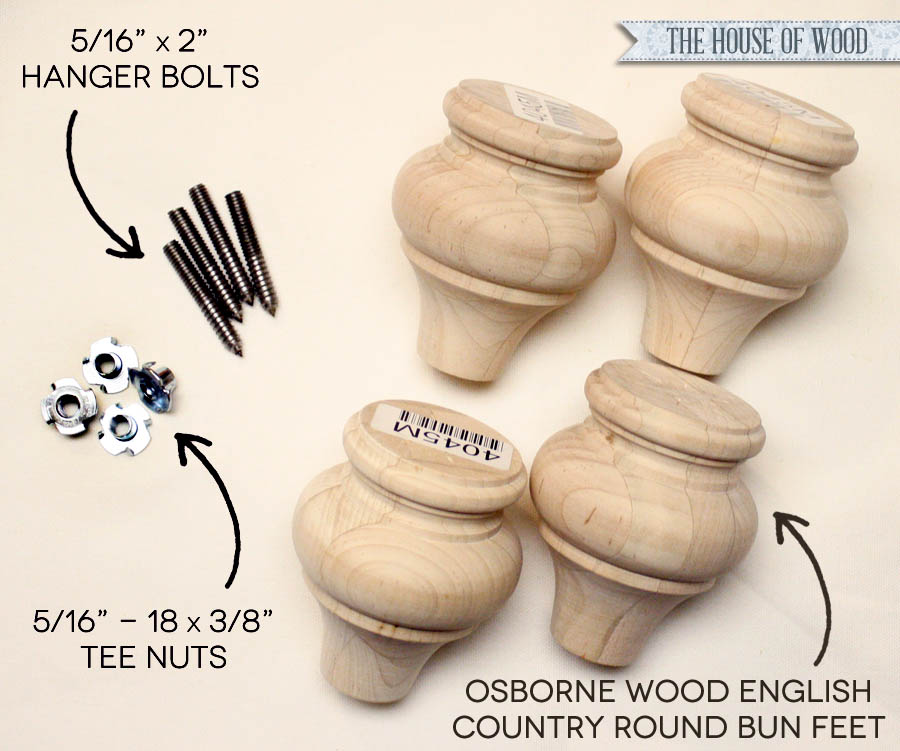 Next, it was time to thread the hanger bolts into the pre-drilled hole in the bun feet. This took quite a bit of muscle to do, so I called in the “Big Guns.” And by “Big Guns,” I mean I asked my husband to do it. And he suddenly became a genius because instead of strong-arming the thing with a pair of vice grips (like I was doing, quite unsuccessfully I might add), he grabbed a nut and a box wrench and threaded the bolts into the feet like it was butter. Color me impressed.
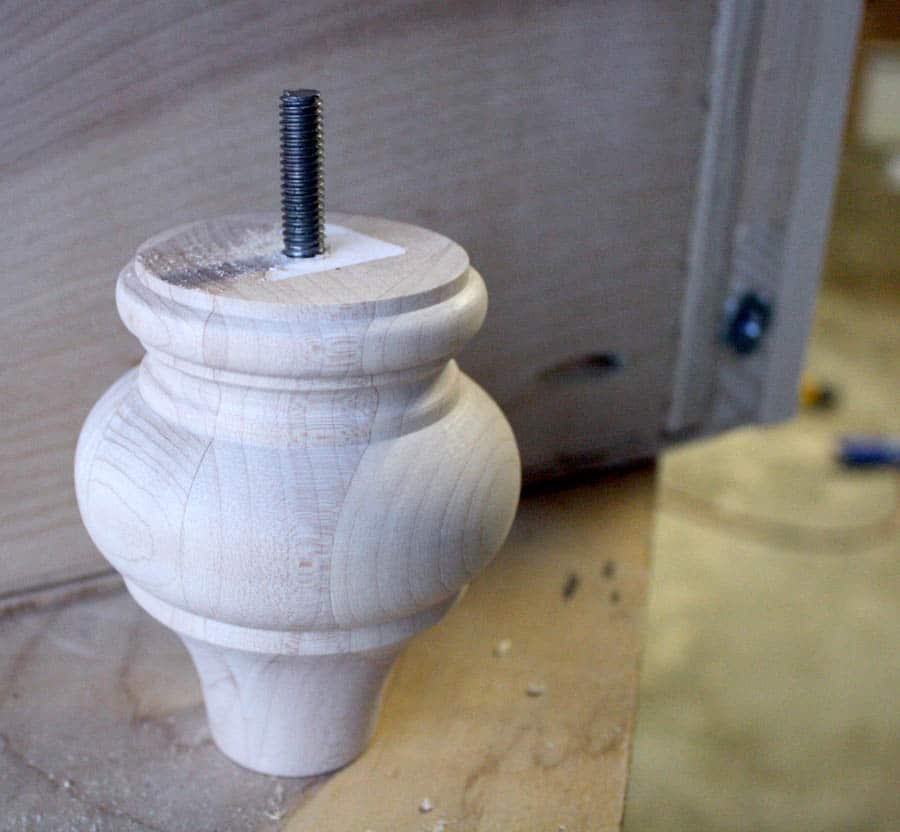 So while Adam was being all Stephen Hawking over there, I pre-drilled a hole on the bottom of the printer table, then tapped the tee nuts in with a hammer. Then I just screwed the feet into the tee nuts. This hanger bolt/tee nut combo allows for leveling adjustments if you happen to have uneven floors. Bonus!
I also discovered I enjoy saying ‘tee nuts’ – there’s a joke in there somewhere but I’m just gonna leave that to your own imaginations. You’re welcome.
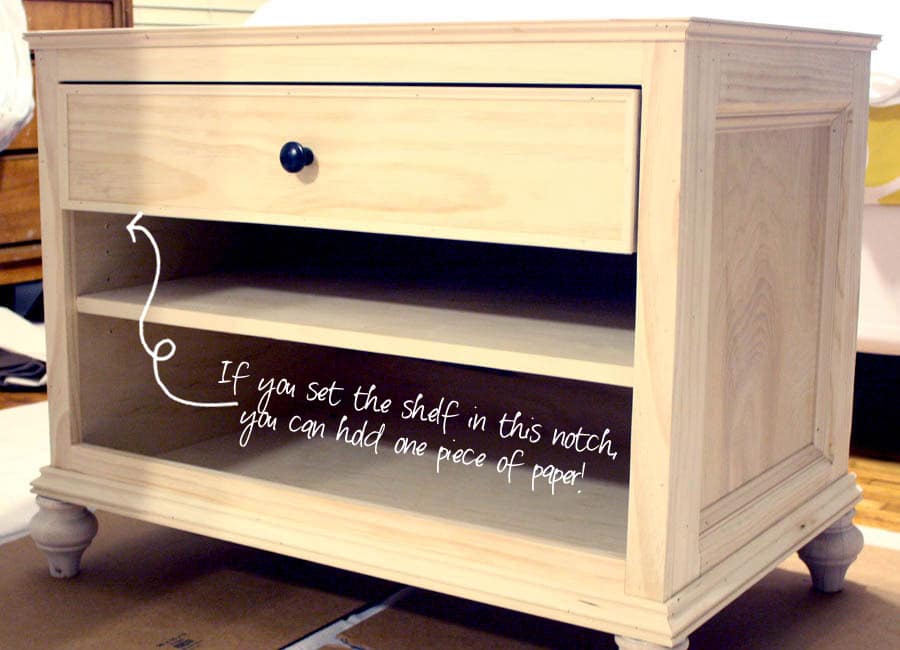
 And look at that middle shelf! It’s adjustable. Oh yeah! I even made it so that it could fit exactly one piece of paper.
Oh, Foresight, you elusive creature, you.
I ironed on a band of veneer edging onto the edge of the plywood shelf so that it looks like a solid piece of wood. You didn’t know that your iron totally counts as a power tool, did you? Yep.
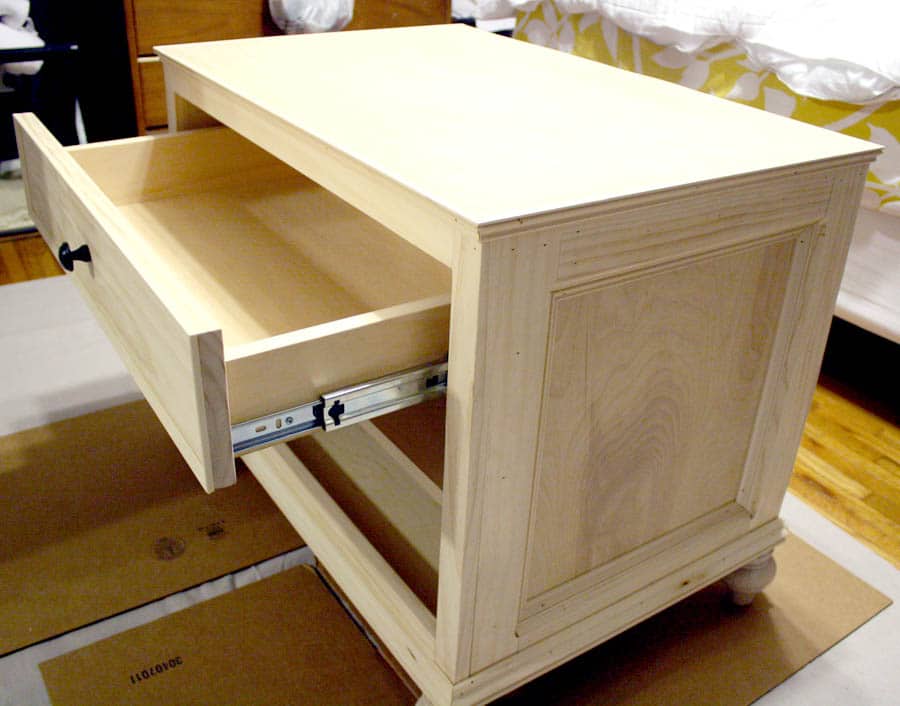
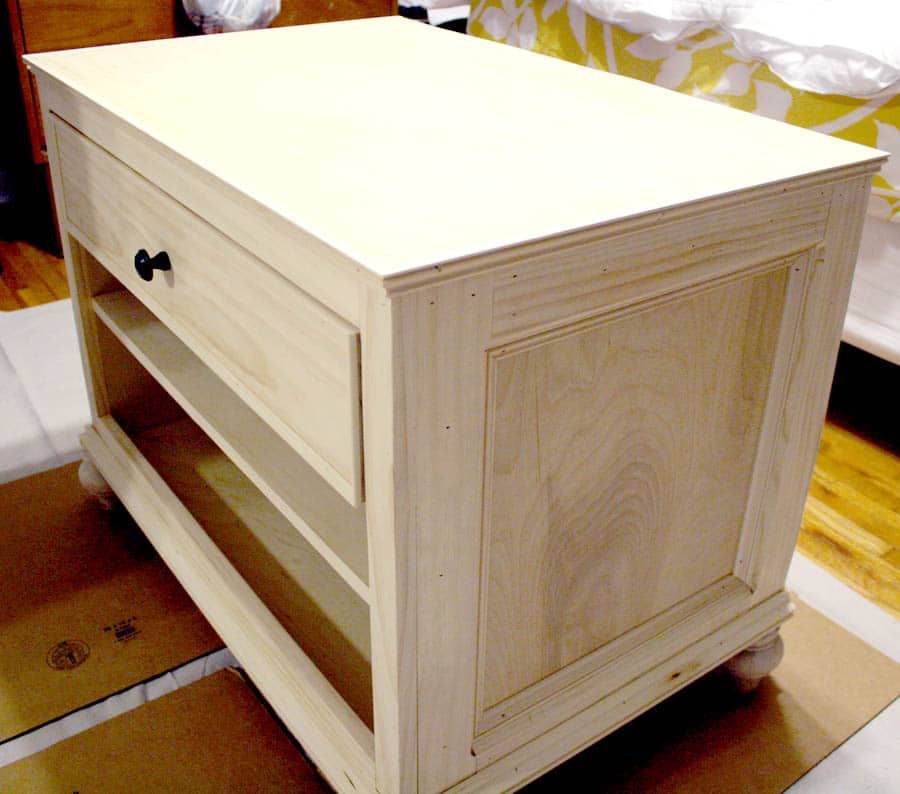 And those are soft-close drawer slides. So fun! I kept trying to slam the drawer shut but it just wouldn’t give in. What can I say? It doesn’t take much to amuse me.
 And here it is, in its new home! What do you think? No more cardboard box furniture, for the WIN!


 As always, I’ll be your BFF if you pin and share this project. And be sure to hop on over to Ana’s site and download the free plans! Oh, and I’ll be back to dish on that snazzy finish too, so stay tuned!
Update: The finishing tutorial for this printer table can be found here.
 Disclosure: Kreg provided me with a complimentary DIY Project Kit to use on a project and Osborne Wood provided the furniture feet. I was not told what to write or what project to complete; all opinions, ideas, and professions of undying love for their products are completely my own. In other words, you can’t buy my love, people. I do what I want.
Well done! I love how it matches so well with his current desk.
Thank you so much, Briel! That’s what we were hoping for – what a great compliment!
Jen!!! Thanks so much for letting me work with you on this beautiful printer table. I love how you took the plans and made them so much more awesome!!! Beautiful work as always, can’t wait to work with you again! XO Ana
Thank YOU Ana!!! As always, your plans are flawless. Looking forward to more collabs in 2015!
I really like the finishing! Can you give details about what/how do you fill the nail holes and staining process?
Thanks! I’m working up a tutorial on that finish and will be posting that shortly! Thanks for asking!
This is so beautiful! Really classic and understated but just gorgeous.
Ha! I was just going to ask about the finish but saw your comment. I actually just got a router and table, totally new for me and trying learn all about it. Awesome build, love the detail the trim adds!
Awesome! I had a router for the longest time, but now that I have a router table, it makes it so much easier to use! Thanks for the kind words and YES – stay tuned for the finishing tutorial! Happy building!
KREG RIP CUT? You are so money. . .and you don’t even know it! I just got a circular saw and spontaneously decided to rip off our bonus room stair carpeting to see what was underneath. That has led me on a wonderful odyssey of replacing our stairs instead of keeping the 2×12’s underneath. The KRC is going to be a huge help.
Oh..and this piece is gorgeous. I can’t wait for your finishing tutorial. 🙂
Jen, I love this table! The details, the legs and the finish. Do you mind sharing what stain you used to get such a fabulous looking piece of furniture ?
Looks great. What type/species of wood for the frame, trim, etc? Also from Home Depot?
Great question! I used Purebond Plywood in birch and the solid wood pieces are select pine – all from The Home Depot! HD’s select pine selection is generally nicer than the regular whitewood – straighter and smoother. A little more expensive, but I’d rather spare myself the headache of wrestling with bowed, cracked, and crooked boards. The furniture feet are knotty pine, from Osborne Wood.
This is absolutely stunning!
Wow Jen!! This is so beautiful! You did an amazing job with the build and the finish is a perfect match! I am totally impressed and will totally pin! I am sure your dad is very proud!
Thank you so much! I appreciate it!
For the side trim, why not just first assemble the 1x3s into a frame and then route the bevel? That way you don’t need to worry about the length of route on vertical pieces. This video shows the technique at around 5:00 minutes.
Thanks for the sharing the video! I wondered that after I’d already done it the hard way. Haha.
Video I mentioned is here: https://www.youtube.com/watch?v=LgEjdfpRZa4
Another home run Jen!!! That is a fine piece of furniture, seriously. Pinning for sure! p.s. The 45 degree bit is called a “chamfer” bit 🙂
P.p.s. I can’t get over how thick your ponytail is! How does such a tiny body hold up so much hair?!
Ahhh, spoken like a true hairstylist! Haha. Thanks, lady! <3
Hi. This is a great piece of HAND BUILT furniture. If possible, can you say how much it cost to build? I love telling others the price of a build so they can compare the cost of buying one from the store.
Thanks! The cost was around $160 – which was a little steeper than what I’d normally spend for an end table (the premium wood and trim made the difference), but MUCH lower compared to Pottery Barn prices, which are upwards of $700, like this one: http://www.potterybarn.com/products/branford-wood-bedside-table/?pkey=cnightstands-bedside-tables&
Hi I was wondering if you can help me ? I have never figured out how I determine the width of the drawer when using the slides… hope you can help !
It really depends on the slides you choose, but I’d recommend measuring the space where the drawer will go (width) and subtract 1/2″ from both sides to allow for the slides. The 1/2″ on both sides is the standard, but again, it depends on the kind of slides you use; the directions will tell you what measurement to allow. Hope that was helpful, good luck!
Hi
I bought 10 slides and none came with instructions so I just made the draw slide on the wood, but next time I want nice draws the fit and slide smoothly ! thanks
darn wrote my addy down wrong hahaha
Hey Ana, really love this, wondering if I could pull this off! Have you posted that tutorial yet?
My name is Jen, but yes, the tutorial can be found in this post and the plans are linked from Ana’s site. Good luck and happy building!
Beautiful work! I wish I wasn’t scared of my router.
Thanks! It’s a grounded fear, that’s for sure! My router table makes it a lot less intimidating though.
Just wanted to leave a couple comments as a seasoned woodworker. You mentioned gluing a veneer strip to the front of the shelf to make it look like real wood. My thoughts are that it will eventually get damaged and fall off, or just plain fall off. Several ideas to consider:
1. Make the shelf out of real wood.
2. If you must use plywood, cut a 1/4″ strip of oak the length of the shelf width and glue that on.
3. This goes for both plywood and real wood, Glue a strip of off-species hardwood several inches wide to the front of the shelf. It will give it a two tone effect.
As a side note, You may want to somehow mention how the plans for this cabinet are easily modifiable to basically any size. The carcass for mine is 16″ W x 14″H x 14″D. Mine actually fits underneath my desk with my printer on top. So far, mine is also free as I have made it completely out of scrap oak or other project leftovers. Thank you so much for the ideas.
Thanks so much for the tips, Chris!
Hi Jen, I’m a newbie builder (one side table and one kitchen island – which turned out pretty good if I do say so myself), and I am confused about the T nuts and threaded hanger bolts process. So you drill a hole in the leg first? How do you make sure you are getting it exactly straight so the leg does not go on all wonky? And the hard part was just screwing the bolt into the wood? Or am I missing something. I can see how putting that bolt into wood would be kind of a tight squeeze, so is that why you needed your hubs? Thanks for helping me get this. I’m sure it’s probably SO simple and I am just a little on the “inexperienced” side. Thanks.
Hi Karen,
I go into more depth regarding the hanger bolt/tee nut combo here: http://jenwoodhouse.com/diy-printer-table/ (scroll down to step 4). Hope that helps – good luck!
What stain did you use?
Hi Dan,
The finishing tutorial is here: http://jenwoodhouse.com/printer-table-finish/
Great project and tutorials, very inspiring!
Which plywood did you use? I went to HD to look for PureBond, only found there are couple of finishes. There are Birch, Maple, Redwood and Sande. The first 3 are exactly the same price at $49, Sande is cheaper at $39… Any suggestions?
Thanks Jimmy! I use maple and birch usually because they take stain similarly. I typically build furniture with maple hardwood boards, so I try to match the wood species whenever possible. Hope that helps!
Perfect, many thanks Jen… Will give Maple a try today 🙂