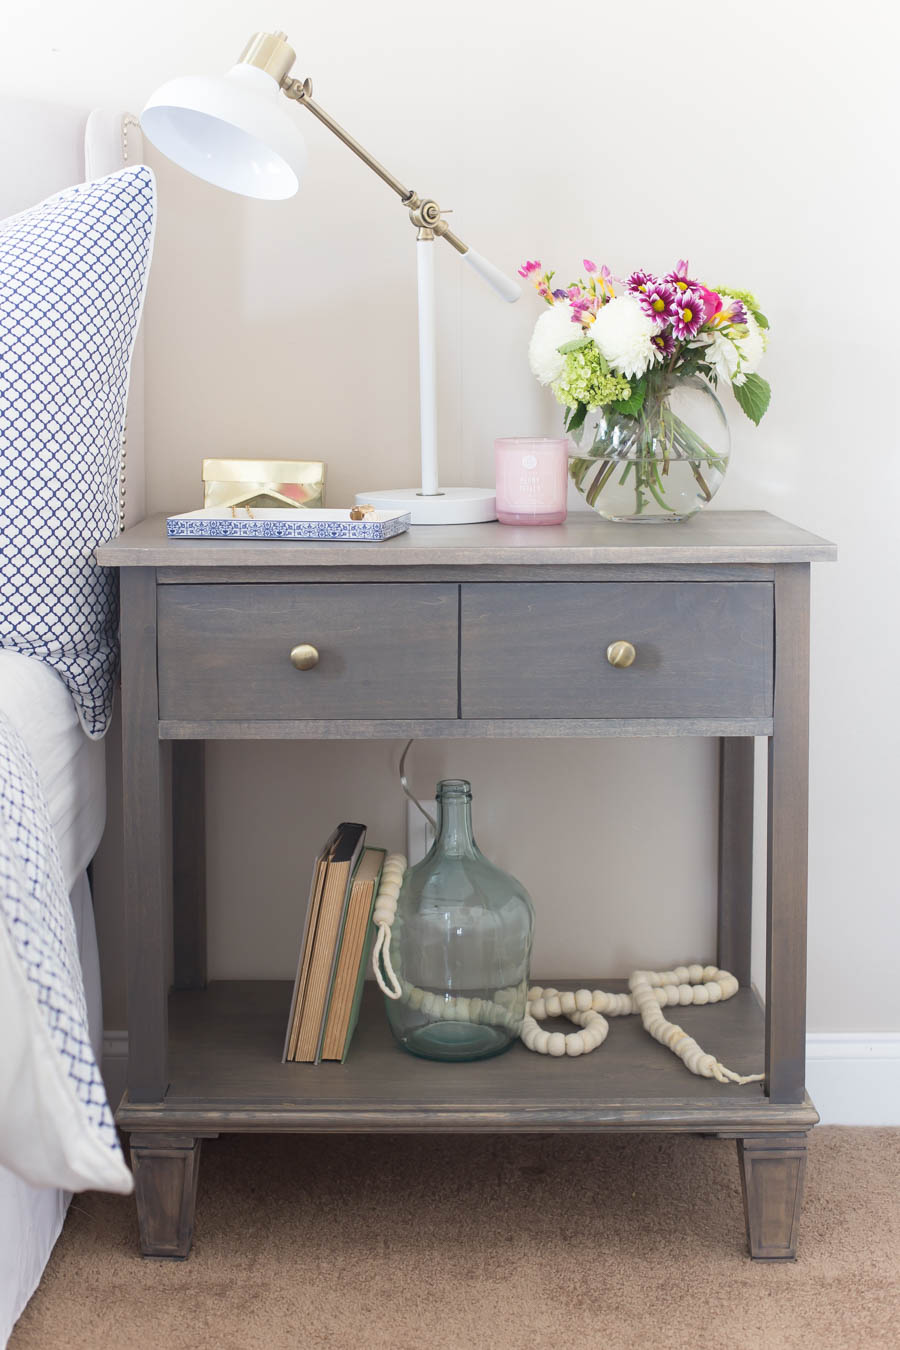
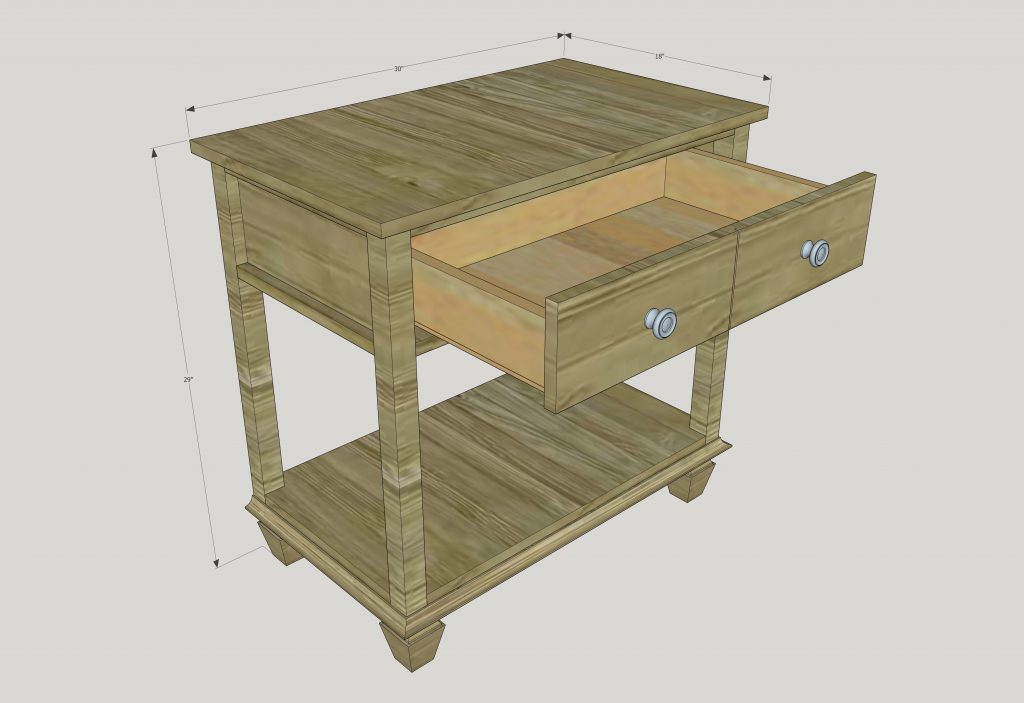
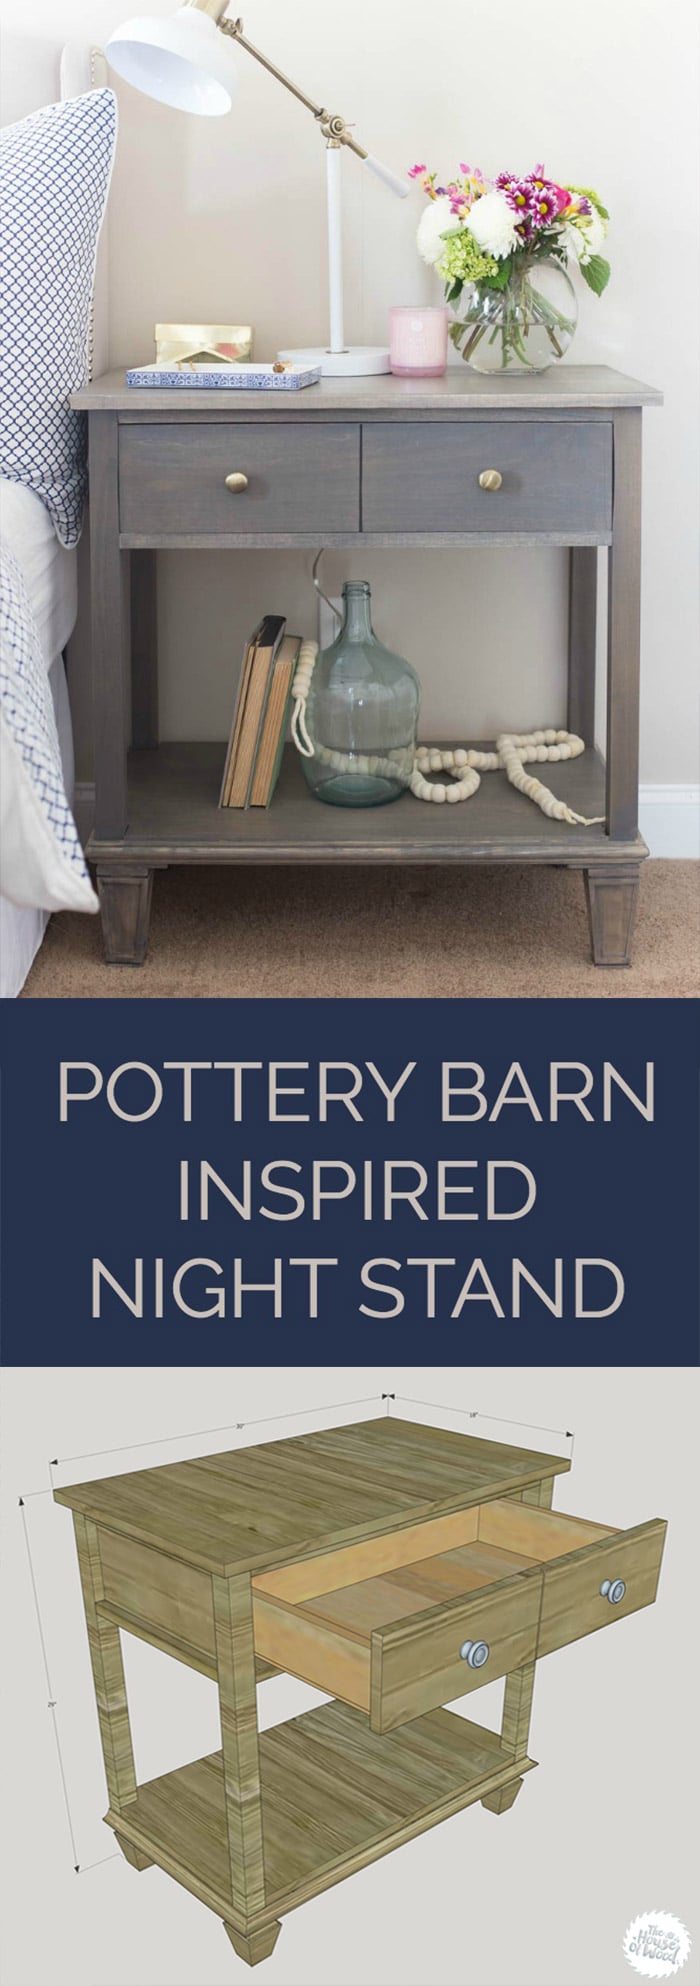
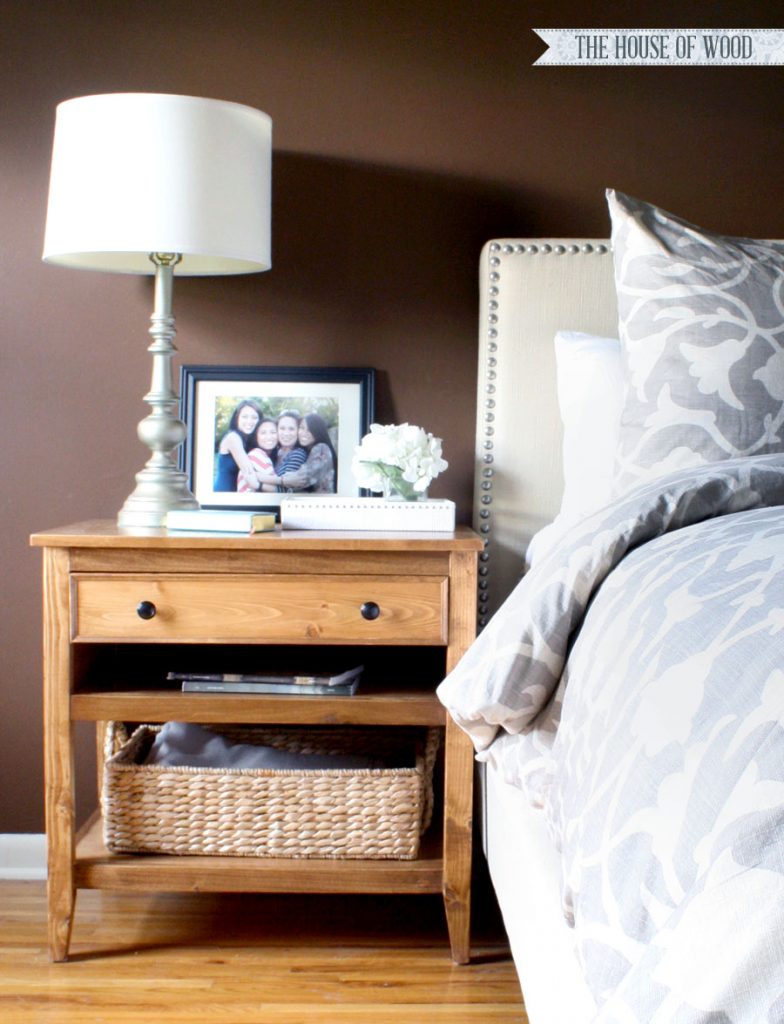
Hello and happy Wednesday! I’ve got quite a treat for you today! I teamed up with my friend (and fellow military spouse!) Chelsea from Making Home Base to bring you the free building plans and tutorial for this beautiful DIY Pottery Barn-inspired nightstand. Can you believe that’s a DIY project? So beautiful!
*This post contains affiliate links. To read my full disclosure policy, please click here.
Chelsea has been hard at work with her master bedroom makeover and she fell in love with these nightstands. Chelsea knew she could build them for so much less so she asked me to draw up the plans for her and I’m so happy that she did because they turned out so gorgeous!
Be sure to head over to Making Home Base for more photos and details on how Chelsea built her nightstands!
Are you ready to build your own? Let’s do this.
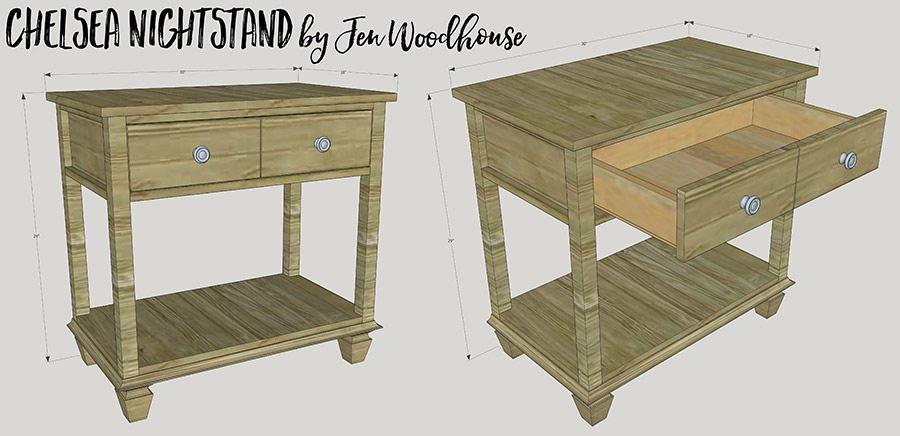
*Note: The plans are for one nightstand.
MATERIALS:
- 2 – 2x2x8′
- 1 – Half Sheet of 3/4″ Plywood
- 3 – 1x2x8′
- 2 – 1x4x8′
- 25-1/4″ of 1×6′
- 1 – Half Sheet of 1/4″ Plywood
- 6′ of 3/4″ Cove Moulding
- 4 – Furniture Feet
- 4 – Metal Corner Brackets
- 2 – Drawer Knobs
- 1 – Set of 14″ Drawer Slides
- 1-1/4″ Pocket Hole Screws
- 1-1/4″ Wood Screws
- 1″ Brad Nails
- Wood Glue
- Iron-On 3/4″ Edge Banding
TOOLS:
- Tape Measure
- Speed Square
- Pencil
- Drill with Countersink Drill Bit
- Table Saw or Router
- Miter Saw
- Kreg Jig
- Brad Nailer
- Clamps
- Safety Glasses
- Hearing Protection
CUT LIST:
- 4 – 2×2 @ 24-1/4″ (legs)
- 2 – 3/4″ plywood @ 13-1/2″ x 5-3/4″ (side panels)
- 6 – 1×2 @ 13-1/2″ (rails)
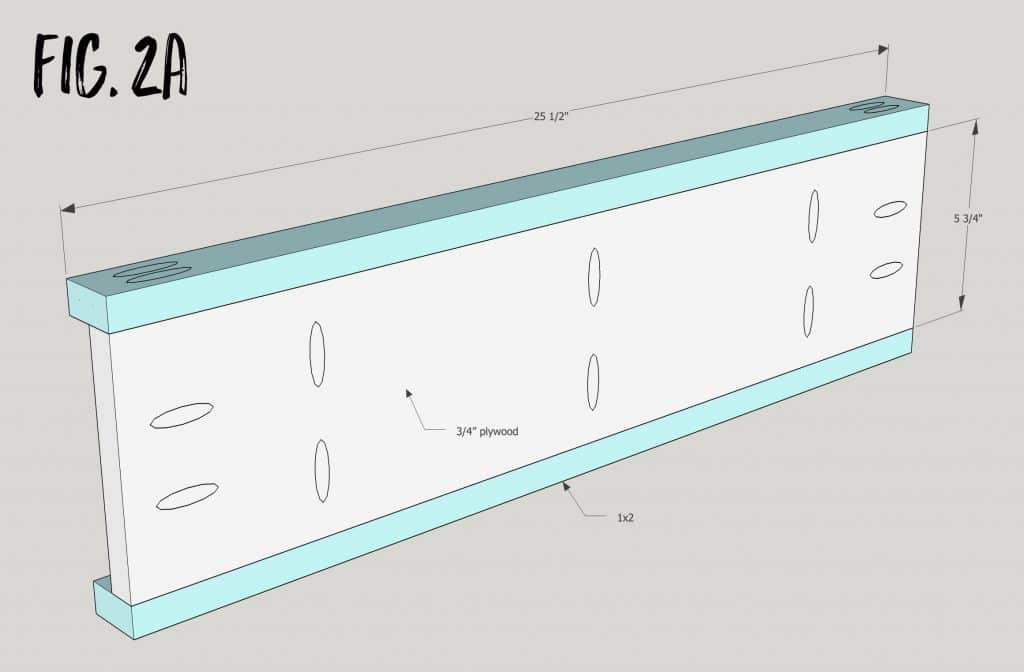
- 1 – 3/4″ plywood @ 25-1/2″ x 5-3/4″ (back panel)
- 6 – 1×2 @ 25-1/2″ (rails)
- 1 – 3/4″ plywood @ 28-1/2″ x 16-1/2″ (bottom shelf)
- 1 – 3/4″ plywood @ 30″ x 18″ (top)
- 1 – 3/4″ cove moulding @ 30″
- 2 – 3/4″ cove moulding @ 17-1/4″
Drawer:
- 2 – 1×4 @ 23″ (front/back)
- 2 – 1×4 @ 14-1/4″ (sides)
- 1 – 1/4″ plywood @ 24-1/2″ x 14-1/4″ (bottom)
- 1 – 1×6 @ 25-1/4″ (face)
STEP 1:
Build the sides. Drill ¾” pocket holes as shown and construct with 1 ¼” pocket hole screws and wood glue. Notice that the plywood side panels are flush to the interior.
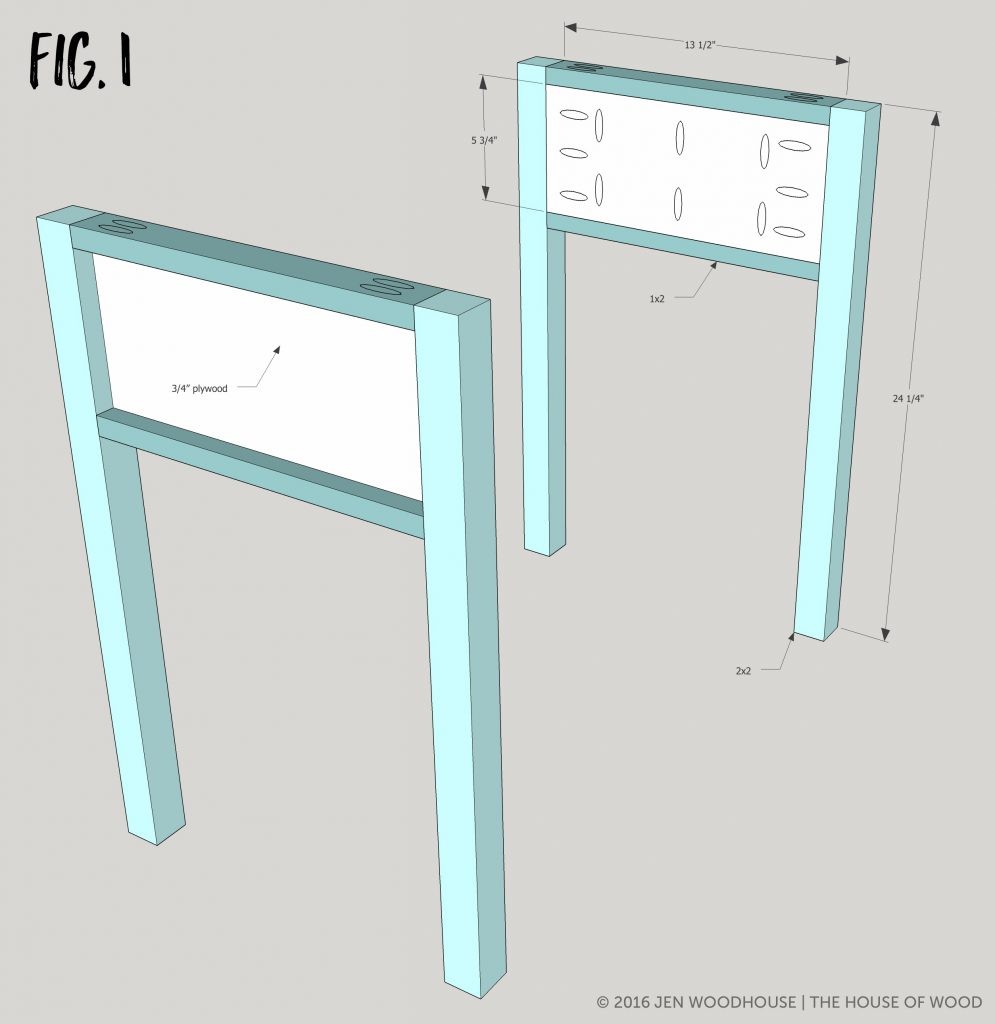
Build the back panel. Drill ¾” pocket holes as shown and attach 1×2 rails with 1 ¼” pocket hole screws and wood glue. Next, construct carcass by attaching back panel to sides with 1 ¼” pocket hole screws and wood glue.
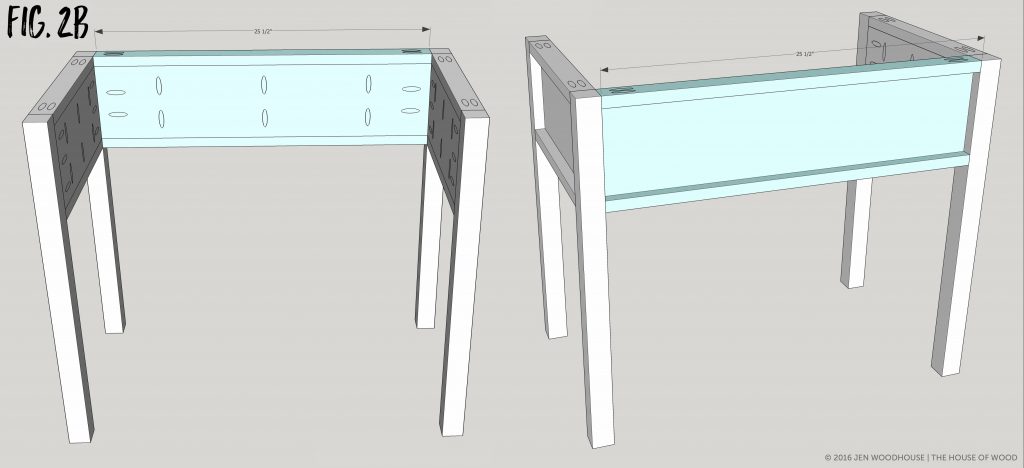
Drill ¾” pocket holes into 1×2 rails as shown and attach to carcass with 1 ¼” pocket hole screws and wood glue. Pre-drill pilot holes into the bottom rails to attach the bottom shelf in the next step.
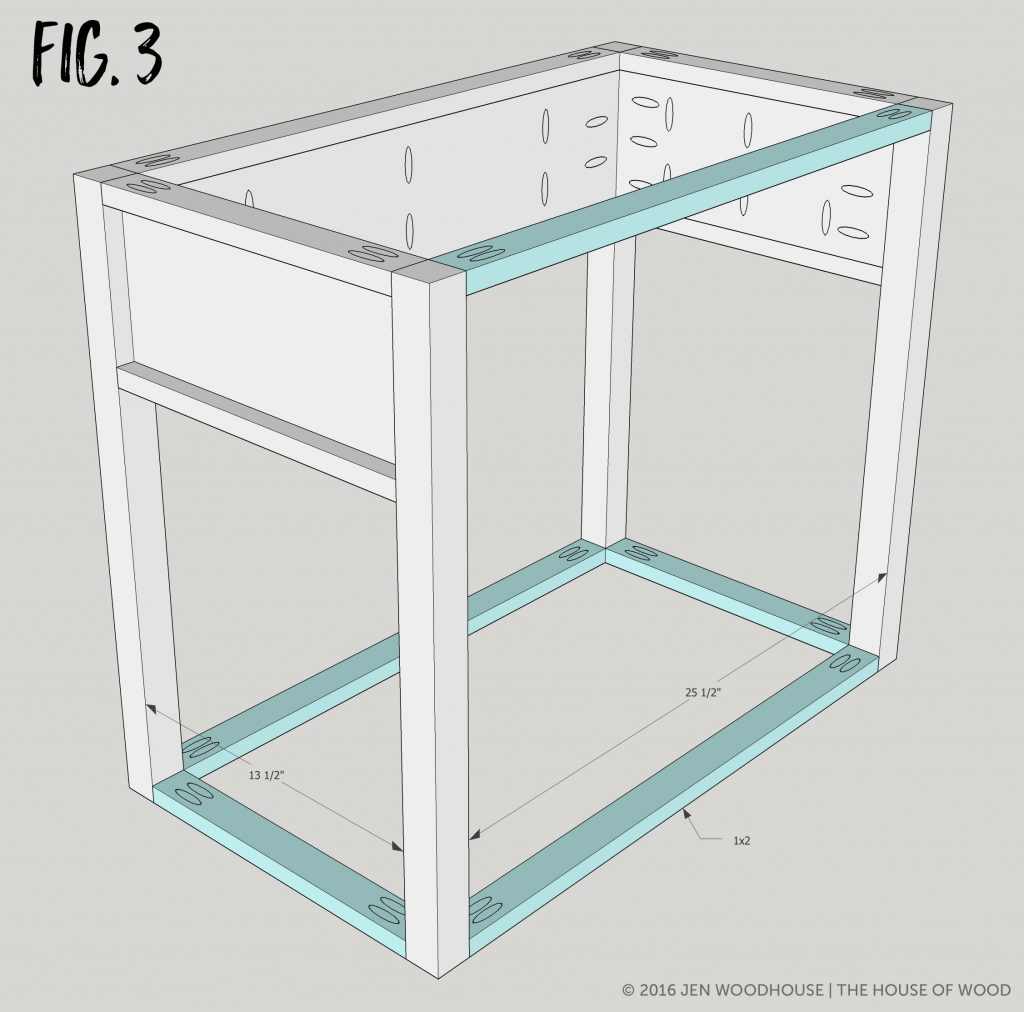
Notch out the corners of the ¾” plywood bottom panel and drop into place. Attach to the bottom rails with 1 ¼” countersunk wood screws driven from underneath. You may want to iron on ¾” veneer edge banding to conceal raw plywood edges.
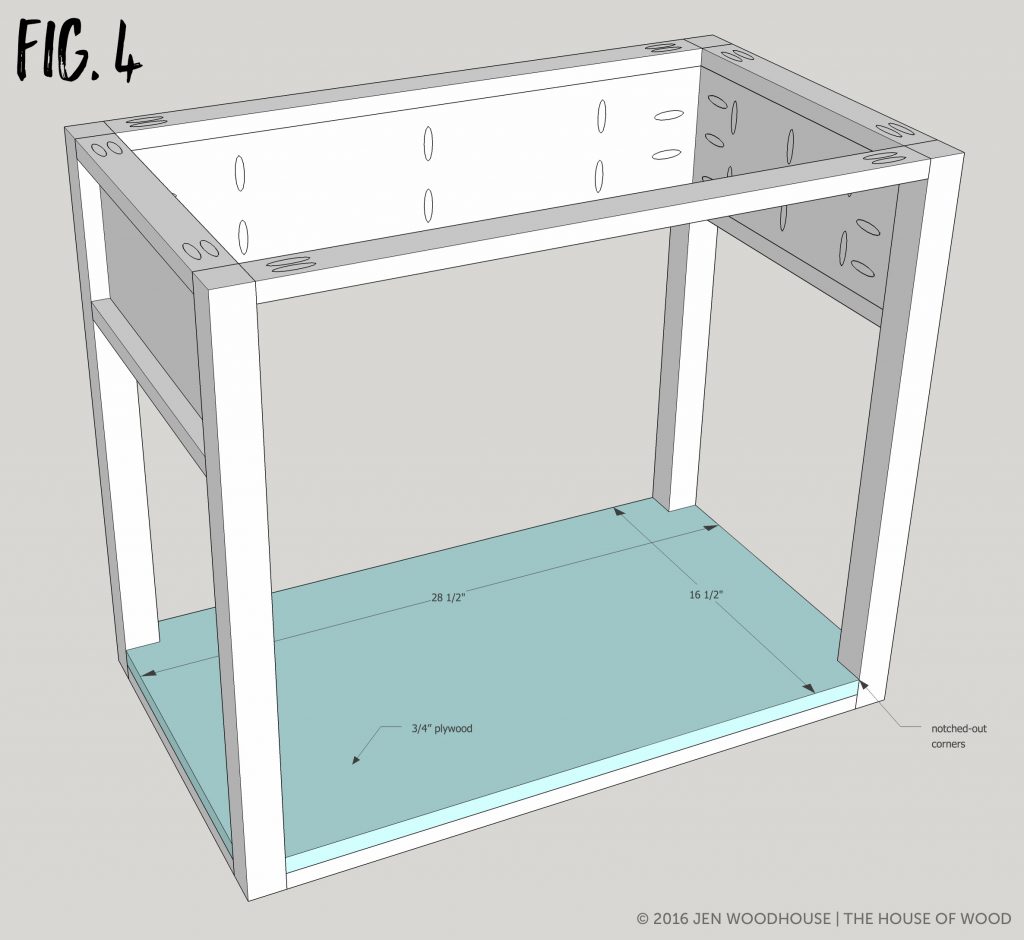
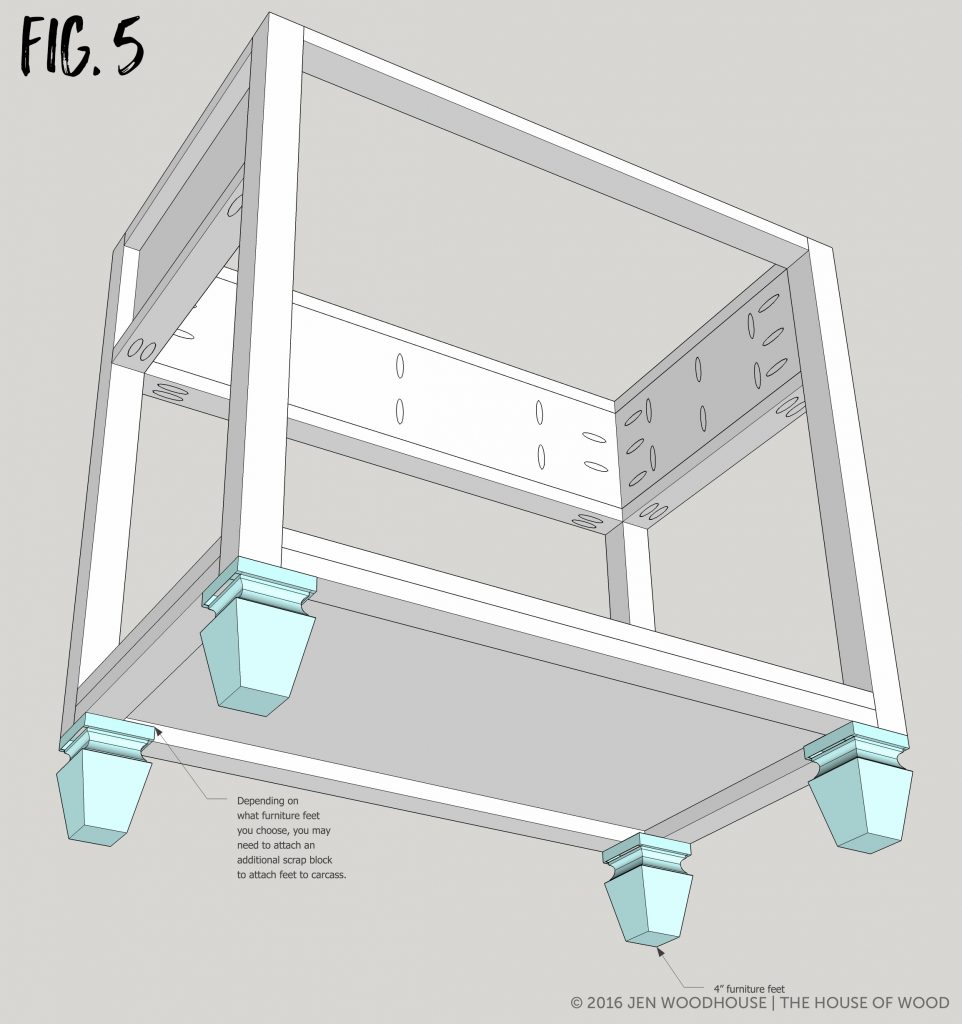
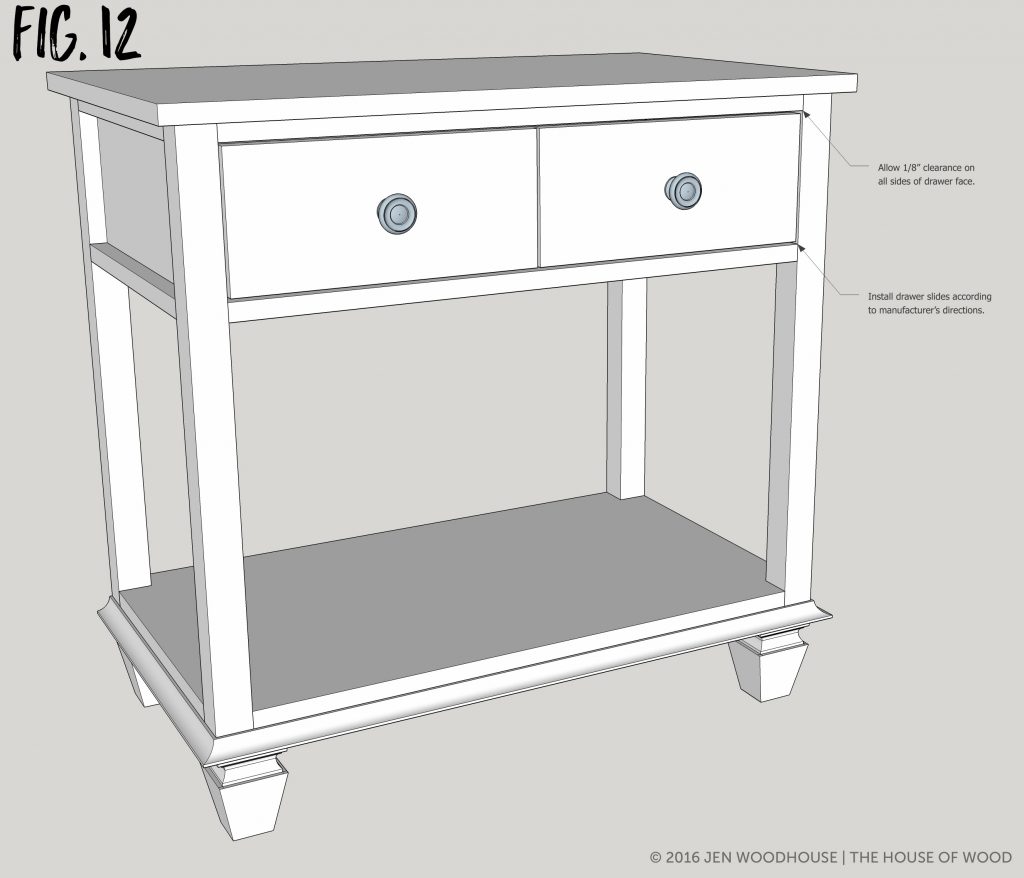
Attach metal corner brackets and screw in furniture feet. Depending on what feet you choose, you may need to attach an additional scrap block to attach the brackets to the carcass.
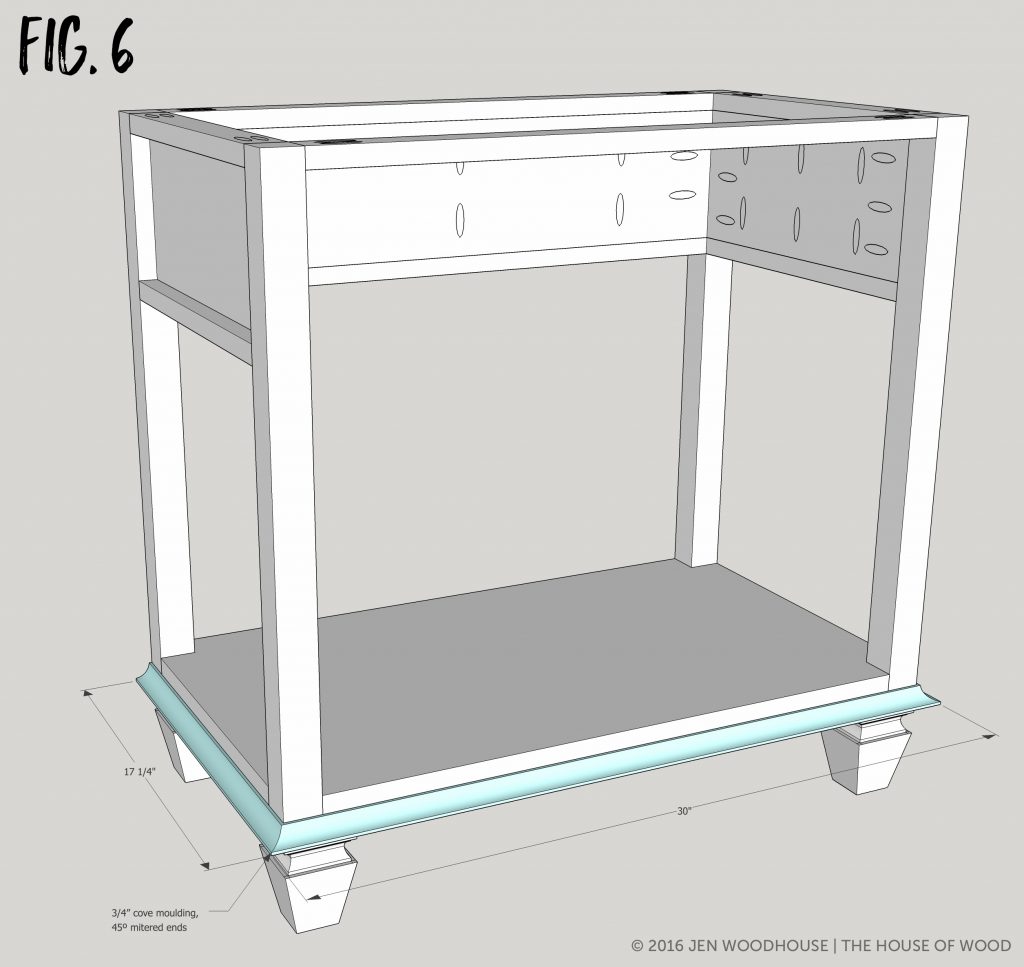
Measure, mark, and cut cove moulding to fit and attach to carcass with 1” brad nails and wood glue.
Pre-drill pilot holes into rails and attach top with 1 ¼” countersunk wood screws and wood glue, allowing for a ¾” overhang on all sides. Iron on ¾” veneer edge banding to conceal raw plywood edges.
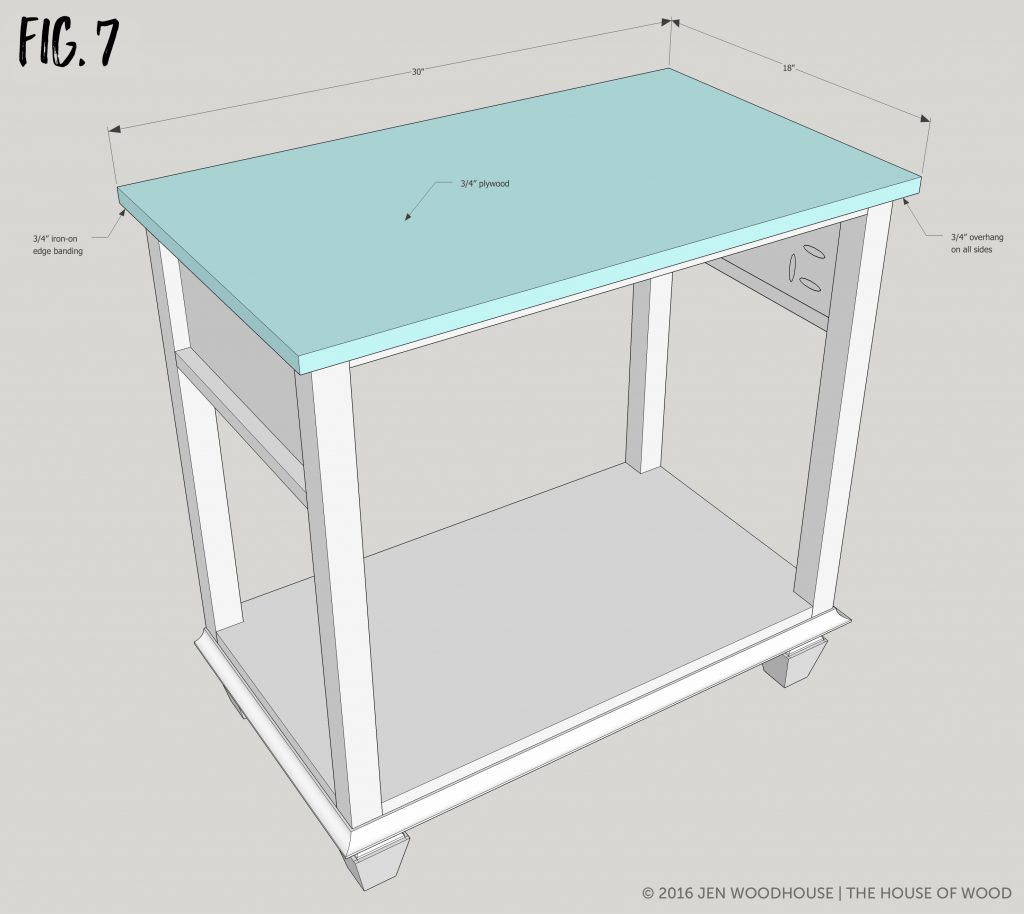
Drill ¾” pocket holes into 1×2 rail and attach to carcass with 1 ¼” pocket hole screws and wood glue.
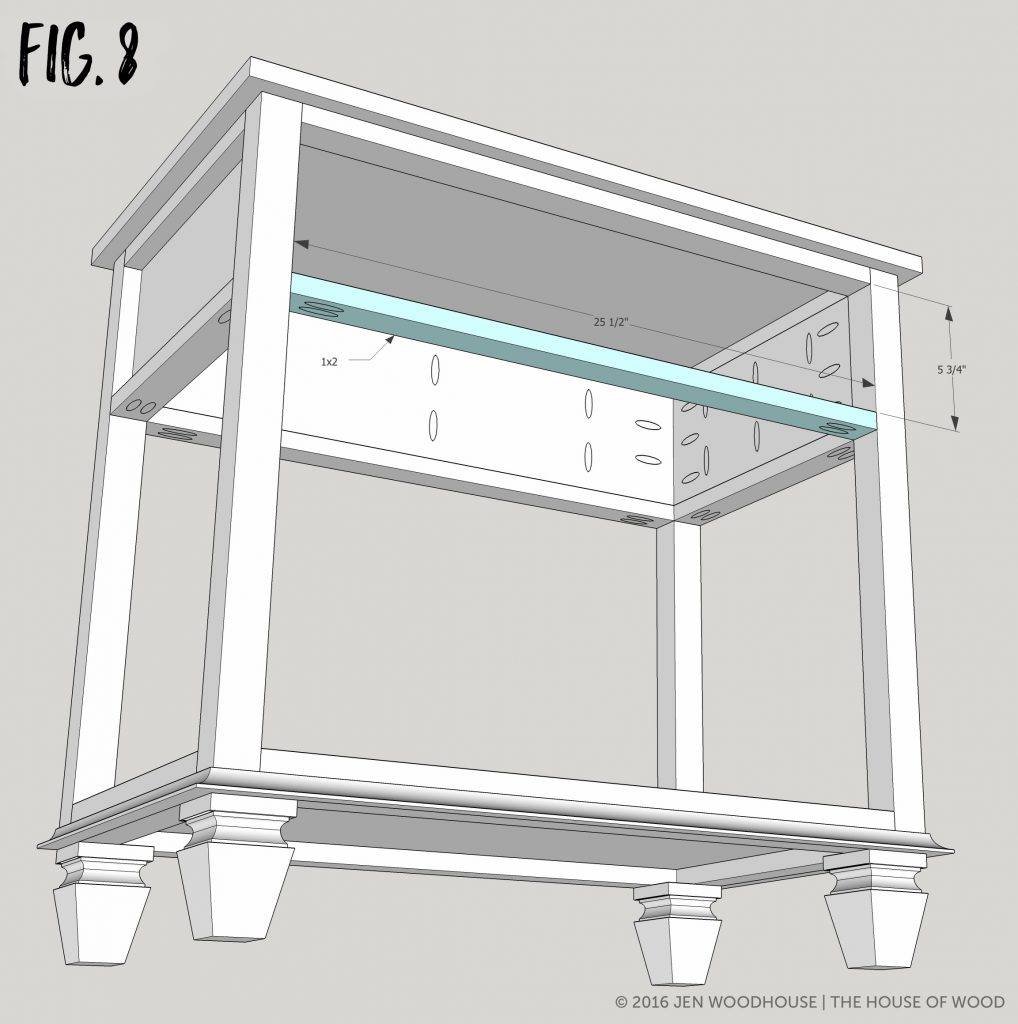
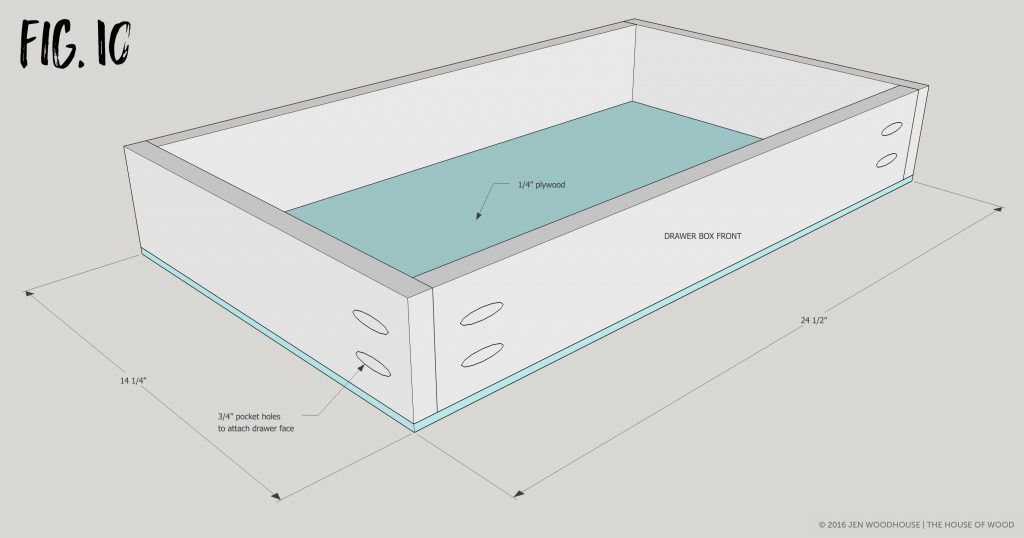
Build the drawer. Drill ¾” pocket holes on the outside of the drawer front and back (pocket holes will be hidden by drawer face in Step 11), then construct the drawer box with 1 ¼” pocket hole screws. Be sure to check for square. Additionally, drill ¾” pocket holes into the sides, facing towards the front to attach the drawer face (see Fig. 10).
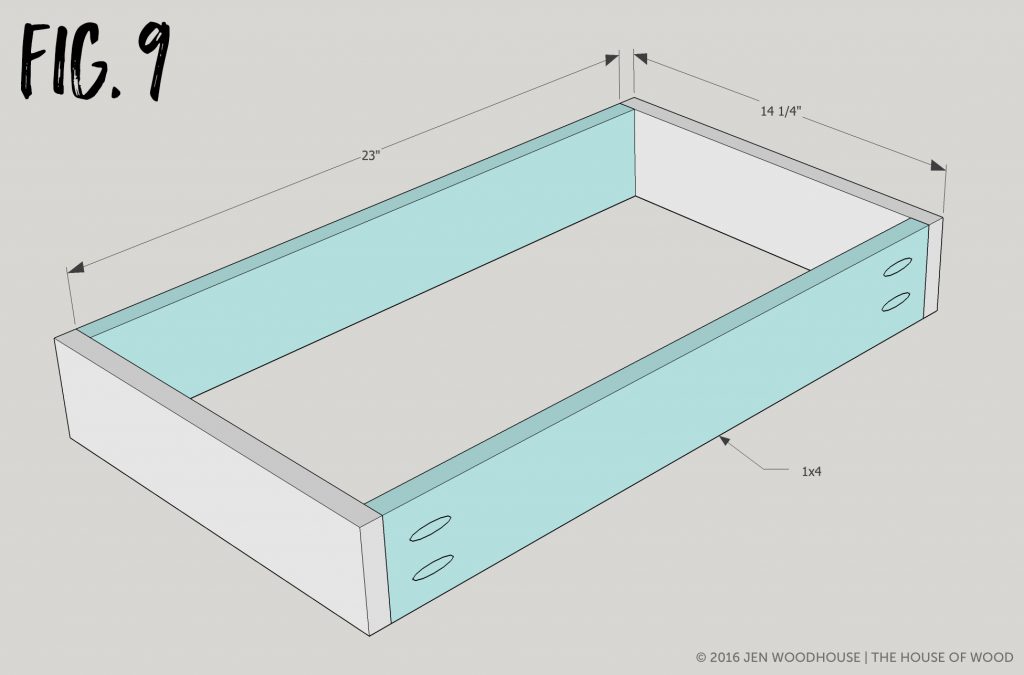
Attach the ¼” plywood bottom with 1” brad nails and wood glue.
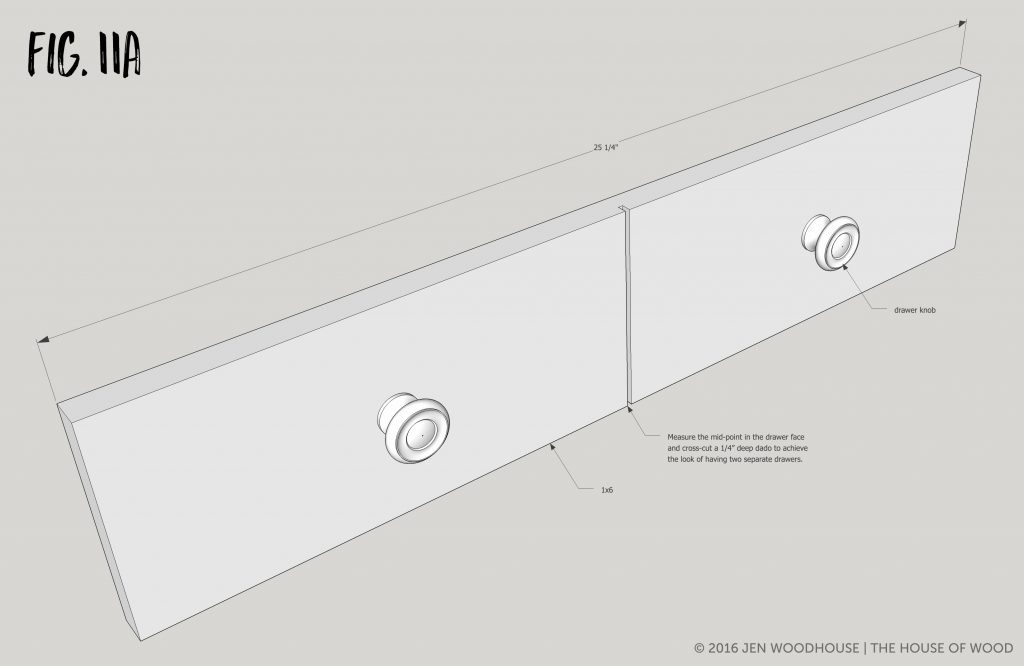
Find the mid-point in the 1×6 drawer front, then run the board through the table saw to cut a ¼” deep dado. This will mimic the look of two separate drawer fronts.
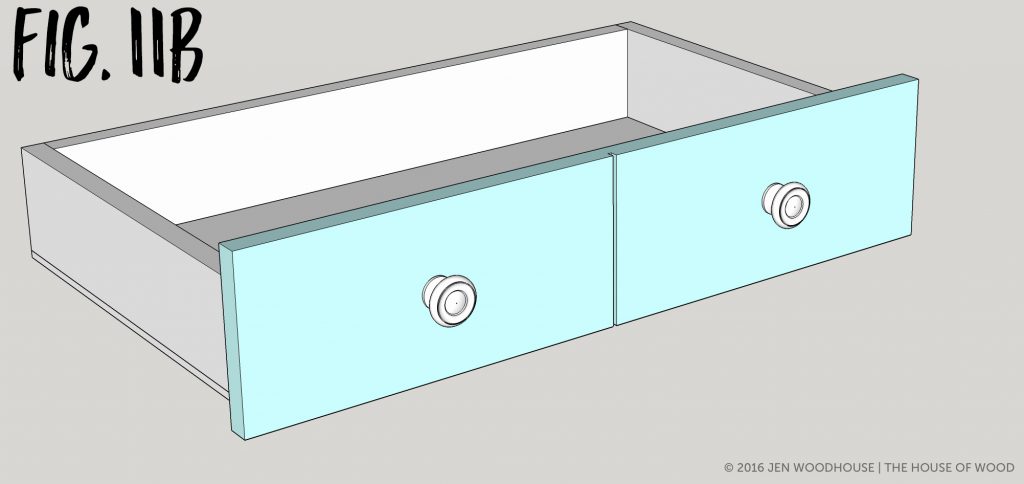
Install drawer slides according to manufacturer’s directions, slide the drawer box into place, then position the drawer face with a 1/8” clearance around all sides. Clamp the drawer face onto drawer box, then attach it with 1 ¼” pocket hole screws. Attach drawer knobs to drawer face.
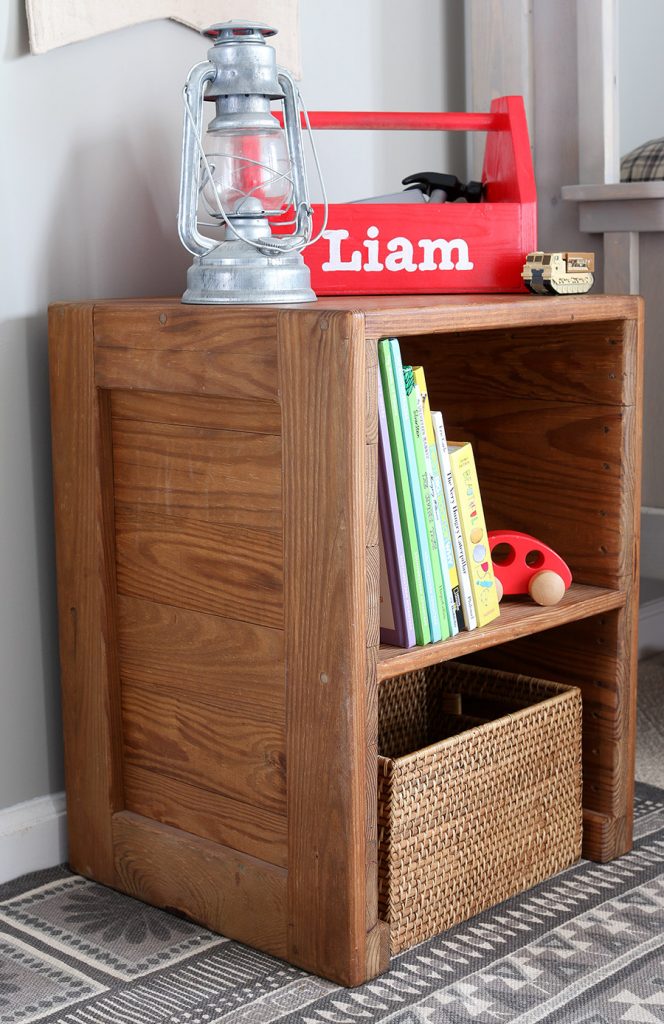
Like this post? Here are a few more nightstand plans to check out:



You are a rockstar, my friend! Thanks for sharing your amazing skills and helping me with this project! I couldn’t be happier with them!
That’s a gorgeous nightstand! I love the finish on it, too!
I love the build and the finish is to die for. I sure hope you share those details too (in the future)
Thank you Jessie! I’m not sure if Chelsea has plans to share a finishing tutorial on her nightstands.
Did you ever share the finishing plans? I am trying to find out what stain or paint was used.
Hi Jessica,
I believe Chelsea did share how she finished these nightstands on her site: http://www.makinghomebase.com/diy-nightstands/
Hope that helps!
Looks Beautiful!! What are the metal corner brackets and where do they go?
Thanks Heather! The metal corner brackets are so that you can screw the furniture feet onto the nightstand. Hope that helps!
What color paint did you use?
Roughly how much did it cost to build this nightstand?
Just started building this and you have a mistake in the plans. You can not get the 4 legs out of an 8ft piece of 2×2. Wish I would have checked the measurements before heading to the lumber store. I now have 3 right sized legs and 1 that is an inch and a quarter too short. Might Want To Update Plans.
Thanks for the heads up, Jessica – sorry about that! The plans have been revised.
No worries. Now I have lots of scrap for another project. I’m super excited about this build! Hoping mine come out just as beautiful as these!!
Hi, I am trying to make your nightstand but the link for the pdf version of the plans says 404 not found when you click on it. By any chance can you update the link? I think the info for the legs might be wrong. I’m actually working on this night stand right now.
Hi KR,
Thanks for the heads up! The link is fixed now.
Thank you so much! I look forward to working on more of your projects!!
Hi, what type of plywood did you use? WOuld WBP grade be ok?
Thanks 🙂
xx
I’m so glad I found this! I can’t wait to make these for our Master bedroom. I just saw an Instagram post from someone who had these Pottery Barn night stands and used the Pottery Barn Toscana Dining Bench at the foot of her bed. The combination was amazing. Any chance you could create a wooden bench inspired by the Toscana Dining Bench from Pottery Barn to go with this?