If you follow me on Instagram or Facebook (you’re amazing – thank you!), you’ll have caught sneak peeks of this project. And if you don’t, get with the program! The House of Wood IG and FB feed is where it’s at, yo.
This project is way overdue, you guys. Like, several months overdue. Way back in September, I promised my sweet friend Emily that I’d build her bedroom furniture and then I totally dropped the ball. Emily is a fiercely talented Kentucky-based photographer and she and her hubby recently bought their first house. Emily’s nightstands and dresser have been on my ‘To Build’ list for-freakin’-ever. I’m so embarrassed it’s taken me so long to deliver because that’s just not how I roll (usually).
But life got in the way, I spent a lot of time traveling, the craziness of the holidays came and went, and then Winter rolled in and I pretty much went into hibernation mode. Read: turned into a big ole baby about working in the freezing temps. Yeah, yeah. Excuses, excuses, right? But! No! More! Excuses! I am so relieved to finally be able to share this project with you guys! And so is Emily. She has the patience of Mother Teresa. For reals.
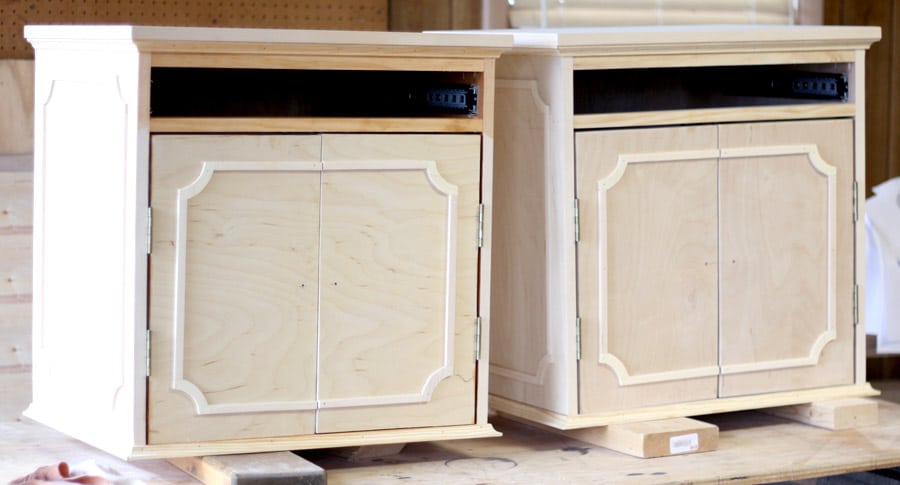
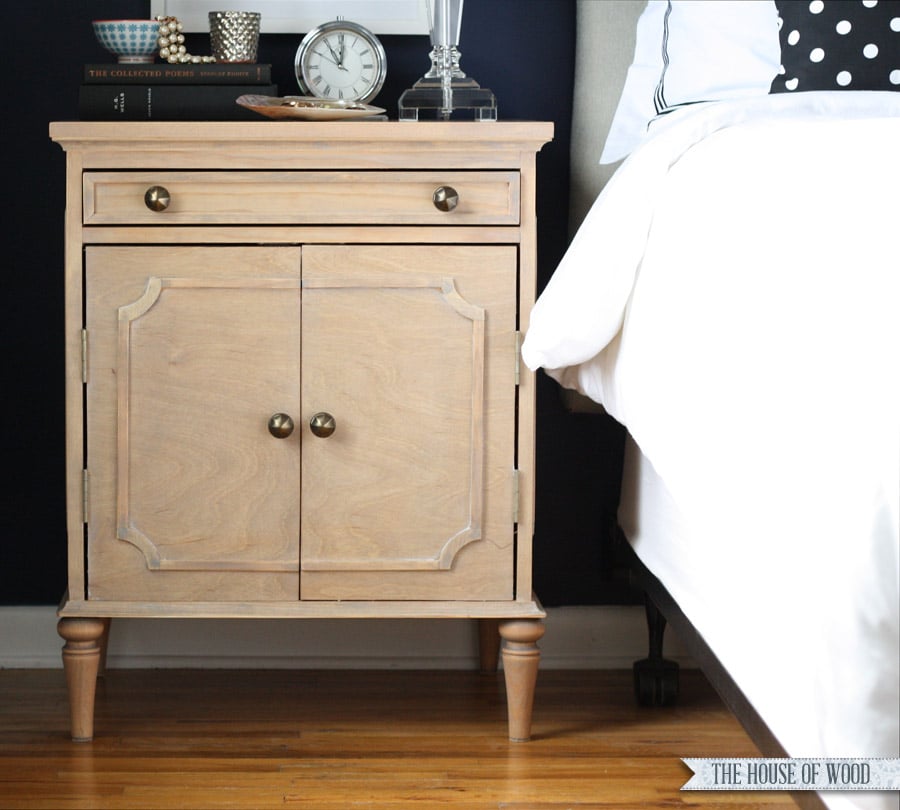
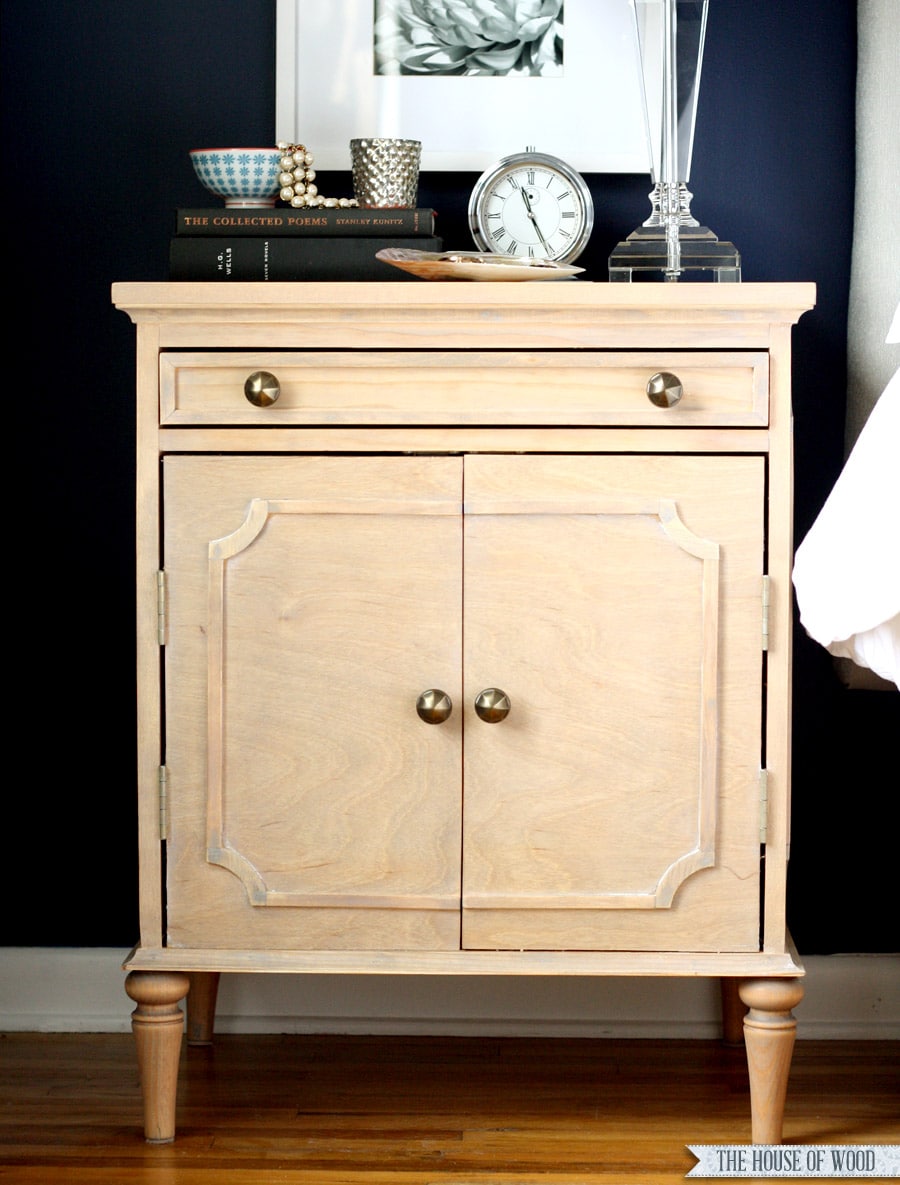
Here’s how her nightstands turned out:
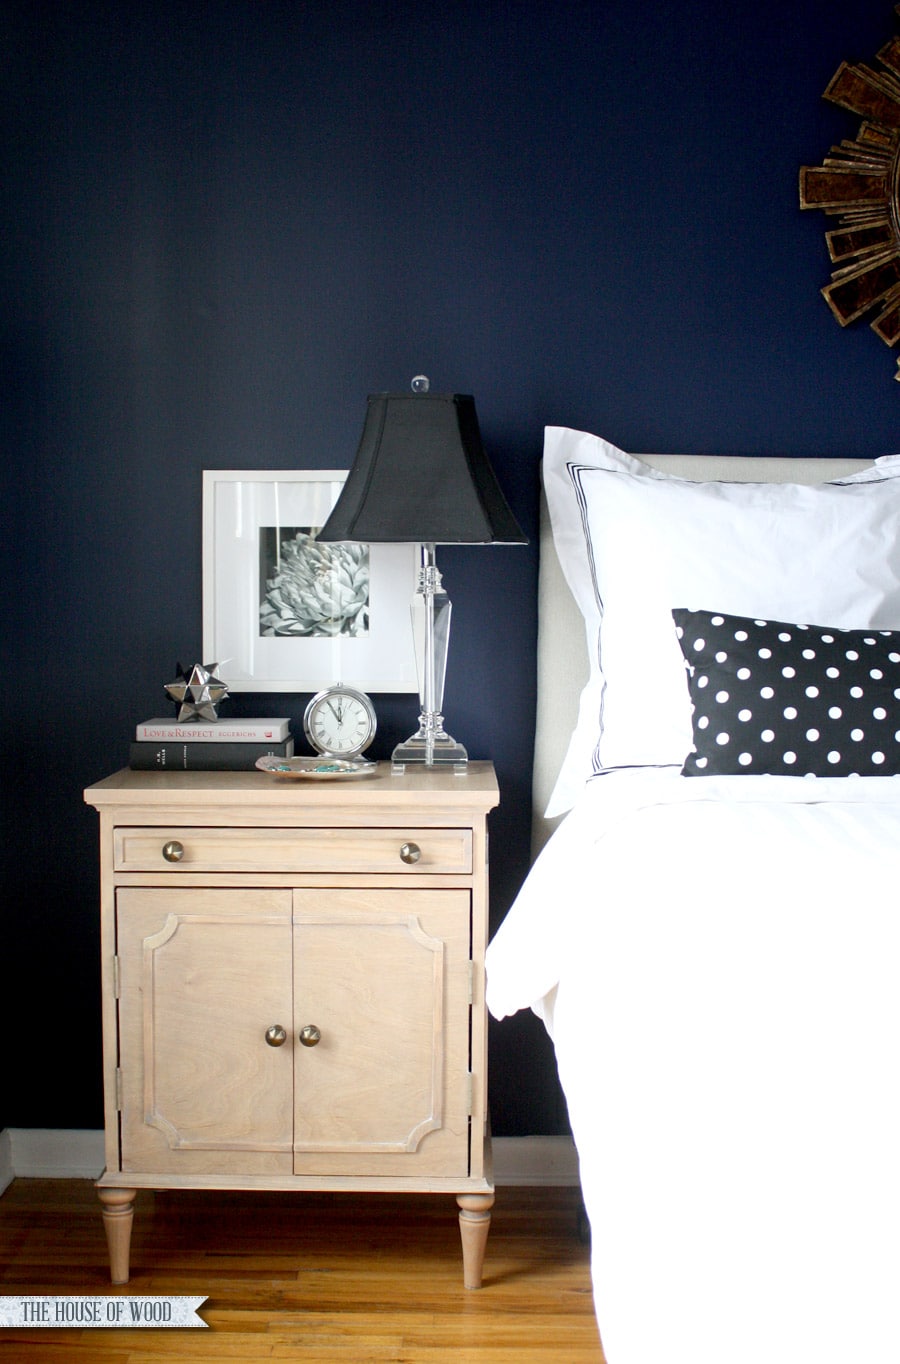
I’m kind of in love with them; I may just need to build another pair for our guest bedroom. And it wasn’t that hard to build – I just had to get my butt in gear. I get intimidated by a project and it sits and sits and I mull over it for a few months until finally I’m like, ohmygoshjustDOitalready! And then it gets done in, like, a day or two. I’m a perfectionistic procrastinator. Is that a thing?
Once again, I called on the lovely and talented Ana White to draw up a plan, which you can download (for free!) here.
As always, I used my favorite Purebond Plywood in birch. It’s the prettiest plywood on the market and it takes stain beautifully. It’s also formaldehyde-free and made right here in North America. Read about why Purebond is the healthier alternative here.

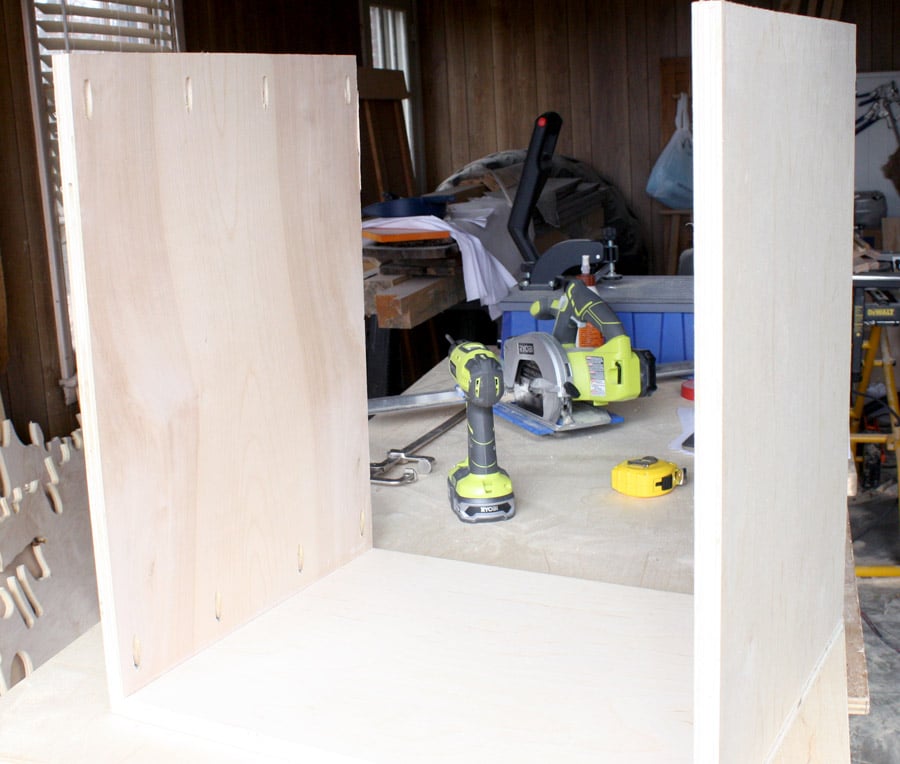
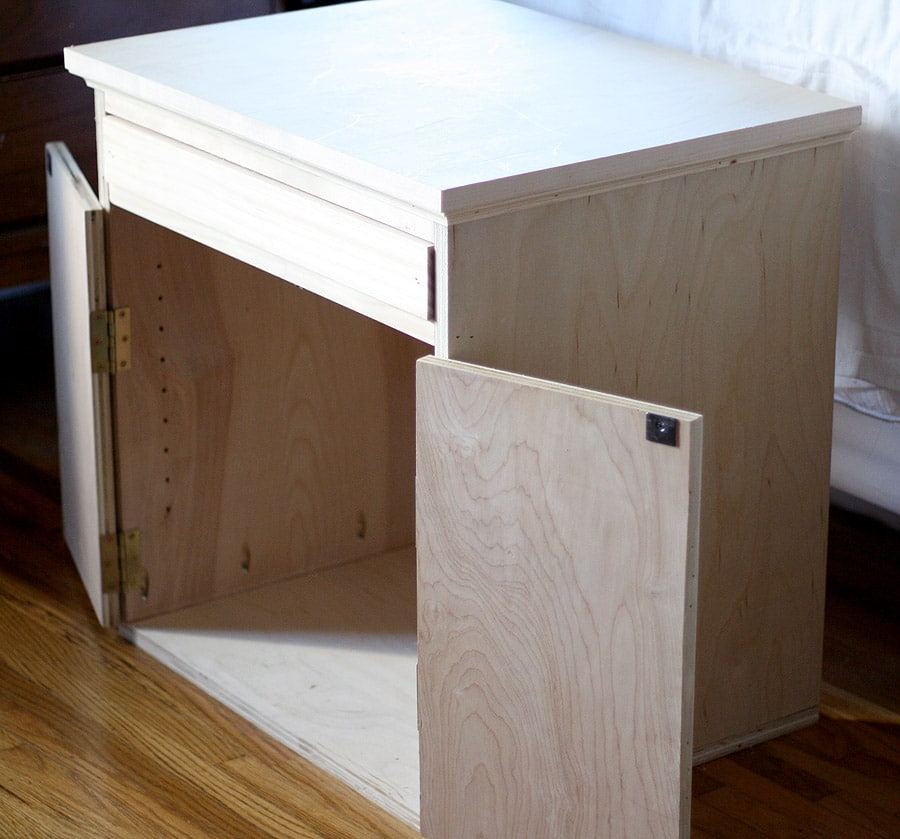
First I built the carcass, using 3/4″ pocket holes and 1-1/4″ pocket hole screws and wood glue.
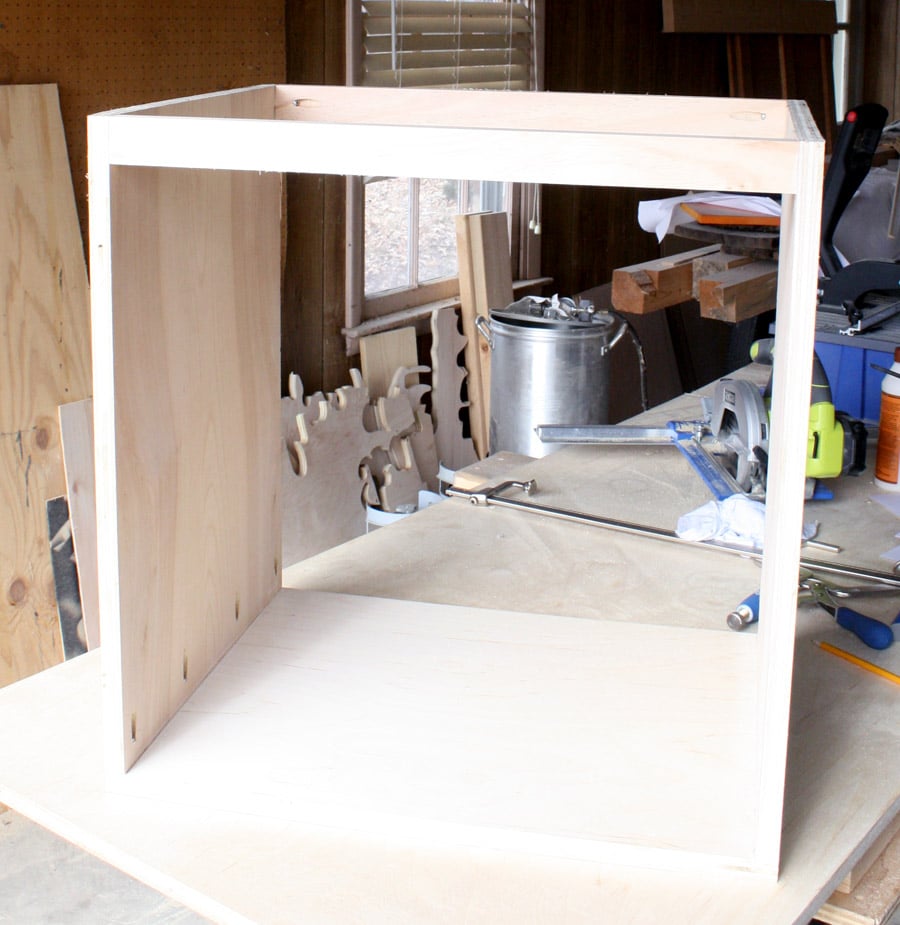
I have to apologize that I don’t have more progress photos for you; blogging is hard y’all! But worry not, you’re in luck! Ana drew up the plan to perfection, outlining every single step so you can build this nightstand without issue.
*This post contains affiliate links. To read my full disclosure policy, click here.
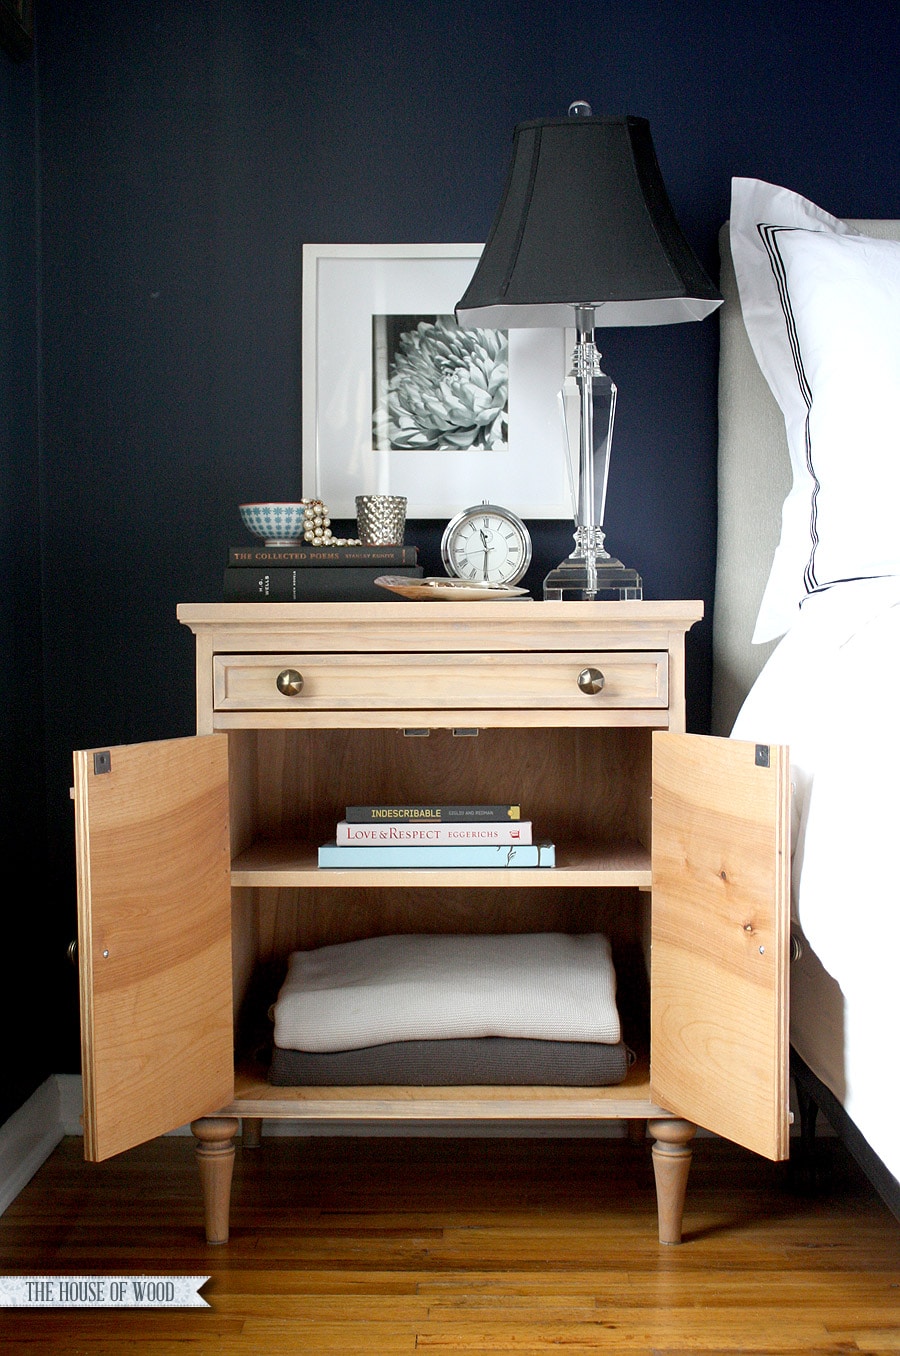
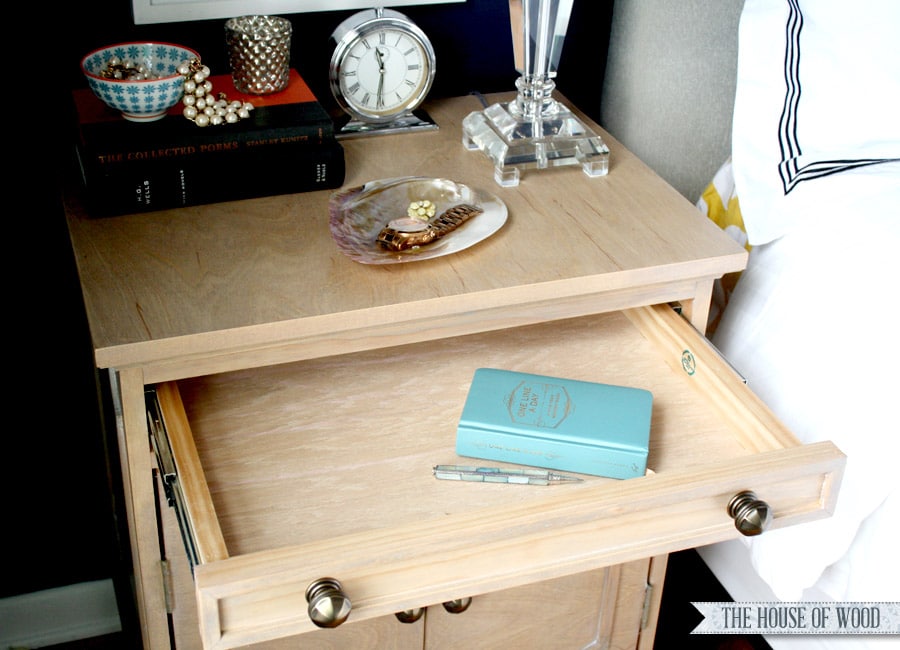
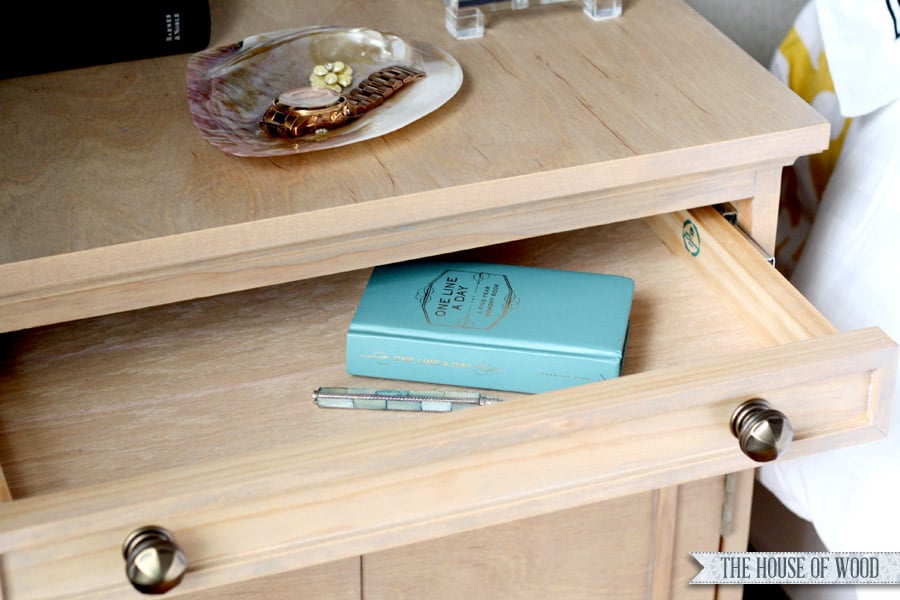
Gotta love that shallow little drawer. So cute! It’s the perfect size to hold an iPad, iPhone, or a magazine. Or a very skinny book. Not a novel, but a short story. You get what I’m saying. And check out those shelf pin holes. I used my Kreg Shelf Pin Jig to make the inside shelf adjustable. So fancy!
I built the shelf per Emily’s request, so Ana’s plans don’t include it, but it’s easy to add. Just cut a piece of 3/4″ plywood at 16-1/2″ x 21″ and there ya go: instant shelf. I ironed on some veneer edging on the front and sides of the shelf to hide the raw plywood edges.
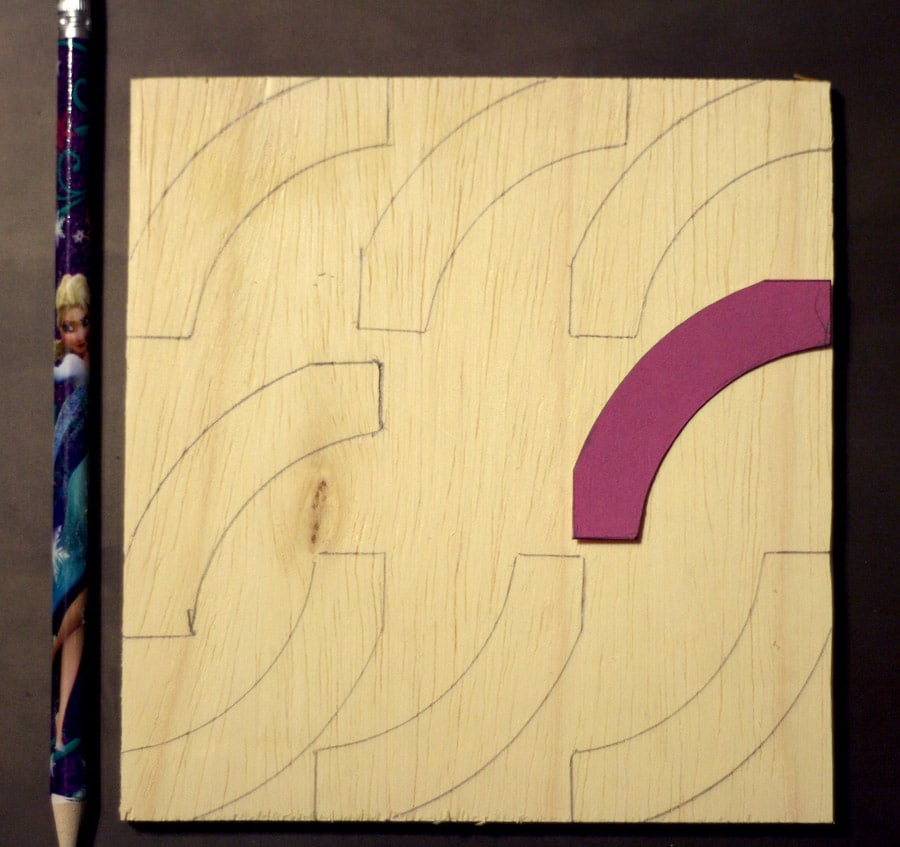
Because I couldn’t find an affordable option for the curved trim, I had to make my own. This did require a bit more intricate detail work, but it was so worth it in the end. Ana’s plans include a graphic for the curved pieces, so I printed it out on card stock and used it as a template. And don’t laugh at my Elsa pencil – it was the only pencil I could find in my entire house. What? Don’t act like the Frozen phenomenon hasn’t overtaken your household too.

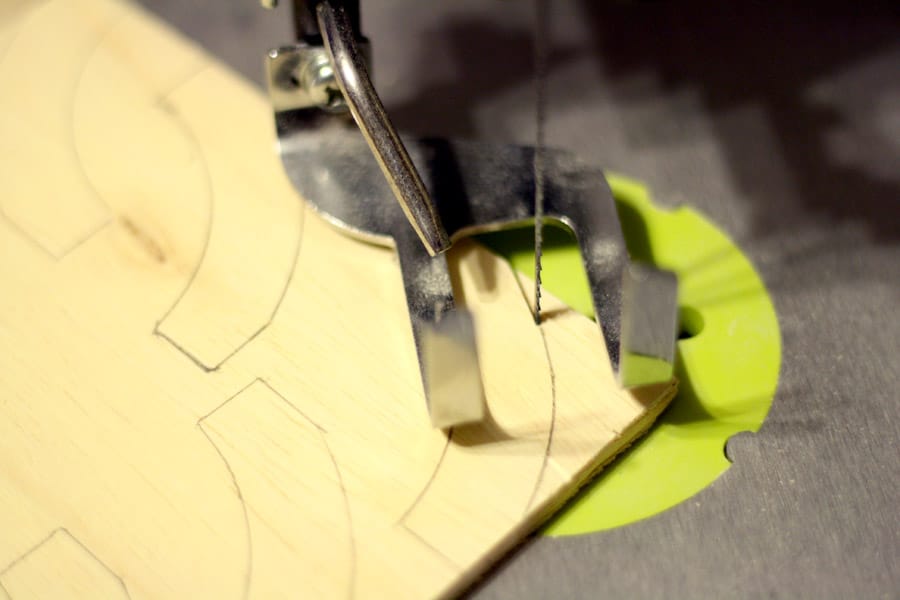
This was the first time I’ve ever used a scroll saw and lemme tell you, I am a huge fan. This is the one I have. I cut the curved shapes out of 1/4″ plywood, following along the pencil lines. I just love the precision of this tool.
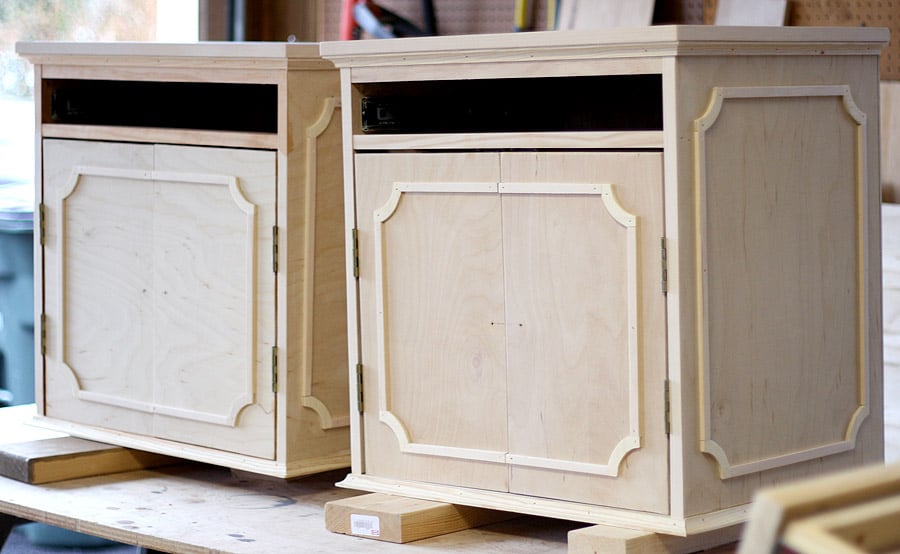
I purchased the straight trim pieces (found in the moulding aisle at Home Depot), connected them with my DIY’d curved pieces to form this fancy-lookin’ moulding, then glued and nailed it onto the sides and doors of the nightstands. Look how pretty! I’m so excited, I just gotta shake it out. *dance break*
Now let’s talk about those legs. They’re custom, but you can purchase them here. Once again, we worked with our good friends at Osborne Wood who made them especially for this project. I attached the legs using my tried-and-true hanger bolt/tee nut combo. Details on how to do that can be found here. Using a drill press to drill the pilot hole for the hanger bolt is ideal, but not necessary. You just want to make sure the pilot hole is as straight as possible, so the leg doesn’t look wonky when installed.
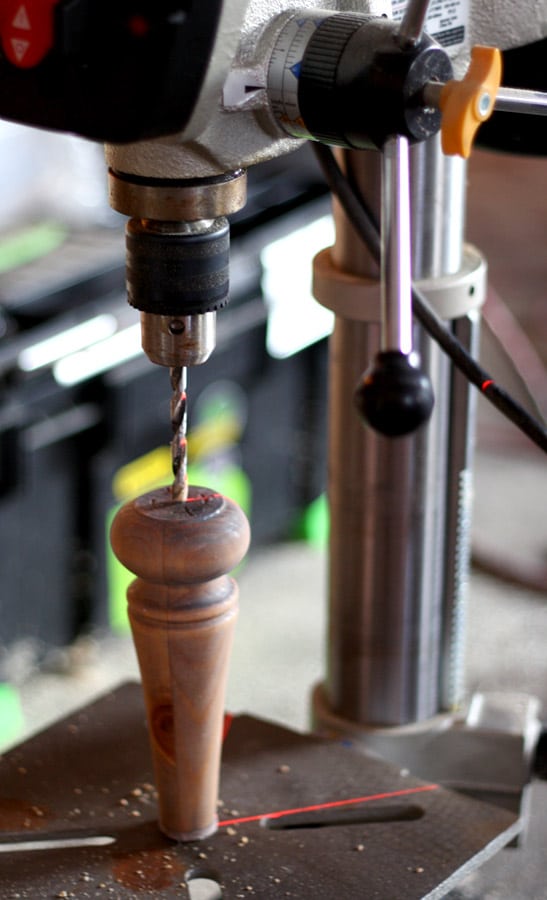
*Helpful hint: when drilling pocket holes into the side panels, take care not to drill the holes too close to the sides of the edge. Otherwise, your pocket hole screws and hanger bolts may have a traffic jam later on. Just a little foresight for ya. Don’t ask me how I know.
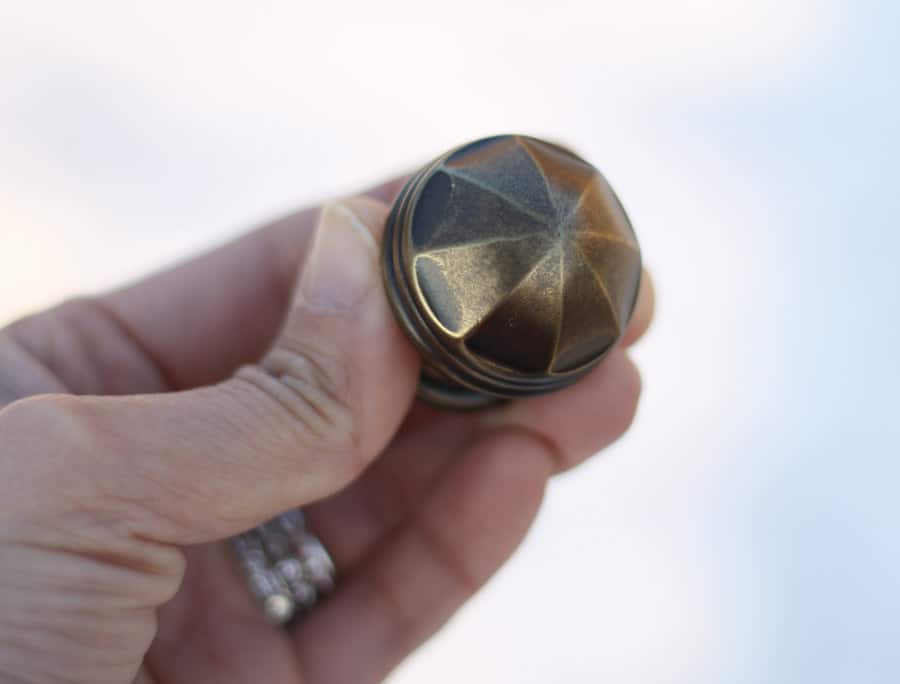
And can you dig these knobs? So rad. I got them from D. Lawless Hardware. And I’d like to bring your attention to the white background in the photo. It’s snow. Told you it was cold. Winter = not my BFF.
Oh, yeah. I hate Winter. Have we covered that? No? There. I said it. And the dear husband wants to get stationed in ALASKA. Will someone please tell him he is out.of.his.mind?
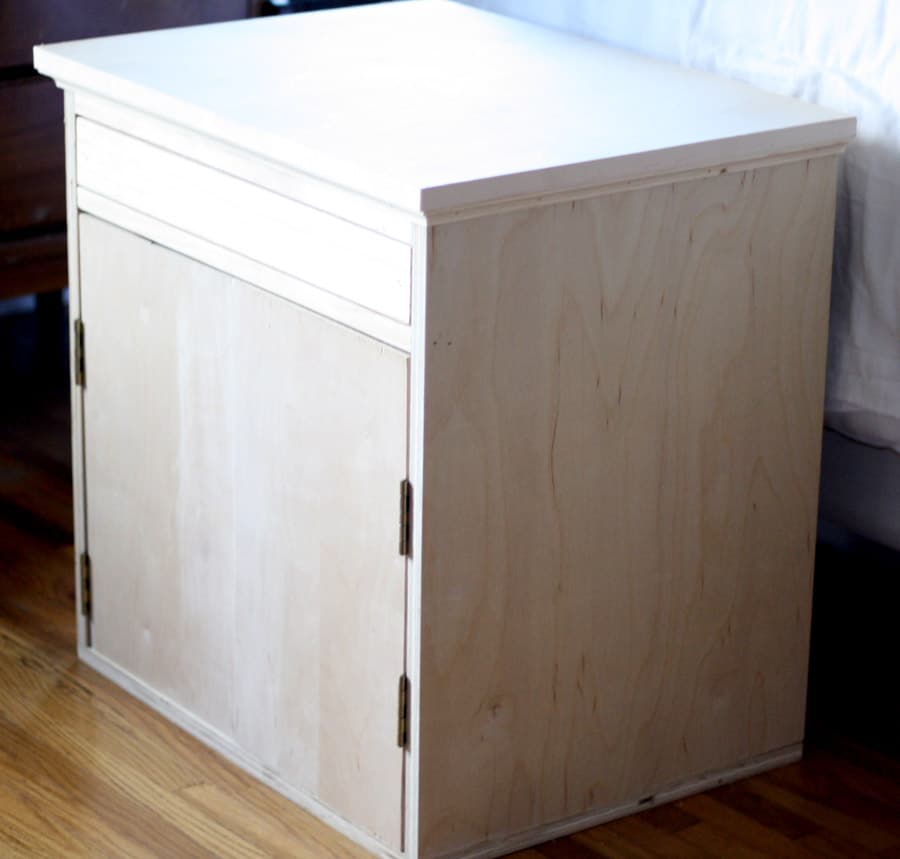
After I built the nightstands, it was time to finish them. I posted this photo on Instagram and Facebook to get your input:
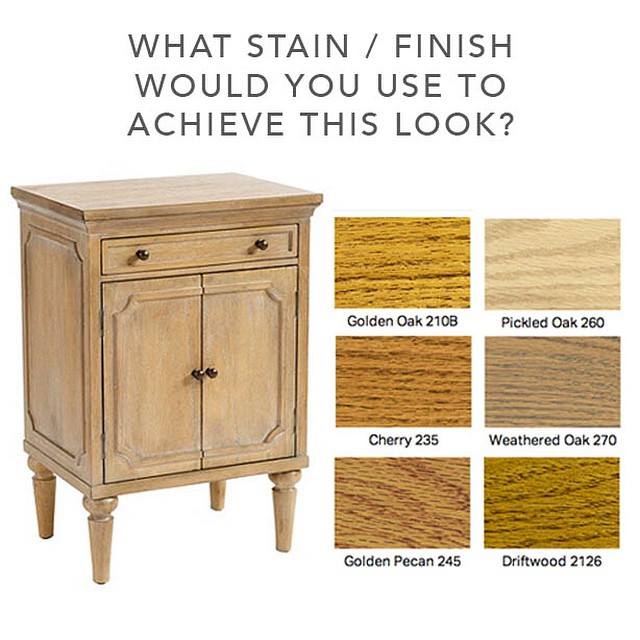
Thanks to your wonderful recommendations, I ended up mixing Golden Pecan stain with Weathered Oak, then followed up with liming wax. Then I finished it with three coats of satin wipe-on polyurethane. I think it turned out pretty darn close. What do you think?
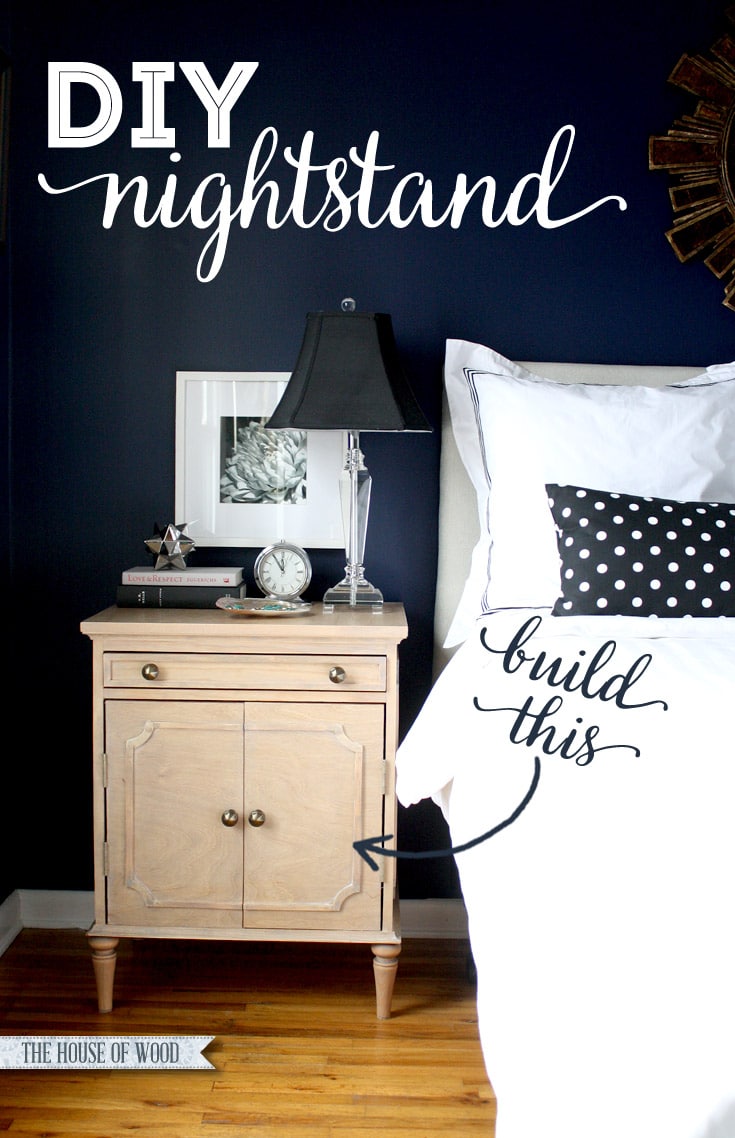
Big hugs and tons of gratitude to Ana for working with me on this project (be sure to download the free plans here) and to Emily, for her unending patience and friendship! I’ll be building her a matching dresser next, so stay tuned for those plans soon! Thanks for stopping by, lovely people! If you’d like to pin and share this project, feel free to use the image below. Thank you, I heart you!
*A huge thank you to RYOBI, Osborne Wood, and D. Lawless Hardware for partnering with me on this project. I received products and/or compensation for this post. All ideas, efforts, dance breaks, and professions of undying love are my own.


I’m so in love with this look! This looks like a lot of work (as most DIY is) but the payoff is so worth it. Fantastic job!
Absolutely perfect! As usual
Gorgeous nightstand Jen!
Gorgeous nightstand! I’m coveting the lamp too! Where is it from? You are so talented
Thanks, Ann! The lamp is from Overstock, but I must warn you – the crystal base arrived broken and shattered, so I contacted Overstock and they sent me a replacement. Unfortunately, the replacement also arrived damaged. Though it’s just a small chip that is very discreet, I’m convinced there is no way of getting this lamp delivered in perfect condition.
Gorgeous! Don’t you just love Ana’s plans?! I also use the shelf pin jig and feel fancy every time. Great tutorial. You’ve inspired me, and I’m sooo jealous of that scroll saw! I’m buying one!
Thanks, Donna! Yes, definitely get one – I love mine!
Oh My Goodness!!! Did you seriously make these from SCRATCH??? Absolutely beautiful work! You are uber talented for sure! You shame the rest of us DIY peoples 🙂 Thank you for sharing your work!
Smiles!
Terry
Hopped over from FFF on Miss Mustard Seed. Amazing night stands! You are quite talented! Also a beautifully put together room. Would it be possible to know the bedding source and the wallpaint color? We’re you the decorator as well? Thanks!
Hi Paula! Welcome, so glad you stopped by! Thank you for the kind words. The bedding is from Pottery Barn. I’m sorry I don’t know the wall color – we’re in a rental and it was painted before we moved in.
I am in love with these stunning night stands. Jen! your blog post is so inspirational that i have decided to build these night stands for my guest bedroom.
Wonderful, Saima! So glad to hear it!
Thanks for your prompt response. I just want to confirm how should i mix Golden Pecan stain with Weathered Oak. Like should i put one coat on the wood first and then put another stain or do i need to pour two stains in a separate bucket mix it and then apply the mixture on the wood.
Hi Saima,
I believe I mixed the two stains together in a plastic container and then applied the mixture to the wood. Start with the Golden Pecan and add Weathered Oak until you get the desired shade – apply it to scrap pieces of wood to test the color. Hope that helps – good luck!
These are very well done! If you had to guess, any idea what it costs in materials to build one? I’m trying to determine whether building or buying will end up being more costs efficient. But I’d much rather build my own. Thanks!
Hi Patrick,
Thanks for the kind words! I would guess both nightstands cost about $75 to make. Hope that helps!
Is that 75 a piece or total? I’m obsessed and making these is next on my list!!!