If you’ve kept up with me on Instagram, Facebook, or Pinterest, you’ll gather that I’m crushing on all things shiny and sparkly right now. Gold, crystal, mirrors… anything unapologetically girlie and glam has been my latest obsession. Gold, especially.
*This post contains affiliate links. To read my full disclosure policy, click here.
Last week, I shared a free printable that I made using Silhouette’s printable gold foil. Not satisfied with just sticking the gold foil stickers on the paper, I embarked upon a DIY gold foil tutorial hunt.
Surprisingly, there isn’t much information out there in the interwebs about how to DIY gold foil. I know, crazy, right? So I told myself, “Self, you will figure this out.” Luckily, I stumbled across this handy video tutorial. God bless you, YouTube. Unfortunately, the tutorial recommends a pricey laminator. Because I’m cheap not willing to spend that much time and money on a passing trend, I decided to try my gold foil experiment (*experiment being the key word here) using this basic laminator instead. If all else failed, I could use it as an actual laminator. Imagine that. I wanted one that was at least 13″ wide just in case I ever wanted to laminate (or hot foil) 12×12 scrapbook paper.
Okay, onto my DIY gold foil experiment! You guys are going to flip out over how easy this is!
Here are the players:
Alright! Let’s get started (and wish me luck)!
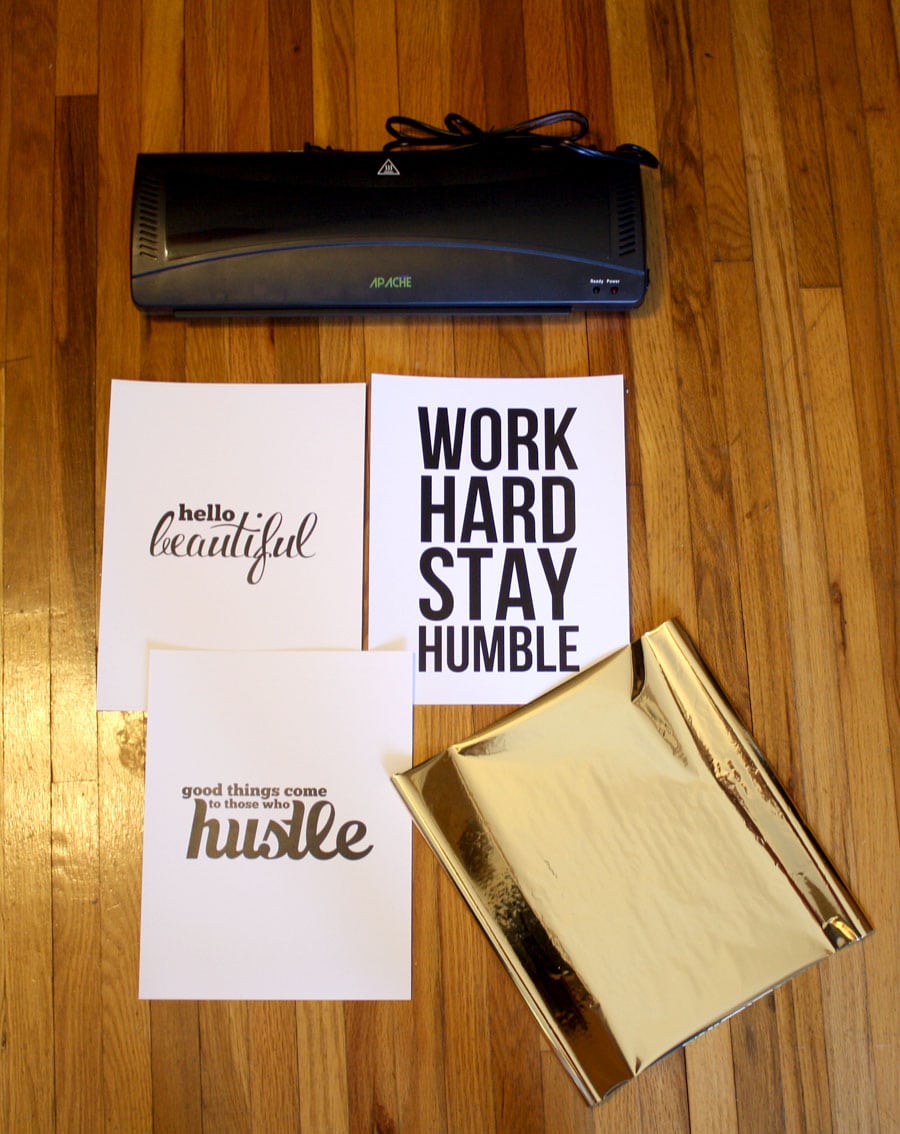
I created these black and white prints in Photoshop and printed them out on a laser printer. You should use a printer that prints with toner because it’s what the foil will react with. You can print your image using a laser printer, or even a photocopier. Just make sure it’s black and white and toner is what’s used (not ink).

Next, I cut a piece of toner-reactive foil large enough to cover the image, gold side up, smoothed out any wrinkles in the foil, then put another sheet of paper on top, to hold everything in place (so that the foil is sandwiched between the two pieces of paper). Then I sent it through the laminator with my fingers crossed!
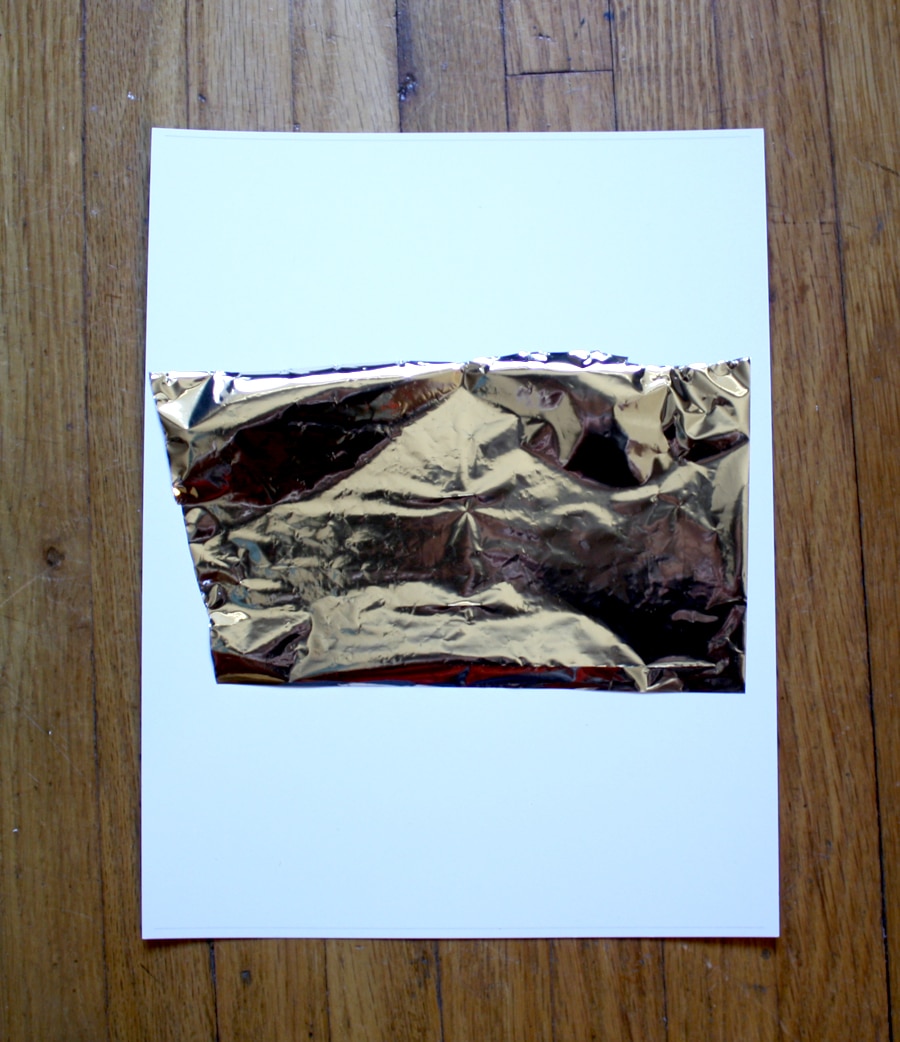
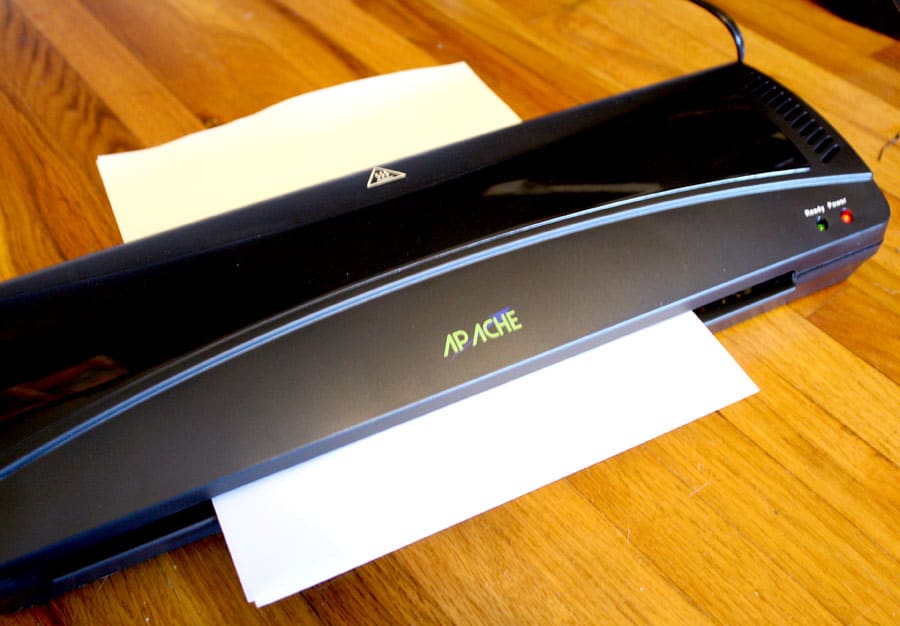
Once it came through the laminator, I peeled back the foil and this is what I found:
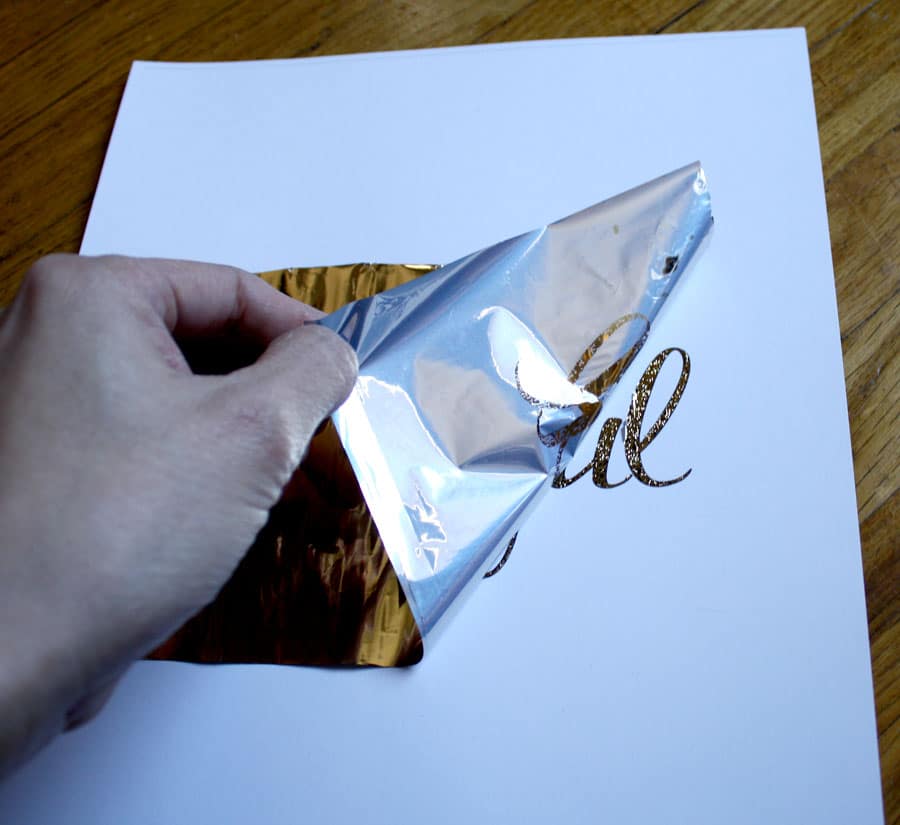

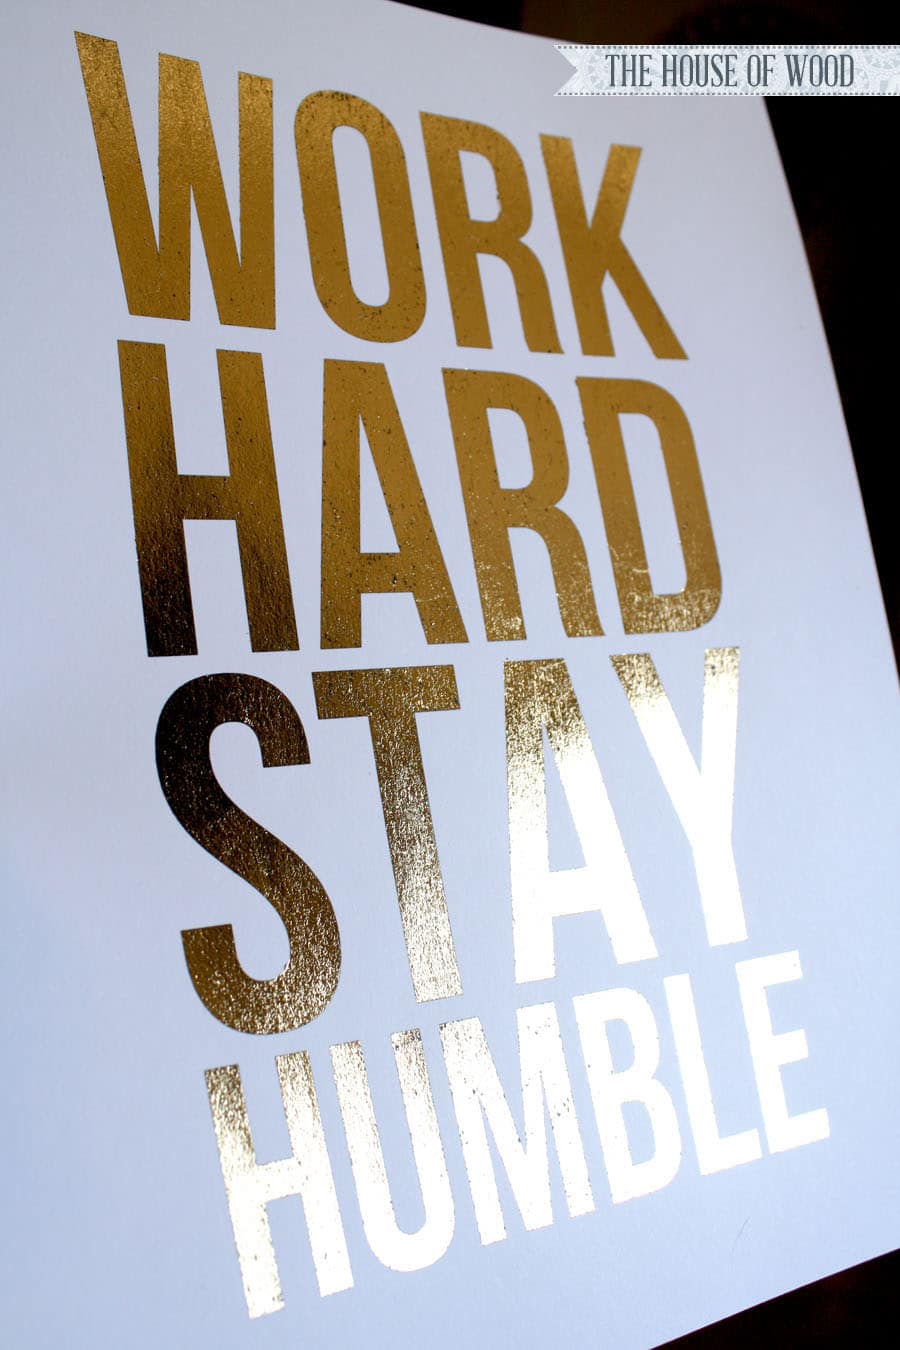
Me, oh, my! My very own DIY! (Gold foil print, that is.) It’s far from perfect, and it certainly won’t buy me a house on the hill if I were to sell them in my Etsy shop, but how neat, right? Here are my 2nd and 3rd attempts:
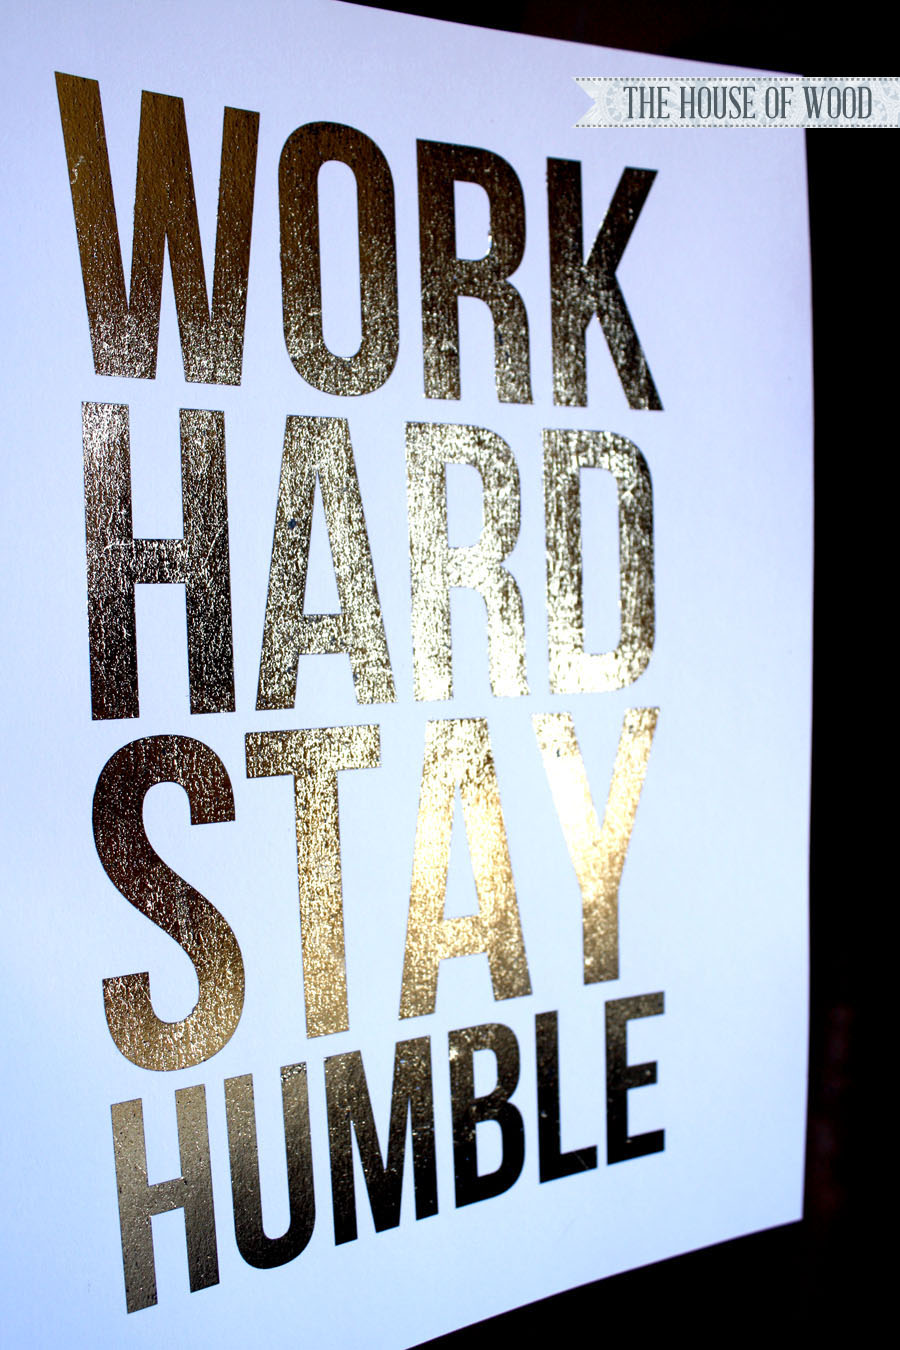
Ahhh, my preciousssss… so shiiiiiiny… And nothing says “Work Hard Stay Humble” quite like glam gold does, amiright? I mean, you can be hard-working, humble, and glamorous all at the same time. True story.
I also learned that lint and dust (or dog hair, in my case) is not good when hot stamping foil to paper. See exhibit A below:
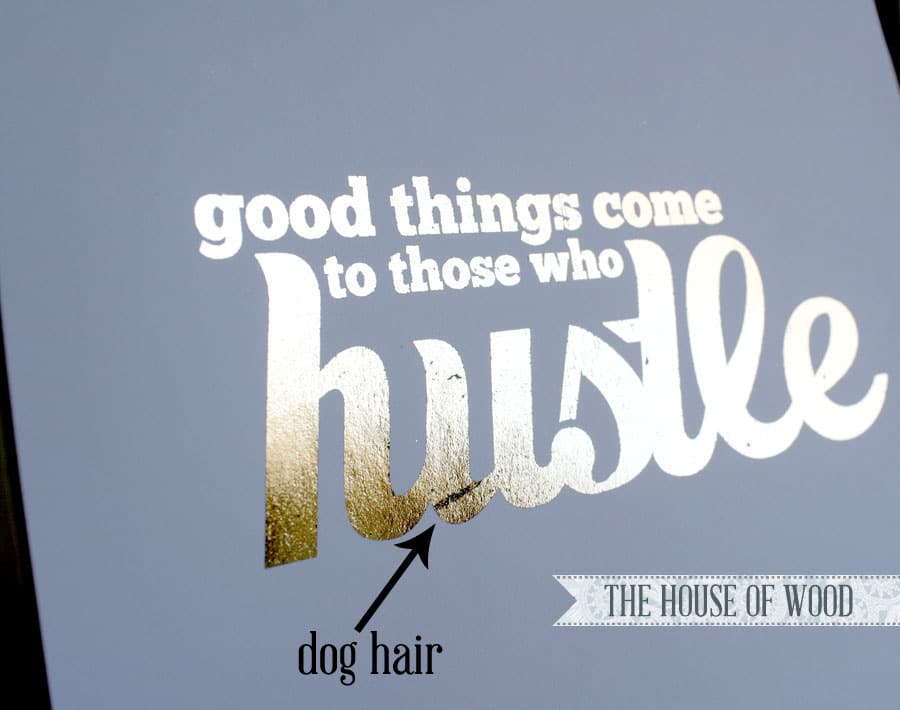
But overall, not a bad little DIY experiment, right? I imagine my DIY gold prints will look even better once they’re framed and hung; you might not even notice the dog hair and other little imperfections (crossing fingers). What do you think? Huzzah for DIY gold foil prints!


This is amazing!
I’ve been dying for some gold foil prints in my apartment, but can’t bring myself to pay $30+ for each one. I’m considering buying a similar laminator from My Binder, but it claims you have to laminate gold foils with a laminate pouch. You didn’t use one, right? You just used an extra sheet of paper over the top?
They turned out great! Thanks for your help 🙂
Thanks! Yes! Just a plain sheet of paper on top.
One last question: How long after you printed out your sheets did you run them through the laminator? I’m assuming fresh toner is better than toner that’s been on there for days, or does it matter?
Thanks again!
No problem! It didn’t matter for me – I had them printed and they sat for awhile before I put them through the laminator.
Hello!! I love this I’m going to try it it can’t be an ink jet printer and must be printed on card stock?! Thanks:)
Your print needs to be printed with toner (like a laser printer or copy machine). Good luck!
LOVE this!!!
Now I have to get me a laminator!!
My to do list is getting too big…I think this is a winter time project!
Hi:
Love this DIY and tried it yesterday but somehow was not getting the gold to stick to the cardstock. I used toner and black ink on white cardstock with a high resolution print but the gold was not staying. Could it be the quality of the foil? Or maybe my laminator was not hot enough? Also, how does it work with a laser printer?
Thank you for doing this!
Have a great day
Kathia
Oh no! I’m sorry it’s not working for you. The foil needs to be toner-reactive. I linked the foil in the post.
why does it not work with ink jet printers?
The toner-reactive foil is reactive to the toner.
Hello,
I have used her DIY with card stock, ink jet printer, the exact gold foil and exact laminator and it did not work for me at first either! Make sure that the image you are using has been processed through a program such as photoshop. I found some images online and copy/pasted into word. For whatever reason, it did not work but as soon as I screenshot the image, imported it into photoshop and put it right back into a word document, it worked. Why? No clue. But it does. Perfectly. Hope this helps!
It won’t work with an ink jet printer, because the foil is toner-reactive, meaning there needs to be toner for the foil to adhere to. Because an ink jet printer uses ink, the toner-reactive foil won’t stick. This is why you must use a laser printer or copy machine that prints with toner.
Thank you! I hadn’t been able to get this to work, even though I was using black toner and a laminator! I was designing in Illustrator, but once I took a screenshot and printed from Photoshop, it worked great! And Jen’s tip about the coated stock helped, too. Now I need to find some coated black paper so the foil will really pop.
Is there anyway this can be done without a laminator ?
I used to this at my work place for signs and invitations. There is also a product that comes in rolls sort of like duct tape sized rolls. I cant remeber the name or maker of it. They come in many colors of metallic foil, not just gold. (Purples, blues, reds etc.). The box the rolls comes in just tells you to print your words or image with the laser printer, then tape the foil in place. Go to a blank document, put your foil prepared printed page, back in the printer and press print from the paper feed not the tray. The paper with the foil side must face the rollers in the printer which is where the heat comes from. When it comes out, remove the tape and the foil plastic and the image will be foiled.
Hi Jen
this is awesome and I can’t wait to give it a go!
I live in Australia and am looking for somewhere local to purchase the gold foil. Do you know the correct terminology to search for and also, do you place the gold foil gold side down against the printed text?
Amy xo
Thanks, Amy! I’d search for “gold foil” or “toner-reactive foil” … something along those lines. Also, you’d put the gold side up, over the text. Good luck!
Thanks lovely
sorry…so gold against the black text or gold side up against the top piece of paper?
so sorry for the silly question xx
Gold side up – facing you.
Thank you Jen xo
Hi Jen
When I am passing this through my laminator, I can still see speckles of black ink left on the print where the foil hasn’t taken. I am thinking my laminator may not get hot enough.
Do you think this process would work by using an iron rather than the laminator?
Amy x
Yes, I’ve heard of people using an iron, but I haven’t tried it myself. Let me know how it goes! Good luck!
Do I have to seal it ?
What do you mean? Seal it with what?
Thank you for the tutorial! I bought that exact laminator, and got prints made at staples so that they would be toner ink, used the gold foil, and ran it through the laminator after I let it heat up for 10 minutes. But it didn’t work at all! Help! What am I doing wrong?? I’d love to learn how & get this down! Haha 🙂 X
Oh no! Sorry to hear that! Did you use the toner-reactive foil? If so, it should stick to the toner on the paper. What’s not working? Is the foil not sticking?
Did you have the foil the right way? You need to make sure the shiny side is up (ie. not facing the text).
I know this because I had it the wrong way the first time! Oops!
Ah yes, figured it out! Thanks!
I’m so glad it worked out! What was the problem?
Great! Good luck!
Great tutorial. I LOVE gold foil anything!
I’ve also tried this project & found that my prints worked out better when I didn’t have a piece of paper on top of the gold foil. I think it just lets that extra bit of heat through, because the gold was definitely less patchy that way.
I just used a little extra gold foil and folded the top of it over the paper slightly to hold it on as it went through the laminator (if that makes sense).
Yeah I found this too, wouldn’t stick at all with another piece of paper on top, not enough heat I guess. Only done a couple of test prints so far but its hard to keep the crinkles out.
I tried this with icraft Deco Foil that I got at Michael’s and it worked. Its a little bit patchy though, I used the laminator at my work and I’m not really sure if I had it hot enough or too hot, what temperature was the laminator that you used?
Great post 🙂
This is straight up bliss. BLISS I tell you!!
Me ha encantado la idea, me hubiera gustado enterarme mejor si hubiera habido un traductor porque no me he enterado muy bien. Aún así le pongo un 10! Muy original
Do you know how to gold foil over an existing image? For example, I have a photo of roses and wanted to write LOVE over them in gold foil. (In you tutorial, you print on just white paper) thanks 🙂
Will you be selling these in your etsy store?
looks so great just ordering the foil and was wondering if you use the standard gold or the Chinese gold? x
Thanks! I used the standard gold. Good luck!
Hey I know this is off topic but I was wondering if you knew of
any widgets I could add to my blog that automatically tweet my newest twitter updates.
I’ve been looking for a plug-in like this for quite some time and was hoping maybe you would have some experience with something like this.
Please let me know if you run into anything. I truly enjoy reading your blog and I look forward
to your new updates.
Sorry, I don’t have any input to offer on twitter updates. Thanks for reading!
Hello,
First, LOVE THIS.
I am having difficulty getting good text print quality.
I design the Print through photoshop, 4800px X 6600px with 600dpi. (8X11)–usually save it under TIFF or BMP.
I’m also using a Toshiba e-studio 2500c printer.
Do you know what I might be doing wrong? Or have any recommendations.
Thanks, Michelle! I usually design the print as an 8″x11.5 (standard letter size) at 300dpi and save it as JPG. The quality turns out fine for me. I hope it’s the same for you. Good luck!
Thanks i’ll try it out
Hey what printer do you use or recommend?
A laser printer.