Thank you guys so much for the love and excitement over my son’s new cabin bed! We’re pretty excited about it. There were a few questions and comments regarding how difficult it is to change the sheets. While changing the sheets on this cabin bed isn’t as straight-forward as a standard bed where all the sides are easily accessible, the wide open ends on the cabin bed make the chore more doable. I don’t suspect it’s any more difficult to change the sheets on a bunk bed. That being said, we love it so much, I really don’t mind the extra effort. Totally worth it, IMHO!
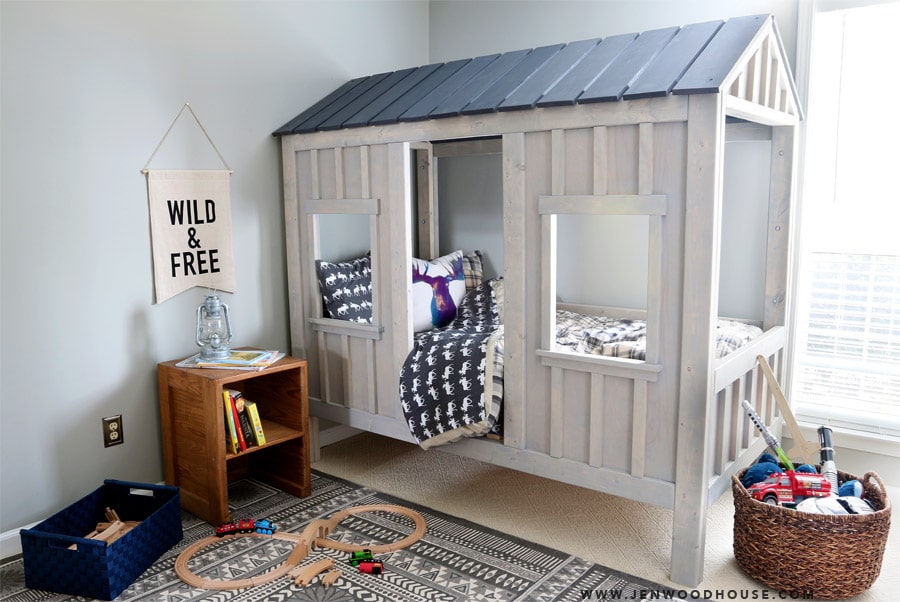
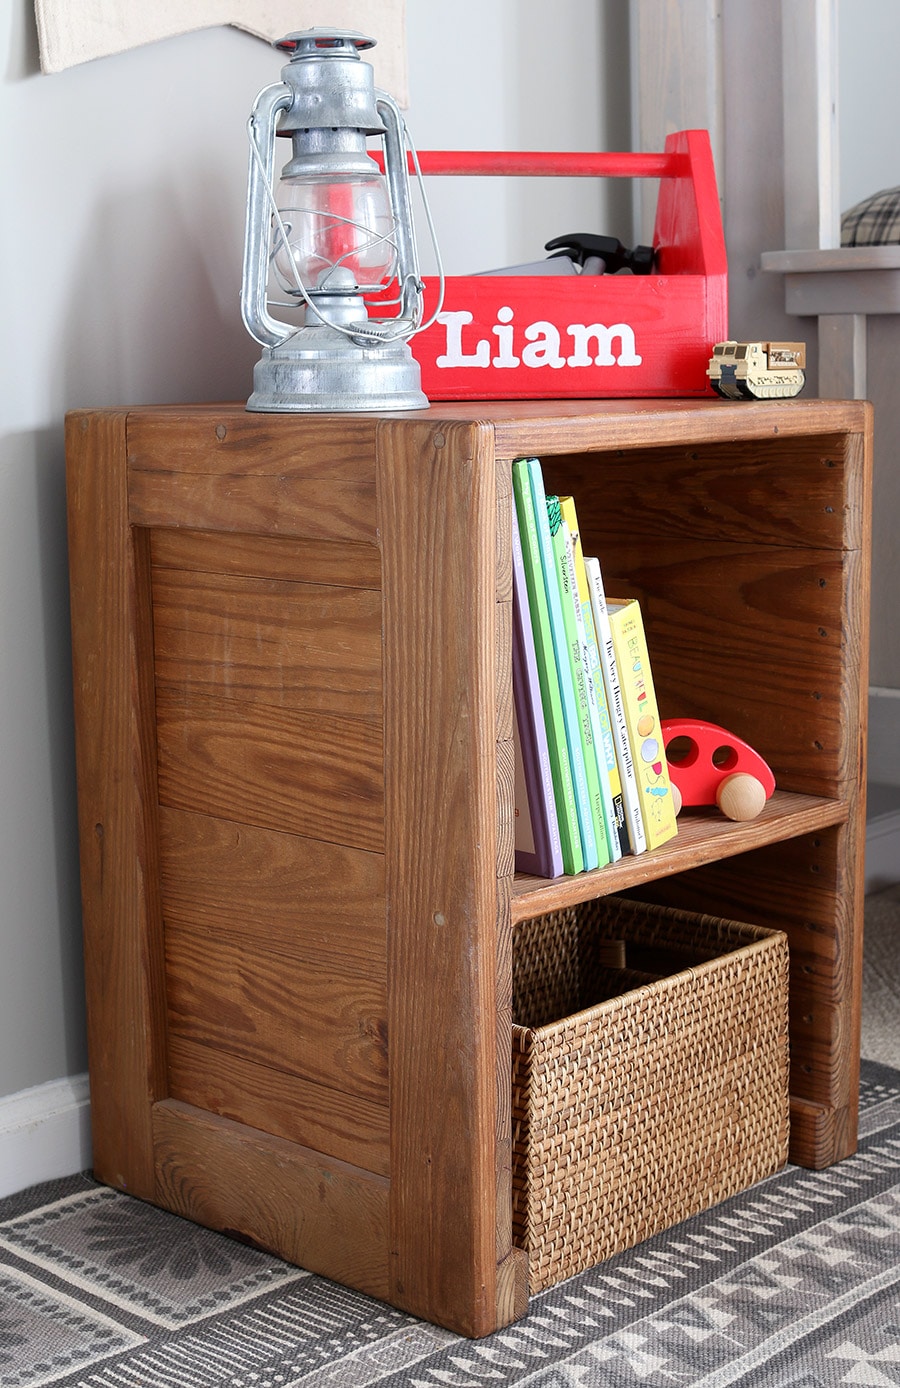
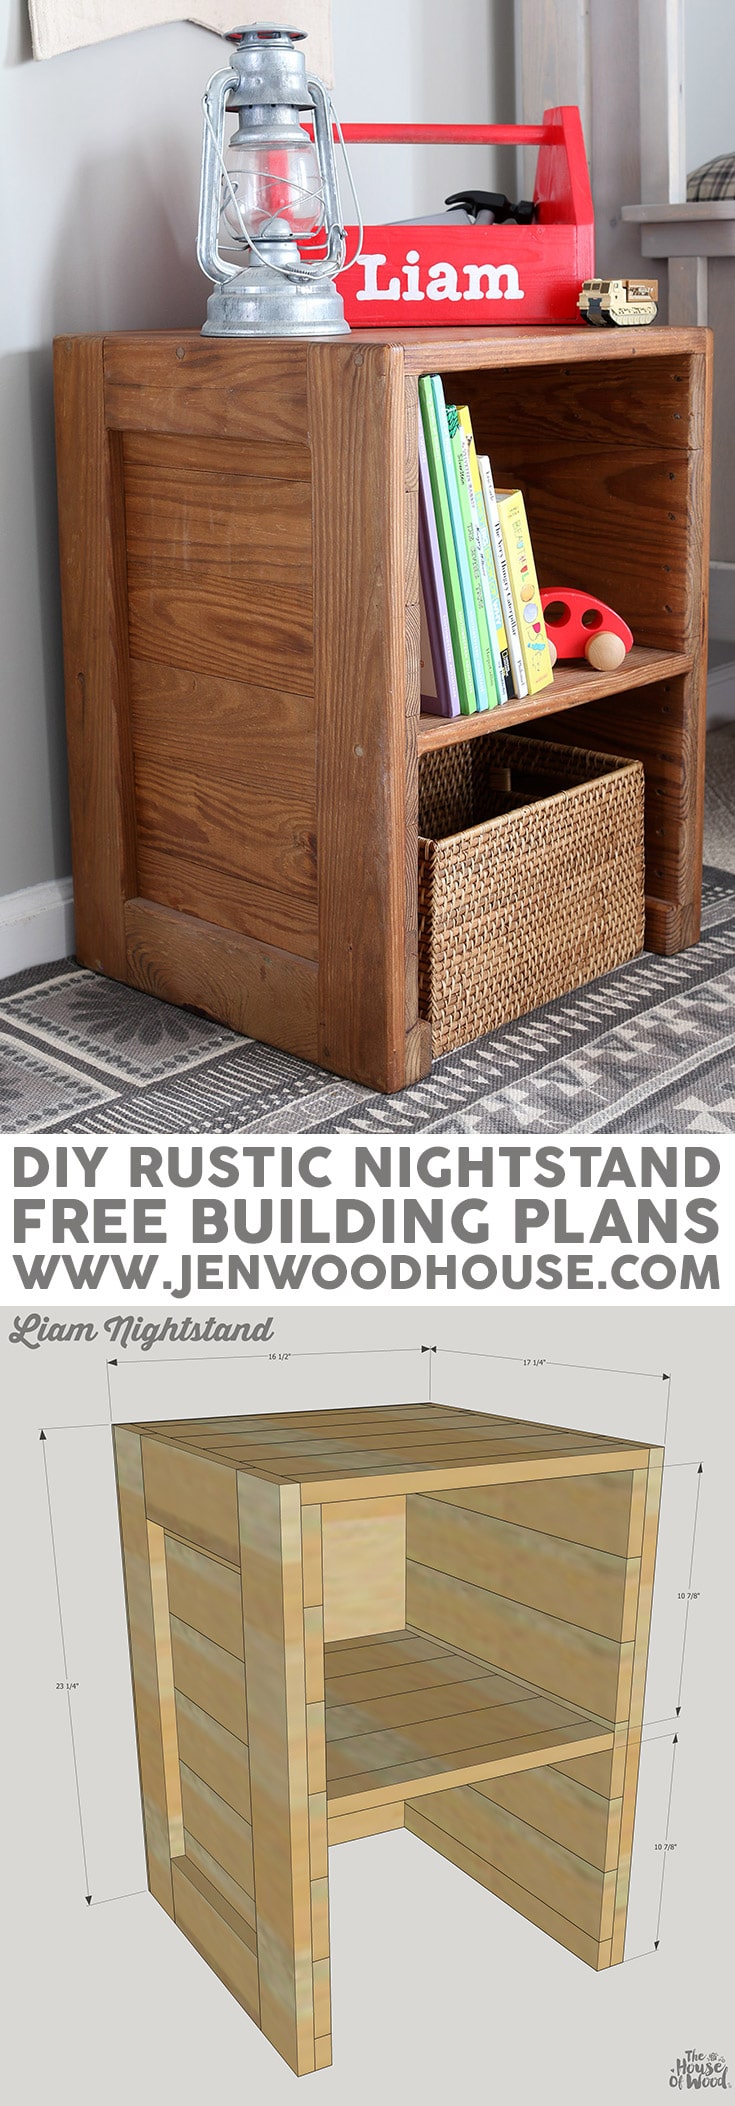
I also received a few questions and requests for plans for the rustic cargo nightstand in the photo. We’ve had this nightstand forever, it seems. My husband inherited it from his parents and I believe his Dad built it decades ago. After inspecting how it was constructed, it appears that my father-in-law employed some advanced woodworking skills, including a dado for the shelf to slide in, routed edges, as well as some biscuit joints (I’m guessing) and other more traditional joinery methods. When I drew up the plan, I simplified and streamlined the build so that no fancy woodworking tools were required to make this nightstand.
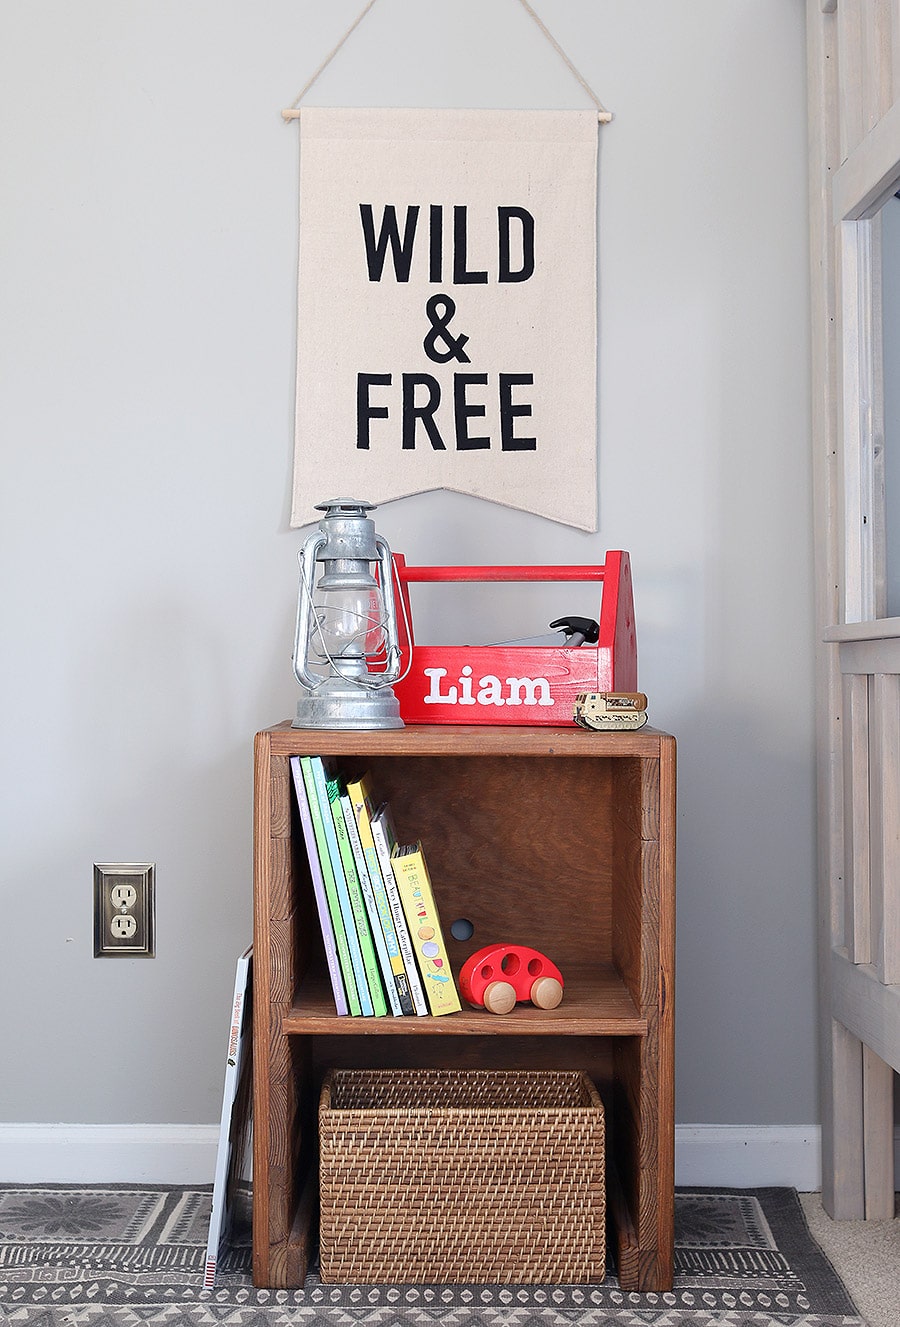
Want to build that adorable red tool box while you’re at it? Here’s the tutorial.

*This post contains affiliate links. To read my full disclosure policy, click here.
Click here to download the PDF plans for Liam’s Rustic Nightstand.
Materials:
- 5 – 1x4x8′
- 1 – 1x2x8′
- 1 – Quarter Sheet of 1/4″ Plywood
- 1-1/4″ Pocket Hole Screws
- 1-1/4″ Brad Nails
- 3/4″ Brad Nails or Staples
- Wood glue
Cut List:
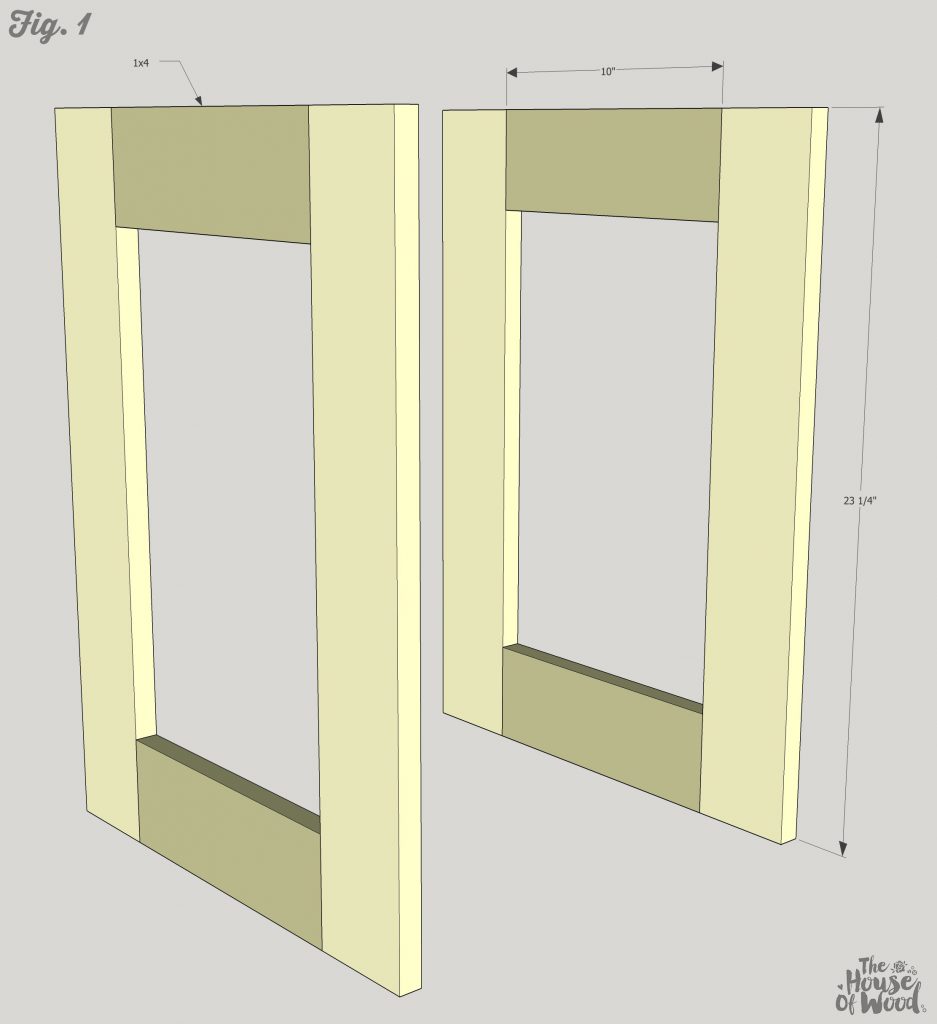
- 4 – 1×4 @ 23-1/4″ (side stiles)
- 4 – 1×4 @ 10″ (side rails)
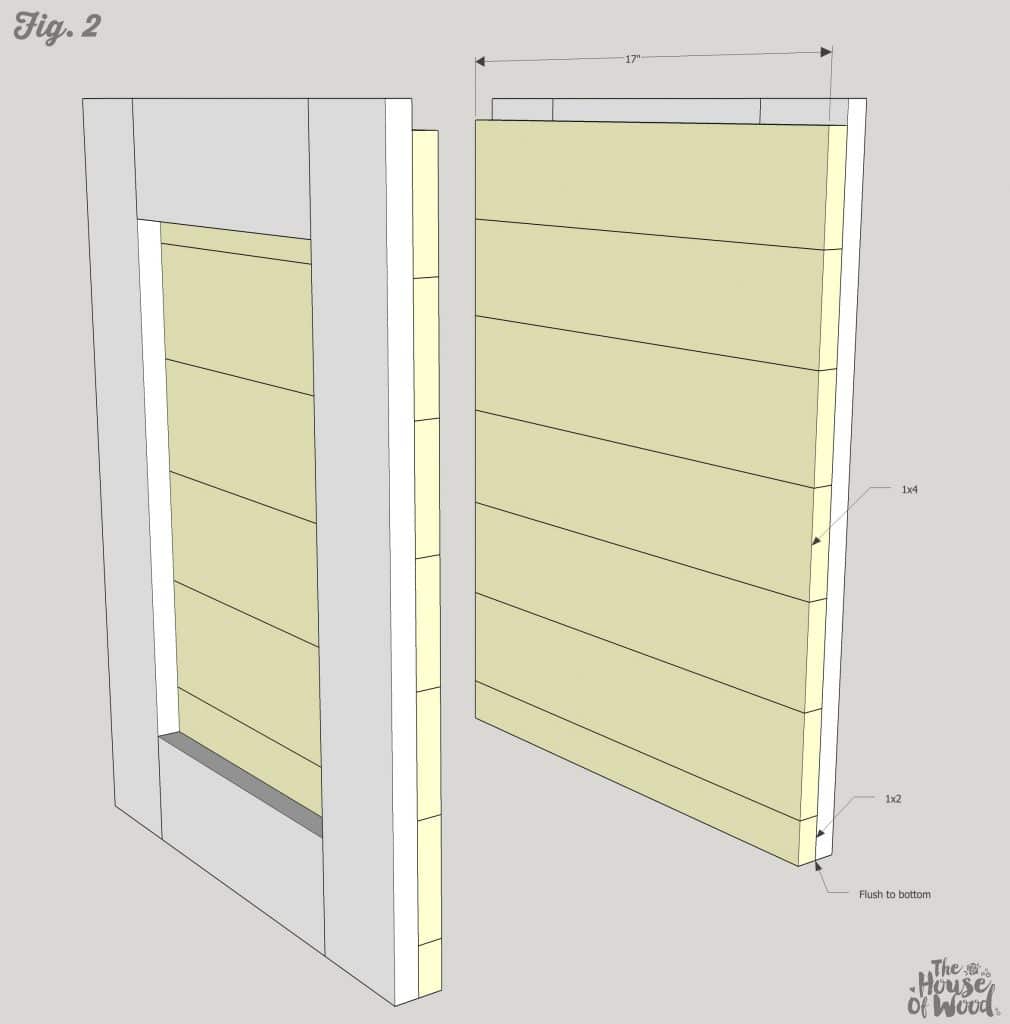
- 12 – 1×4 @ 17″ (side planks)
- 2 – 1×2 @ 17″ (side planks)
- 2 – 1×2 @ 13-1/2″ (shelf)
- 4 – 1×4 @ 13-1/2″ (shelf)
- 2 – 1×2 @ 15″ (top)
- 4 – 1×4 @ 15″ (top)
- 1 – 1/4″ plywood @ 23-1/4″ x 16-1/2″ (back)
Tools:
- Tape Measure
- Pencil
- Speed Square
- Circular Saw
- Cordless Drill
- Pocket Hole Jig
- Brad Nailer or Hammer
- Stapler (optional)
- Safety Glasses
- Hearing Protection
Step 1
Build the two sides. Drill 3/4″ pocket holes into the 1×4 rails and attach it to the 1×4 stiles with 1-1/4″ pocket hole screws and wood glue.
Step 2
Plank the sides. Attach the 1x2s and 1x4s to the sides with 1-1/4″ brad nails and wood glue. Notice that the boards are flush to the bottom, so there will be a 3/4″ inset at the top.
Step 3
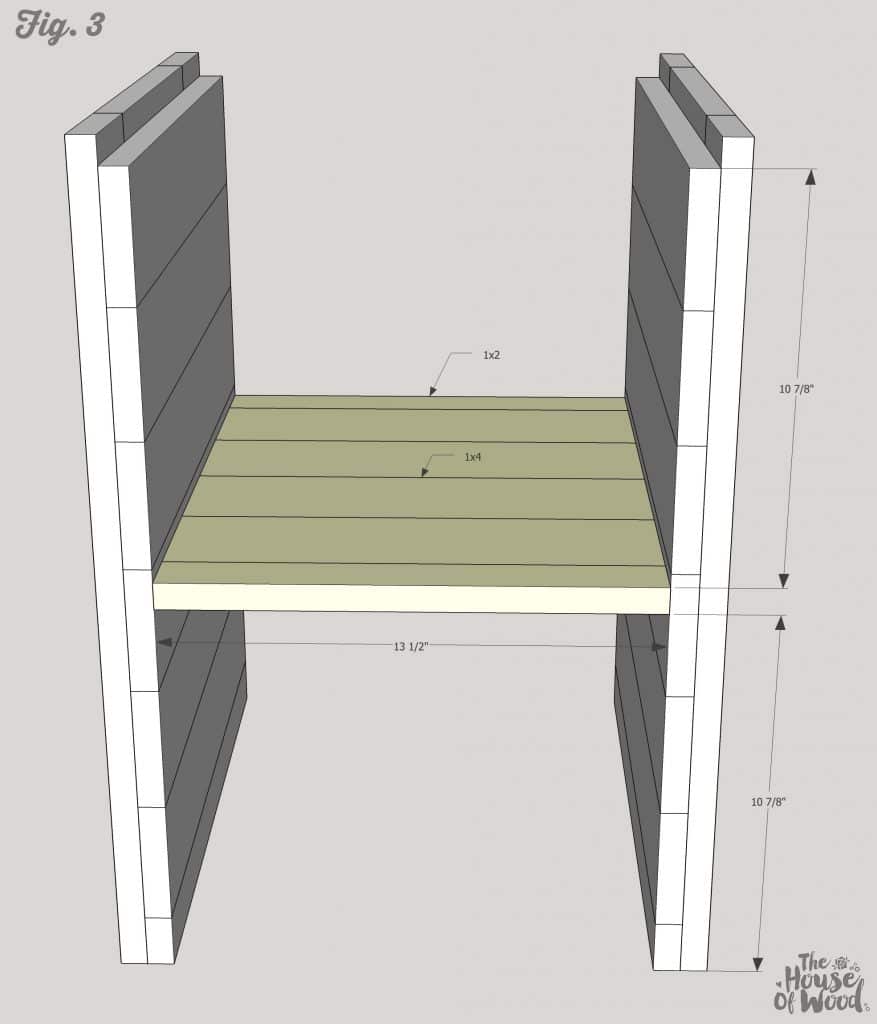
Add the shelf. First, construct the shelf by planking the boards together. Drill 3/4″ pocket holes into the edges and ends of the shelf boards and join with 1-1/4″ pocket holes screws and wood glue. Next, attach the constructed shelf to the side panels with 1-1/4″ pocket holes and wood glue. Alternately, you can use a shelf pin drilling jig to make the shelf adjustable.
Step 4
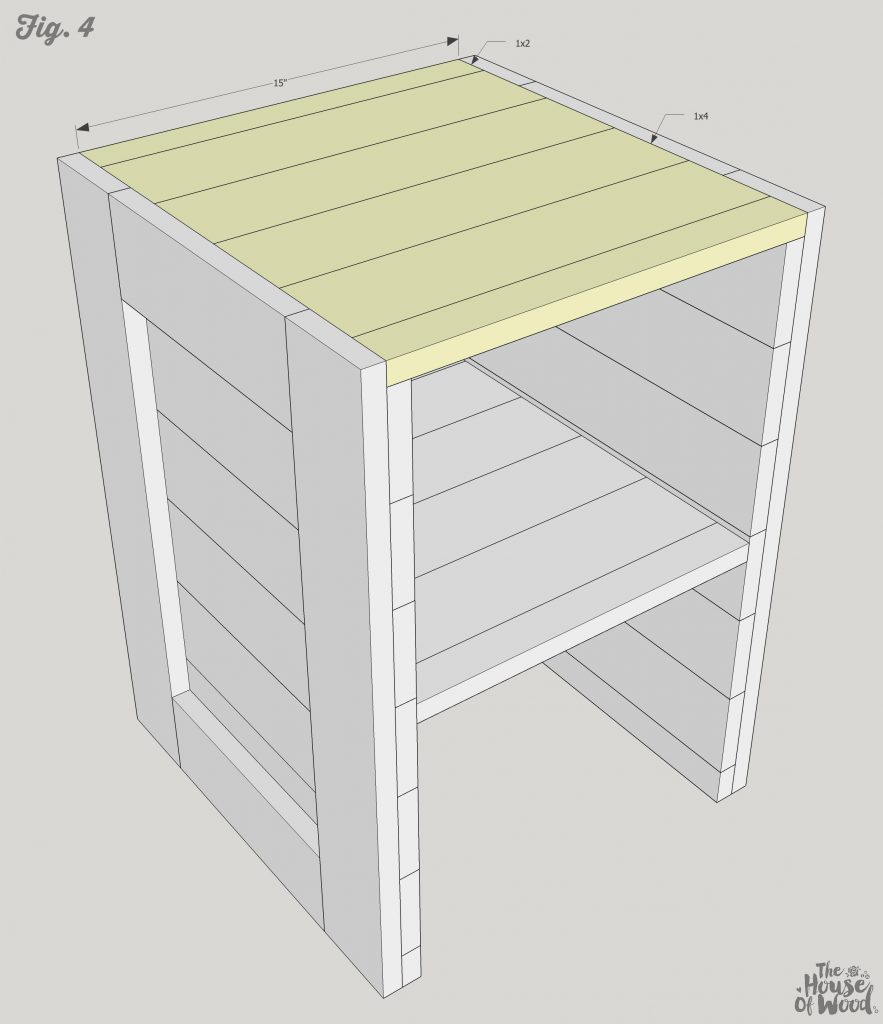
Add the top. Once again, construct the top by planking the boards together and drilling 3/4″ pocket holes into the edges and ends of the boards, then join them together with 1-1/4″ pocket hole screws and wood glue. Attach the top to the carcass with 1-1/4″ pocket hole screws and wood glue.
Step 5
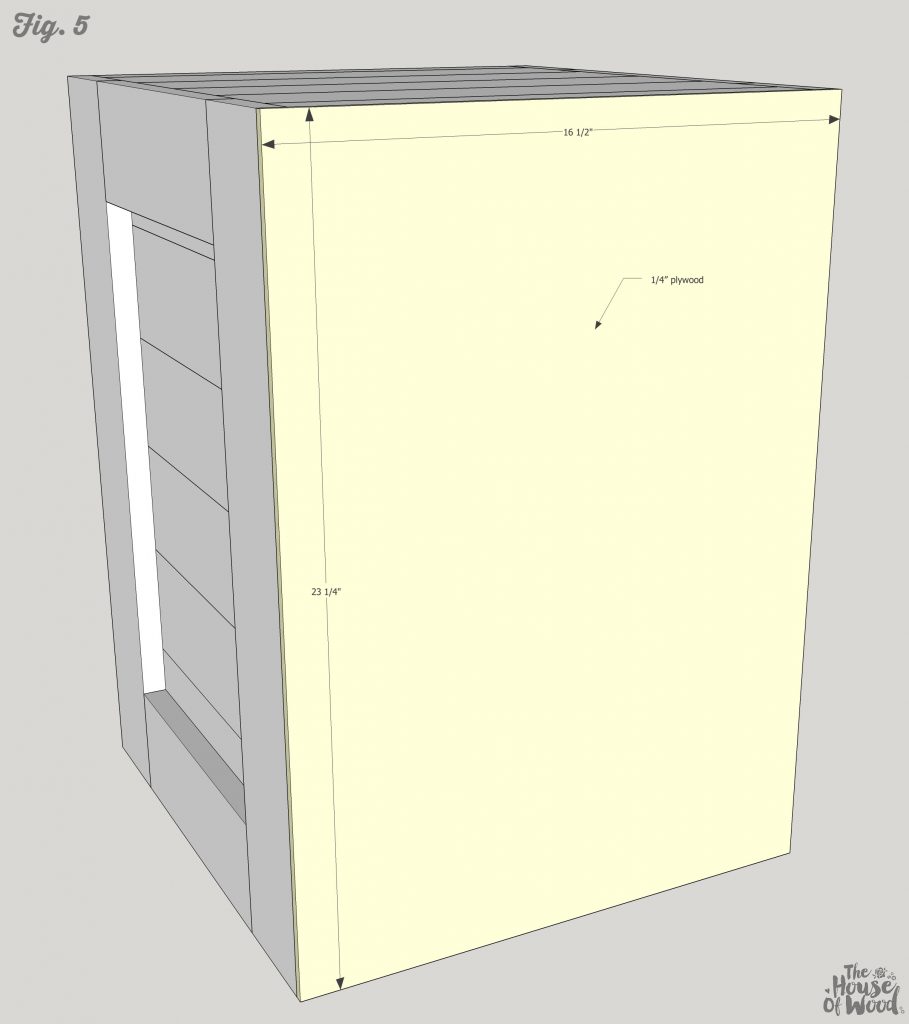
Attach the back panel with 3/4″ brad nails or staples and wood glue.
Thanks so much for reading, friends. I can’t wait to see your versions of this rustic nightstand. Be sure to tag me (@jenwoodhouse #houseofwood) if you’d like to share your handiwork! Follow me on Instagram, Facebook, and Twitter. Be safe, have fun, and ask questions if you need to. Now go make some sawdust!
If you enjoyed this project, I’d love for you to PIN and SHARE it!
Any details on stain/finish you used on the cabin bed?
Yes! I’m putting together a stain/finishing tutorial and will be publishing that soon. Thanks Tyson!
Your night stand looks like the Classic Cubbie from This End Up Furniture. Nice and sturdy.
Hey! From the pictures of the finished project, it looks like there are extra 1x2s added to the inside of the bottom opening. These aren’t mentioned in the plans or cut list. Can you clarify?