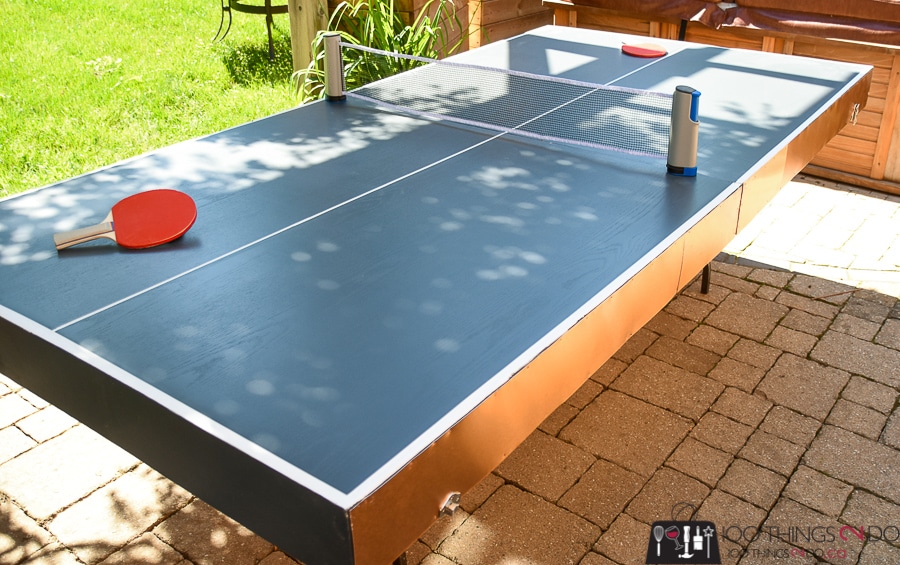
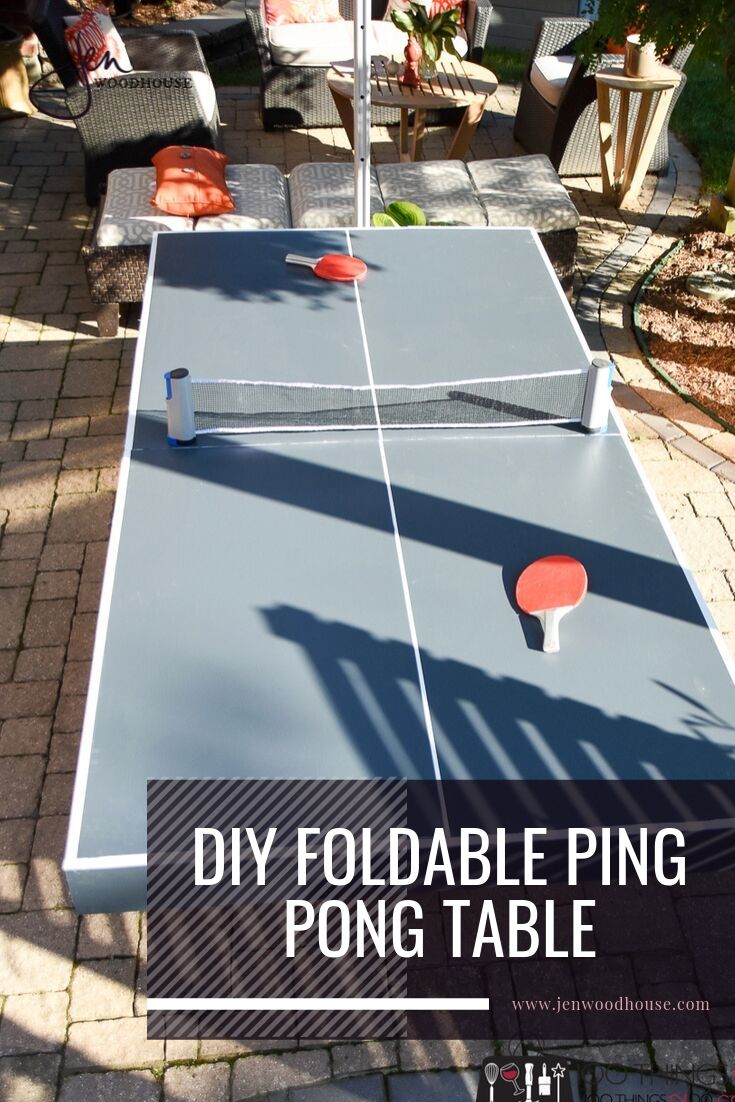
Shelly here with a GREAT project for you in advance of 4th of July family celebrations – check out my awesome-sauce DIY Folding Ping Pong Table!! Perfect for family fun and the best part is, I’ve reversed the fold from typical ping pong tables so that this can be stored on a 10-inch wide footprint! Wahoo!
 I’m not going to lie, there are errors in my photos, but the plans were amended after-the-fact so that you don’t repeat my mistakes. Sort of typical of my posts over on 100Things2Do.ca – I like to make the mistakes and save you the trouble.
DIY Folding Ping Pong Table
Supplies:
- (1) 4 x 8 Ft. Sheet of 3/4-inch Plywood
- (1) 14-inch square of 3/4-inch Plywood Scrap
- (6) 1 x 6 x 6 Ft. Boards
- (1) 2 x 6 x 8 Ft. Board
- 1-inch Pocket Screws
- 2 1/2-inch Pocket Screws
- (2) 24-inch Heavy Duty Continuous Hinges
- Wood Glue
- 14-inch Metal Drawer Glides (optional)
- 29-inch Folding Table Legs (*tip: search Craig’s List!)
- Painter’s Tape
- 3/4-inch Brad Nails
- 1 1/4-inch Brad Nails
- 1-inch Wood Screws
- 1 1/4-inch Wood Screws
- (2) 24 inch x 36 inch Copper Sheeting (optional)
Cut List:
Cut your plywood, or have your home improvement store cut it in half so you have (2) 48″ x 48″ squares
- (4) 1×6 @ 48 inches (nominal measurements 3/4″ by 5 1/2″)
- (1) 1×6 @ 49 1/2 inches
- (1) 1×6 @ 16 1/2 inches
- (1) 1×6 @ 32 7/8 inches
- (1) 1×6 @ 15 1/2 inches (ripped to 4 3/4 inches wide)
- (2) 2×6 @ 48 inches (ripped to 4 1/2 inches wide)
Drawer:
- (2) 1″ x 3 3/4″ @ 14 inches
- (2) 1″ x 3 3/4″ @ 15 1/2 inches
- (1) 3/4″ ply cut to 14″ by 14″
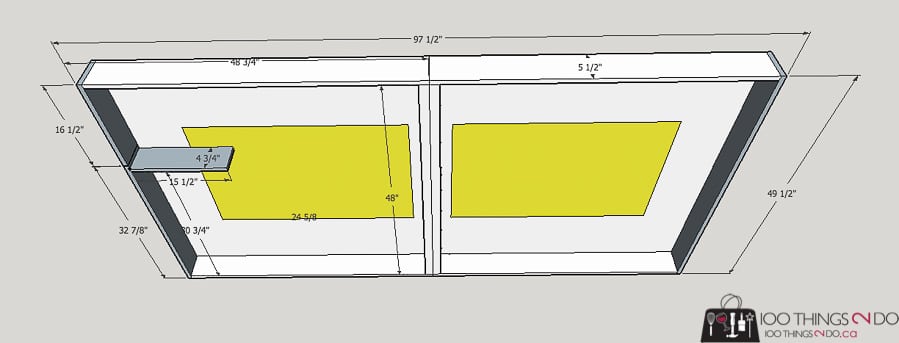
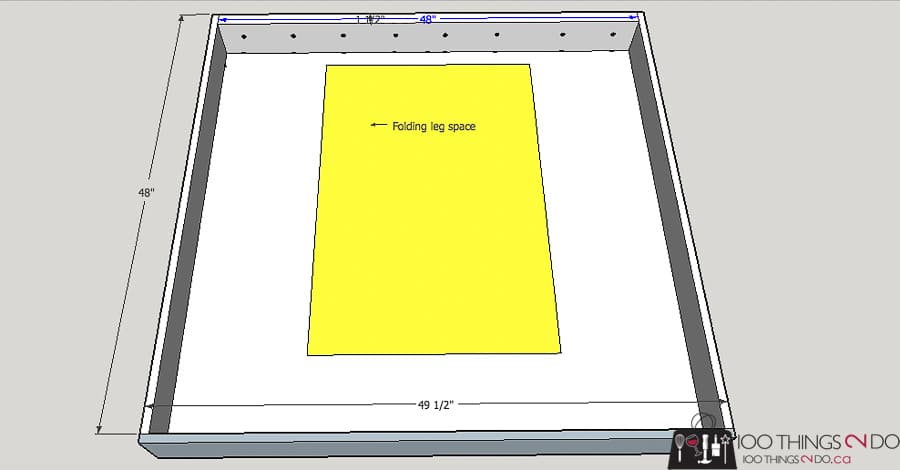
plan is showing the underside of the table
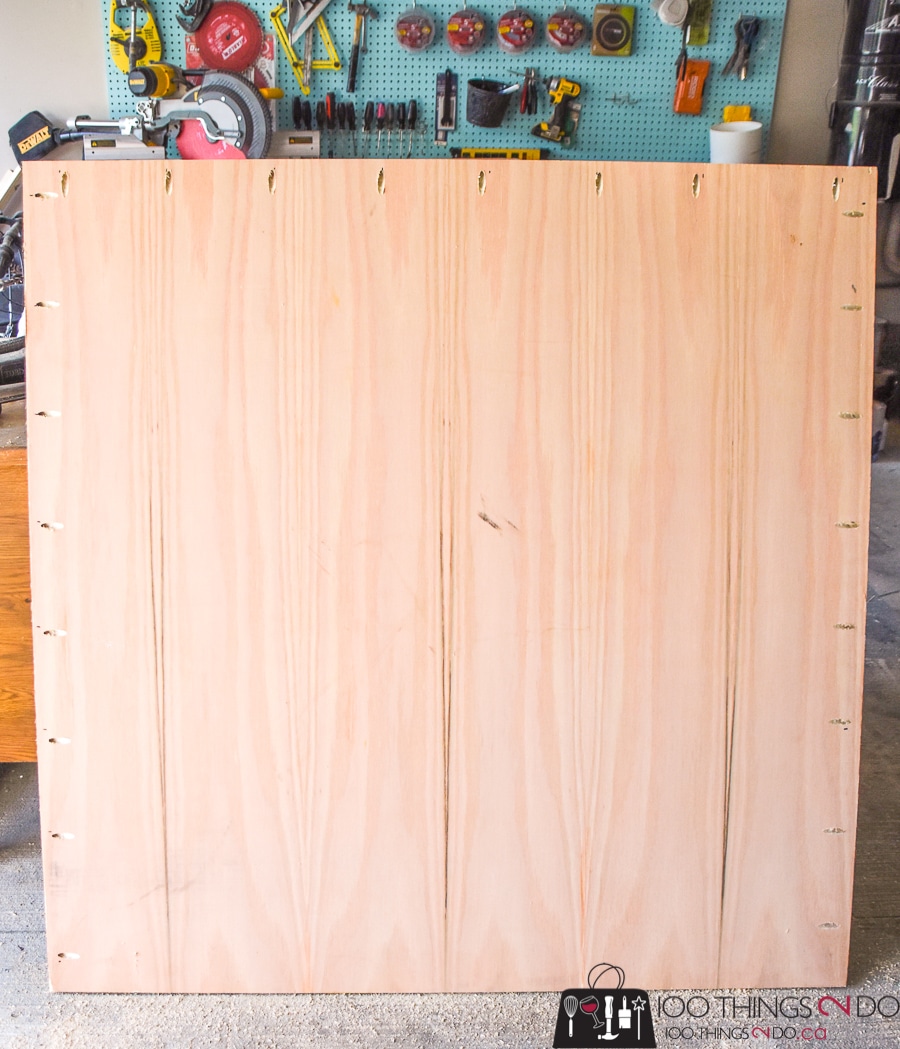
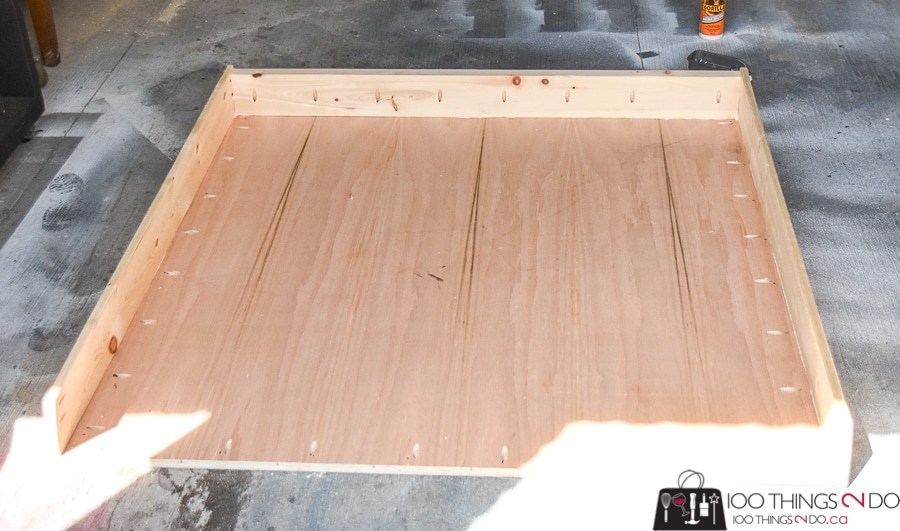
To begin building a DIY folding ping pong table you’ll need to drill 3/4-inch pocket holes around 3 sides of the 48″x48″ plywood. The manufacturer’s instructions on my pocket hole jig said to drill at 2 inches in from either side and then space a pocket hole every 6-8 inches apart.
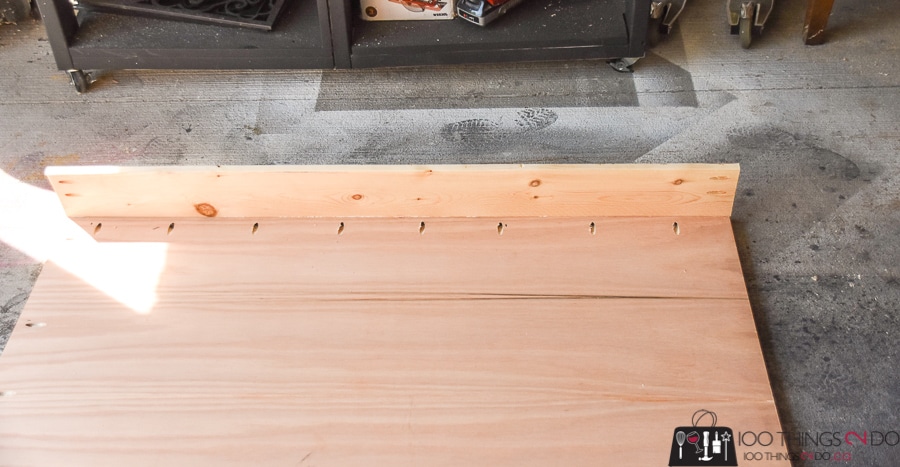
 Using wood glue and 1-inch pocket screws, attach the side pieces (48-inch boards) to the sides. Do your best to keep the side boards flush with the top (seen here as the bottom) of the ping pong table.
 Attach the 49 1/2-inch board to the last side with the pocket holes, again with wood glue and 1-inch pocket screws.
Drill pocket holes in one side of the 2×6 boards (now 2 inches x 4 1/2 inches), every 6 inches. Use wood glue and attach to the bottom face of the ping pong table between the side boards. Pre-drill and screw in (2) 2-inch wood screws from the outsides into the 2 inch x 4 1/2 inch boards for extra strength.
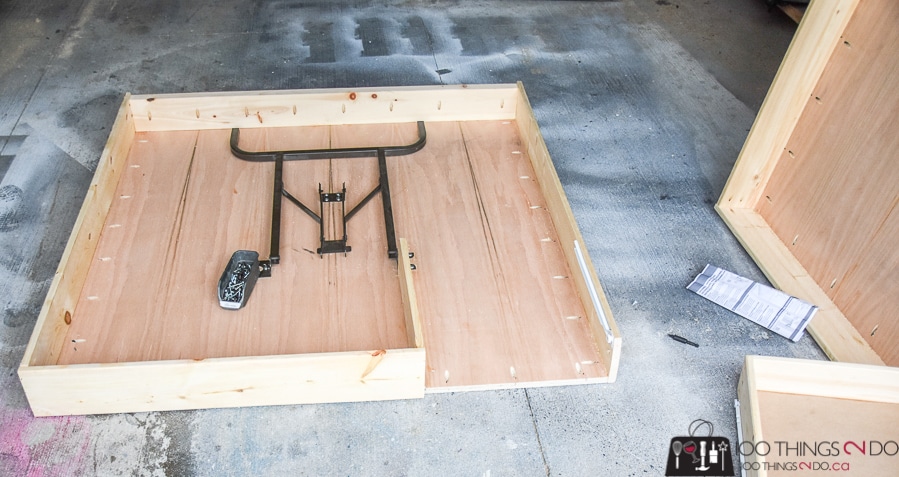
 I built half of the ping pong table at a time so I could be sure of the table leg placement.
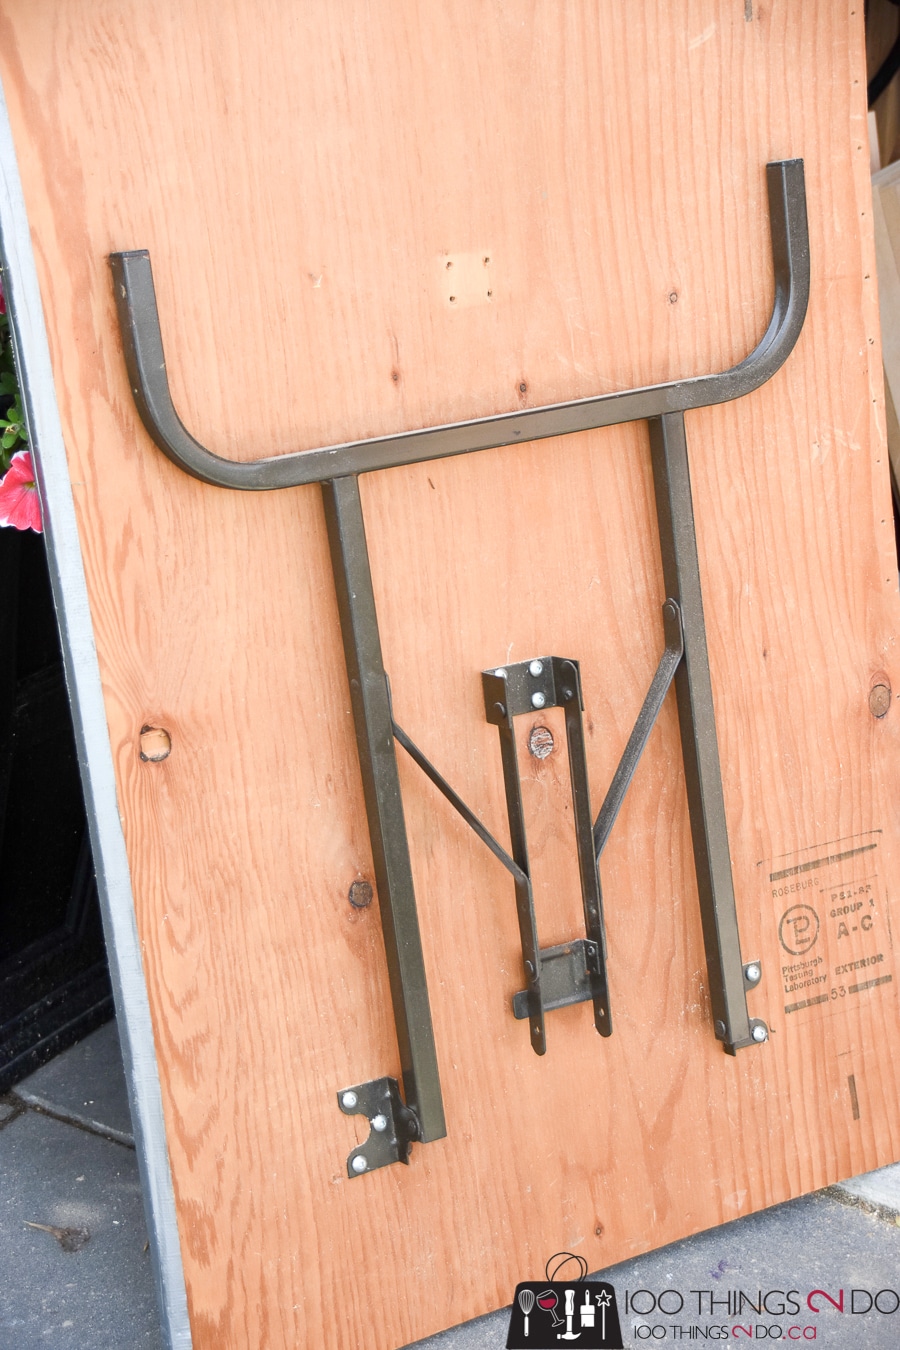
Before running out and spending a fortune on new table legs, surf your local Craig’s List and pick up an old folding table. I picked up this guy for $25 and just removed the legs for this ping pong table project. Genius, right?!
 Attach the legs to the bottom of the ping pong table so that the feet are about 2 inches from the 2 inch x 4 1/2 inch board and centered down the middle. The below photo is of side #2 of the ping pong table, but you get the idea about centering.
plan is showing the underside of the table
Start building the second half of the folding ping pong table in the same way as the first, but instead of attaching a 49 1/2-inch face board on the third pocket-hole side, attach the 32 7/8-inch board and leave the last section empty (for now).
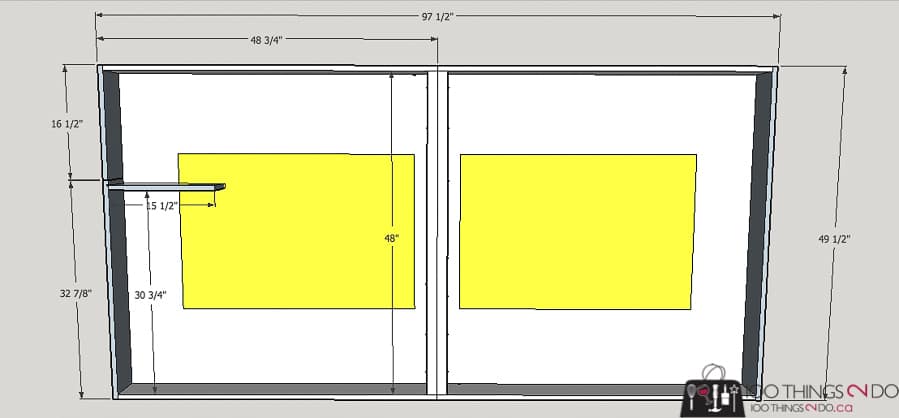 Drill pocket holes in one long and one short side of the 15 1/2-inch board and attach at the edge of the 32 7/8-inch board with wood glue and 1-inch pocket screws. The short side will be screwed directly into the 32 7/8-inch board. This board will be 30 3/4 inches from one side and 16 1/2 inches in from the other.
*Note: Typically, drawer boxes should be 1 inch narrower than the drawer opening. This will allow for 1/2-inch clearance on either side for the drawer glides. Depending on what type of drawer glides you get, this is usually the case, but you’ll want to double-check according to the manufacturer’s directions. It took a LOT of swearing sweating for me to earn that tip for you.
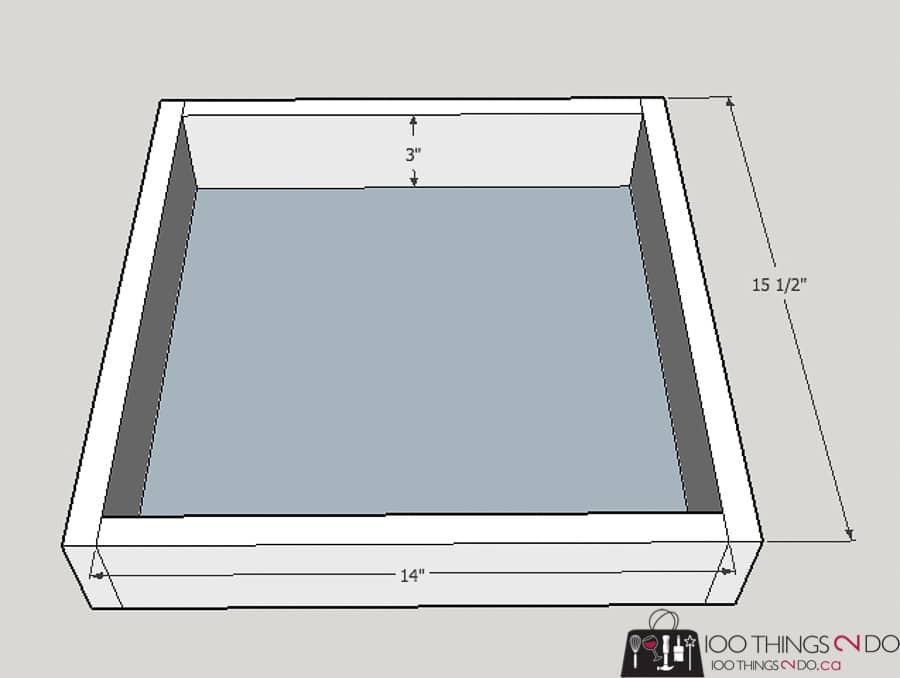
Time to build the drawer box!
I used some scrap 3/4-inch MDF that I had lying in the garage, but 1/2-inch MDF or plywood would work just as well. Cut the base to 14 inch x 14 inch square.
Attach the 3 3/4-inch x 14-inch side boards to the base with wood glue and 1 1/4-inch brad nails. Finish by attaching the 15 1/2-inch pieces across the ends with wood glue and 1 1/4-inch brad nails (a nail gun is easiest). Clamp tightly before nailing for the best grip. The plans indicate the drawer depth at 3 inches, but that is because the 3/4-inch ply/MDF is set inside the drawer and not under the sides.
 Now comes the “fun” part.
I am NOT a fan of drawer glides and I think it’s fair to say they are not a fan of mine. I spent 2 hours and numerous attempts to get my glides in accurately and running smoothly – so you can imagine how blue the air was in my garage. My mistake? The boards I received from my home improvement store were bowed in the center. Save yourself the stroke and get the straightest boards you possibly can. If your boards are straight and your framing is square, then the drawer glides should work smoothly right out of the gate.
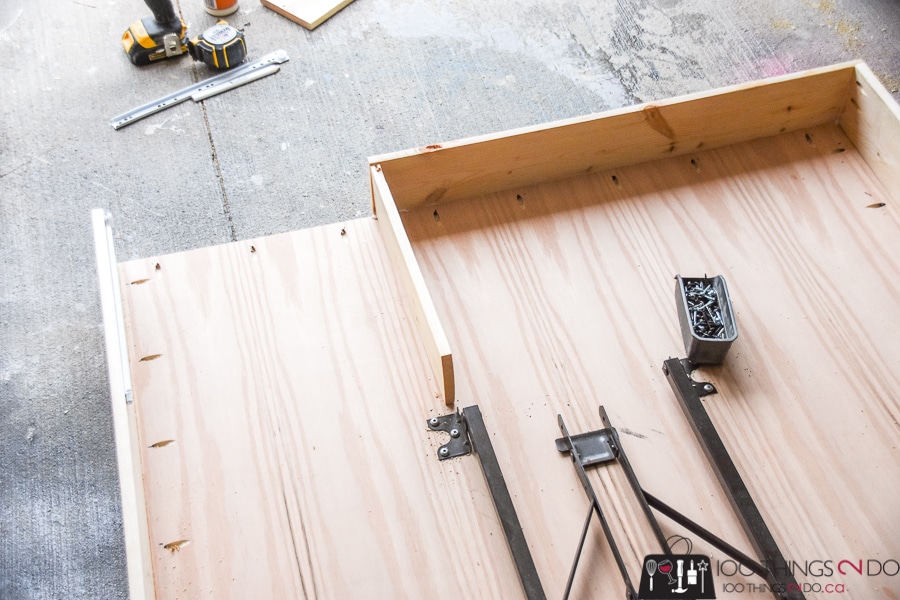 Don’t attach the 16 1/2-inch face board until everything is running smoothly. Once it is, set the face board up so that it is about 1/8-inch gap out from the rest of the face board and flush with the outside edge of your folding ping pong table. Use wood glue and 1-inch wood screws drilled from inside of the drawer.
Which reminds me… we haven’t made this bad boy a FOLDING ping pong table yet have we?
Time to attach the two 24-inch continuous hinges! Pre-drill every hole and attach to the 2-inch center boards with 1 1/4-inch wood screws.
The bottom should look like this:
 Fold one side up and check to make sure everything lines up nice and tight.
 I attached my clasps temporarily just to make sure everything was nice and tight and secure.
Time to sand and prime – this is where all of the little nicks and scratches and any little boo boos are erased. My sander is like my magic wand – hiding the mess and getting Cinderella to the ball.
Prime the top and sides and add wood filler (if necessary) once dry. Add a second coat of primer around the outside edges and down the center of your table (we’ll use the primer as the white boundary lines on the table)
It’s time to tape off your folding ping pong table. This table isn’t quite regulation size. A “real” ping pong table should be 60 inches wide by 108 inches long by 29.92 inches high. Ours is 49 1/2 inches wide by ≈97 1/2 inches long (our height should be close to accurate) because that’s why 3/4-inch plywood comes in. You gotta work with what you’ve got right?
Lines on a ping pong table should be 28/32 inches for the outside border and the center line should be 3/32 inches wide. My eyes are too old to find those markings on my tape measure, so I made life easier and used the 3/4-inch side and face boards as my boundary lines. I taped off where the boards lined up with the plywood. Hey, if this isn’t regulation size, then who needs regulation boundaries?
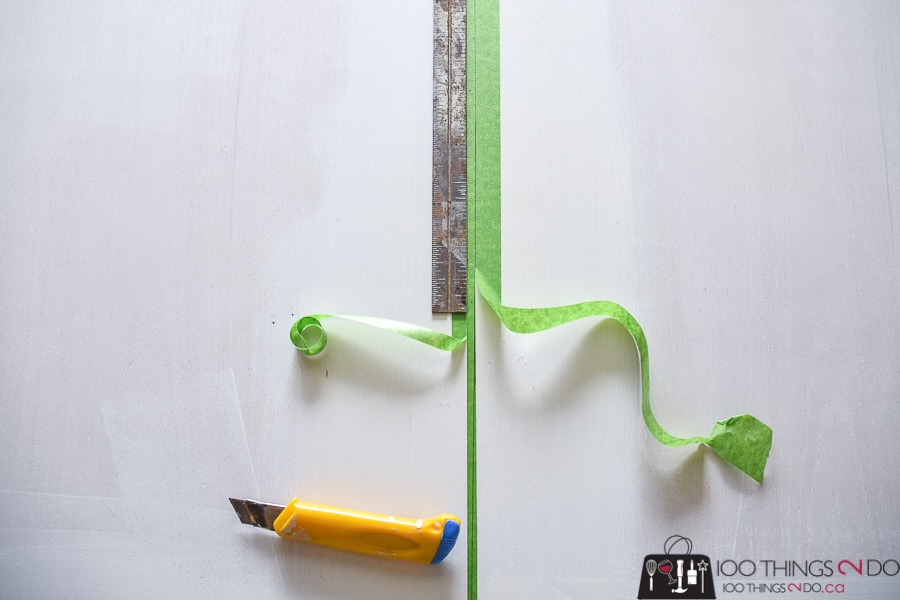
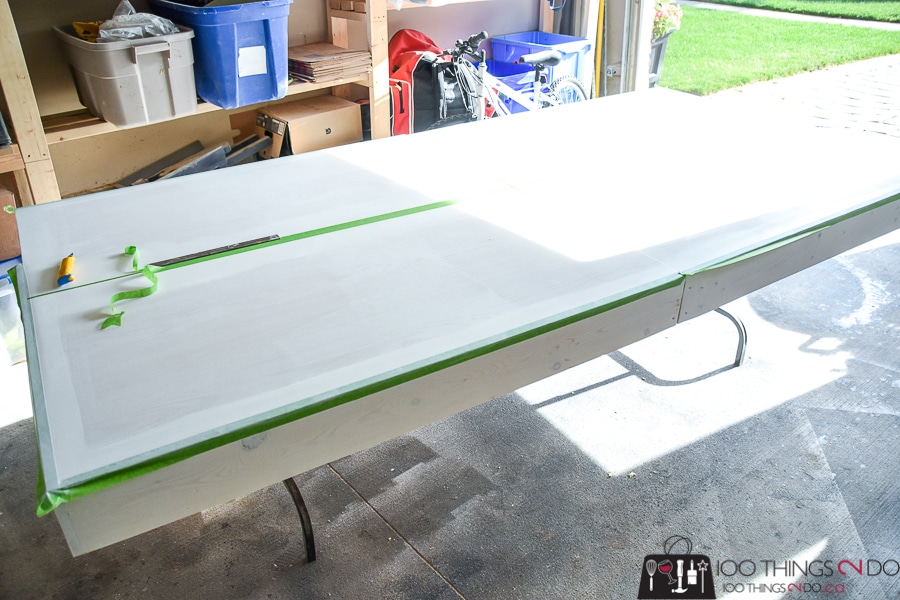 For the center line, I found the middle and laid down painter’s tape. From there, I marked 1/8 inches on either side of the center line and cut away the excess with a utility knife.
SOOOO much easier!
 Paint the surface and sides with a dark color – I chose to use outdoor appropriate paint so I could put my table on the patio for the summer.
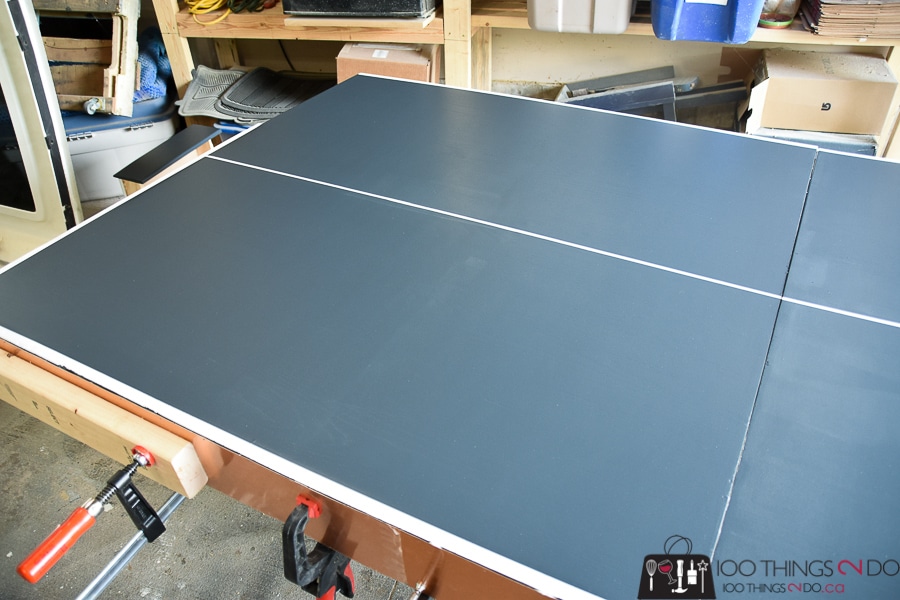
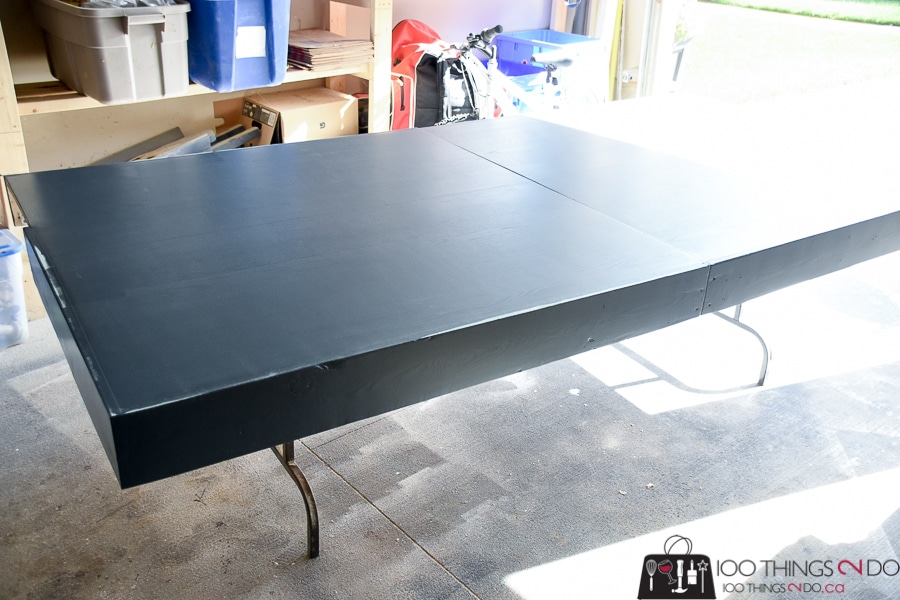 Two coats and you are ready to peel off your tape! (The best part!)
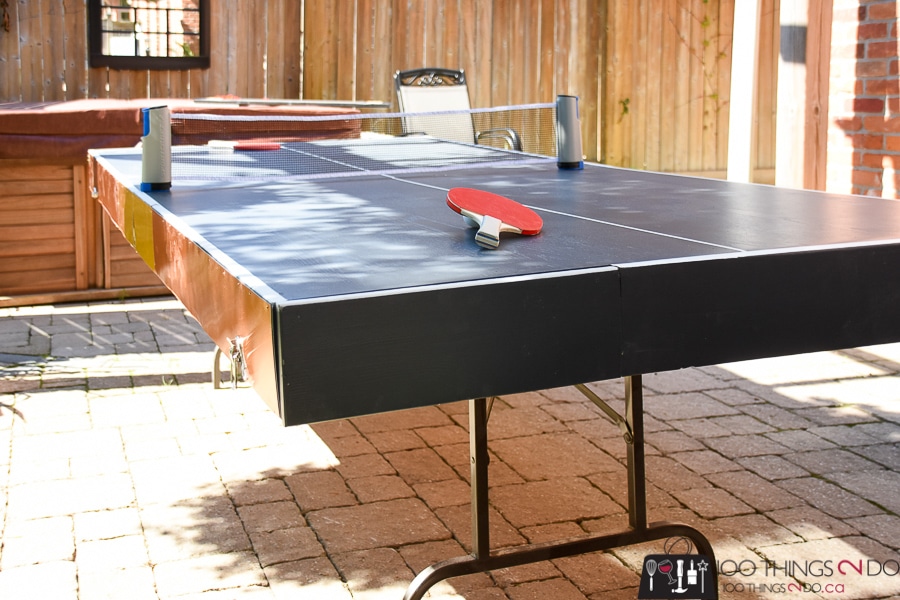
 Having folded the ping pong table to check for a tight fit, and then re-opening it again for painting, you will have noticed that the side of the ping pong table could get pretty scuffed up. You don’t have to do the next step, but I thought adding some copper flashing (not real copper, but aluminum that looks like copper) might prolong the life of my wood and protect my table from too much damage.
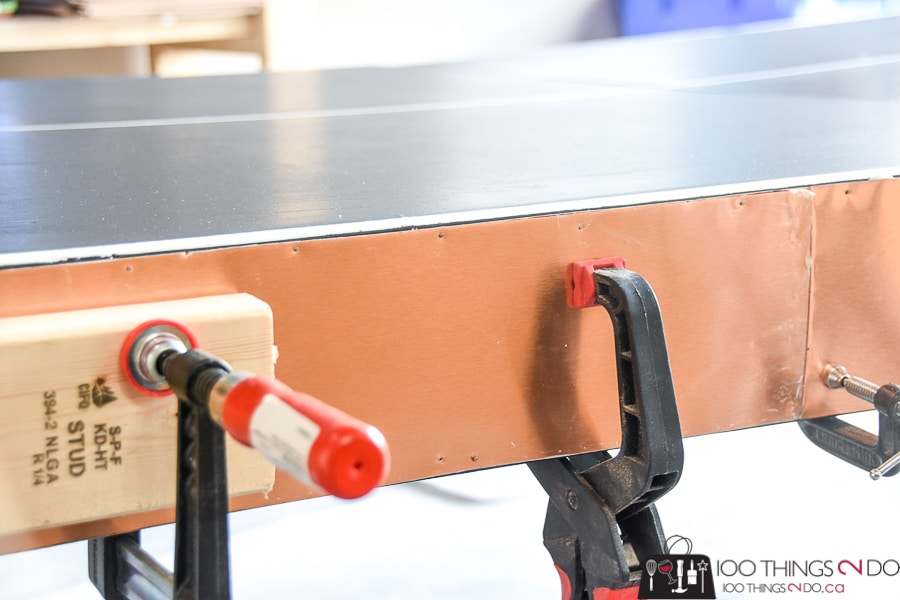
A bit of heavy duty glue, 3/4-inch brad nails and clamps will bind the copper to the sides pretty easily.
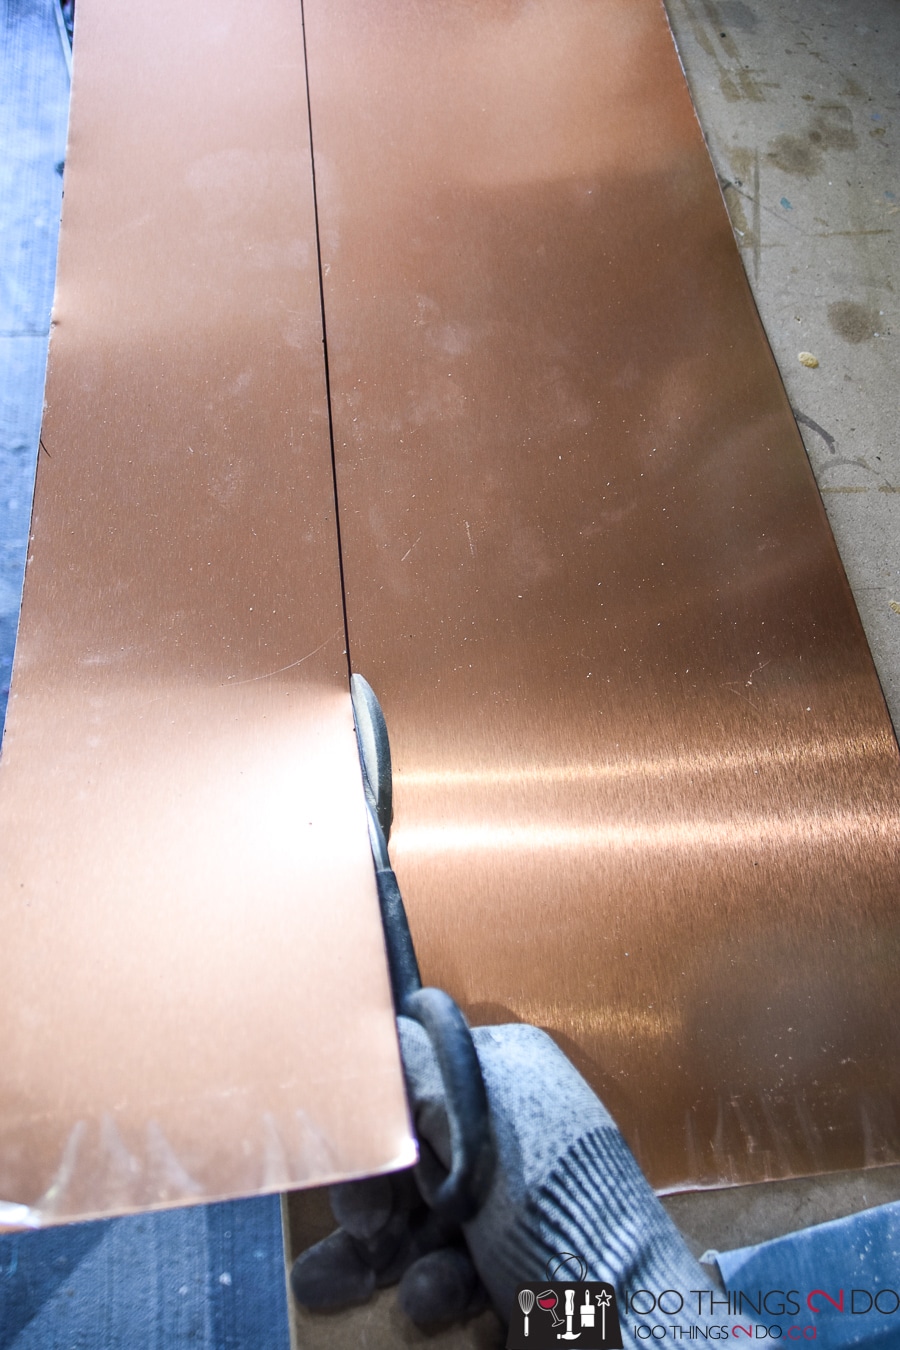 You can find this sheeting at many home improvement stores. It’s thin enough to cut with tin snips, thick enough to offer some protection and coppery enough to glam up your table.
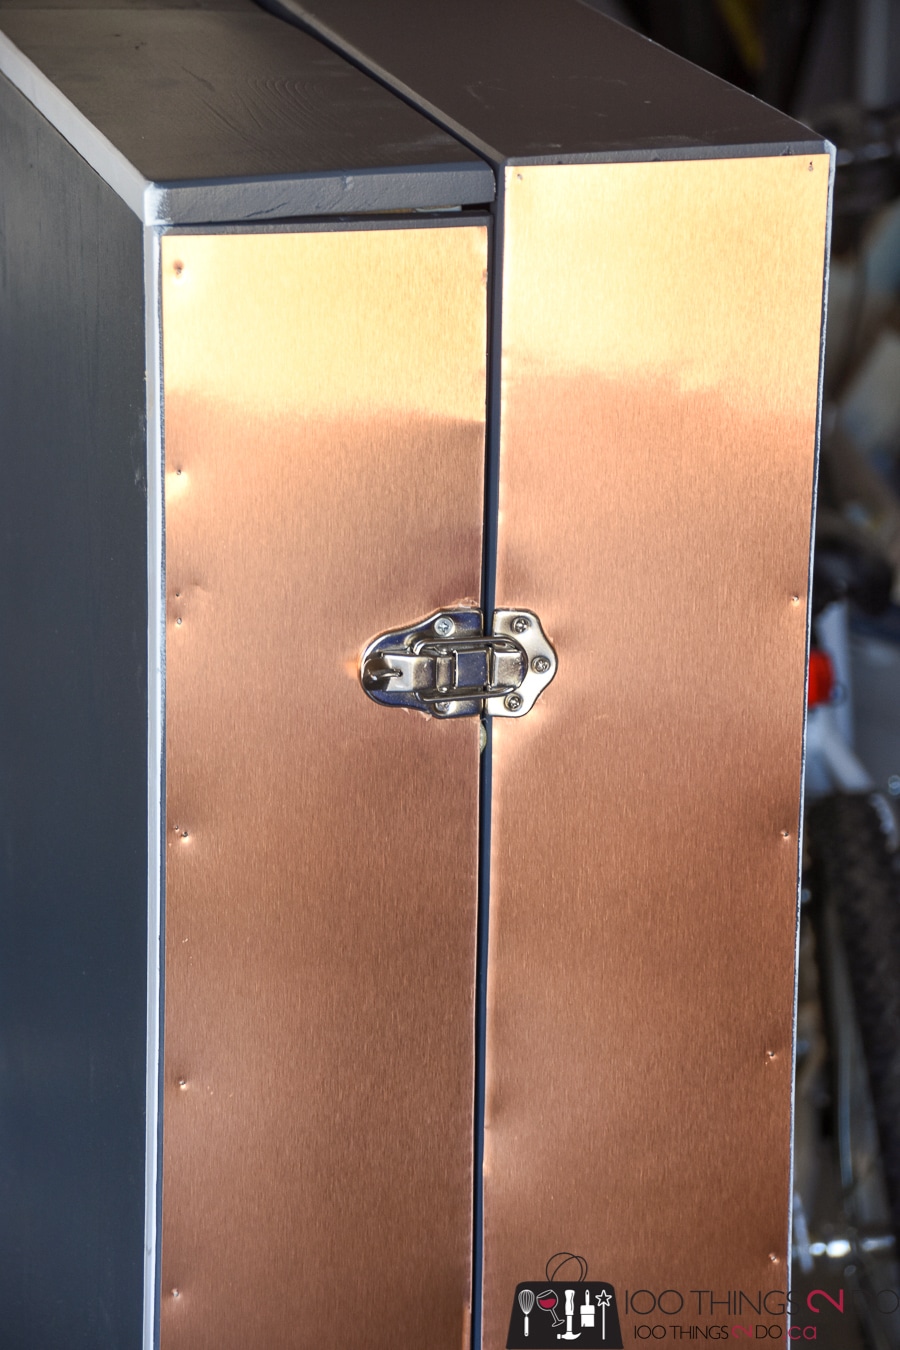
 Re-attach the clasps and you are ready to play on your DIY folding ping pong table!
 I folded it up (check out that tiny footprint!) and put it on a skateboard to wheel it to my backyard.

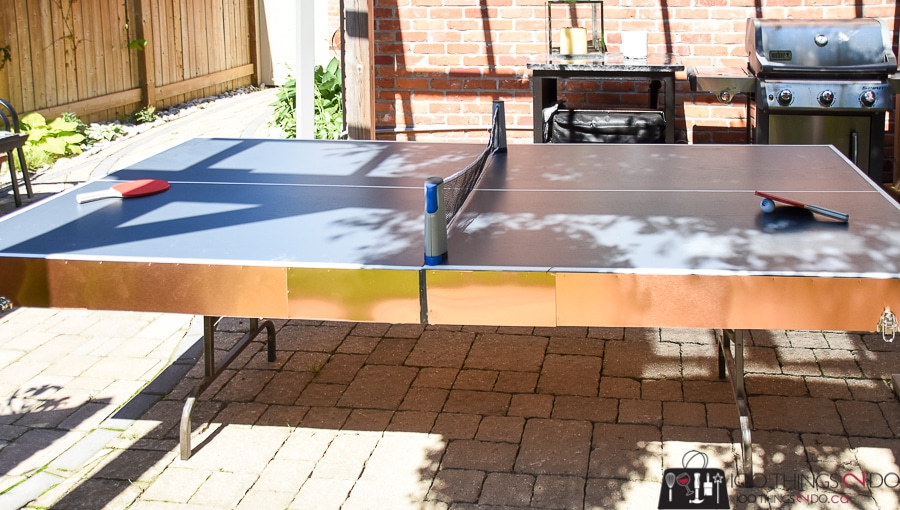 You’ll see a mistake I made here: the extra piece of copper needed to clad the sides was about 12 1/2 inches long – I wasn’t thinking and I cut the pieces from the copper sheeting, but didn’t make sure the grain of the metal was running in the same direction as the original pieces. That’s where you see the light reflecting differently. Duh-me.
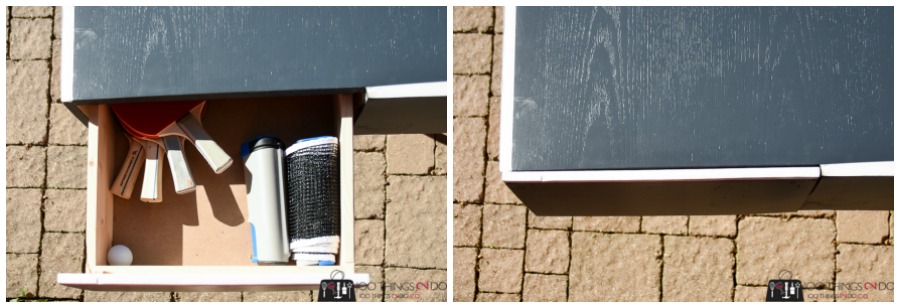
 The hidden drawer easily holds your net, extra balls, and at least a half-a-dozen ping pong paddles!
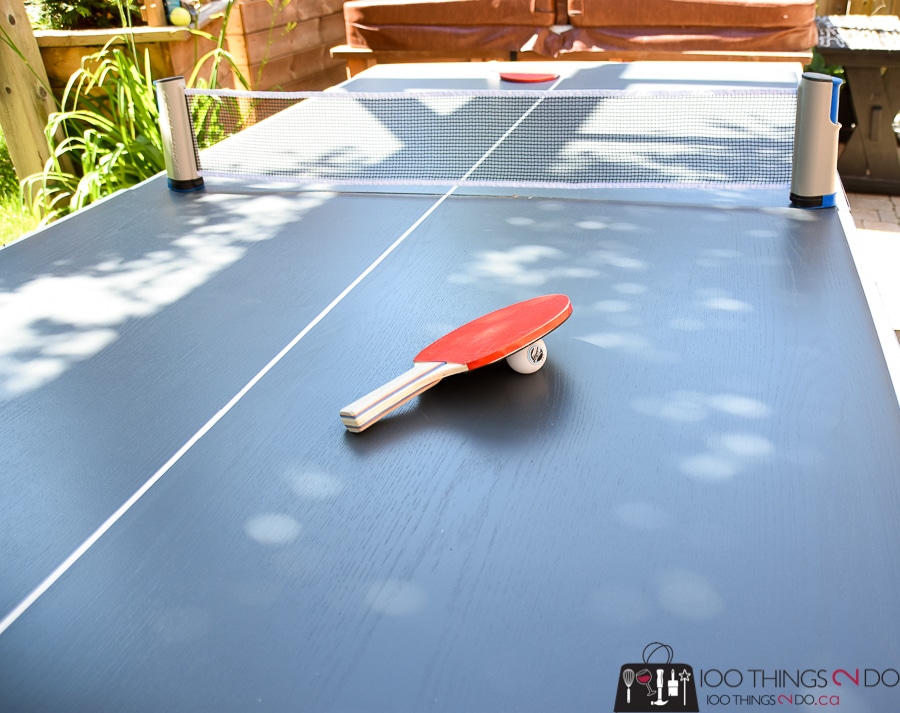 Sunset game of ping pong, anyone?
The best feature, I think, is the folding option. When you’re done playing, just tuck your paddles etc into the drawer, collapse the legs, click the clasps and tuck your folding ping pong table away in the garage. One compact box of fun.
That’s it folks! You’ve just made a DIY folding ping pong table and you’ve made yourself the hit of your family/friends/family reunion – at about half the cost of purchasing a bulky table that takes up twice the space.
For more backyard fun ideas check out:
- One-man ping pong
- Personal fire pit
- 100 Things 2 Do this summer
- The Tough-Mudder of Hopscotch
- Championship Beer Pong
Happy 4th of July weekend friends and Happy Canada Day back home!
Pin it for later!


This table is not the standard size which is 9′ x 5′. It is only slightly larger than 8′ x 4′.
While true, there are also many “mini” or “mid” size recreational tables. It wont’ make much of a difference for the vast majority of users. I would try to find a different solution for the net, but the table size doesn’t bother me at all.
Does the table feel 100% supported? It looks great and I love the small footprint! The copper was a nice touch!! I just want to know, 1) has it held up, & 2) is it level or does it dip in the middle from
Weight?
Good work!
one can purchase 2 panels of baltic birch, each measuring 1” x 60” x 60”, and cut it down to 1” x 60” x 54”. A 1” skirt will add the necessary rigidity across the panel. I like the piano hinge fold.
Could you please let me know type and size of clasps used.
Hi nice design! How is the sturdiness of this table with the folding table legs? Does it wobble front to back or side to side much? How wide are the table legs at the bottom?
Hi, how much did this cost to make?
This is my question as well
This is such a fantastic idea! I love the idea of saving money while also getting a custom-sized table. The step-by-step instructions look super clear, and I can’t wait to try this out for my game nights. Thanks for sharing!
This is such a fantastic idea! I love the step-by-step instructions you provided—it makes it seem so doable. Can’t wait to try this out and save some money while having fun! Thanks for sharing!
I’m making a ping pong table for my garage and the description of your process is super helpful. And your final product turned out awesome…. nice work!