Plumbing rough-in for a small bathroom and leveling the floor with a self-leveling underlayment.
Welcome back to our Guest Bathroom Renovation! We’re transforming our guest ensuite bathroom from BASIC to BEAUTIFUL (hopefully! Fingers crossed.) We’re mixing modern and traditional styles for a classic, timeless feel that features marble mosaic tile, warm wood accents and vintage elements.
If you missed my previous posts on this guest bathroom renovation, catch up here:
Here’s where we left off:
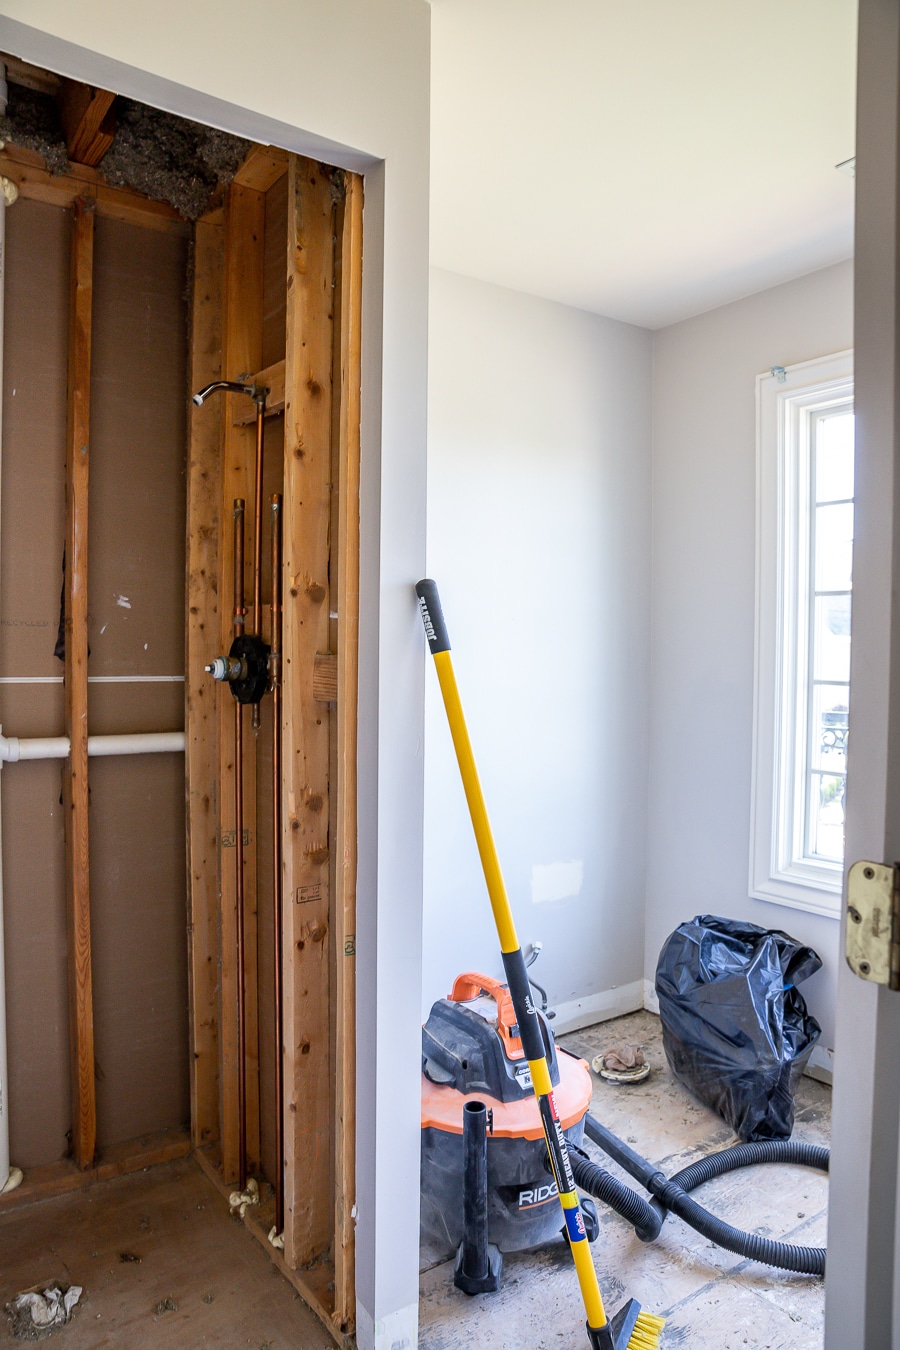 We removed the toilet, sink, mirror, hardware, light fixture, shoe molding and baseboards, floor tile, shower stall, and insulation. You can watch the play-by-play on my Instagram stories.
Today’s To Do List:
- Move shower valve and pipes to opposite wall
- Repair shower drain
- Patch subfloor
- Demo wall
- Prime floors with underlayment primer
- Level floors with self-leveling underlayment
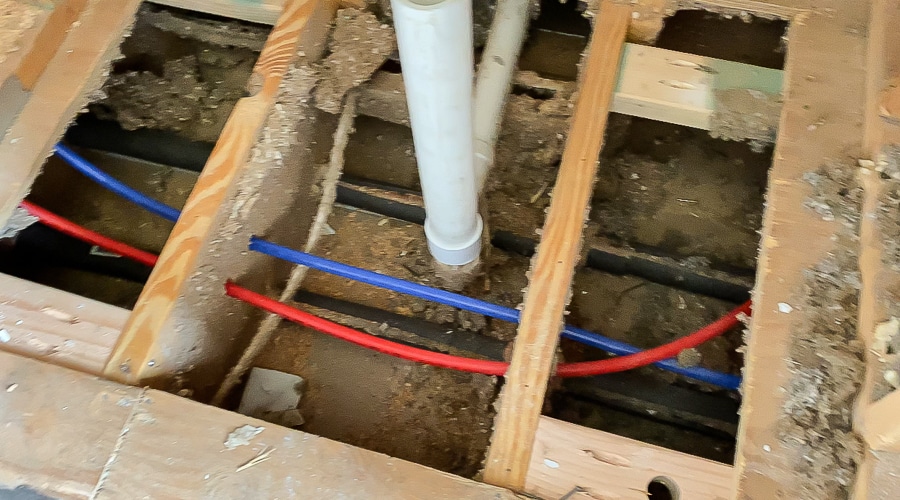 The plumbers replaced the copper pipes with PEX piping and moved the valve and pipes to the opposite wall. (My apologies for the fuzzy iPhone pic!) It took two of them about 3 hours to do this. They cut into the subfloor and ran the PEX pipes under the floor and up the opposite wall. They chose to use PEX because it’s much easier and quicker to install and it’s more durable than copper. The less time they spend on installation, the better my cost savings are since they’re paid by the hour. Also, the lifespan of PEX tubing is 40-50 years and it’s quickly becoming the industry standard.
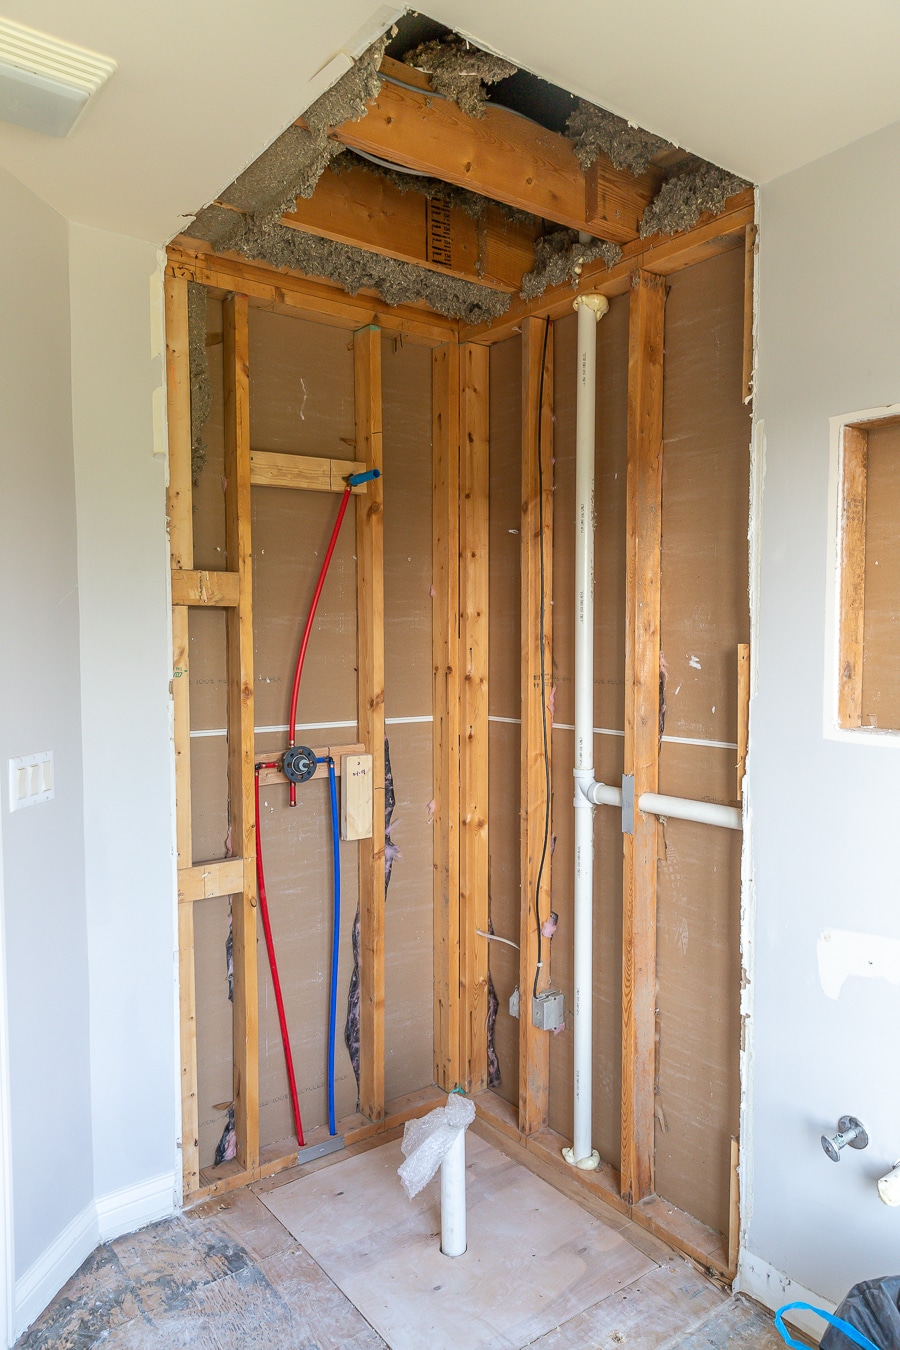
As soon as the plumbing was moved, we patched the subfloor and demo’d the wall (that was fun). I can’t believe how open this space feels now!
 Now it’s time to move onto prepping the floor. I ran a level across the floor and found that there were quite a few dips and high spots. I had my suspicions of this because the previous tile had lippage in some places.
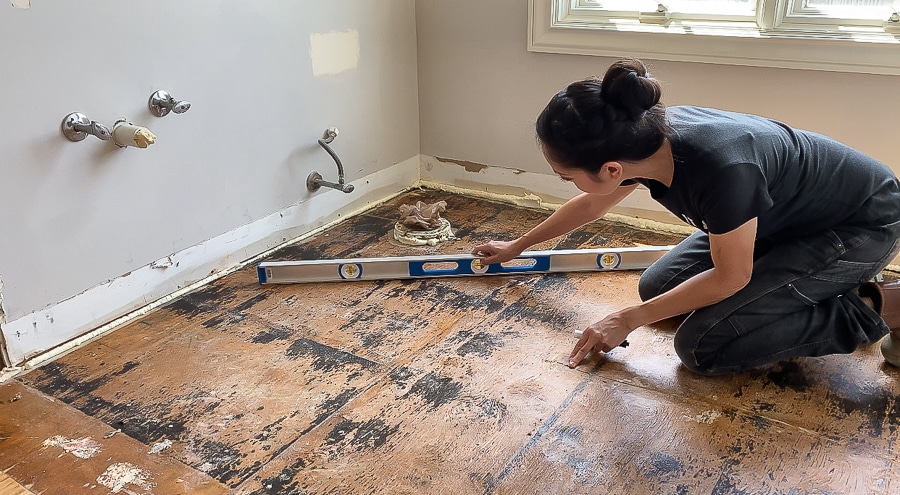 After some research, I found this self-leveling underlayment – you can pour this onto a floor and it seeks its own level. Per the manufacturer’s directions, this underlayment primer is recommended for proper adhesion. The directions say after applying the primer, you can pour the self-leveling underlayment in as little as 3 hours, but not more than 24, so I rolled it on with a short nap roller and let it dry.
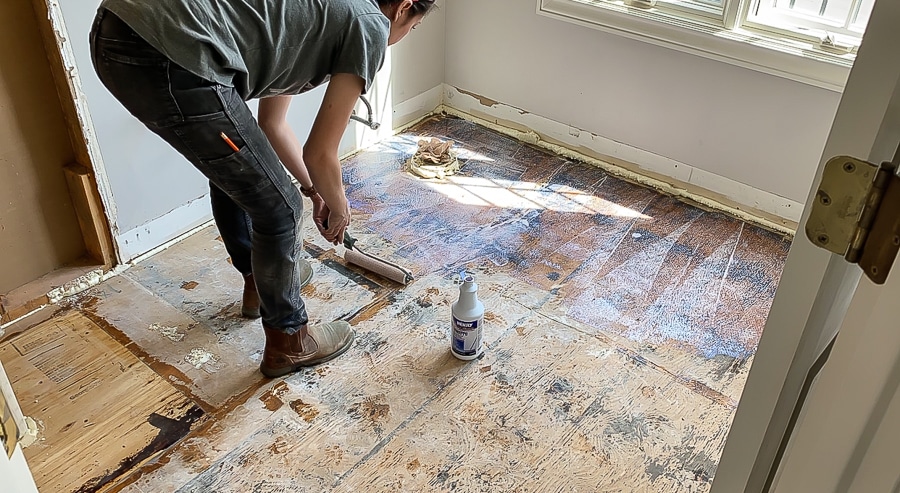 Before applying the primer, I sealed the joints in the subfloor with silicone caulk and dammed the perimeter with spray foam insulation. A professional tile guy on YouTube recommended these steps to prevent the self-leveling underlayment from dripping through the cracks or behind the walls. In hindsight however, I realized this was an unnecessary step for me and the spray foam insulation was a pain in the butt to remove after the fact.
I didn’t need to dam the perimeter of the room because the self-leveling underlayment wasn’t as thin as I was expecting. I mixed it up exactly according to the directions and the consistency was still thick enough that I could easily control where it went. Oh, well, live and learn.
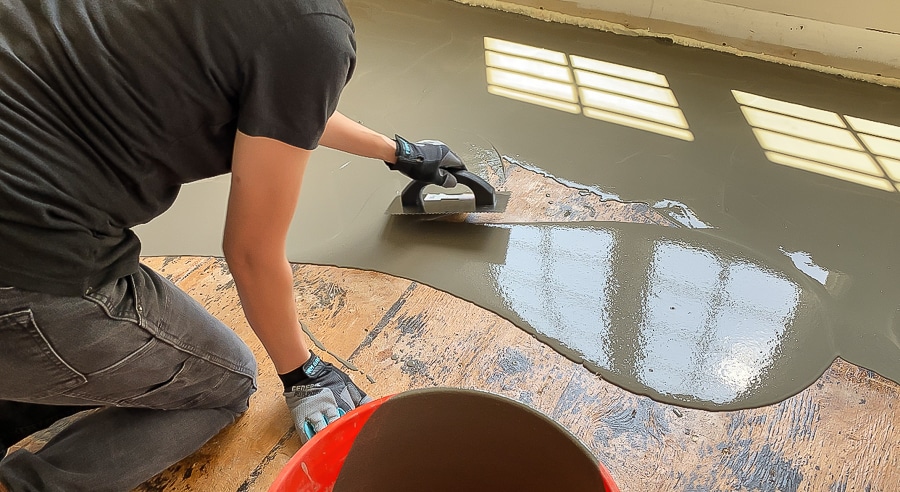 I mixed up the self-leveling underlayment using a paddle attachment on my drill and poured it onto the floor. Then I used the flat side of a trowel to spread it around, breaking the surface tension and allowing it to flow. Once it’s all spread out, you just let it do its thing, seek level, and cure for the recommended time: 6 hours for ceramic tile and 16 hours for all other floor coverings.
Next on the list is to install the cement board on the floors and walls, build the frame for the pony wall, and start building the shower back in. This guest bathroom renovation is moving along nicely and I’m learning a lot! Follow me on Instagram for behind-the-scenes videos and sneak peeks!
Guest bathroom renovation MASTER CHECKLIST:
Demolition
Remove bathroom door temporarily to make room for demo?Turn off water and valves, empty pipes and tankRemove pedestal sink and toilet, plug holesRemove medicine cabinet, bathroom hardware, light fixtureRemove shoe molding and baseboardsDemo floor tile and cement boardDemo and remove shower stallRemove insulationClean up site
Plumbing Rough-In
Move shower valves to opposite wallsRepair shower drain- Install toilet
Electrical Rough-In
- Relocate outlet to adjacent wall
- Replace overhead vanity light with wall sconces?
- Replace vent fan
- Add lighting in shower?
Framing
Demo shower walls- Frame pony wall
- Don’t forget to add the toiletry niche (plan around tile size)
Floors
Prime floors with underlayment primerLevel floors with self-leveling underlayment
Shower Installation
- Check to ensure studs are plumb and even, shim if necessary
- Add insulation
- Install cement board, seal seams
- Roll on waterproofing membrane
- Install shower tray and curb
- Waterproof floor and curb
Walls
- Repair drywall where medicine cabinet used to be
- Molding?
- Paint
- Install baseboards and shoe molding
Tile
- Tile shower walls
- Tile shower floor
- Tile bathroom floor
- Grout and caulk
Vanity
- Install vanity (will it fit?)
- Install faucet and sink
- Hang mirror
Lighting
- Install wall sconces or overhead vanity light?
Miscellaneous
- Order and install glass shower door
- Install toilet paper holder, towel bar, towel ring, towel hook
- Add artwork and accessories


What are your thoughts about glass backsplash on the shower walls?
This is a fantastic series on your guest bathroom renovation! Following along with the progress is really informative, especially the details you share about plumbing rough-in and floor leveling. It seems like these are important steps that might not be readily apparent in the finished product.
Speaking of the finished product, I’m curious to see what design choices you make for the shower tile. Will you be going for a classic look or something more modern? I’m eager to see how you tie everything together!