Hi friends! Remember the DIY storage ottoman that I built with my besties at Simpson Strong-Tie? Well, I just made a DIY Kamado grill table to go with it! Can you believe that I won this awesome Kamado grill from The Home Depot last year? I know, I couldn’t believe my ridiculous good luck either – please don’t hate me. I love you. I will cook things on this grill for you.

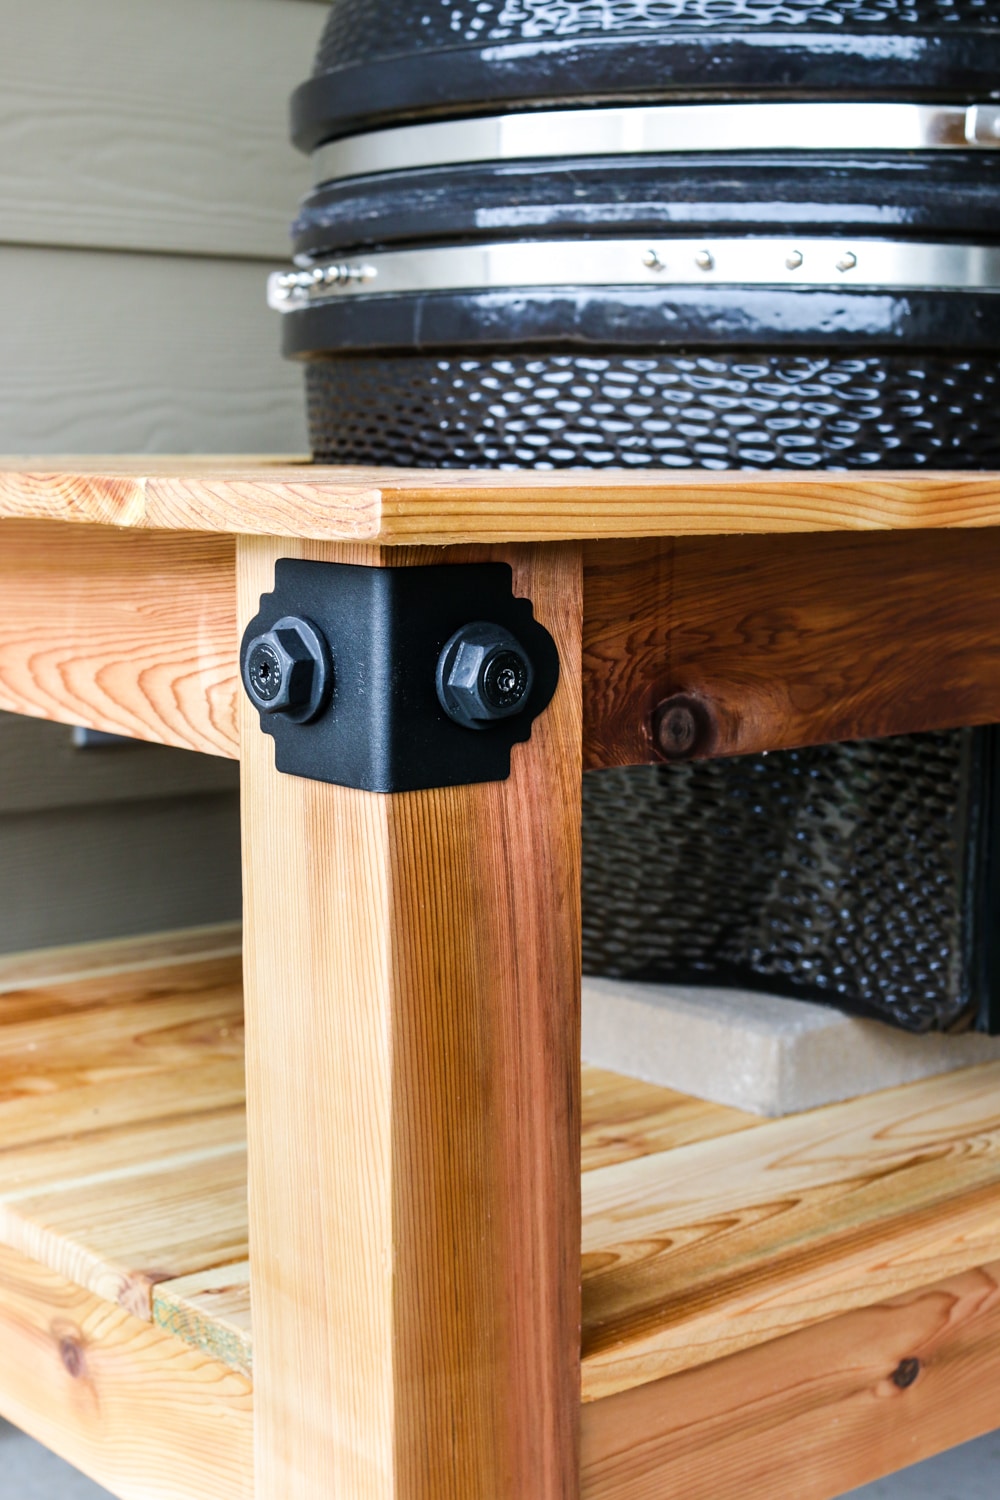
I’ve been crushing hard on these black powder-coated Outdoor Accents™ that Strong-Tie just came out with and now I want to build ALL THE THINGS with them! They are truly beautiful and functional. Who knew hardware could look this good? Simpson Strong-Tie, that’s who. Can you tell who’s sponsoring this post? 😉
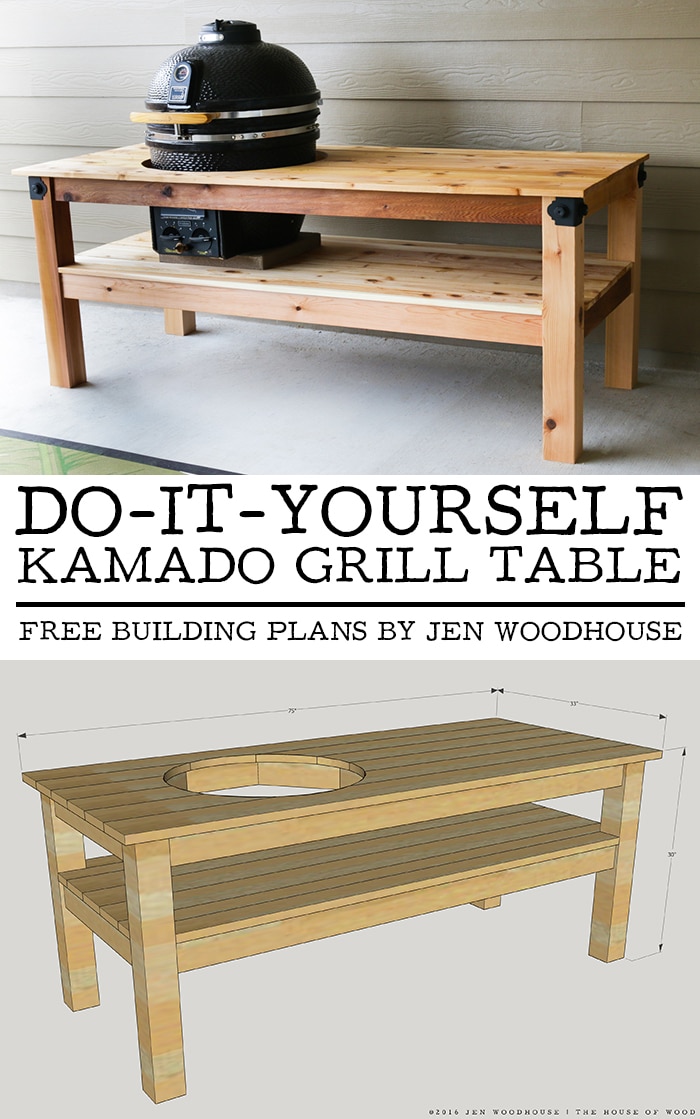
But seriously, I am super excited to be sharing my newest DIY Simpson Strong-Tie project with you. This build has been on my list for over a year now. Way to get things done, Jen. #winning
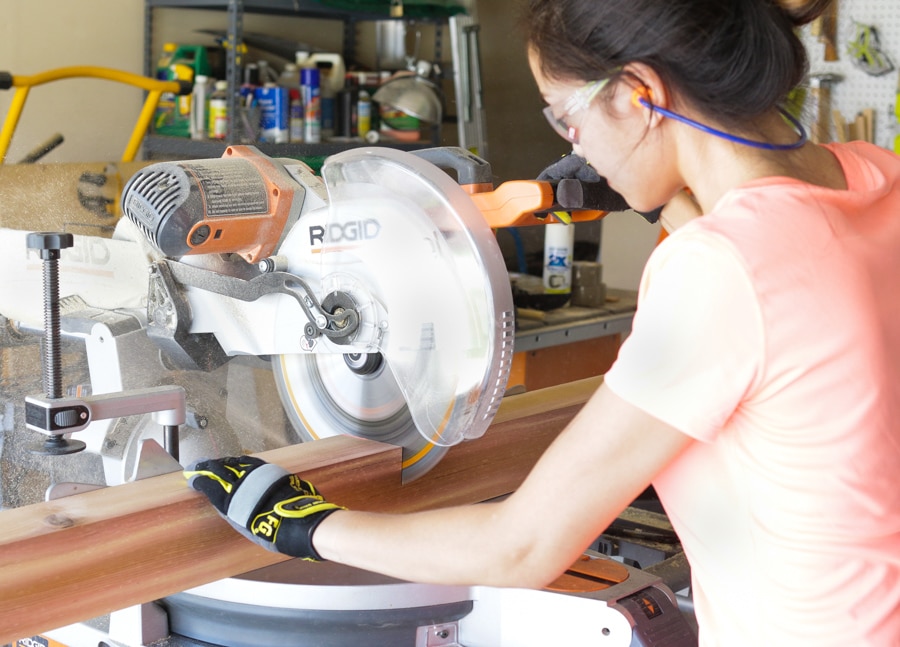
I chose to use rough cut cedar for this project. I ripped and planed all of my boards before building. Even though cedar fares well outdoors, I applied a couple coats of exterior finish to preserve that beautiful wood tone. If I left the wood untreated, it would weather to a gorgeous grey color. Okay, so are you ready to build your own DIY Kamado Grill Table for your outdoor space?
I wanted to make this DIY Kamado Grill Table design as simple as possible. There are a lot of DIY grill tables floating around the interwebs that have all the bells and whistles, but there’s something to be said about simple, classic design. I tend to overthink things, so when I was drawing up several different designs, some included drawers, cabinets, and even one with a sliding barn door, but I kept going back to basics and stripping the design down to the bare necessities.
My two main concerns with building a wood table for a grill that can get to upwards of 800º F was 1) would it be strong enough to support a 220-lb. ceramic grill? and 2) would it spontaneously combust and burn the whole house down? After extensively researching googling these concerns, I came to the conclusion that folks have already built these DIY Kamado grill tables and have lived to tell the tale. Wood Kamado grill tables are also commercially sold, so I figured my chances of spontaneous combustion or disintegrating tables were pretty slim.
 Another factor that intimidated me was the fact that I was working with cedar which is more expensive than regular old pine. If you were to build this table out of pine, the cost would run about $100, but because I chose cedar, my cost doubled. Even still, $200 is hundreds less than what I would have paid had I bought my table from a store. Also, I was able to design it to fit my space. Just two of the many reasons why I DIY: cost and custom.
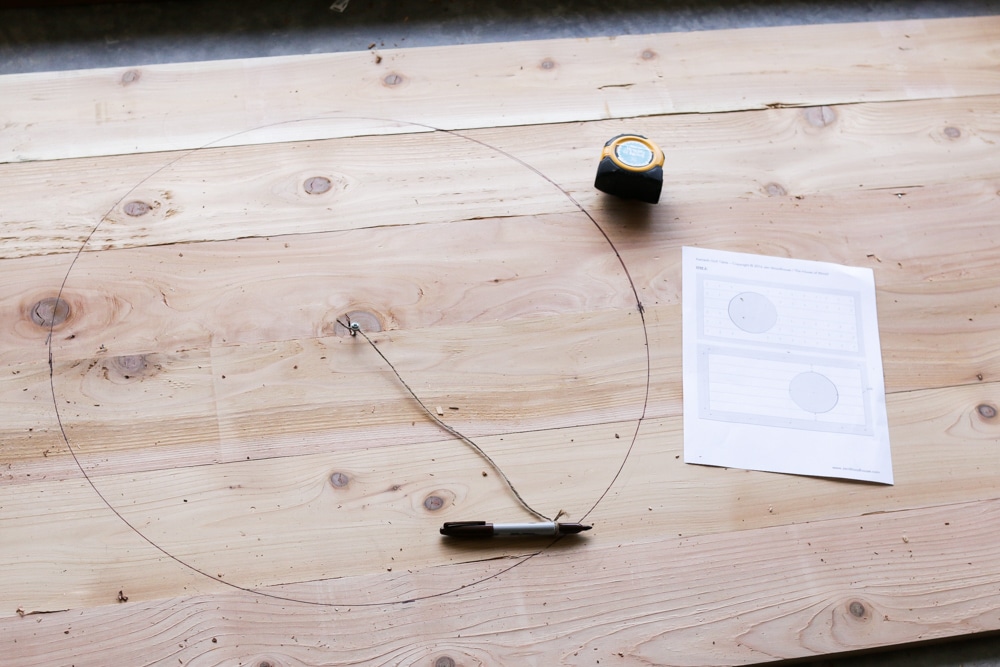
I’ve included all of the instructions in the building plans, but I wanted to share how I was able to draw an oversized circle using a makeshift compass. First, I measured the circumference of my grill, then decided to make the opening 24 inches in diameter – ample clearance for the grill. If you have a different size grill, you’ll want to measure the widest part of the grill and allow for a couple inches of clearance.
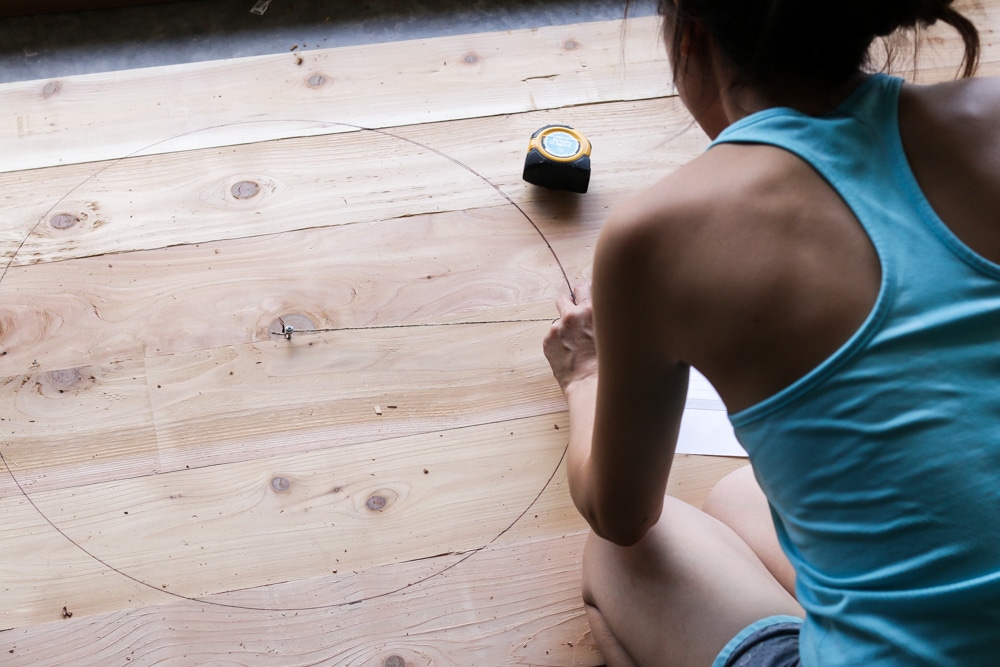
After constructing the table top, it was time to mark where the circle cut out would be. I found the center of the circle and drilled a screw into it. Then I tied a string to a marker and drew the circle. *Tip: keep the marker perfectly perpendicular to ensure the most precise circle.
All of the measurements are in the plans: the diameter of the circle is 24 inches, the radius is 12 inches. How ya like me now, seventh grade geometry?
Now let’s take a peek under this table and see what’s going on with this situation. Because this lower shelf would be supporting the full weight of the grill (all 220 pounds of it!), I wanted to make sure it was plenty strong. I added these 2×4 cross supports underneath for strength and stability.
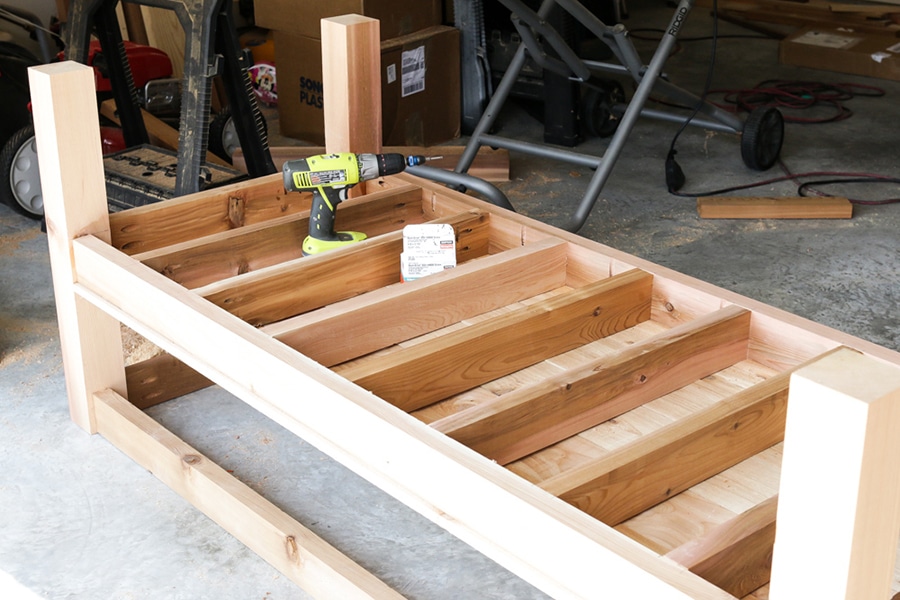
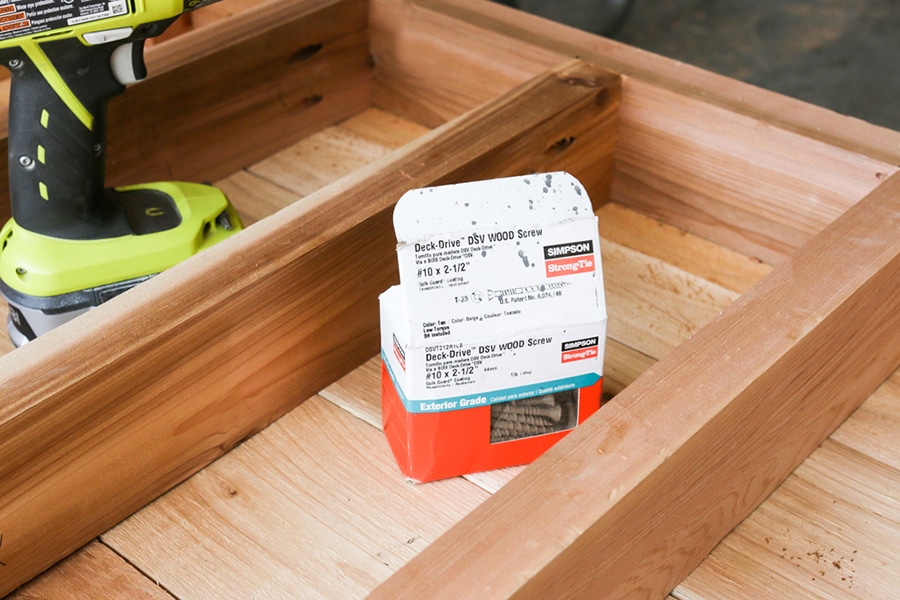
I used these exterior Simpson Strong-Tie® Deck-Drive™ DSV Wood Screws to attach the lower shelf boards to the table. Alternately, you could use pocket hole joinery here, but I chose to simply drive the screws from the top of lower shelf into the 2×4 supports and aprons. Because cedar is super soft, I didn’t have to use a separate countersink drill bit to countersink the screws. I just up’d the torque on my drill and drove the screw slightly beneath the surface of the wood. I’ll fill it with wood putty to hide the screw head during the finishing process.
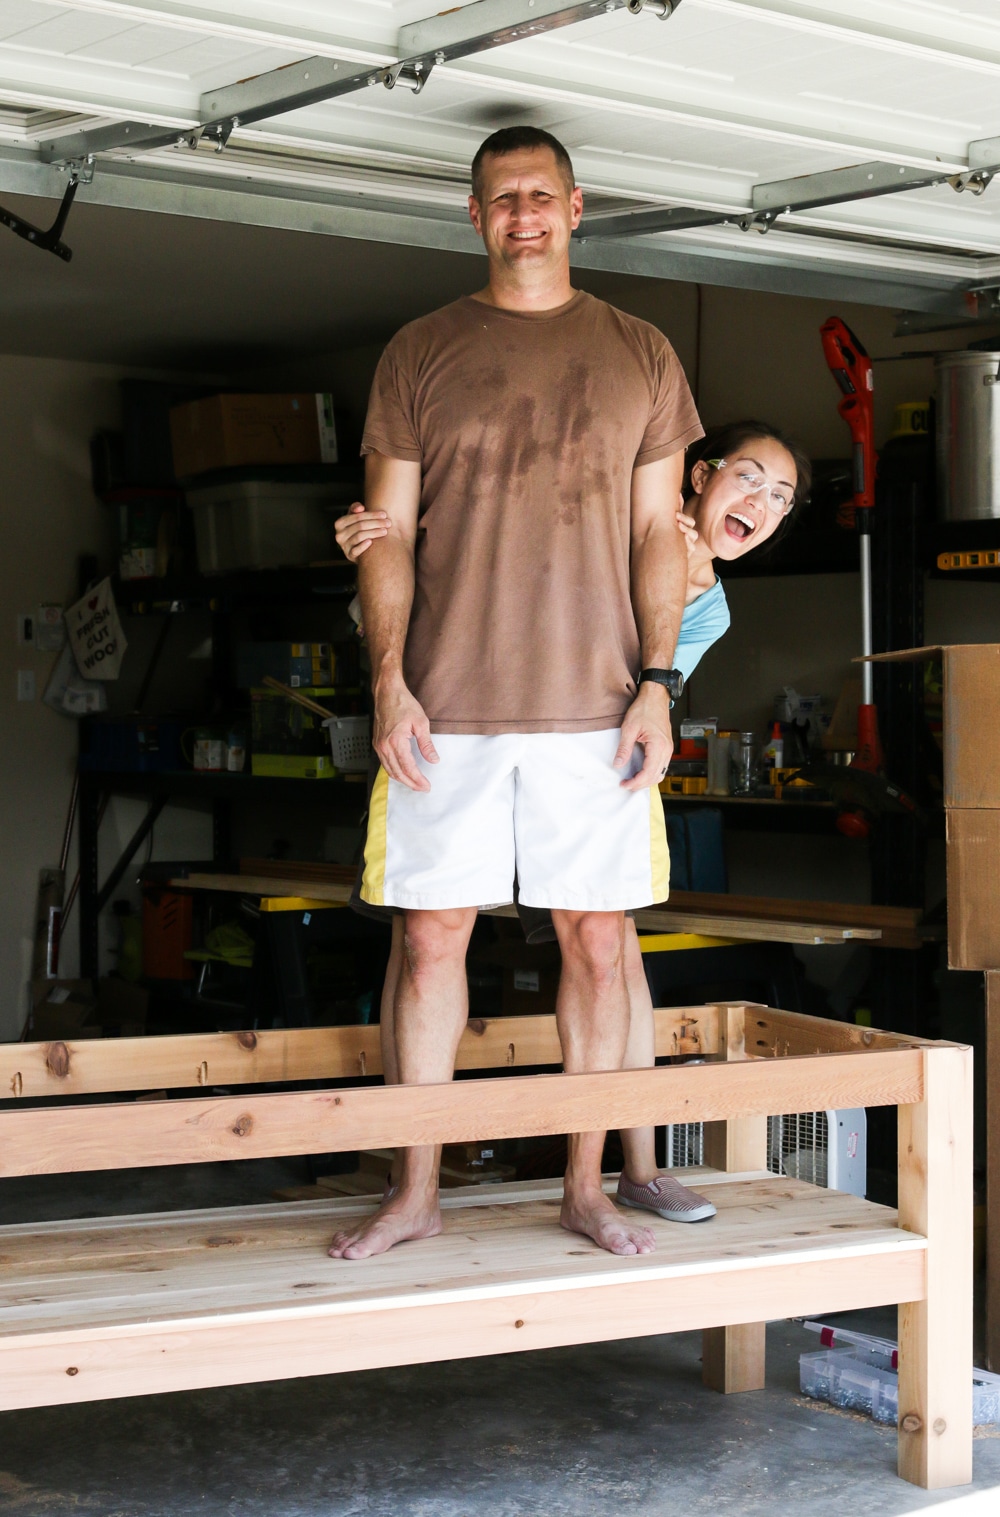
Now let’s conduct a very scientific strength test, shall we? Between my hubby and me, we’re putting about 300 pounds on this table. And confession time: I’m hiding behind him because I didn’t want to bother with putting on a bra because it is so stinkin’ hot here in Texas. Was that TMI? My apologies. But seriously, ain’t nobody got time for that. I’d build naked if I could, but I think that’s frowned upon. Howdy neighbors!
 Okay, so Main Concern #1 has been put to rest. My grill didn’t come crashing through the table. Here’s another helpful tip – and this may seem like a no-brainer to you, but I honestly had to think this through. I wondered, how in the world am I going to lift this heavy-ass grill onto the table without busting a hernia?
Take the thing apart. Unscrew the hinge, take the top off, remove the inner basin and guess what. The grill gets so much lighter! Duh. I know.
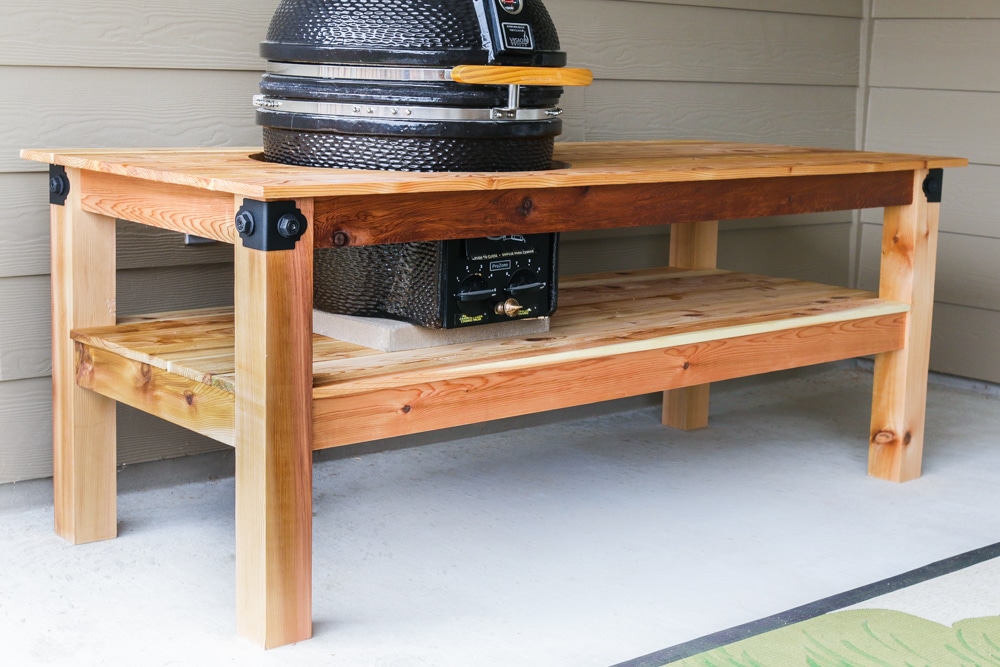 Okay, so let’s address Main Concern #2: spontaneous combustion. From what I read all over the interwebs, do not – I repeat – DO NOT place the grill directly on a combustible surface (i.e. combustible surface = wood). I picked up a paver stone from Home Depot and set the grill on top of it to absorb some of the heat and protect the table. Just be sure whatever surface you use to absorb the heat, that it doesn’t prop up the grill too high so that you’re still able to access the pull-out ashtray below.
We haven’t grilled out yet (still too stinkin’ hot!), but as soon as I do, I will report back with my findings. My assumption is all will be well based on my research googling.
*UPDATE: We grilled out on this table and lived to tell the tale! Our grilling experience went off without incident. The ceramic grill retains heat so well, the table didn’t even feel hot. Huzzah! I shared the real time experience via Instagram Stories – are we friends on Instagram? Let’s be!
So there you have it: DIY Kamado Grill Table. Aren’t those Outdoor Accents gorgeous? They can be used structurally, but in this case, I’m using them decoratively because they’re that pretty. They’re like the jewelry for my table because let’s be honest, we can all use a little bling in our lives, amiright?
Don’t forget to download the building plans above so you can build your own Kamado Grill Table! Thanks for reading, friends! Happy grilling!
Be sure to PIN IT for later!


Just what I’ve been looking for. I’ll be very grateful if you could send me your plans please.
Jen
Love your Kamado Grill Table and can’t find a link to the plans. Would you be so kind as to send me a link to them. So glad to see you using the Simpson StrongTie decorative hardware. I used it throughout my outdoor kitchen and hope to use it when I replace my 17 year old my Big Green Egg grill table. I ust need your plans. Ive looked at dozens of tablr plans but like yours the best.