Sigh… aren’t they beautiful? But are they $369 kinds of beautiful? I think not.
So, armed with Ana’s plans, I waddled up and down the vast, intimidating aisles of Lowe’s gathering my supplies. It was the first time I took a trip to Lowe’s to buy lumber without my husband. I was a little apprehensive at first, but once I got there, I felt very empowered. It didn’t hurt that all the friendly, strapping young men working in the lumber department were more than happy to assist me. What a peculiar sight I might have been: imagine 1 tiny Asian girl + 7 months pregnant + pulling a cart full of lumber behind me = strange looks all around. Ha.
I made sure to measure twice before making any cuts (Watson supervises):
Here are my cut pieces. I doubled what was listed in Ana’s plans for two nightstands. Also, I found that I ended up needing 10 of the 1x4s @ 22 1/2″ (instead of 8) because I used 5 boards for each nightstand top (4 boards didn’t cover the whole top). No idea why my numbers were off…
By the way, can I just tell you how much I love my compound miter saw? It was a Mother’s Day gift from the Hubs last year. And look! I was able to get all my cuts done during nap time.
After all my cuts were made, I busted out the trusty Kreg Jig and drilled a few pocket holes in my pieces then joined them together to make the sides, front, and back frames:
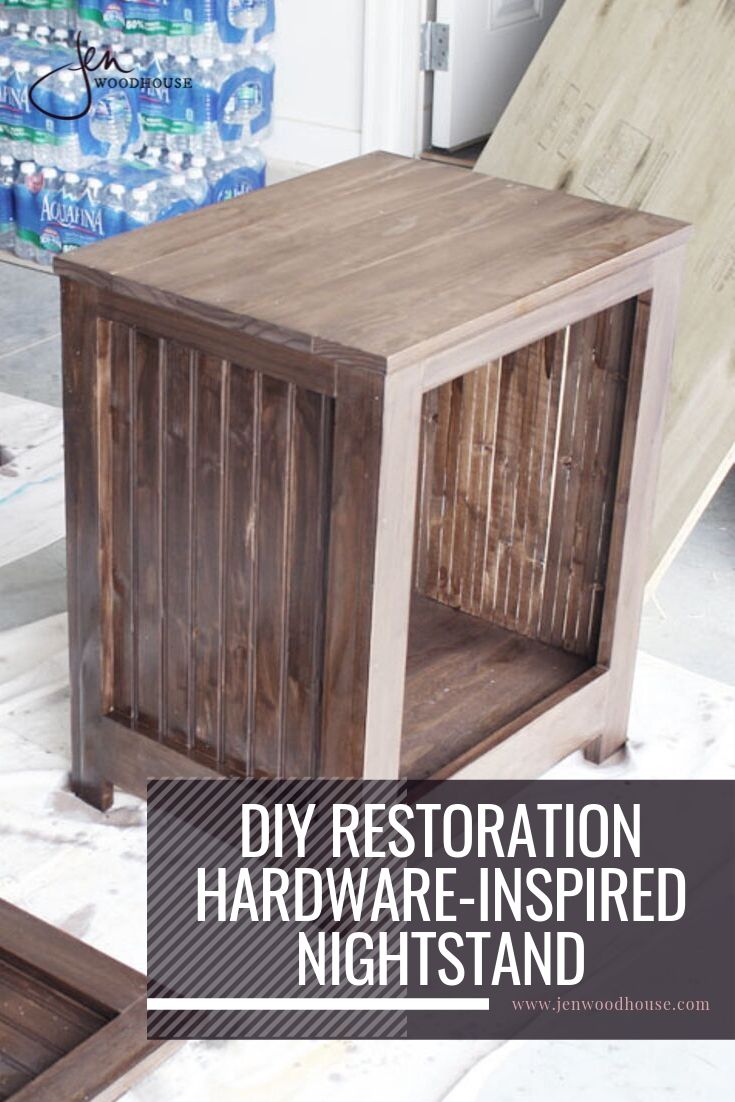
Then after cutting some plank paneling down to size, I nailed them to the insides of the side frames. The frame on the right shows what it looks like from the inside of the nightstand and the frames on the left show the outside. Puuuurty.
Next I drilled the bottom pieces of plywood to the side frames. Well, hello there, morning laser beam of sunlight shooting directly into my garage making it a sweltering sauna.
Next, I glued and nailed the front frames on, drilling pocket hole screws in on the bottom shelf. Also, because I’ll be putting these nightstands in a place where the back is exposed, I chose to continue the plank paneling on the back, instead of using a sheet of plywood for the back panel. I think it’ll look more finished that way. Here’s the back frame, ready for the plank paneling:
I attached the plank paneling to the back frames just as I did with the side frames (using glue and 3/4″ finish nails). The nightstand on the left shows the inside of the back panel and the one on the right is what it’ll look like from the outside.
Then I glued and nailed the back frames onto the nightstands, drilling pocket hole screws in at the bottom shelf. Here’s the view from the back (hellllooo, lovely!):
Now to construct the doors. I Kreg Jig’d em up and zipped some screws in:
Then added the plank paneling. The door on the left shows the inside, and on the right is what it looks like from the outside:
Now they’re ready for their tops!
I assembled the top boards by first drilling pocket holes, then joining the boards together, like this:
Then I attached the tops with glue and 1 1/4″ finish nails and gave the 2 pieces a good sanding. After vacuuming all the dust with a shop vac, I wiped the nightstands down with a damp rag to remove any remaining dust and debris.
Ahhh… the end is in sight! Here are my lovelies ready to be stained! Aren’t they puuuuurty?
I used Rustoleum’s Ultimate Wood Stain in Dark Walnut. It turned out a little darker than I expected. I probably should have wiped the excess off immediately after, instead of waiting 15-20 minutes like the directions say. This stuff dries in an hour, so after 15-20 minutes passed, it was a bit tacky and more challenging to manipulate. Behold: my embarrassing staining job:
Yuck, with a capital Y, right? So, I fired up my palm sander with 60 grit sandpaper and sanded the stain down, in hopes of improving the finish. This is what I came up with:
I think I kind of like the rustic finish; it looks like reclaimed wood. I think the imperfections look more deliberate and intentional, instead of looking like I let my one-year-old loose with a can of wood stain. The wood felt coarse from the 60 grit sandpaper, so I sanded the surfaces down with a 120 grit sanding block to smooth it all out again and wiped everything down with a damp cloth to remove all the sawdust.
After I brushed 3 coats of polyurethane on, I drilled the sash lifts and strap hinges on the door and attached the doors. It’s easier to drill the hinges on the door first and then drill the door onto the nightstand (take my word for it). I also included a magnetic clasp on the inside so that the doors click and stay shut. And here they are, finished:
To be honest, I’m not sure how I feel about the finish. I loved these pieces up until I mucked it up with my misuse of stain. I think I’ll refinish them sometime in the future, but for now I’ll wait and see how I feel after we’ve lived with them in our home for awhile. What do you think? Suggestions?
Cost Breakdown:
Pine lumber: $92.11
3 Packages of plank paneling: $29.13
2 Sash lifts: $5.02
4 Strap hinges: $10.68
2 Magnetic clasps: $2.38
Pocket hole screws: already owned
Finish nails: already owned
Rustoleum dark walnut stain: already owned
Rustoleum polyurethane: already owned
Total cost for 2 nightstands: $139.32 ($69.66/each)
That’s a savings of about $600. Um, yes please. I’ll take it!
I love the finish!!! We actually made a coffee table & the stain was a bit darker than I wanted so I actually attacked mine with the sander once the stain dried & it gave the rustic worn look that I am in love with. We plan on building some of these night stands soon & I am super excited to get started.
Hi Jen! I made a single night stand using basically your design except I didn’t use any nails all pocket holes. Where you use 1 X 2 I used 1 X 3 (needed for pocket holes). 1 X 2 too narrow for pocket holes. I also added a shelf inside. I also used pocket holes to attach top. I used Minwax Early American stain. Just finished adding Polyurethane. Only thing left to do is install hardware. Sorry now I didn’t make 2 of them. Your instructions were great help, thanks again.
I need to re-read the plan but do you know how big the back panel was? The plan said the back panel was optional …!?! I need a back panel. I guess I should bust out my adding skills. BTW, thanks for the heads up on the extra 1×4 @ 22 1/2″
Yes, building the back side is optional… it just means that when you open up the cabinet, you’ll see the wall behind it. But you wouldn’t notice that it’s missing a back, unless you opened up the door and peeked into the cabinet.
I didn’t use plywood for the back side. Because I planned on placing the nightstands where the back would’ve been in plain sight, I opted to continue the plank paneling all the way around, so that instead of seeing a piece of plywood back there, the back would look more finished and match the other three sides. If you’d like to go this route, just build a frame like the front frame and attach the plank paneling to that.
If you’d like to use a piece of plywood for the back side, though, another option would be to build the three sides, then measure the height and width and cut the plywood to fit. I often cut as I go to ensure that no lumber is wasted and that my measurements are precise. Then just attach the plywood back with glue and finish nails.
Did you ever re-stain these. I guess the question is more, does sanding and re-staining work if you hate the color? I stained these aged oak but my husband wants dark dark dark so I put dark walnut on top but now it looks yellowish and not a color I am going for…
No, I never did. The hubs actually liked it this way, so I kept it. Yes, you can definitely sand and re-stain if you hate the color! My suggestion would be to sand it down to raw wood, if possible, then re-stain it to the dark color you’re looking for. Good luck!
I love this! These are going to be perfect for my guest bedroom, i’m hoping that you could provide the plans for the project though, the link below is not working:
http://ana-white.com/2012/02/plans/kentwood-nightstands-or-end-tables
Sorry to hear the link isn’t working for you – I just checked it and it’s working for me: http://ana-white.com/2012/02/plans/kentwood-nightstands-or-end-tables
These pieces are fine designed. Also, it can be used in a loft style. In the stores, such furniture is much more expensive than $140, especially since these are handmade pieces. Good job and thanks for sharing


I love the finish!! I opened the link to your blog in hopes of finding out how you did it 🙂
Where in the world can I buy black strap hinges?? I’ve looked in all major hardware store in my town., no luck online either.
If I remember correctly, I think they were chrome and I spray painted them. Hope it helps!
Great job!!! I am very impressed that you made them. I am a coward to attempt to build something.
I love the finish!!! We actually made a coffee table & the stain was a bit darker than I wanted so I actually attacked mine with the sander once the stain dried & it gave the rustic worn look that I am in love with. We plan on building some of these night stands soon & I am super excited to get started.
Hi Jen! Any reason why you didn’t use Kreg pocket-holes to attach sides to front and back instead of using nails from the front?
Hi Larry,
I’m not sure, but that sounds like it would work beautifully!
Hi Jen! I made a single night stand using basically your design except I didn’t use any nails all pocket holes. Where you use 1 X 2 I used 1 X 3 (needed for pocket holes). 1 X 2 too narrow for pocket holes. I also added a shelf inside. I also used pocket holes to attach top. I used Minwax Early American stain. Just finished adding Polyurethane. Only thing left to do is install hardware. Sorry now I didn’t make 2 of them. Your instructions were great help, thanks again.
Correction! I did use 3/4 nails (nail gun) to attach the panels! 🙂
Great to hear! I’d love to see a pic, if you have one!
Not sure how to attach the pic. Tried copy and paste to the comment but didn’t work. Any suggestions? 🙂
I need to re-read the plan but do you know how big the back panel was? The plan said the back panel was optional …!?! I need a back panel. I guess I should bust out my adding skills. BTW, thanks for the heads up on the extra 1×4 @ 22 1/2″
Hi Kathleen!
Yes, building the back side is optional… it just means that when you open up the cabinet, you’ll see the wall behind it. But you wouldn’t notice that it’s missing a back, unless you opened up the door and peeked into the cabinet.
I didn’t use plywood for the back side. Because I planned on placing the nightstands where the back would’ve been in plain sight, I opted to continue the plank paneling all the way around, so that instead of seeing a piece of plywood back there, the back would look more finished and match the other three sides. If you’d like to go this route, just build a frame like the front frame and attach the plank paneling to that.
If you’d like to use a piece of plywood for the back side, though, another option would be to build the three sides, then measure the height and width and cut the plywood to fit. I often cut as I go to ensure that no lumber is wasted and that my measurements are precise. Then just attach the plywood back with glue and finish nails.
Hope that helps!
Did you ever re-stain these. I guess the question is more, does sanding and re-staining work if you hate the color? I stained these aged oak but my husband wants dark dark dark so I put dark walnut on top but now it looks yellowish and not a color I am going for…
No, I never did. The hubs actually liked it this way, so I kept it. Yes, you can definitely sand and re-stain if you hate the color! My suggestion would be to sand it down to raw wood, if possible, then re-stain it to the dark color you’re looking for. Good luck!
It’s nearly impossible to find knowledgeable people about this topic, but you sound like you know what
you’re talking about! Thanks
I love this! These are going to be perfect for my guest bedroom, i’m hoping that you could provide the plans for the project though, the link below is not working:
http://ana-white.com/2012/02/plans/kentwood-nightstands-or-end-tables
THANKS!
Sorry to hear the link isn’t working for you – I just checked it and it’s working for me: http://ana-white.com/2012/02/plans/kentwood-nightstands-or-end-tables
http://ana-white.com/2015/02/DIY_furniture/nightstand
thanks for the tips! I used your basic designs and added a drawer!
Love the barn door. I am fascinated by the industrial look and then when you put it with a little country it really is awesome. Thank for sharing.
I actually love the finish on these! Gonna have a bash at this Myers with my handmade dining table
They turned out gorgeous! Love them, love the distressed and rustic look
Great work. Do you know if Home Depot or Lowe’s will make the cuts of wood for you? I don’t have the right saw to make these cuts.
Yes, Jon, Home Depot will make cuts for you.
These pieces are fine designed. Also, it can be used in a loft style. In the stores, such furniture is much more expensive than $140, especially since these are handmade pieces. Good job and thanks for sharing