Restoration Hardware sells these nightstands for $369 each.
Sigh… aren’t they beautiful? But are they $369 kinds of beautiful? I think not.
So, armed with Ana’s plans, I waddled up and down the vast, intimidating aisles of Lowe’s gathering my supplies. It was the first time I took a trip to Lowe’s to buy lumber without my husband. I was a little apprehensive at first, but once I got there, I felt very empowered. It didn’t hurt that all the friendly, strapping young men working in the lumber department were more than happy to assist me. What a peculiar sight I might have been: imagine 1 tiny Asian girl + 7 months pregnant + pulling a cart full of lumber behind me = strange looks all around. Ha.
I made sure to measure twice before making any cuts (Watson supervises):

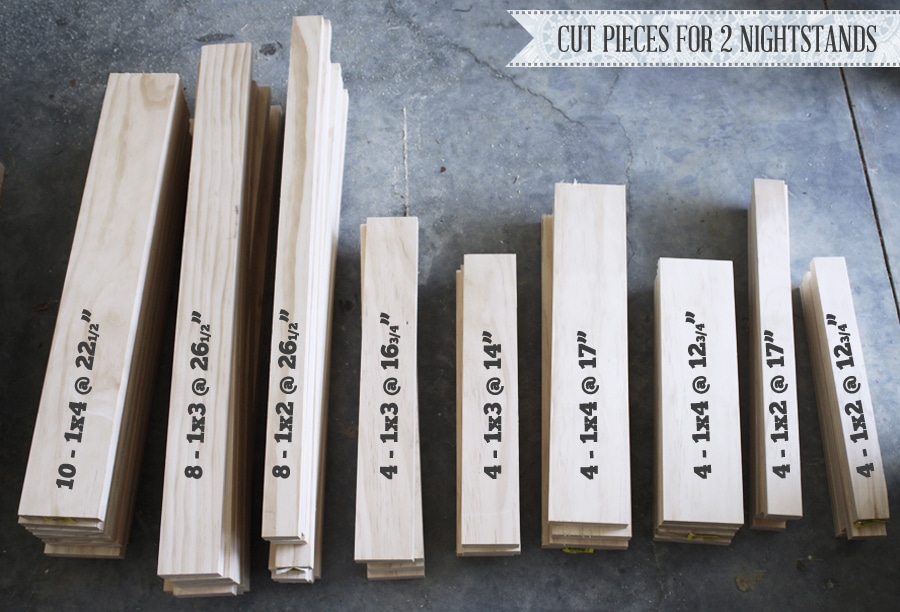
Here are my cut pieces. I doubled what was listed in Ana’s plans for two nightstands. Also, I found that I ended up needing 10 of the 1x4s @ 22 1/2″ (instead of 8) because I used 5 boards for each nightstand top (4 boards didn’t cover the whole top). No idea why my numbers were off…
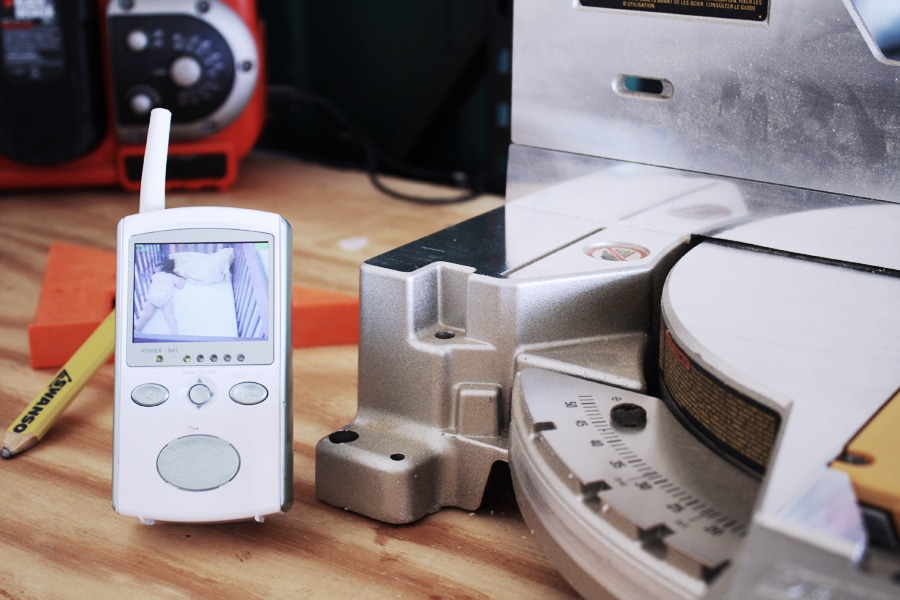
By the way, can I just tell you how much I love my compound miter saw? It was a Mother’s Day gift from the Hubs last year. And look! I was able to get all my cuts done during nap time.
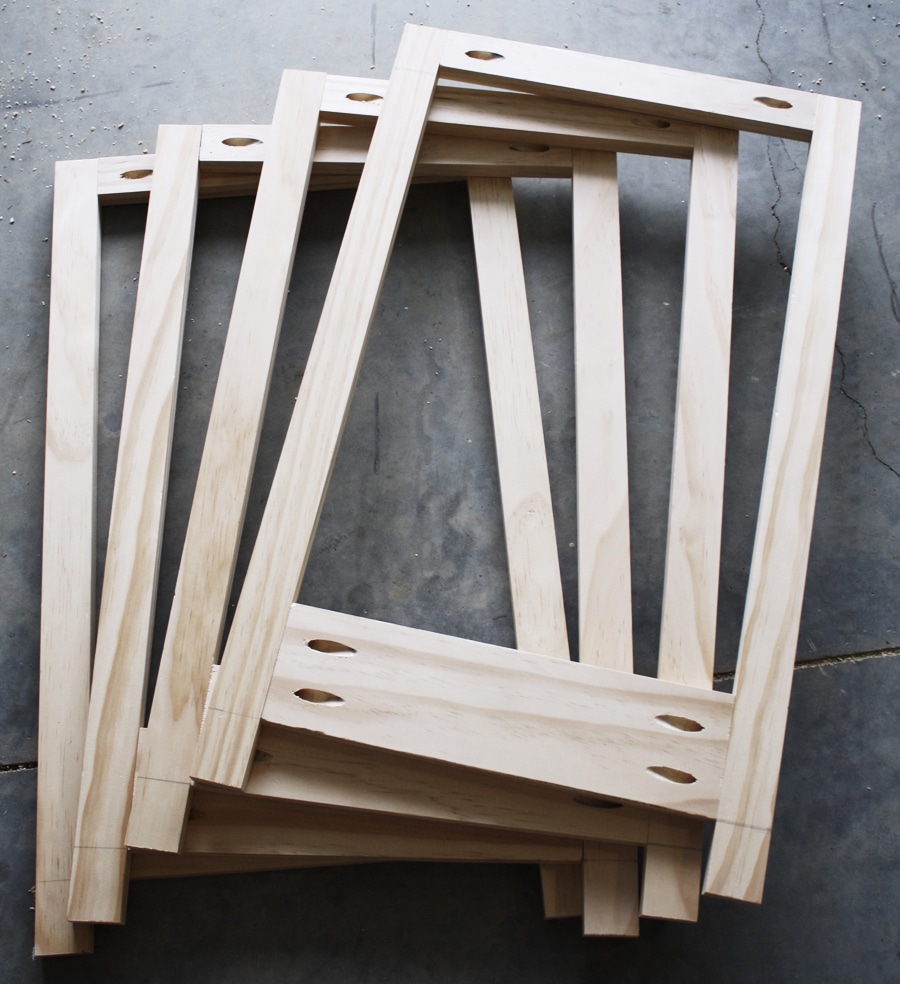
After all my cuts were made, I busted out the trusty Kreg Jig and drilled a few pocket holes in my pieces then joined them together to make the sides, front, and back frames:
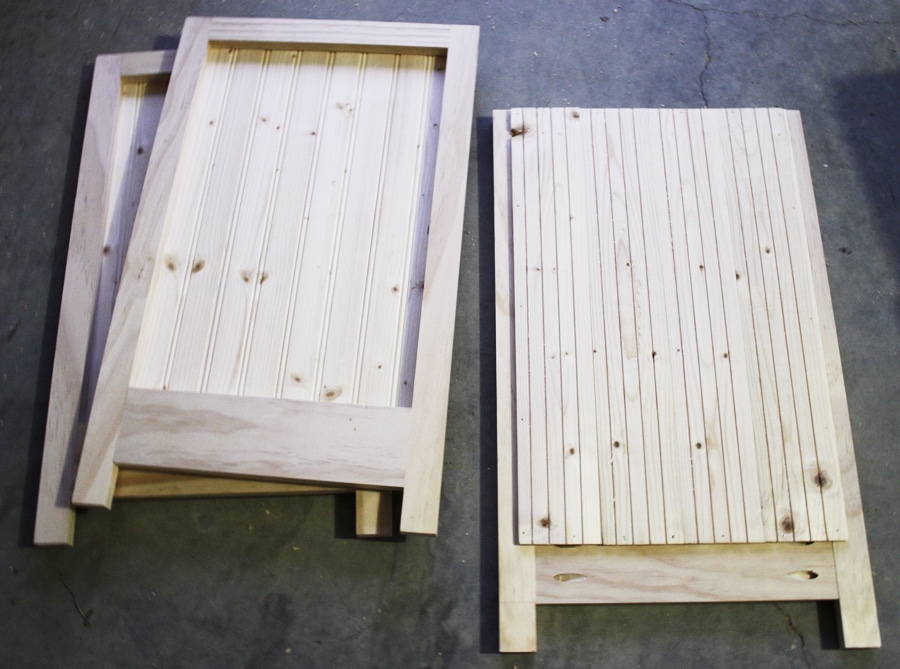
Then after cutting some plank paneling down to size, I nailed them to the insides of the side frames. The frame on the right shows what it looks like from the inside of the nightstand and the frames on the left show the outside. Puuuurty.
Next I drilled the bottom pieces of plywood to the side frames. Well, hello there, morning laser beam of sunlight shooting directly into my garage making it a sweltering sauna.
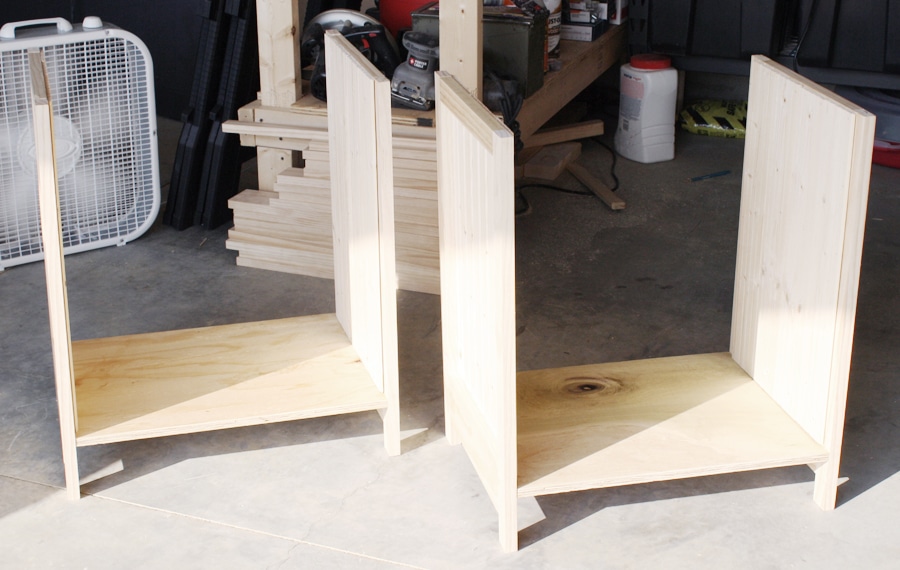
Next, I glued and nailed the front frames on, drilling pocket hole screws in on the bottom shelf. Also, because I’ll be putting these nightstands in a place where the back is exposed, I chose to continue the plank paneling on the back, instead of using a sheet of plywood for the back panel. I think it’ll look more finished that way. Here’s the back frame, ready for the plank paneling:
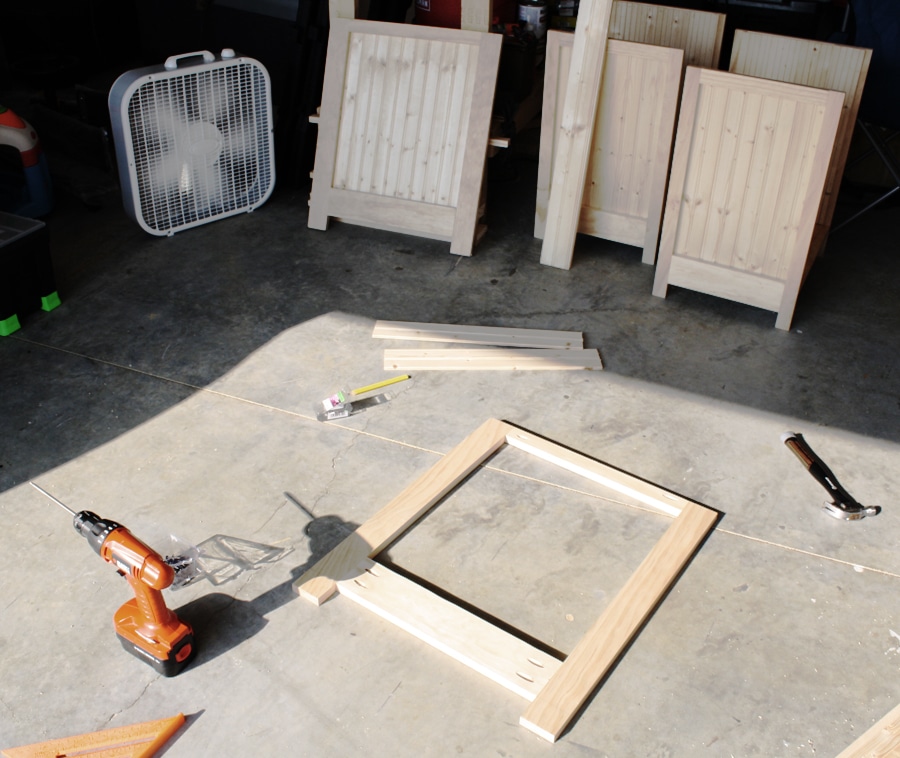
I attached the plank paneling to the back frames just as I did with the side frames (using glue and 3/4″ finish nails). The nightstand on the left shows the inside of the back panel and the one on the right is what it’ll look like from the outside.
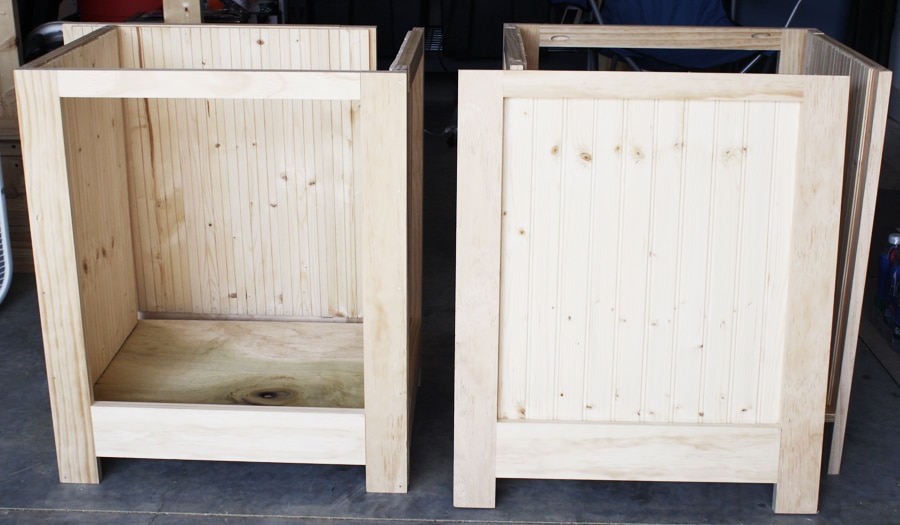
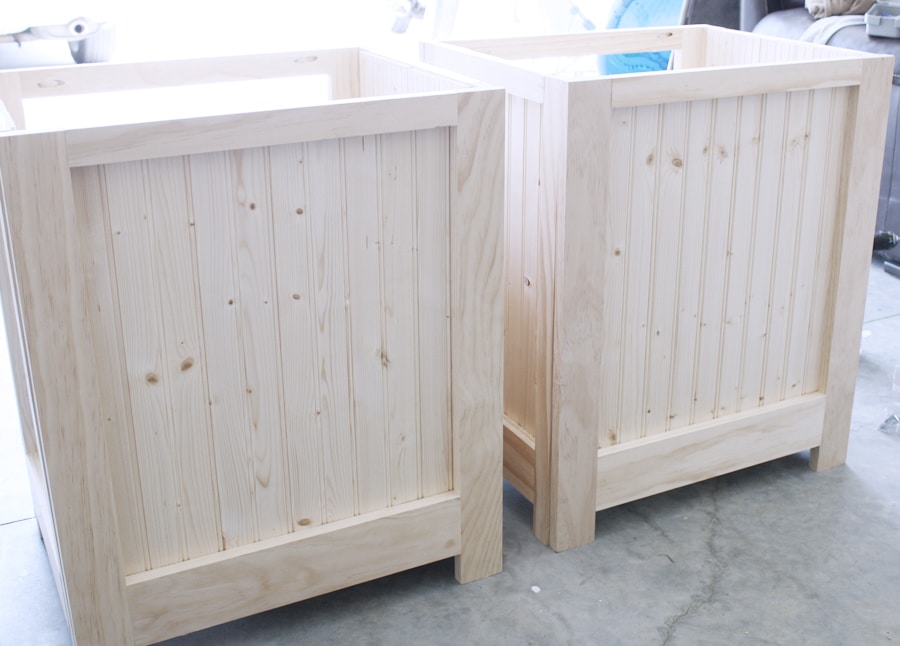
Then I glued and nailed the back frames onto the nightstands, drilling pocket hole screws in at the bottom shelf. Here’s the view from the back (hellllooo, lovely!):
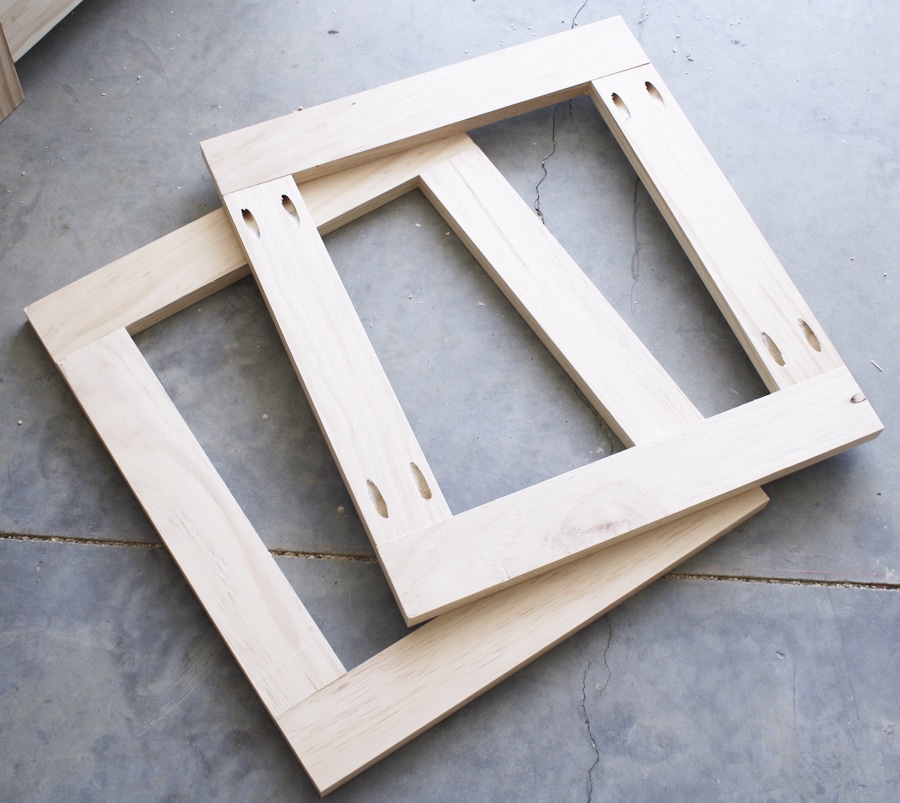
Now to construct the doors. I Kreg Jig’d em up and zipped some screws in:
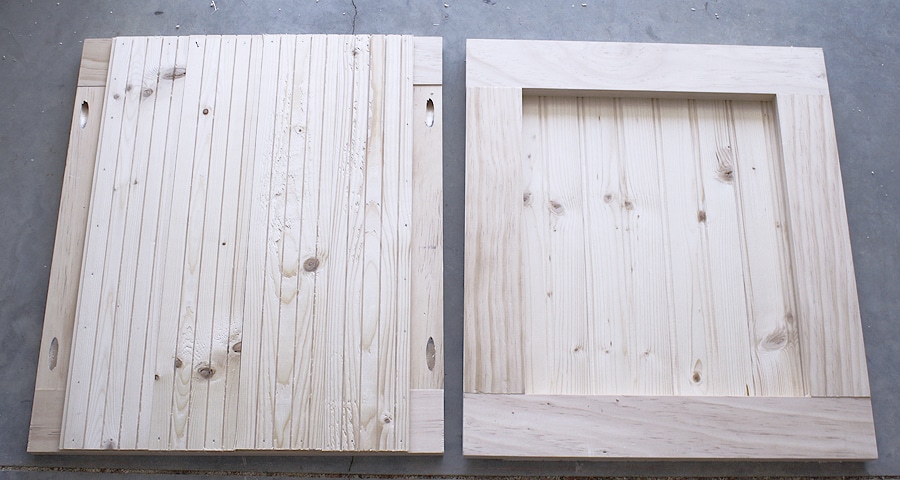
Then added the plank paneling. The door on the left shows the inside, and on the right is what it looks like from the outside:
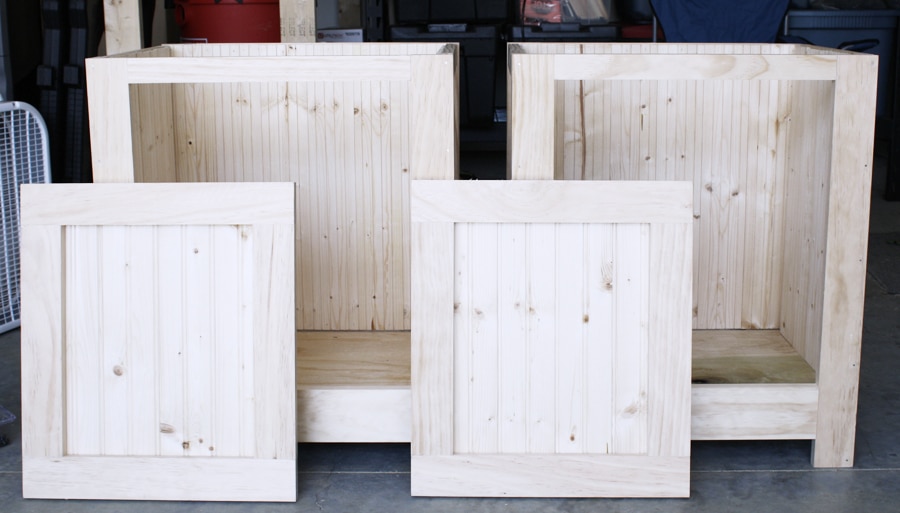
Now they’re ready for their tops!
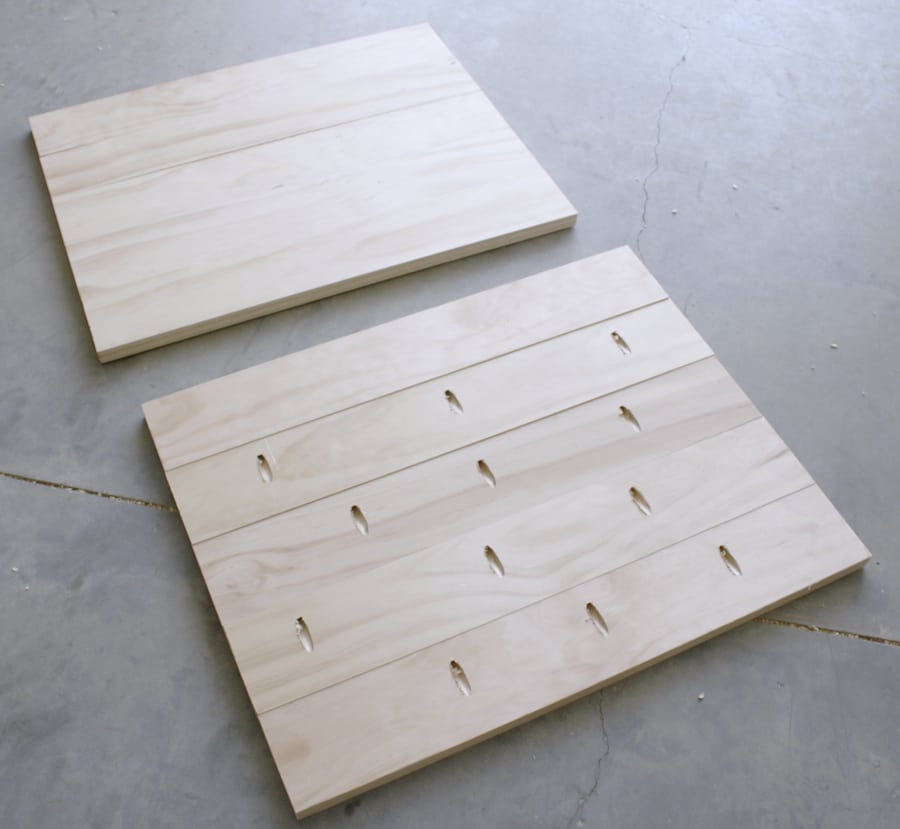
I assembled the top boards by first drilling pocket holes, then joining the boards together, like this:
Then I attached the tops with glue and 1 1/4″ finish nails and gave the 2 pieces a good sanding. After vacuuming all the dust with a shop vac, I wiped the nightstands down with a damp rag to remove any remaining dust and debris.

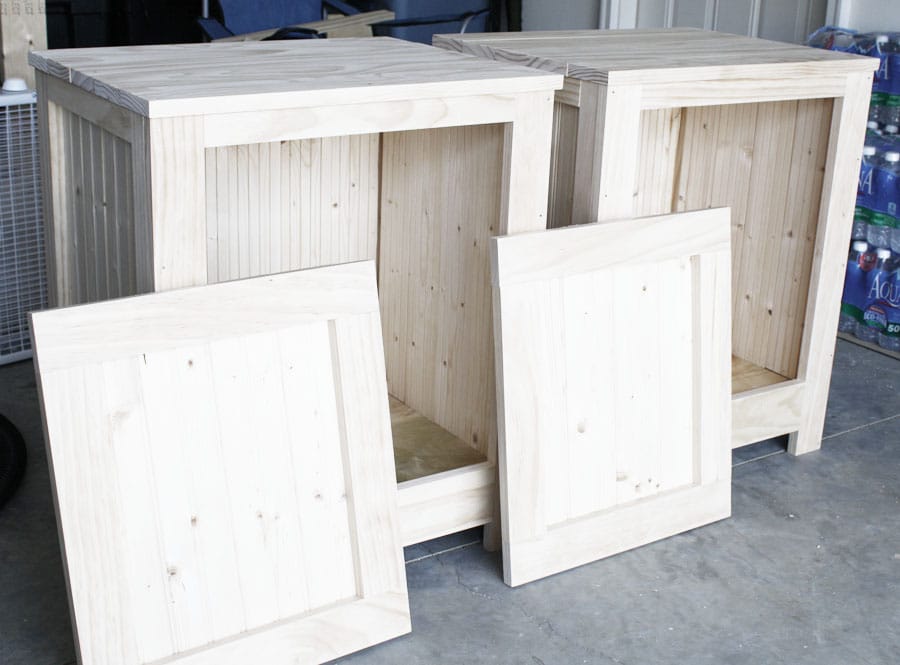
Ahhh… the end is in sight! Here are my lovelies ready to be stained! Aren’t they puuuuurty?
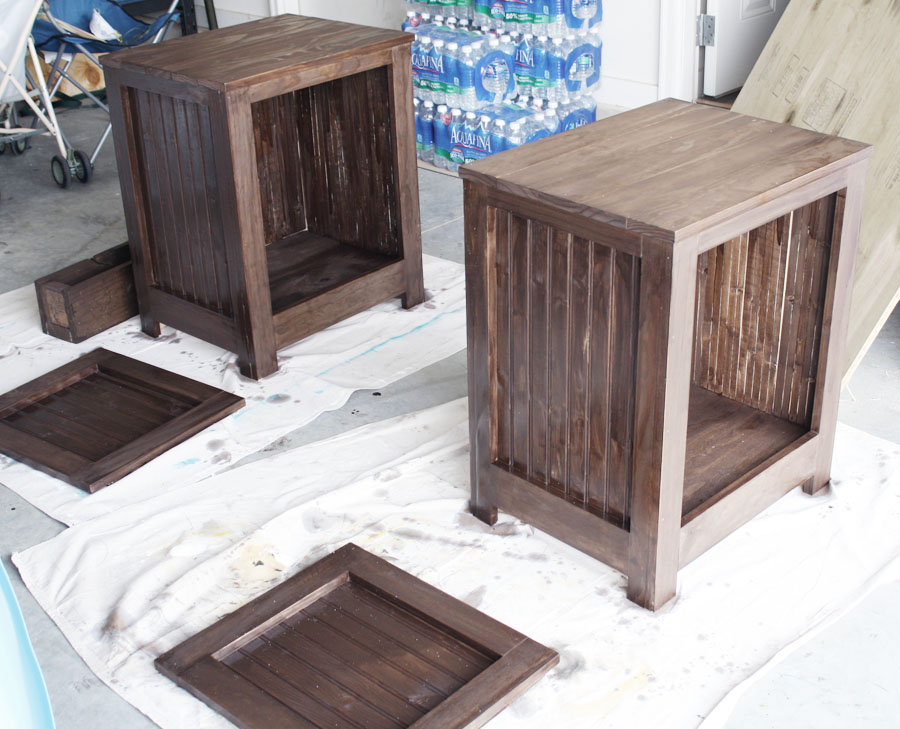
I used Rustoleum’s Ultimate Wood Stain in Dark Walnut. It turned out a little darker than I expected. I probably should have wiped the excess off immediately after, instead of waiting 15-20 minutes like the directions say. This stuff dries in an hour, so after 15-20 minutes passed, it was a bit tacky and more challenging to manipulate. Behold: my embarrassing staining job:
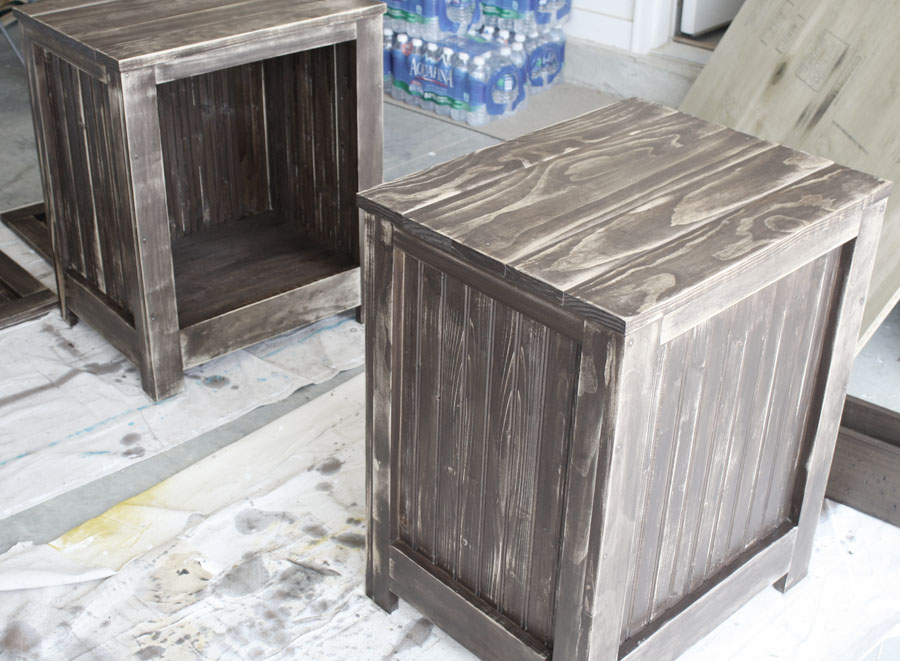
Yuck, with a capital Y, right? So, I fired up my palm sander with 60 grit sandpaper and sanded the stain down, in hopes of improving the finish. This is what I came up with:

I think I kind of like the rustic finish; it looks like reclaimed wood. I think the imperfections look more deliberate and intentional, instead of looking like I let my one-year-old loose with a can of wood stain. The wood felt coarse from the 60 grit sandpaper, so I sanded the surfaces down with a 120 grit sanding block to smooth it all out again and wiped everything down with a damp cloth to remove all the sawdust.
After I brushed 3 coats of polyurethane on, I drilled the sash lifts and strap hinges on the door and attached the doors. It’s easier to drill the hinges on the door first and then drill the door onto the nightstand (take my word for it). I also included a magnetic clasp on the inside so that the doors click and stay shut. And here they are, finished:
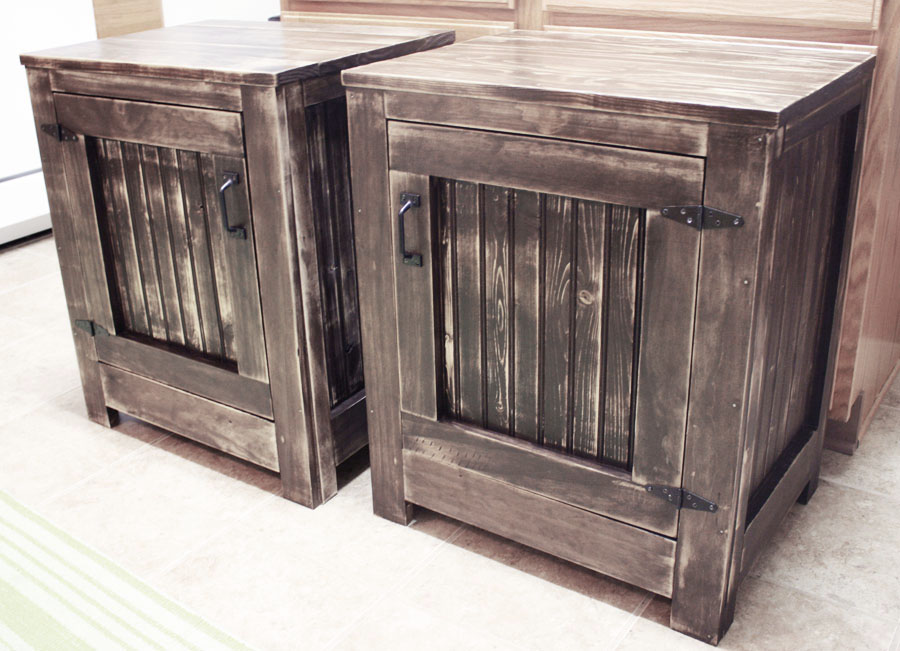
To be honest, I’m not sure how I feel about the finish. I loved these pieces up until I mucked it up with my misuse of stain. I think I’ll refinish them sometime in the future, but for now I’ll wait and see how I feel after we’ve lived with them in our home for awhile. What do you think? Suggestions?
Cost Breakdown:
- Pine lumber: $92.11
- 3 Packages of plank paneling: $29.13
- 2 Sash lifts: $5.02
- 4 Strap hinges: $10.68
- 2 Magnetic clasps: $2.38
- Pocket hole screws: already owned
- Finish nails: already owned
- Rustoleum dark walnut stain: already owned
- Rustoleum polyurethane: already owned
Total cost for 2 nightstands: $139.32 ($69.66/each)
That’s a savings of about $600. Um, yes please. I’ll take it!
Pin it for later!



I like the design that you are going for. I am trying to do the same for my office with old vintage movies themes.
I just made one as a night stand for my son’s room too! I kind of like them dark and rustic 🙂 Put them with the rest of the furniture in the room and maybe they will feel at home!
Yep… I’ll give them a day or two to cure and then I’ll take some styled photos and see how I feel then. Thanks for the tip!
Found them! You did such a great job on the build! The problem with the stain is the amount of time you left it on. I literally wipe off within 3-5 minutes. This means that you probably need to work one side at a time. BUT, I do think your finish is kind of cool! It looks like you sanded it quite a bit? You could sand it just a bit more with an orbital sander and I think the finish might be really neat. I like different and a bit out of the box at times. I think the finish looks kind of old and shanty… But you are seeing them in person. I do love them though, and you built them perfectly!
I agree… the directions on the can says leave it on 15-20 min before wiping. By that time, it was tacky and almost dry! Next time, I’ll definitely just put it on, then wipe it off. The finish will probably look more even, as a result, too. Thanks for the tips!
We live where it is very hot and humid. I have found that it really works best to wipe it off quickly, if not immediately. When I am working in the winter I can let it sit a bit longer, but I still try to work on small areas and wipe before moving on. I do love them though, and I really think the finish looks very cool!
Good point. When I was working on this project, it was 102 degrees out and VERY humid. I also stained my rustic planter box (https://jenwoodhouse.com/2012/07/10/easy-peasy-rustic-planter-box) at the same time, this time putting it on and then immediately wiping it off and it looks so much better. I think that’s the technique I’m going to have to go with next time. You live and learn. Thanks again for the kind words, inspiration, and encouragement!
I think the look is fabulous by today’s standards and I’m sure your quality is better! What you could have done with the stain is wipe it down with paint thinner. That would work even if it had sat for hours… comes in handy when something calls you away from your project or when a color comes out too dark. It is also the best wipe down after sanding before the finish as water will raise the grain.
Thanks for the tips!
Okay, you are the WOMAN! So impressed! The cabinets are beautiful!! Thank you for sharing. Visiting from Sister’s of the Wild West. Would love it if you would share this at my Make it Pretty Monday party tomorrow at The Dedicated House. http://thededicatedhouse.blogspot.com Wishing you a grand evening. Toodles, Kathryn @TheDedicatedHouse
Will do, Kathryn! Thanks for dropping by!
These look AWESOME! Love them more than RH’s version =)
I am soooo impressed!! These are wonderful and the fact that you made them yourself is amazing to me.
Mary Alice
i personally LOVE the stain – it wasn’t perfect at the start, but sanding them down really did make them look reclaimed and rustic. in fact, if/when i make MINE (because again, you’ve inspired me!), i’ll mess up like you did, only on purpose. 🙂
These are so pretty, I love them! I recently just completed my first furniture project and think I’m not addicted. I’m pretty sure I could use some new nightstands. I will have to remember to pin this tutorial.
http://www.sarahdawndesigns.blogspot.com/2012/07/diy-coffee-table-makeover.html
These are amazing! They look like they cost a fortune. I love the hinges
I like the grey/brown barnboard look, so my method is to apply the stain (I usually wipe it on with a cloth so it isn’t too heavy), then once it’s dry, wipe watered down beige paint over the stain. Again I wipe it on so I can control the thickness. Once that’s dry I apply a coat of wax and buff it. So far I’ve had remarkable success with it.
I really like the sanded look of yours, but if you think it’s too dark you might want to try the watery paint.
Thanks so much for the tip!
I LOVE them! Yours are 100 times better than the Resto ones. In my opinion, the Resto ones look like the Malm set from IKEA. Yours have so much character. Job VERY well done!
Restoration Hardware tables at a fraction of the cost? Yes, please! You rock those tools!
xo,
Shannon
WOAH! These are awesome! Great job! You could definitely try to lighten it up though.. maybe paint it with a very, very thin layer of greyish white. It would definitely still let the stain show through!
Thanks for the tip, I’ll try it!
I love this!! I love it when I find other women who love wood-working as much as me. And very impressive at 7 months pregnant. I’ve been wondering about when I get pregnant again will I keep on wood-working? I think I will, thanks to your fine example! 🙂 And now I am super convinced that I need to buy a Kreg-jig.
Thanks for the kind words, Laura! I see that you’re from TN and have lived in AL too – we have much in common (besides the love for woodworking)! And yes, the Kreg Jig definitely pays for itself easily – get one! You’ll love it.
I found you through MMS’s FFF. These are amazing. They turned out soooooo wonderful. I love the toned down/rustic look they took on when you sanded down the stain. Great job!
Thanks so much, Heather! And thanks for stopping by!
Hey Jen,
This is my first visit. I found you via Roeshel at “The DIY Show Off”.
I think you did one flippin fantastic job on these nightstands.
I am so jealous…… I have wanted a Kreg Jig for years. My dream is to not only make my own night stands, but my own platform bed frame with storage on each long side. My house is so tiny that I need such.
I can’t believe the instructions told you to leave the stain on that long. I started wiping my large entertainment center down as soon as I did one single small side…. you can always recoat again if you want darker. I wanted darker, but was in a rush, so did not do more than I think it was two coats and I am glad now that I stopped. And from what I have seen from surfing the diy sites, your uh oh is very stylish and “in” right now.
Congratulations!!! I think they are fabulous just as they are!
Sheryll & Critters.
Hi Sheryll! Thanks so much for the kind words! I can’t recommend the Kreg Jig enough – it pays for itself ten times over! Definitely get one if you’re going to be building your nightstands, platform bed, and more. Can’t wait to see what you come up with! Good luck and thanks again!
WOW! These are absolutely gorgeous! You did an incredible job.
I am so in love with your nightstands!! I think yours are better than the Restoration Hardware version!
Thanks for linking up – I featured you today! http://www.flamingotoes.com/2012/07/crush-of-the-week-think-pink-features-57/
Wow, thanks so much Bev! And what a great roundup you’ve got there… so lovely to be in these ladies’ company!
I can’t believe you made these from scratch. You are so talented!
Thanks for sharing this at my Make it Pretty Monday party at The Dedicated House. Hope to see your prettiness again on Monday. Toodles, Kathryn @TheDedicatedHouse
Of course! Thanks for having me!
I found these plans on Ana White. I noticed the 1×3’s on her plans are cut 26 1/4 and yours are 26 1/2. I’m building these and have the materials ready to start and I was curious if you did that for a reason or if it was a typo. Thank you ma’am