*This project is sponsored by The Home Depot.
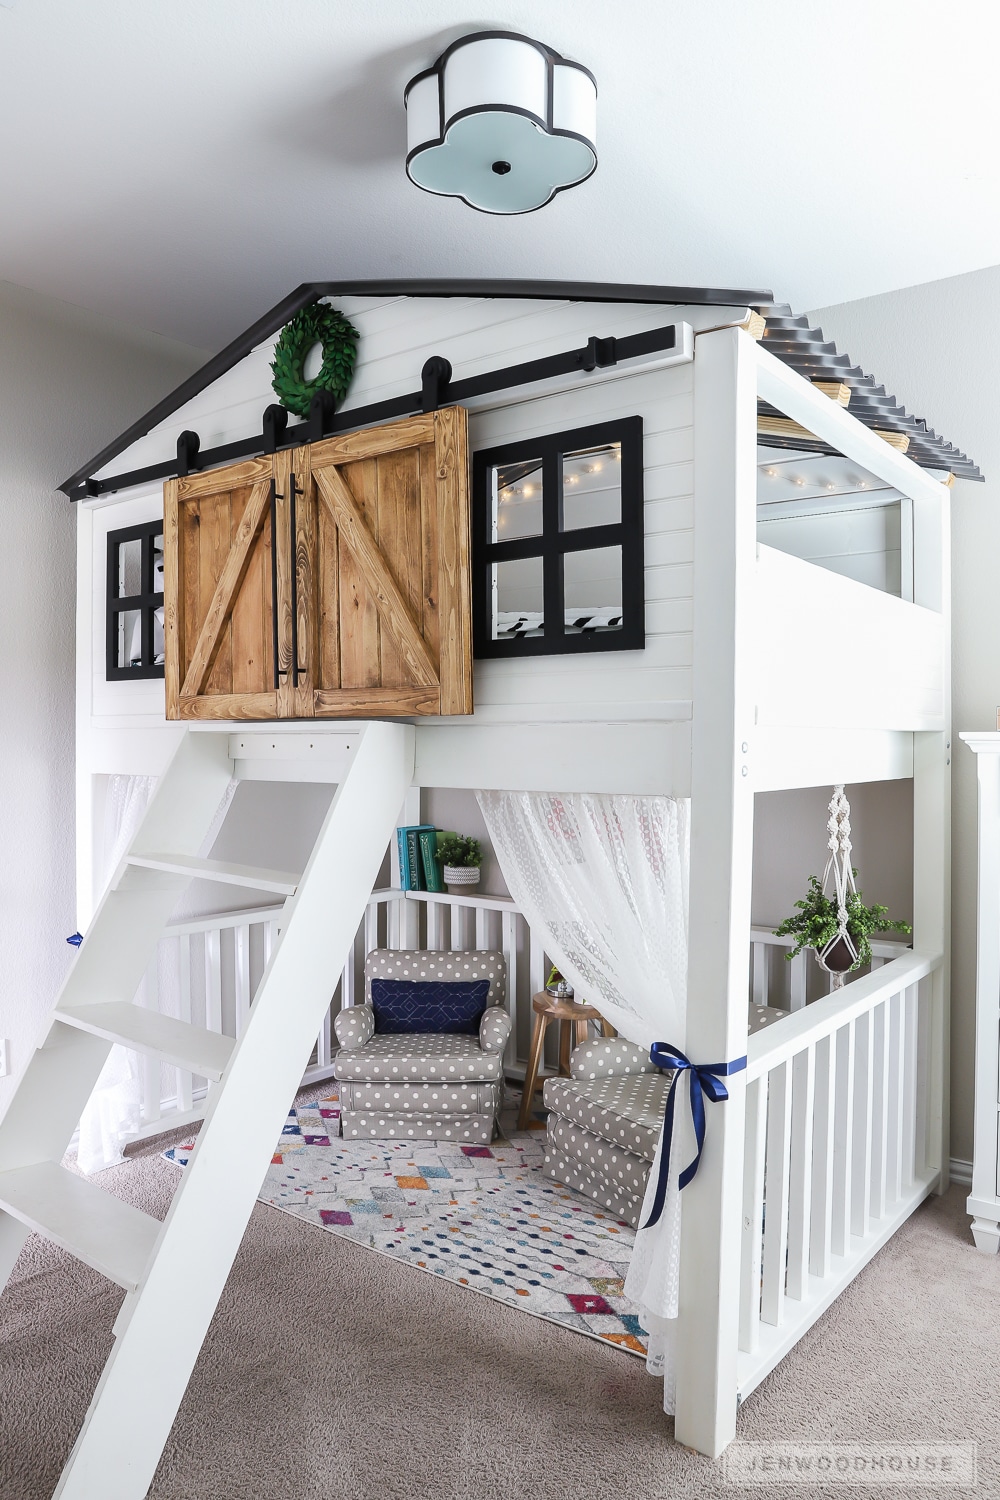
My Oh My! I’ve had ants in my pants over this DIY Sliding Barn Door Loft Bed project for months now and I am SO EXCITED to finally share the plans and tutorial with you guys! Are you ready for this? Hunker down, friends, this is gonna be one ton of fun.
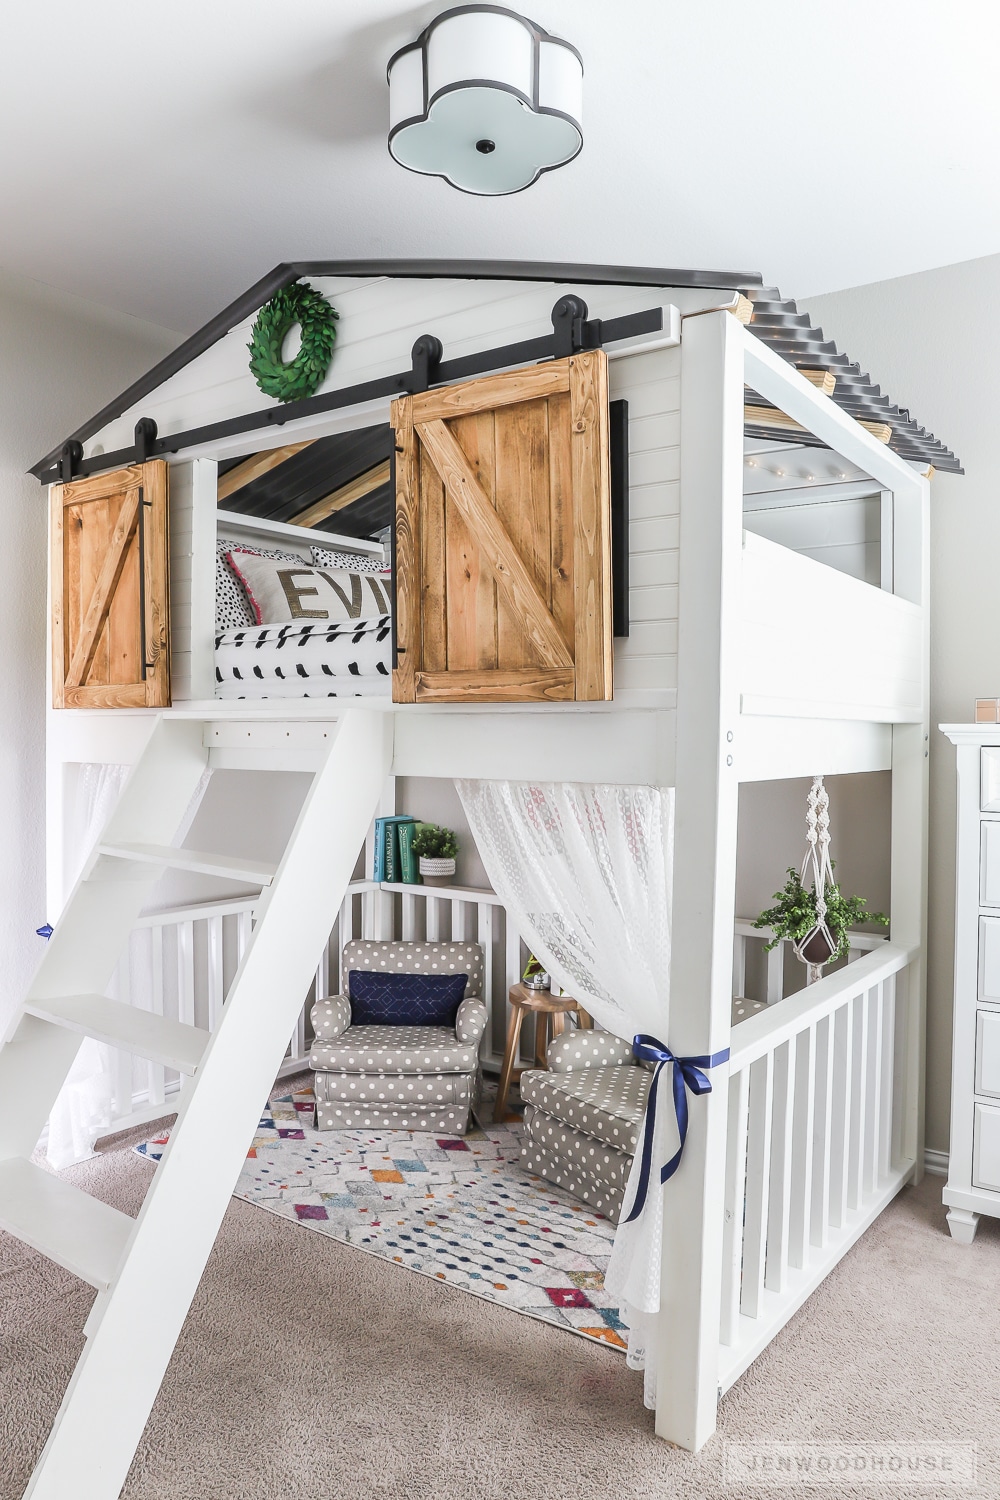 If you follow me on Instagram, you’ll have seen sneak peeks and behind-the-scenes footage as we were building this DIY sliding barn door loft bed. I saved the Instagram stories in my highlights, so feel free to check that out. By the way – this plan fits a full-size mattress and the total cost was about $550.00. Also, just for reference, we have 9-foot ceilings in this room.
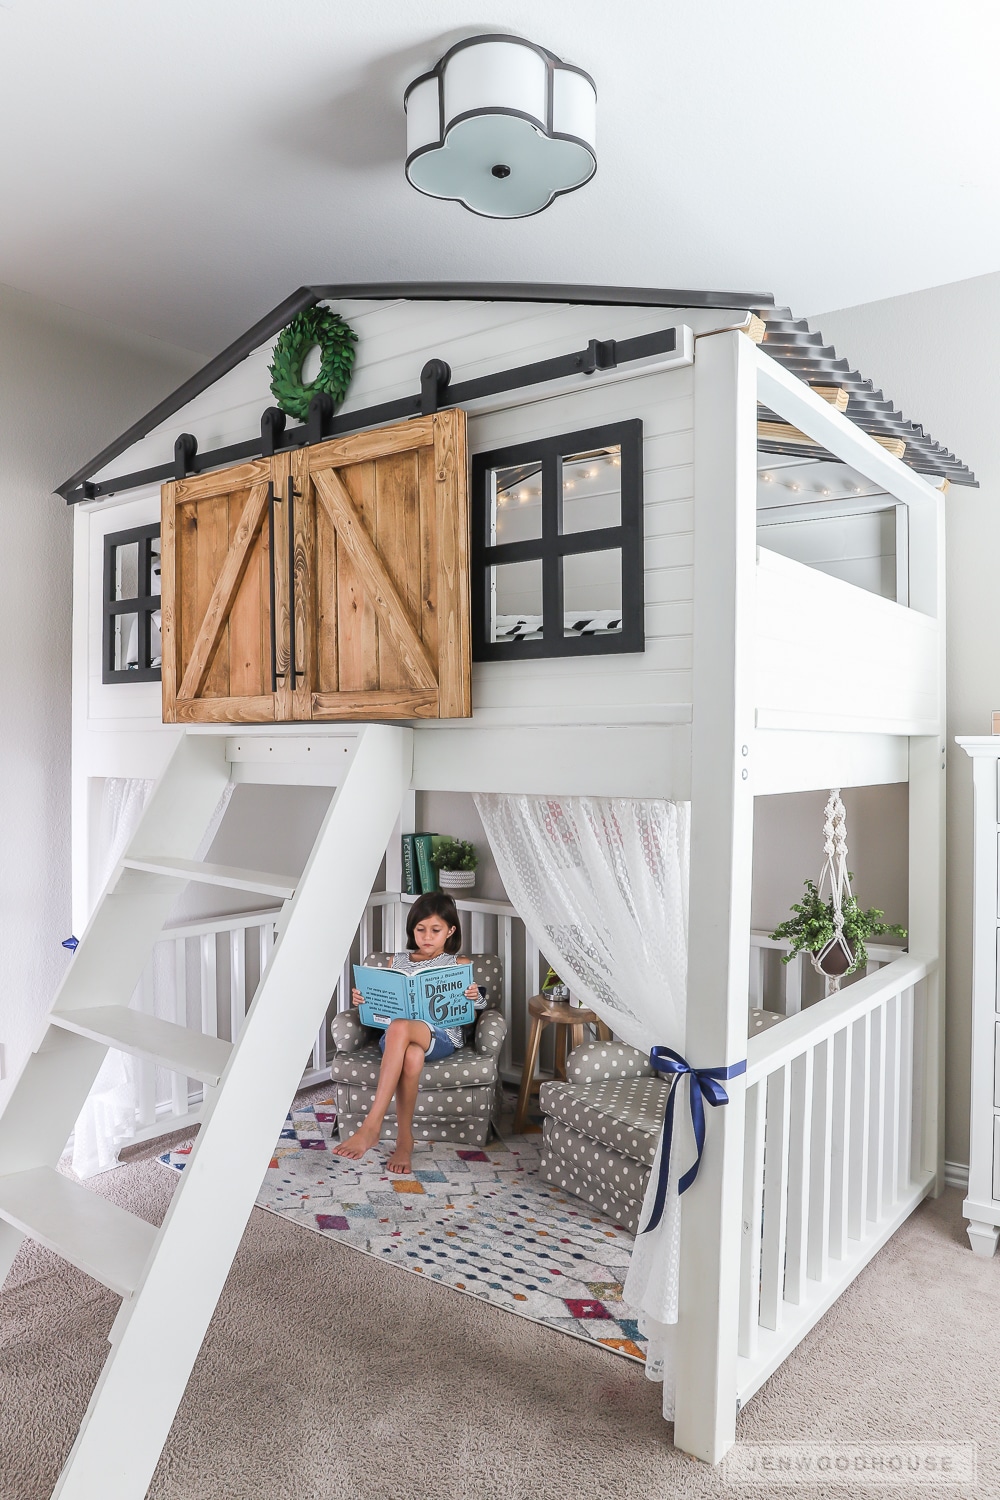

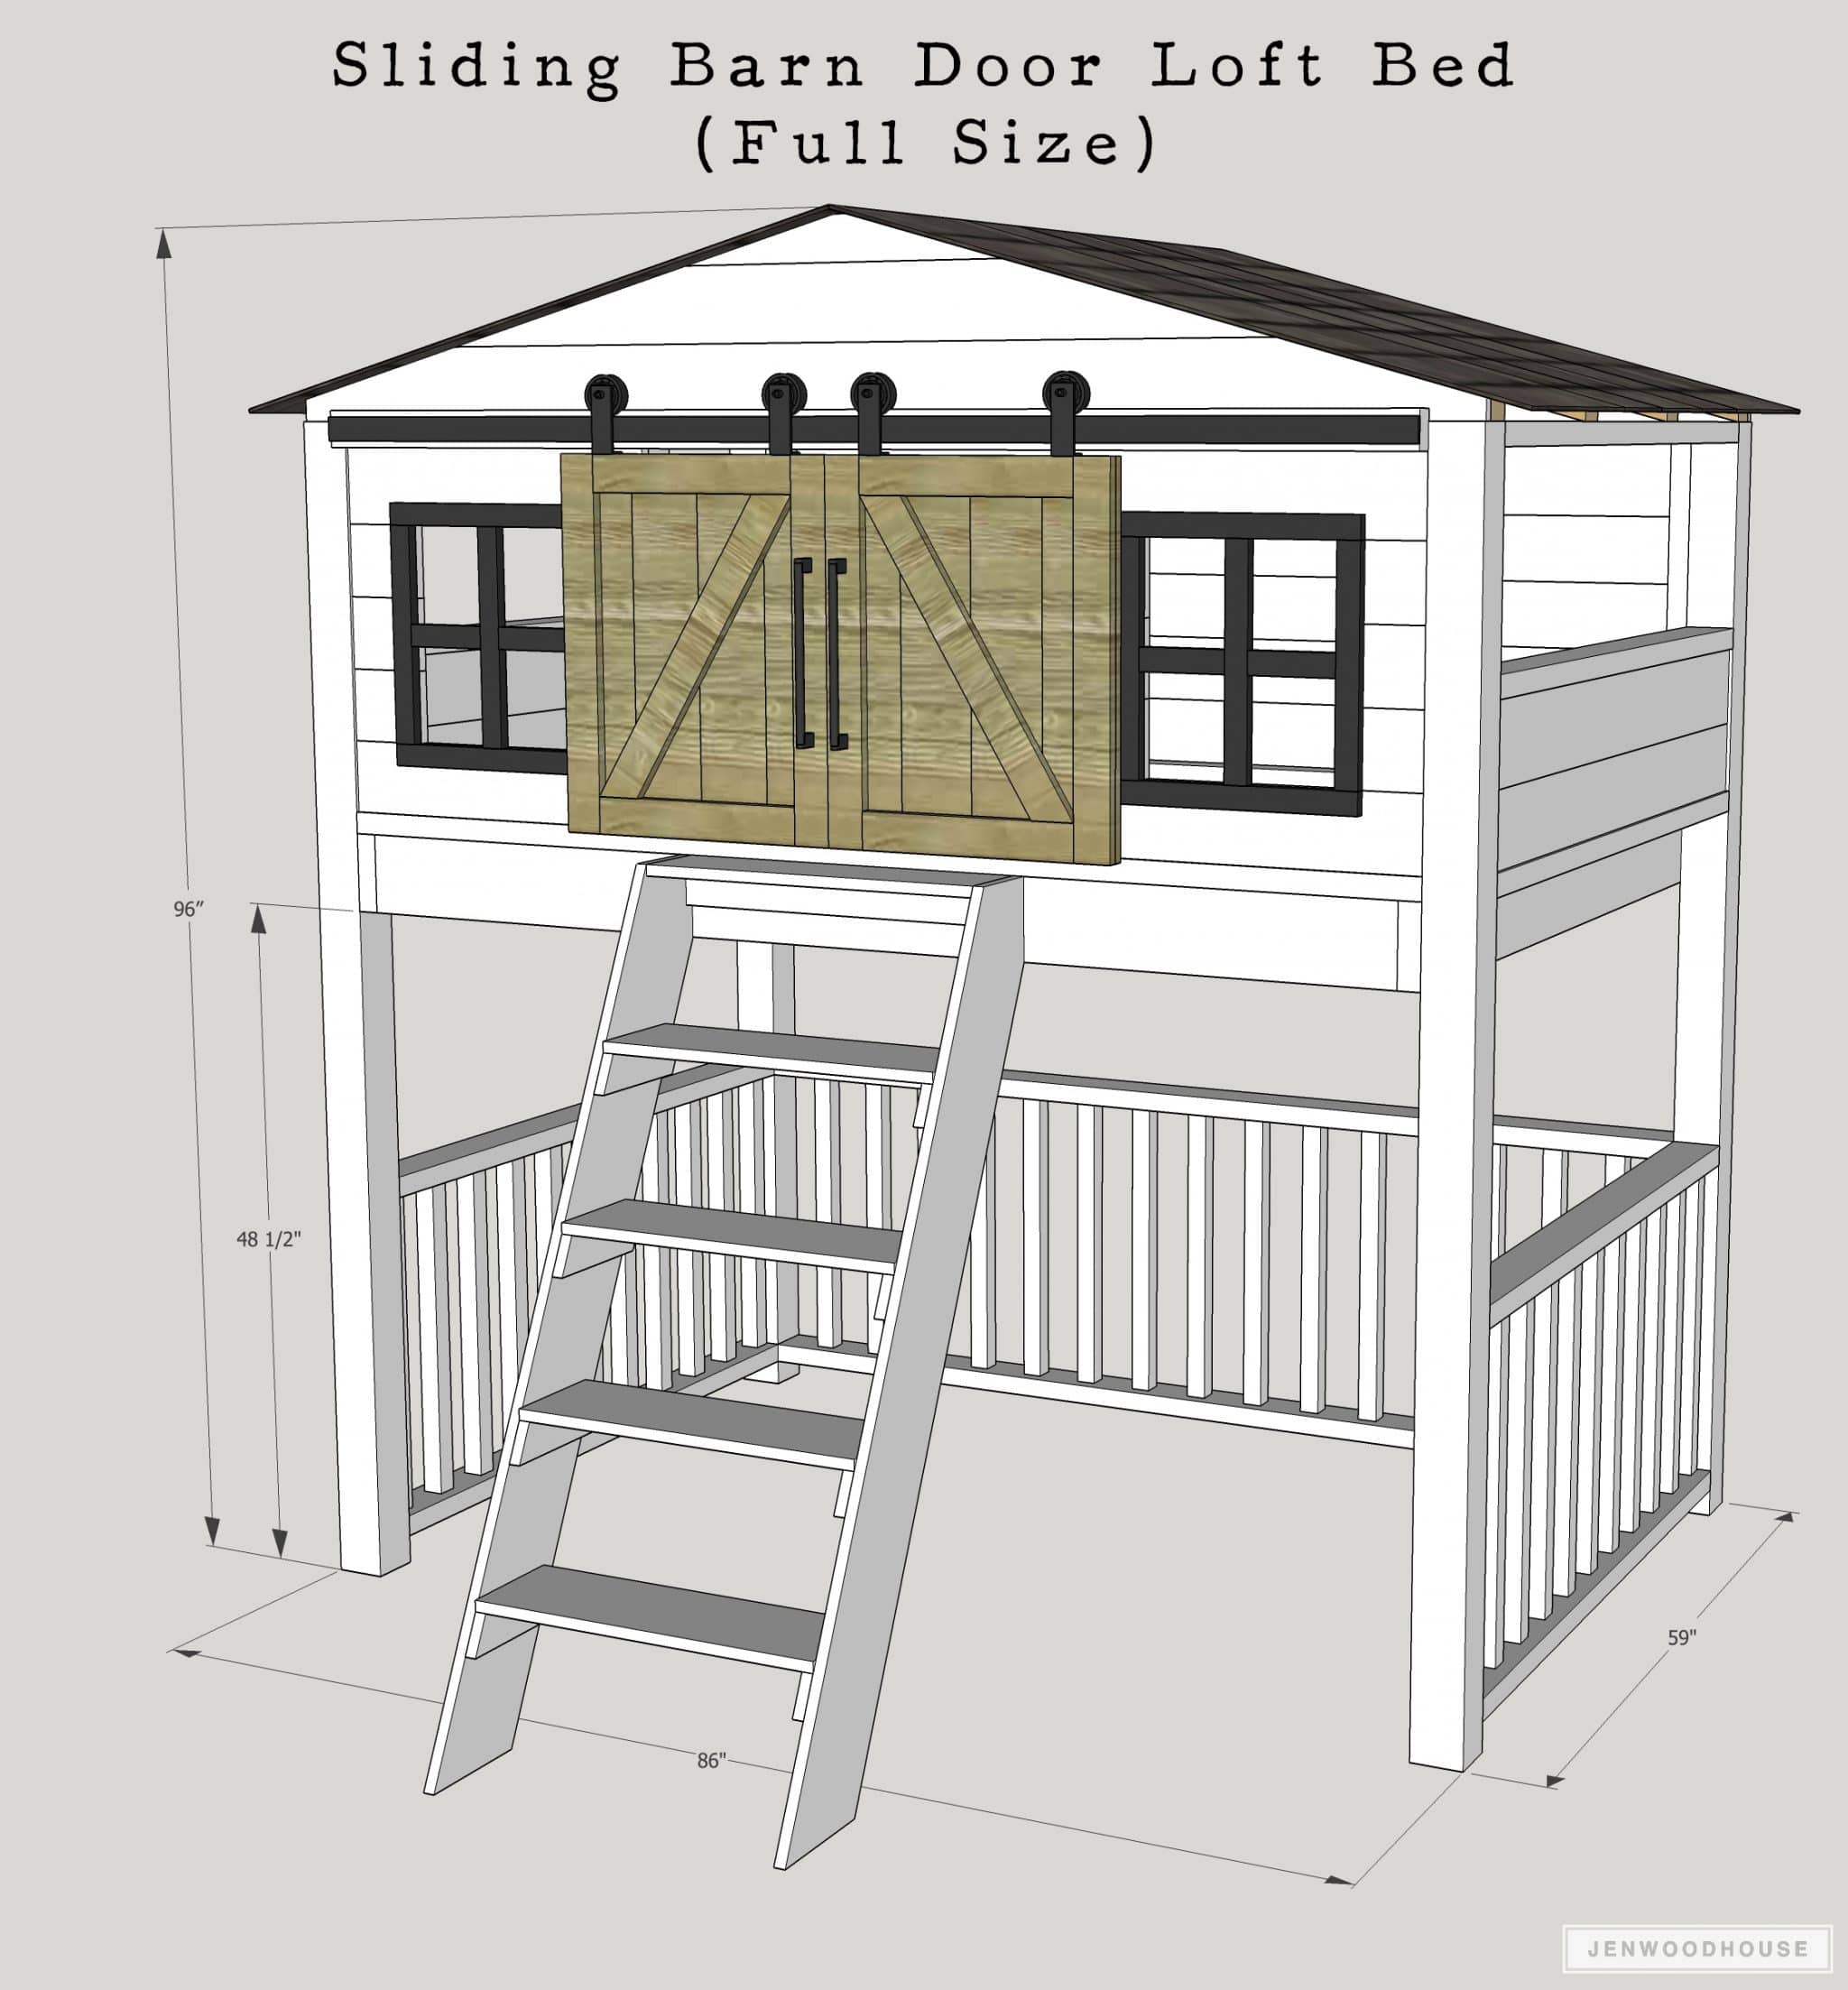 Do you want the cliff notes? Here’s how it’s gonna all shake out… and if you’re curious about the basics of staining and finishing wood, watch the videos at the end of this post!
- Railings
- Side panels
- Front and back panels
- Mattress box
- Assembly
- Stairs
- Doors
- Roof
Hardware and Roofing Supplies:
- (1) Sliding Barn Door Hardware Set
- (2) Top Mount Hangers
- (6) Simpson Strong-Tie Fence Brackets
- (8) 3/8-inch x 5 1/2-inch Carriage Bolts
- (3) 3/8-inch Split Locking Washers 3-pack
- (1) 3/8-inch Zinc-Plated Steel Flat Washers 8-pack
- (4) 3/8-inch Zinc-Plated Cap Nuts 2-pack
- (3) Suntop 26-inch x 8 ft. Polycarbonate Corrugated Roof Panels in Castle Grey
- (1) Suntop 4-ft. Ridge Cap in Castle Grey
- (1) Woodtite 1-inch Fasteners 50 pcs.
- 2 1/2-inch and 1 1/4-inch Wood Screws
- 2 1/2-inch and 1 1/4-inch Pocket Screws
- 1 1/4-inch Brad Nails
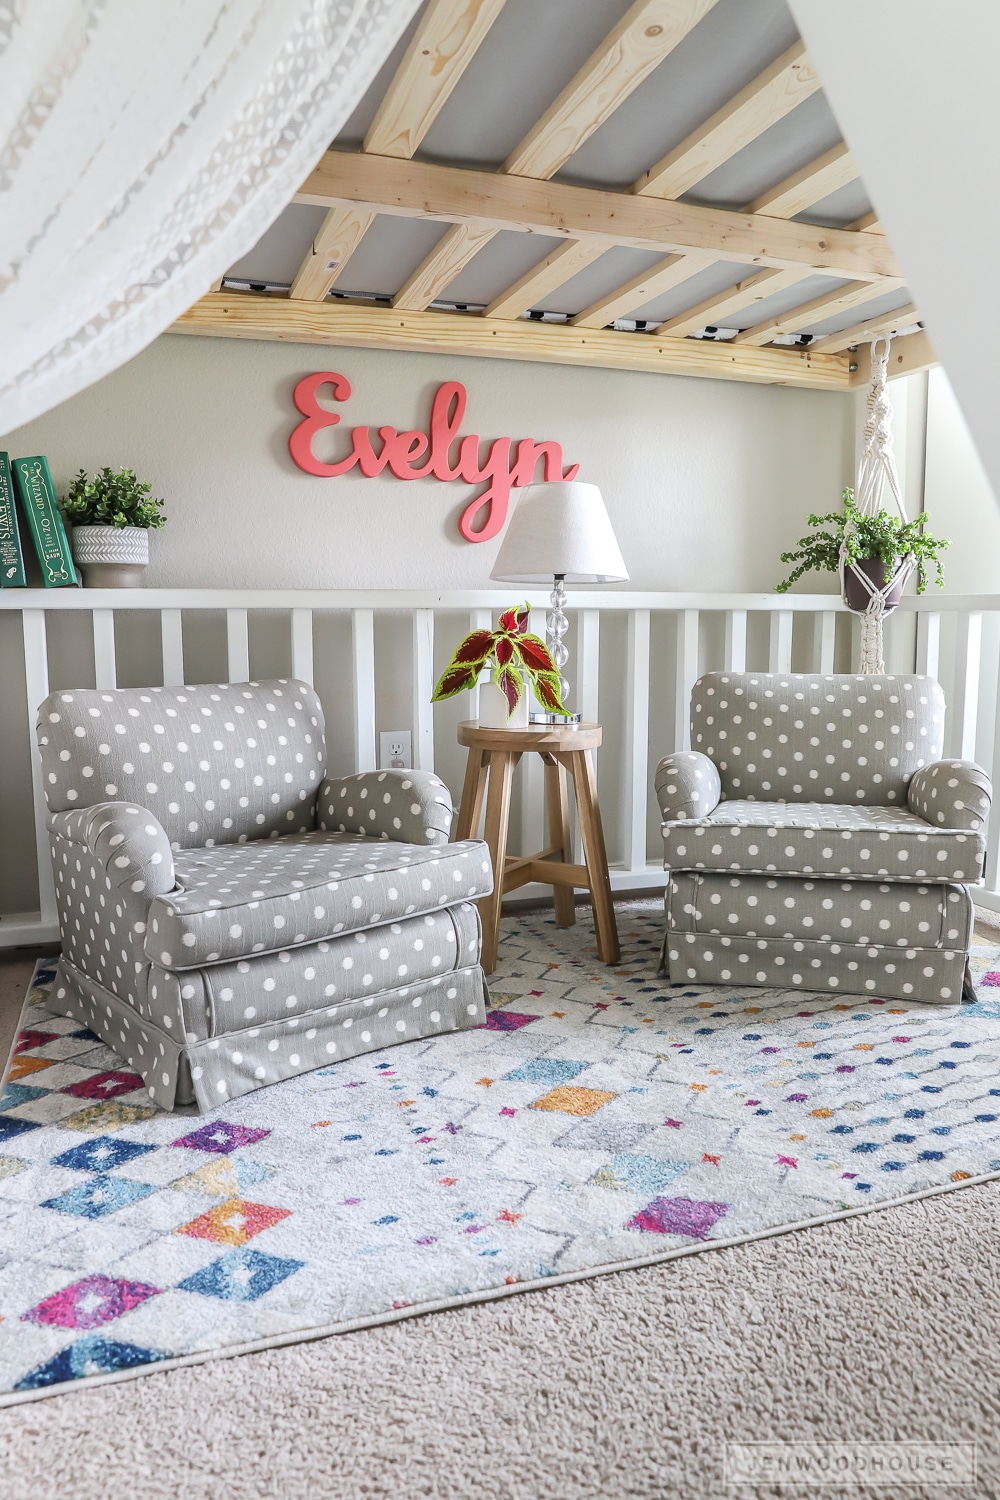 How to build a DIY Sliding Barn Door Loft Bed
1. BUILD THE RAILINGS
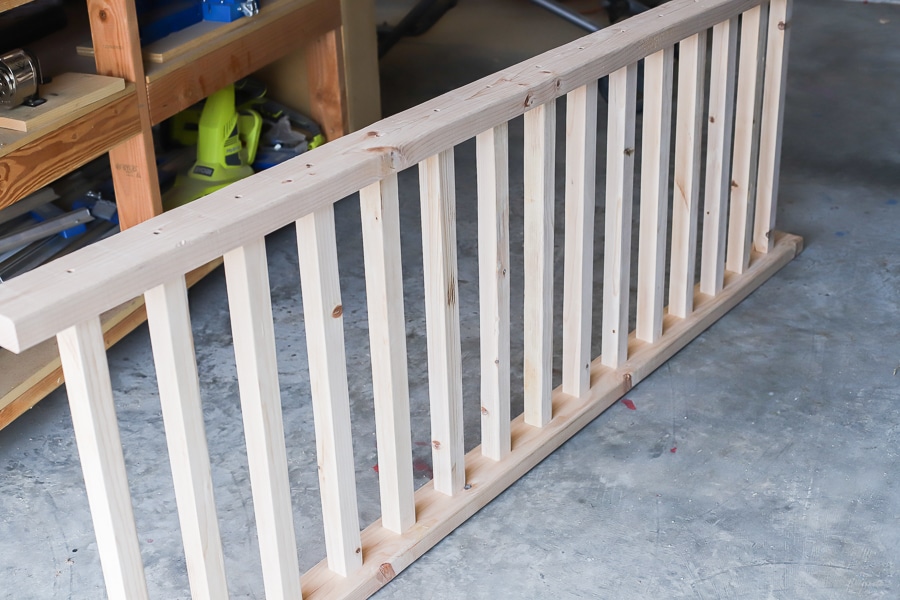
You can purchase 2×2 lumber off-the-shelf, but we found it to be more cost-effective to rip down 2×4 studs to make the 2×2 balusters. We used a 2×4 spacer to evenly space the balusters 3 1/2 inches apart. Pre-drill pilot holes and countersink the 2 1/2-inch wood screws. It’s also a good idea to sand the balusters before you attach them.
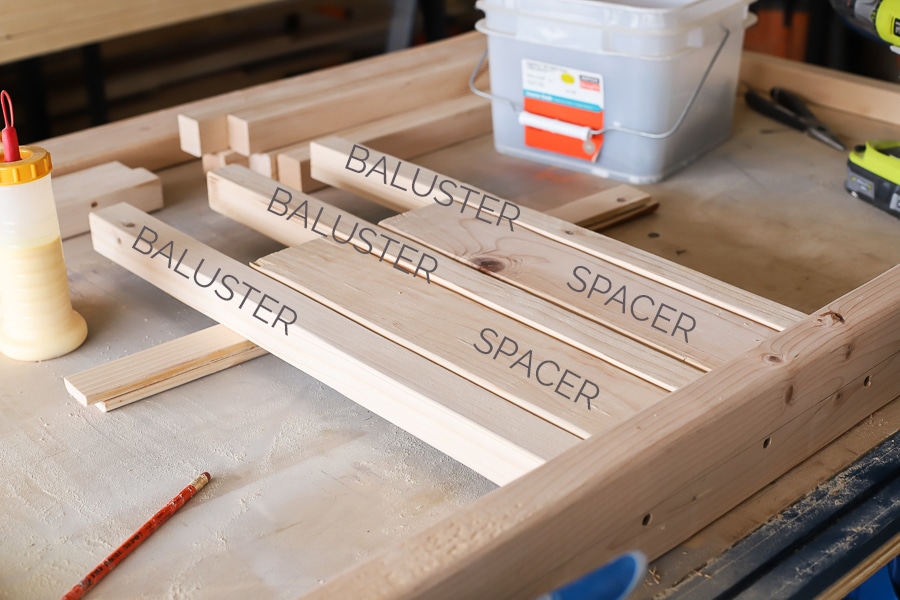
Lather, rinse, repeat eleventy times.
Fill the screw holes with wood filler, then sand smooth.
2. BUILD THE SIDE PANELS
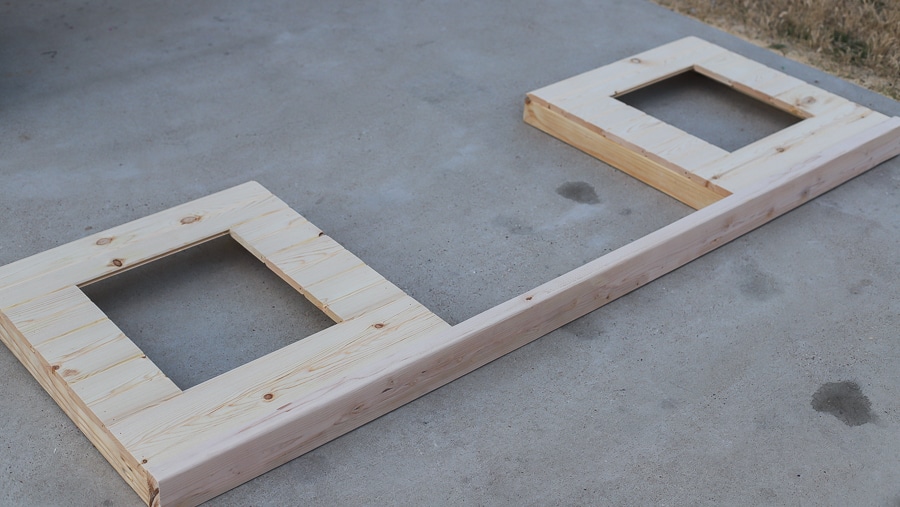
Does your Home Depot sell 2×3 lumber? My Texas store location does, but I could never find them when we lived in Alabama. If you can get your hands on some 2x3s, they’ll work best because they allow the tongue-and-groove boards to be slightly inset. In the photo below, the rails are 2x4s and the stiles are 2x3s. See the inset? Now you’ll be able to attach the 3/4-inch thick T&G boards and not have them stick out past the 2x4s.
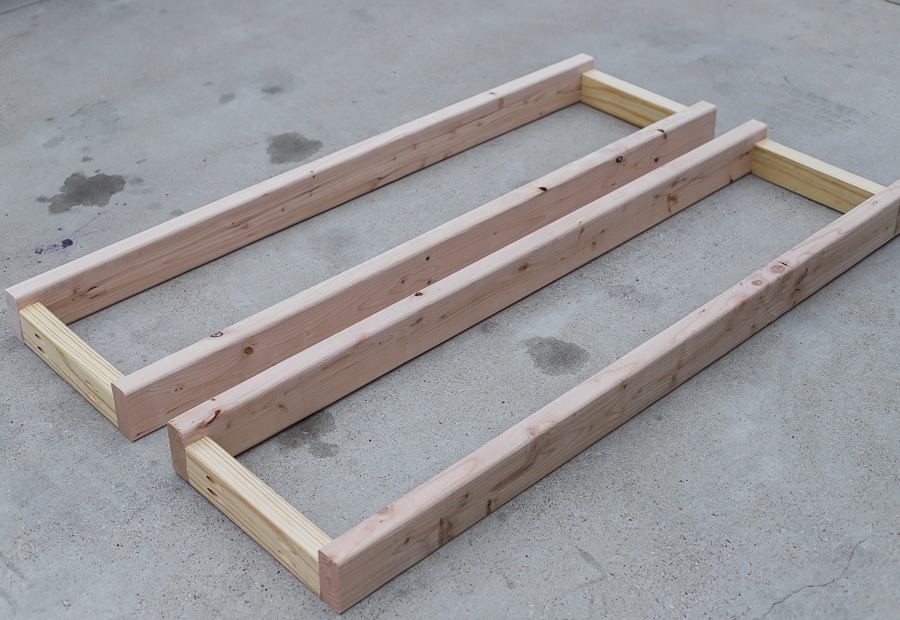
Notice how the T&G boards fit nicely into place. Once you build the frame, you’ll just glue and nail the T&G boards in place – easy peasy.
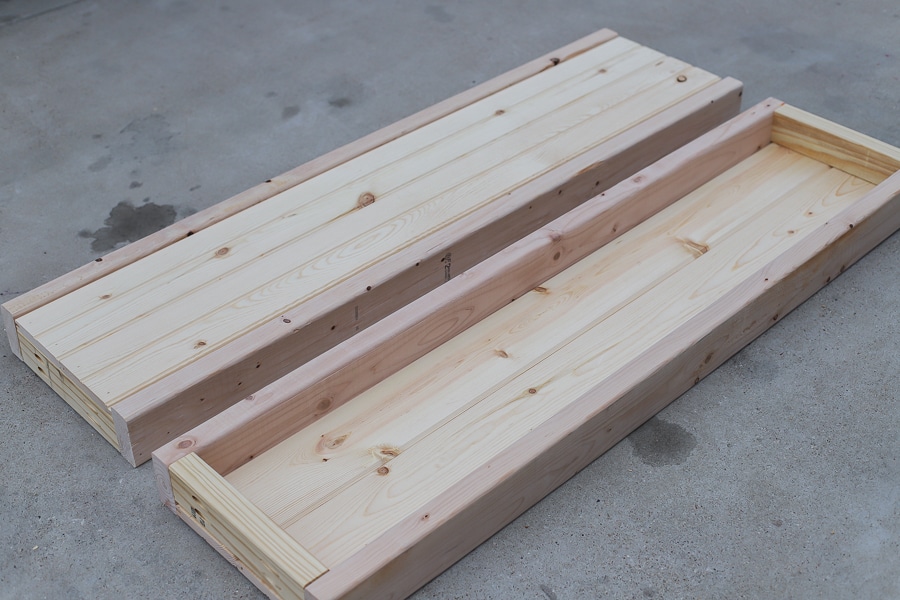
The photo below shows one constructed side panel. You’ll build two of these, of course. These will end up being the headboard and footboard of the bed.
Special shoutout to my good friend and neighbor, Tamra. She’s a supermom to 6 kids (3 of which are triplets!), Army wife, and overall amazing friend. She’s been a Godsend. Tamra’s not only listened to me over-analyze, second-guess, and agonize over every part of this project, but she helped me sand and paint ALL THE THINGS. And there were so many things to be sanded and painted. She’s a trooper. Thank you, Tamra!
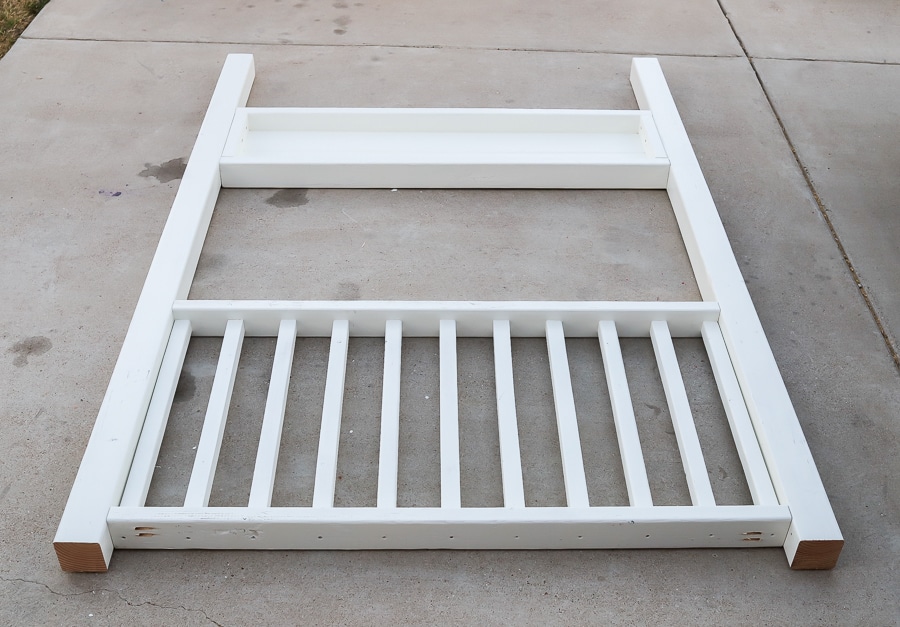
I built each component (railings, side panels, front and back panels, mattress box) separately, then brought everything into the room for assembly, but I’d recommend building as you go, if you can. No matter how accurate my measurements were, once Adam and I got the parts into the room, those pre-determined measurements changed and shifted as we put the bed together. So, if you can (and if you have the patience and time), build as you go. Meaning, build the two side panels and back railing, then take the completed side panels into the room, then attach the back railing. The side railings are permanently attached, while the back railing slides into place with these fence brackets. This makes disassembly much easier when it comes time to PCS (move). Measure the space for the mattress box, then build accordingly. Attach the mattress box to the legs, then measure the space for the front and back panels, then build for those dimensions… and so on and so forth. Make sense?
Because I built the side, front, and back panels beforehand, then tried to put it all together in the room, there was a lot of trial and error. We’d carry the front panel into the room, try to fit it into position, discovered it wouldn’t fit, then have to take it back out to the shop to shave the sides down with a hand planer and belt sander until the front panel fit into place. Same thing goes for the back panel.
My sweet husband. He lifts all the heavy things. Repeatedly. God bless him.
If you build as you go, you’ll be able to measure and then build to those measurements. If you choose to build the loft bed the way I did, just know that you’ll likely need to make adjustments along the way. I hope you have a sweet husband who lifts heavy things repeatedly too.
3. BUILD THE FRONT AND BACK PANELS
Same song and dance for this part too – the stiles are 2x3s while the rails are 2x4s, which allows space for the tongue-and-groove boards to be slightly inset from the 2×4 rail. Attach the T&G boards with glue and nails.
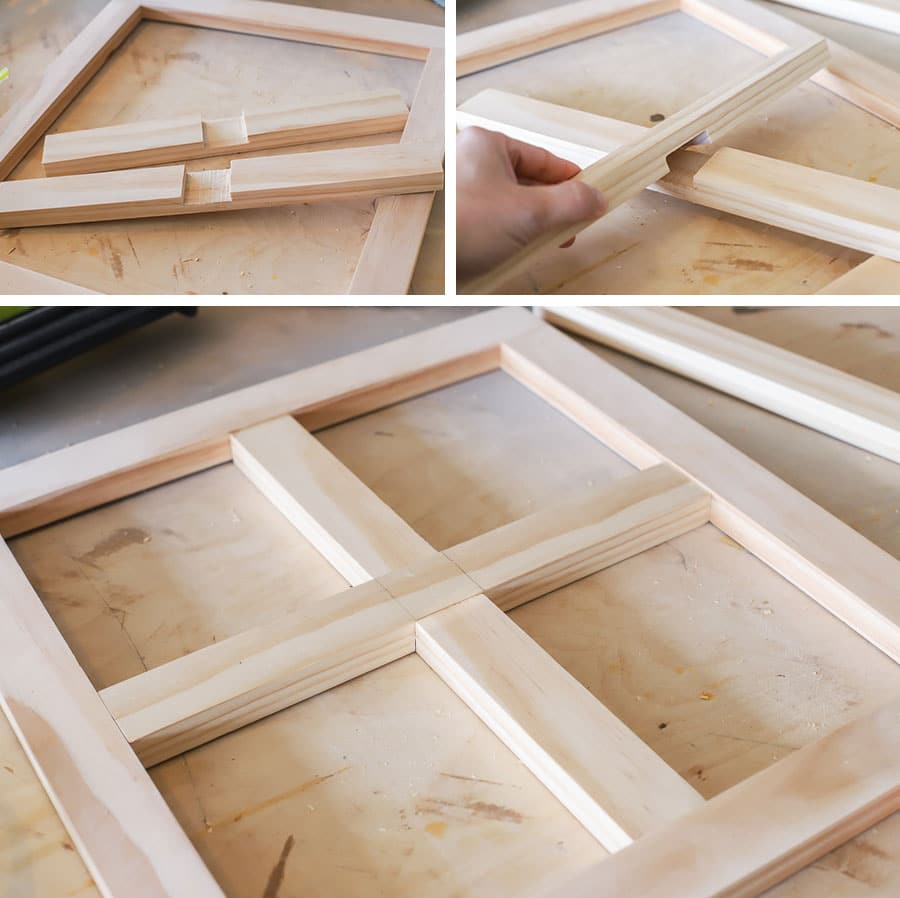
For the windows, I constructed the outer frame with pocket hole joinery and cut overlap joints for the muntins (the criss-cross part). The muntins were then attached to the frame with pocket screws. I cut the lap joints with several passes on the table saw. You can also use a circular saw for this – just be sure to set the depth of the cut so that you’re removing half the amount of material on both pieces so that when you join the two, you’ll have a flush surface.
4. BUILD THE MATTRESS BOX
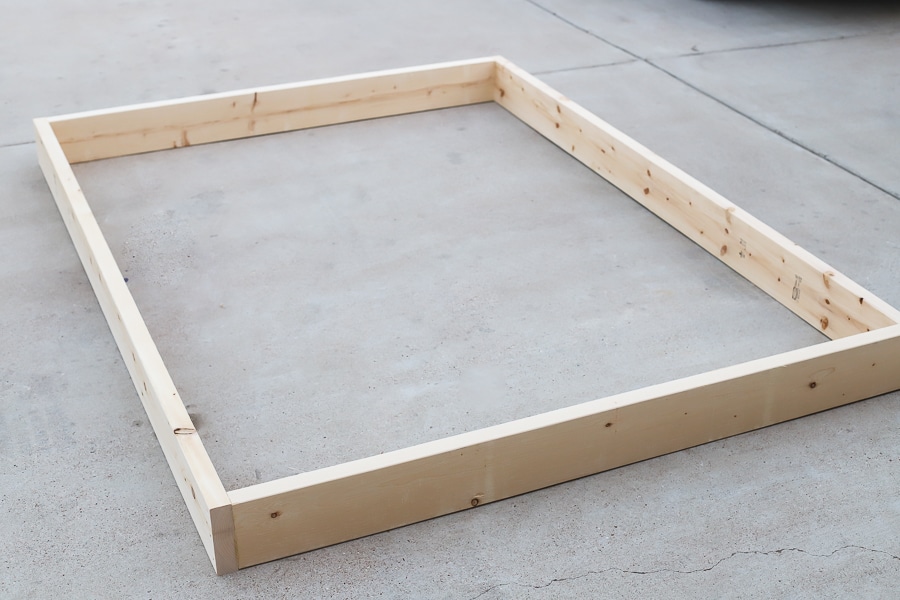
This part is pretty easy. First, you’ll build the box out of 2x6s and 2 1/2-inch wood screws. Check for square, adjust as necessary.
Next, you’ll attach the 2×3 mattress cleats to the sides of the bed box. Measure and mark the center point on the short ends and attach the fence brackets. These brackets will hold the center support so that the mattress doesn’t sag.
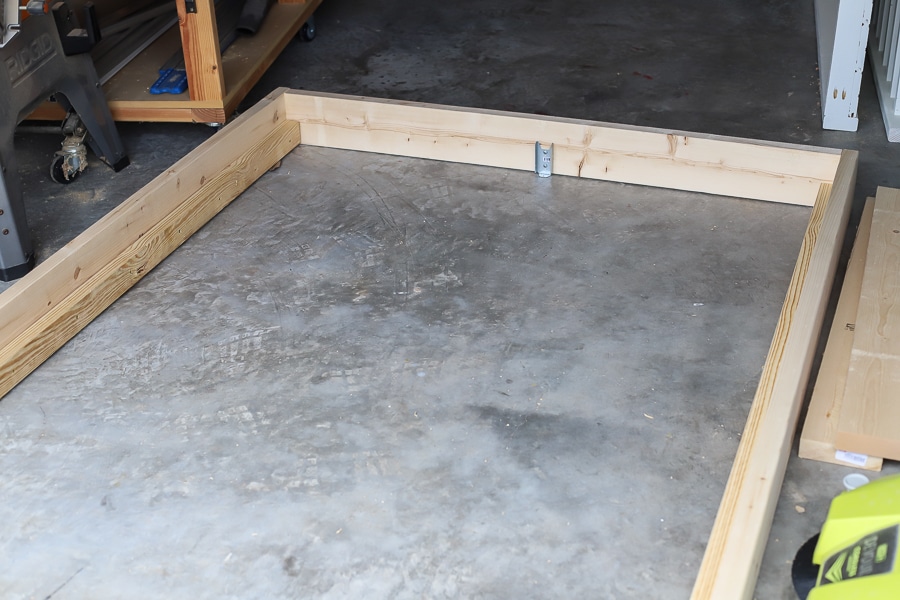
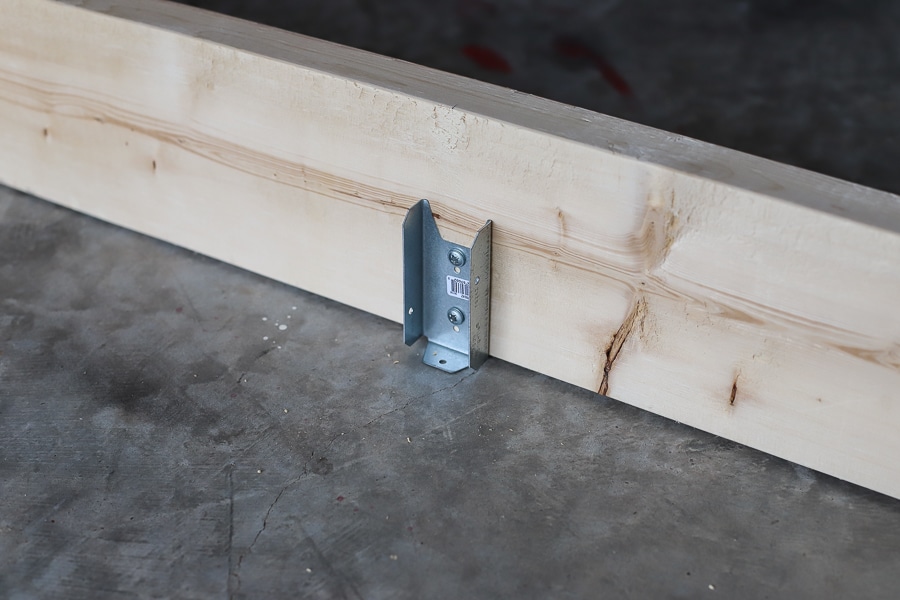
5. ASSEMBLY – ATTACH THE MATTRESS BOX TO THE LEGS
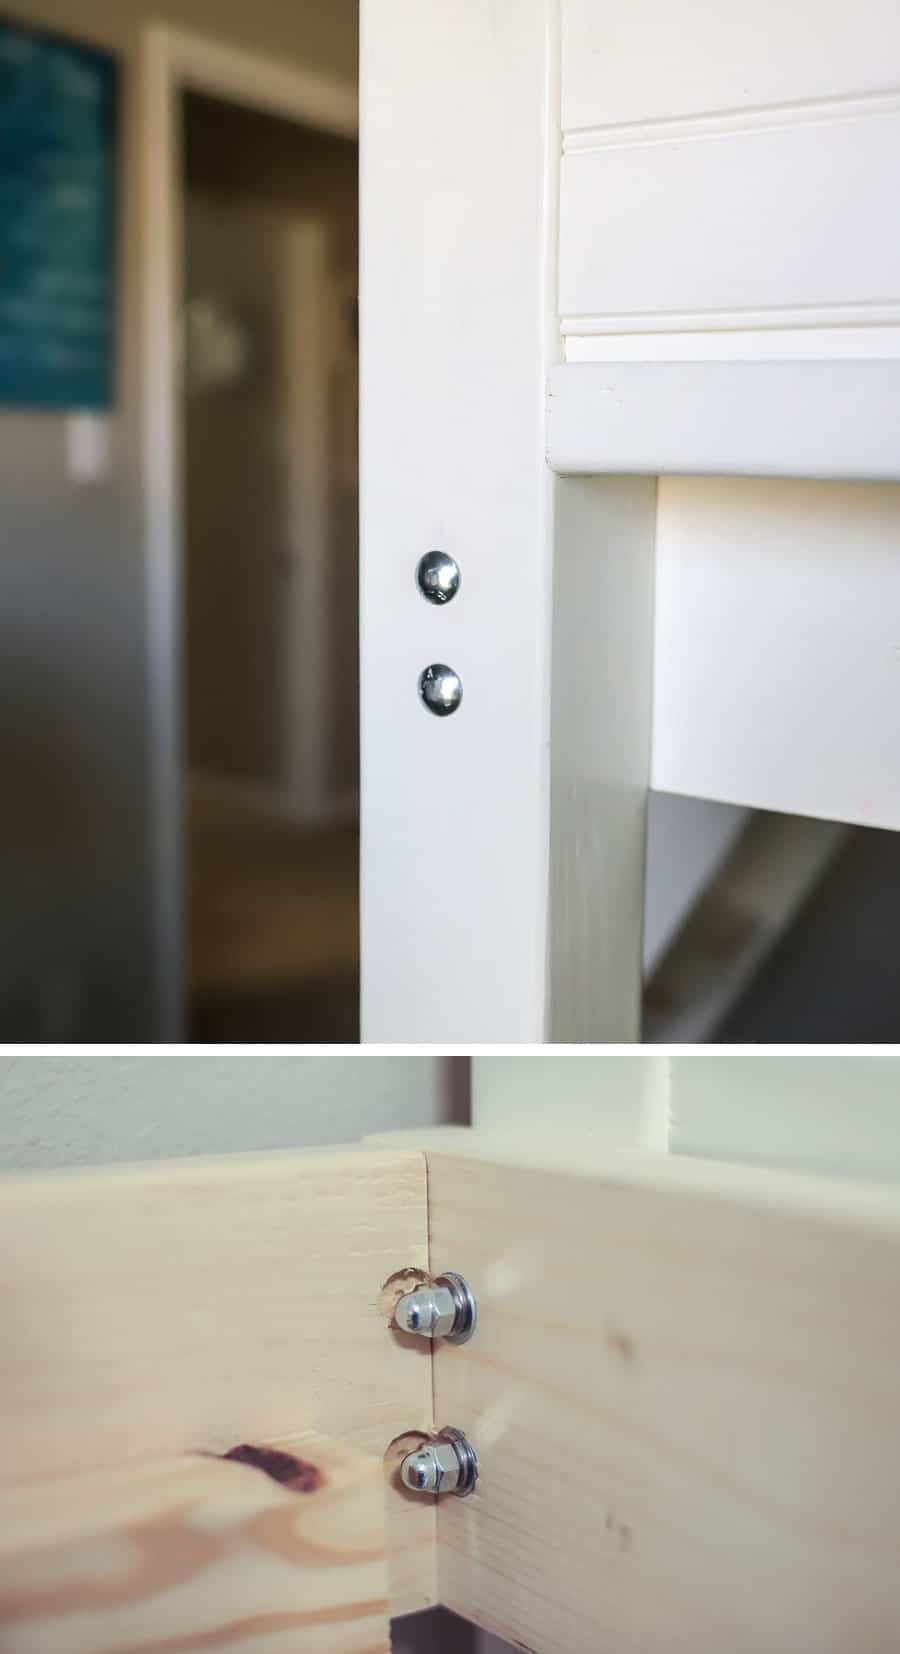
Bring the mattress box into the room and attach it to the 4×4 legs. This is where we used the carriage bolts, flat washers, split locking washers, and cap nuts. We pre-drilled the holes into the 4×4 legs and 2×6 mattress box, then inserted the carriage bolts, washers, and cap nuts. You’ll see where I had to carve out a space in the adjacent boards for the cap nuts. If you place your hardware further inward, you shouldn’t have this problem.
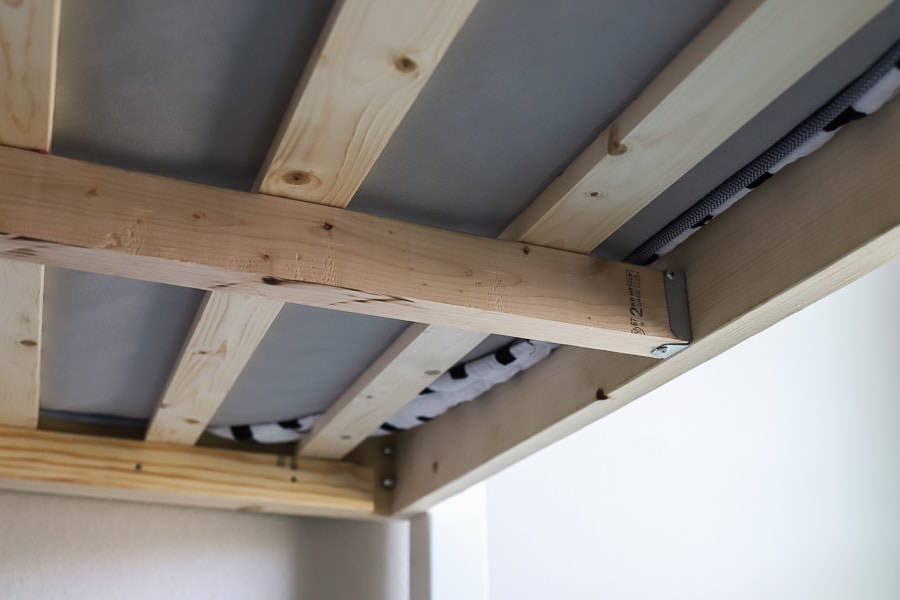
Once the mattress box is in place, you can measure and cut the 1×3 mattress slats and lay them in place. I spaced them about 5 1/2 inches apart (I used a scrap tongue-and-groove board as a spacer) and screwed them down with 1 1/4-inch wood screws. Be sure to pre-drill pilot holes so that you minimize the risk of the wood splitting.
This is also a good time to put the full-size mattress in – once you have all the walls attached, it’ll be a tough job to wrestle the mattress inside.
6. BUILD THE STAIRS
After hemming and hawing over whether to build stairs or a ladder, I finally decided to build stairs. I used 1×8 boards for this, which is plenty strong for the kiddos, but I feel a little uneasy when my husband puts his weight on these stairs. You may want to use 2×8 boards if you have trust issues like I do.
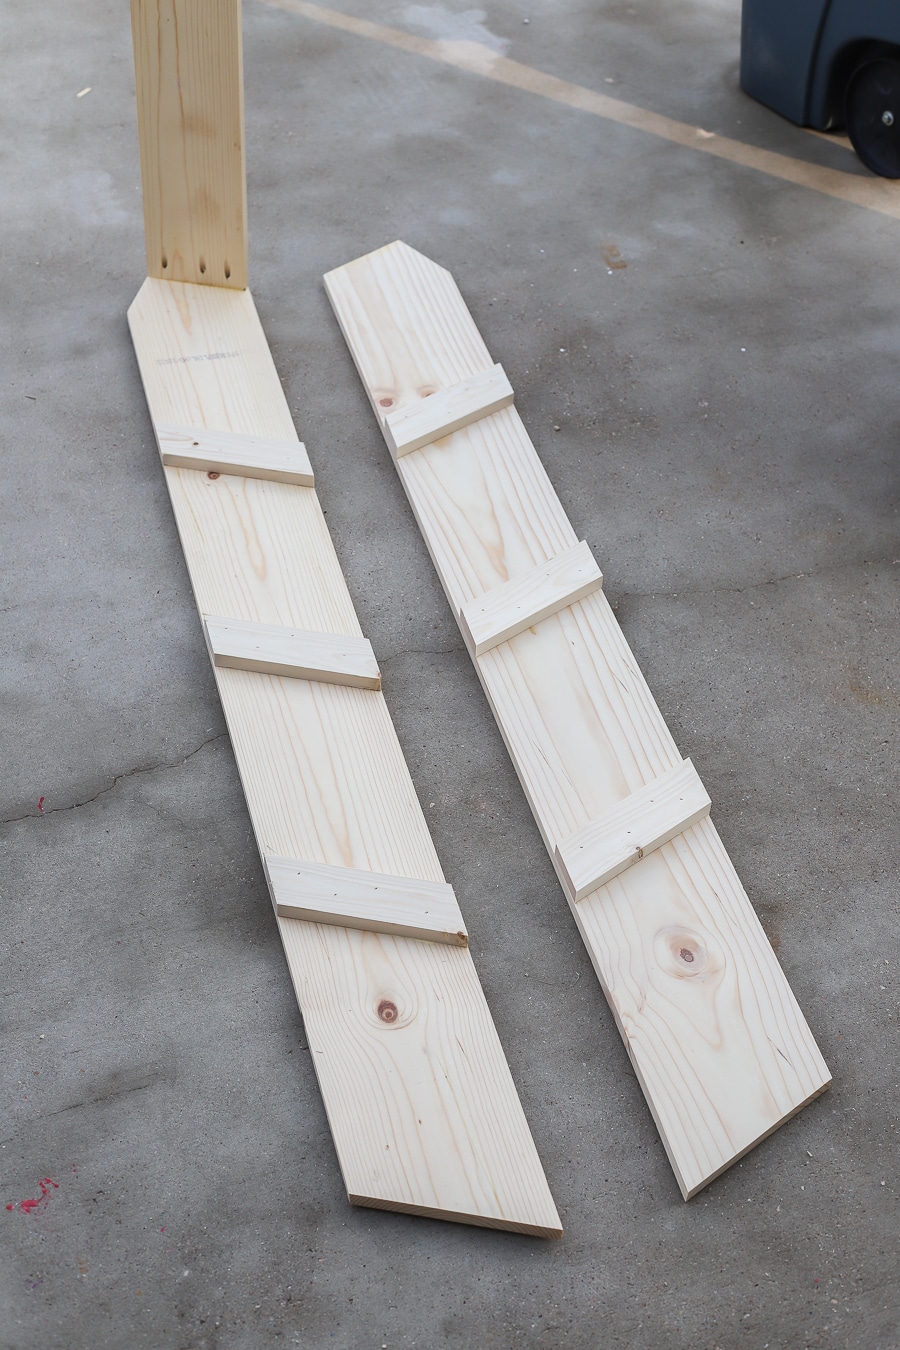
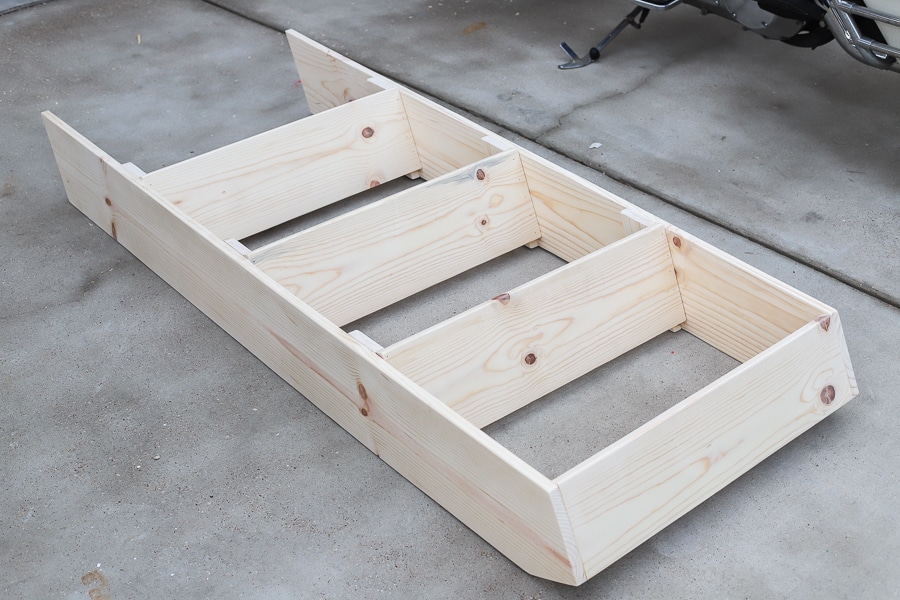
7. BUILD THE DOORS
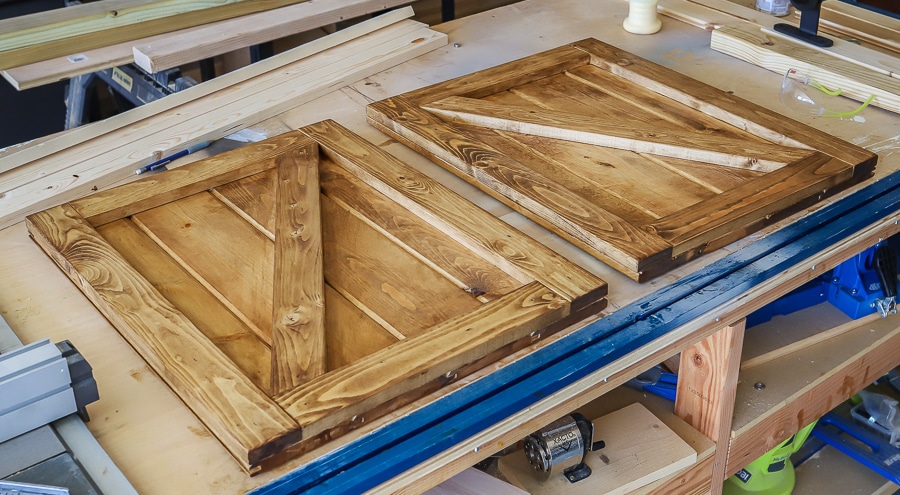
I used leftover scrap tongue-and-groove boards and 1×3 mattress slats to build the doors. Measure, mark, and cut the T&G boards to length, plank them together, then attach the 1×3 boards on top with glue and nails. Simple enough. I used Varathane’s Golden Oak wood stain for the barn doors. Below, you’ll find a couple helpful videos on my staining and finishing process.
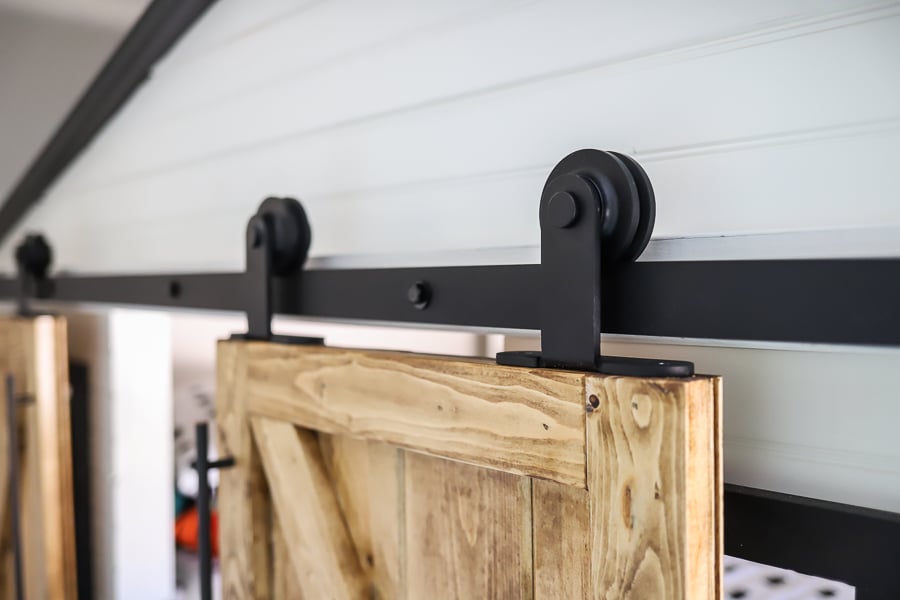
Installing the sliding barn door hardware was very straight-forward. The instructions that came with it were very easy to follow. Remember, the hardware set includes 2 hangers, so you’ll need to order 2 more because you need 4 total – 2 for each door. We did have to cut the metal rail down from 96 inches to 79 inches – we used an angle grinder for this, then used a file to remove any burrs and sharp edges and touched up the edges with black spray paint. We screwed the top mount hangers onto the doors, positioned and tightened the door stoppers, then hung the doors.
8. CUT THE ROOF PANELS AND ATTACH THE ROOF
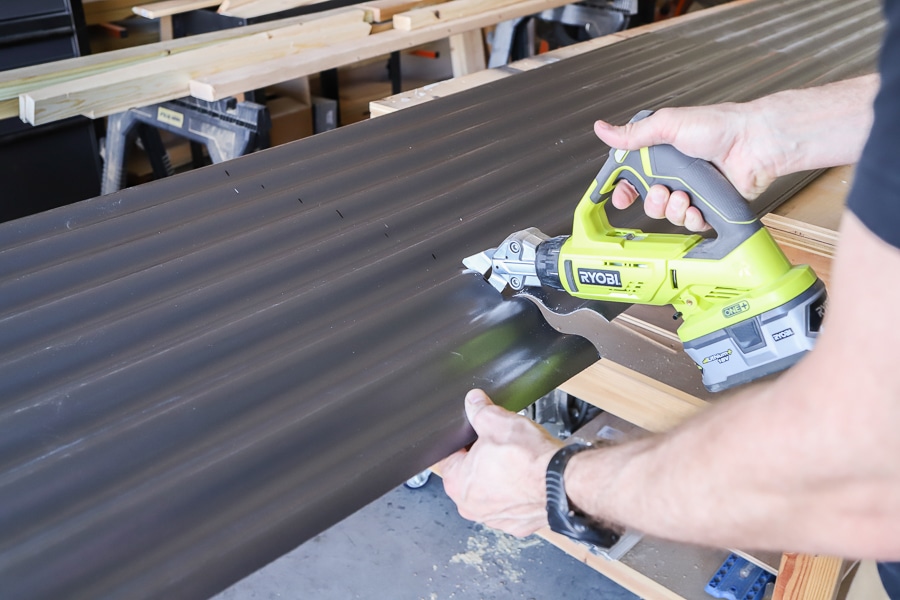
Because this DIY sliding barn door loft bed already weighs a ton, I didn’t want to add too much more weight with the roof. I considered real shingles (too messy and gravelly), cedar shingles (not available in-store), plywood (more weight)… you name it, I probably considered it. I finally decided on these polycarbonate corrugated roof panels. They’re super light and come in different colors – you may even choose the translucent roof panels, if you want more light to come through. We chose the 8-foot panels in Castle Grey and used battery-powered RYOBI shears to cut it. You can also use a circular saw or even some heavy duty kitchen shears – the panels are plastic, so they’re super light and easy to work with.
We used these wood screws with foam washers to attach the roof panels to the rafters.
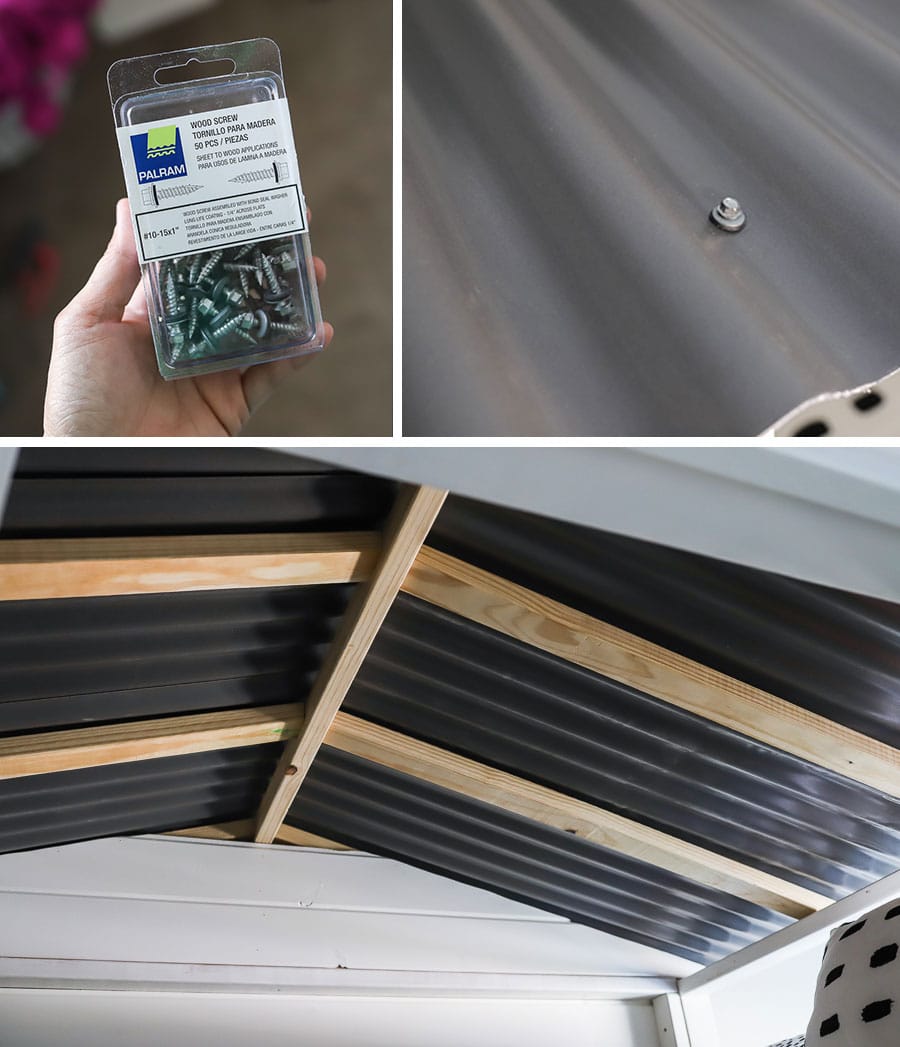
I kind of wish I would have either stained or painted these rafters. Oh, well. Hindsight is 20/20, isn’t it?
We also switched out the existing ceiling fan for this pretty flush mount light fixture. Isn’t it perfect?!
So… are you ready to build your own DIY Sliding Barn Door Loft Bed? I’ve got you covered with the plans! Hope you enjoy them – feel free to reach out if you have any questions along the way and please tag me on social media if you build this bed – I’d LOVE to see your versions! Happy building!
SHOP THIS POST
*This project is sponsored by The Home Depot. This post contains affiliate links. All expressed opinions and experiences are my own words. My post complies with the Word Of Mouth Marketing Association (WOMMA) Ethics Code and applicable Federal Trade Commission guidelines.




Have you gotten around to modifying this for a twin bed? Hoping to get my husband to make this a twin bunk for our boys!
Hi Jen. I’ve been working on this bed as a project for the past few months, and it is looking great. I am ready to get going on the roof and barn door assembly. In the plans it looks like the measurement in length for the assembly is 79 inches, but the link that it takes you to in the home depot website is for a 72 inch set, which seems too small as I started to put it up. I also noticed on this page that you said you cut down the barn door assembly from 96 inches. Did you get that 96 inch assembly from home depot?
Hi John,
So sorry for the confusion! Yes, we did get the 96″ barn door kit from Home Depot – sorry about that incorrect link! I’ll try to find the right link and replace it in the post. We cut our rail down from 96″ to 79″ however, I think the 72″ rail just might end up working for you, because we have about 4-5 inches overhang on each side of the rail… hope that helps!
*I did a quick search and found this barn door hardware kit – the rail is 78″ long: https://homedepot.sjv.io/c/1241677/456723/8154?u=https%3A%2F%2Fwww.homedepot.com%2Fp%2FAmerican-Pro-Decor-Black-Solid-Steel-Sliding-Rolling-Barn-Door-Hardware-Kit-for-Single-Wood-Doors-With-Routed-Floor-Guide-5APD10652%2F207017950
Love this! Curious how you got the mattress in there (maybe I missed it)? Also, would a full size bed fit below? We are moving and my 4 year old will be in a room with a 10 ft ceiling – was thinking this would be perfect for her room – but she still requires me to sleep with her on occasion and I was wondering if the bed could be put below and then the top could be used as a hideaway, reading nook.
I was looking to see if I could find something similar pre-made that wasn’t to expensive – was shocked to see that this exact bed was being sold for over $3,000! For that price, I am thrilled to see the plans and build it myself for a 1/4 of the price!
Hi Linda,
We put the mattress in there once we had 3 of the four sides assembled. This is noted in the plans. And yes – you can put a full size bed underneath and make it a bunk bed! I’ve seen several of my readers make this modification to their own projects and it’s absolutely adorable! Good luck!
If my ceilings are 8 ft, is there a way to keep this structurally sound, but also reduce the height?
Hi Eryka!
Sure! You can make the legs shorter, but keep in mind, this will also reduce the height under the bed. Hope that helps!
This is such a cute idea!! I was definetly thinking of doing this but if my daughter already has a normal twin and full flat bunkbed, do you know what the appoxomite adding of stuff price would come out to?
You and your husband did a great job! I can’t wait to make this. Where did you get the sheets from?
How tall is it Jen?
Hi i was wondering if you could adjust the size of the height of the whole bed down to 90”? I have an 8’ ceilings in my kids room.
Hey!
I absolutely adore these plans, the downside, i have super low ceilings at 7.5′ how tall is this loft bed without the roof? Or, how tall is the roof from the beam that the doors slide on to its top? I was hoping that without the roof this may fit in our small space.
Appreciated!
Hi Ren,
The overall height of the bed is 8 feet tall. You could reduce the height by cutting down the legs, but do keep in mind this will also decrease the overhead space underneath the bed. Hope that helps. Best of luck on your project!
In your plans, do you include tools needed for making this bed. I’m new to the DIY for furniture and stuff. Just want to make sure I have the proper tools before starting the project.
Hi Garret,
Yes! A tools, materials, and cut list are all included in the plans, as well as 3D diagrams for each step. Hope that helps!
Hi ,would it make a difference if i didn’t do the railing. For example would it be less expensive or would it be less stable
Hi Jen, Ive been planning of building something similar but for an outside cubby, thanks for the barn door idea, will just need to put some sort of flashing over the door track to keep it weatherproof. Thanks
I just love this. Thank you for sharing these plans.
I was wondering what is the thickness of mattress you used for this bed? I have a 12″ thick full mattress, but am afraid this will be too thick, making it hard for the kids to fit through the opening.
Hi Karen,
I believe our mattress is a standard thickness, about 9 inches.
Hi again, we are building this bed! So excited to get it together! One last question: what type of paint did you use? regular latex? trim paint? eggshell or satin?
Hi Karen,
So exciting! We used satin latex paint in the color “Simply White” by Benjamin Moore. Hope that helps!
Thanks so much!
Can the bottom part be built as another bed (so bunk beds instead of a loft area)?
Hi Ramina,
Of course! I’ve seen several of my readers convert this bed into a bunk bed!
Hi, we are building it as i’m emailing you. Wanted to know what size are the baluster ?? What size do we cut them? And thank you so much for this beautiful bed for my baby girl. If you have all the measurements for everything that would be awesome.
Are you able to take it down and put it back up easily and is it possible to buy it from you?
And do you need special tools to build the bed? thats why I asked if we could buy it from you, because I’m worried that I need special tools to build it.
If we can buy it from you is it possible that you could make it out of logs and sticks because i really want it to be like a forest or jungle.
THANK YOU!!!!
Thanks Erica! This bed is not for sale.
What if you wanted to enlarge this to cover 12 foot by 12 foot and turn the bottom half into a w/in closet and let the top part have a full size platform bed with room for a nightstand and other useful items? I’ve been wanting something like this for a long time.
Can you send me copy of plans for the loft bed with bard door, please.
Hi Lee,
You’ll find the plans for the barn door loft bed here: https://www.sprucdmarket.com/plans/sliding-barn-door-loft-bed/
Thank you!