Hungry Eyes. That was my youngest sister’s nickname growing up because she’d always order the biggest thing on the menu and then not be able to finish it.
Huuuuungry Eyes,
One look at you and I can’t disguise, I’ve got…
Huuuuungry eyyyyyes.
I feel the magic between you and I…
The song is stuck in your head now, isn’t it? You’re welcome. What? It was a good song and even better in the movie, amiright or amiright? #nobodyputsbabyinacorner
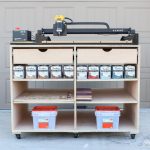
When I designed this workbench, I knew I wanted to be able to fit a full sheet of plywood on it, so I made it massive at 4 feet wide by 8 feet long. And now that it’s complete, I’m re-thinking my decision to make it so enormous. Now I need a bigger garage.
Just call me ‘Hungry Eyes.’
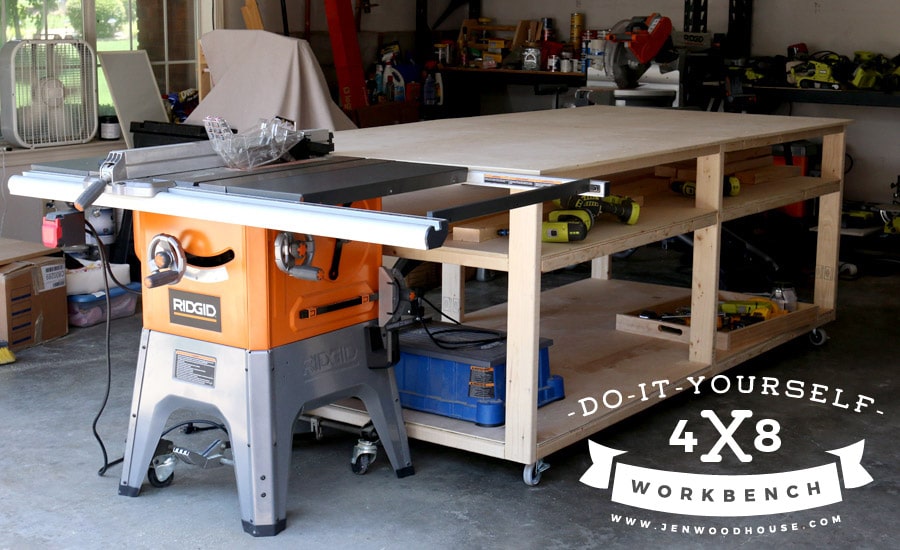 This was a super simple and very quick build with a few clever features added. The materials list is pretty straightforward – a few 2×4 studs and three sheets of plywood or MDF are all you need. The cost for this bench runs about $100 in lumber. Because I chose the nicest, prettiest plywood, Purebond Plywood, my cost was closer to $150. What can I say? I have my priorities.
*This post contains affiliate links. To read my full disclosure policy, click here.
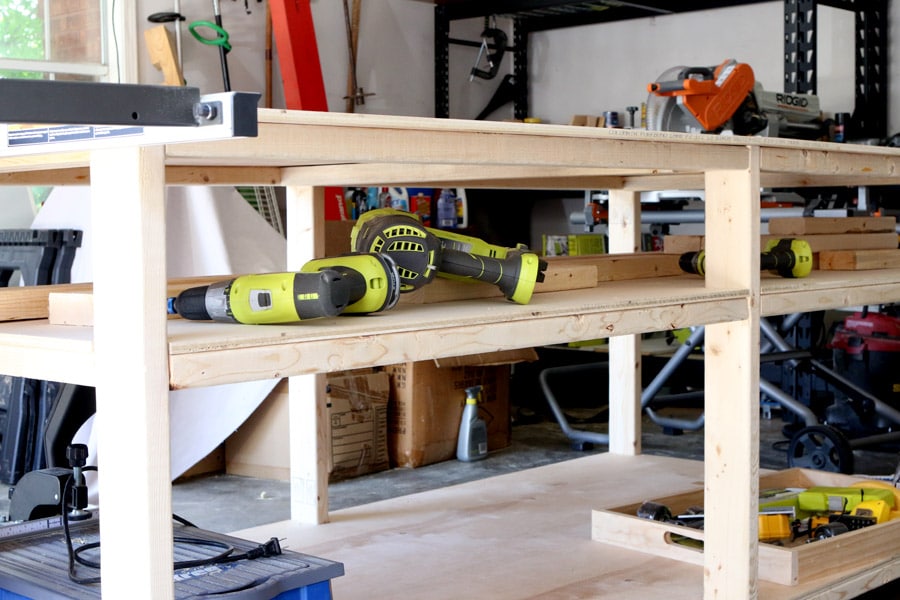
Whenever I’m building, my workspace gets so overcrowded with tools and materials that I no longer have space to work. I find myself wasting time clearing off the mess I made before I can continue working. Inspired by the ingenious Paulk workbench, I added this second shallow shelf so that my tools and things are still within arm’s reach, without cluttering up the top of my workspace. The bottom shelf can hold scrap lumber and other larger tools.
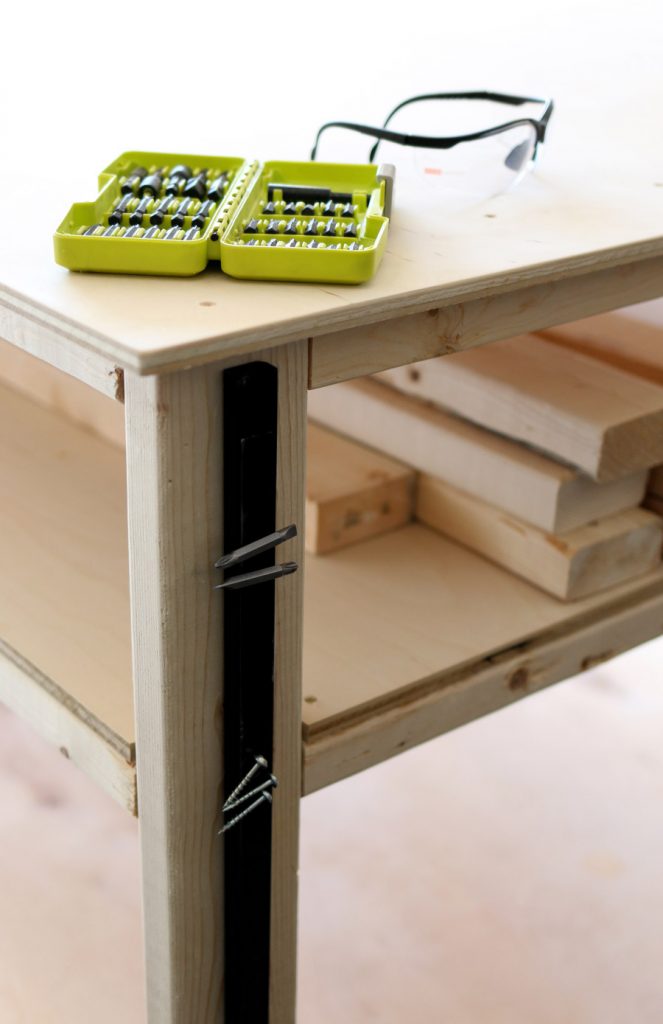
Another handy feature I added was a couple of these magnetic strips to hold screws, drill bits, tools, and other miscellaneous (magnetic) things.
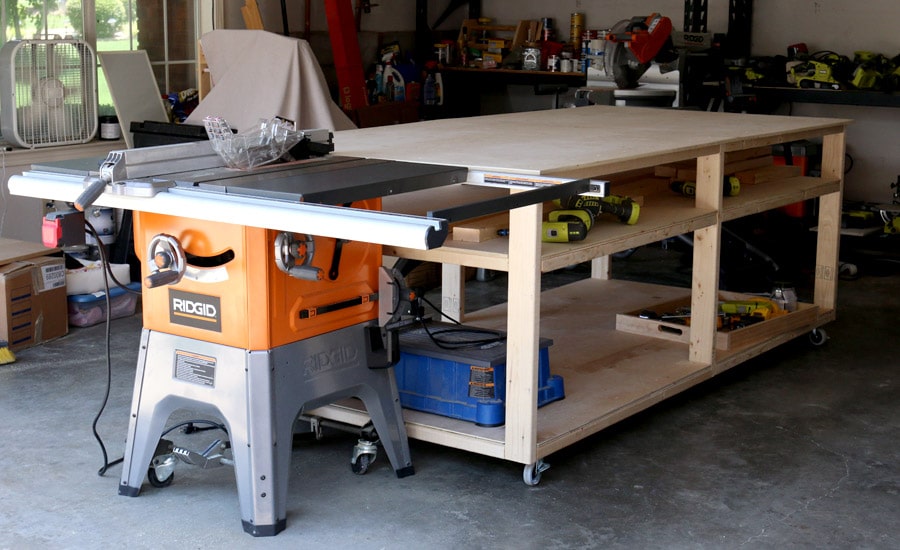
 The workbench is the same height as my table saw, so it can also serve as an out-feed table for the saw. The workbench is on locking swivel casters so it’s easily movable and manageable, despite the size of this beast.
Pretty neat, right? Okay, so let’s get on with the tutorial!
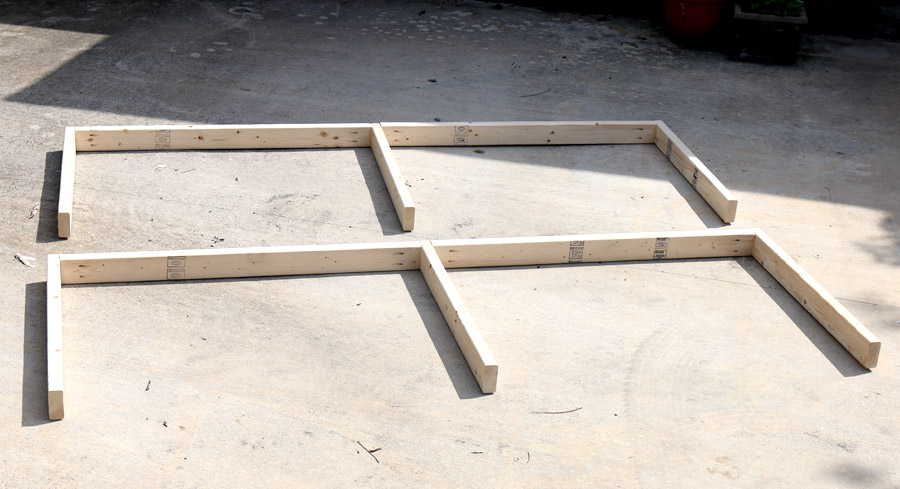
First, I built a couple of gigantic letter E’s. I used pocket hole joinery for this. This is the Kreg Jig I use and love.
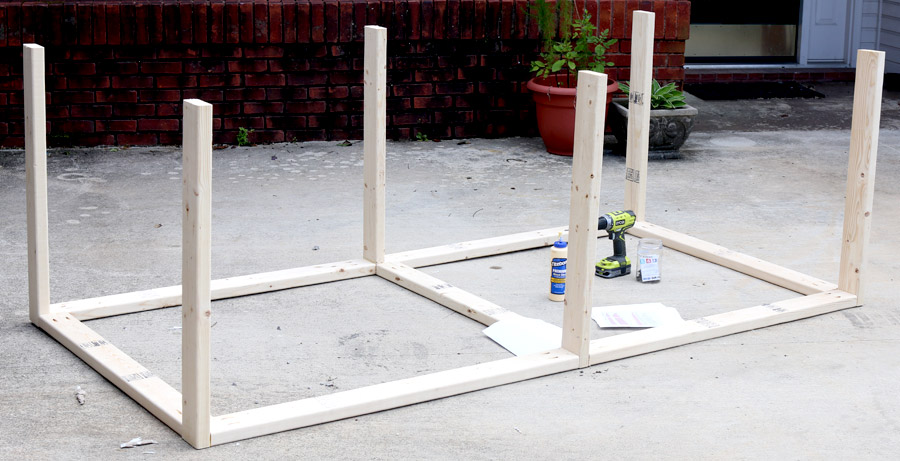
 Then I built the carcass with 2-1/2″ pocket hole screws and wood glue.
 Next, I notched out spaces in the plywood with my jigsaw so the legs would fit in nicely.
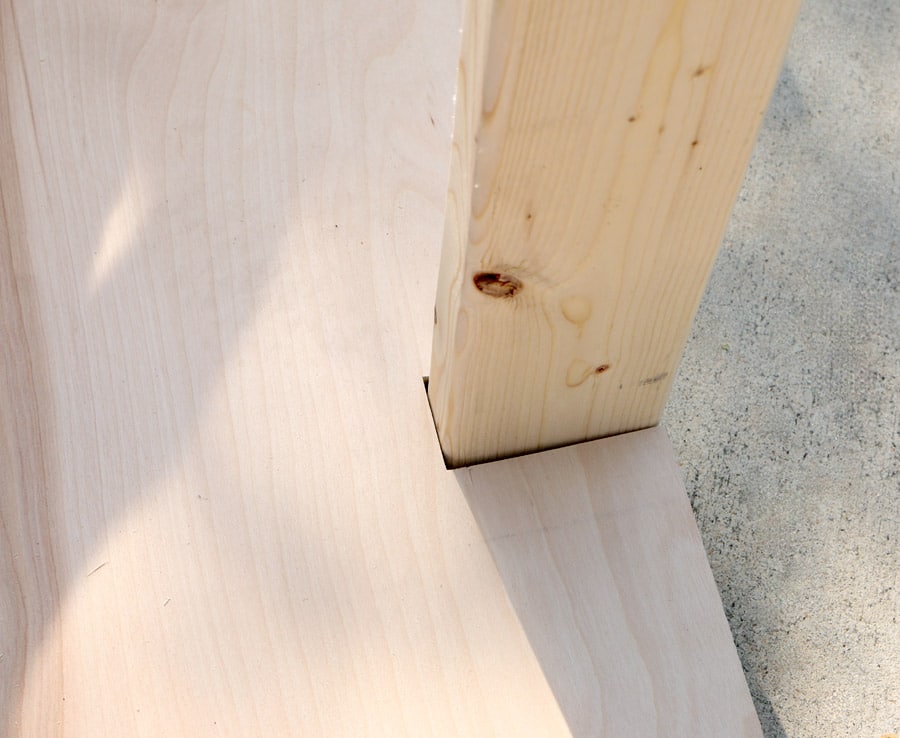 Then I dropped the plywood into place and secured it with 1-1/4″ deck screws. Bottom shelf: done!
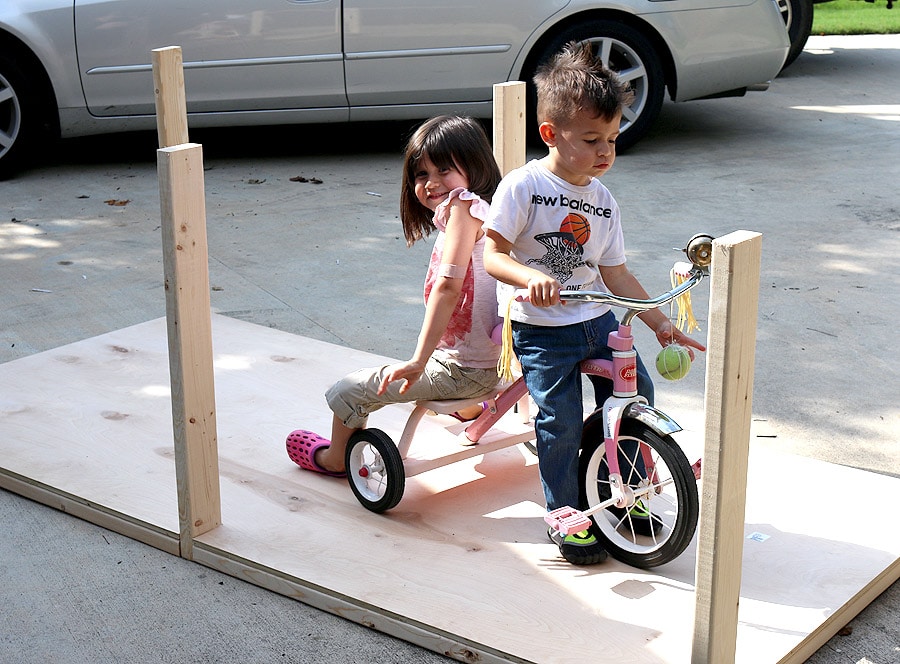
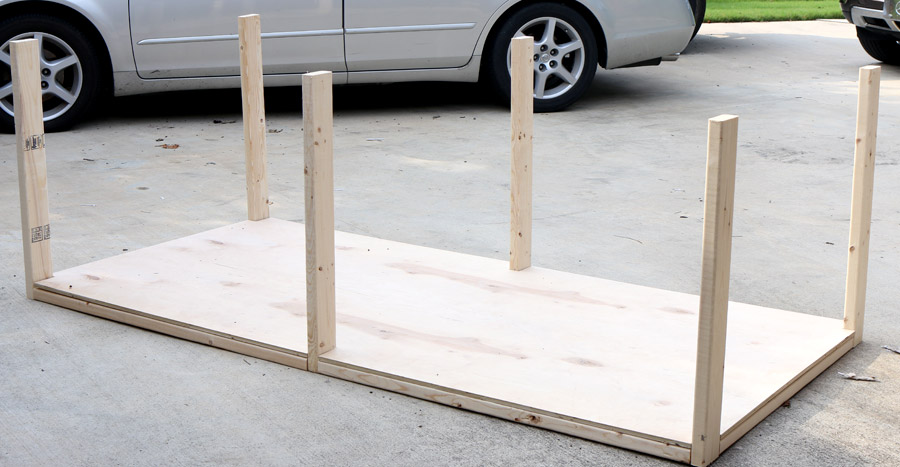 Before I could move on, my 2- and 4-year-old decided it was their stage/tricycle track.
It’s a good thing they’re cute.
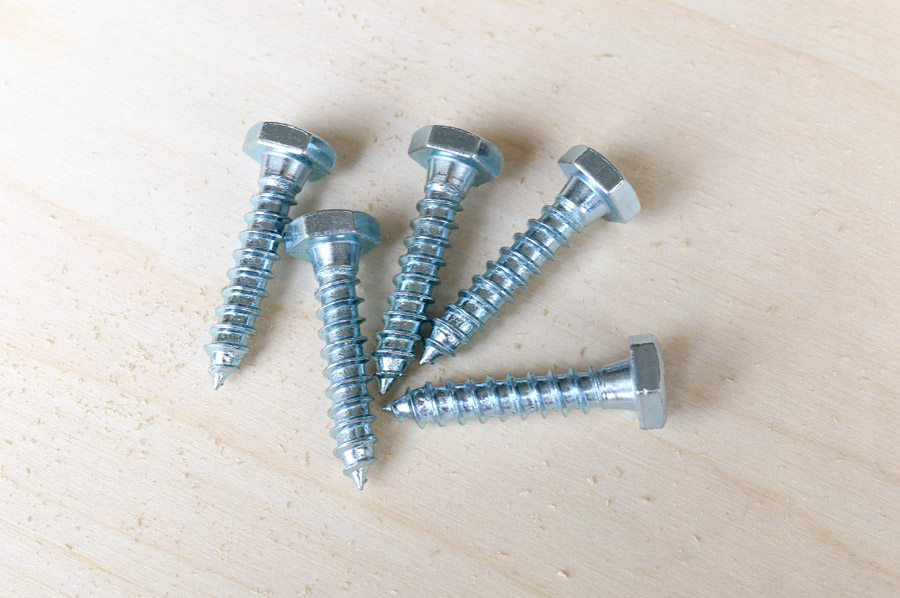
 Before the workbench got too heavy, I decided to attach the casters. I used lag bolts to secure the 3″ locking swivel casters to the bottom. The casters in the middle are non-locking.
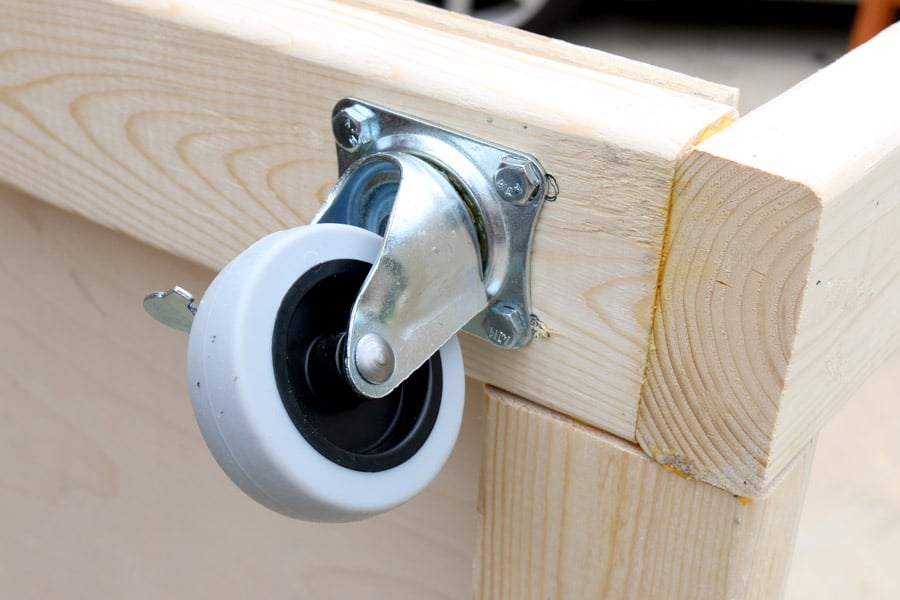
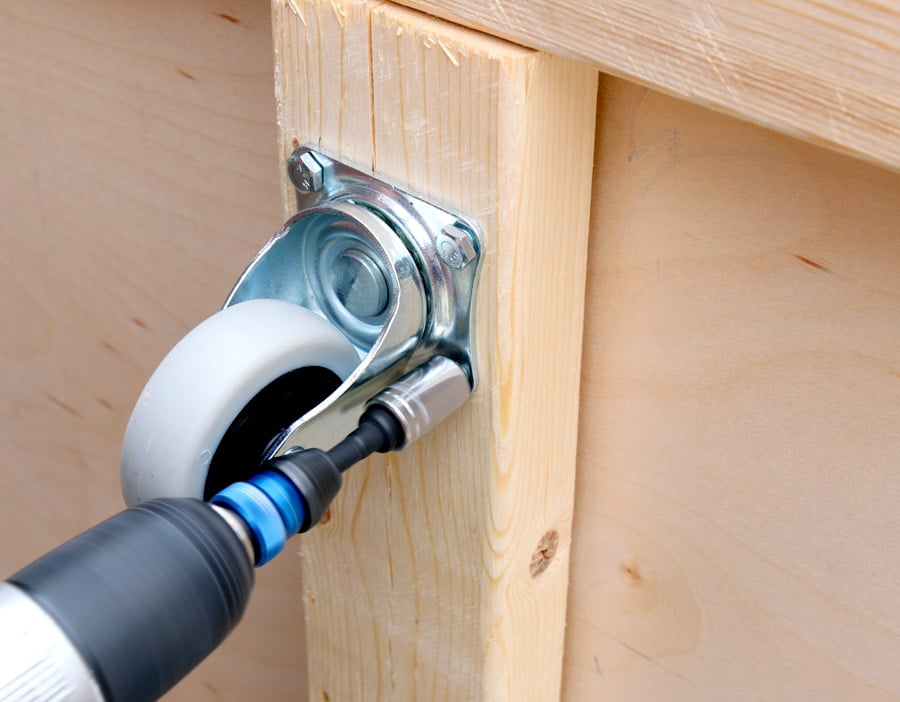 Then I built the second shelf frame just as I did with the bottom.
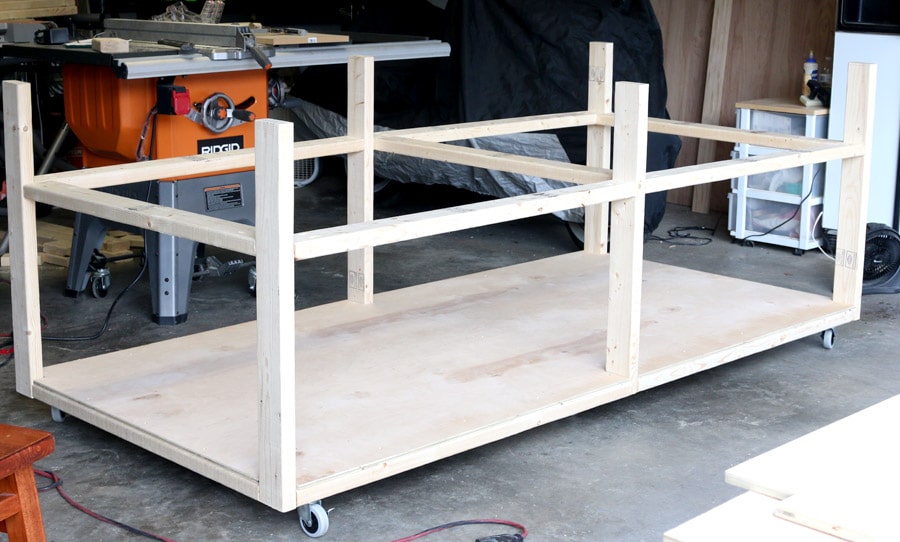 Same thing with the plywood here too – notch out the leg spaces, drop in the plywood, and attach it with 1-1/4″ deck screws.
For the two bottom shelves, I cut the plywood down a couple inches on two sides because I wanted it to sit flush to the frame, with no overhang. I did this with my table saw, but you could easily use a circular saw with a Kreg Rip-Cut. If you use a circular saw, I’d recommend switching out the blade to a plywood/OSB blade to minimize tear-out in your plywood.
It was quite a challenge to rip and cut a full sheet of plywood without an out-feed table, so I know this workbench will be very useful after it’s built.
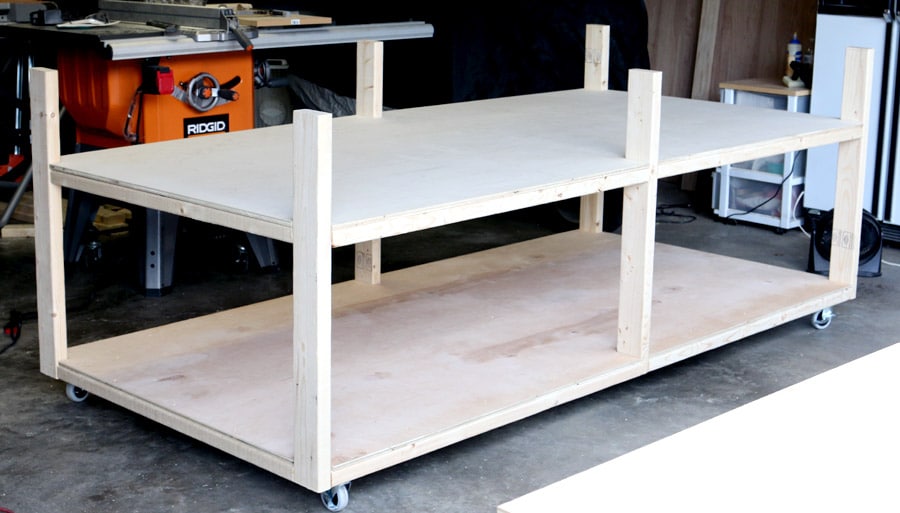 This thing is super sturdy – solid as a rock, see?
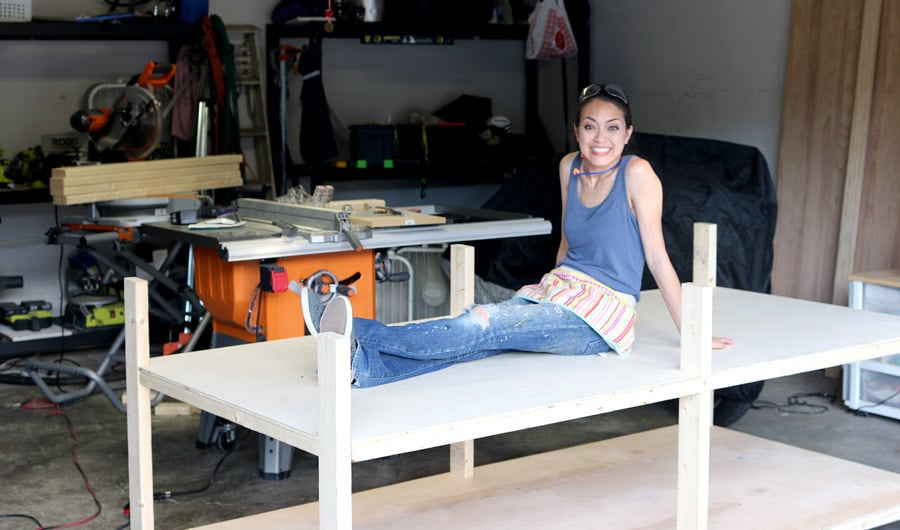 Then I moved onto the top – building out the frame like I did the previous ones.
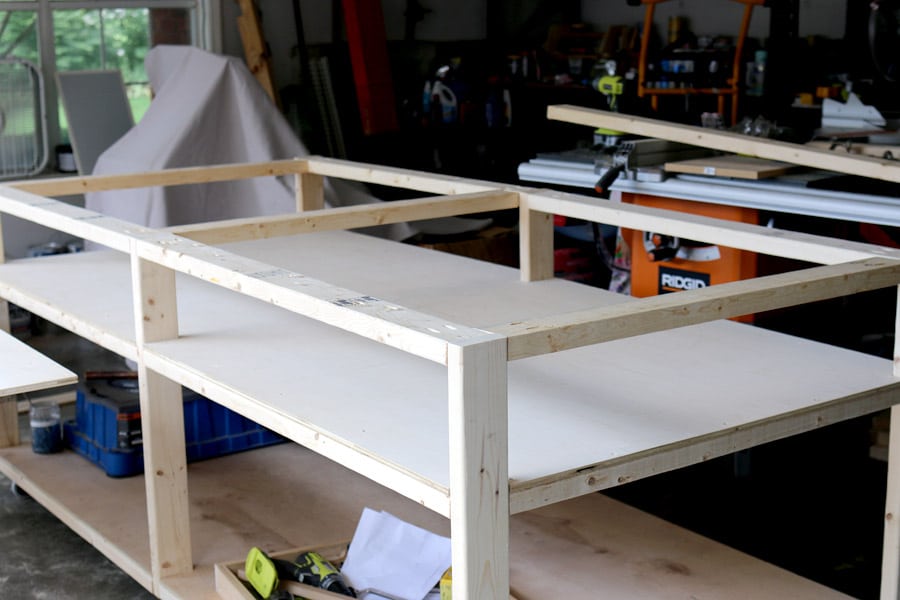 This time, I didn’t have to cut the plywood at all. I just laid it on top, allowing for an inch overhang on all the sides, then attached it with 1-1/4″ deck screws. I didn’t use glue here because once the top gets too buggered up from working on it, I can easily remove the old top and replace it with a new sheet of plywood.
 I just love this shallow second shelf – super useful!
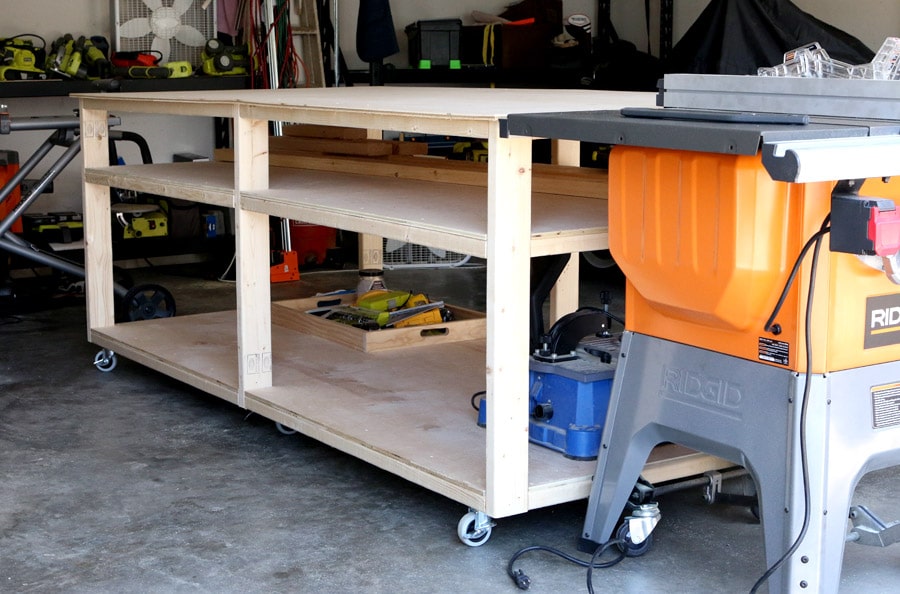 When I look at this behemoth of a workbench, the song starts playing in my head:
One look at you and I can’t disguise, I’ve got…
Huuuuungry Eyes…
I feel the magic between you and I.
I’ve got hungry eyes for all the projects just waiting to be tackled. I. Am. So. Excited.
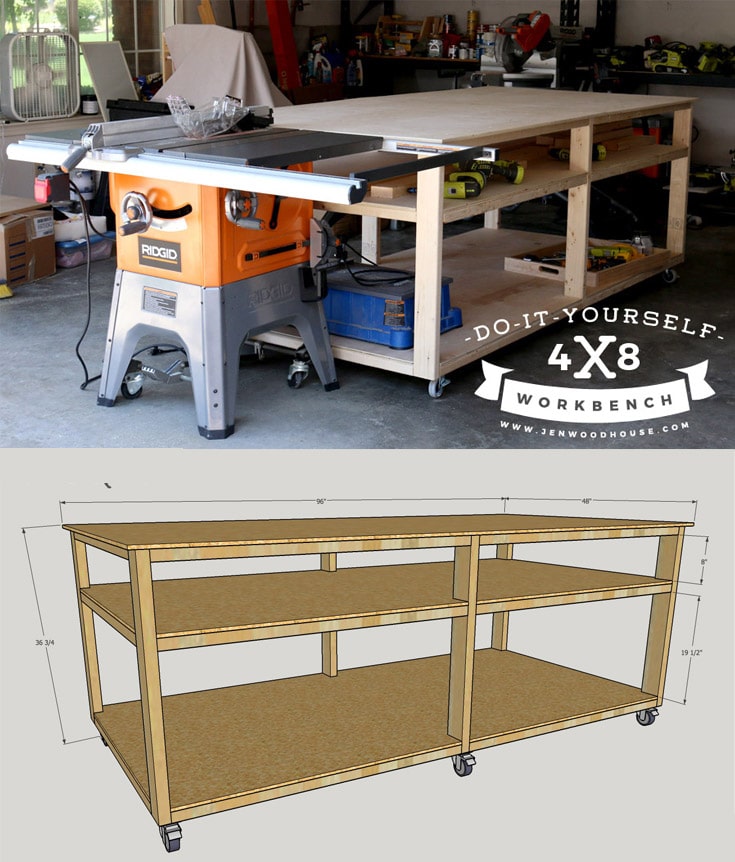
If you’d like to build this for your own workshop, I’ve drawn up the step-by-step plans for you!
I would love for you to pin and share this DIY workbench using the image below! Thank you and happy building!

WOW!! Jen that is amazing. I see some fun times in your future building on that workbench. The size is amazing. Now the trick is to keep it uncluttered. I would have that piled high with tools in no time!!
Thanks Crissie! That’s what that second shelf is for – to keep the clutter off the top. 🙂
I love this workbench! Perfect for an outfeed table and more. I need to build one of these. And get a better tablesaw;)
What software is used to make the detailed plans? Need to use it for my plans.
I use Google Sketchup to draw up my plans. There’s a free version!
Hi Jen, your workbench is amazingly functional and simple to make. Thank you so much for the plan and all the cute pictures. I really enjoyed them, very clear and easy to follow! I started to read your blog via anawhites, you become one of my fav bloggers now! I have a question about the lag bolts, is there any reason of using lag bolts instead of regular screws? Thanks!!
Thanks Ivy! I’m so glad you found your way here! 🙂 I used lag bolts because regular screws would have slipped through the opening on the casters. The lag bolts have a much larger, hex-shaped head that is bigger than the hole in the casters so it stays put. And I think it’s a heavier-duty option, so I went with lag bolts. Hope that helps!
thanks so much, Jen for your explanation. It really helps. I think I will just order what you used and follow your plan to build mine, except I will make it 2×12 to fit my space. I am still a newbie, may I ask a silly question, is there any benefit to overhung an inch on each side of the top?
No, I just like the look of it and also it allows me to “cheat” if the table isn’t perfectly square. Good luck and I’d love to see your bench when you’re done, so please tag me (@jenwoodhouse #jenwoodhouse) if you post it on social media! 🙂
Clamping, ladies, clamping! On a woodworking work bench, you want overhang (actually more like 2″) for clamping pieces during build up.
While I am new to the kreg pocket screws thing (Christmas gifts!), I’d have never thought to use them on a workbench. Nicely done! I would do one thing differently — use a continuous 2×4 for the long bottom rails, rather than splitting it and fastening to the center verticals. It would be stronger that way. And for the top as well.
Hi Peter,
I’m able to clamp without issues. Good point on the continuous 2×4 rails – if I were building this again, I’d definitely choose that route. Thanks for the comment!
I wonder how it works in conjunction with the table saw lift system ?
I just found your site and found it quite interesting.
With this plan for the Work Bench does it work well with a woodworking clamp?
Thanks! Yes, I clamp things to the bench all the time!
Thanks for the guide, i made mine 30×48 to fit my basement shop and its wonderful. I saw your project through a kreg email and nexi think i might attempt something like your printer table with the glaze. Wonderful plans and photos really helped this newbie!
Thanks so much Mike! Glad you stopped by!
Wonderful project! And the best part is your upbeat style, to many posters present things like a distasteful high school shop project, or that last 1 mile walk. This type of project will bring more folks into woodworking. Going back to an older post of a single (under 5′ round) ubit for holding power tools, this would work well as an extender. Thanks
Best Lew
Very nice, I want to build one
Hello Jen
Please help so I try to made this but boy oh boy major issue the guy at lowes cut everything wrong, I have 3 sheetwood at 5 feet 1 inch and 3 feet 1 inch and 27 2*4 now I have 6 legs at 3 feet 5 inch and all rails are 2 feet 10 inch so of course it don’t fit , can you please tell me what to cut the rails down to make it fit the sheetwood tops….THANKS IN ADVANCE BEEN WORKING ON IT FOR TWO DAYS
Just finished building this workbench. Fantastic build.
Purchasing a new Ridgid table saw (just like yours) this weekend. Looking forward to the use.
Awesome! Thanks for the kind words, Ben!
GREAT PROJECT! I love how happy you and your kids look!
How do like the Rigid Table Saw? How does your outfeed table match up? What would you suggest to do differently now?
Thanks TJ! I love my Ridgid table saw – the outfeed table is the perfect height. If I were to build it again, I think I’d make it half the width – I ended up using only half of the table anyway.
I just wanted to say that your workbench is awesome. I liked your workbench so much that I actually made one myself. However, I only have so much space in my basement for a workbench so when I made mine I shrunk the size to 2’x4′. I had a lot of fun building it and I really enjoy using it. Again, your workbench is totally awesome and I want to say thank you for the idea!
Hi Jen, your table looks great and I’ve downloaded plans – exactly what I wanted… 4×8 on casters and with an extra shelf in there, along with a minimal look. I am wondering one thing though – is this table actually pretty strong? It looks like it might be slightly on the weaker side, both due only have one shelf support piece crossing under the middle of each shelf (as opposed to several) and also I’m wondering if the 2x’s placed flat (as opposed to upright) are going to be as strong?
If there were anything you would do to beef up the strength (either by changing your original design, or adding extra pieces to it maybe) what might that be? Or do you think your design will be strong enough for me to load up a metal flat file to sit on the bottom shelf?
Sorry so many questions! But they all relate to max load of the table, and whether you think this is strong enough as is.
Thanks again, would love to hear a quick response back from you on this! And keep up the good work : ))))
Amy
Hey;
I know this is a little late in this post and I’m sure you’ve been using the heck out of this bench already but I’d thought I’d give you some input when you go to change out your top.
MDF or they now have HDF.
If your not sure it stands for Medium Density Fiber and High Density Fiber.
This stuff is very heavy duty especially the newer HDF. The best part about using it for workbench tops that doubles as an out feed table is that the material is so smooth you’d be amazed at how easily it is to feed your larger pieces thru the table saw. Once you get the new piece on go over it with “Bullseye” shellac from Home Depot or Lowes.
This helps to seal it from any water damage and increases how smooth the top is.
There’s plenty of times I’m working on a large cabinet and you need to be able to move it around to work on it.
Anyway just looking thru some rolling workbench images and saw yours and thought I’d give you that little bit of my experience.
Thanks so much for the tips, Mark!
This is a great design. I am usin it to build a 30” wide x 8’ work bench. One thing I did to enhance it was to make about 28” on one end height adjustable. Now I can put my compound miter saw, router table or planer at that end at tabletop height. Love the table saw option at the other end. Great job and great basic design.
Great design that I purchased from you. It gave me the basis of what I was looking for. I’m tall so I modified the legs to be longer, as in chest height. I also did my version in the 6ft length. I saw your design online at 1:30PM, went to HomeDepot for supplies, and completed it by 9:05PM, then went out to Karaoke with my wife. My cost was a little over $200, but I bought some big casters at over $60 with breaks on them. This design has freed up a lot of shelf space in my garage, which is a huge plus for me.
I was looking at photo after photo online and yours was the design that a guy like me needs for his shop. It’s the essence of practical. Well done.
Hi Jen,
I want to buy the plans for the 4 x 8 workbench. However, i want to find out if i can put couple of power sockets at the ends to use for Sautering ? if yes, how would you recommend that ?
Thanks
Naveen
Hi Naveen,
I can’t speak to how the power outlets would be installed, but the easier alternative would be to simply screw a power strip to the workbench. Hope that helps.
Jen, do you think this could be done with a Simpson Strong Tie WBSK kit (with a few extra brackets for the third row)? I think it would need to incorporate some RTF2Z brackets as well. Using the brackets will add to the overall strength of the table rather than using pocket screws. Any thoughts?
I love the table and think this would be a great addition to my new workshop. where can I find the actual plans and cut list? Thank you
Hi Craig!
You can find the plans here: https://gum.co/xxrZh
Also, if you’re interested, I redesigned this workbench and have plans for the new one here:
https://www.sprucdmarket.com/plans/workbench-with-storage-shelves/
Hope that helps!
Hi Jen.
I’ve needed a decent outfeed table for the table saw for years. Saw a photo of something similar to yours recently and just built myself a second bench, this time a HUGE one, at 48″W x 96″ L x 38″ H. I designed the height at 38″ to match my table saw (a Bosch 4000 on a portable base).
The concept from which I was working has the table saw “built into” one end of the workbench; however mine will need a wider rip fence system. Presently, the fence on this saw can only rip up to 24″ or 26″ wide. I designed the workbench REALLY wide for the occasional wide ripping job, so here we are in limbo.
SO: Did you upgrade your rip fence system on your Ridgid table saw? That would be very interesting to me. Thanks from Greg in California.
Hi Greg,
Thanks for your note! No, I didn’t upgrade the Ridgid fence. This is the fence that came with the saw.
I liked the concept, and since I have just acquired an older Beaver saw witha 6.5 foot tqble, it was obvious that I would need a run-off table to suit. Several details would need to be changed. The posts will be doubled 2 X 4 that can be tcut to accept the horizxontal pieces to reinforce the jointery. Pocket screws are nice but not functional beyond cabinetry. Not robust for heavy weights. The other detail is the lack of a center devider so as you push stuff onto the shelf, it does not get pushed out the other side. And yes, power bars on three sides is a must