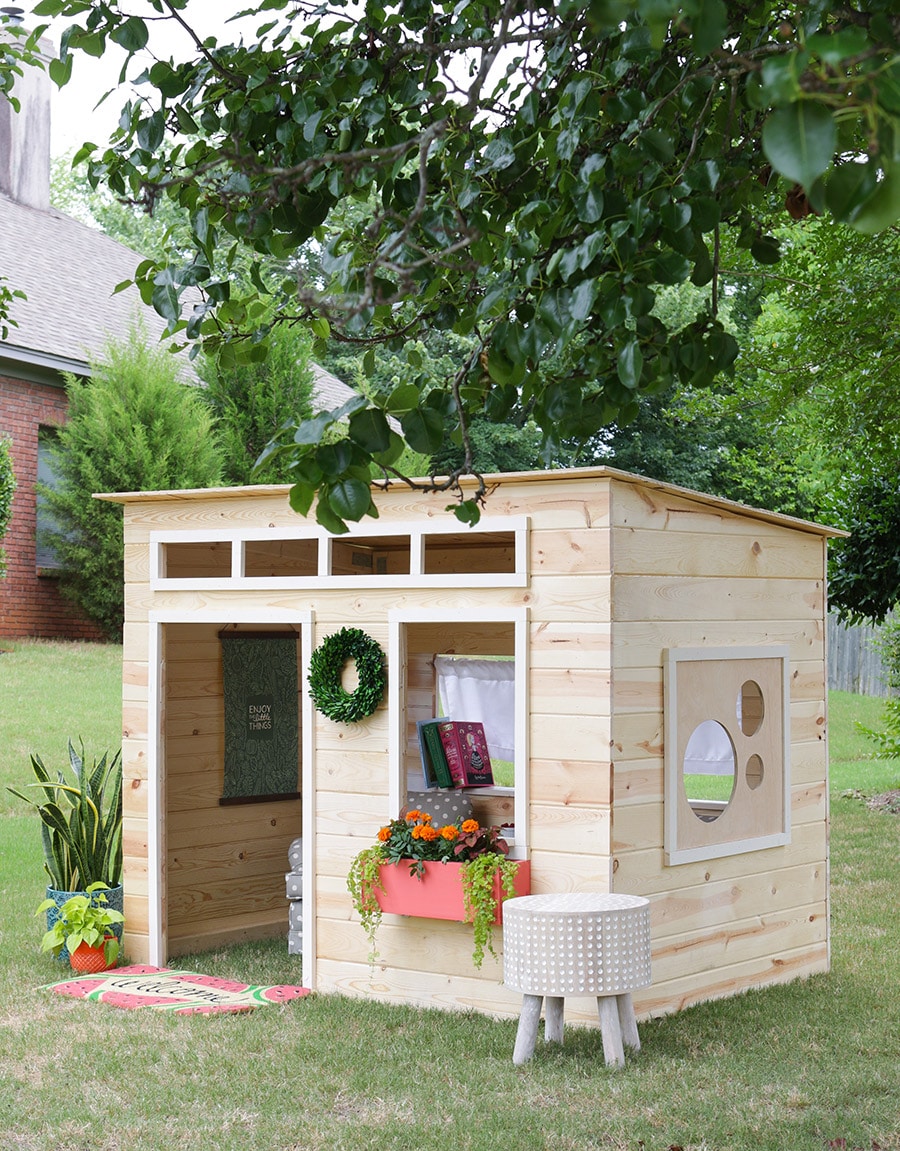
You guys. I can’t even tell you how insanely excited I am to share my latest build with you today. I mean, just look:
Is that not the most adorable thing you ever did see?
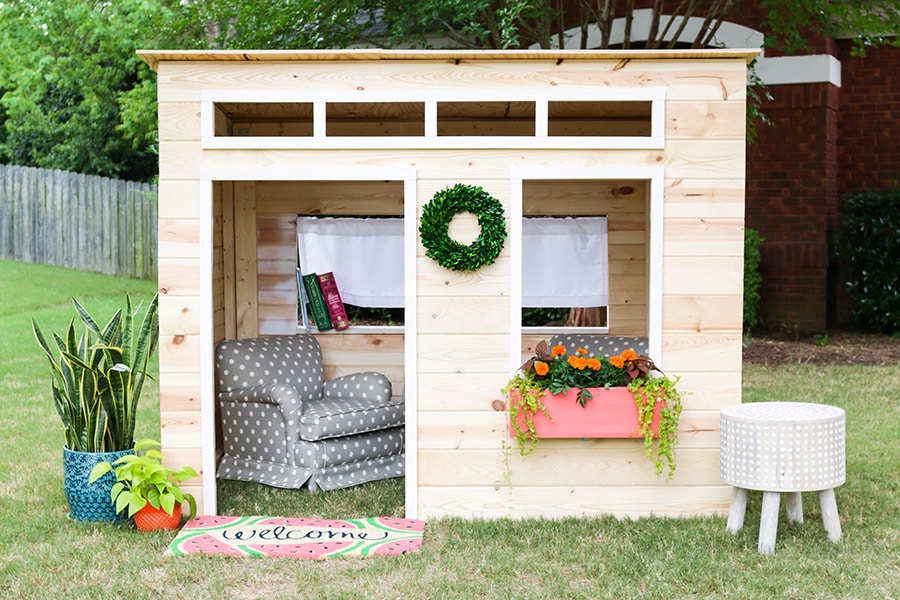
The tongue-and-groove planks!
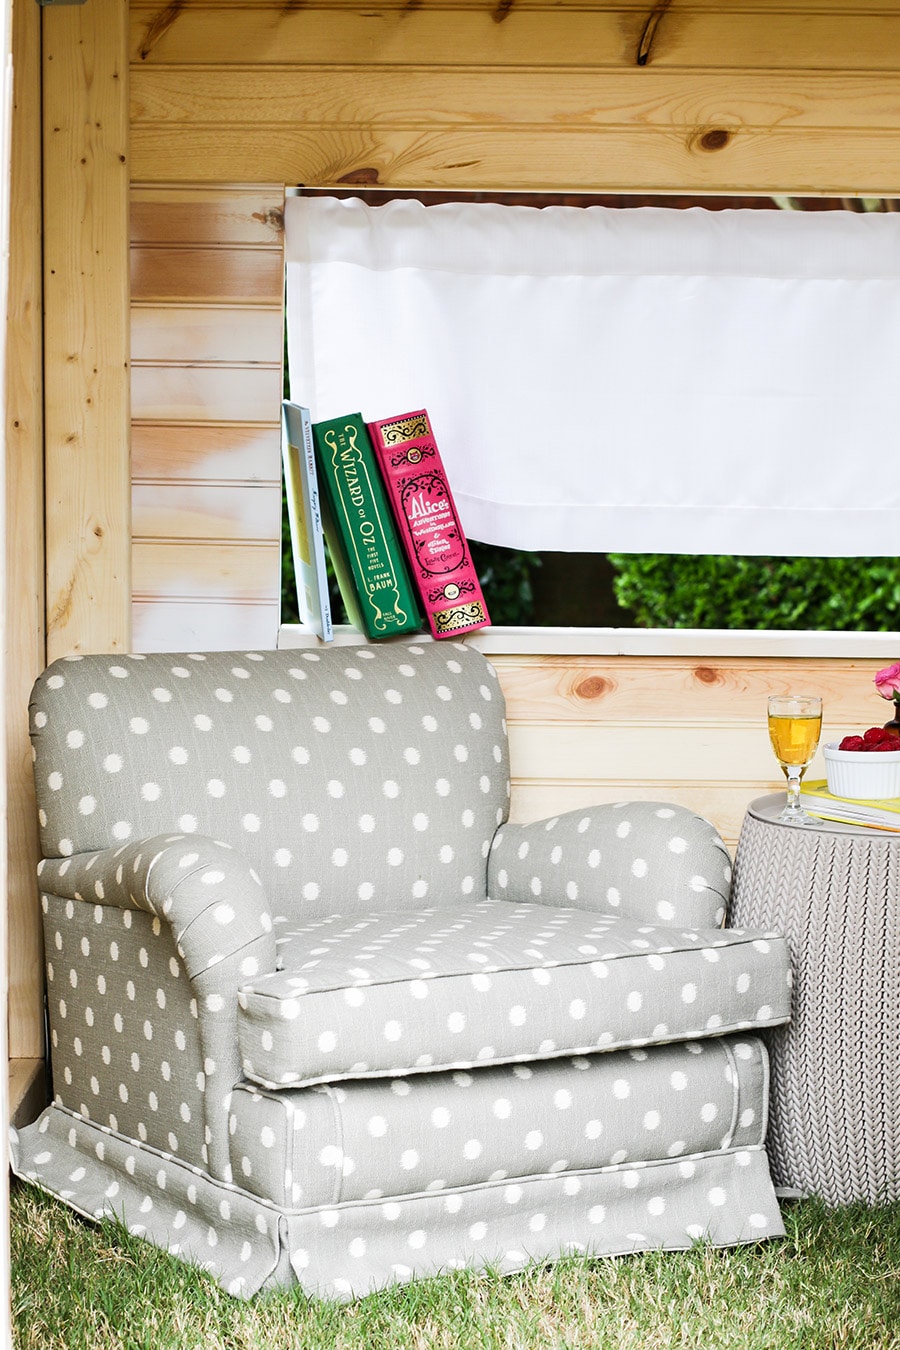
The transom window!
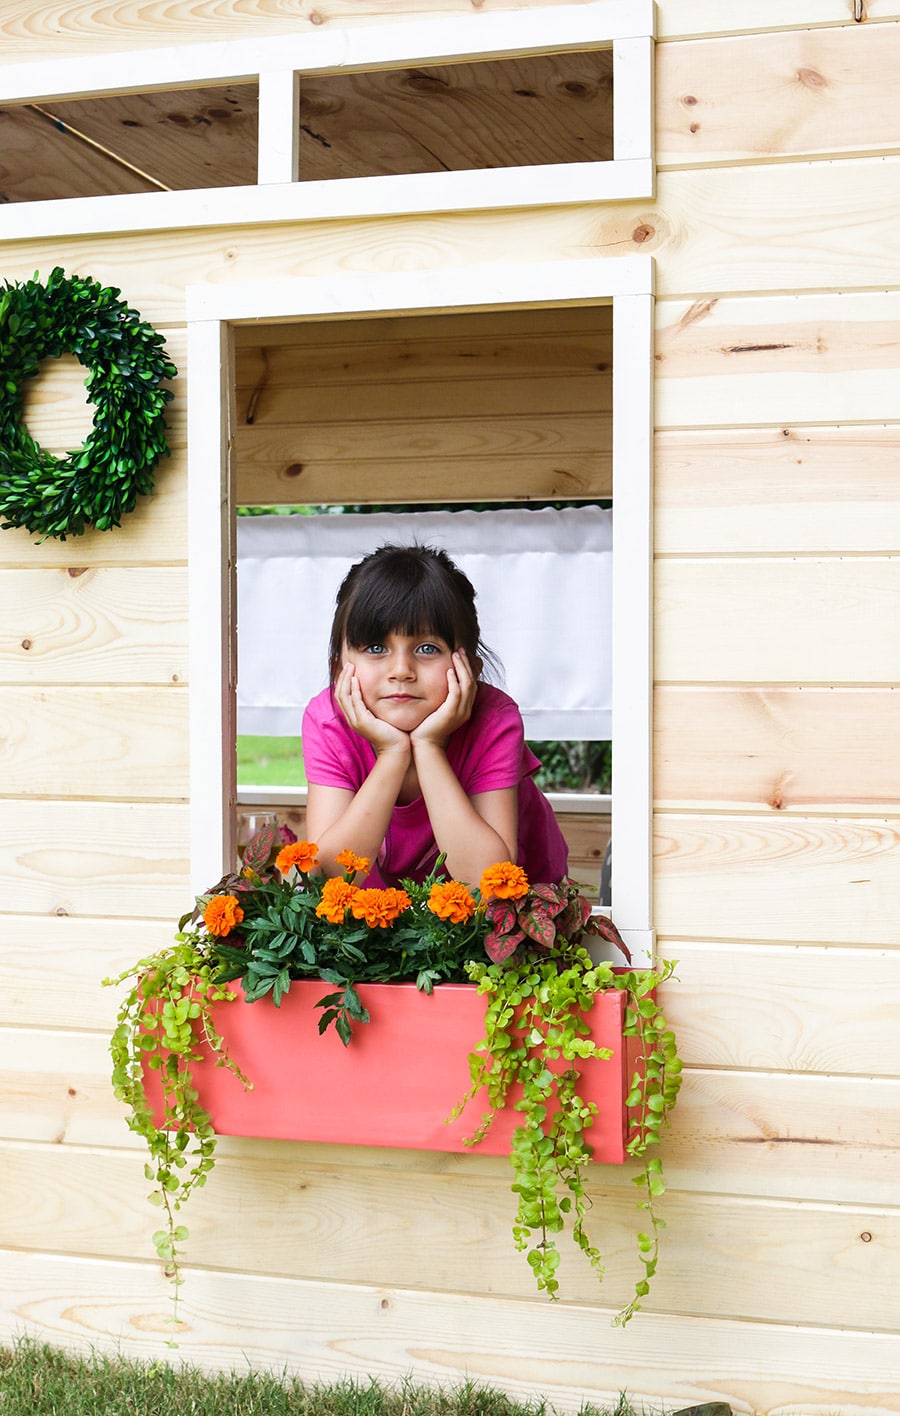
The flower box!
Seriously. I can’t even. I am dying over here.
Dyyyyying.
I’m dead.
Okay, okay, I know what you’re thinking. I can feel you judging me with your judgy eyeballs.
You’re thinking:
“But Jen, you said ‘INDOOR’ playhouse and we are CLEARLY OUTDOORS.”
I know, I knowww.
But trust me, if you saw my house right now, you would be thanking me for sparing your precious peepers. They would literally burn out of your head if you saw what a train wreck my house is right now.
We’re about to move (again! Army life) and we are buried in cardboard boxes and crap ev-er-y-where. I have no idea how we move so often and still manage to collect SO.MUCH.STUFF. We had a yard sale right before we moved out of our house in Kentucky and when we got to our new house, we had another yard sale because we were unpacking boxes, asking ourselves, “why the heck did we move this crap across state lines?!”
I blame my husband – I am a devoted de-clutterer. That’s my story and I’m stickin’ to it. #pinkyswear
So that’s why we had to move the INDOOR Kids’ Playhouse outside. Kinda like when it rains on your wedding day and you have to move the ceremony indoors. It’s totally like that, only the opposite. Isn’t it ironic? (see what I did there) #punny #alanis4ever!
Speaking of Alanis, have you heard her recent remake of “Ironic”? It.Is.EPIC.
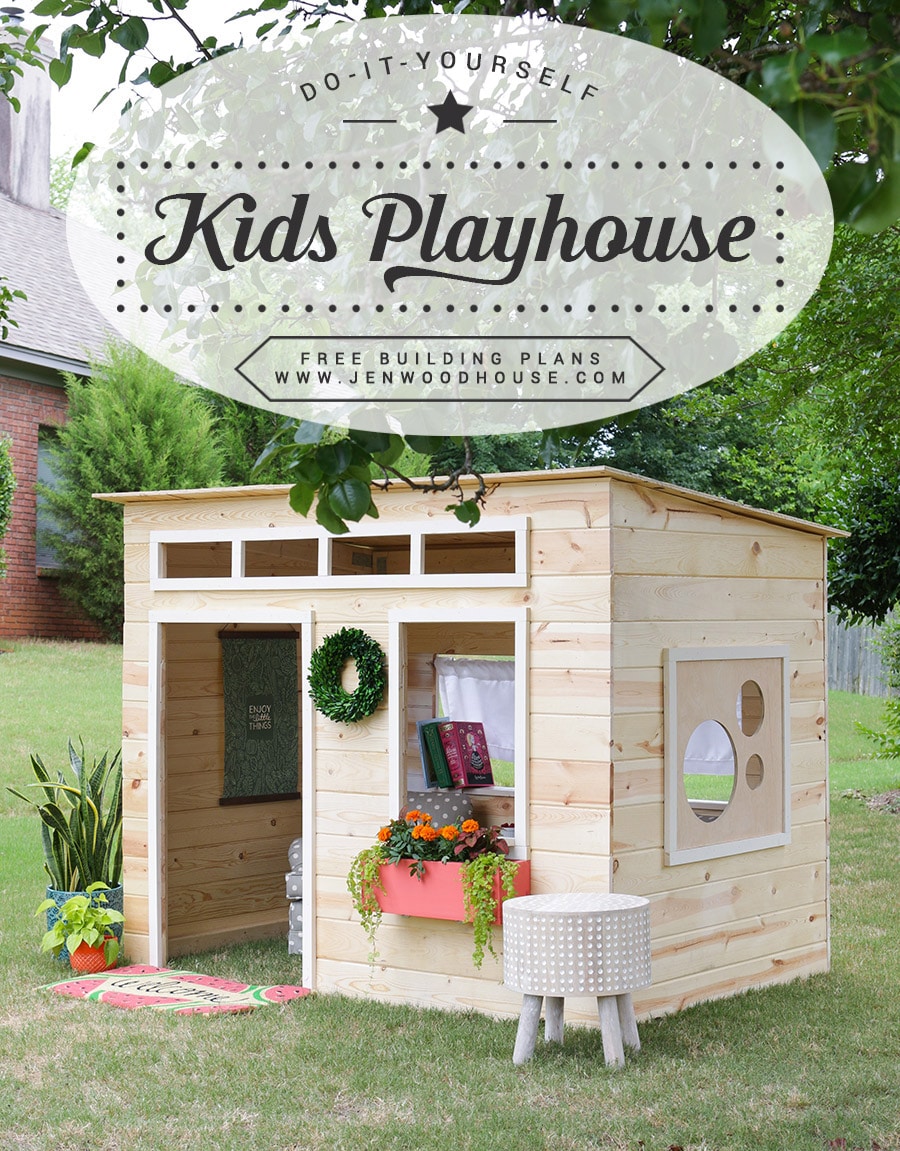
Okay, enough shenanigans. Are you ready to learn how to build this stinkin’ adorable DIY kids indoor playhouse? I’ve got you covered with the free building plans!
I teamed up with my good friends at Simpson Strong-Tie® for this build. If you’ll recall, I’m a fancy schmancy Brand Ambassador. Oh, you missed the announcement? Catch up here. We’ll wait.
Building with Simpson Strong-Tie® mending plates, tie plates, and angles make this build a very easy and straight-forward project. You guys. I built this playhouse in TWO DAYS.
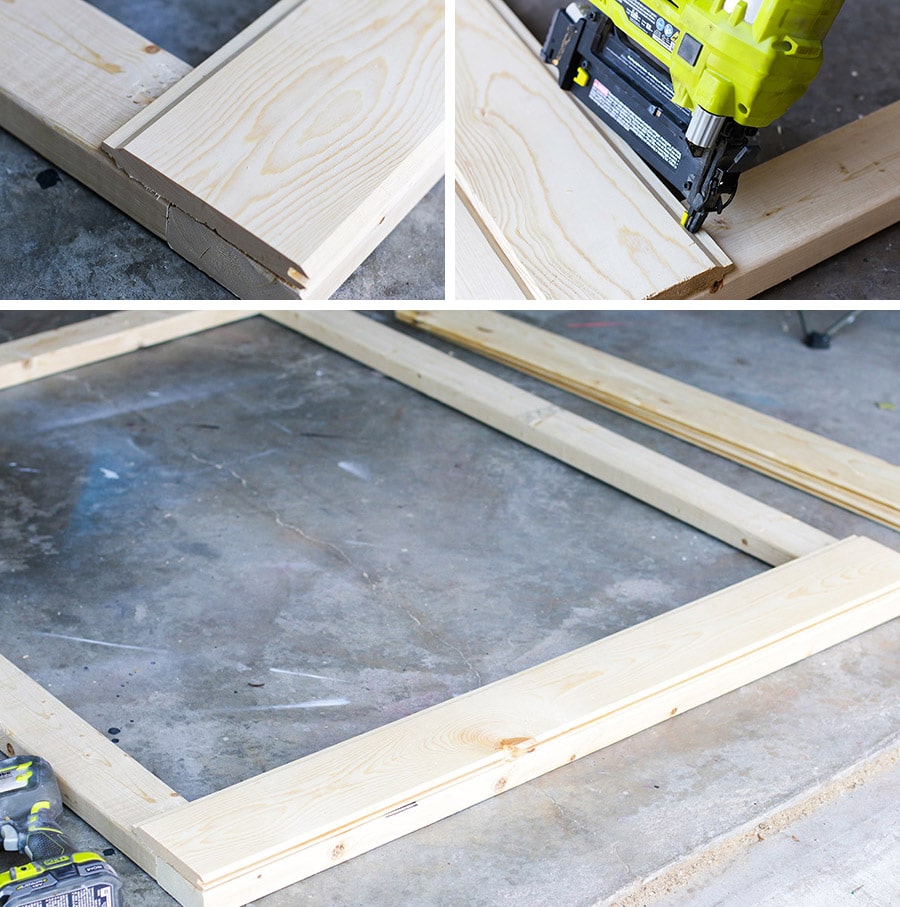
Basically, it goes like this: build the frame out of 2x4s. Nail the tongue-and-groove planks on and you’ve got a DIY kids playhouse. The Strong-Tie connectors make it so easy and super quick and you don’t need any fancy tools to do it – just a drill, a saw, hammer, and brad nailer and you’re good to go.
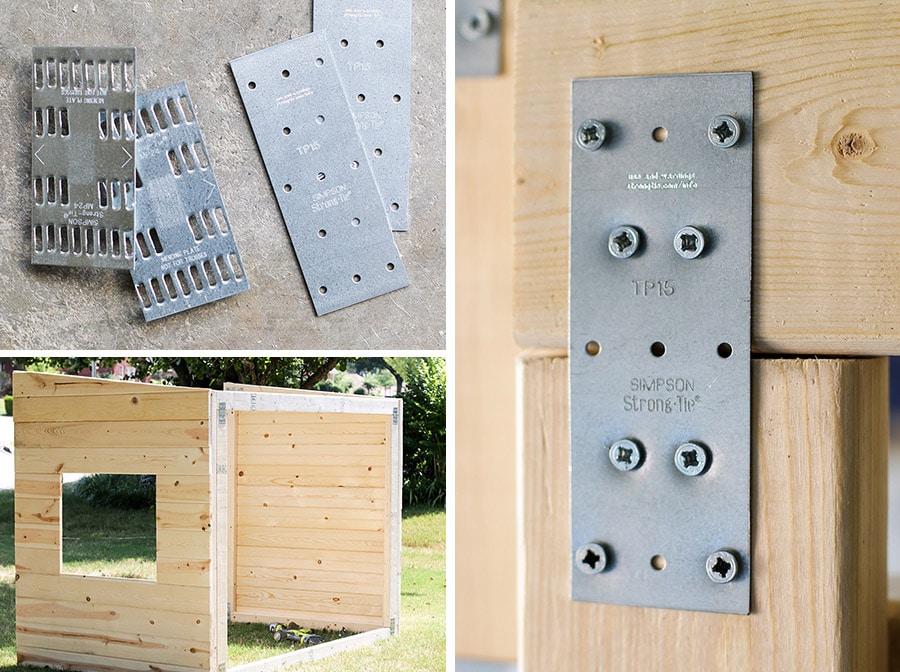
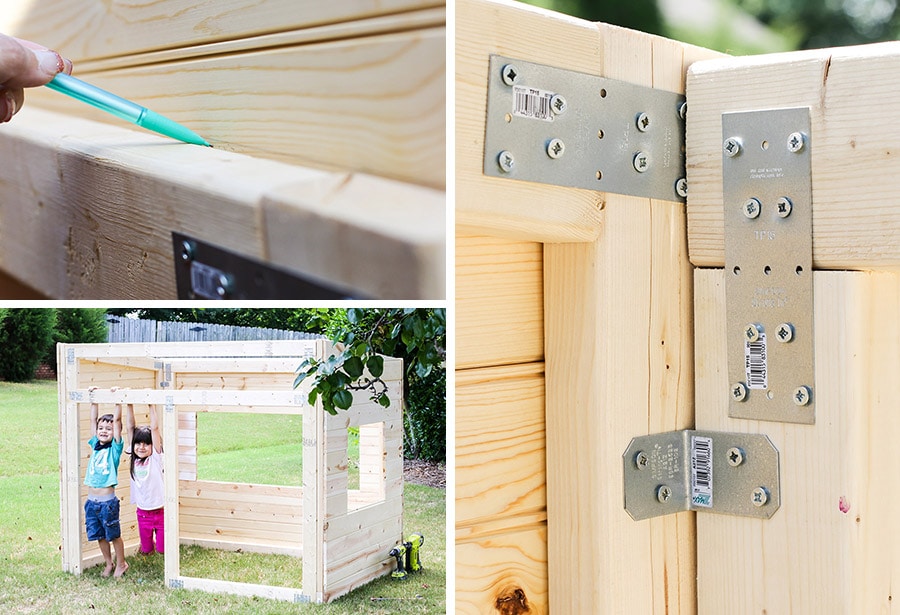
You’ll see from the building plans that I chose to use Simpson Strong-Tie® MP24 mending plates on the exterior sides of the frames so that the tongue-and-groove boards would sit flush to the frame and I used Simpson Strong-Tie® TP15 tie plates on the interior sides of the frames to add extra stability and strength.
As soon as the frame was built, I used my brad nailer to nail the tongue-and-groove planks on. Start at the bottom, with the tongue facing up, then stack the next board above it, interlocking the tongue into the groove. Shoot a few nails at a 45º angle into the tongue (as shown in the photo below) to secure the board to the frame. By nailing at the tongue, you’re able to hide the nail holes a little easier.
The reasons I chose tongue-and-groove boards over regular lumber is because 1) I love the charming look of it and 2) they’re so much cheaper! At my local Home Depot, one 1x6x8′ tongue-and-groove board costs $5.32 and one 1x6x8′ common board is $11.72. I just saved you half your money. You’re welcome.
If you follow me on Instagram or Facebook, you’ll have seen a sneak peek of this project. My kiddos were too excited, I pretty much had to build around them. It’s a good thing they’re cute little monkeys.
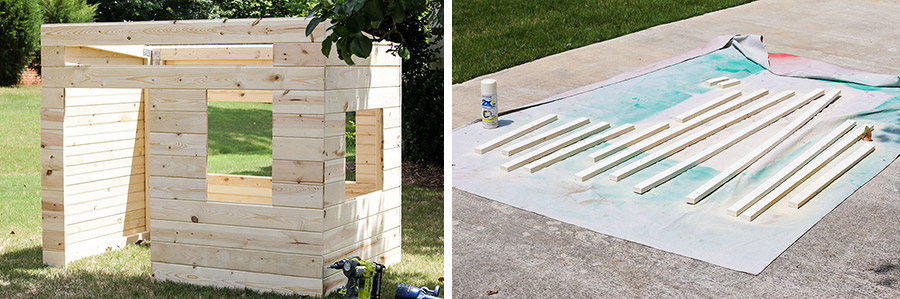
Because the roof is angled, the top boards will have to be cut to fit. Hold the top board in place (don’t attach it just yet), mark the line, and cut off the excess with a jigsaw or circular saw. You’ll only have to do this for the two sides. The front and back panels are all straight cuts. Hallelu!
Once the four separate panels were built, I used Simpson Strong-Tie® A21Z angles to join all four sides to construct the house. I used 3 angles at each corner. This way, the playhouse can be easily assembled and disassembled, which is a must for military families like us.
Ta-da! The playhouse is up! Now is a good time to stain or paint, and finish the house, before adding the trim and other details. I chose to leave the wood natural and simply sprayed a few coats of clear polyurethane on the playhouse to protect the wood. I spray-painted the trim pieces white then simply glued and nailed them onto the playhouse.
 Finally, screw the roof on with 1-1/4-inch wood screws driven into the 2×4 frame. I chose plywood for the roof, but wouldn’t this look cute with actual roof shingles or maybe a corrugated roof panel? Totally adorbs. You could even drape a large piece of fabric over the top for the roof, if you wanted to. You know, since this is an INDOOR playhouse.
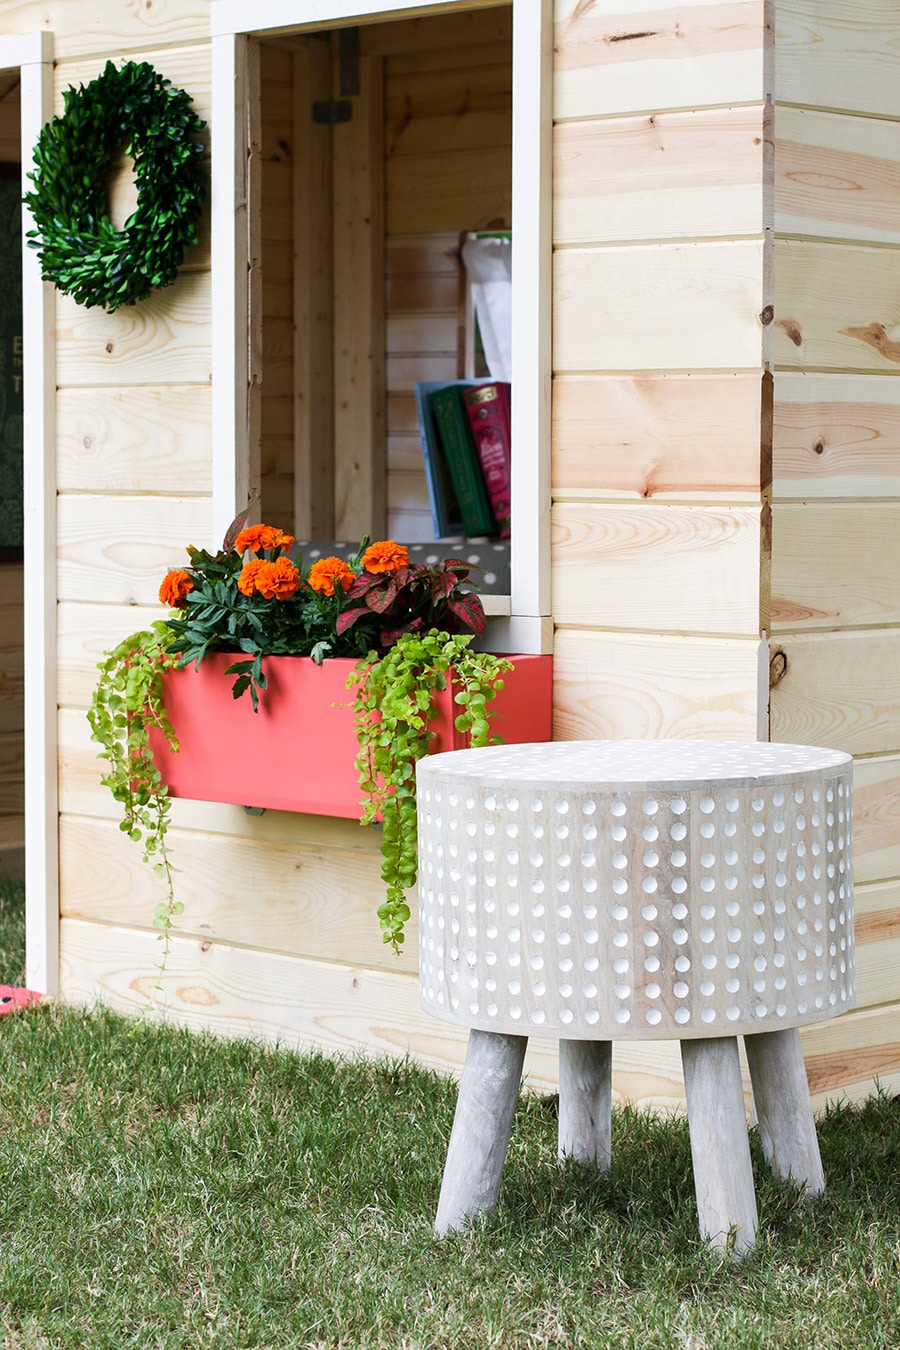
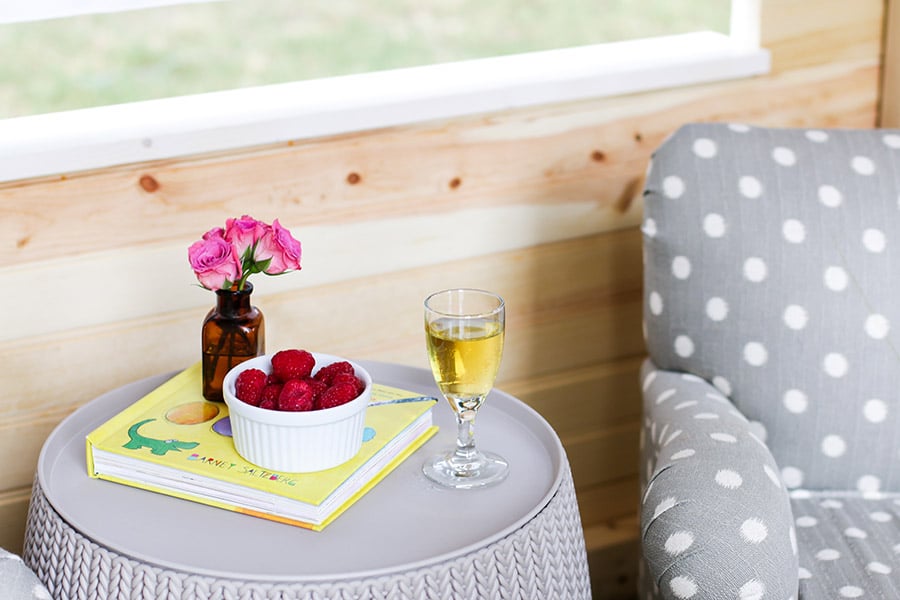
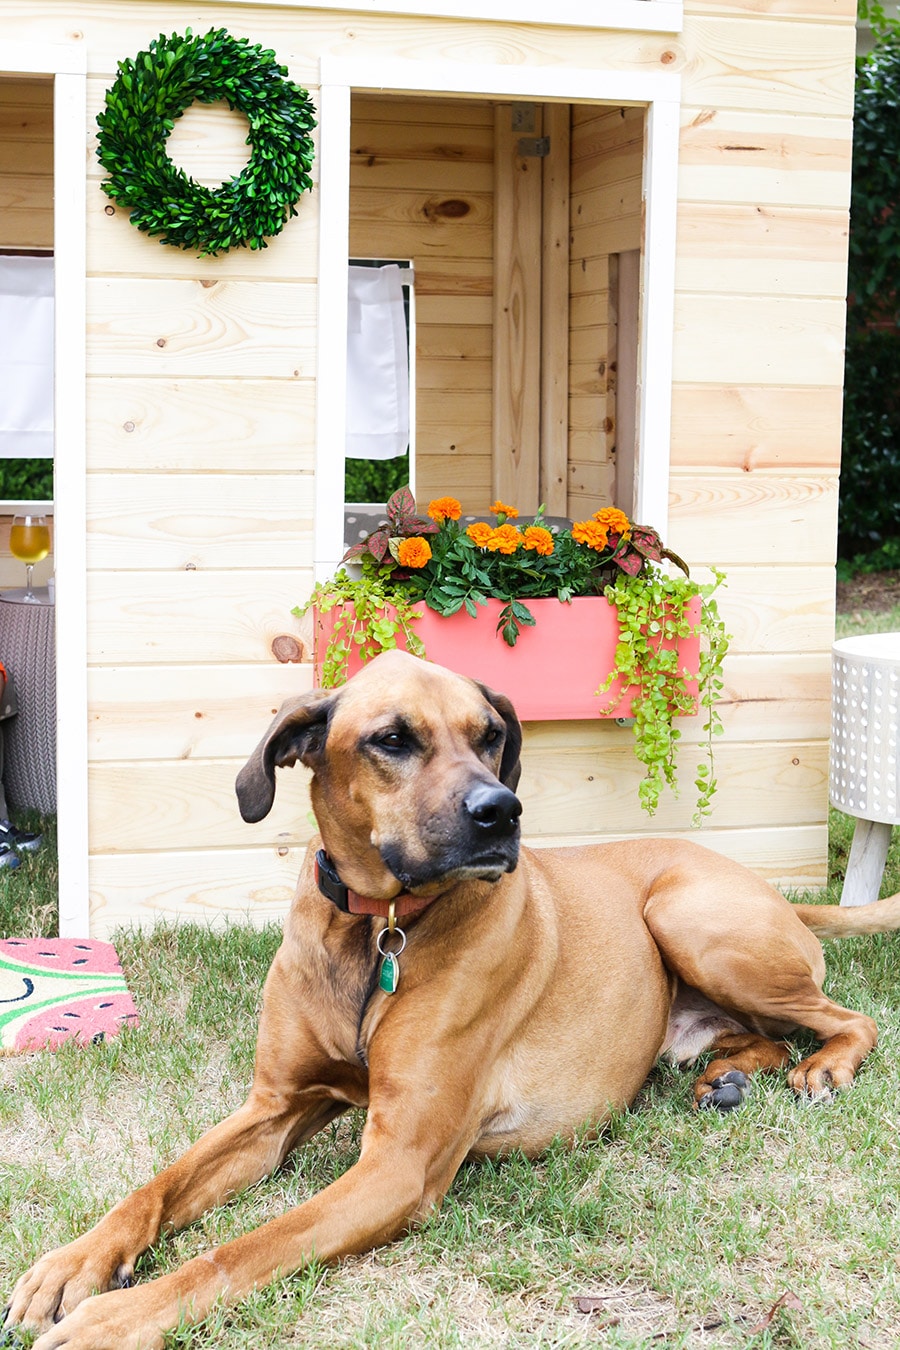
I’m kind of in love with this tiny flower box too. I made it out of a scrap 1×6 board. My daughter picked out all the flowers for her tiny garden. That creeping jenny just kills me.
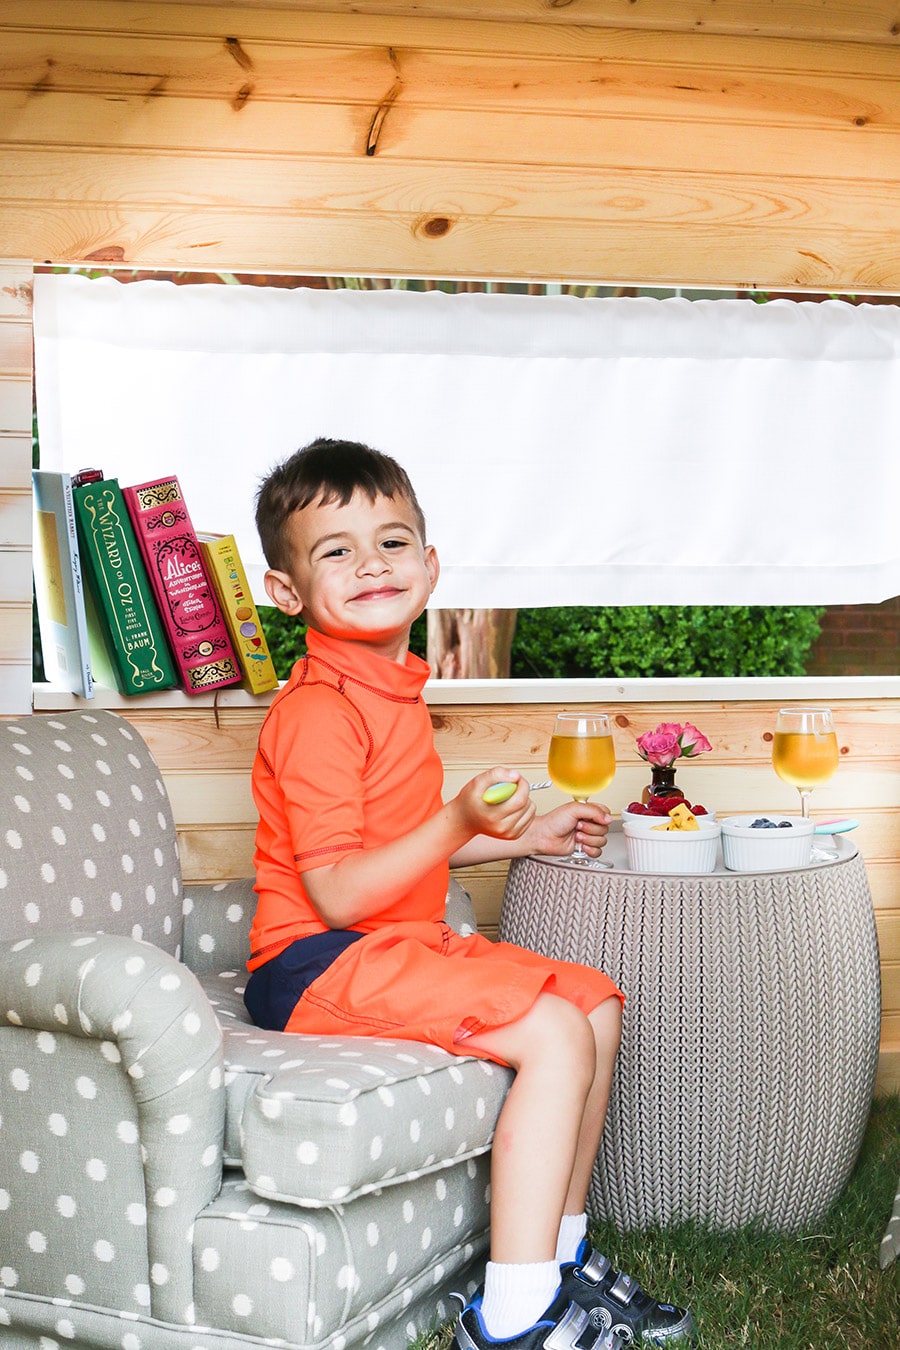
By the way, that’s apple juice, not alcohol, in that tiny wine glass. What kind of monster do you take me for? #motheroftheyear
If you’d like to convert this indoor playhouse to one that is suitable outdoors, I would recommend using exterior-grade plywood and finishing it with several coats of exterior-grade polyurethane. You may even want to use cedar or redwood, since those wood species are naturally resistant to decay. Also, I’d replace the roof with one that is suitable for outdoors.
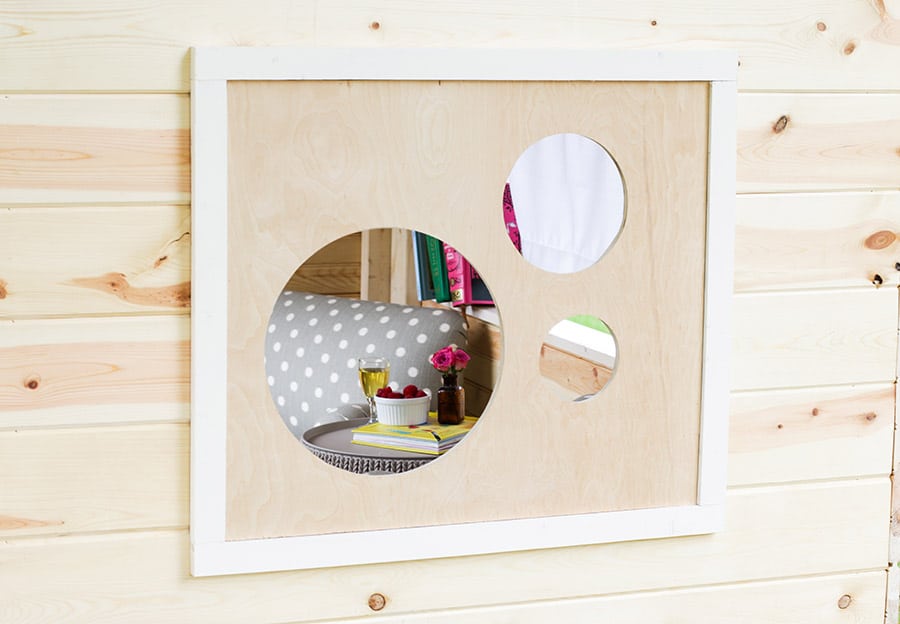 Aren’t these circle windows cute? You could certainly build a normal window, but who wants normal? I think the circle windows add a sweet touch of whimsy.
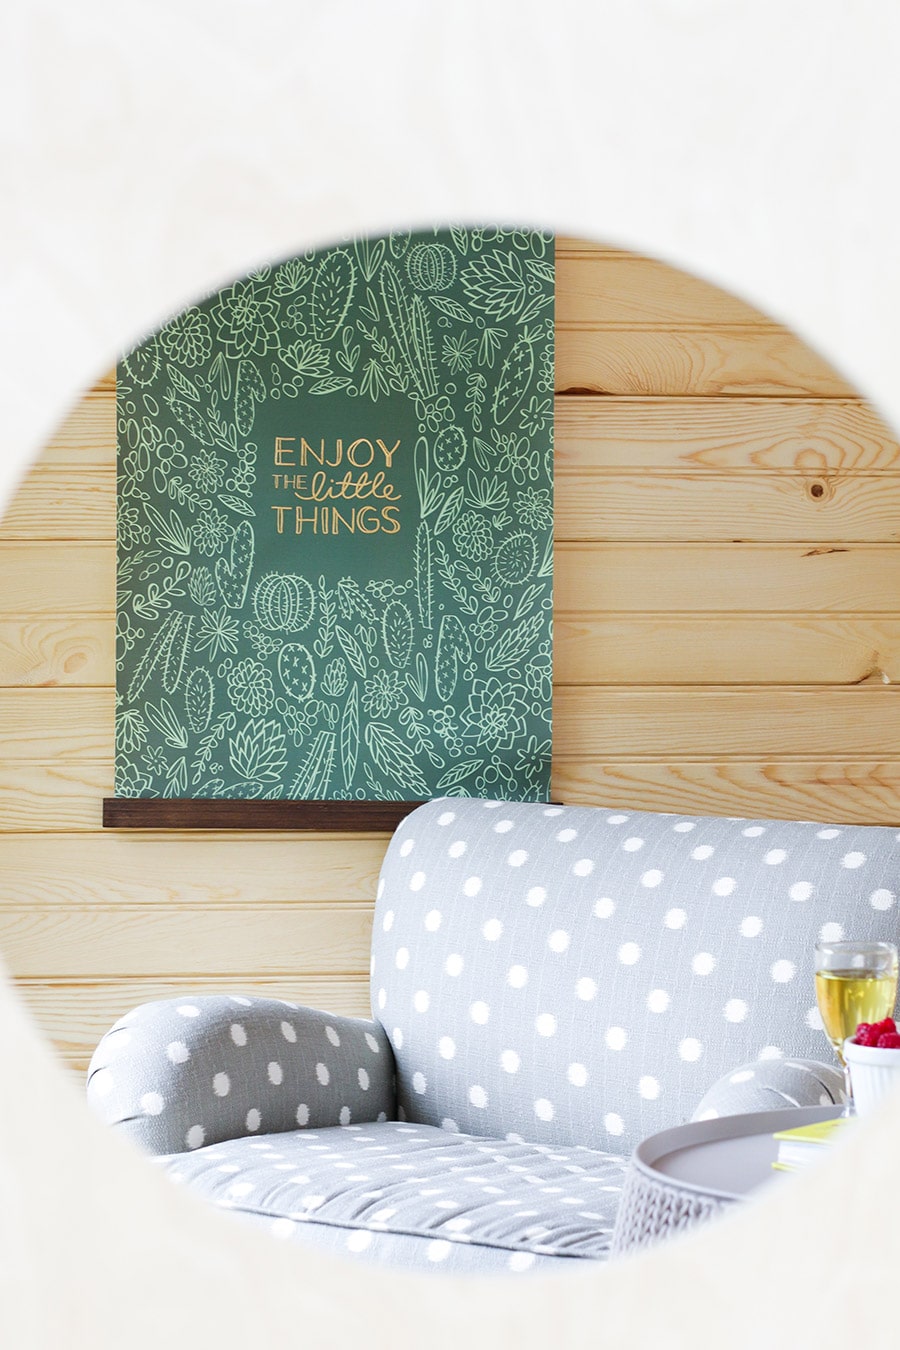
Enjoy the little things. Hahaha… get it?
It’s funny because this is a little house for little people and the sign says… okay. You get it.
Speaking of little, get a load of this guy. This is Watson, our giant Rhodesian Ridgeback. I suppose when the kids get tired of this playhouse, we could convert it to Watson’s dog house. It’s a two-fer. #winning
He looks larger than life next to this tiny house. Let’s film our very own reality show and name it: Tiny house. Giant dog.
 My kids are absolutely in love with their new playhouse. They love having picnics and story time in here. Maybe we’ll even camp out in here one night.
Yeahhh… probably not. My idea of ‘roughing it’ is staying at a hotel with no wi-fi. #firstworldproblems
 My son wanted to wear the most obnoxious thing he owned. They went to the zoo earlier in the day and he said he wanted to wear this outfit so that Daddy would not lose him.
Oh, look. He succeeded.
What do you think? Do you want to build your very own DIY Kids Indoor Playhouse?
Okay, so let’s talk numbers. This project cost me about $250 in building materials and took 2 days to build. Not too shabby, right? You can totally knock this out in a weekend. Be sure to download the free building plans so you can build your own DIY Kids Indoor Playhouse!
If you’re interested, here’s a source list:
Preserved Boxwood Wreath / Carved Wood Stool / Basket Side Table / Upholstered Chairs
Enjoy the Little Things Banner / Welcome Mat / Teal Ceramic Planter / Orange Ceramic Planter
Be sure to PIN IT so you don’t forget it!
 *This post contains affiliate links. To read my full disclosure policy, please click here. A huge thank you goes to Simpson Strong-Tie® for partnering with me on this project. All efforts, opinions, giant canines, and happy children are my own.


Finally had a kid and made him this for his 3rd Birthday! It’s a ramen shop 😀
Awesome! And I love ramen! If you’d like to share your project on my site, you can do so here: https://jenwoodhouse.com/share-your-project
How do I get the plans for the modern clubhouse? I would like to build one for my son this week.
This would also be a good plan for a chicken coop with a few minor adjustments. I may try it next week. Thanks for the plan and inspiration!
I can’t find the plans for this project anywhere. I direct link would be immensely helpful!!
Not sure if you know but someone is selling “plans” for this playhouse on Etsy using your photos
https://www.etsy.com/listing/1249401097/2×4-playhouse-plans-for-kids-wooden?click_key=5bc3f302e6be99836eed6d4cd943f6b0ec7ea7c5%3A1249401097&click_sum=f37e75d7&ga_order=most_relevant&ga_search_type=all&ga_view_type=gallery&ga_search_query=playhouse+plans&ref=sr_gallery-1-15
Thank you for the heads up, Rachael! I’ve reported that thief to Etsy. He’s also selling my free plans for a cedar planter. Hopefully people don’t waste their money on plans that are available here for free!
Is there a list of what i could take to home depot so I make sure what all i need is cut right incase they don’t have it please if this is available let me know if i missed it somewhere, this is a nice playhouse my grandbaby would love
Hi Danielle,
Yes, you can get the PDF plans sent to your email and print them out! Happy building!
Please send me the plans for the kids indoor playhouse. I’ve tried to get the plans but they don’t appear in my inbox. Thank you!
Little confused by the plans, is the number and size of tongue and grove boards under the shopping list?
I would like the free plan, and FYI they are still selling your plan on ETSY!
Sent, thank you Marie! And that’s disappointing to hear about people stealing my plans to sell them elsewhere. Thank you for the heads up!
Just getting started on this and absolutely am loving the process so far. I do have one question. The 1″ x 6 “x 8′ (L) Tongue and Groove boards require many 48″ cuts. I noticed the plans only call for 22 boards. Is the intention to have 1 full board cut into 2 to make the 48″ boards? ultimately it’ll be shorter due to the kerf on my blade, so can the boards be slightly shorter than 48”?
Love the design of this playhouse. Can you treat the wood to make it weatherproof to use outside, as the plan says inside playhouse? Also I may have missed it but following the plans what are the dimensions for the playhouse when built? We have a tall 4 year old and a 1 year old and want to make sure it’s suitable for them both. Many thanks.
I’m going to use this plan to build a chicken coop 🙂 Thank you!
Can someone share the plans with me?
I keep trying to get them and I don’t get an email.
Hi Kyle,
Plans are automatically sent, but can sometimes end up in the spam folder. I just resent them, so please let me know if you’re still unable to access them. Thanks!
I cannot seem to find the plans in my inbox or spam 🙁
Hi Jen, love the design and would like to build one. I subscribed but have not seen the plans in my inbox/junk folder. May you please forward them.
Hello I have signed up but have not received the plans for this lovely house, want to build it for my daughters, thanks.
Hi there have checked my spam folder and tried many times to get the plans, but to no avail? Is it possible to let me know how to get these? Thank you so so much.
I just resent the plans – hopefully you get them this time!
HI I put my email in several times for the plans but never received them could you send them to me directly. Also checked both inbox and junkmail thank you so much for your time the playhouse is so cute
Hi Angela,
I just resent them – check your spam folder also. Thanks!
How can I get the plans for this playhouse?
Sent! Please check your spam folder.
I can’t find the plans for this project anywhere. I direct link would be immensely helpful!!
I recently tried several times to sign up for the download for the playhouse plans. I have not received them and they are not in junk or spam folder. Could you send them to me? Thank you so much!
Hi, could I get the plans of the playhouse please?
Not sure how to get the plans, can you send to me
Hello, I tried putting in my email twice today, but the plans did not arrrive, I checked all my inboxes. Is it possible for you to resend them to me.
Thank you so much!
where can i find these plans