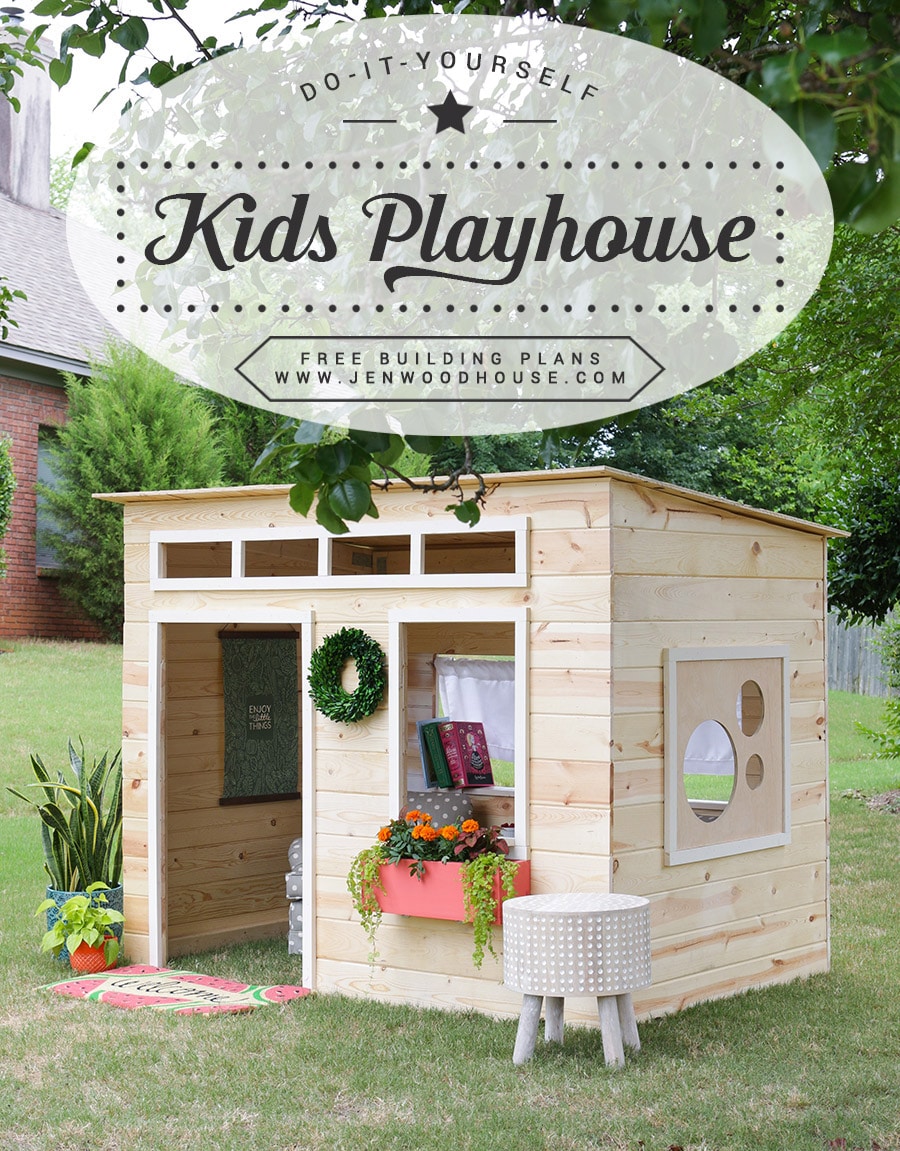
You guys. I can’t even tell you how insanely excited I am to share my latest build with you today. I mean, just look:
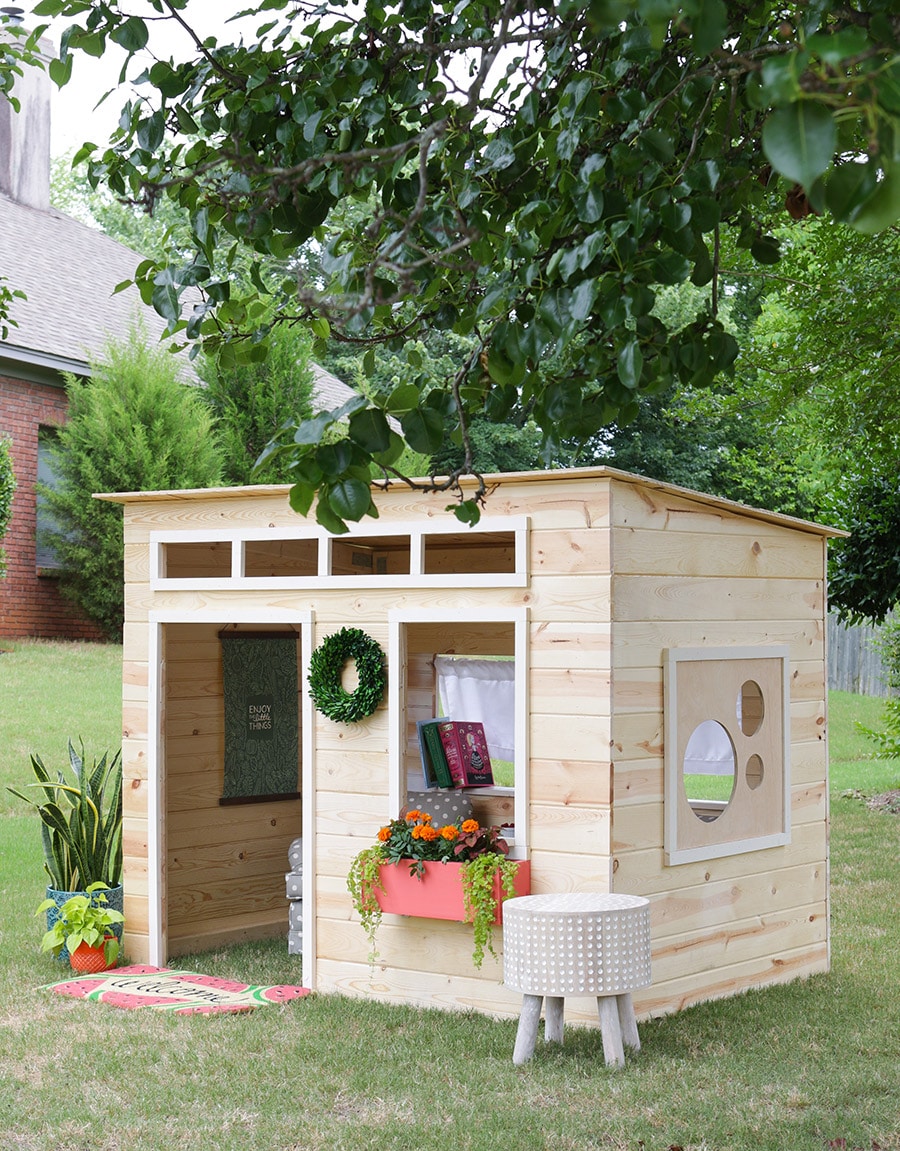
Is that not the most adorable thing you ever did see?
The tongue-and-groove planks!
The transom window!
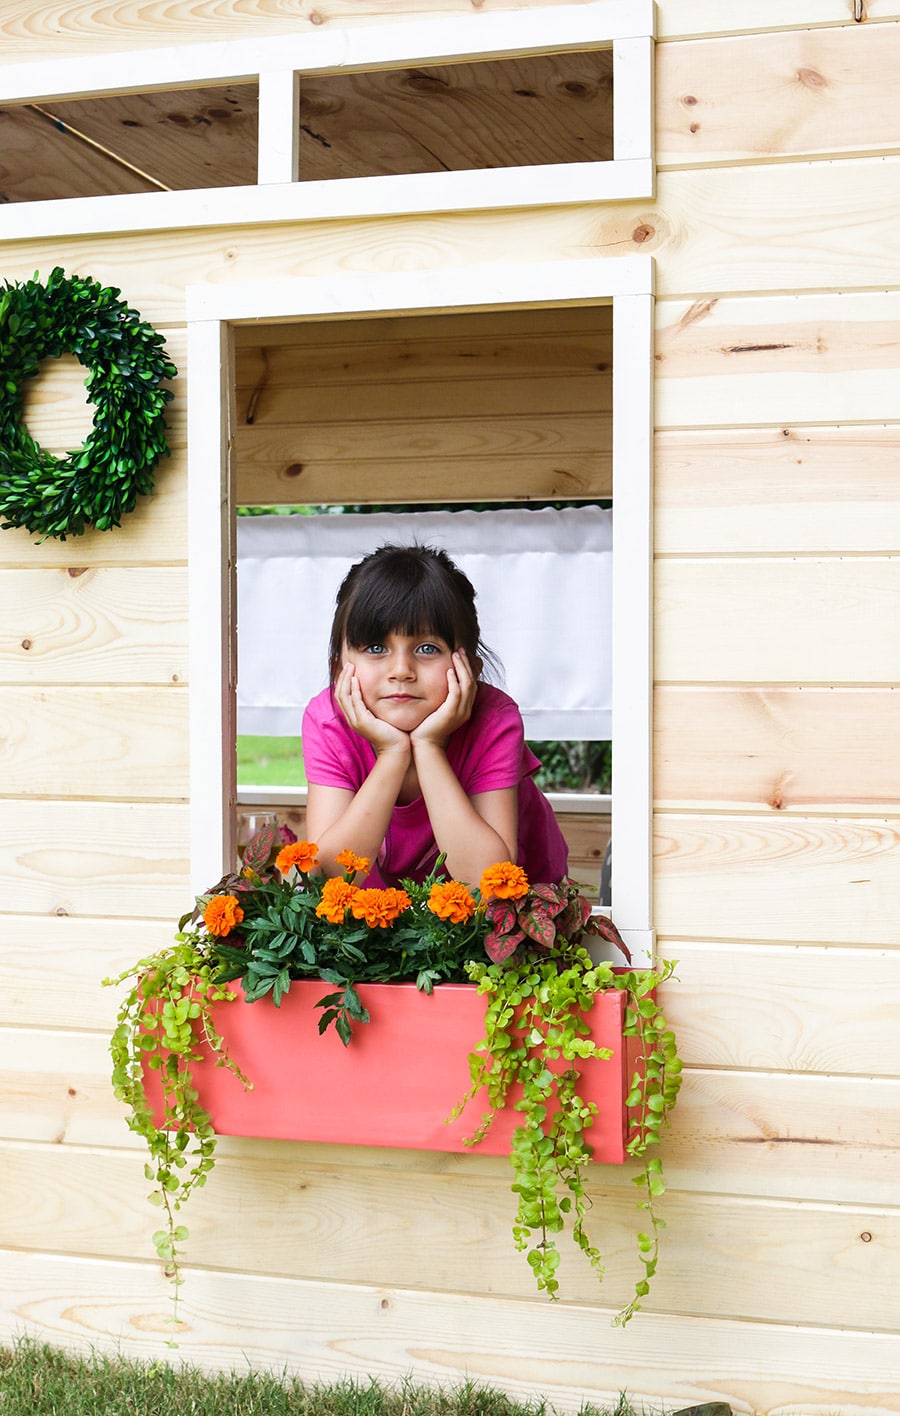
The flower box!
Seriously. I can’t even. I am dying over here.
Dyyyyying.
I’m dead.
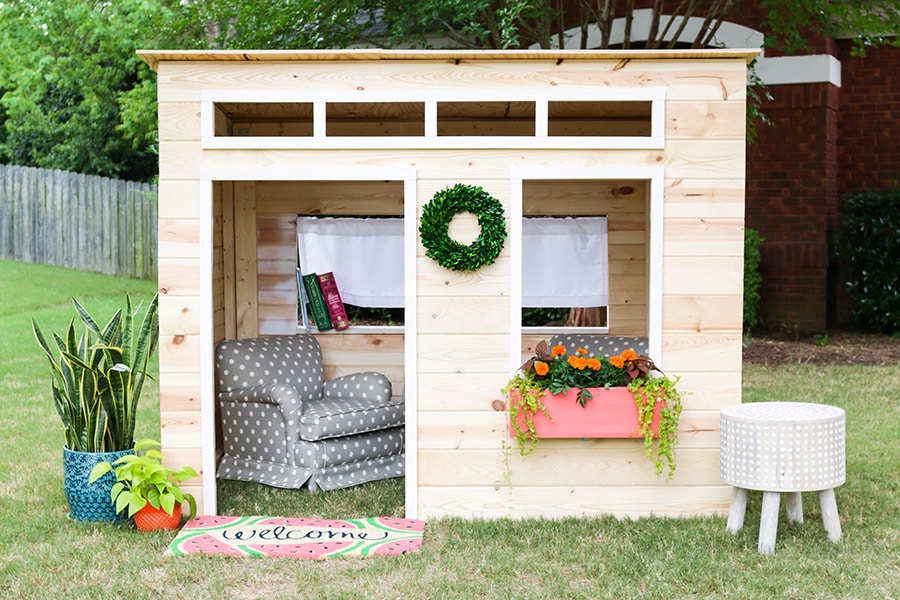
Okay, okay, I know what you’re thinking. I can feel you judging me with your judgy eyeballs.
You’re thinking:
“But Jen, you said ‘INDOOR’ playhouse and we are CLEARLY OUTDOORS.”
I know, I knowww.
But trust me, if you saw my house right now, you would be thanking me for sparing your precious peepers. They would literally burn out of your head if you saw what a train wreck my house is right now.
We’re about to move (again! Army life) and we are buried in cardboard boxes and crap ev-er-y-where. I have no idea how we move so often and still manage to collect SO.MUCH.STUFF. We had a yard sale right before we moved out of our house in Kentucky and when we got to our new house, we had another yard sale because we were unpacking boxes, asking ourselves, “why the heck did we move this crap across state lines?!”
I blame my husband – I am a devoted de-clutterer. That’s my story and I’m stickin’ to it. #pinkyswear
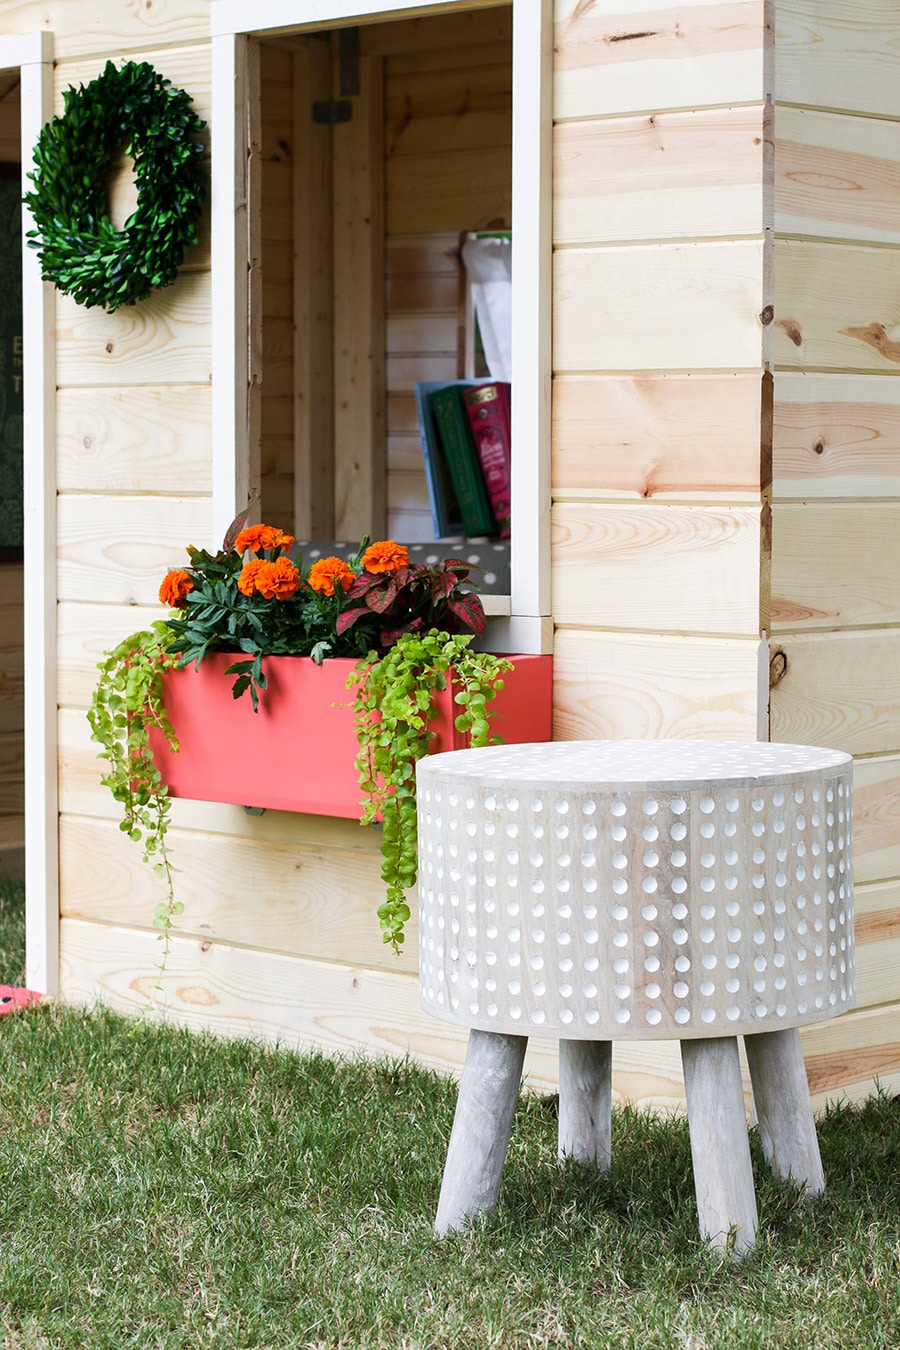
So that’s why we had to move the INDOOR Kids’ Playhouse outside. Kinda like when it rains on your wedding day and you have to move the ceremony indoors. It’s totally like that, only the opposite. Isn’t it ironic? (see what I did there) #punny #alanis4ever!
Speaking of Alanis, have you heard her recent remake of “Ironic”? It.Is.EPIC.
Okay, enough shenanigans. Are you ready to learn how to build this stinkin’ adorable DIY kids indoor playhouse? I’ve got you covered with the free building plans!
I teamed up with my good friends at Simpson Strong-Tie® for this build. If you’ll recall, I’m a fancy schmancy Brand Ambassador. Oh, you missed the announcement? Catch up here. We’ll wait.
Building with Simpson Strong-Tie® mending plates, tie plates, and angles make this build a very easy and straight-forward project. You guys. I built this playhouse in TWO DAYS.
Basically, it goes like this: build the frame out of 2x4s. Nail the tongue-and-groove planks on and you’ve got a DIY kids playhouse. The Strong-Tie connectors make it so easy and super quick and you don’t need any fancy tools to do it – just a drill, a saw, hammer, and brad nailer and you’re good to go.
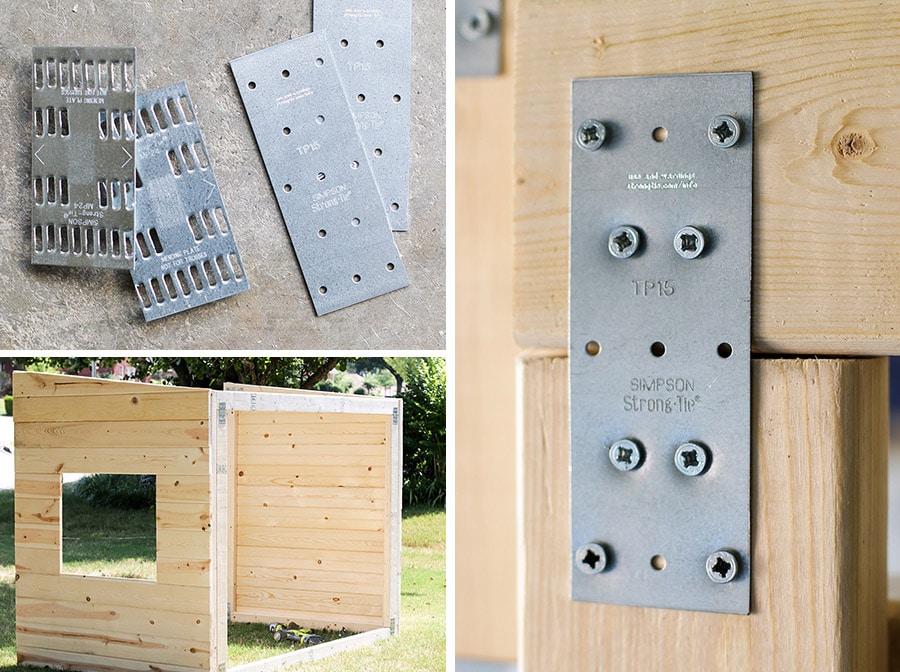
You’ll see from the building plans that I chose to use Simpson Strong-Tie® MP24 mending plates on the exterior sides of the frames so that the tongue-and-groove boards would sit flush to the frame and I used Simpson Strong-Tie® TP15 tie plates on the interior sides of the frames to add extra stability and strength.
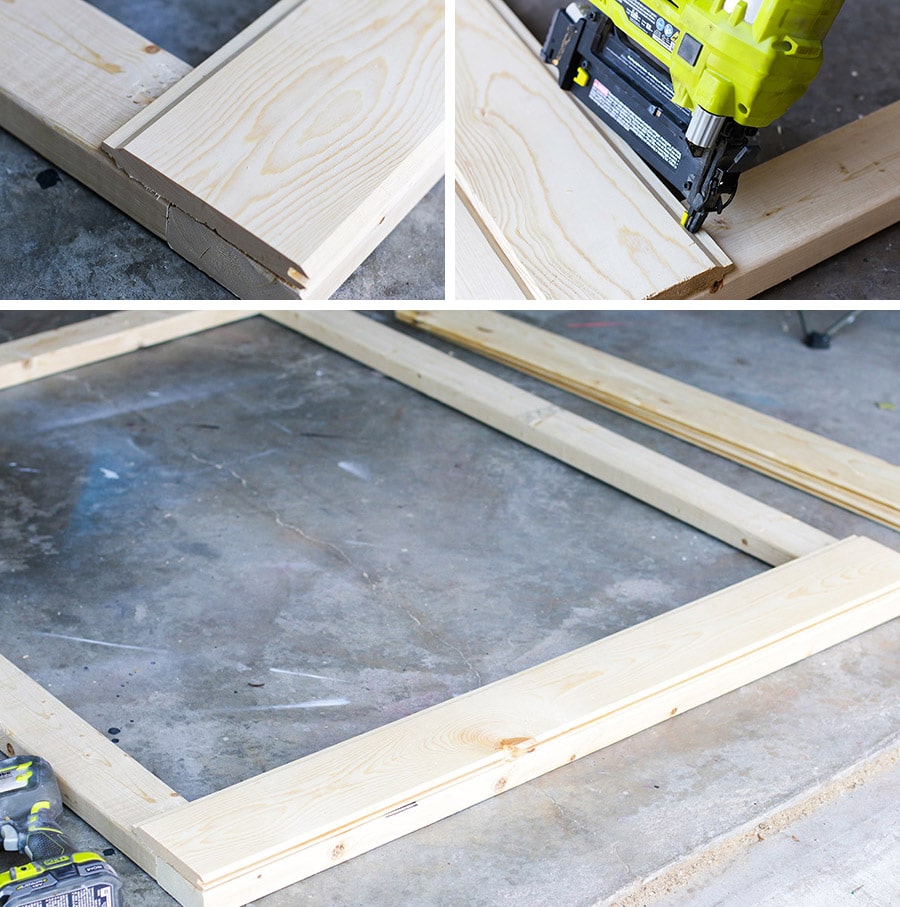
As soon as the frame was built, I used my brad nailer to nail the tongue-and-groove planks on. Start at the bottom, with the tongue facing up, then stack the next board above it, interlocking the tongue into the groove. Shoot a few nails at a 45º angle into the tongue (as shown in the photo below) to secure the board to the frame. By nailing at the tongue, you’re able to hide the nail holes a little easier.
The reasons I chose tongue-and-groove boards over regular lumber is because 1) I love the charming look of it and 2) they’re so much cheaper! At my local Home Depot, one 1x6x8′ tongue-and-groove board costs $5.32 and one 1x6x8′ common board is $11.72. I just saved you half your money. You’re welcome.
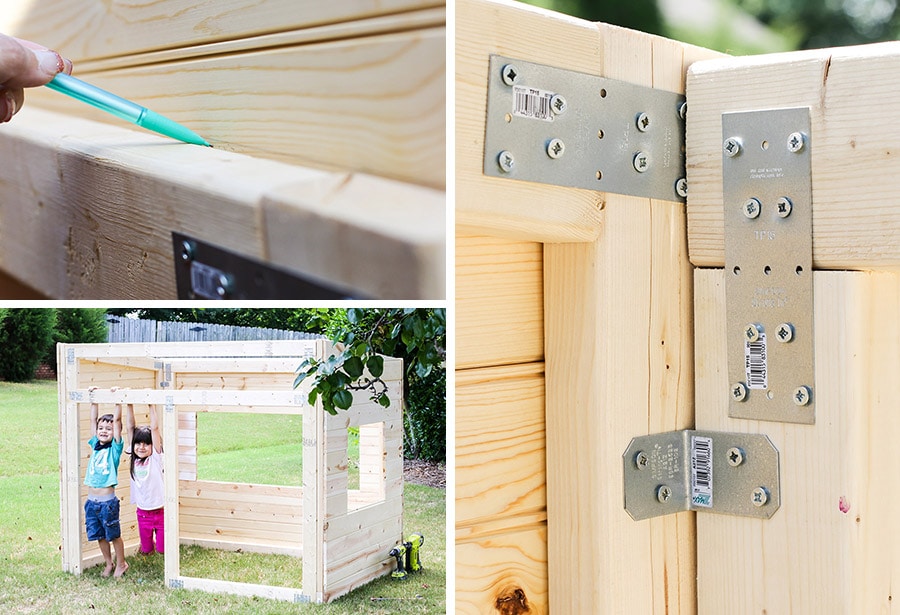
If you follow me on Instagram or Facebook, you’ll have seen a sneak peek of this project. My kiddos were too excited, I pretty much had to build around them. It’s a good thing they’re cute little monkeys.
Because the roof is angled, the top boards will have to be cut to fit. Hold the top board in place (don’t attach it just yet), mark the line, and cut off the excess with a jigsaw or circular saw. You’ll only have to do this for the two sides. The front and back panels are all straight cuts. Hallelu!
Once the four separate panels were built, I used Simpson Strong-Tie® A21Z angles to join all four sides to construct the house. I used 3 angles at each corner. This way, the playhouse can be easily assembled and disassembled, which is a must for military families like us.
Ta-da! The playhouse is up! Now is a good time to stain or paint, and finish the house, before adding the trim and other details. I chose to leave the wood natural and simply sprayed a few coats of clear polyurethane on the playhouse to protect the wood. I spray-painted the trim pieces white then simply glued and nailed them onto the playhouse.
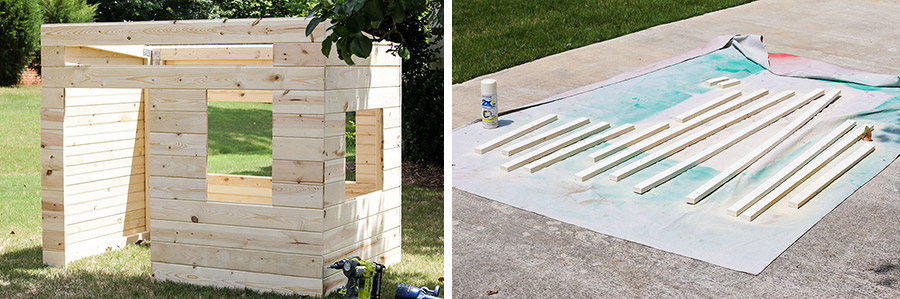 Finally, screw the roof on with 1-1/4-inch wood screws driven into the 2×4 frame. I chose plywood for the roof, but wouldn’t this look cute with actual roof shingles or maybe a corrugated roof panel? Totally adorbs. You could even drape a large piece of fabric over the top for the roof, if you wanted to. You know, since this is an INDOOR playhouse.
I’m kind of in love with this tiny flower box too. I made it out of a scrap 1×6 board. My daughter picked out all the flowers for her tiny garden. That creeping jenny just kills me.
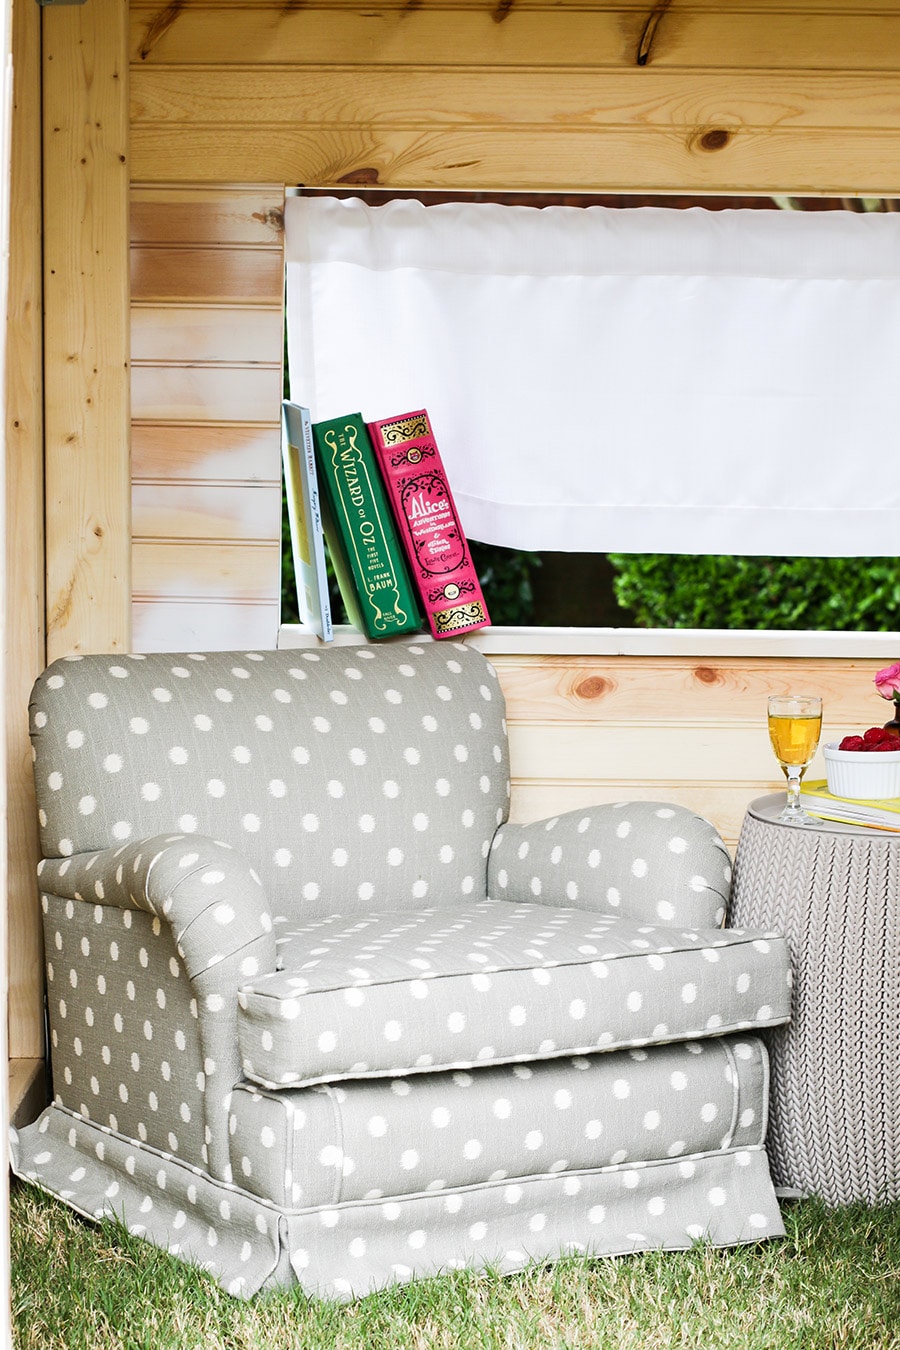
By the way, that’s apple juice, not alcohol, in that tiny wine glass. What kind of monster do you take me for? #motheroftheyear
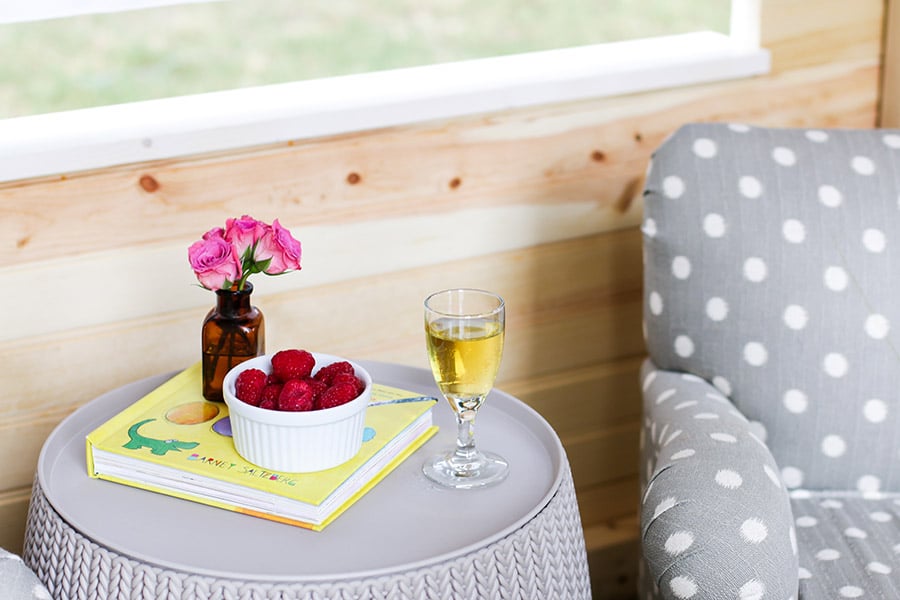
If you’d like to convert this indoor playhouse to one that is suitable outdoors, I would recommend using exterior-grade plywood and finishing it with several coats of exterior-grade polyurethane. You may even want to use cedar or redwood, since those wood species are naturally resistant to decay. Also, I’d replace the roof with one that is suitable for outdoors.
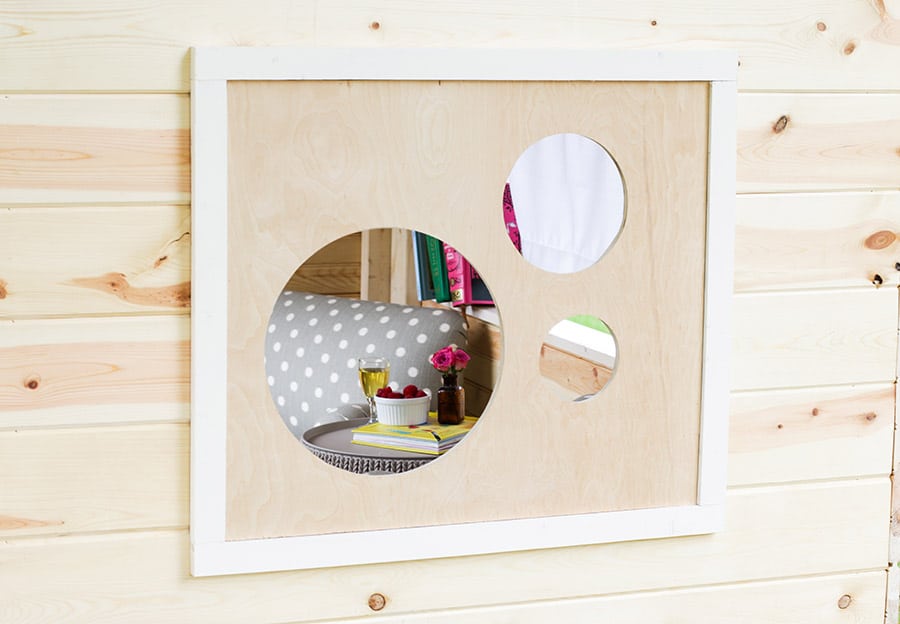 Aren’t these circle windows cute? You could certainly build a normal window, but who wants normal? I think the circle windows add a sweet touch of whimsy.
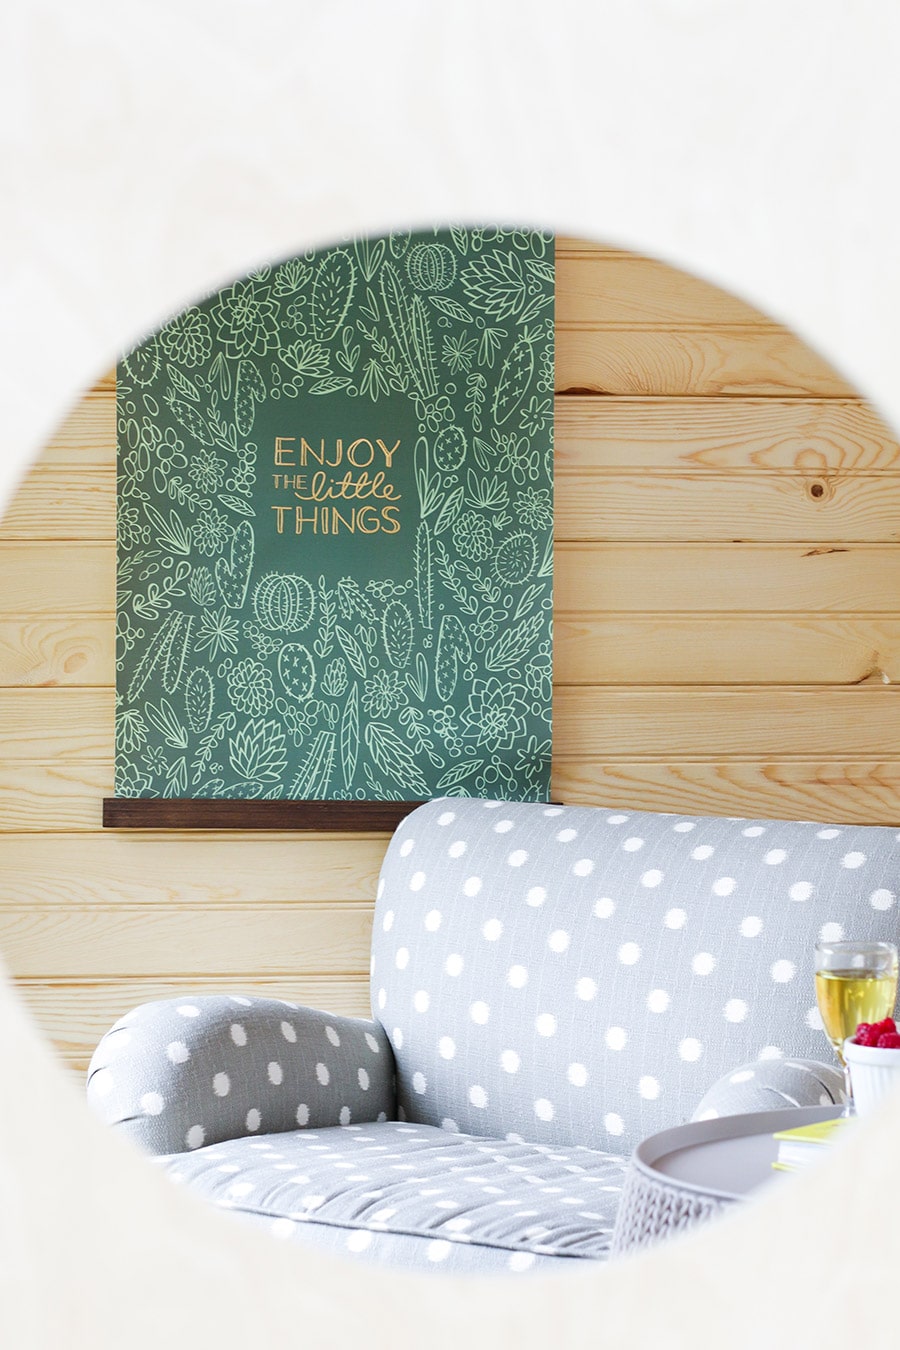
Enjoy the little things. Hahaha… get it?
It’s funny because this is a little house for little people and the sign says… okay. You get it.
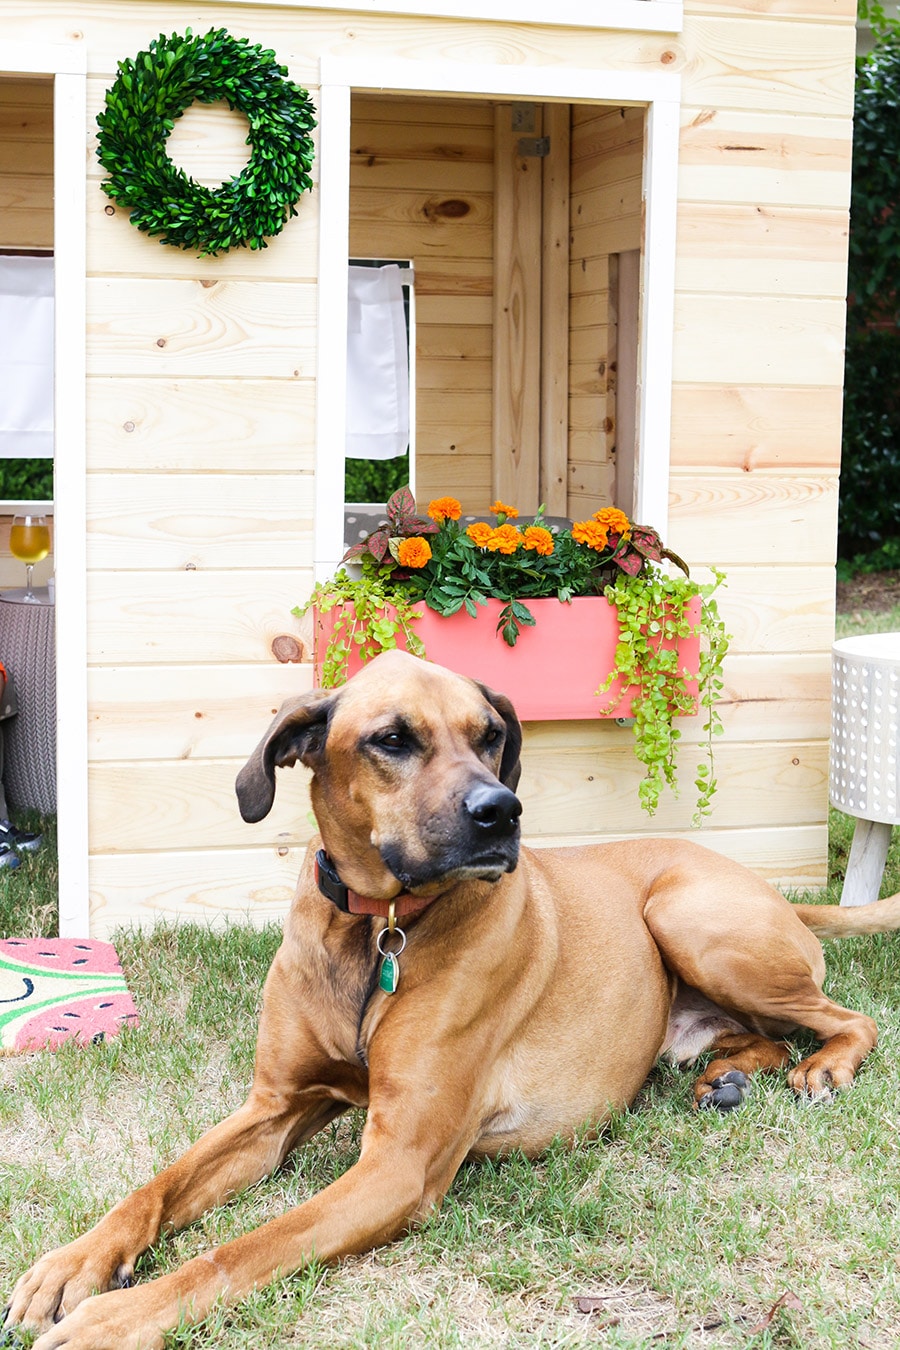
Speaking of little, get a load of this guy. This is Watson, our giant Rhodesian Ridgeback. I suppose when the kids get tired of this playhouse, we could convert it to Watson’s dog house. It’s a two-fer. #winning
He looks larger than life next to this tiny house. Let’s film our very own reality show and name it: Tiny house. Giant dog.
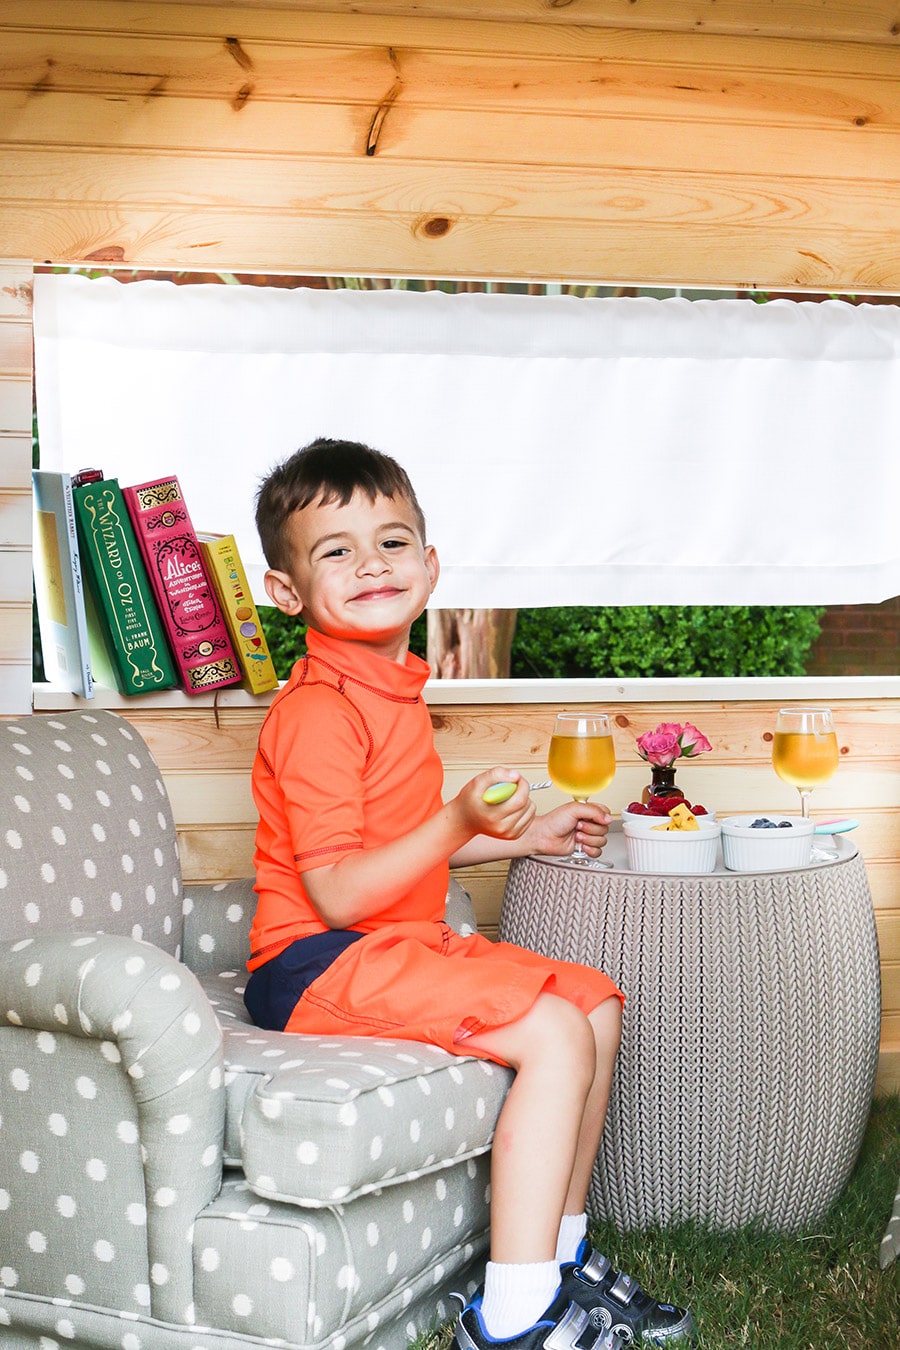
 My kids are absolutely in love with their new playhouse. They love having picnics and story time in here. Maybe we’ll even camp out in here one night.
Yeahhh… probably not. My idea of ‘roughing it’ is staying at a hotel with no wi-fi. #firstworldproblems
 My son wanted to wear the most obnoxious thing he owned. They went to the zoo earlier in the day and he said he wanted to wear this outfit so that Daddy would not lose him.
Oh, look. He succeeded.
What do you think? Do you want to build your very own DIY Kids Indoor Playhouse?
Okay, so let’s talk numbers. This project cost me about $250 in building materials and took 2 days to build. Not too shabby, right? You can totally knock this out in a weekend. Be sure to download the free building plans so you can build your own DIY Kids Indoor Playhouse!
If you’re interested, here’s a source list:
Preserved Boxwood Wreath / Carved Wood Stool / Basket Side Table / Upholstered Chairs
Enjoy the Little Things Banner / Welcome Mat / Teal Ceramic Planter / Orange Ceramic Planter
Be sure to PIN IT so you don’t forget it!
 *This post contains affiliate links. To read my full disclosure policy, please click here. A huge thank you goes to Simpson Strong-Tie® for partnering with me on this project. All efforts, opinions, giant canines, and happy children are my own.


Sweet Jesus does it get any cuter?! You sure know how to make a box look amazing! So, so beautiful (and fun for the kids too).
Thanks Jaime! xo
Yay for cute houses and Jaime’s that spell their names right!
You are killing me with all the cuteness!!! Great job!
Thanks friend! <3
Very cute, but how can it be an indoor playhouse when it’s too big to go through a door?
Thanks Chris! All 4 panels come apart easily. You would build each panel, then put the 4 sides together indoors, just like you would a store-bought playhouse.
Wow!! This is so cute!! I love everything about it!! And you have styled it so beautifully too! I can imagine how much the kids love it!
Thank you Anika!
Jen – this post and this project are one of my all-time favs! You had me alternating between cracking up and oooing and awwing with every single picture and detail! I am so in love with this house – can I come live next to you?!?! 😉 Can’t imagine why this one can’t fit on the moving truck, lol!
Thanks so much for the kind words, Megan! I’ve already promised it to our next door neighbors, but I’m so tempted to keep it! LOL
Did you also make the little stool. It is almost as adorbs as the little house!
Totally agree on the stool! Sadly, I didn’t build it, but I did link the products in the post! Thanks for stopping by, Nicole!
I am loving this playhouse!!! Would you have to do more than seal it if you wanted to keep outside? I know nothing about wood/building but I’m itching to get into it! Your plans are great!
Thanks Katherine! To make this playhouse suitable for outdoors, I’d remove all the plywood components (plywood doesn’t fare well outdoors) and apply at least 3 coats of an exterior-grade top coat.
Thank you so much for sharing this! We are also a military family, so being able to take it apart and with us would be amazing. …We would build it for outdoors. Do you think I could still use the adorable tongue-and-groove wood? Would I need to put top coat on the boards before putting them together, or after? If you don’t think that’s the best option, what kind of wood would you recommend for the walls?
This is too cute! You had me cracking me up, too! I love how you styled this little playhouse. Your kids will be so bummed when you can’t take it with you!
Thanks Jenna! This just means I have to build them another, more epic one at the new house!
Your such A good Mommy.
Its too Cute.
You are so funny, Jen 🙂 I love all your tangents 🙂 the playhouse is incredible!
Thanks so much Janice! Thanks for stopping by!
So I’m thinking that with a few mods, this could totally work as a chicken coop. Much easier and affordable than the plans I see online! Hmmmm……
I have 3 girls ages 1, 4 and 5 that would love this!!
That playhouse is all kinds of ridiculous cuteness!
This has to be the cutest thing I’ve ever seen!! <3
Thanks Ashley! <3
Thats what I was just thinking! Haha I love this.
This is the cutest I believe I will attempting this soon and the read was a great one super funny I enjoy tutorials like yours & thanks for all your ideas you do rock ✌?️
This would make a great birthday gift for my son! Thanks so much for the GREAT idea!!
This is adorable! I would love to make this even a little bit bigger and have it for the kids when they get older as a little escape place for when they fight or need a quiet place. Thanks for sharing! Love it!
Yes, a she-shed! Totally, DO IT! Haha – thanks for stopping by Denise!
Hi! Thanks a lot for the plans and great idea.
We are building it a little bit smaller and now we are about to put the roof.
But we are not sure on what to cover or paint the roof.
We are thinking about covering it with asphalt shingle material.
But I wanted to ask you for advice. Any hint will help.
Thanks a lot!!
Can you tell me the dimensions please?
Hi Mary,
All of the dimensions are in the building plans. Hope that helps!
Hi Jen,
Any chance you have this plan in a larger size? We love this four our 6 and 7 year old boys! We started to do the math but bring our very first build, we thought better to ask. Thank you!
I’d love to know this, too!
Hi! where are the building plans? I would love to do this for my girls for Christmas.
Where do we get the plans?
Hi Jenny,
I have a zero experience doing carpentry but I want to build a simple playhouse for my kid. Can you give me some ideas ? I am thinking of using pallet as a base.
My husband and I are in the process of building this playhouse now. The plans are good for the most part, we are newbies to this. However the measurements seem a bit off. Since 2×4 aren’t really 2″ x 4″ anymore. And at least in our neck of the woods it is costing more. But we are having fun working together.A pallet as a base probably wouldn’t be big enough. We had some old plywood 4’x4′ squares that we laid down and set the house one.
Where did you get the plans? I entered my information to download them twice and they never made it to my inbox. 🙁
Hi Kristeen,
I’m showing that the plans were emailed on 4/26 at 11:48pm, but they might have ended up in the spam folder.
Do the plans for this playhouse include the building materials you used?
My husband just finished making this for our grandchildren .Super easy instruction to follow! We added shutters on the front and side windows and a Dutch door with using two pallets as the base for a floor.The kids are loving it
Thank you for your comment, Janice! Your playhouse sounds darling – I love your modifications!
Do you have a link to a picture of the modifications you made? I’d love to see! I’m hoping to make a playhouse for my daughter’s birthday.
Do you have a pic of your playhouse with the modifications?
hi
kudos to you and this amazing thing a beauty. can’t believe you are not keeping it. however, it seems to good to be true that you did it so easily! are you sure??? am wanting to buy a pre-fab house, but haven’t heard the best reviews and read those are a headache to assemble. so why not try this DIY and have a super cute outcome rather than the pre-fab ones? i need mine to be outdoor only. any tips on making it durable and long lasting? thank you!! you’re awesome- i may try it.
Hi Dani,
Thanks for your kind words. I’d recommend building with solid wood – cedar or redwood is a good choice for exterior projects because those particular wood species are naturally resistant to decay. Also, I’d suggest applying several coats of an exterior-grade finish to protect it from the elements. Hope that helps – good luck with your project!
thanks for your response. i actually just saw this info embedded in your step by step details. i must have missed it. if you have any tips for a first timer- i’d appreciate it!! thanks and carry on with all your creativity- i love it!!!
I have a question about the wood screws you used. The materials list says to buy 2″ wood screws and 1 1/4″ wood screws. Where did you use each of these sizes of screws. Also, the standard wood screws I saw at the hardware store seem to be too fat to fit through the holes of the Strong Tie plates. Do I need fairly narrow screws? Wouldn’t a 2″ wood screw go all the way through the 2×4? That seems super long. If you could direct me to the screws you used it would be much appreciated! So excited to work on this project. I bought all the 2×4’s yesterday and am hoping to start building the frame today.
Awesome! Strong-Tie makes great screws so I’d recommend you take a look at their vast selection of hardware. Most of their screws are made so that pre-drilling isn’t necessary too, so it eliminates a step! I think the screws are #9 or #10 screws – they should be skinny enough to fit through Strong-Tie connectors. Best of luck on your build – can’t wait to see your DIY playhouse!
I haven’t found where you actually use the 2” screws. All the screws for the Simpson ties require the 1-1/4” #8 screws.
#8 1-1/4″ screws worked for me. However, I didn’t see any steps that would have used the 2″ screws. And yes, I believe the 2″ screws would have been too long for the 2.x4s.
Oh, one more question. When I cut the pieces with 5 degree angles, is the measurement for the long side or the short side? Or, in other words, do I angle away from the perpendicular measurement line into the scrap side or into the measured side?
Is the 5 degree angle cut on the ends to account for a 10 degree slope on the roof? What I’m reading is that each board gets a minus 5 degree for each board between the back wall and the side wall so the angle of attachment will be 80 degrees and plus 5 degrees for each board between the side wall and the front wall so 100 degree attachment. Is that correct? If that is correct do I just cut off a 3.5″ (width of a 2×4) x 0.3″ triangle at the end of the vertical support, using a circular saw?
One more question- is there any issue with making this structure a foot taller/wider/deeper? Thanks so much!
There is a guy near me that is selling some old tin roofing from a barn, think that could work for a roof? I am thinking about putting this outdoors! Welcome to
TX by the way!
Hi Rebecca,
Thank you! I don’t see why the tin roof wouldn’t work for your project – I bet it will look super cute!
I’m looking at this with an eye toward a chicken coop. Thanks for the plan.
We’re just about finished with the playhouse. It looks great and I’m so grateful for the plans! I’ve noticed that it seems a few measurements and instructions may be wrong. For example, on your house, the front window is 5 boards tall. The door is 9 boards tall. But on the plan diagram the door is only 8 boards tall and the window is 4 boards tall.
One question – how did you attach the transom window trim? Is it nailed from the top or bottom or just glued?
We’re painting yesterday and tonight and hoping to present it to our daughter for her birthday tomorrow. I’ll share pics of the painted finished product. Thanks again.
Thanks for your comment, Kathryn. Yes, I believe I did end up deciding last-minute, as I was building the playhouse, to make the door and window bigger.
I attached the transom window trim with nails and glue.
Can’t wait to see yours! Thanks again!
Here it is. Thanks again for the plans. She loves it. I know she’ll get a lot of use out of it for years to come.
https://goo.gl/photos/ZvJtHrYad3HdLtnA9
Wow, it turned out absolutely adorable! Cute baby too! 🙂 Thank you for sharing Kathryn!
We had some issues with the measurements as well. Sometimes the width of the timber wasn’t taken into account and we had to make slight adjustments. Read through and check overall sizes before you cut your timber
This is adorable! Thank you for sharing your plans. Can you share how much this project cost? Or at least the lumber costs?
Thanks Laura! I mentioned it in the post – the project cost about $250 in materials. Hope that helps!
Magnifique cette petite maison est si jolie et vos enfants sont si mignons… J’aime aussi votre décoration et les coupes de fruits frais… Avez-vous pensé à la peindre comme les maison Scandinaves ? Meilleures salutations de Suisse
I love your design on this playhouse!! I am planning on building it this weekend!
quick question – what are the 2″ screws for? I’m assuming all the plates use the 1 1/4″ wood screws so I wasn’t sure where is would use the bigger screws. Thank you!
This could easily be used as an outside playhouse, right?? Making sure I’m not missing something!
Hi Bevin,
Yes – I mentioned how a few small changes can convert this indoor playhouse to an outdoor one within the post.
So I saw the suggestion to use cedar instead of plywood for outdoor use. But I can’t seem to find any tongue and groove wood that isn’t plywood…. am I crazy?
Hi Pam,
The tongue-and-groove boards are actually solid wood, not plywood. The roof on this indoor playhouse is made of plywood – if you’re going to build an outdoor playhouse, I’d use roofing shingles instead. Hope that helps!
That is soooo adorable!! I was in search of a DIY playhouse for my kids and came across this on Pinterest. I would hope that if my husband and I decide for sure to build this exact model that it would come out just as beautifully like this one has came out. But I’m not sure how ours will turn out since it would be our first time ever building something this massive. Great article piece.
Hi Jen, I’ve been crushing on this for months now and am getting ready to build for my sons birthday! I have 3 rough and tough boys and am concerned about the stability of the T&G boards next to the window edges as it doesn’t appear they have any framing behind them. Does the 1×2 trim reinforce them sufficiently or would you recommend additional framing? You do beautiful work – I’m in love!!
Hi Rebekah,
The trim does provide stability for the T&G boards but the boards themselves are rather sturdy because of the tongue and groove construction. However, if you feel that you need additional support as you’re building, there’s nothing stopping you from adding additional braces on the inside. Hope that helps!
Is there a plan to follow or supply list provided or one to purchase? I didn’t see one but wasn’t sure if I missed it. This is so adorable and I would like to start building one this spring!
Hi Amanda,
Yes, here is a link to the plan: https://jenwoodhouse.com/plans/SST-Kids-Indoor-Playhouse.pdf
I just wanted to say thank you so much for this wonderful tutorial! I am just finishing this house – only the trim left to go! It was my very first woodworking project and in the process I learned to use a circular saw, mitre saw, jigsaw, and brad nailer. I have always wanted to build a playhouse for my kids and am so happy I overcame my fear of power tools. You are so inspiring and my kids and I have you to thank for many happy hours of building and playing!
Thank you for your sweet note, Michelle! I’m so happy to hear this – and way to go on overcoming your power tool fears! Hope your kiddos enjoy that playhouse for years to come!
Oh YES!!! This is definitely a project for Summer 2017!! Thank you for including the plans!!!
Of course! Thanks Beth!
I love this! Thank you for sharing. How much did this cost to build (a ball park figure….I know material prices vary)?
Jen will you be my friend? I love your style of writing I feel like you are a friend. thank you for sharing your fun projects with us but even more for sharing yourself and your adorable lucky children. I’m thinking of building this for my sister’s yard, she has lots and lots of space, rural North Dakota, and grandchildren. Because of your wonderful design, when they are done I can move it to my yard. I was planning to put screening on the windows to keep the mosquitos down. I think screen stapled in place with trim inside and out to cover the edges should work well. or maybe I’ll make real screen windows so when it’s inside for the winter they won’t be in the way. hmmmmm decisions decisions……
This is adorable!! I am looking for quick plans because I am not an expert builder but really want a playhouse for the littles this year. My oldest turns 4 next week & would LOVE to give her a playhouse for her birthday. Yours looks like I MIGHT be able to accomplish it in time. Thank you!
Wow! amazing. Such a gorgeous ideas. every child inspires to want this colorful playhouse. I just back my childhood time. thanks, this wonderful Diy pallet playhouse ideas.
Hi Jen,
Thank you so much for these super easy, super cool, super cute plans! I used them for my daughter’s 4th birthday and she LOVES it. It’s so solid and it came apart and went back together so easily, too.
Now she’s politely asking me for a front door for it and I have no idea where to start! Do you have any suggestions?
Thanks again — this is really too cool.
Thanks for the awesome comment, Brian! Hearing that never gets old – so glad these plans worked out for you and your girl! As for the front door – funny, my kids were asking for the same thing! I think it would be super easy to add a door by building the door out of 1x boards, and then adding a couple of door hinges and a door knob. Maybe our next playhouse will have a door because they are clearly in demand! Haha
you rock 🙂
Grandma found her new she shed. I love your sense of humour but seriously, your furniture looks in better shape than mine so if I buy new, then no dogs allowed. They’ve already chewed up my couch.
Hey Jen! I have been studying these indoor play house plans for a solid hour!!! I have a client wanting an indoor dog house ? (how awesome is that?!?) but it HAS to disassemble to get IN the house!! Which is why your plans are AWESOME!!! I just have a question about the strength around the windows… does the trim you added to the exterior add strength? I really don’t want to add extra vertical nailers (we are leaving the inside “unfinished” like you did. And I feel like the extra nailers will make it too busy in there.. but with it being a dog house I’m concerned. You can tell children not to jump through the windows and halfway count on them listening.. but a dog?!?!? Gah!! Any insight would be MUCH appreciated!! THANK YOU
-Ranae
Hi Ranae,
An indoor dog house does sound fun! The window trim does offer some strength. I’d recommend building it without the extra nailers and if you think you might need the extra strength, then it would be easy to add after the fact. Hope that helps! Good luck!
omg this is so cute i will build like this one for my kids and you are gonna help me 😉 you just nailled it
I can’t wait to build this for my kids! I’ve tried to get the plans several times but haven’t gotten the email. Is there another way to download the plans?
Hi Miranda,
I’m showing that you unsubscribed from my email list on 10/22 which may be why you’re not receiving the email. I just resent the plans – hopefully the email won’t get lost in your spam folder. Please let me know if you still haven’t received the plans.
I’m also a mil wife and we’re pcsing soon. What a cuyr playhouse!!! You’re amazing!! But how do you move this when you move? I know movers would do that, but is it safe? I mean, is it gonna stay in one piece by time you get to your destination? Did the movers move this to your next house?
Hi Erica!
We actually gave this playhouse to our neighbor, but I did design the playhouse so that it easily disassembles into separate, flat panels – easy for PCSing!
I’m looking at building this for my son as an outdoor playhouse. I was wondering how easy it would be to add a base/ flooring?
This house is so cute…I will allow it in my yard! lol I have banned all plastic ones so far but my boys want a playhouse. My Dad is retired and wants a project so I sent him these plans. The only thing we are having issue with is the front wall – the sides are sloped at 5% and the front 2×4 sticks out above the frame on the side wall? How does the roof go on? Do I have to cut the angle off the top of the 2×4 on the front wall? Thanks 🙂
Thank you for your plans. I saw a similar playhouse for sale, but it was too small for us so I’m excited to size this up some to 8′ x 6′. I do have one question with the plan. The shopping list doesn’t indicate which dimensions are for what kind of wood. So, are all the 1 x 4’s framing wood and the others tongue and groove? I can go through the plans and highlight, but with the size adjustment I’m not sure which things I need to change and how. I was thinking about just doing T1-11 siding, but I don’t think it would save much money if I can figure out the measurements, since I’ll be cutting away so much in the front and one side and the siding doesn’t come tall enough.
This is so great. I’m planning to build a tree house for my kids. Your project gave me some ideas for it. Nice share, Jen
Jen
This plan looks great. Just a suggestion for those wanting a portable playhouse. You might consider replacing the 90 degree angle brackets with loose pin door hinges. This would make setup and tear down easy.
Thank you and your family for your service.
Ken
Nice!! You have given amazing information on this blog. I really like it. Amazing DIY for kids. I also like to create different types of DIY to decorate my home & I want to try this also. Thanks for sharing this…
What is the age range for this playhouse
How much did materials cost to build this playhouses? It’s adorable I’m wanting to build for my granddaughter
Thanks Tonya! We spent about $250 on materials. Looking forward to seeing yours – happy building!
thank you
What did you use for the paint of the stain?
Wow, this is the cutest play house I have ever seen. I am sure it must have been a tough job to come up with something like this.
Hi, I’m wondering where you priced this at? I realize this post was from a couple years ago, BUT I just priced this material conservatively at $455 at HomeDepot! That’s a far cry from $250…
Hi Jen. My 4yo daughter loves the pictures so I’m going to have a crack at building it! I was wondering if you have the plans / dimensions in metric figures? If not, I’ll convert myself. Thanks and keep up the great work – love your website!
Hi Matt,
Thanks for writing! Unfortunately, I do not have the dimensions in metric. Looking forward to seeing your build! Good luck!
Hello – Very nice and looking to build for my two little ones. What would be the dimension for a floor (2×4 frame) to be added?
Thank you!!!!
Hi, do you think that this might work as an outdoor playhouse if I were to put it on cinder blocks and then covered the cinder blocks inside the playhouse with one of those foam floor coverings that piece together? I’m sure that I would also have to paint or stain and water proof the wood to protect it. I just really want to build this with my 5 year old daughter. She absolutely fell in love with the pictures! Any thoughts?
How much did the materials cost?
Hi Jen! Can you elaborate any on making this an outdoor playhouse?
I cannot find a link to the plans. Is it possible to point me in the direction of where they may be?
Hi Wendy,
There is a box that says “Download the plans” in the post where you can enter your email and get the plans emailed to you. Hope that helps!
Would it be okay if I use a 1/2” plywood for the roof instead of the 3/4” one?
Hello Jen,
It looks like a very nice and not to coplex plan. Thank you!
Do you by any chance have the plan in the CM instead of inches?
Thanks (:
Nir
Hi Jen,
I love your site. I’m a dad with two daughters, but I have ZERO carpenter experience. I’m going to try your kids fort, I signed up for. Wish me luck!
DJ
Awesome! Good luck, David!
i cant find the building plans for this can i get it emailed…
How do we get the building plans? Need material list and instructions on Easy Kids Indoor Playhouse? TYIA
Bonjour
Serait-il possible d’avoir les plans de cette jolie maison pour enfant.
Merci
Hi,
I’m trying to pull a free plan for this kids playhouse but don’t see option to get this free plan. Please let me know if I’m doing something wrong or I have to pay for this free plan?
Hi Jen, are you located in canada?
Do you have the package with all the materials for me to buy and put it all together?
That is soooo cute! I have been looking to build one and this doesn’t look too hard. Any clue how heavy it is? I would like to find a way to move it around in my yard, to keep grass alive and even put in on my porch or in the garage. How hard is it too move?
Thank!
Finally had a kid and made him this for his 3rd Birthday! It’s a ramen shop 😀
Awesome! And I love ramen! If you’d like to share your project on my site, you can do so here: https://jenwoodhouse.com/share-your-project
How do I get the plans for the modern clubhouse? I would like to build one for my son this week.
This would also be a good plan for a chicken coop with a few minor adjustments. I may try it next week. Thanks for the plan and inspiration!
I can’t find the plans for this project anywhere. I direct link would be immensely helpful!!
Not sure if you know but someone is selling “plans” for this playhouse on Etsy using your photos
https://www.etsy.com/listing/1249401097/2×4-playhouse-plans-for-kids-wooden?click_key=5bc3f302e6be99836eed6d4cd943f6b0ec7ea7c5%3A1249401097&click_sum=f37e75d7&ga_order=most_relevant&ga_search_type=all&ga_view_type=gallery&ga_search_query=playhouse+plans&ref=sr_gallery-1-15
Thank you for the heads up, Rachael! I’ve reported that thief to Etsy. He’s also selling my free plans for a cedar planter. Hopefully people don’t waste their money on plans that are available here for free!
Is there a list of what i could take to home depot so I make sure what all i need is cut right incase they don’t have it please if this is available let me know if i missed it somewhere, this is a nice playhouse my grandbaby would love
Hi Danielle,
Yes, you can get the PDF plans sent to your email and print them out! Happy building!
Please send me the plans for the kids indoor playhouse. I’ve tried to get the plans but they don’t appear in my inbox. Thank you!
Little confused by the plans, is the number and size of tongue and grove boards under the shopping list?
I would like the free plan, and FYI they are still selling your plan on ETSY!
Sent, thank you Marie! And that’s disappointing to hear about people stealing my plans to sell them elsewhere. Thank you for the heads up!
Just getting started on this and absolutely am loving the process so far. I do have one question. The 1″ x 6 “x 8′ (L) Tongue and Groove boards require many 48″ cuts. I noticed the plans only call for 22 boards. Is the intention to have 1 full board cut into 2 to make the 48″ boards? ultimately it’ll be shorter due to the kerf on my blade, so can the boards be slightly shorter than 48”?
Love the design of this playhouse. Can you treat the wood to make it weatherproof to use outside, as the plan says inside playhouse? Also I may have missed it but following the plans what are the dimensions for the playhouse when built? We have a tall 4 year old and a 1 year old and want to make sure it’s suitable for them both. Many thanks.
I’m going to use this plan to build a chicken coop 🙂 Thank you!
Can someone share the plans with me?
I keep trying to get them and I don’t get an email.
Hi Kyle,
Plans are automatically sent, but can sometimes end up in the spam folder. I just resent them, so please let me know if you’re still unable to access them. Thanks!
I cannot seem to find the plans in my inbox or spam 🙁
Hi Jen, love the design and would like to build one. I subscribed but have not seen the plans in my inbox/junk folder. May you please forward them.
Hello I have signed up but have not received the plans for this lovely house, want to build it for my daughters, thanks.
Hi there have checked my spam folder and tried many times to get the plans, but to no avail? Is it possible to let me know how to get these? Thank you so so much.
I just resent the plans – hopefully you get them this time!
HI I put my email in several times for the plans but never received them could you send them to me directly. Also checked both inbox and junkmail thank you so much for your time the playhouse is so cute
Hi Angela,
I just resent them – check your spam folder also. Thanks!
How can I get the plans for this playhouse?
Sent! Please check your spam folder.
I can’t find the plans for this project anywhere. I direct link would be immensely helpful!!
I recently tried several times to sign up for the download for the playhouse plans. I have not received them and they are not in junk or spam folder. Could you send them to me? Thank you so much!
Hi, could I get the plans of the playhouse please?
Not sure how to get the plans, can you send to me
Hello, I tried putting in my email twice today, but the plans did not arrrive, I checked all my inboxes. Is it possible for you to resend them to me.
Thank you so much!
where can i find these plans
Is it possible to get the plans?
Hello Jen,
Please send my the written step by step plans and shopping list to the Simple Playhouse.
I could not find it anywhere on your page
Thank you in advance
Hello! I tried putting in my email for these plans, but did not recieve anything. Is it possible to have them sent?
Thanks!
I agree, I think a 57 year old should get to have her own playhouse, but the height is a bit small. hmmmmm how a bout a simple grown up playhouse next.