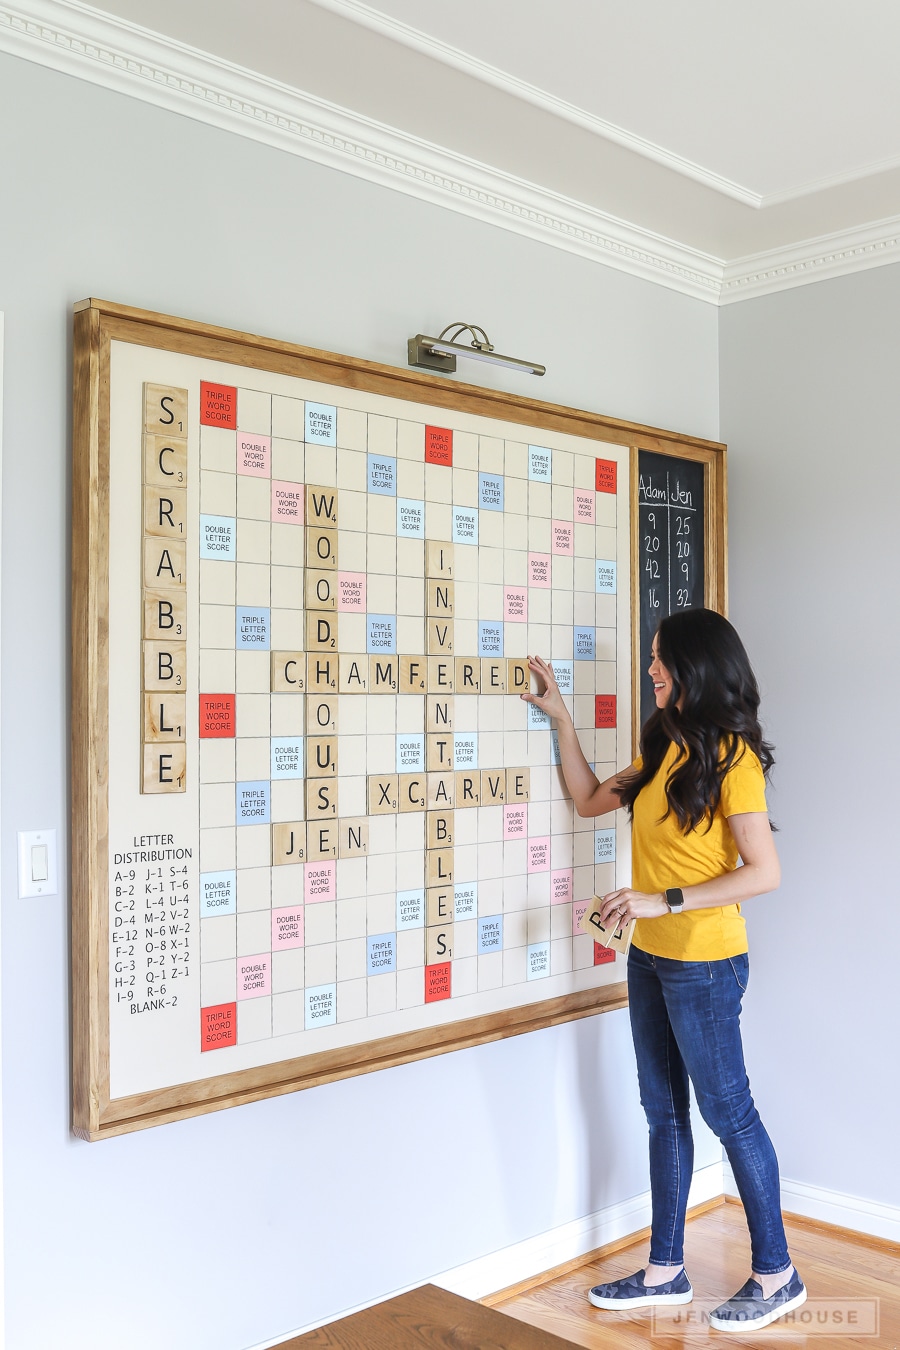
Our new house has a large basement, which Adam has claimed as his “Man Cave.” In the few weeks that we’ve been living here, we’ve quickly realized that we primarily use this space as our family lounge. We kick back and watch TV, and there’s a playroom nearby – it’s a great place for us to relax and hang out together. While we haven’t made any solid plans as to what to do with this space yet, we’re considering turning part of the basement into a theater room, complete with a wet bar and concessions area. We also envision entertaining our friends and family with games, movie nights, and more. What better project to kick off our basement plans than this DIY Giant Wall Scrabble® Game Board? I am totally geeking out over it!
I’m excited to be partnering with the awesome folks at Inventables to bring you several fun projects this year! Did you catch my adorable baby name puzzle I made a few months ago? These little puzzles make great baby shower gifts!
When I was thinking of tackling this DIY Giant Wall Scrabble Game, I knew this was a job for my Inventables X-Carve 3D Carving Machine. This project was so much fun to make, but it’s incredibly time-consuming, so I don’t recommend taking it on unless you have a lot of time on your hands, like me. Ha!
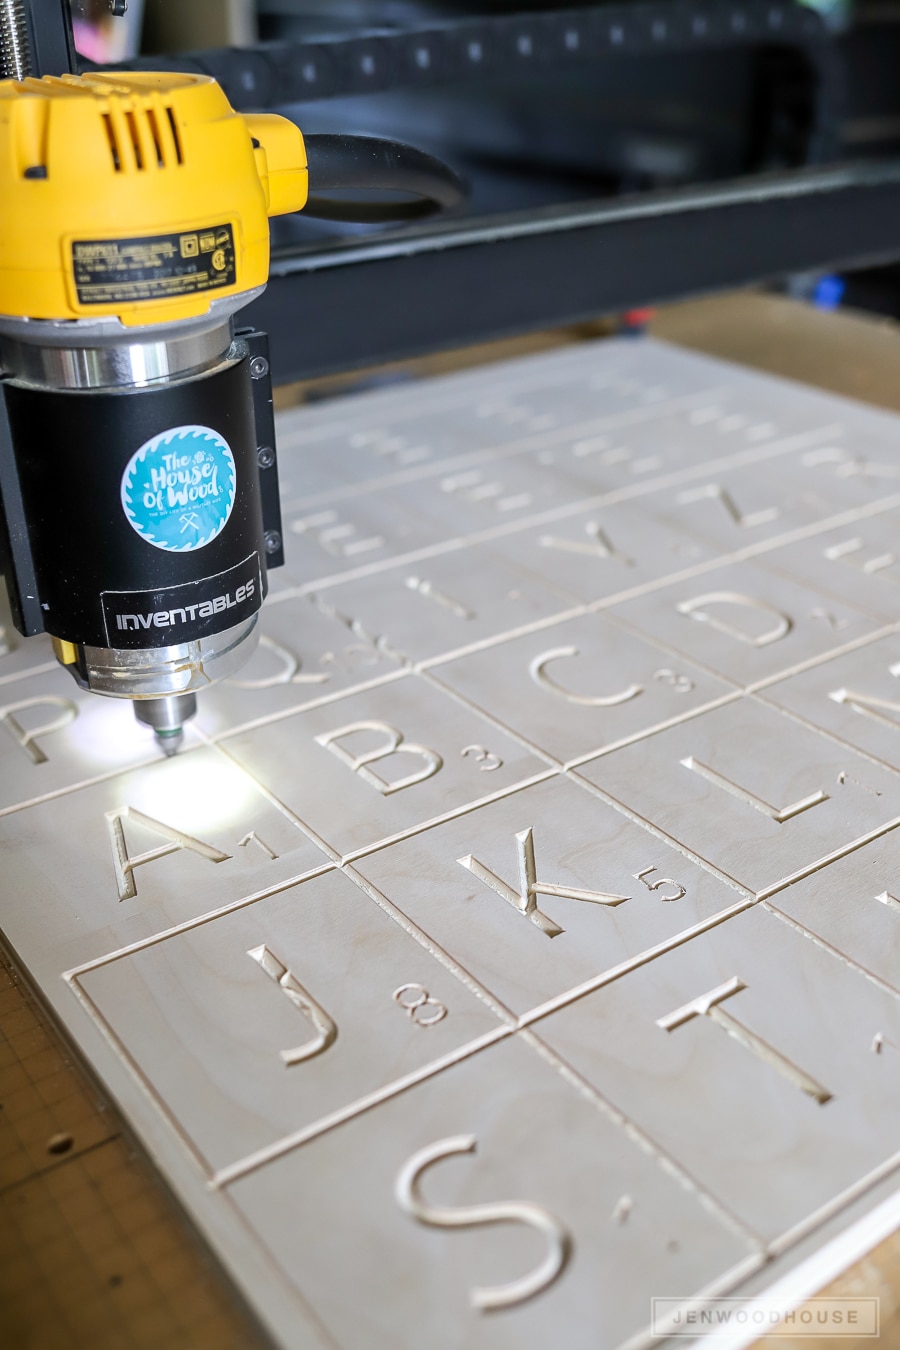
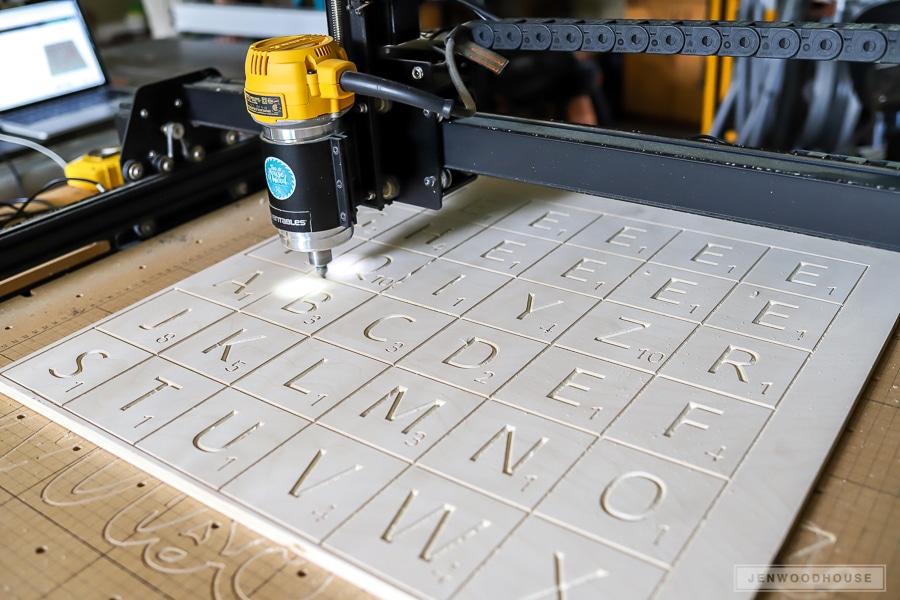
A quick Google search rendered this free SVG file for Scrabble tiles. I downloaded it from Hey, Let’s Make Stuff and it saved me a TON of time since I didn’t have to design the tiles from scratch. Thank you, Cori! I did modify the file a bit – I changed the size so that each tile was 3 1/2-inch square and then imported it into Easel (Inventables’ free design software) where I mapped out the tiles so that several tiles fit on four separate pieces of 23″ x 23″ 1/2-inch thick plywood. Here’s the file in Easel. After simulating the carve in Easel, I discovered that the 90º V-carve bit would give me the fastest and most precise cut. It took about 35-45 minutes to carve each plywood panel.

Tools and Materials:
- Inventables X-Carve 3D Carving Machine
- Table Saw
- Circular Saw
- Cordless Drill/Driver
- Compact Router
- (1) Full Sheet of 3/4-inch Plywood
- (1) Full Sheet of 1/2-inch Plywood
- (1) 1 x 12 x 8 Ft. Board
- (4) 1 x 3 x 8 Ft. Boards
- (4) 1 x 2 x 8 Ft. Boards
- (2) Quart Cans of Magnetic Primer
- Chalkboard Paint
- (100) Rare Earth Magnets
- French Cleat
- Giant Scrabble Tiles SVG File
- Bonus Tiles SVG File
Step 1: Carve the Scrabble Tiles
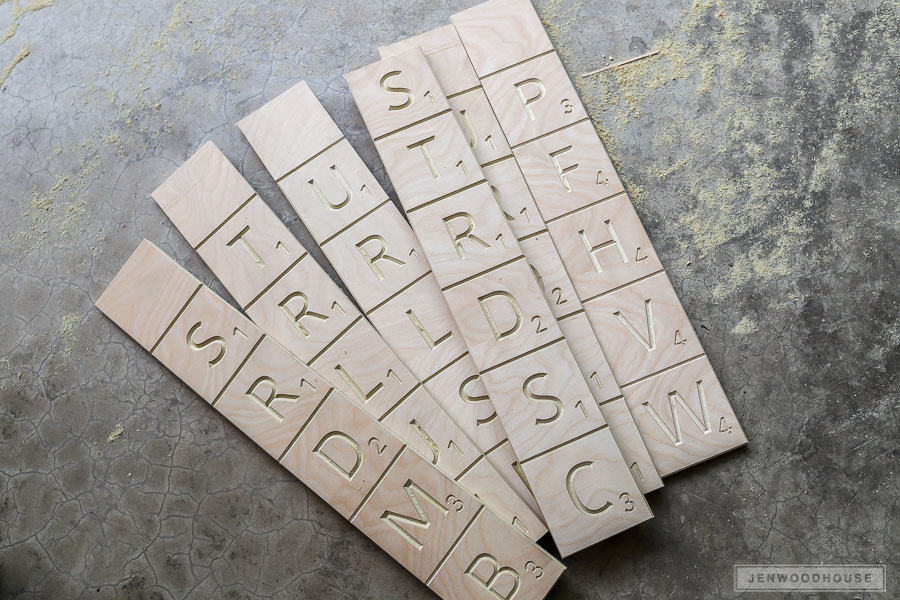
Instead of having the X-carve cut out the tiles individually, I set the cutting depth for the letters and numbers to 1/8″ deep and the box outline to 1/16″ deep. I’ll use the box outline as a guide make these cuts on the table saw to save time.

Step 2: Paint the Letters and Numbers
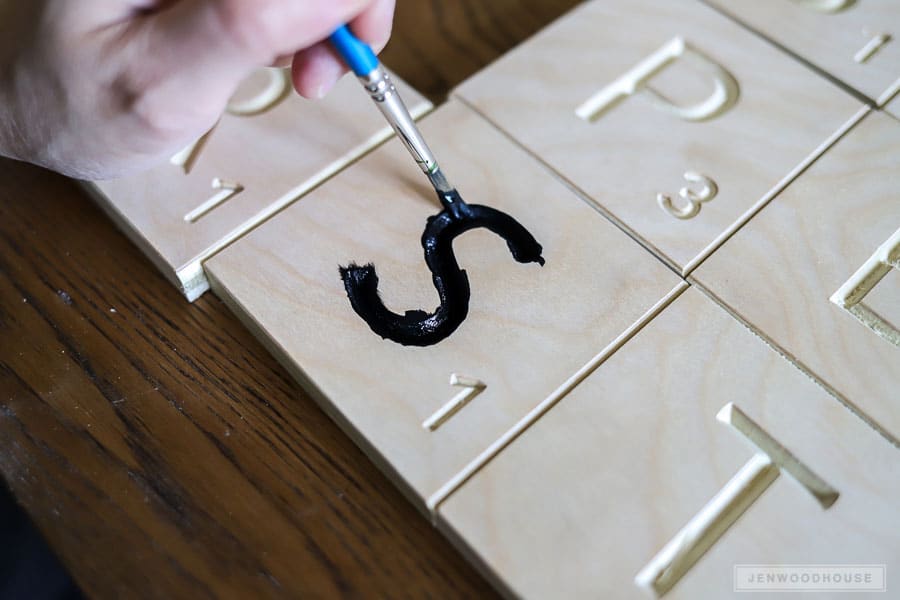
Once the carve was complete, I hand-painted the letters and numbers with black acrylic paint. Be sure NOT to dilute the paint – the water will seep into the wood fibers and you won’t be able to get a clean, crisp outline. You can’t even sand that out, unless you sand off a layer of the plywood. No bueno.
Ugh. I can’t even look at it.
Avert your eyes! Avert your eyes!
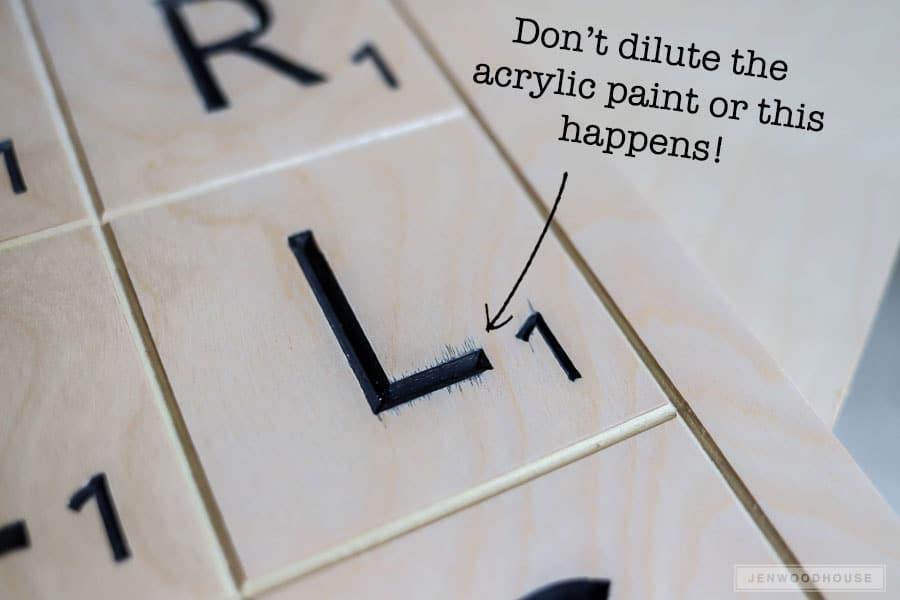
I ended up having to carve a whole new panel because I made that mistake. Take it from me – use a small paintbrush to paint the letters and numbers with acrylic paint straight from the bottle. And don’t worry about a messy job. In fact, my 6- and 8-year-old helped me with this task. As long as you don’t dilute the paint, you’ll be able to sand off the excess paint later on.
Step 3: Sand Excess Paint
Sand the excess paint off with 180-grit sandpaper and you’re left with a crisp, clean Scrabble tile:
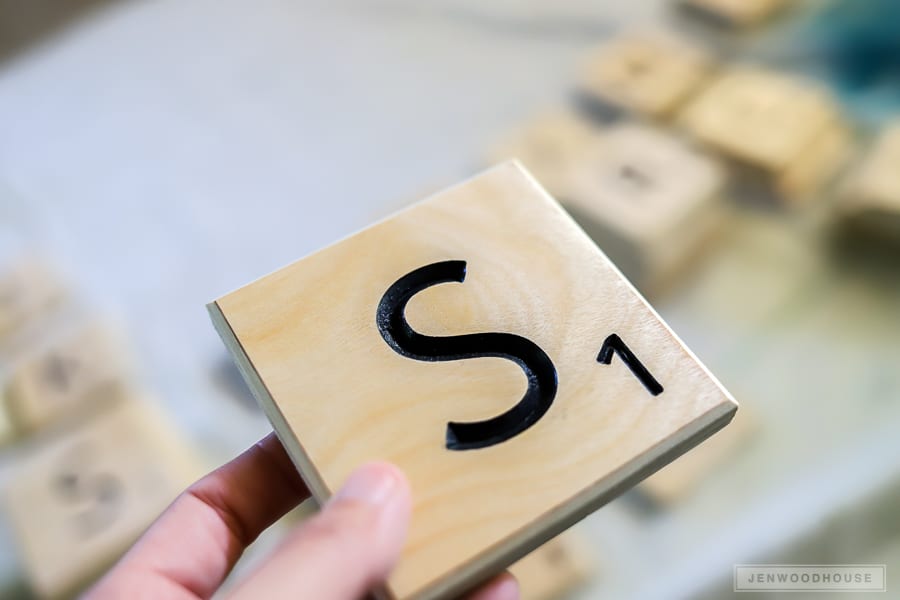
Ahhh… much better. I can go on living.
Also worth mentioning – be sure to paint the tiles and sand the excess paint off BEFORE you slice them up. It’s so much easier to sand a large panel, rather than try to hold onto a 3 1/2-inch square while sanding. Don’t ask me how I know.
Step 4: Cut the Tiles Lengthwise
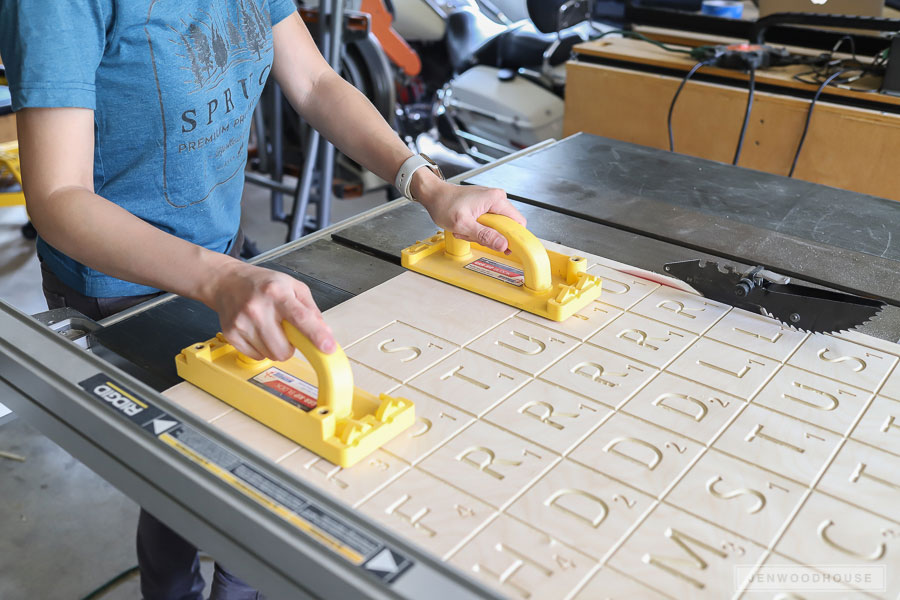
After the tiles have been painted and sanded, use a table saw to slice up the tiles lengthwise.
Step 5: Cross-cut the Tiles
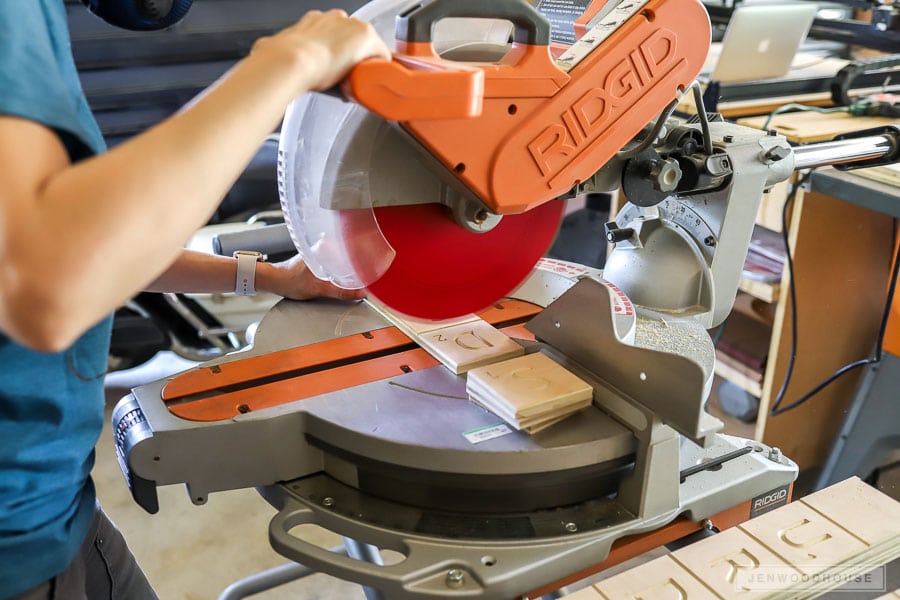
Then chop them up into individual Scrabble tiles on the miter saw.
Step 6: Sand edges
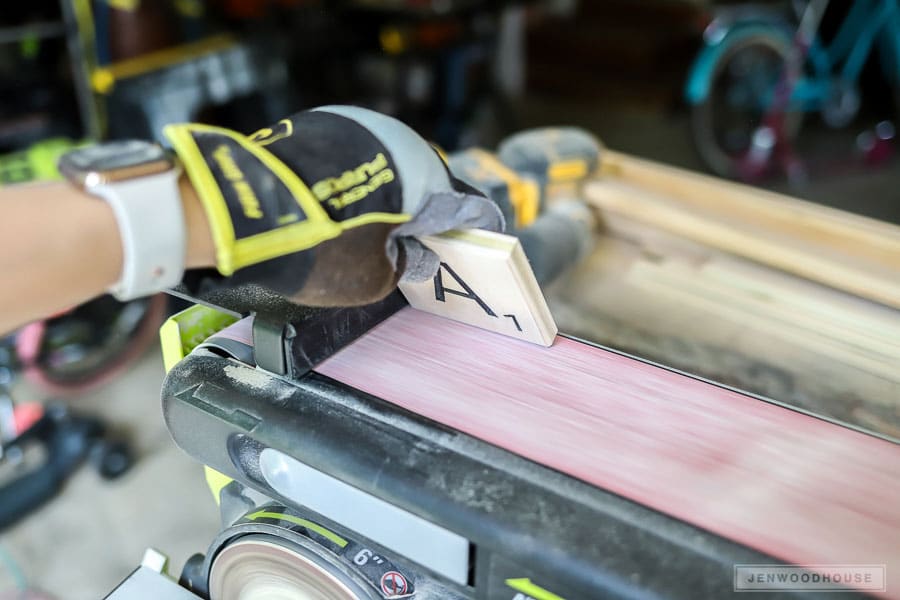
Next, I used a bench sander to sand all the edges and sometime in a moment of lunacy, I decided that these tiles needed a chamfered edge on them. It would’ve been easier to have the X-carve cut the chamfer, especially with the 90º V-carve bit, but hindsight is 20/20, folks. And so I chamfered each edge of each tile by hand on the bench sander… 100 tiles x 4 edges = pure insanity.
Apparently, I enjoy over-complicating things and creating extra work for myself as a result. It’s a gift.
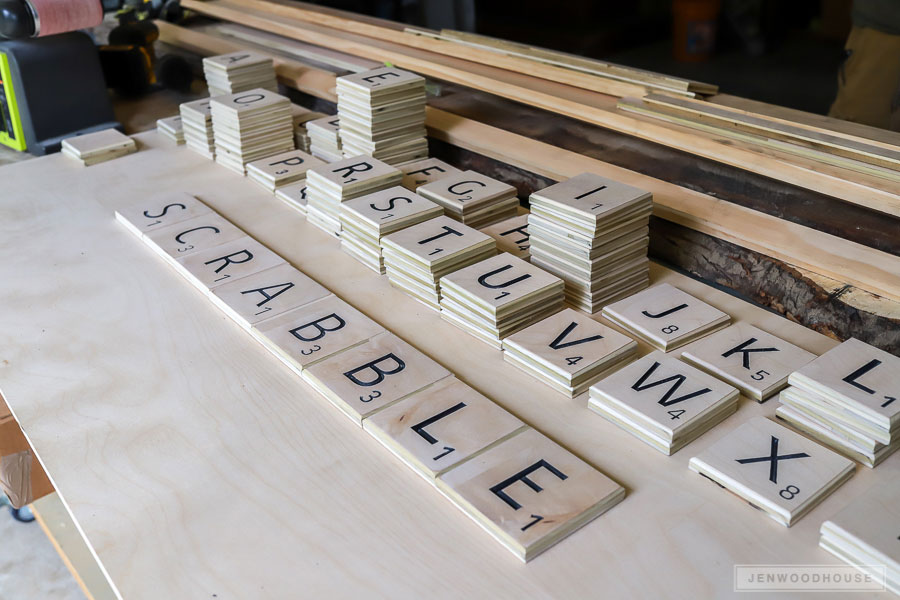
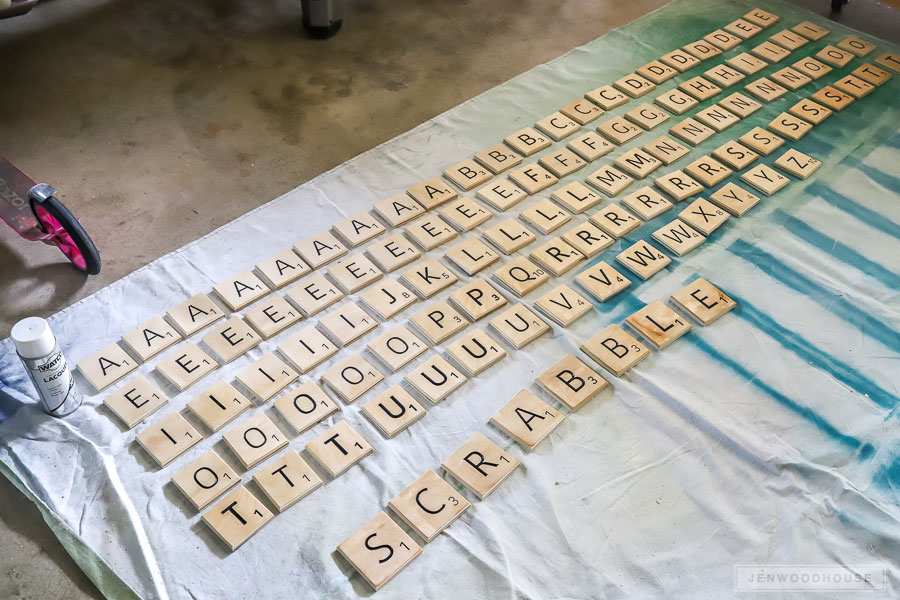
After the dust settled, I was left with 100+ beautifully chamfered and carved Scrabble tiles.
Was it worth it?
Ask me again when we’re knee-deep in a highly competitive Scrabble match and “chamfered” is the winning word. Twenty points to Gryffindor!
Step 7: Finish Tiles with a clear top coat
Finally, I sprayed a couple of coats of gloss lacquer on the Scrabble tiles and called it a day. Despite the strong odor, I really love using this spray lacquer because it dries quickly and is so easy to apply. After the tiles dried, they felt a little rough to the touch, so I hand-sanded each tile with a 400-grit sanding sponge.
Another tip – I always get glossy spray lacquer (as opposed to satin, semi-gloss, or matte finish) because once you sand that top coat, the gloss is dulled to a satin finish anyway.
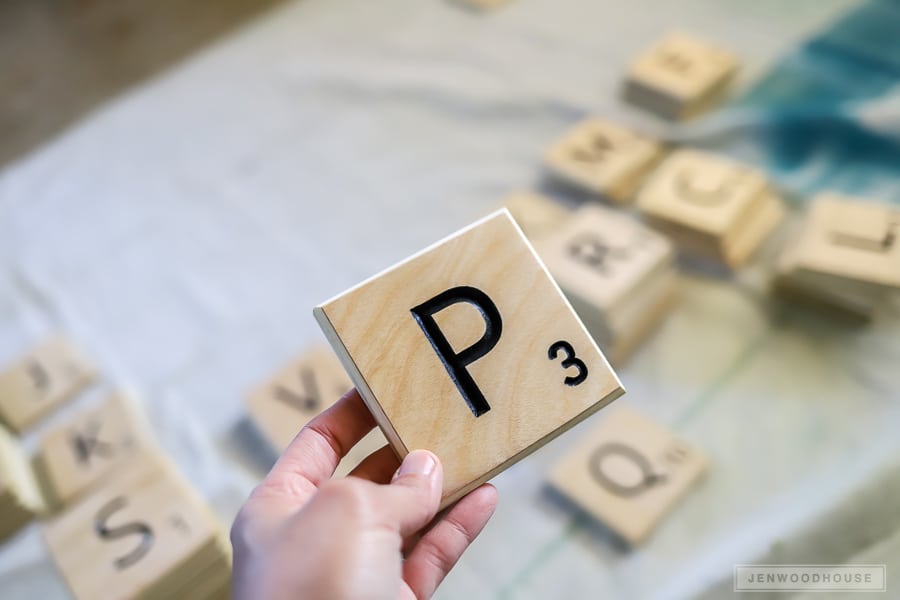
The prettiest P you ever did see! Check out those clean, crisp lines and beautiful wood grain!
Step 8: Drill holes for magnets
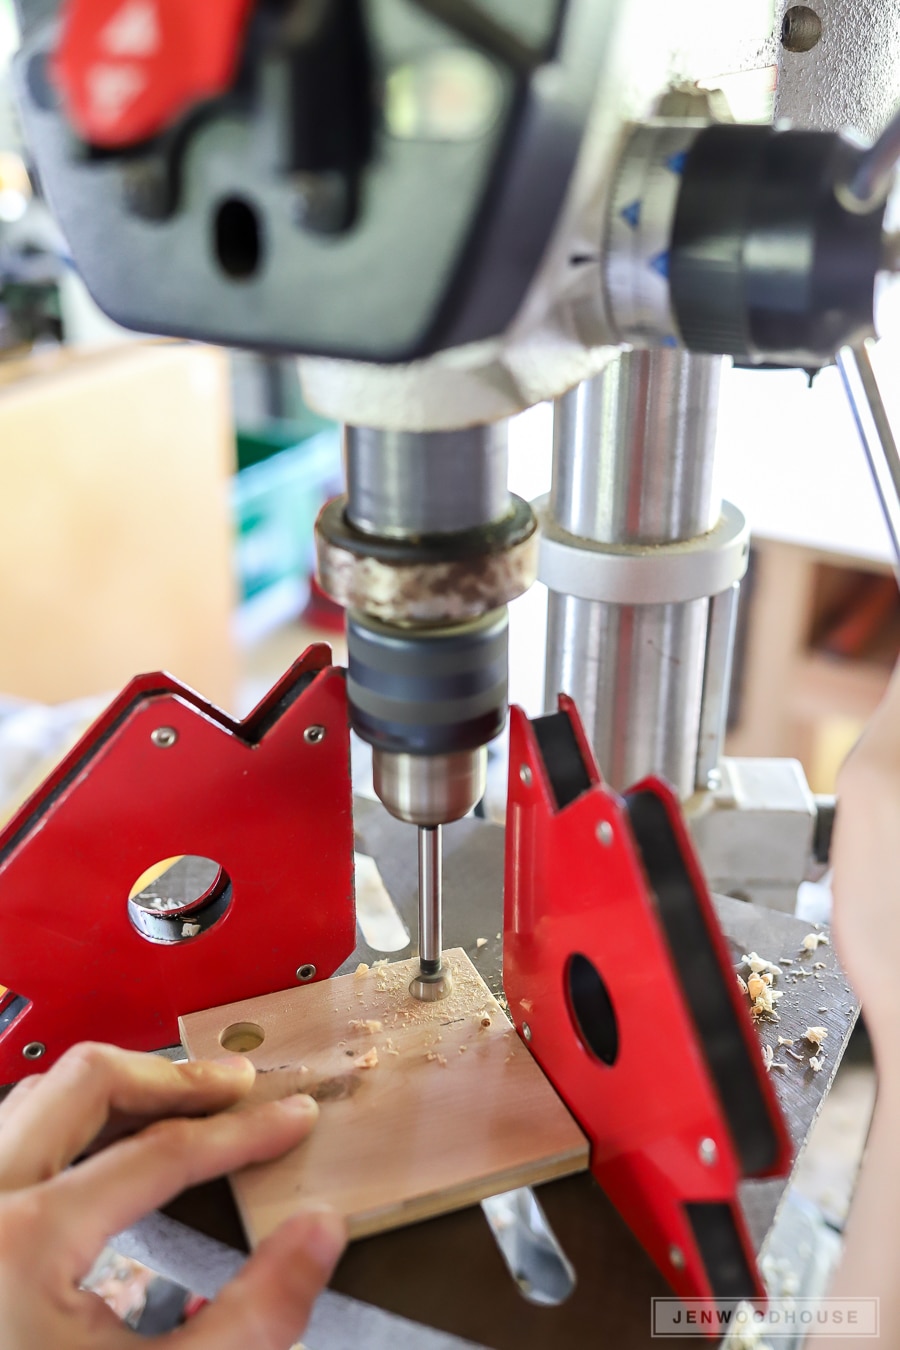
Because I wanted the tiles to sit flush to the game board, I used my drill press to drill holes into the back of each tile so that I could inset the magnets. If you don’t mind the game pieces sitting proud on the game board, feel free to skip this step and just glue the magnets to the back of the tiles. But I’m a crazy person who likes to over-complicate things, remember? We talked about this.
CASE. IN. POINT.
But I was feeling pretty clever when I found a new use for my welding magnets. Instead of building a jig, I set my welding magnets up so that I could slide each tile into place and drill in the exact location every time. All 400 holes of them!
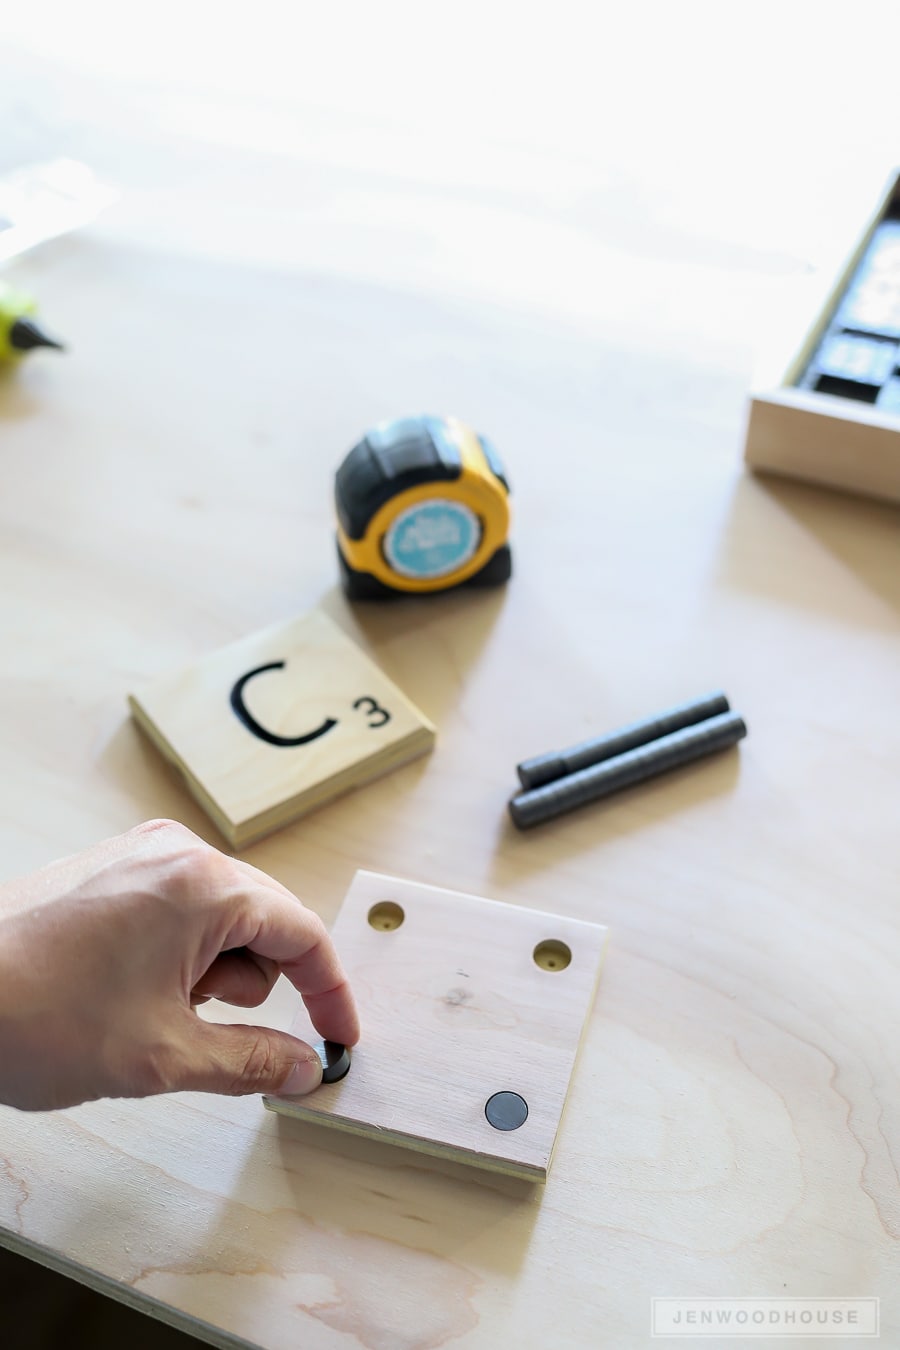
Four hundred holes later, I glued the 1/2-inch ceramic magnets in. This was another mistake – after reading the instructions on the can, Rust-Oleum recommends using rare earth magnets with their magnetic primer. Doh! You’ll get a stronger magnetic bond with the rare earth magnets. I ended up filling 2 of the 4 holes on the back of each tile and attaching 2 rare earth magnets to the back. Then, I discovered that some of the tiles still didn’t stick to the Scrabble board very well, so I went back and added these bigger magnets to the back of each tile.
Step 9: Attach the 1×12 and cut game board to size
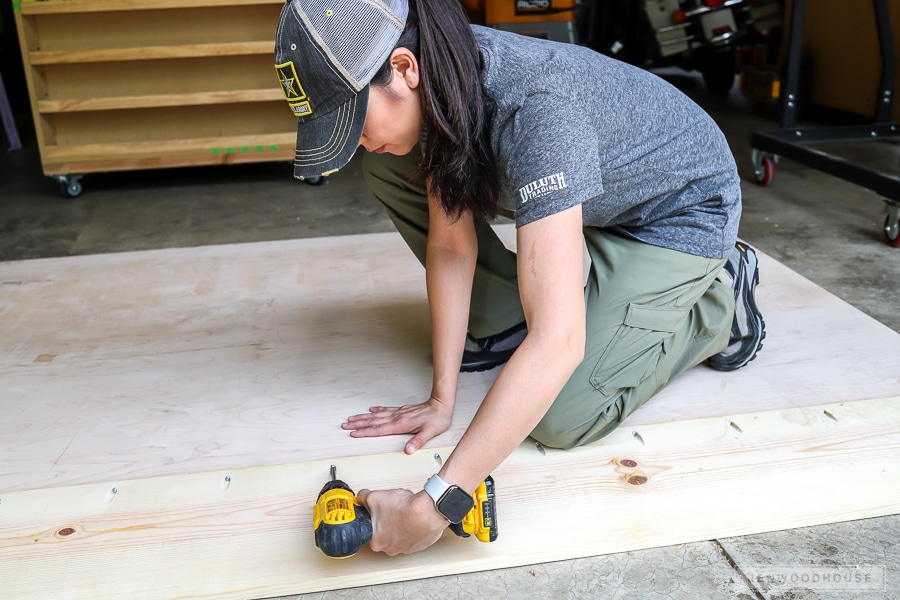
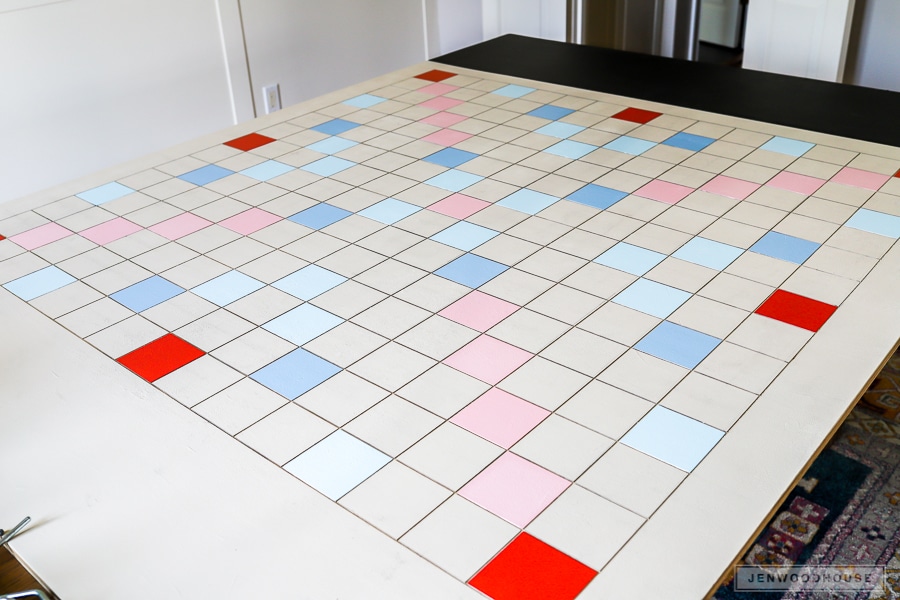
Because a full sheet of plywood is 96 inches x 48 inches, I had to make it larger in order to accommodate the 220 tile spaces. The original Scrabble board is made up of 15 by 15 spaces (220 spaces total) and with 3 1/2-inch Scrabble tiles, the playing area needs to be at least 52 1/2 inches square. I grabbed a 1×12 board and edge-joined it to the plywood, hiding the pocket holes on the back of the plywood. Then I flipped the whole thing over, filled the seam with wood filler, and sanded everything flat. Now I had a full game board that measures 80 inches x 59 inches. The extra area will be for the chalkboard.
Step 10: Paint the plywood with magnetic primer and chalkboard paint
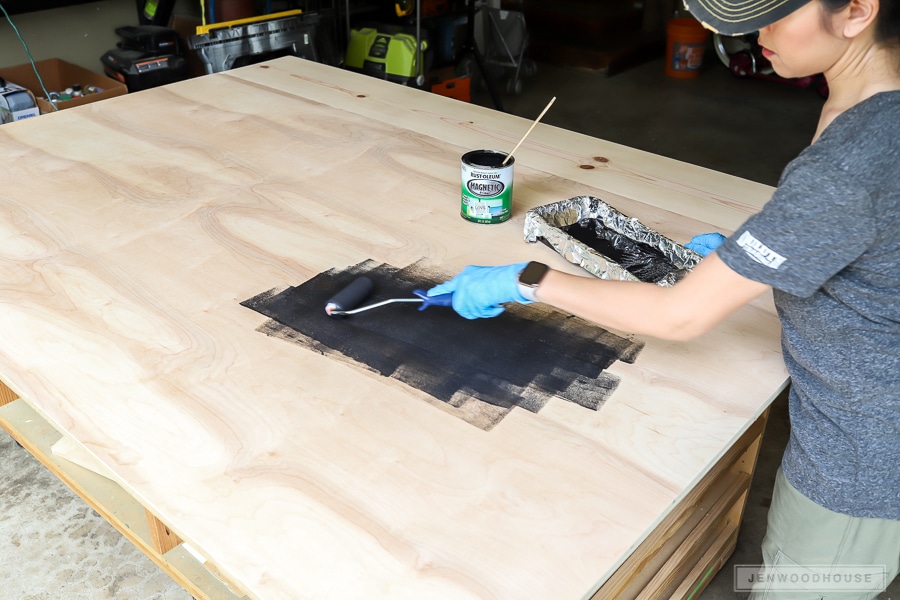
Rust-Oleum recommends 3 coats when using their magnetic primer and for an area this large, I ended up using two quart-size cans. When you open up the can, the paint is super gloopy (that’s a technical term), so you’ll have to stir it until it’s an even consistency. This will take several minutes – don’t lose heart and just keep stirring. The gloop will incorporate. Trust. I used a dense foam roller to roll on the paint. I waited about 30 minutes between coats and rolled on 3 coats, as recommended.
Quick tip: line the paint tray with aluminum foil to make clean-up a piece of cake.
Great.
Now I want cake.
Step 11: Use a straight edge and mark the gridlines
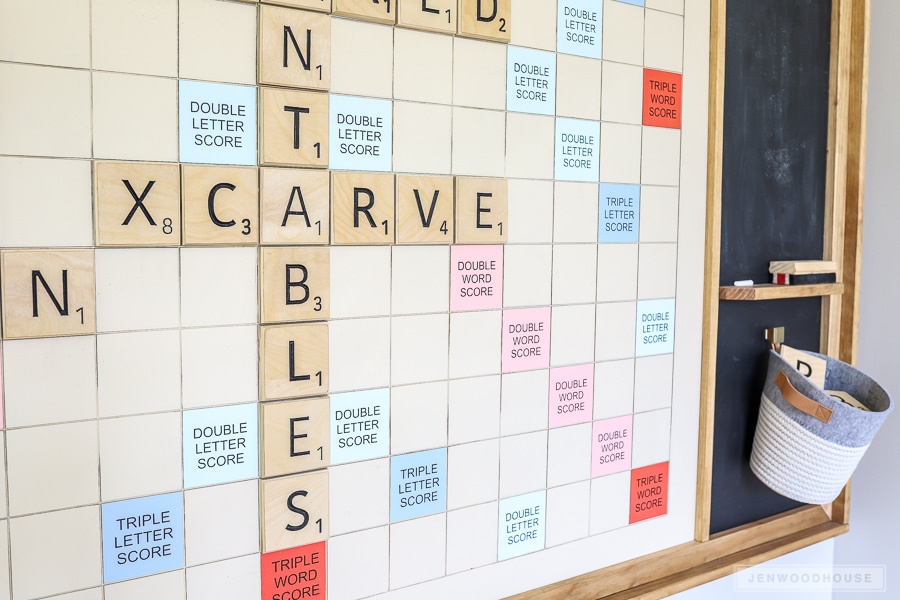
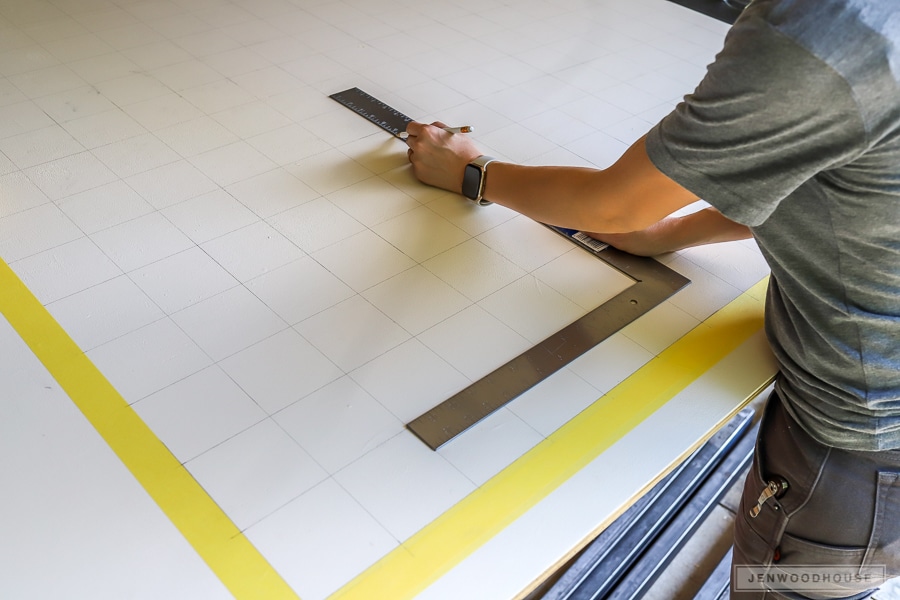
I used a straight edge to pencil in the grid. Each square measures 3 1/2 inches x 3 1/2 inches. This step isn’t actually necessary. You could just measure 3 1/2 inches for each square, mark the two ends and clamp a straight edge to act as a fence for your router. But again, I’m an expert at working harder and not smarter, remember? But this is good news for you – I’ve made all the mistakes for you, so you don’t have to! You are welcome.
Step 12: Route the gridlines
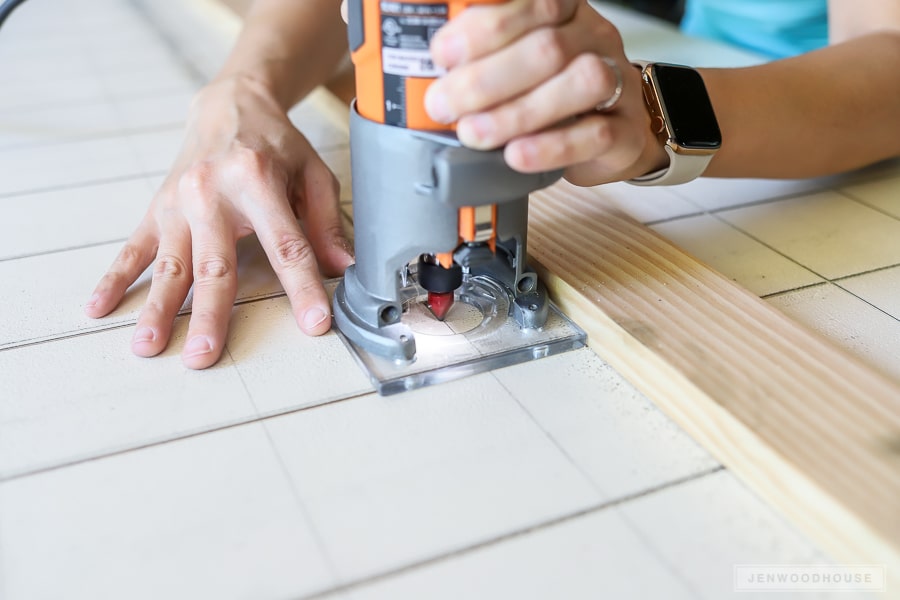
I routed the grid with this corded router and after a few snafus with the power cord, I really wished I would have had this cordless compact router instead. It took me about 2 hours to route the entire grid. Whew! I used a V-bit and routed the grooves about 1/16 inches deep.
Step 13: Paint the scrabble board
Here’s another instance where hindsight is 20/20… I wish I would have painted the plywood after I routed the grid because it got pretty dirty and scuffed as I was working. So, do as I say, not as I do. Route first, then paint.
These are the latex paint colors I used in a satin sheen:
- Background: Malton (BM 1073)
- Double Letter Tiles: Crystal Springs (BM 764)
- Double Word Tiles: Smashing Pink (BM 1303)
- Triple Letter Tiles: Sapphire Ice (BM 808)
- Triple Word Tiles: Habanero Pepper (BM 1306)
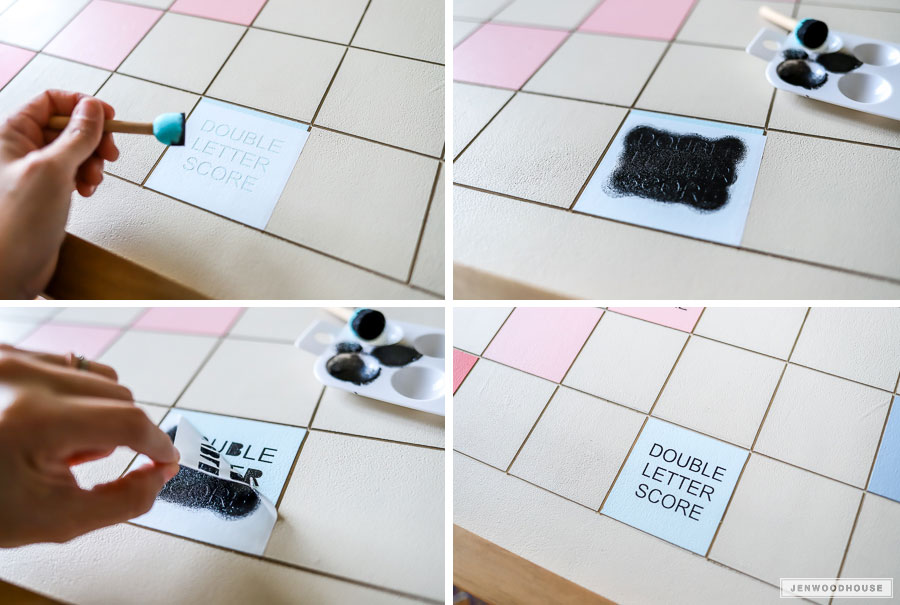
After the paint dried, I stenciled the text onto the bonus tiles. Prepare yourself for a very long evening. Put on your favorite TV series and stencil your little heart out.
>>> Download the stencil for the bonus tiles <<<

Step 14: Add the ledge and frame
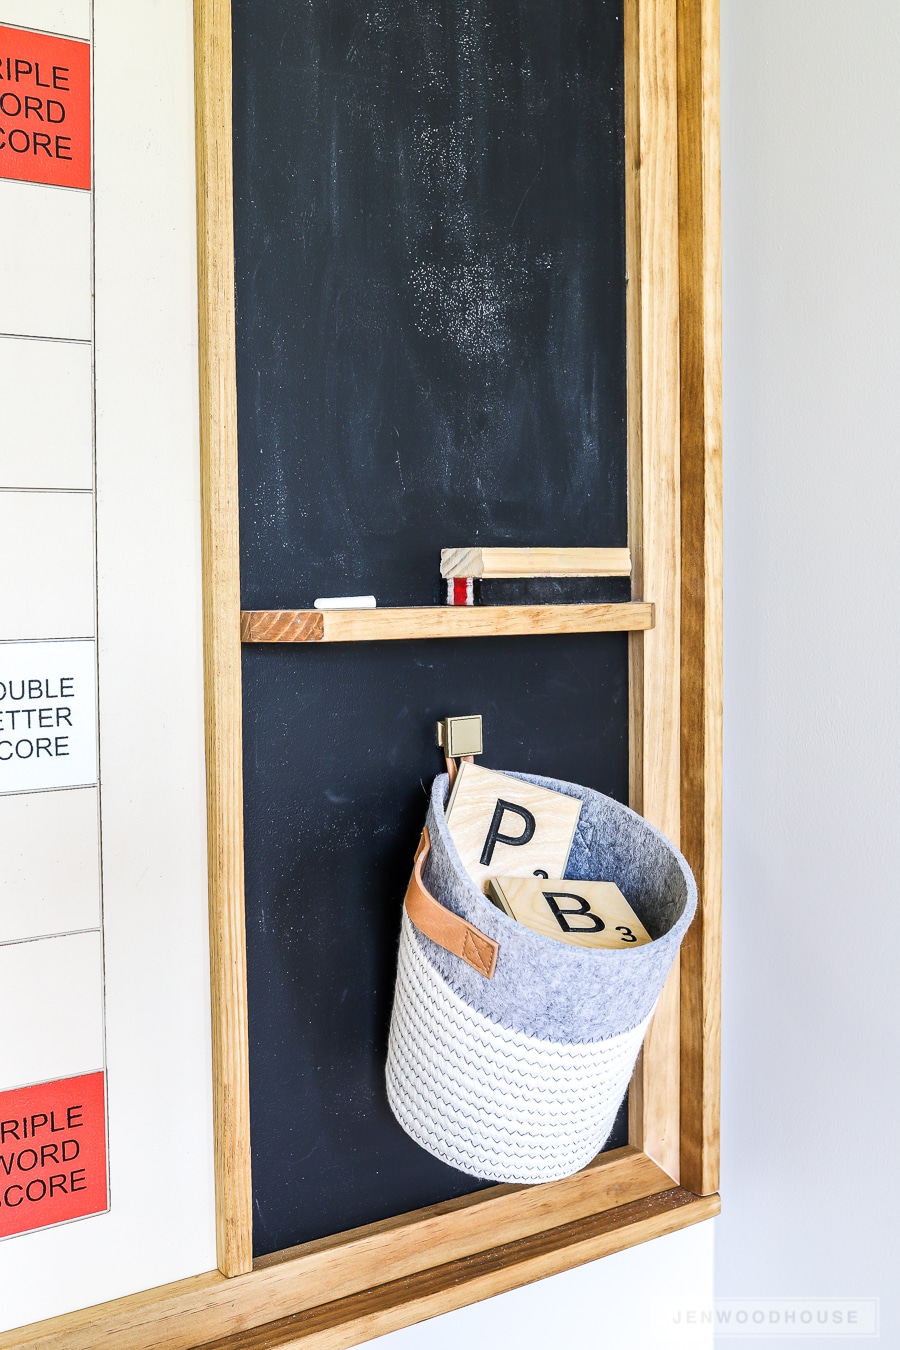
Now that the most meticulous parts are done, it’s time to wrap this project up. Let’s add the ledge (stained Golden Oak) and frame out the entire thing. Measure, mark, cut, and attach the boards with wood glue and brad nails. I hung a cute little basket right under the ledge to hold extra tiles and other miscellaneous items. Finally, we used a French cleat to hang the Scrabble board up on the wall.
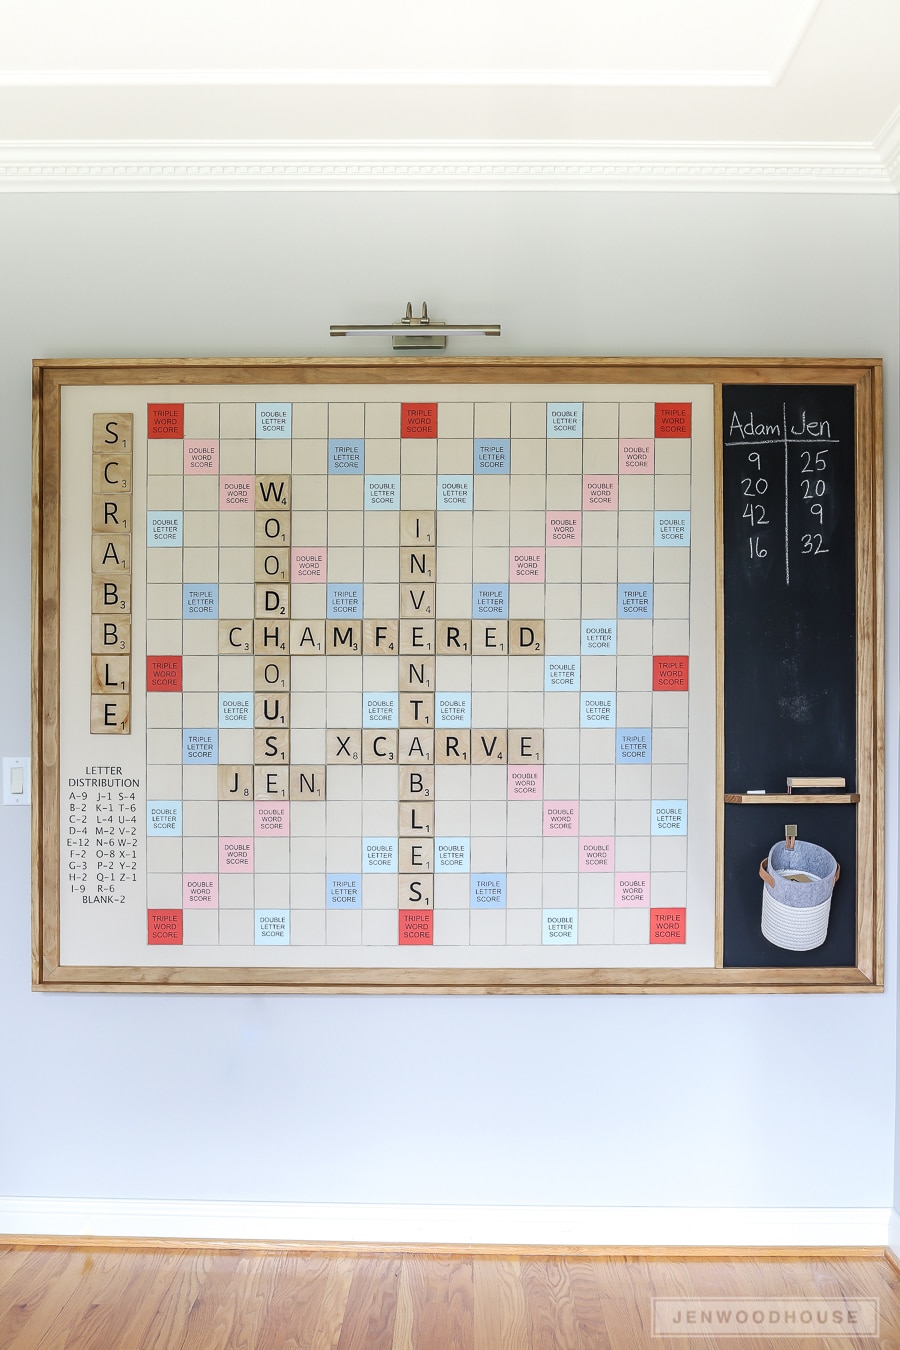
Now that it’s done, I can think of better ways to make this DIY Giant Scrabble Game Board. For example, instead of hand-routing the entire board, I could have divided up the game board into nine equal parts with each panel made up of 5×5 squares. That way, each panel would be small enough for the X-carve to carve and I wouldn’t have had to stencil all of the bonus tiles by hand. But it’s done and even though it did take me about 15 years to complete, we absolutely LOVE how it turned out!
Now then. Who’s up for a game of Scrabble?
*This post is sponsored by Inventables and contains affiliate links. To read my full disclosure policy, please click here.


can you link us to your easel project? i think you just have to go to the file menu in Easel and you can share and publish your project.
Hi Peter,
I just added the link in the supplies list. Thanks!
got it! was looking at the wrong scrabble link. thank you!
What an incredible project! Way over my head, but I love it!
Jen, This looks really great and like something I would like to take on. Did you do trays for each player’s tiles as in the original board game?
Yes, after our first game, we discovered trays were needed to hold our tiles so I whipped a few up out of scrap 1x3s.
Thanks Candy, I was surprised so many other people didn’t ask the same thing, since it was my first thought after reading the whole article and reviewing it just incase I missed it. ?
Is there a way to do this project if you don’t have the carving machine? Would love to do this, but the machine is a bit out of my price range. Thanks!
Hi Kristi,
Yes of course! Instead of carving the letters on the Scrabble tiles, you can paint or stencil them on! Hope that helps!
Thank you for sharing, this is awesome!
Question about the magnets. You say you ended up using the larger rare earth magnets, but it doesn’t sound like you needed 4 of those per tile since they were stronger, sounds like you used two per tile, but at the top under your materials list, you list 100 rare earth magnets, so did you just use one magnet per tile? Will one of these magnets hold or is two needed? They seem pretty pricey so I don’t want to buy more than I’ll need.
Hi Kelsey,
Yes, the magnets were definitely trial-and-error. The magnets I linked are larger (about 1.25″) and super strong – 1 per tile should work. The smaller ones weren’t quite strong enough, but they’re glued in there, so I didn’t bother removing them. I suspect they’re really not necessary though, now that the larger ones are on there. I will say, however, make sure you apply at least 3 coats of the magnetic primer – that 3rd coat made all the difference! Hope that helps!
awesome! thank you!!
Is there any chance you would sell the carved out letters? We don’t have that machine and likely wouldn’t get enough use out of.
Love! Love! Love this! Will definitely be doing this for our bonus room! It’s a work of art, too! Thanks for the fantastic ideas!
Thanks for visiting, Cassie!
Jen, I admire your dedication and skill, what a great project and well executed. I am in the middle of building your assembly/outfeed table although available space dictates a little downsizing.
Keep on makin sawdust.
Thanks so much for the kind note, Keith! Can’t wait to see your outfeed table!
I have been fussing over the $1000+ price tag for the Pottery Barn and RH Scrabble boards and knew there was something out there we could use for a DIY but have yet to find something that checks all the boxes. I choked on my drink when I saw your teaser video and have been patiently waiting for the debut of the final product. OMG I’m in LOVE and can’t wait to add this on our list of DIY’s! It’s perfect! Thank you for sharing! Side note, what stencil did you use for the Letter Distribution chart??
Hi Vianca,
So glad you found my tutorial! Just another reason why I love DIY: it’s so much more cost-effective! I actually created the stencil for the letter distribution chart. I used my Silhouette cameo to cut the vinyl stencils. Thanks again!
Thank you for sharing! It’s been so long since U’ve used my silhouette, but is the template for the Silhouette something that can be shared? 🙂
what size carve machine do you have?
The largest one!
What side is the magnetic paint painted on? I assume under the paint of the scrabble board but want to make sure. Thank you!!!
Hi Gretchen,
The magnetic paint is on the front. Hope that helps!
Thank you so much for the tutorial for this super fun project! How can we find the stencil for the letter distribution chart?
Jen,
I saw you recommended one type of magnets then used a different kind, I know you were following recommendations of the can but bottom line, could you elaborate a bit on what magnets will hold the best?
Thanks for the plans! They are great!
Hi Joey,
Thanks for the kind words! Yes, figuring out which magnets to use required a bit of trial and error. The larger rare earth magnets that I linked (1.25″ diameter) would be what I recommend and wish I would have started with those instead of wasting my time with the smaller ceramic ones. Hope that helps!
WOW !
If you ever want to come to Africa, and do a workshop tutorial for us, you’re most welcome.. :))
Did you have to get permission to use the copywrited board?
Jen,
What size plywood did you use? My lumber yard sells 4×8 sheets, but this looks larger!
Nevermind! Guess I couldve just read it in its entirety haha!
Hi Donna,
This is a full sheet of plywood plus a 1×12 board. I elaborate in Step 9. 🙂
I would totally pay you to make one and ship it to me! This would go great in the “teen cave”
What a great idea. This job is beyond PRICELESS.
Maybe I missed it. Is there a stencil for the “letter distribution” part on the board
Im wondering the same thing (as well as how to make the stencil for the board spaces (ex: double word score).
Did you ever get this worked out?
Sharon
Is it possible you could give measurements as to where to start the scrabble board? After the frame and the chalkboard and all of that? sorry do not want to risk messing it up…… its an investment of time and finances! So excited to start
Hi Zoe,
So glad to hear you’re going to make this! The Scrabble board is centered top to bottom and starts 10 inches from the left edge of the plywood. The chalkboard is about 14-15 inches wide. Hope that helps! Can’t wait to see your version!
What was your estimated cost of all materials?
I would love to put this in my home but, I do not have time to make this. Would you consider making another one and selling it to me? If so what would the cost be?
Thanks
Hi Ayana,
Unfortunately, due to the time-consuming nature of this project, I’m unable to make them to sell at a price that makes sense for both buyer and seller. Sorry about that!
Just curious…. about how much in materials did it cost, and about how much time was invested? Just asking for my own personal use… and whether I can “con” my husband into making me one. Thanks, and beautiful work! I just saw one of these in a model home, and was doing a search… none of them come close to the workmanship, except for yours! Beautiful!
Hi Robin,
Thanks for the kind words! I’m sorry I didn’t mention the cost and time invested in the post – I thought I did! And now I don’t remember exactly. This was an extremely time-consuming project and I’d guesstimate a few hundred dollars in materials…? I do remember it was hundreds less than the store-bought version! Good luck with getting your husband on board! Haha
If you are just starting out, which Inventables X-Carve would you recommend?
Hi Kimberly,
It would really depend on what you’re wanting to carve. The Carvey can carve up to an 8×10 space while the X-carves can carve larger. I have the largest X-carve and I believe the cutting capacity on it is about 29″. Hope that helps!
OMG this is genius!
Making everyone stand up to play makes it more of an active game, which is great. And it looks amazing!
Hi Jen,
I’m so obsessed with your giant scrabble game. I’m about to be knee deep into this project. My first question is what size did you cut your scrabble pieces 1/2 inch plywood?
Hi Karen,
The Scrabble tiles are 3.5″ square. Looking forward to seeing your version!
Hi,
I’m looking for the size to cut the plywood for the X-Carves. I would also like to know from the 3/4 plywood, how would I use the X-Carves to complete the lines on the game board? You mentioned it but didn’t elaborate too much. I’m trying to work smarter not harder like you suggest!
Hi Karen,
The 1/2-inch plywood panels were about 23″ x 23″ and I’ve made the files available for the X-carve. The link is in the blog post. And instead of hand-routing the grid on the playing board, if you divide up the playing board into 5×5 squares, you can fit each panel onto the largest X-carve. Then once the grid and the bonus tiles are all carved out, you can put it all together. Hope that helps!
I LOVE this!!! I WANT this!!! NO WAY can I make this!!!
Could you make me one? How much would you charge?
I would love to make this but dont have the tools. How much woukd you charge to make one for me?
Love this! I want to try and make this. Is there a link that has the whole alphabet of letters? Thank you
Hi Mary,
Yes, it’s linked in the blog post.
Just come make me one! Lol. I love it but I am just not this crafty
Please, can you make one for me? How much would you charge?
Yes! I’m getting a new house and want this in my playroom. How much would you charge to make this? I have none of these tools nor am I this creative/handy lol
Hi. I have been trying to get my head around this project for awhile and I saw yours. Kudos. I was thinking of doing it similarly, on a slightly smaller scale but scrapped it whwn I thought of all of the pieces sticking together in the basket.cis that an issue. I wss thinking of adding the magnets to the board instead. What do you think?
Amani, I like your Idea a lot. The tiles would have a metal strip,right? I considered inserting dowels on the board with holes in each letter too.
Oh my gosh I bet this is a hit at parties! What a fun idea, now you need to make some giant tile holders 🙂 I kept seeing this on IG and wondered how the tiles stayed on. I thought it was velcro but magnets are brilliant, otally pinning this for when I get my auto routing tool.
I totally just saw that you put your name up there and some woodworking terms, love it, you are so cute!
Awesome project. Question: how did you use the magnetic primer and the chalkboard paint, that is the magnetic primer first then the chalkboard paint?
Hi Kyomi,
Yes, the magnetic primer goes on first, then once it’s dry, you can paint over it.
What a great idea. This job is beyond PRICELESS.
Hi!
Love the project! I plan on making my own, without using tools since I my workshop isn’t set up yet haha. I found bulk wood tiles on Amazon and plan on stenciling everything instead of just the special board squares. I did have a couple questions though.
1) What is the thickness of each tile?
2) What thickness of plywood did you use for the board itself? And did you just use one board?
3) Did you put chalkboard paint over the entire board (after you used the magnet primer), or just on the side where the chalkboard was going?
4) Where did you find the letter distribution file?
So sorry for all the questions!! I’m trying to learn to plan my diy’s before my husband comes back with ALL the questions lol!
Thank you!
Thanks Tish! The tiles are 1/2-inch thick plywood.The board is 3/4-inch thick plywood. No, I painted the chalkboard paint just on the side. I created the letter distribution file in Photoshop. Hope that helps and good luck with your project!
Jen,
Love your project- I’m embarking on a board of my own using all your instructions. Here’s my question- how did you make the stencil? Or did you use an exacto-knife to cut the stencils out?
Brilliant idea!
Hi Jen
I’m having a hard time locating a letter distribution stencil for the silhouette. I’m also not locating the stencil for the double/triple letter and word. Are you able to share the file with me? I’m just purchasing all the items I will need so I can start and finish this in a timely manor.
So great to hear you’re tackling this project, Karen! I linked the files for the Scrabble tiles and bonus tiles in the blog post, under the materials list. For the Letter Distribution stencil, I just typed it all out and used Arial font. Hope that helps!
Jen
I found someone to make the stencils for the bonus tiles. What size the those tiles? Did you do one whole sheet or individual?
3.5″ by 3.5″ would be the routed playing space. You would want the stencil to fit inside of that square. Also would recommend you do each stencil/square on its on or you would be looking for a really large stencil.
Did you paint right over the magnetic paint? How did the magnetic paint hold up? I’ve read negative reviews
Yes, the magnetic paint works great!
Can I get some clarification on the magnets? I see four magnets on the back of the tile in the picture, but I also see your explanation of earth magnets and revising your plan. Since the materials list mentions 100 earth magnets, does this mean you just placed one large “earth” magnet on the back of each tile? Was this instead of the four? Thanks in advance. I’m doing this! Thanks for sharing all your hard work.
Hey there! Are you open to making and selling these? Don’t have the machinery nor the time to do it. Name your price!
Are you able to make and sell this board?
Jen,
I’m asking about the stencil for the left bottom side of the game that’s says distribution list.
hello,
I saw where the stencil for the bonus letters are but when I click on them it just shows the images. I there a place to download them?
thank you,
Jenae
Hi Jenae,
Yes, you can download them directly from that page. Hope that helps!
I see it has been mentioned a few times, but I am still struggling to find it. Where is the distribution list for the scrabble letters?
Sexondly, you had mentioned the scrabble boards ten inches from the edge of the plywood. I am making this now, and that would make the chalkboard 17′. So I think it actually needs to be 11.5 inches from the edge to account for the inner frame and the the distribution section. This allows for 10′ of space for the distribution section before the playing board starts.
Also, I only used one can of magnetic paint to make only the playing board itself magnetic to help lower costs just as an additional idea!
Hi Donna,
I simply typed out the distribution list and did not provide a separate file for this.
This is unbelievably awesome! I am not handy with woodwork, and I was wondering if you’ve considered selling these? It would be so cool in a game room!!
What an amazing project! I am a huge Scrabble fan and can’t think of anything that would make the game more enjoyable than having a giant Scrabble board.
what brand do you use for the glossy laquer?
Hi Jenae,
I used Watco spray lacquer: https://amzn.to/2ZuH9jj
Hope that helps!
Hello,
Can I ask what the cost was to make this, materials wise?
I saw this abc knew instantly that I wanted to make this for our family. Do you have a file for the Letter Distribution section? If not, what font did you use? Thank you!
Would you ever consider selling the scramble letters without the magnets? the X-Carve would be out of my price point sadly.
Hi Emily,
Thanks for your message! Unfortunately, I don’t have the time to make and sell these Scrabble tiles.
This is fantastic! Do you know the estimated cost for you to make this?
Thank you!
Jen Woodhouse is literally the best!!! Everything I find on here is just amazing! I read it every day, and thanks to this amazing blog, I am also so grateful A HUGE thank you to the owner of this community, please continue helping the community with amazing new content.
Hi dear,
could you tell me how can I buy one from somewhere? thanks so much.
I’m definitely making this. So awesome. One question: how has the paint held up? I’m concerned that with use the paint will get messed up.
Thanks, Adam! The paint still looks great!
Wow! With the magnets you linked to, would they be enough by themselves? Or would 3 magnets per tile still be needed?
Thank you!
What kind of glue did you use to secure the magnets?
How did you end up with the nice straight black lines in-between the spaces on the Scrabble Board? You indicated to route first but how would you keep the white paint from seeping into the black routed lines? I can’t imagine that you could tape off the routed lines.
Hi Susan,
I’d recommend using a paint roller to paint the background that way the paint won’t seep into the routed grooves. Hope that helps!
Making this for Christmas and had a few questions. Do you think it is necessary to inset the magnets or could you just attach to back? What type of glue did you use to attach them? Will just one larger magnet work, or did you still leave the smaller ones as well? I don’t have the x carve but was able to find a company on amazon that makes the tiles the right size already done. They aren’t cheap at $2.99 a piece but still far cheaper and less labor intensive. Just thought I would pass that info on for others.
Hi There!
I love the idea of this project for a gift. I’d love to make this for my mom. Is there a printer-friendly option to print out the steps of this project?
This is beautiful but not really DIY. You guys look like pros and who has those tools yeah definitely not DIY.
Awesome. Just maybe change title. To hand crafted enormous scrabble wall game; one of a kind.
It’s amazing !
Thanks for the compliments, Barb. I’m definitely not a pro! If you don’t have the X-carve, you can most certainly paint the tiles, as opposed to carve them. There are other options that will achieve a similar result!
I know this was asked before but didn’t see that there was an answer. What is the approx cost of materials? (Assuming we have all those fancy cutting tools.) Thanks!
Hi Christina,
Cost of materials will vary based on location and availability. There is a list of materials in the post so folks can price them out more accurately. Hope that helps!
Absolutely beautiful. What type of plywood did you use for the tiles? Birch, maple, oak? Also what type of wood did you use for the frame? Poplar, pine, maple? Additionally, how many coats of chalk paint were needed after the 3 coats of magnetic primer?
Hi Lisa,
All great questions! I believe the plywood was either birch or maple. Oak tends to be pricier, and because I painted it, the grain pattern and tone didn’t matter (no use spending more money than necessary). I believe the frame is poplar or pine. I painted a couple coats of the chalkboard paint on. Hope that helps!
Thanks so much for your Quick response. You are so inspiring. Did you apply a clear coat over the painted scrabble board?
Hi Lisa,
No, there’s no clear topcoat. The paint is durable enough!
I so appreciate your quick and helpful replies. Did you use 1/2” or 3/4” for the playing board? And for the it side frame, is that 1×2 or 1×3 Boards? It’s hard to tell in the pictures which pieces were used for the inside and outside frames.
Thank you so much for your quick and helpful response. For the scrabble board, did you use 1/2″ or 3/4″ plywood. Also, for the outside frame, is that 1×3 or 1×2. From the pictures, it’s little hard to tell the inside and outside frame widths and depths.
Great project. Wondering how much does the game board weigh and what did you use to fasten it to the wall?
Hi David,
I would guesstimate the game board weighs maybe 50 pounds? We used a French cleat to hang it on the wall.
Thanks for the quick reply. Pictures and the tutorial are great, really look forward to trying this project.
Jen,
I just read your project story of the DIY giant Scrabble board. I am not a woodworker, nor creative in any way. I would never have the patience for that sort of project. (I do have my own pursuits that I find fulfilling).
I wanted to say how much I enjoyed your writeup. Your sense of humor, your warm self acceptance and your efficient writing style all add up to a great story, even if I won’t ever build the project described therein.
I am reminded of the many talents and personality we are each created with and of the wonderful gift it is to be a member of the human race. And I am inspired to get off the couch and tackle a couple of the projects on MY OWN DIY list.
Thank you!
Dale
Hi Dale,
Wow, thank you so much for your thoughtful comment! It made my day. And thanks for reading!
Jen
Very nice project. I sincerely apprciate you going over the lessons learned from your mistakes. Myself, I have always wanted to buy an XCARVE, but just haven’t pulled the plug yet. Any lessons learned on that tool?
Mike
thank you for sharing this great tutorial on DIY Giant Wall Scrabble Game Board. I have enough space for it in my house. I think it would be fun to make it with my kids. It’s a really great idea!
Wow, very impressed and very interested in making one. How many hours roughly would you say it took you? Knowing full well that it’ll take me 2-3 times as long.
15 years and one quarantine later I am almost done with my board!!! I am using 1/4” boards that I laser cut with a dremel digilab so a bit different but I like it. My husband also had the idea of instead of using rare earth magnets to use sticky magnetic sheets cut to the size. A lot cheaper, looks really clean and it worked!! I should listen to him more;)
Awesome, Gretchen! And great idea on the magnetic sheets! We’d love for you to share your project when you’re done: https://jenwoodhouse.com/share-your-project
do you have names of anyone that would be willing to make one of these for us? i am not able to do this myself. Price, basically, would be no issue. the only thing is that the wall I would like to hang this on cannot hold anything larger than 75″ wide. And I would use a white board rather than chalk board. I love your post!!
Thank you,
Great article.
Sam S
Has anyone made this and want to sell??
Can you post a picture of what the back of the tiles look like after you added the additional magnet? Are the 4 smaller magnets even necessary or do you think the larger one does the trick?
Did you use the X-Carve to do the double word score?
I am making this project for my wife for the holidays. For anyone looking to do this project, do NOT use the magnetic paint. It is not consistent enough and the letters slide. I used 3 coats as per the directions but the letters still slide. I am having to carve out pockets behind each letter to glue in a magnet to keep the letters in place. An additional problem with the magnetic paint is that it is so thick and it does not dry smooth.
Thanks for your input, Eric. Are you using the rare earth magnets on the back of the tiles, as I suggest? I haven’t had any issues with the tiles sliding once I switched out the magnets. Yes, the paint is very thick which is why I mention having to stir it VERY well before application. The finish on my board is smooth.
This was an epic project!! Well Done!
I made one, though slightly smaller, non-magnetic table top version for the Kids ‘N’ Stuff Children’s Museum, in Albion MI, about a decade ago. I made the tiles rectangular and small enough (3″ x 2.5″) so kids could grab them easily. I did not have a X-Carve, so used a CriCut and adhesive vinyl for the letters., then sealed with water based urethane. and I made the mistake of cutting prior to sanding, so can attest to the challenge of 100 tiles individually.
If you have to make letters, I would recommend sanding sealer application prior to painting, or urethane prior to paint, then after painting and sanding, a second and third coat of urethane.
I am so impressed with all your projects!! I still do not have a 3D router…. Thanks for creating this creative community!!
What size router bit did you use to get such sharp corners on the letters and numbers?
Is there a way to do this project if you don’t have the carving machine? Would love to do this, but the machine is a bit out of my price range. Thanks!
Yes! You can just use paint instead of engraving!
I am attempting to make this now. I am not going to spend the money on an X Carve machine, so I used a silhouette machine and cut vinyl letters for the pieces then sprayed high gloss clear coat over them. They look great and it is really quick.
That is VERY cool! 😍
Jen,
This is awesome. My daughter ran across this 2 years ago and kind of filed it away. We are in the process of building a vacation rental cabin in the Smoky Mountains and decided we would tackle this project. Would you happen to have the photoshop file of the letter distribution available for download? What did you print that out on transfer it to the board?
Thanks again! What a great project.
How much would you charge our church to do one of theee for their youth room?? Please??❤️
Call me 513-999-1310
Nitza Foster
Clifton SDA church in Cincinnati OHio
How much would your charge to make one for us. We are a family of 3 with no friends or family around and my son has speech needs. Would love something like this for our home and evening family time. It could totally be smaller as well.
Same question as everyone else how much would you charge …
So cool!!!
I would like one for my classroom as well.
Please make contact.
I don’t have Easel, I have Aspire. Could you send the file and the g code to me?
I have the same question as everyone else??? Price??
Did anyone else ever get an answer or a response? She did SUCH of a great job WOW . I wish I had the time and the talent to do this. ❤️
Love this!!! So creative and can think of ways to create similar without the luxury of carving, but the inspiration is awesome!
What a fantastic idea! I love how customizable the giant Scrabble board is. Can’t wait to try this out for our next game night! Thanks for sharing such clear instructions!
Hello Jen, I am so excited to make this board – this will be my first ever X Carve / wood working project (probably should start on something easier but go big or go home. This post is how I discovered the X carve in the first place – anyway, my question is the thickness of the plywood and the 1x12X8′ board you attached. You mentioned 2 plywood sheets, 1/2″ & 3/4″. The 1/2″ is cut to make the tiles and I assume the 3/4″ is used for the game board. If so, how are you attaching the 3/4″ plywood to the 1″x12″x8′ board? Do you have 1/4″ raised up? I didn’t see anyone else ask this question so I must be missing something (I’m sure it’s me) but I don’t know what.
You also said you should have cut the board to nine equal parts with each panel made up of 5×5 squares (making the board only 45″?) – would those have to be attached together with pocket holes? And, do you think the lines would look different between the grid carved by the machine vs. the lines where the cut board are attached together? Thanks so much for posting this amazing project. I hope mine turns out as good (or as close to it as a newbie can get!)