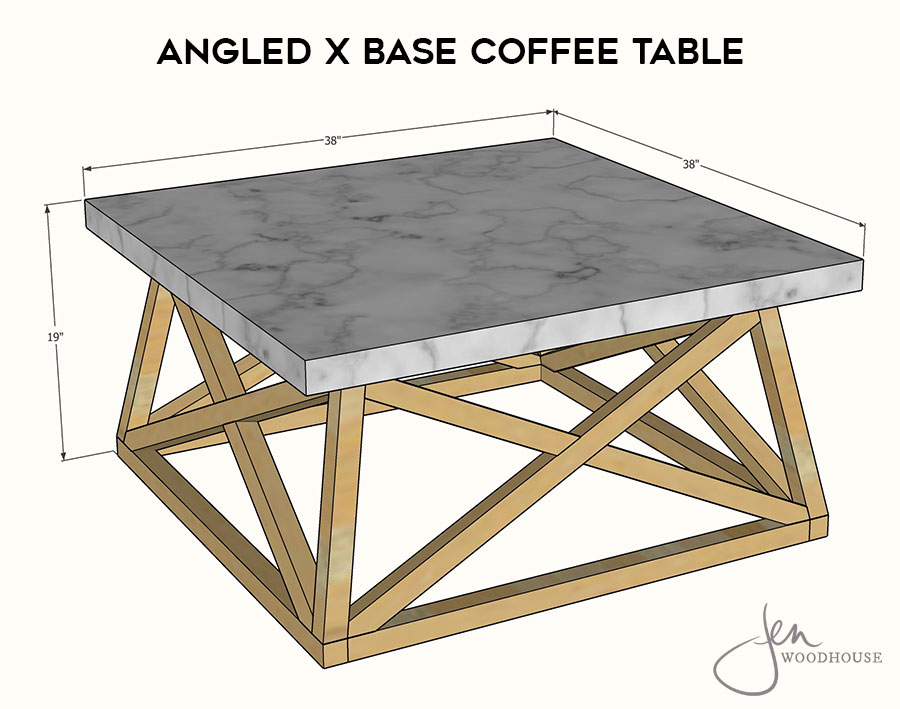
Hi friends! I’m so excited to be teaming up with my sweet friend Anika from Anika’s DIY Life to bring you the free plans, tutorial, and video on how to build this beautiful DIY Concrete and Wood Angled X Base Coffee Table! Psst… want to know a little secret? That’s not real concrete! You’ll have to check out Anika’s post to find out how she made that faux concrete top! Before you go, be sure to grab the plans below so you can build this gorgeous coffee table for yourself!
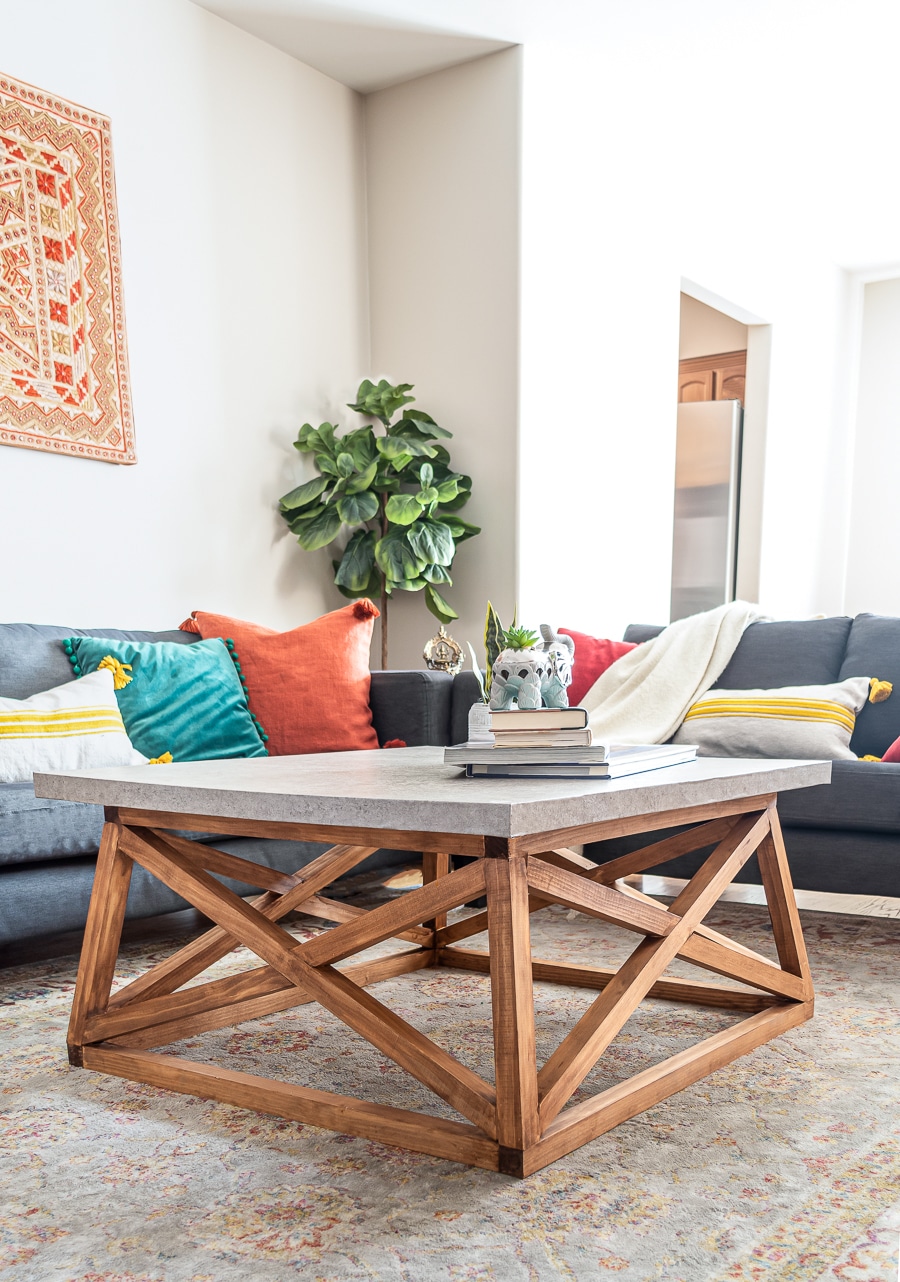
How to build a DIY concrete and wood angled X base coffee table
MATERIALS:
- (7) 2 x 2 x 8 Ft. Boards
- (1) 4 x 8 Ft. Sheet of 3/4-inch Plywood
- 2 1/2-inch Pocket Screws
- 2-inch Wood Screws
- Wood Glue
TOOLS:
*Affiliate links used.
- Tape Measure
- Pencil
- Carpenter’s Square
- Cordless Drill/Driver
- Compound Miter Saw
- Pocket Hole Jig
- Safety Glasses
- Hearing Protection
- Dust Mask
CUT LIST:
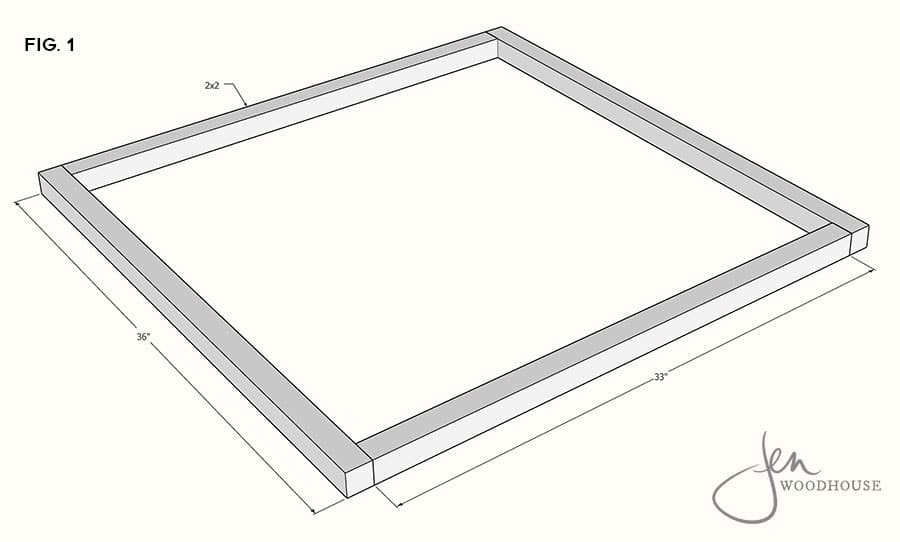
- (2) 2×2 @ 36 inches
- (2) 2×2 @ 33 inches
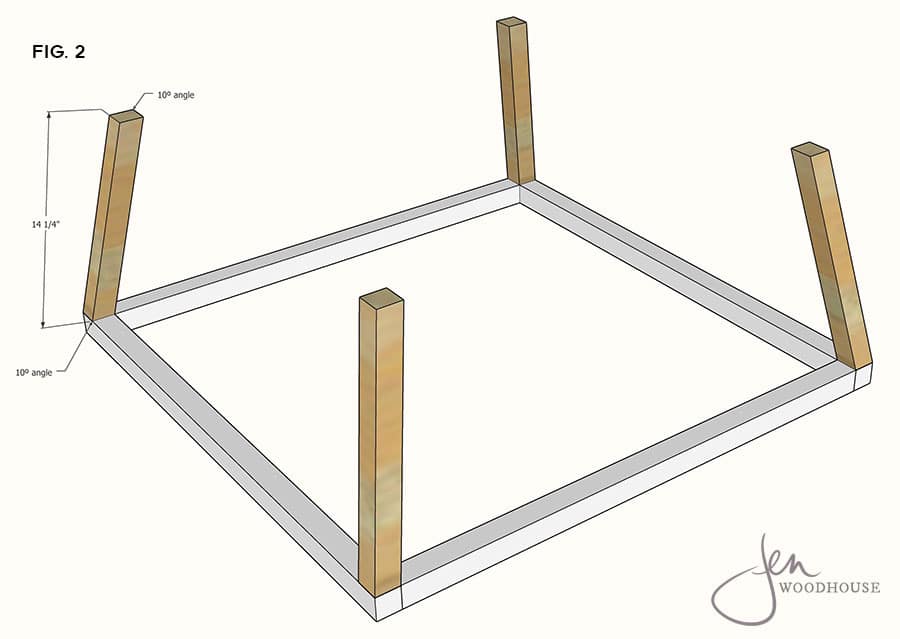
- (4) 2×2 @ 14 1/4 inches
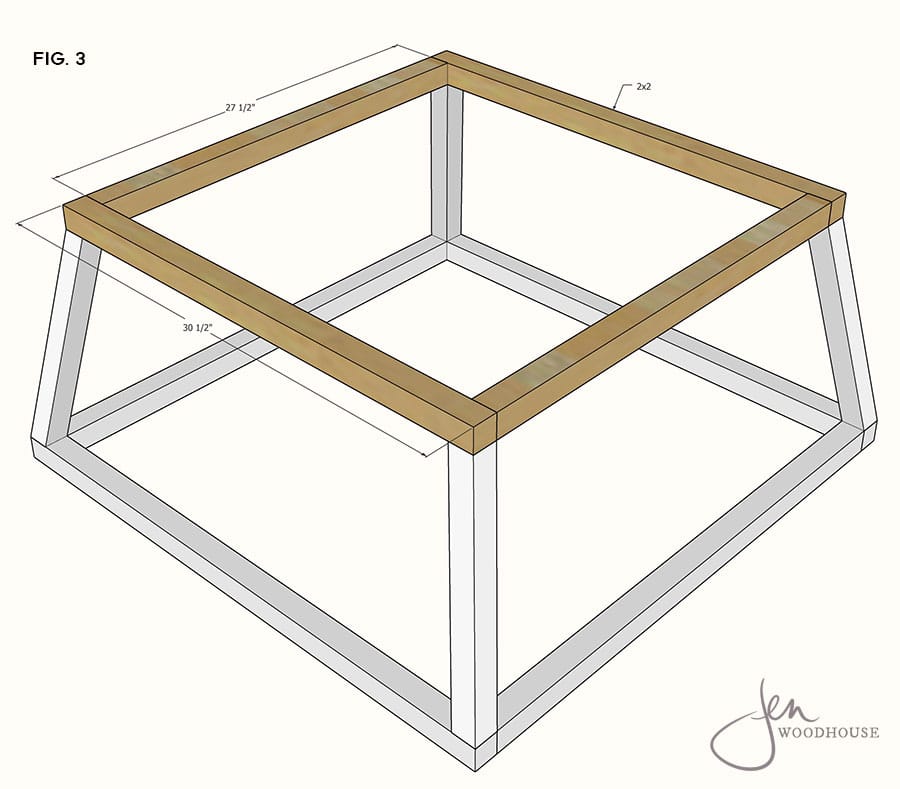
- (2) 2×2 @ 30 1/2 inches
- (2) 2×2 @ 27 1/2 inches
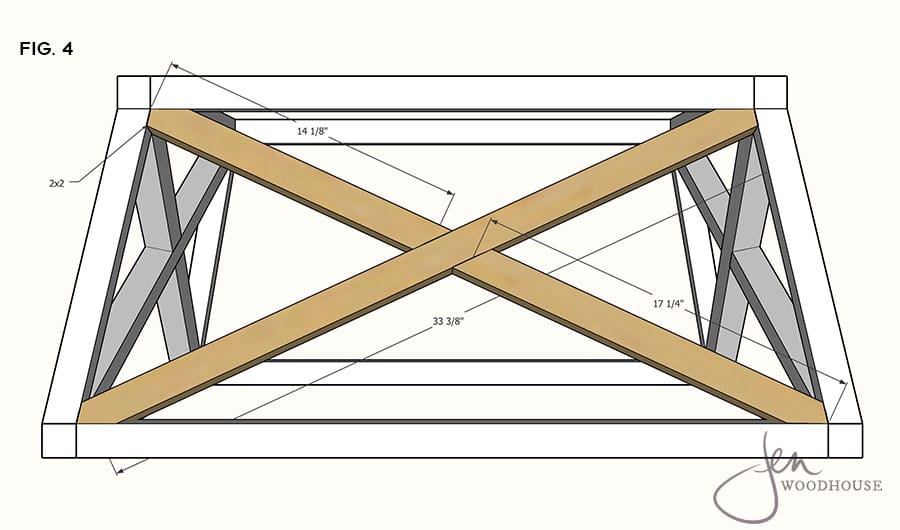
- (4) 2×2 @ 33 3/8 inches
- (4) 2×2 @ 17 1/4 inches
- (4) 2×2 @ 14 1/8 inches
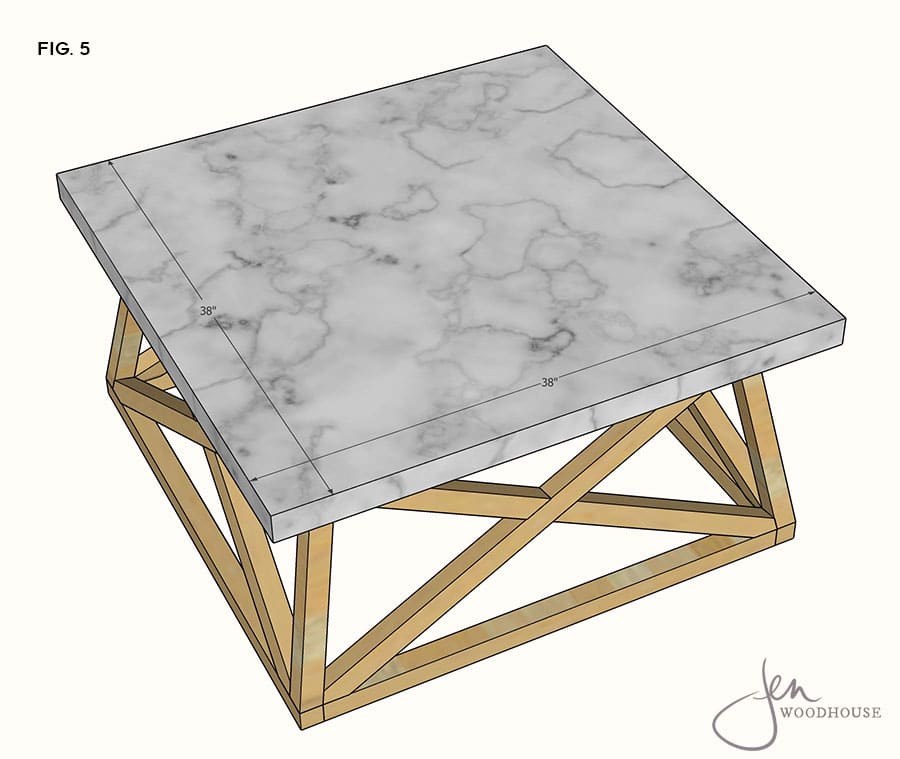
- (2) 3/4-inch plywood @ 38 inches x 38 inches
Step 1 – Build the bottom frame
Measure, mark, and cut the 2×2 boards to length. Drill 1 1/2-inch pocket holes into the ends and build the frame as shown with 2 1/2-inch pocket screws and wood glue. Check for square and adjust as necessary.
STEP 2 – ADD THE ANGLED PIECES
Set the miter saw to cut a 10º angle. Measure, mark, and cut 2×2 angled pieces to length, with both ends at a parallel 10º angle. Drill 1 1/2-inch pocket holes into the ends and attach them to the bottom frame with 2 1/2-inch pocket screws and wood glue. Be sure to angle these boards in towards the center of the table.
STEP 3 – ADD THE TOP FRAME
Measure, mark, and cut 2×2 boards to length. Drill 1 1/2-inch pocket holes into the ends and build the frame as shown with 2 1/2-inch pocket screws and wood glue. Attach the constructed frame to the carcass with 2 1/2-inch pocket screws and wood glue.
STEP 4 – ADD THE ANGLED X PIECES
I recommend holding these boards in place, marking, and cutting to fit to ensure the tightest joint. Measure, mark, and cut the long boards first and attach them to the carcass by toenailing 2-inch brad nails and wood glue. Then, cut the short boards and attach with 2-inch brad nails and wood glue.
STEP 5 – ATTACH THE TOP
Measure, mark, and cut 2 pieces of the plywood to size. Laminate them with wood glue to make a thicker top. Lay the top face down and flip the base over on top of it. Center the base on the plywood, pre-drill pilot holes and attach the top to the base with 2-inch wood screws and wood glue.
Sand, stain and/or paint, and finish as desired.
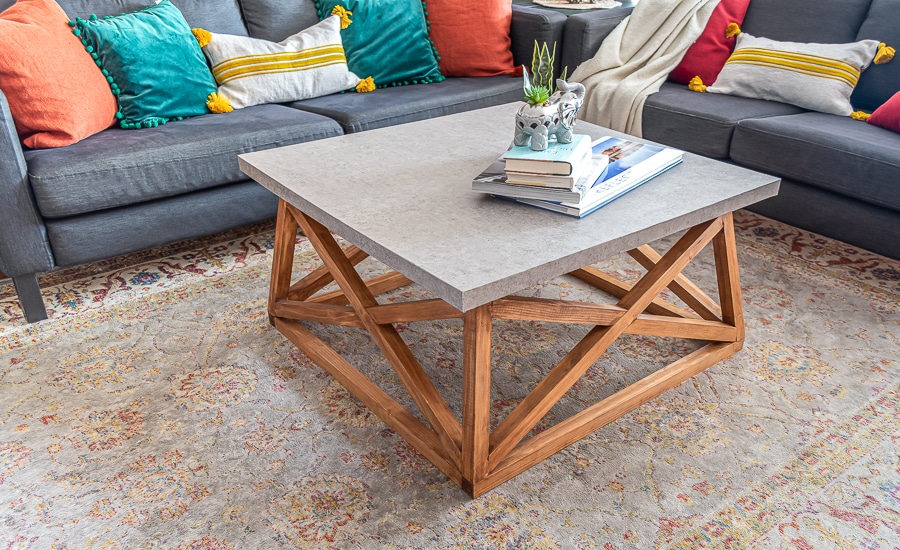


This table looks so good! ???????
Your work seems to be great. Continue the great effort!!
Amazing work, Jen! I like this coffee table so much! Hopefully, I will have the patience to do it myself 😀
it is amazing work and good explanation
nice post
Nice Blog on a coffee table. The thoughts are clear and well explained. Thank you for sharing your work, truly worth reading. On the other hand, if you’re interested in buying Hard Wood Flooring materials in Austin, feel free to visit our website. Thank you and God bless!