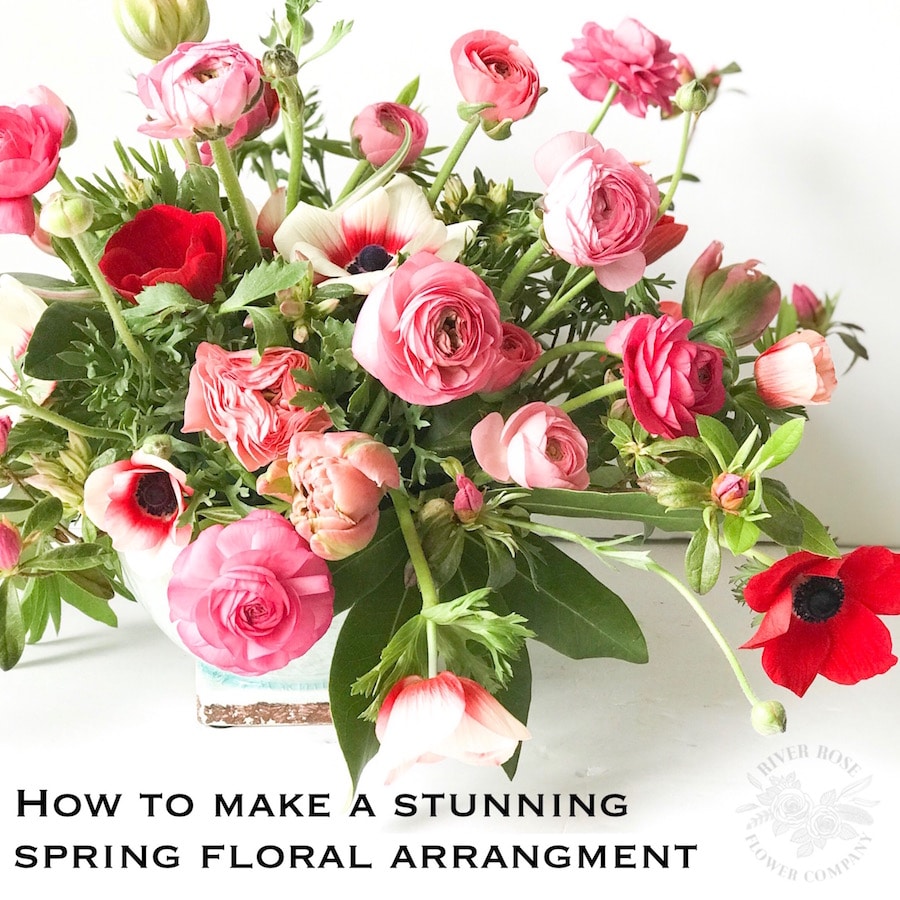
Hey everyone! Carrie Bishop from River Rose Flower Company. Today, I am excited to teach you how to make a stunning Spring Floral Arrangement. Let’s get started!
Materials:
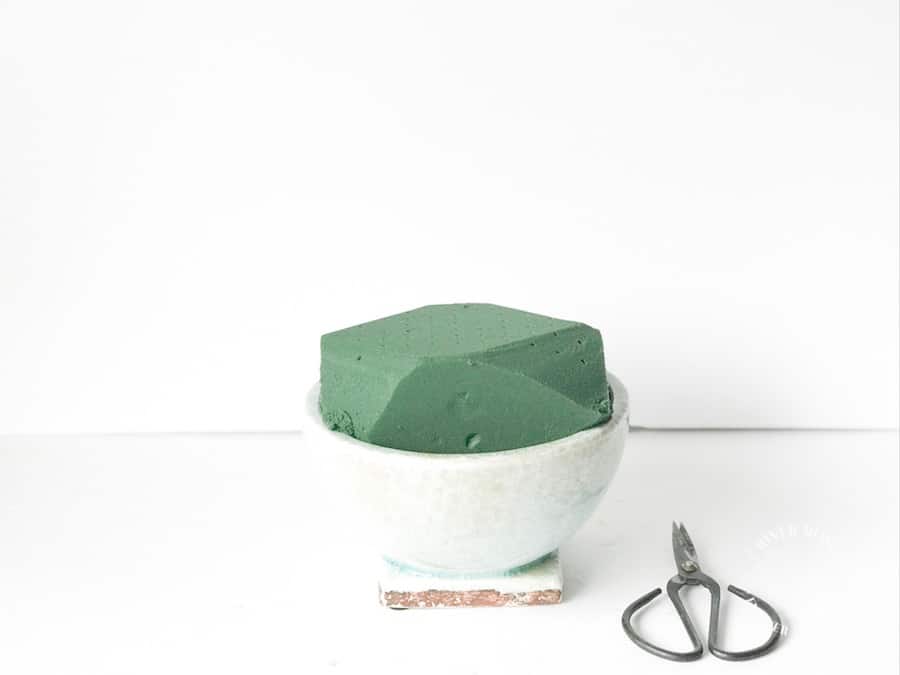
- 1 footed vase 3-4 inch opening
- 1/2-3/4 soaked floral foam brick
- 5-6 stems of greenery with large leaves
- 6-8 stems of greenery with medium leaves
- 6-8 stems of greenery with small leaves
- 3-4 stems of greenery with buds
- 3 large bunches/bouquets of spring flowers
- 1 pair of floral shears
Step 1
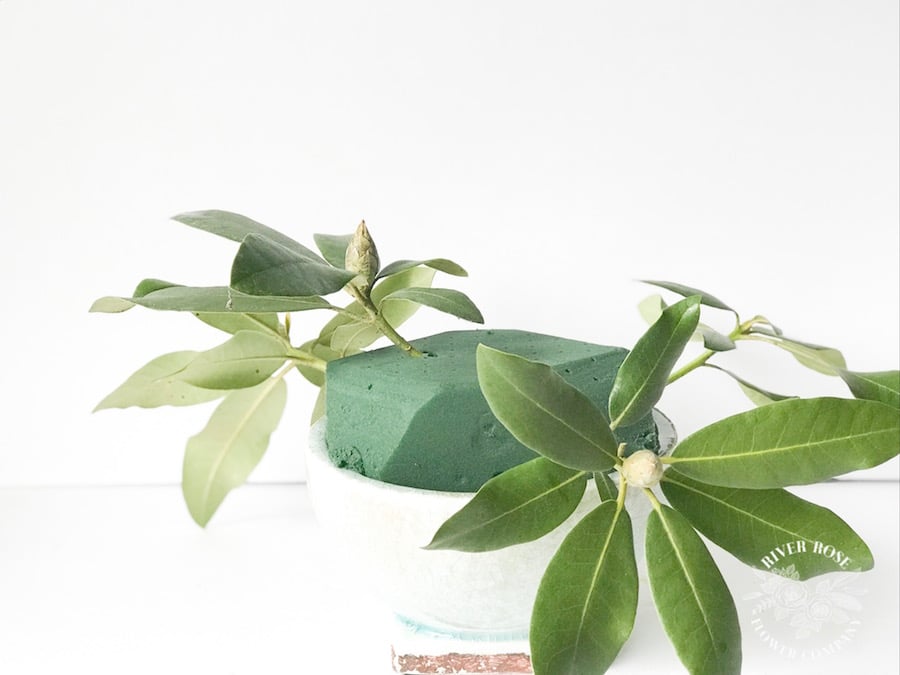
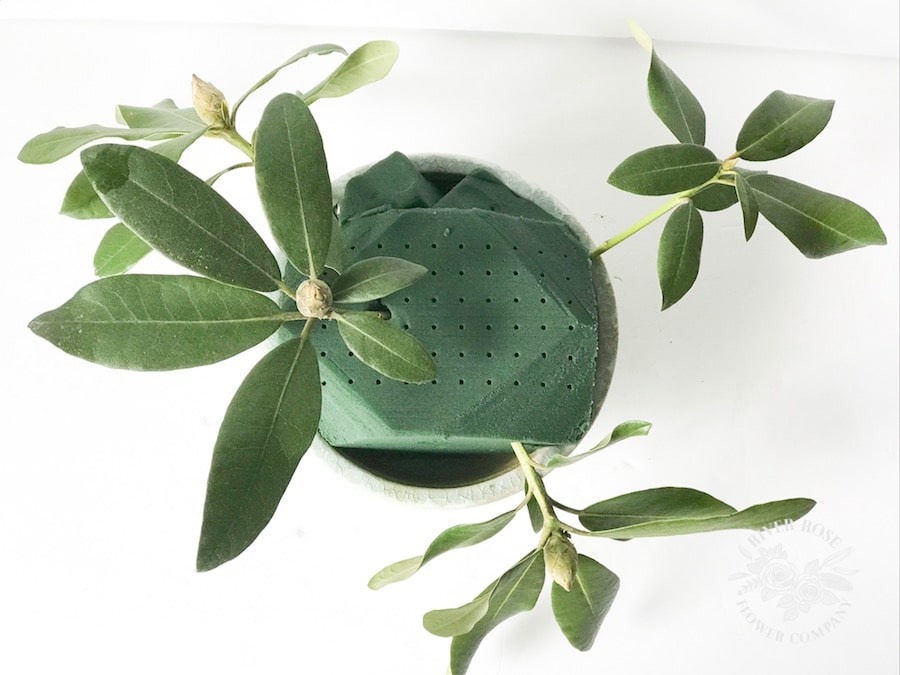
Measure your floral foam brick piece to tightly fit in your footed vase. Place it in the sink to soak for about 2-3 minutes with a slow stream of water. Cut the corners off in order to give yourself more surface area to place your flowers.
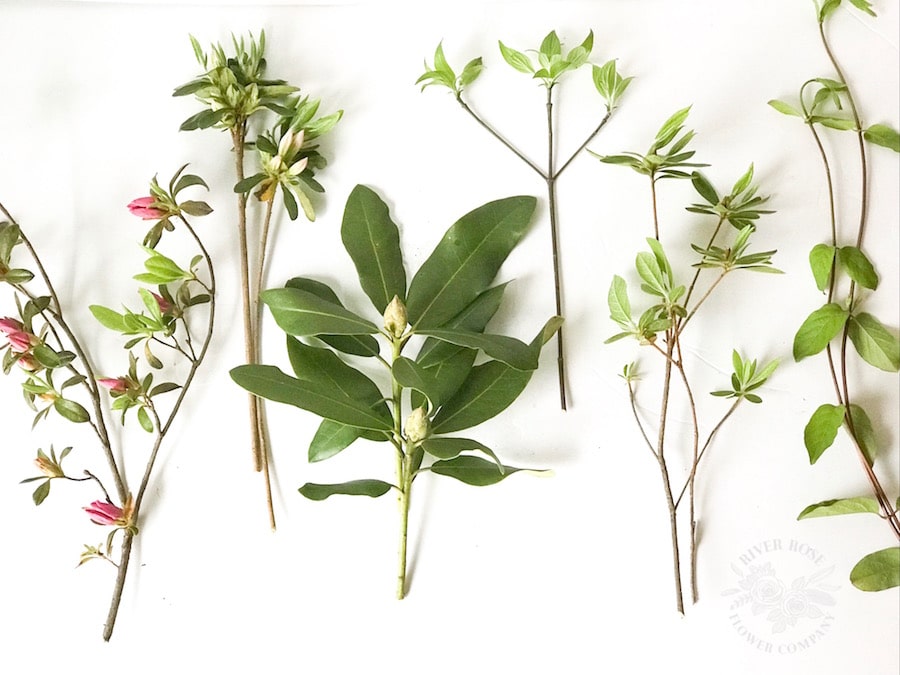
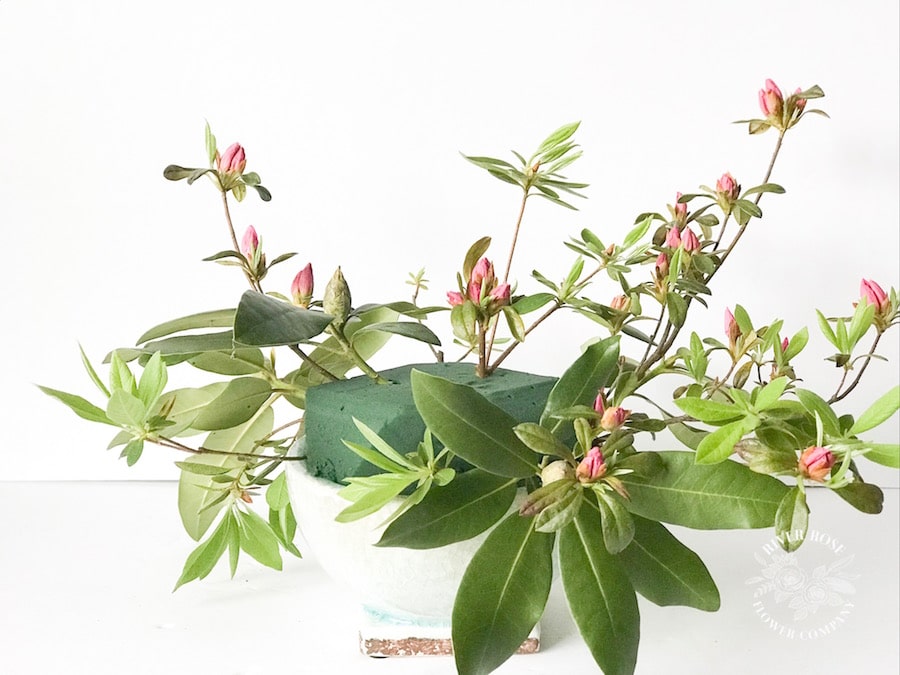
All of this greenery was found in my backyard. Make sure that you have greenery with different size leaves, this will help you cover up the floral foam.
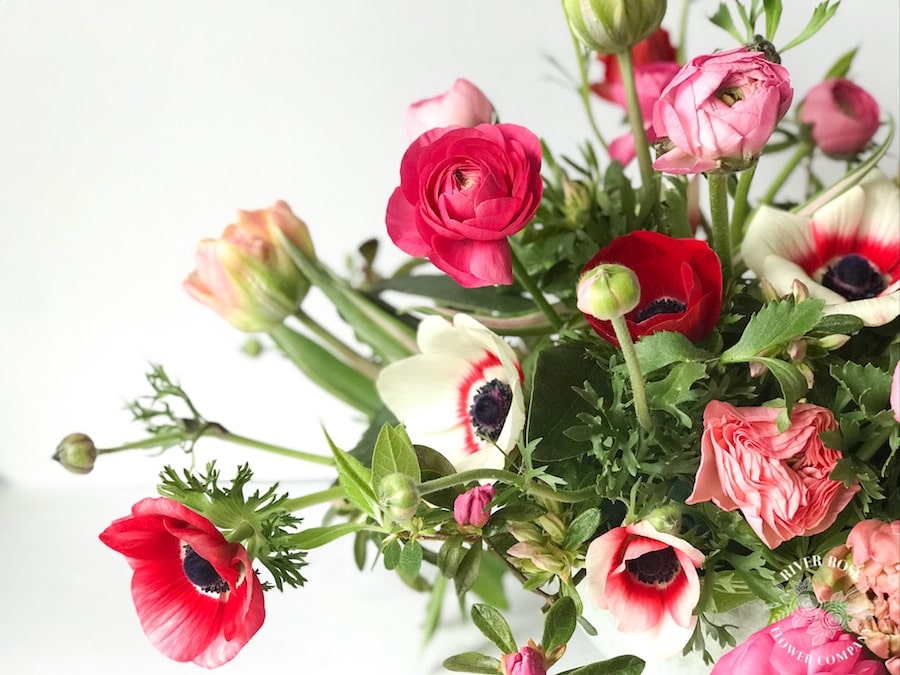
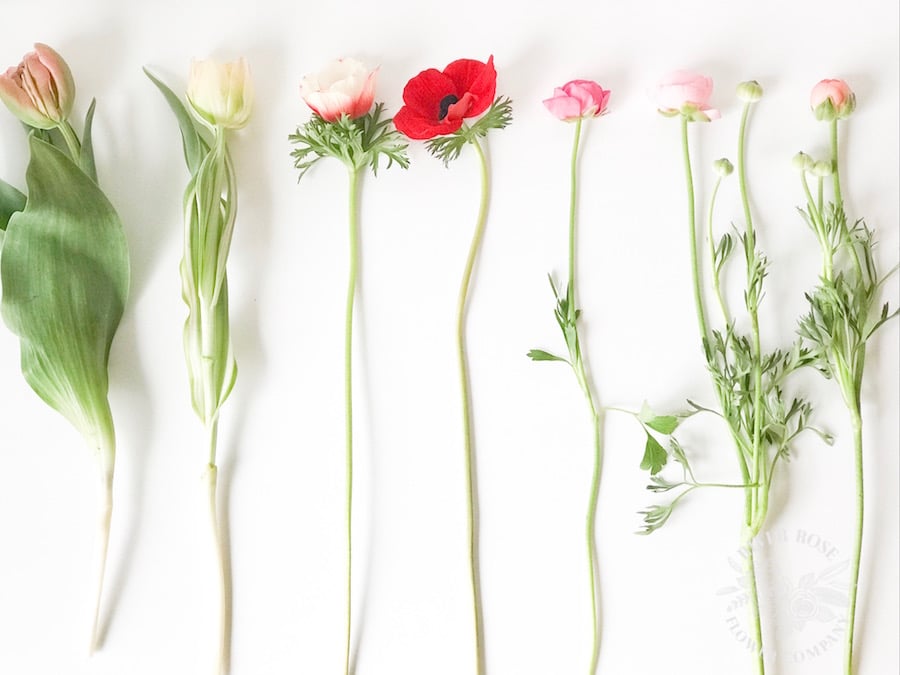 Flowers from left to right: tulips, anemones, and ranunculus. To insure proper flower distribution, make sure that you have 3 stems of every flower represented.
 Step 2
 Step 2
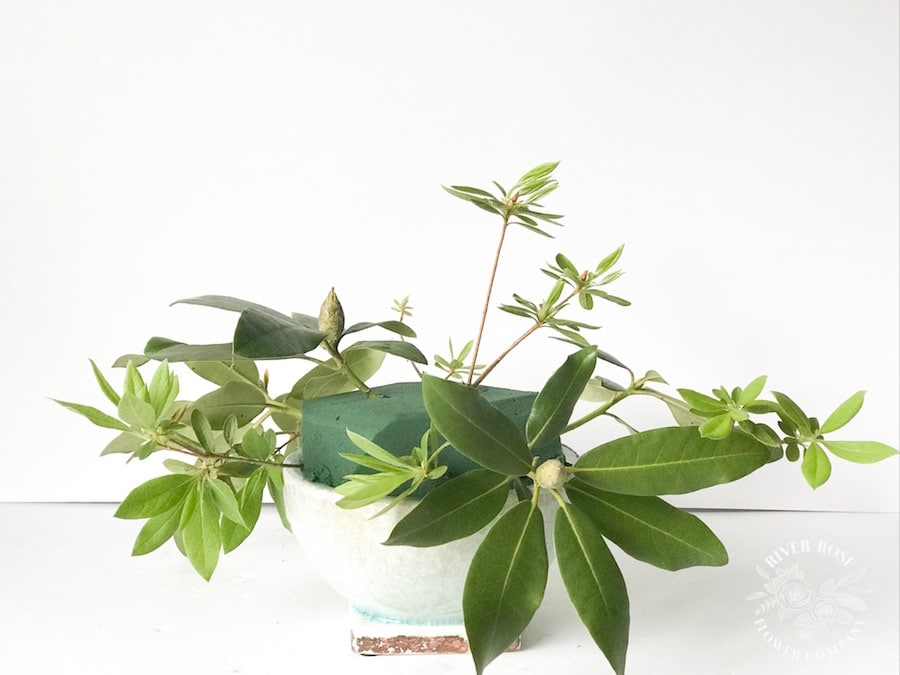
Add the large leaf greenery first. I like to angle the stems down to cover as much floral foam. I will take one of the smaller large leaf greenery pieces and place it on the top. This will cover some of the floral foam, but leave enough room for plenty of flowers.
 The next few steps will be different layers of greenery. In order to keep the arrangement balanced, I only add one layer of greenery each time.
Step 3
 Step 3
Repeat the layering of greenery. I like to make a large triangle with my greenery and then place the 4th stem on top. You can see this pattern with every layer of greenery. This triangle shape helps with spacing out your greenery properly.
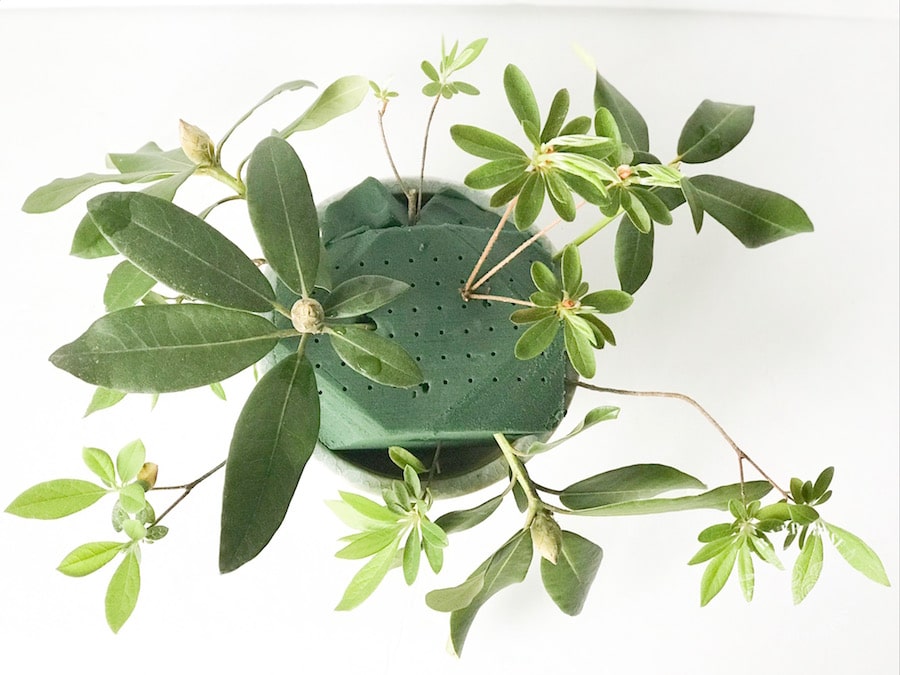
I recommend adding your greenery from largest leaf to smallest leaf and then add the greenery with buds.
 Reserve some of your greenery for filling in the gaps at the end.
Step 4
 Step 4
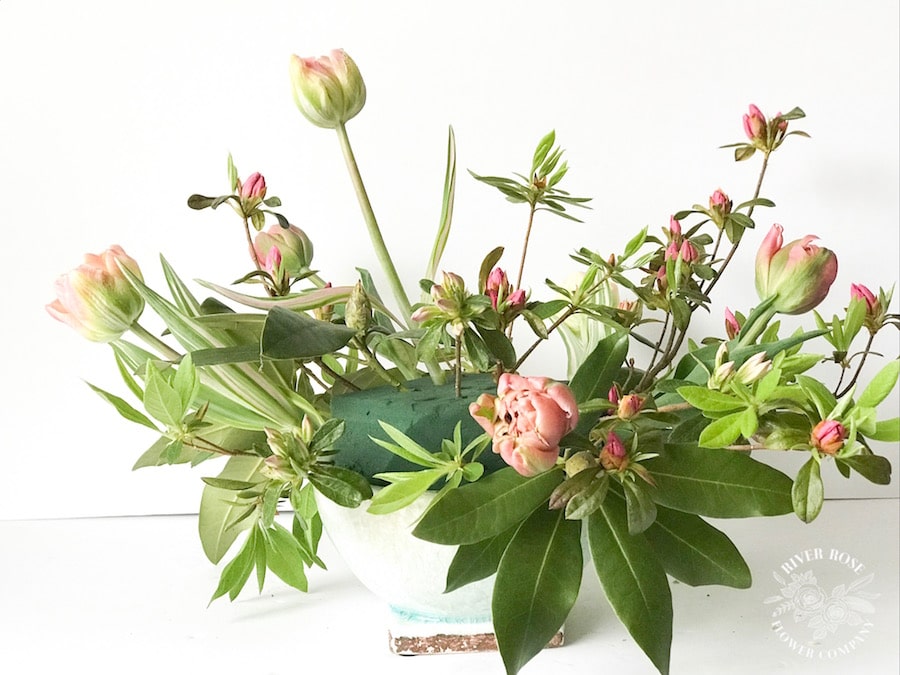
Start adding your flowers. Usually I will tell people to add the largest flowers or base flowers first. With this arrangement, I started off with the tulips first because I have the least amount of them.
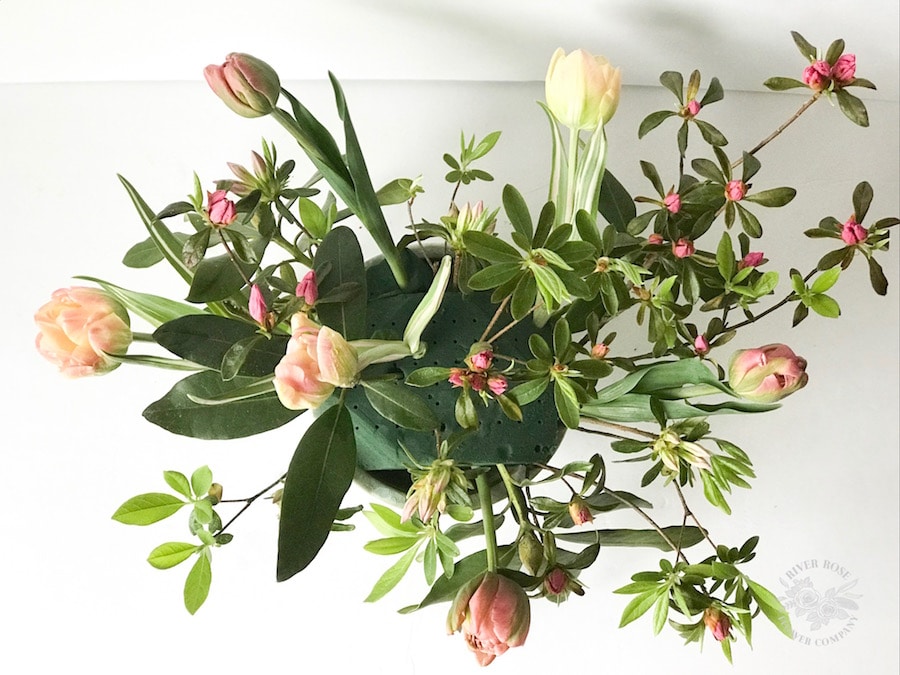
I had three stems of the light pink tulips and three stems of the vintage pink tulips, so I was able to spread out the tulips in triangles just like the greenery. Another reason why I would arrange tulips first, is that tulips have thicker stems. You do not want to wait too long to add them to your floral foam or there may not be room.
Step 5
 Step 5
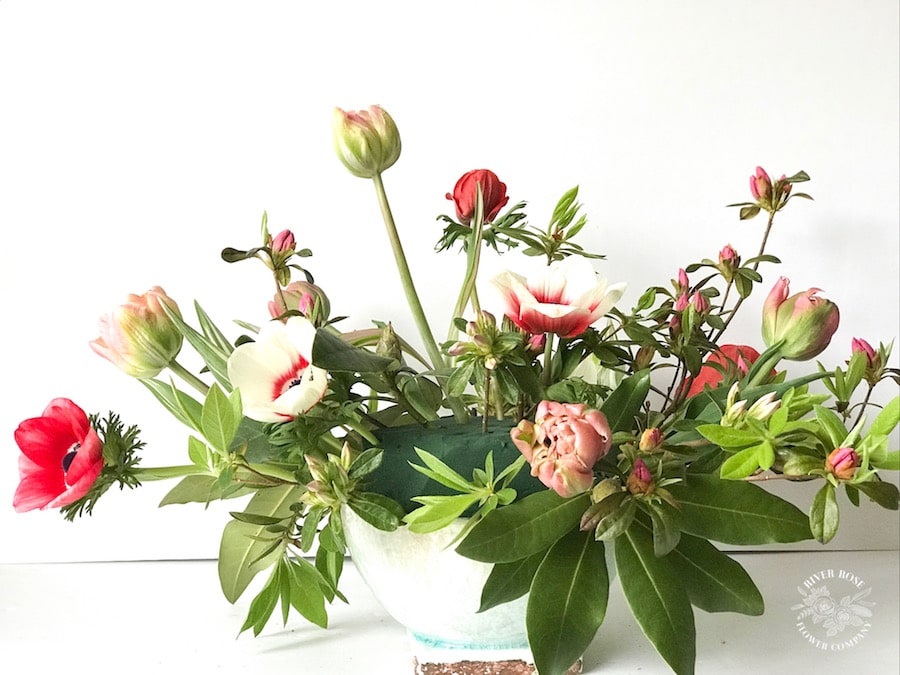
Add the anemone as the second flower. Anemones open up during the day and close up at night. Some blossoms are bigger than others. I recommend placing the larger blossoms toward the bottom covering up large patches of floral foam.
 You can also place some of the larger blossoms flowing out as fun focal points. If you do have one blossom flowing out, make sure that you place the same flower flowering out on the opposite side to balance the visual weight of your arrangement.
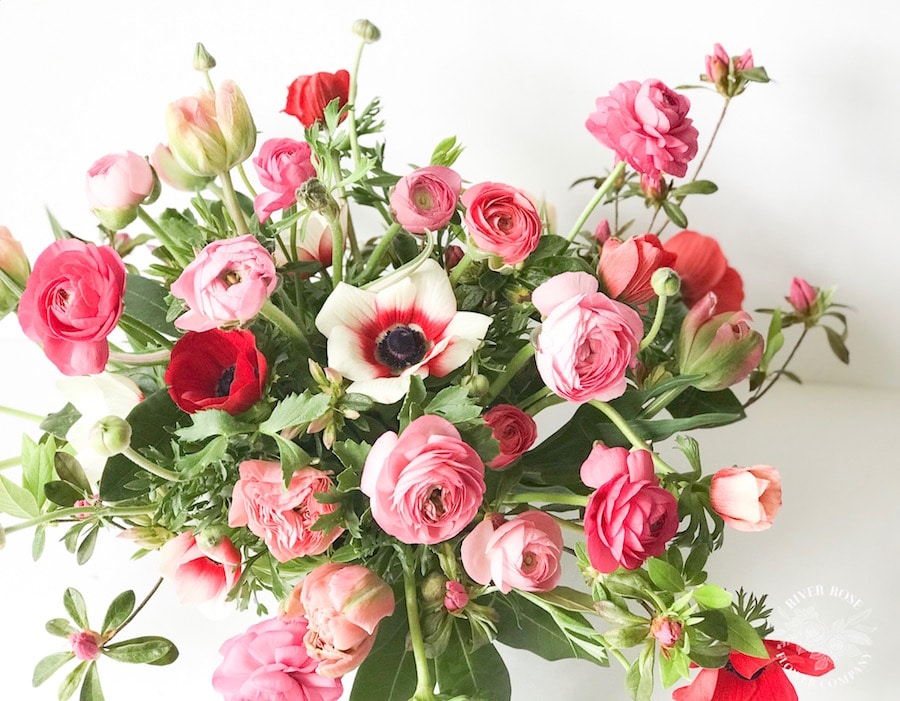
Up to this point, I have tried to add everything in equal parts in organized layers. However, this is not your typical arrangement and we want to create an unbalance cluster of flowers in order to create drama in the arrangement. As you can see, I decided to place most of the ranunculuses on the front right hand side of the arrangement. Some are tucked in, but most of the them are flowing outward. Spread out the remainder of the ranunculuses throughout the arrangement.
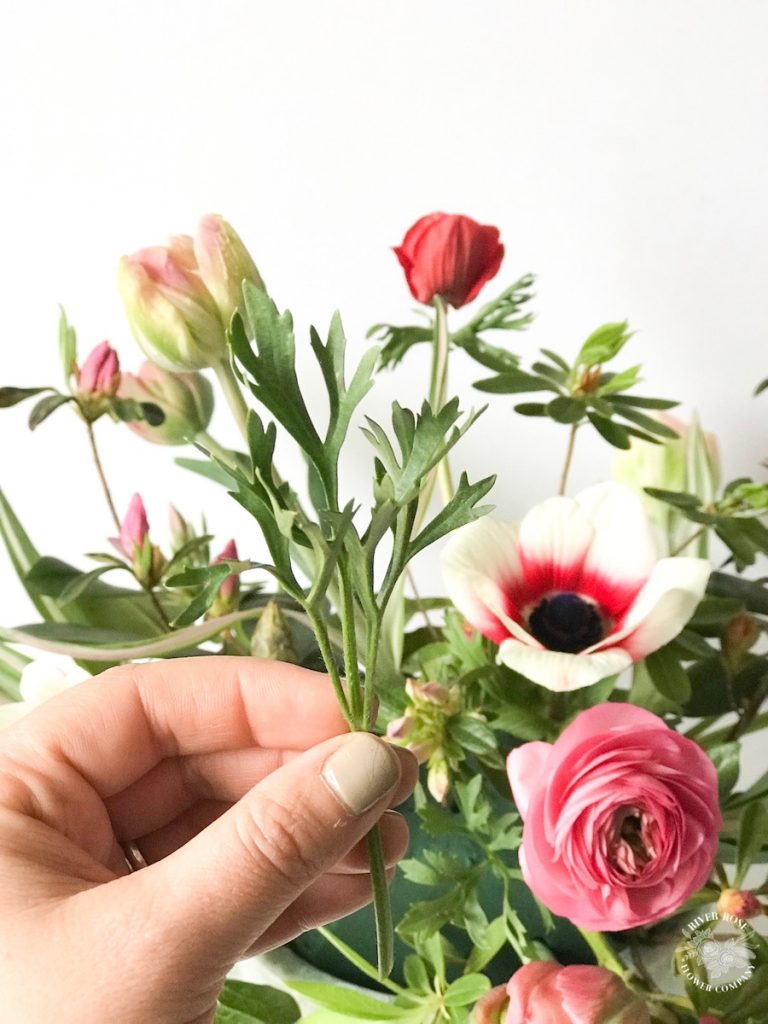
Most ranunculus stems have 1-2 blossoms, a bud, and several leaf clusters. My tip is to use every bit of the stem in order to cover up the floral foam gaps. You can see how I cut the leaf stem and then used it to cover up some of the floral foam.

Step 6
Make sure to use your ranunculus buds. Do not throw them away. They add great texture and they help balance out the buds from the greenery.
Step 7
 Step 7
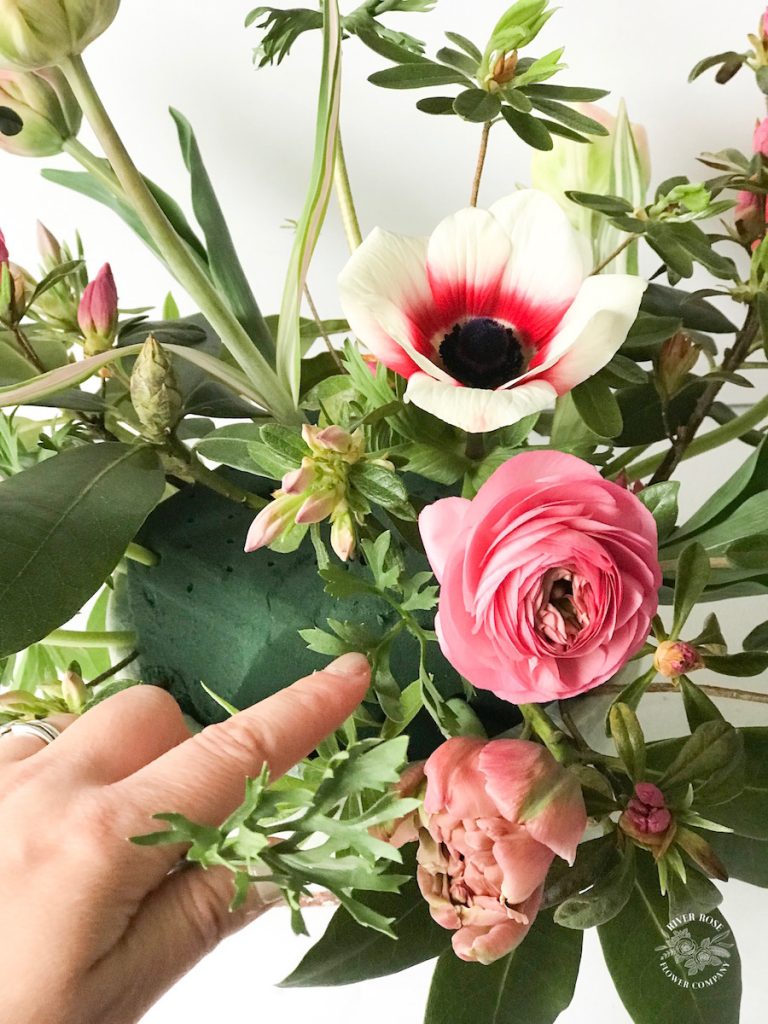
As the last step, cover up any floral foam gaps. Easy cover up options are: use a large blossom cut short and position it close to the floral foam, use a piece of extra greenery, or use extra leaves from the flower stems that were cut off.
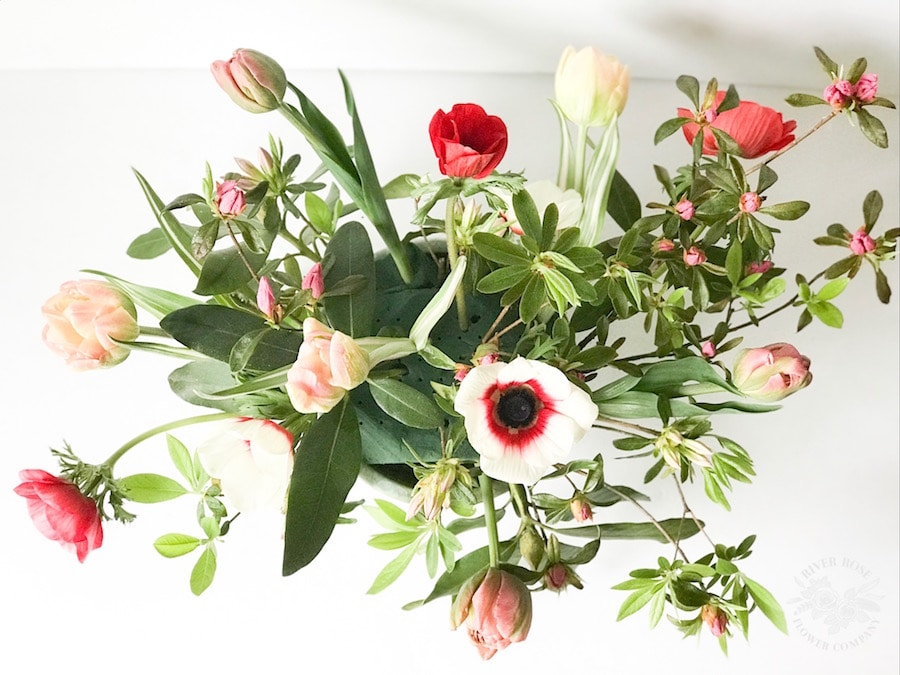
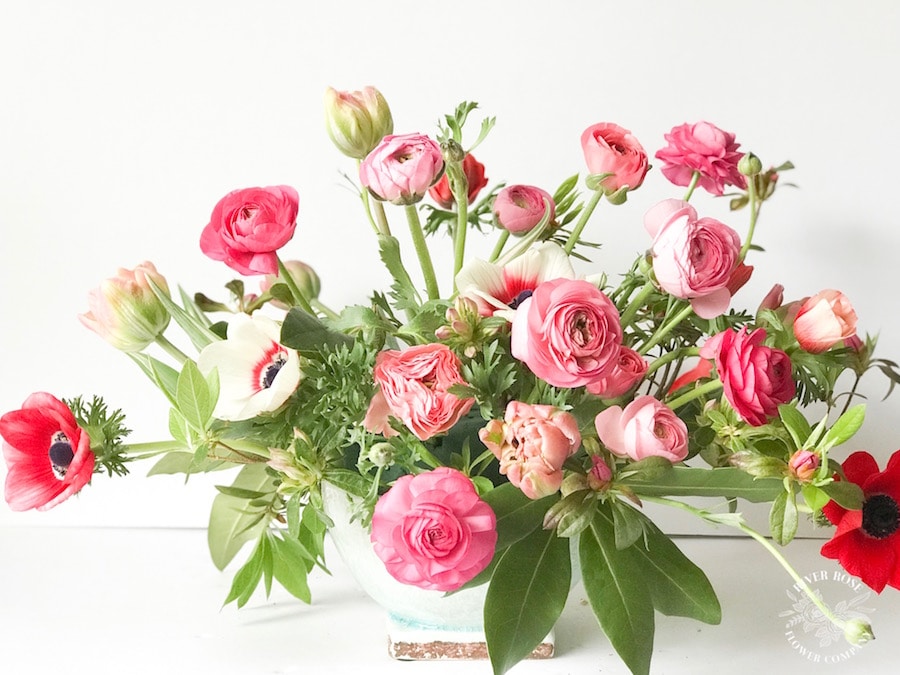
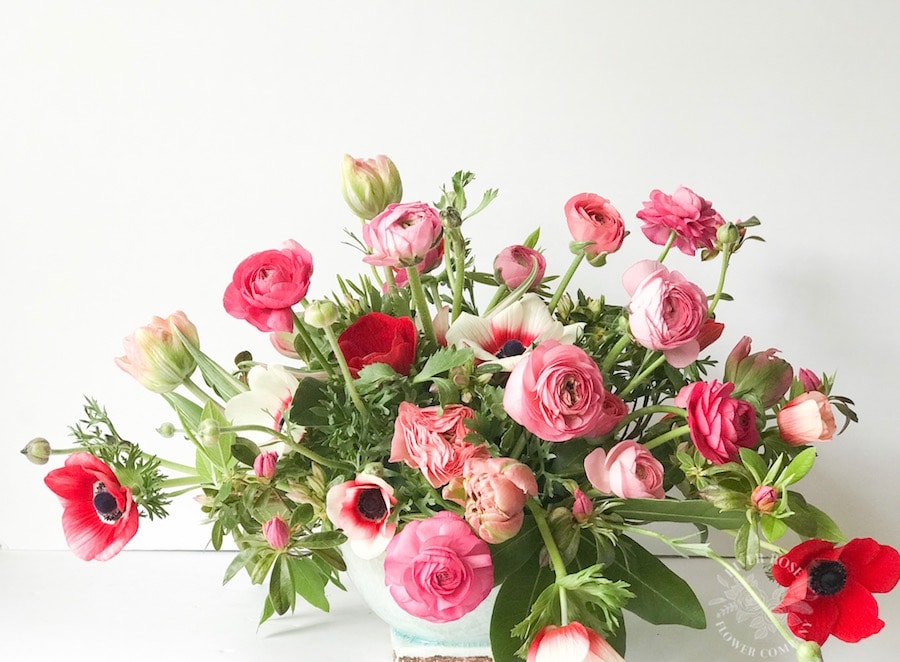 Find a good location to show off your stunning spring arrangement and you are good to go. Congratulations! You did it! You just made a stunning Spring Floral Arrangement!
 Thanks so much for reading this Spring Floral Arrangement tutorial. Hope you enjoyed your lesson and that you learned something new and inspiring. If you’d like to learn more floral arrangements, here’s another of my flower tutorials here.
XOXO, Carrie


I’m still learning a lot about flower arranging – how long should an arrangement like this keep, and how can I extend it? Can I water the sponge? Total rookie here 😛
Hey Kristin,
You are asking great questions! Typically an arrangement in the floral foam will last 9-12 days. You can water it every other day, by pouring a 1/2 cup of cold water in the center of the arrangement. To help extend the life of your cut flowers, you will want to keep them out of heated areas. Thanks for reading the blog;) Sincerely, Carrie Bishop-River Rose Flower Company
This is one of the easiest tutorials to make a beautiful floral arrangement. Thanks for sharing this post, Carrie!
Thank for saying that! I try to make them easy and pretty.