Hello and happy final days of Summer, y’all! Those of you who keep up with me on Instagram have already seen sneak peeks of my latest DIY project. I can’t wait to finally share the details with you! Three words to describe this piece: smooth, sturdy, and solid! The finish is buttery smooth, the build is suuuuuper sturdy, and the construction is solid. I absolutely love it. As usual, I can’t build anything without the guidance of my generous and gifted friend, Ana White. She’s a master at figuring out and creating easy-to-follow plans. Speaking of plans, you can build your own Pottery Barn-inspired Media Console by downloading the plans here!
The Hubs has doggedly held onto the most archaic rear-projection TV that he proudly picked up at a pawn shop during his bachelor years. Huge, cumbersome, and semi-functional, it truly was an eyesore in that room. Meanwhile, our 50″ plasma TV was collecting dust, perfectly functional, yet unused, in our baby boy’s nursery. Why an 11-month-old needs a television in his room is beyond me. I mean, isn’t the iPad enough? #firstworldproblems
Only kidding. We were storing the TV there until we could get a stand for it. Or until I could build one. Naturally, I emailed Ana, asking for her help in drawing up the plans for this media console I spotted at Pottery Barn (priced at $1099*). She is so generous, you guys. Every time I hit her up, I’m amazed and completely humbled that she agrees to work with me!
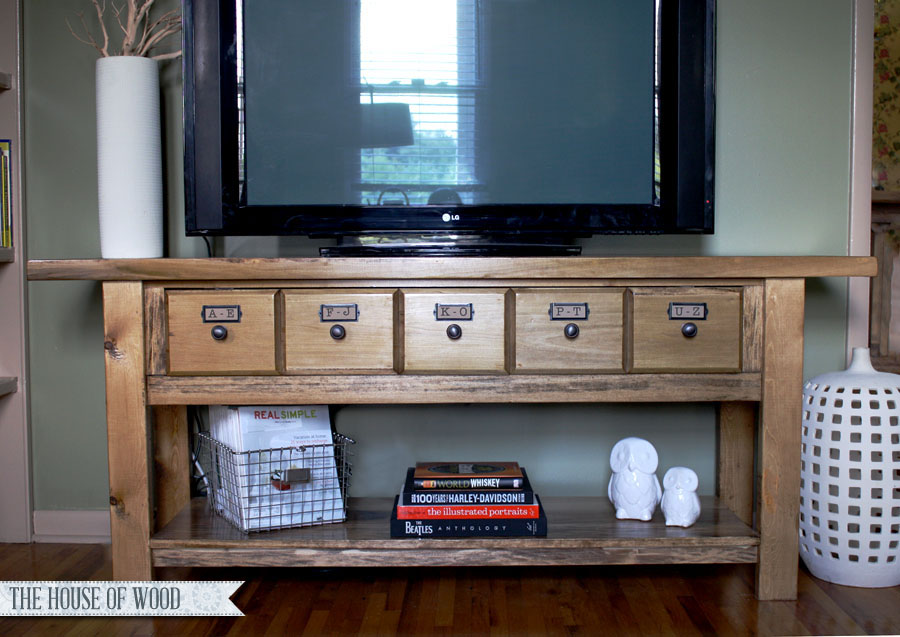
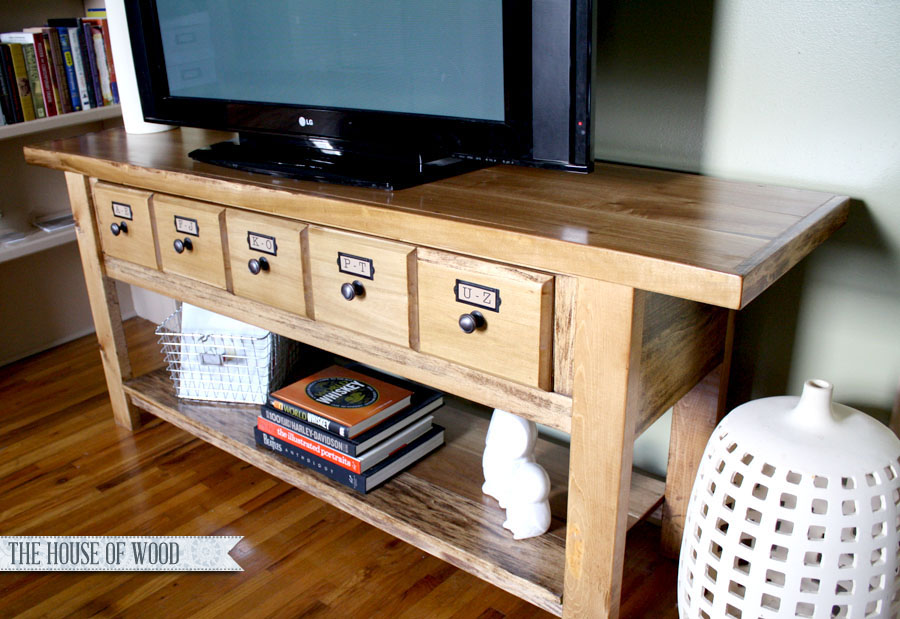
Here’s how it turned out:
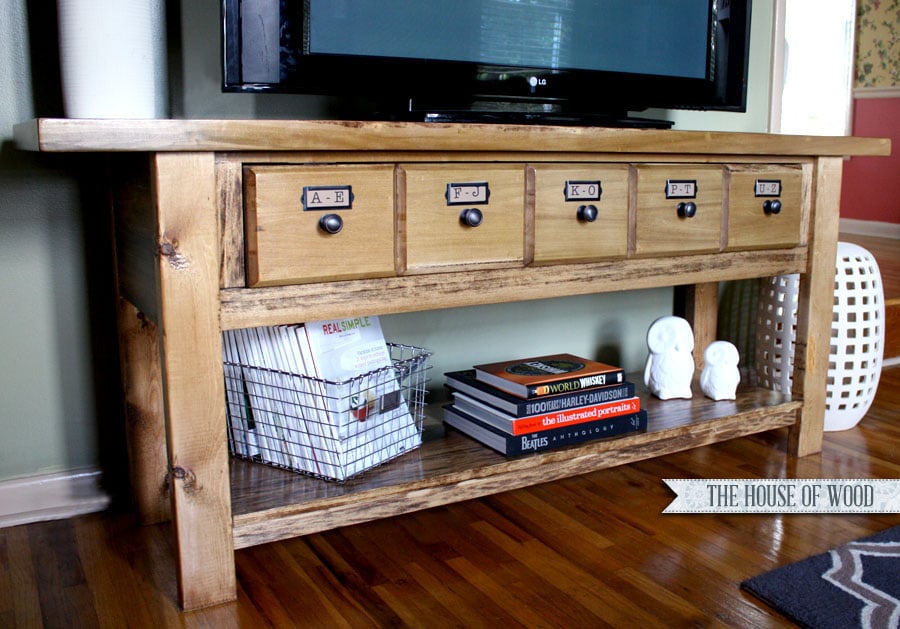
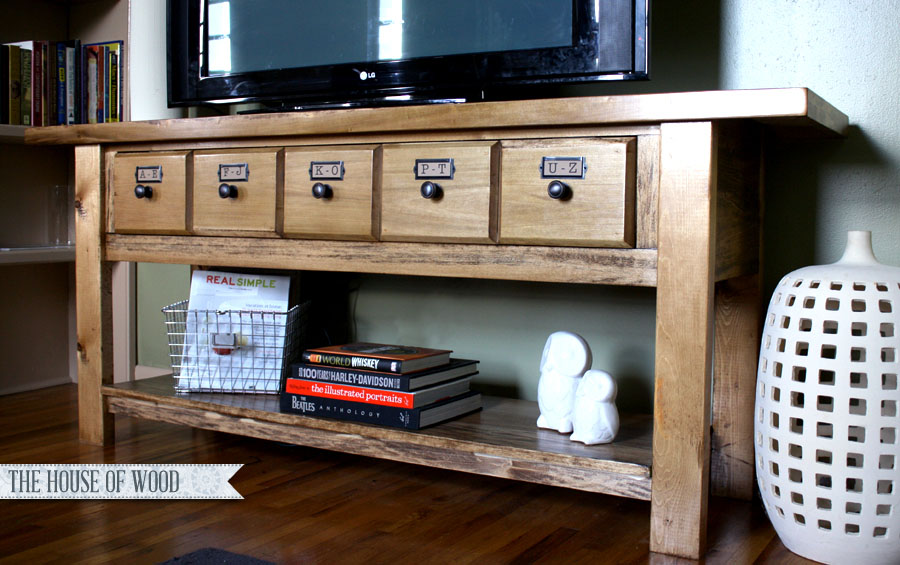
Gorgeous, right? And super easy to build too! I love those beveled apothecary-style drawers. But I’ll let you in on a little secret…
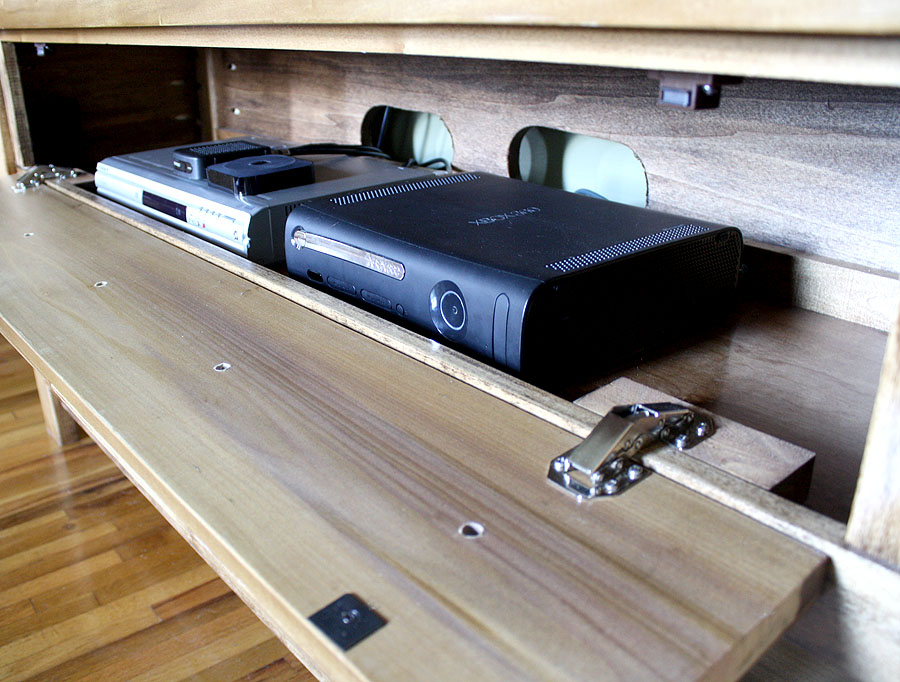
Those aren’t real drawers, it’s a flip-down cubby! I certainly could have placed all the media components on the bottom shelf, but my wee ones are inexplicably drawn to flashing lights and buttons, so I decided to hide them away, out of sight, out of mind. Though this does mean that we need to leave the door flipped down when we’re watching TV, to access the remote control sensors, I figured it was a compromise I was willing to make. Besides, I’m not really a fan of putting those ugly cable boxes on display, are you? I might reconsider once the kiddos are old enough to resist the urge to press every button they see; then that space could be used to store DVDs (or VHS, if that’s how you roll).
I used mostly poplar wood for this piece, with the exception of the spruce 2×4 legs and the plywood shelf. Ever since I discovered Purebond Plywood, I won’t use any other kind of plywood. Not only is their birch hardwood plywood beautiful and finish-grade, it’s environmentally responsible and the healthier choice for us, since almost all of the furniture I build is meant for indoor use. Unlike other plywood, Purebond uses a soy-based adhesive, instead of the industry-standard toxic urea formaldehyde, which is a known carcinogen. This means healthier indoor air quality and a more eco-friendly option. I purchased a birch 4×8 panel at my local Home Depot. It should be available at most Home Depot stores, but if it’s not, you can certainly order it from them!
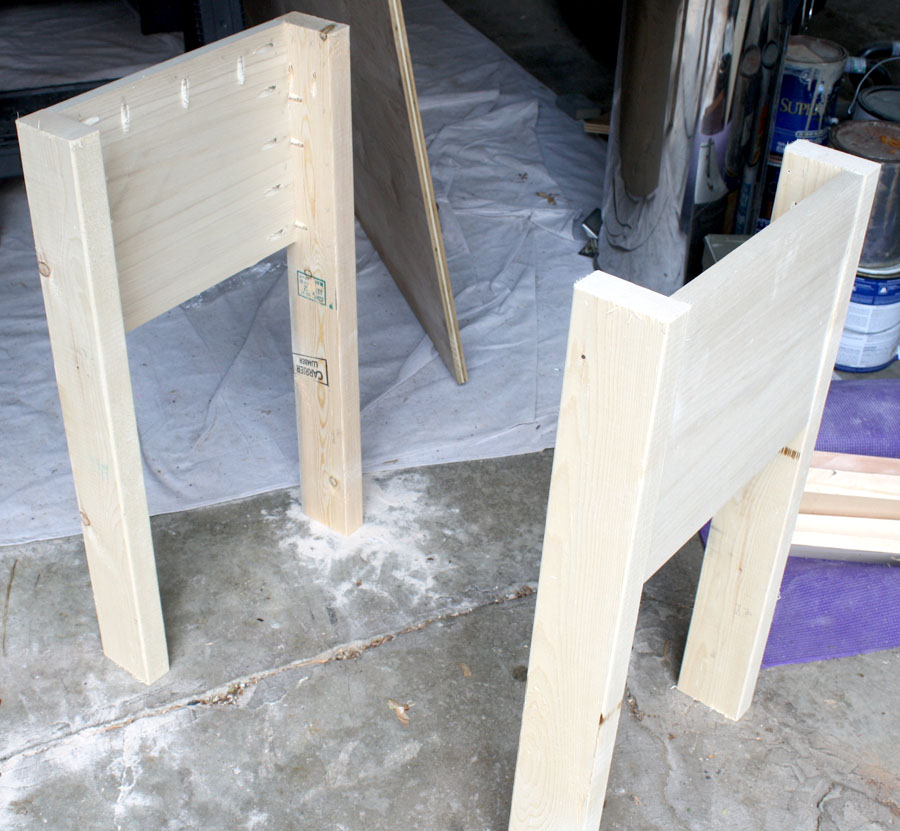
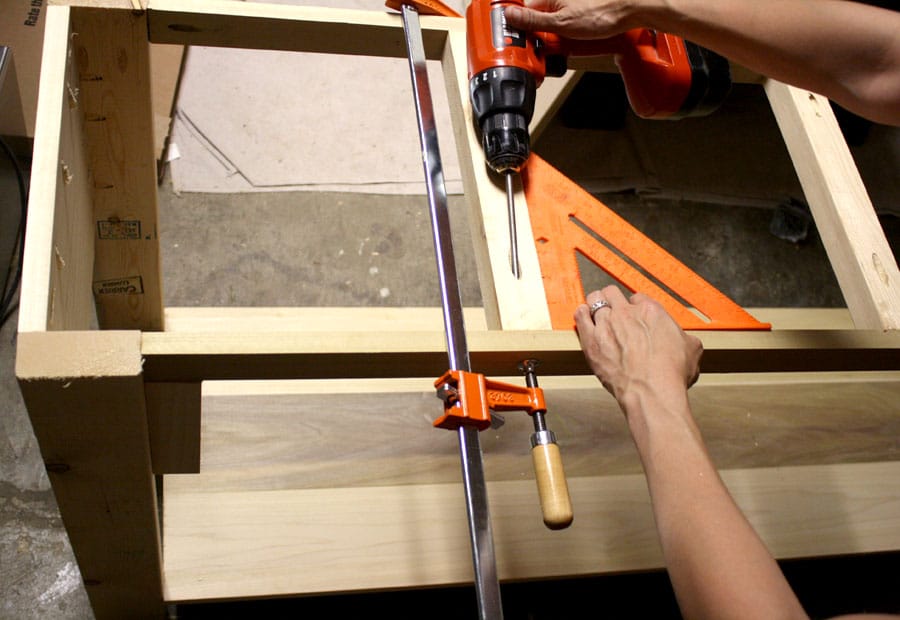
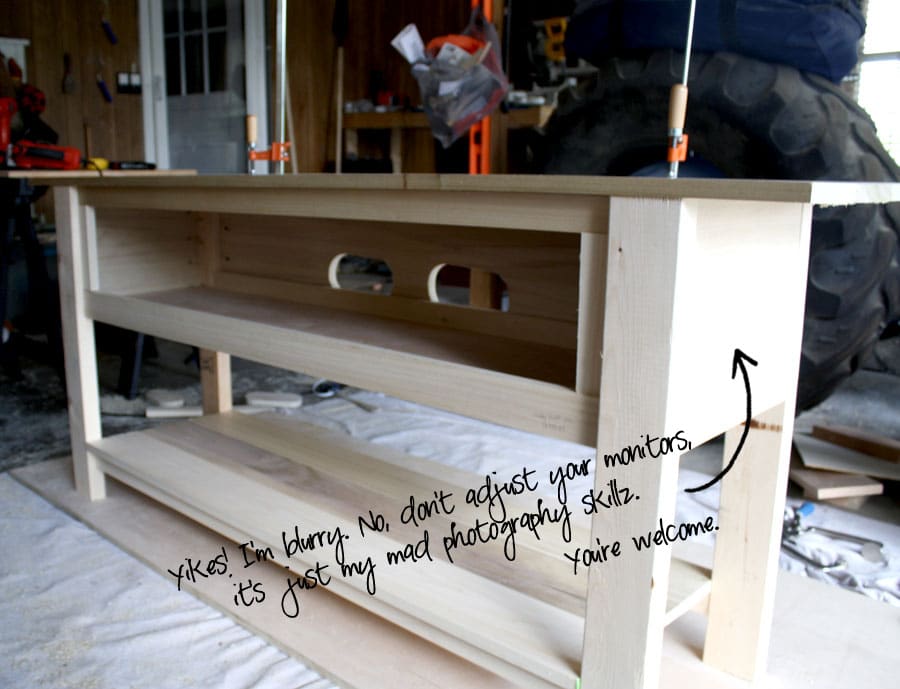
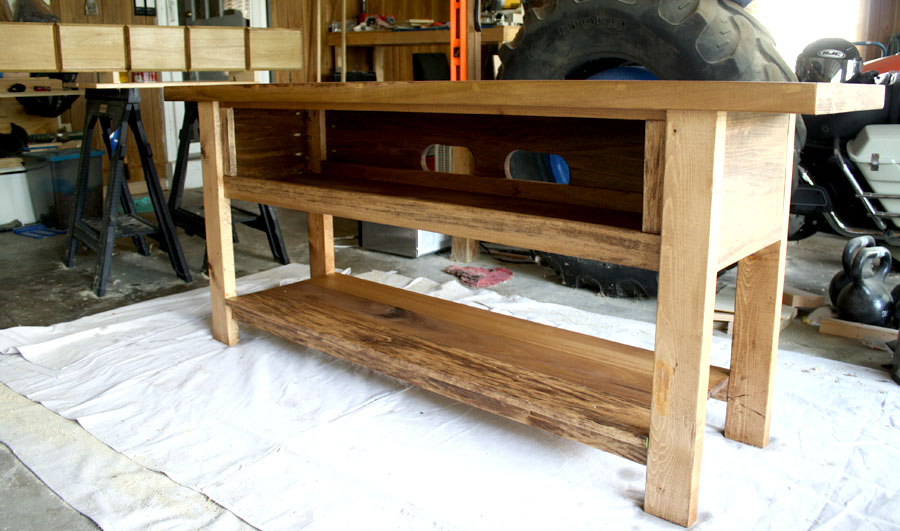
Okay, so onto the build! First, I attached the legs and sides together with glue and pocket hole screws:
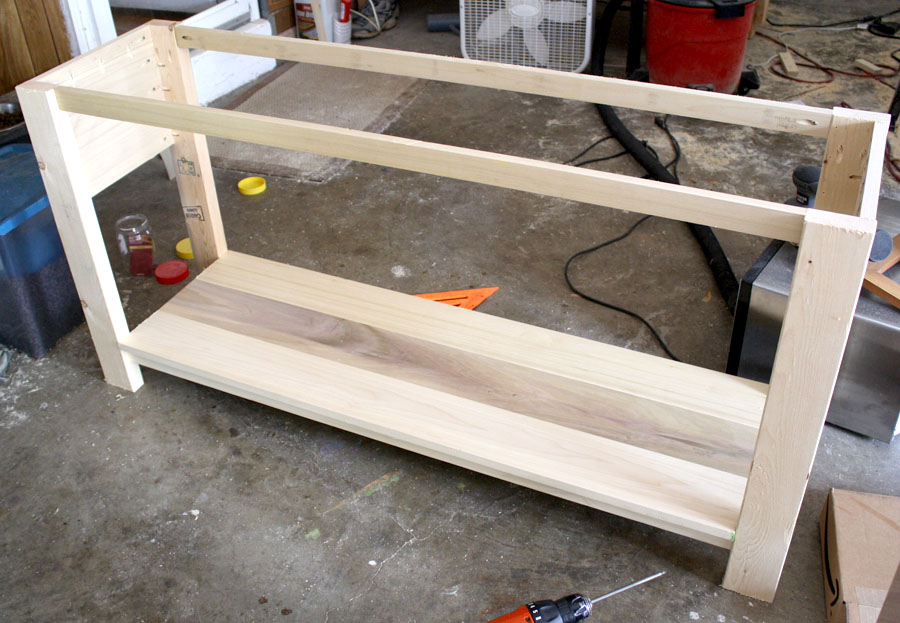
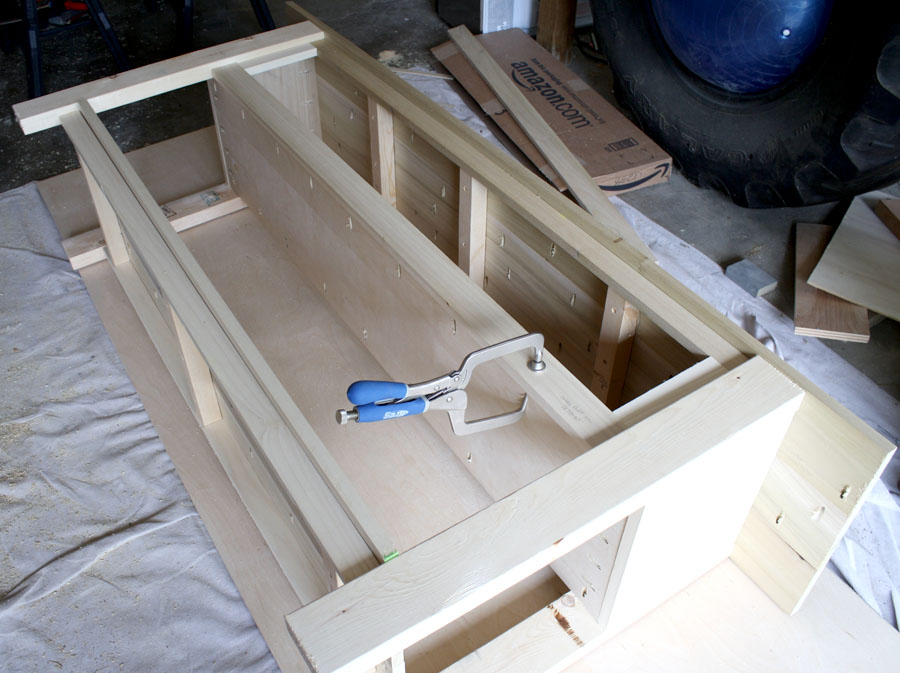
Then added the bottom shelf and tabletop support frame:
I also added a few 2x2s to help support the heavy weight of a TV, making sure everything was square and even. These supports are probably not necessary (they’re not in Ana’s plans) because the pocket hole joints are strong, but I like to overdo things. I mean, why do, when you can overdo? Apparently, I’m a ‘just-in-case’ kind of girl. Oh, and I love using clamps – we’re like BFFs. Clamps make things a gazillion times easier when you’re building alone (yes, I realize how pathetic and lonely that sounded).
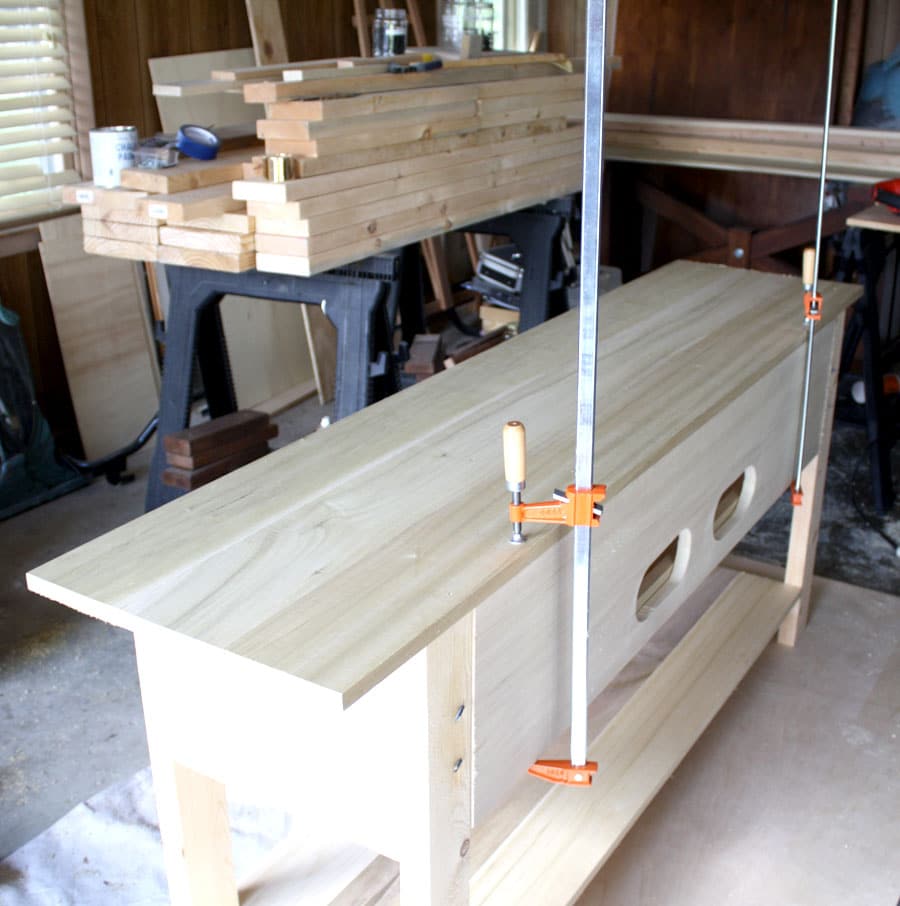
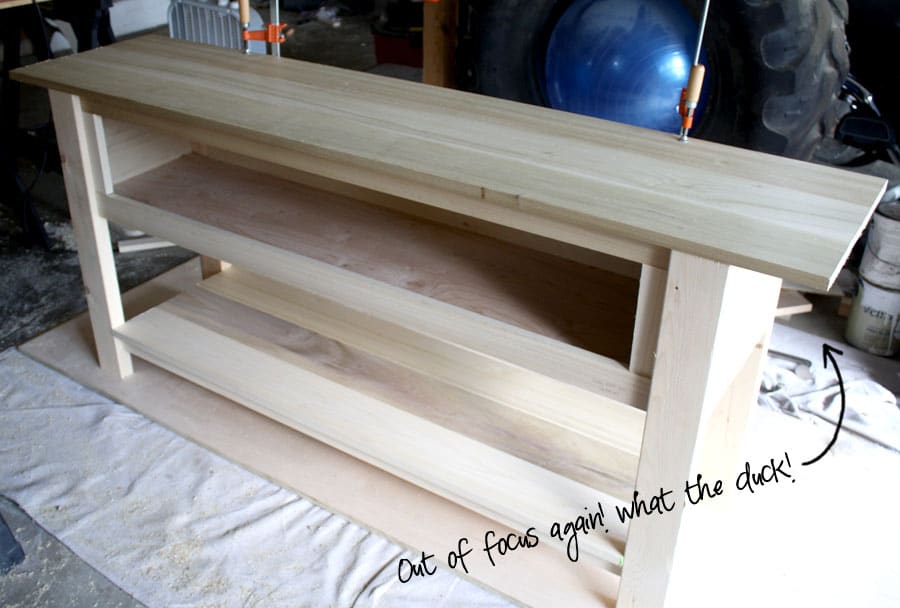
Then, I attached the top and middle shelf (you can see the gratuitous 2×2 supports underneath the tabletop here), along with the trim:
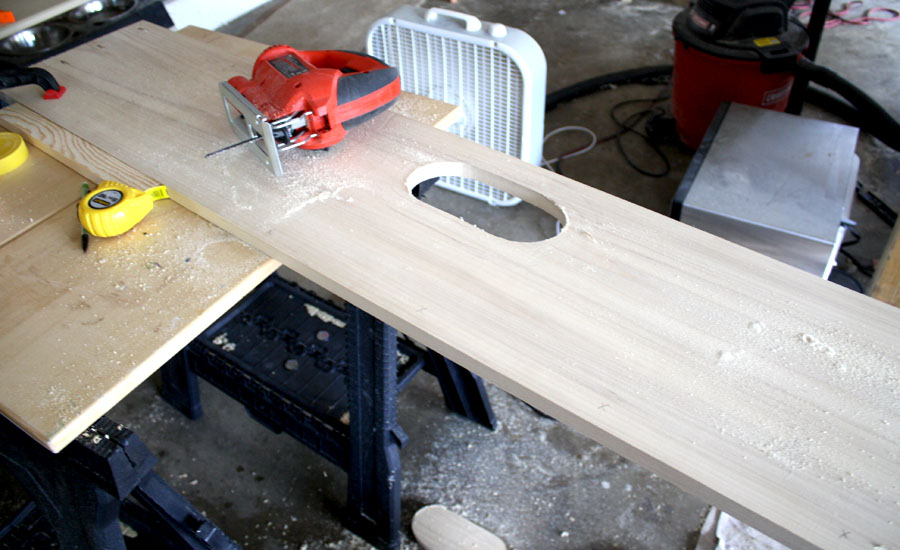
Then, because I knew I’d be placing the media components inside the cubby, I used my jigsaw and cut out a couple oval openings for the cords to pass through. For added strength, I used a 1×12 solid poplar board for the back (instead of the more commonly used 1/4″ plywood panel):
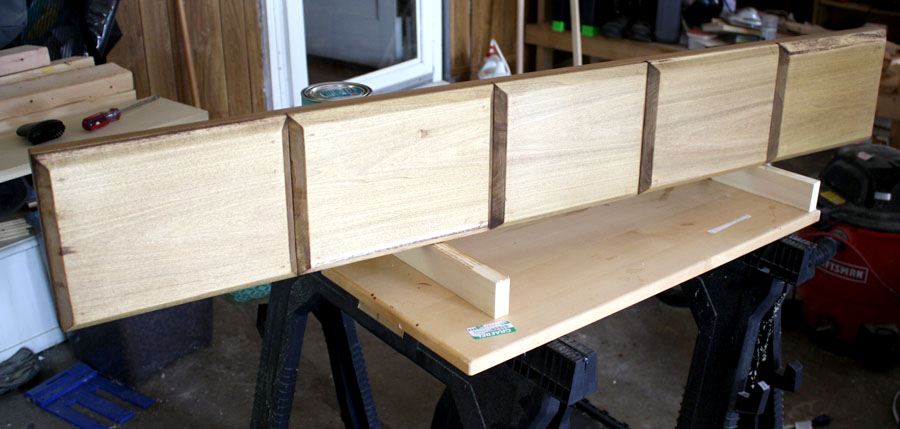
Now here comes my favorite part: learning how to use new tools! The Hubs bought me a new router so he could bevel the edges of each drawer front. Did you catch that? I said “he” – which, he was more than willing to do because I am a total wimp. I have to warm up to a new tool, I don’t just jump into bed with one after the first date, if you know what I mean. (Yikes. Could you imagine? Sleeping with a router, a circular saw, or even a nail gun? Things could get bloody. You’re welcome for that visual. Sleep well, you sadomasochist.) I did, however, help hold the boards steady so he could run the router over each edge, I mean give me some credit. Consider that our second date. I might just fly solo on the next project (yes, I’m aware that this whole metaphor just took a strange turn). After cutting each drawer face individually from a 1×8 board, then beveling each edge with a router, I attached them to another 1×8 board with glue and finish nails.
*This post contains affiliate links. To read my full disclosure policy click here.
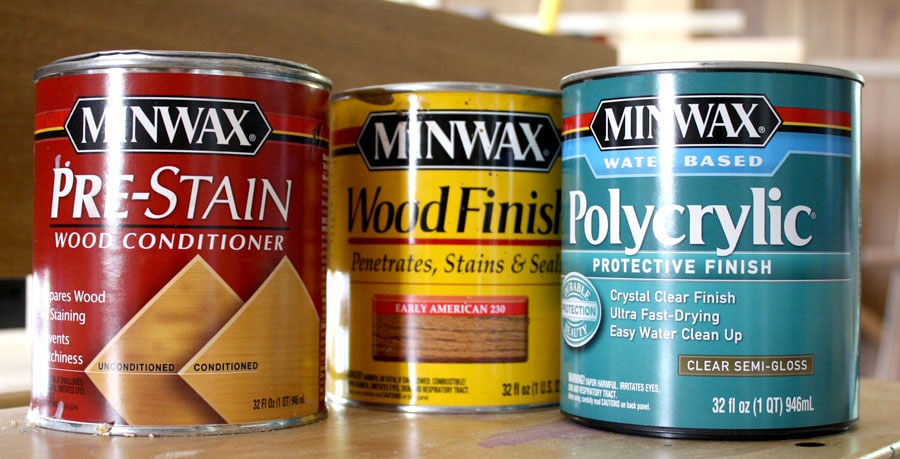
Before attaching the faux-drawer front panel to the console, I stained the two pieces separately. I really love how the finish turned out. It’s so silky smooth. First, using a palm sander, I sanded the wood with 120-grit sandpaper, then moved up to 220-grit, and finished up with 400-grit. I vacuumed up any dust and debris then wiped everything down with a damp rag so I could start with a clean, fresh surface. I applied Minwax’s Pre-Stain Wood Conditioner and let it soak in for about 15 minutes or so. I highly recommend this step when working with woods like pine and poplar! It makes all the difference in the world! I wasn’t sponsored or paid to say that, I just really believe in not skipping this step! It really helps the wood absorb the stain evenly.
Then I applied Minwax’s Early American Stain with a rag and wiped it off almost immediately with a dry cloth. After letting that dry overnight, I brushed on a coat of Polycrylic with a high-quality synthetic brush. Don’t use a foam brush or roller here, it can create bubbles in your finish, which is totally annoying. And don’t use a crap brush either. There is nothing more frustrating than having to pick hairs out of your beautiful finish. Except for maybe having bubbles in it. That, and the bajillion flies that suddenly come out of the woodwork (ha… see what I did there?) just to land on your painfully perfect topcoat. Again… #firstworldproblems
Okay, so here’s how I achieved that buttery, silky, smooth finish I talked about earlier. In between each coat of Polycrylic (I applied 3 coats), I wrapped a piece of 400-grit sandpaper around an old sanding block and hand-sanded each surface, concentrating mainly on the tops and shelves. I did this in between each coat, then wiped everything down with a damp rag to remove the sawdust. After the third coat of Polycrylic, I gave it a final sanding with 400-grit sandpaper, then applied Minwax’s Paste Finishing Wax with a soft cloth. Taking the time to complete these extra steps made all the difference in the world. This thing has such a beautiful, hand-rubbed finish to it (that’s what she said). Seriously, it feels so nice, I wish you had feel-a-vision. It’s so smooth, I could cuddle it (but I won’t).
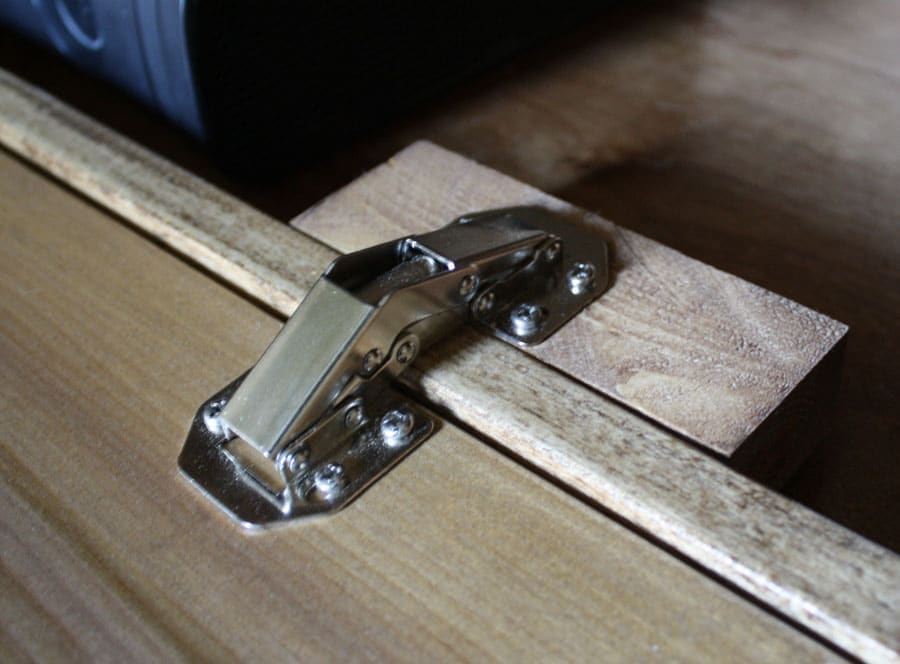
Okay, moving on. After everything was stained and finished, it was time to attach the faux-drawer door. I wrangled my (ever-obliging) Husband to help me with this step, as it took two people to hold the door and screw on the hinges. There were a couple of hardware options I considered, from a lid-support hinge (usually used on a toy box lid – so the lid doesn’t come crashing down on tiny fingers) to flap hinges with braking joints (although that would require a forstner bit to carve out a notch for the hinge to inset in) to regular left and right support hinges. Ultimately, I ended up choosing these Euro overlay hinges since I was familiar with them, they were completely concealed, heavy duty enough to support the weight of the flip-down door, and didn’t require an extra drill bit to install. We did, however, have to attach a small block of wood where the hinge would sit:
For the finishing touch, we installed a couple of magnetic catches at the top so the door clicked into place when closed. It’s the little things.
Oh yeah, I purchased those charming little card holders from here and oil-rubbed bronze knobs from here.

I LOVE it. Mostly, I love that my Husband’s unwieldy behemoth of a TV is gone, baby, gone! But honestly, I think this is the first piece of furniture that I’ve built, that I would actually pay ca$h money for from a real furniture store! I know, right? It was easy to build, and if you’re like me, you’ll find that with each piece that you build, you’ll only get better and better at it. Kinda like cheese; I get better with age.
Okay, so here are the numbers, since y’all are into that sort of thing:
Budget Breakdown:
Lumber: $135.37
Plywood, screws, hinges, catches: $63.27
Knobs and card holders: $37.73
Finishing supplies: $32.14
Total cost: $268.51
Thank you, thank you, thank you to Ana, for working with me on this project! You can download her easy-to-follow plans here. And if you decide to build this Pottery Barn-inspired Media Console, please come back and share your work with me. Your media console and my media console can be twinsies and they will be BFFs for life!
*Update: I just saw that the PB version is on sale at 50% off! What the duck! Do you think those big box stores are taking notice of the power that is DIY? I like to think so. Yeah, baby!




what are the lengths of the legs?
Hi John, the legs are 29 1/4″ long. All measurements can be found in the plans. Hope that helps!
Having a hard time locating the plans – can you provide a direct link? Thanks.
Sure thing, Bryan! Here you go: http://www.ana-white.com/2013/08/plans/ridge-media-console
Heya are using WordPress for your blog platform? I’m new
to the blog world but I’m trying to get started and set up my own. Do you
require any coding knowledge to make your own blog?
Any help would be greatly appreciated!
Yes, I use WordPress and love it. It requires very little coding knowledge. Good luck with your new blog!
Another amazing project! You are awsome!! Inpiring work!!! A big Thank you for share it!!!!
I am curious if this is too heavy? I have little kids and a obsessive need to not let items topple so would this be one I need to wall mount do you think?
Hey there, this post is really old but I wanted to comment on a small improvement that you could make. A device called an “IR Repeater” or “IR Extender” could be added very easily for about $30. This would allow you to use your devices with the cabinet door closed.