An in-depth tutorial on how to build DIY built-in cabinets with drawers! Lots of step-by-step photos, tips, and tricks on how to build and install drawers, including an awesome video!
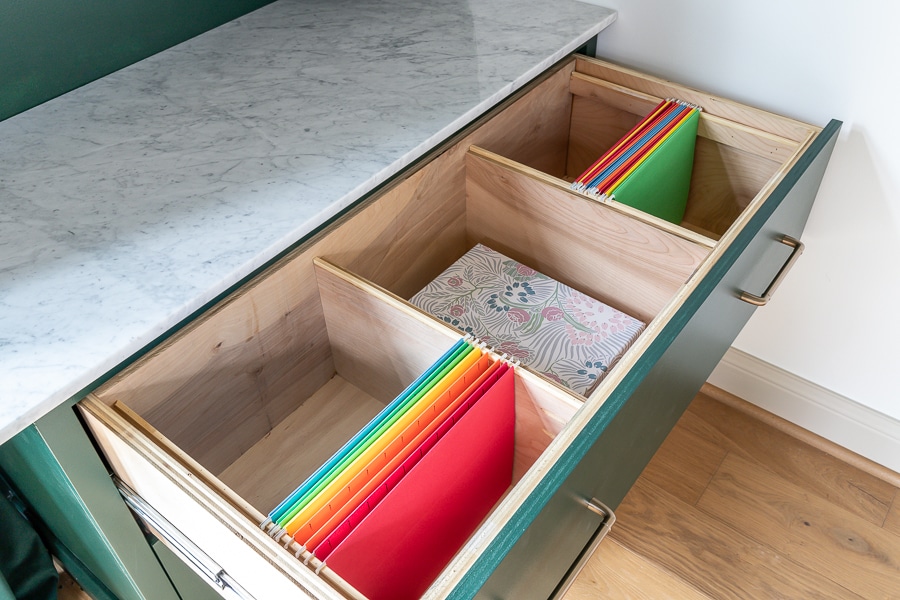
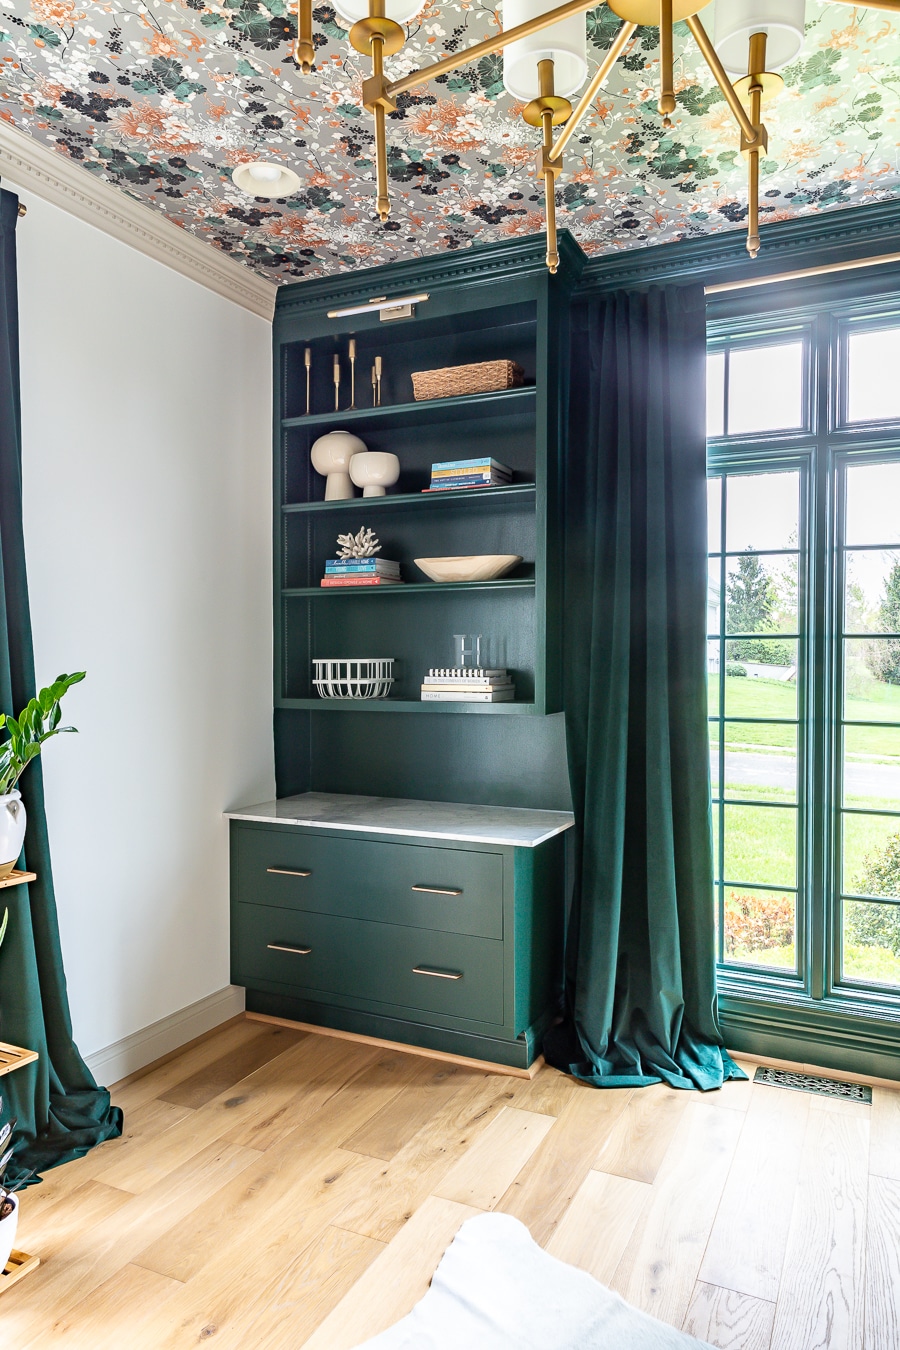
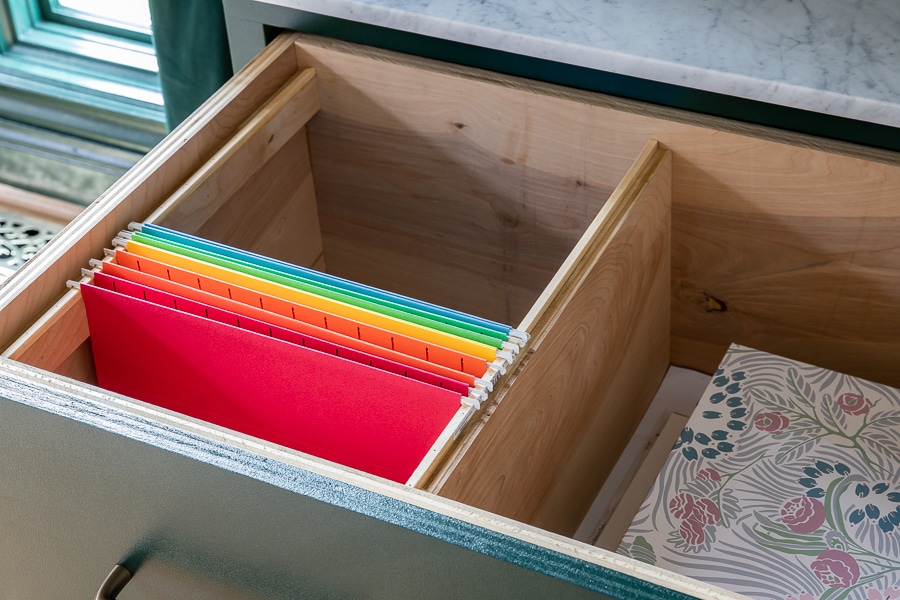
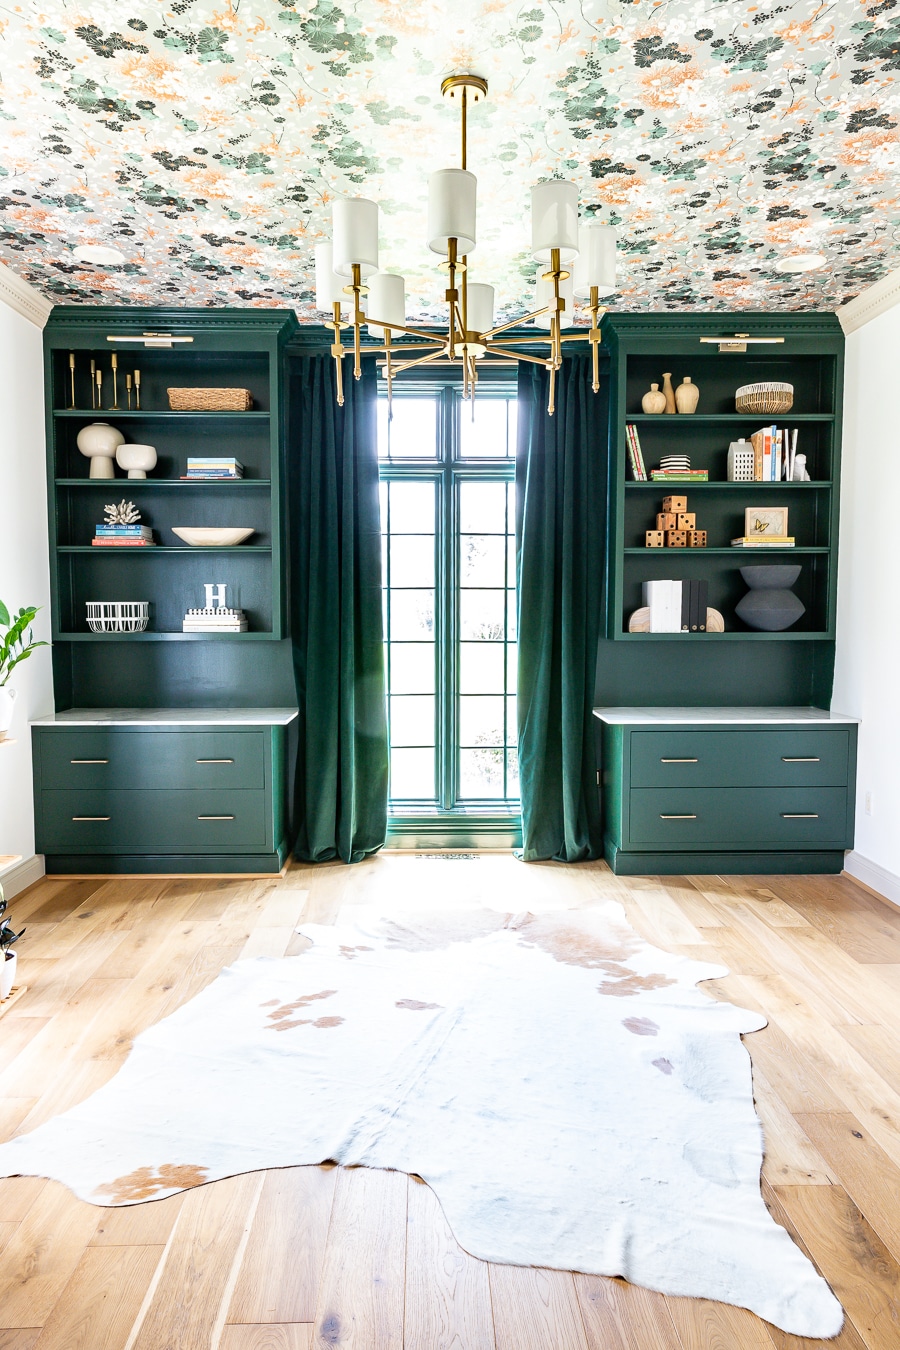
Hiii!!! I am so excited to share my latest DIY project with you today! I am one step closer to completing my home office makeover. Did you see my progress so far? I shared it here on The Home Depot blog! Can you believe these beautiful built-in cabinets are DIY?! They look amazing and the functionality of it is SO GOOD. I made these drawers super deep and wide so I can hide pretty much everything I ever owned in here. But wait… there’s more! These drawers have a little secret…
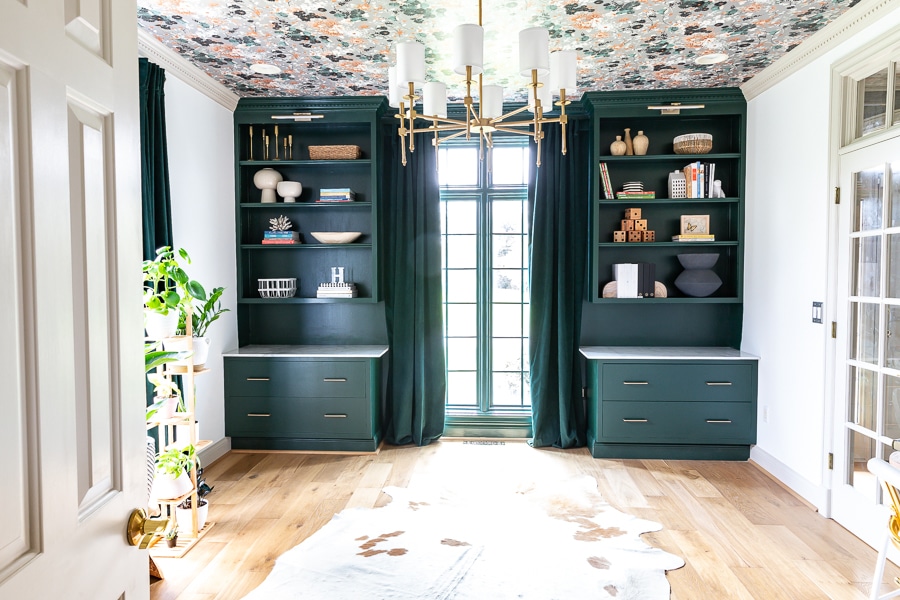
I really needed some file cabinets for my home office, but I didn’t want them to look like file cabinets, you know? ‘Cubicle chic’ is not the vibe I’m going for in here. I wanted filing cabinets that looked more like a beautiful piece of built-in furniture and this is what I came up with! Have you ever seen file cabinets look so good?! And guess what – they were surprisingly easy and affordable to build. Two sheets of plywood and a few 1x boards brought the cost to about $150 for each cabinet! BANANAS.
Read on for a few of my tips and tricks and be sure to watch the video to see how it all came together!

Download the plans
As always, I’ve drawn up complete step-by-step plans for this DIY built-in cabinet. I write my plans like a recipe, so if you can follow a recipe, you can build this cabinet! The plans are much more detailed than this blog post and include both an easy and intermediate version for making the drawer dividers (hanging file folder feature). This project is a great beginner-level project that gives you a ton of bang for your buck. Also, I’ve included linked sources for the products in this room at the end of this post, for your convenience.

Cut the plywood parts
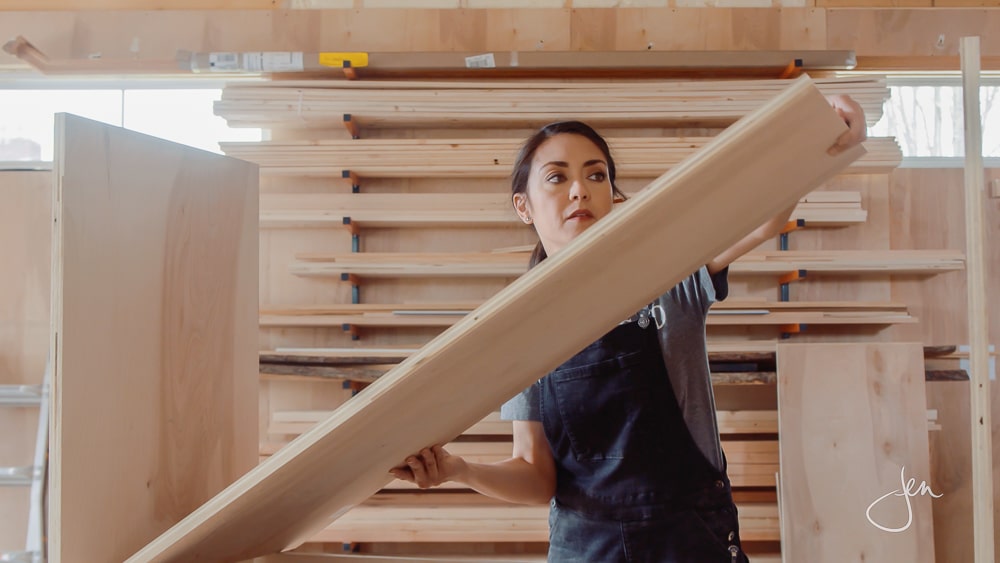
First, I cut the 3/4-inch plywood parts to size using my circular saw and a straight-edge guide. I also changed out the blade to a plywood blade, which will result in a cleaner, more precise cut with minimal tear-out. In the left photo above, you can see me using my foam board insulation trick – I like to use it as my cutting mat because it supports the entire sheet of plywood and protects whatever is underneath. This foam board is cheap, easy to store, and easy to manage and I cut on it over and over.
Once the side panels are cut, I used a jigsaw to notch out the bottom to accommodate the toe kick. Our baseboards are 5 1/2 inches tall, so that’s how high I made the notch. If you have shorter or taller baseboards, just be sure to cut the notch accordingly. Keep in mind, however, this may change your measurements going forward. I clamped the two panels together and used a jigsaw to make these cuts. By clamping them together, I’m minimizing my room for error and I now had to make just two cuts instead of four. #worksmarter

Construct the carcass
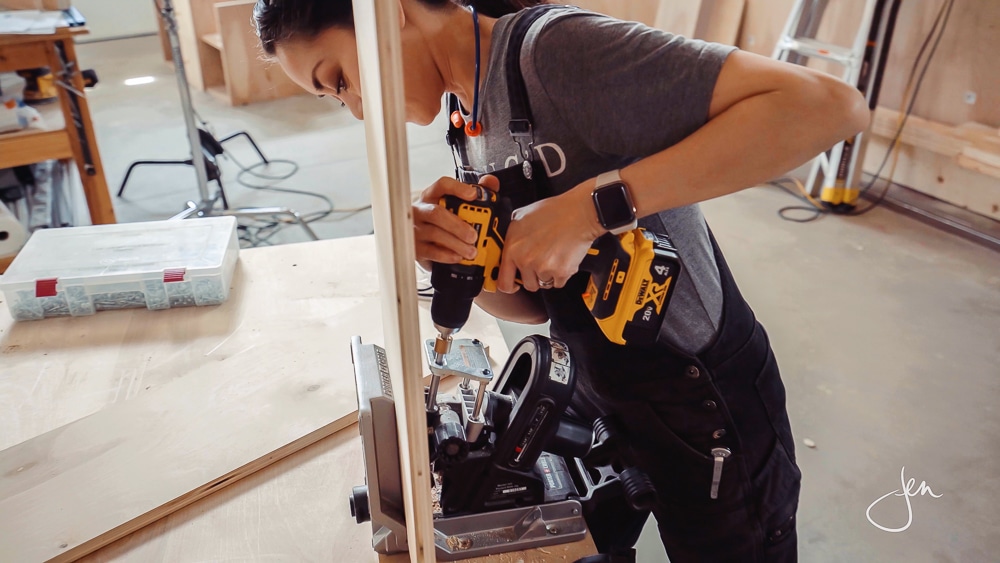
Next, I cut out the toe kick parts as well as the middle support board. I drilled 3/4-inch pocket holes into these boards and attached them with 1 1/4-inch pocket screws and wood glue. If you don’t have a pocket hole jig, you can pre-drill pilot holes and construct the carcass with just regular wood screws and glue. I typically use glue on all of my joints – I think of it as cheap insurance.

Add the bottom
After the carcass was constructed, I added the bottom. I laid it into place and secured it with wood glue and 1 1/4-inch brad nails. I also added the top supports with pocket screws and glue.
All of the dimensions and list of materials for this DIY built-in cabinet are in the plans, as well as a recommended cut layout for the plywood. I kept a few things in mind when laying out these cuts: I thought about how to make the best use of material so that there’s very little waste, as well as how to make the most efficient cuts. I also kept grain direction in mind, in case you’d like to stain your project.

Attach the face frame
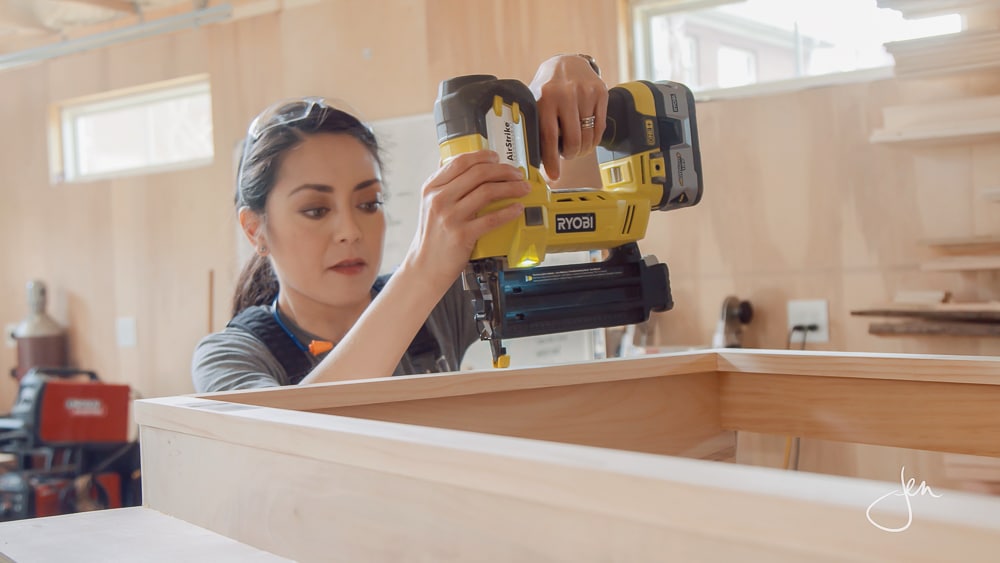
Now it’s time to move onto the face frame. For this part, I used solid wood 1×2 pine boards. You don’t really want to use plywood for this because you’ll see the layered plywood edges. I attached the face frame with wood glue and brad nails.

How to build a drawer
Okay, it’s drawer building time! I hear from a lot of folks that building and installing drawers can be intimidating, but as long as you take your time and make sure you’re “checking for square,” you shouldn’t have too much of an issue. You’re basically just building a box. Measure the opening and then build the box accordingly. Standard drawer slides typically require a 1/2-inch clearance on each side, which means you’ll build the drawer box 1 inch narrower.
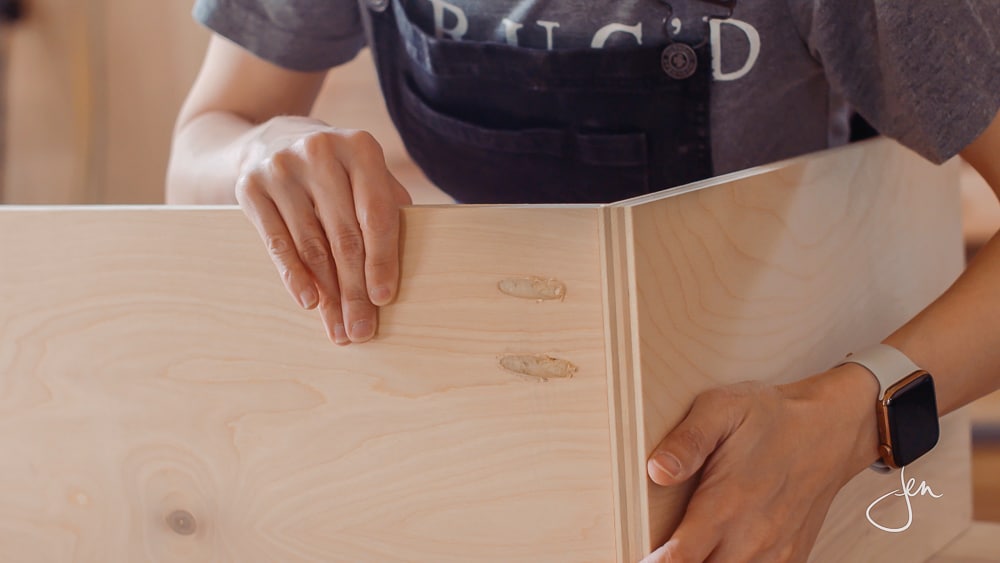
First, I cut the drawer parts from the plywood and labeled them to stay organized. Then I drilled 3/4-inch pocket holes into the front and back parts. You always want the front and back parts to sit inside the side parts, rather than the other way around (see photo above). If the side parts are inside the front and back pieces, when you push and pull the drawer, over time, the joint will weaken. Then I just constructed the box with 1 1/4-inch pocket screws and wood glue.

How To Check For Square
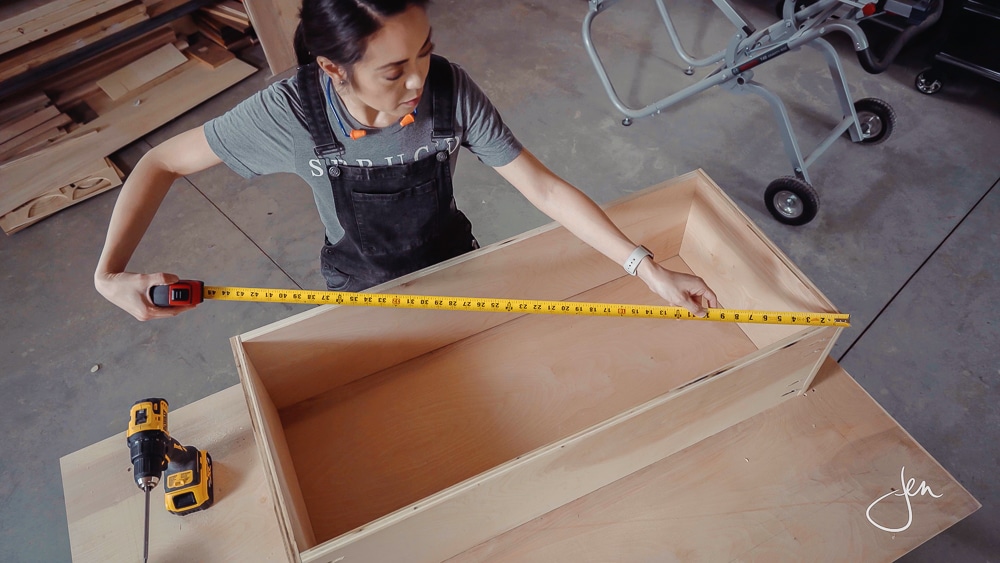
Here’s what I mean when I say to “check for square.” Take the tape measure and measure all four corners on the diagonal – these measurements should match. If they don’t, then take the longer measurement and squeeze the corners together to adjust them until the two measurements are the same. Clamp, screw, and let the glue dry. After the four sides of each drawer box were constructed, I added the 1/4-inch plywood bottom with wood glue and staples. I prefer using staples here instead of brad nails because the staples have a little more holding power.
Be sure to watch the video above to see how I install the drawer slides. It’s not as hard as you might think!

Attach drawer face
Finally, I attached the drawer face. I slid the drawer in, positioned the face where I wanted it, and clamped it down. I used my friend Brad’s card trick to achieve the same spacing around the drawer face. Then I drove screws in from the inside of the box to attach the face.

Sand, paint, and finish
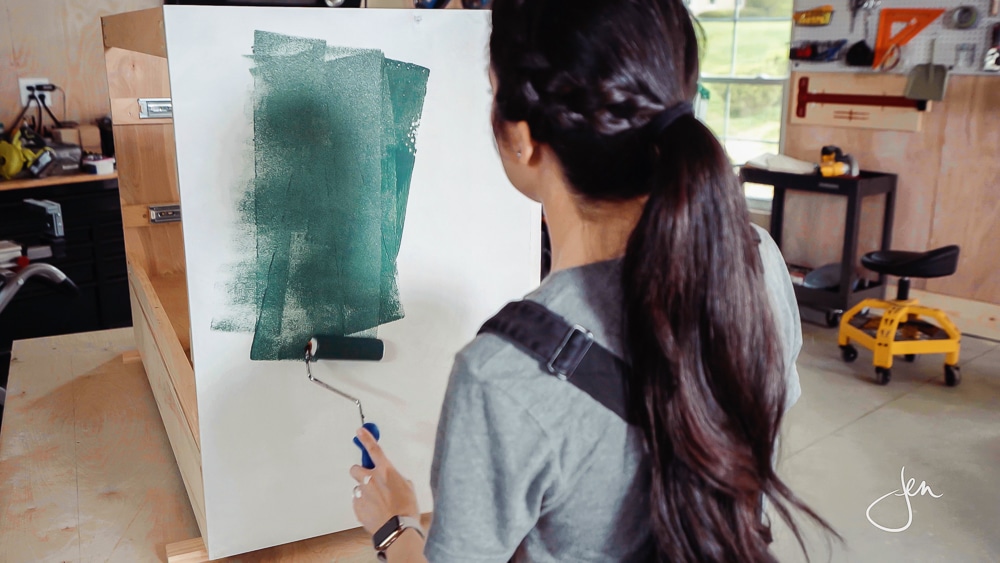
We’re almost there! Now it’s time to finish this baby. I rolled a coat of primer on the cabinet and followed up with three coats of latex paint. This color is Sherwin Williams’ Roycroft Bottle Green in a semi-gloss sheen. Once the paint was dry, we brought the cabinets into the room for installation! This is the most exciting thing ever!!!

Secure the cabinets to the wall studs and attach top
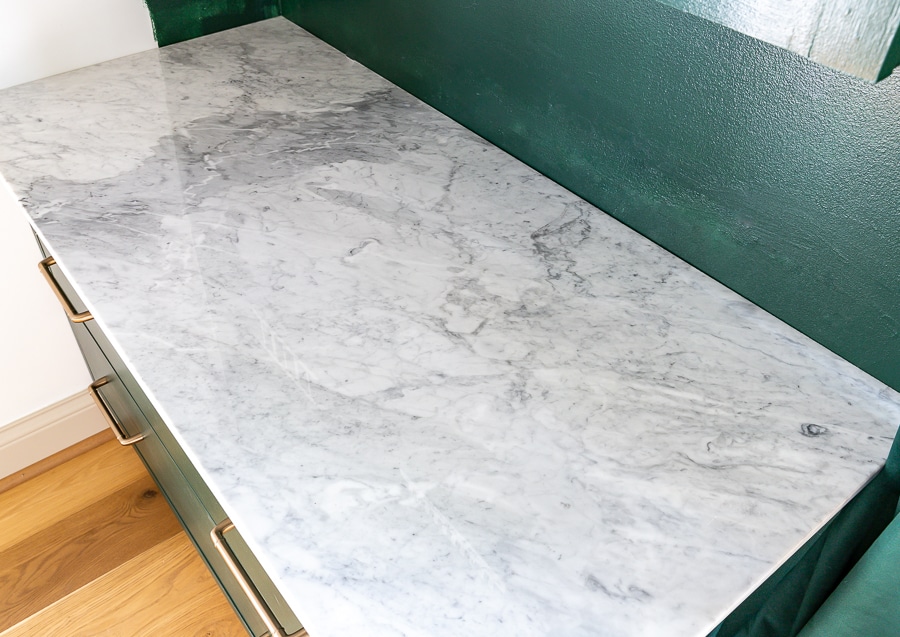
We used a few shims to level the cabinet since our floors aren’t perfectly flat and then we screwed them to the studs in the wall. It’s important to secure the cabinet to the studs because if both drawers are open at the same time, the cabinet can tip over. Once the cabinet was secure, my friend Josh added the baseboards and shoe molding. I had my local stone supplier cut the tops out of a beautiful Carrera marble slab, then attached them to the cabinet with silicone.
Wait one. hot. second. Let’s just take a moment to drool over this gorrrrrgeous marble top… I can’t even. Can you even? I. CANNOT. EVEN.
Okay. Carry on.
Are you freaking out like I am?! Because I am totally freaking out over these DIY built-in cabinets! I am insanely in love with how this space is coming together!

Here’s what’s left on the docket:
- Design and build a desk (it’ll go in front of the built-ins, with my back towards the bookshelves)
- Build bookshelves down to meet marble countertop
- Install that last bit of missing shoe molding
- Add (make?) wall decor/artwork
It’s going to feel SO GOOD to see everything come to fruition. Stay tuned for the full home office reveal…

Product Sources:
*Affiliate links used.
- Built-in paint color: Sherwin Williams Roycroft Bottle Green
- Wall paint color: Benjamin Moore White Heron
- Trim: Benjamin Moore Revere Pewter
- 8-Light brass chandelier
- Picture lights
- Antique brass candlesticks (no longer available, similar 1, 2, 3)
- Sculptural vases (no longer available)
- Raw wood vase trio
- Oversized wooden dice (DIY!)
- Framed butterfly
- Ceramic house (similar)
- White pug bookend (no longer available)
- Stone bookends (similar)
- Black vase
- Velvet curtains
- Cowhide rug
- French oak hardwood flooring
Want to see more of my DIY cabinet projects? Check out this carved entryway cabinet, or this desk with hidden printer cabinet, or this printmaker’s cabinet!







Interested in your curtains!
Hi Danielle,
I updated the post to include product links! 🙂
Incredible DIY!!! I’m super impressed.
What is the cieling wallpaper? I love the colors!
Hi Melanie,
Thank you! I really love how the wallpaper turned out. Unfortunately, I can’t recommend it. The company sent me defective rolls and were extremely difficult to deal with. They finally sent me rolls that weren’t defective, but only after weeks and weeks of back and forth. I don’t wish that headache on anyone! Best of luck finding an alternative!
Is there a tutorial for the top shelves too?? I’ve looked but I don’t see it. It is gorgeous and almost exactly what we are wanting in our daughters room!
Thanks for the question, Sarah! Unfortunately, I don’t have plans for the bookshelves – they’re original to the home.
Any chance you know how to do something similar? I came to ask about them too! Trying to save $1500 by doing something like this on our own!
Will you post plans for the bookshelves that go on top? I need to build some of these for my dining room!
Wonderful DIY!!! Thanks for sharing this post.
LOVE LOVE LOVE! I’m giving this a try, but would like to create doors on the front and a shelf on the inside instead of drawers. Any tips or plans for this? We built your playhouse last summer and can’t wait to dig into this one. Thanks for being such an inspiration!
Hello, this looks like a great plan to follow and your work is phenomenal. I’m new to DIY projects and this plan is exactly what I’m looking for. However my office is pretty small and I am wondering if the measurements of the file cabinets be adjusted? I need at most 30” in length and 15-18” in depth. Thank you in advance.
Hi Tamara,
Thanks for the kind words! Yes, absolutely – you can modify the plan to fit your space. That’s the great thing about DIY!
I have tried to get the plans for you File Cabinet video several times. Please send me the plans (email) or let me know how to get the Plans.
Thank you for the great video.
I signed up for the email list in order to get the plans, but they haven’t arrived in my inbox. Can you send them? I love how it turned out and would like to create something similar.
Hi Jen,
I downloaded the plan, I really liked the idea of your cabinets. Are satisfied with the color of Sherwin Williams or would you choose a little lighter now? I really like this green color, but I have some doubts.
Thanks.
Hi Pete,
Yes, I absolutely love the color! I was looking for a really rich, deep, dark green so this fit the bill for me. You can see how it looks in the room here: https://www.instagram.com/p/B_moM47DVhW/ Hope that helps!
Very helpfull) Thanks a lot. P.s. +1 follower:)
Great ideas
Looking at your plans for a filing cabinet
Omg, I love it all. That deep dark green color you selected, just makes it all come together fabulously. I love this color. Thank you for sharing this beautiful post
Wow!! Great idea!! So creative and fun.
Hey! Thanks for sharing this helpful information..
Thank you for sharing this content. We appreciate your efforts and hope that others will find them helpful.
Hey Jen!
Could you tell me the measurements for where to place the rail supports? Also what is the clearance between the drawers?
This was super helpful. Do you have the heights that the slides are attached at? Is there a specific height or spacing the drawers should be separated from the cabinet or themselves by? Thanks!