If you’ve kept up with me on Instagram, Facebook, or Pinterest, you’ll gather that I’m crushing on all things shiny and sparkly right now. Gold, crystal, mirrors… anything unapologetically girlie and glam has been my latest obsession. Gold, especially.
*This post contains affiliate links. To read my full disclosure policy, click here.
Last week, I shared a free printable that I made using Silhouette’s printable gold foil. Not satisfied with just sticking the gold foil stickers on the paper, I embarked upon a DIY gold foil tutorial hunt.
Surprisingly, there isn’t much information out there in the interwebs about how to DIY gold foil. I know, crazy, right? So I told myself, “Self, you will figure this out.” Luckily, I stumbled across this handy video tutorial. God bless you, YouTube. Unfortunately, the tutorial recommends a pricey laminator. Because I’m cheap not willing to spend that much time and money on a passing trend, I decided to try my gold foil experiment (*experiment being the key word here) using this basic laminator instead. If all else failed, I could use it as an actual laminator. Imagine that. I wanted one that was at least 13″ wide just in case I ever wanted to laminate (or hot foil) 12×12 scrapbook paper.
Okay, onto my DIY gold foil experiment! You guys are going to flip out over how easy this is!
Here are the players:
Alright! Let’s get started (and wish me luck)!
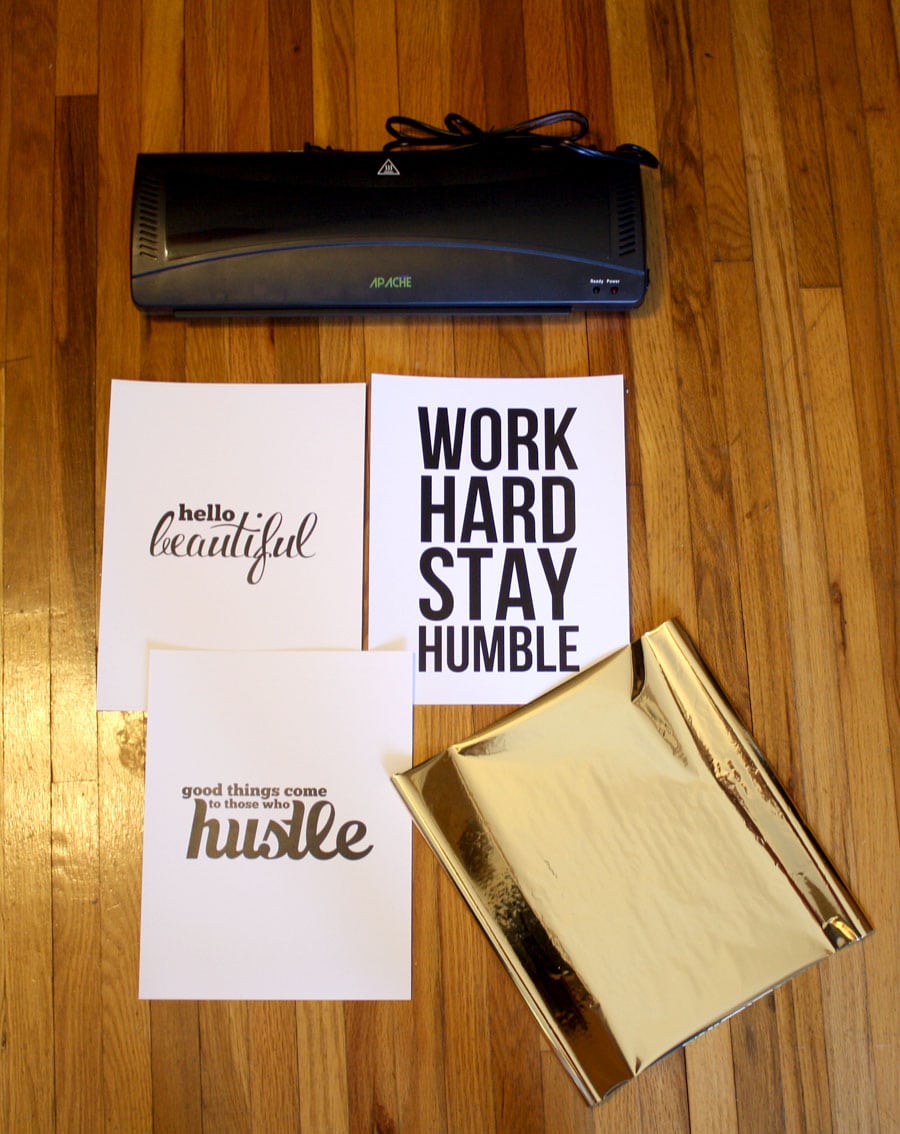
I created these black and white prints in Photoshop and printed them out on a laser printer. You should use a printer that prints with toner because it’s what the foil will react with. You can print your image using a laser printer, or even a photocopier. Just make sure it’s black and white and toner is what’s used (not ink).

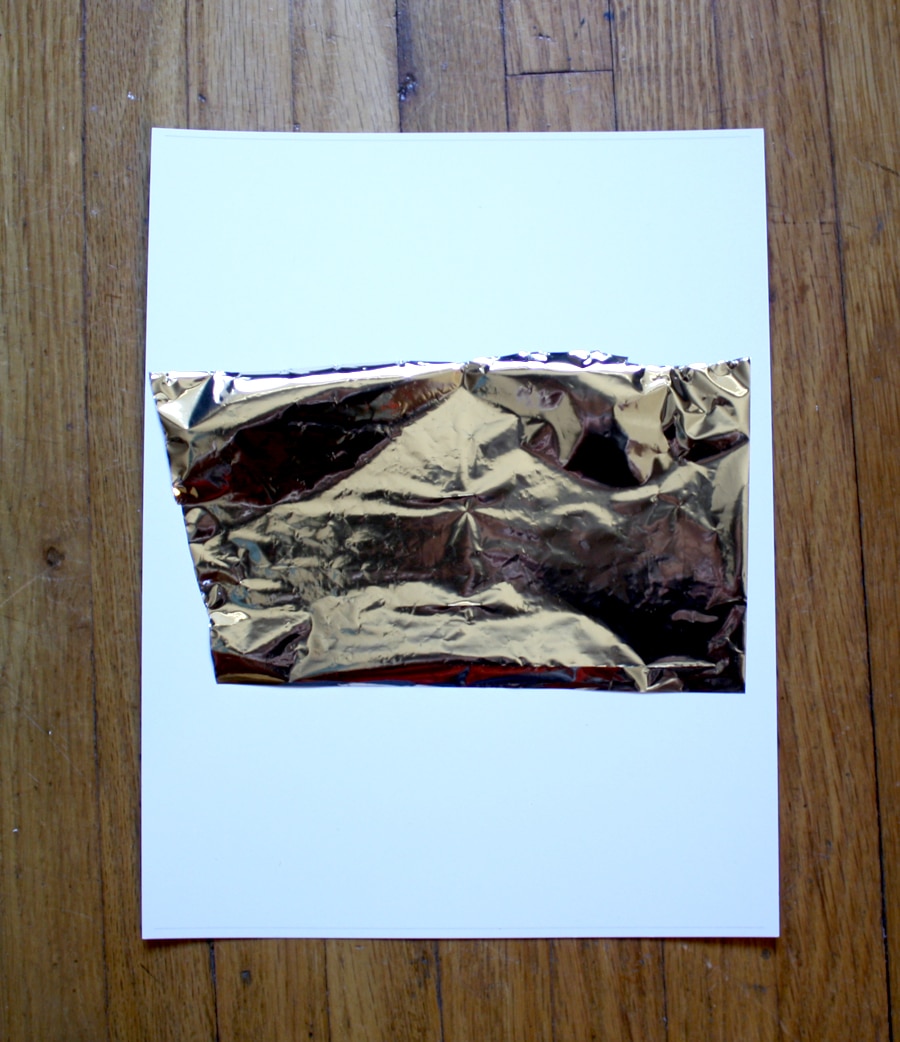
Next, I cut a piece of toner-reactive foil large enough to cover the image, gold side up, smoothed out any wrinkles in the foil, then put another sheet of paper on top, to hold everything in place (so that the foil is sandwiched between the two pieces of paper). Then I sent it through the laminator with my fingers crossed!
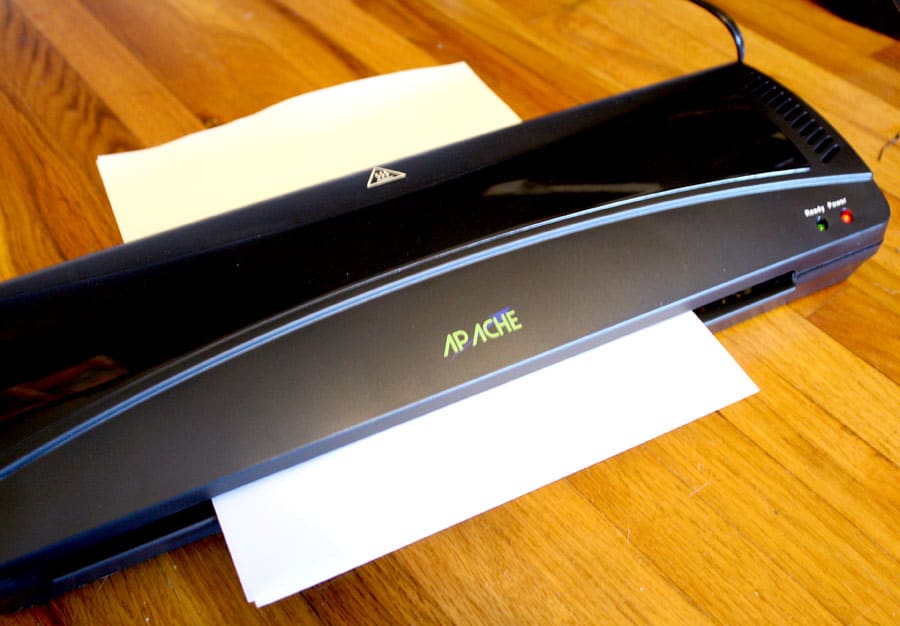
Once it came through the laminator, I peeled back the foil and this is what I found:


Me, oh, my! My very own DIY! (Gold foil print, that is.) It’s far from perfect, and it certainly won’t buy me a house on the hill if I were to sell them in my Etsy shop, but how neat, right? Here are my 2nd and 3rd attempts:

Ahhh, my preciousssss… so shiiiiiiny… And nothing says “Work Hard Stay Humble” quite like glam gold does, amiright? I mean, you can be hard-working, humble, and glamorous all at the same time. True story.

I also learned that lint and dust (or dog hair, in my case) is not good when hot stamping foil to paper. See exhibit A below:
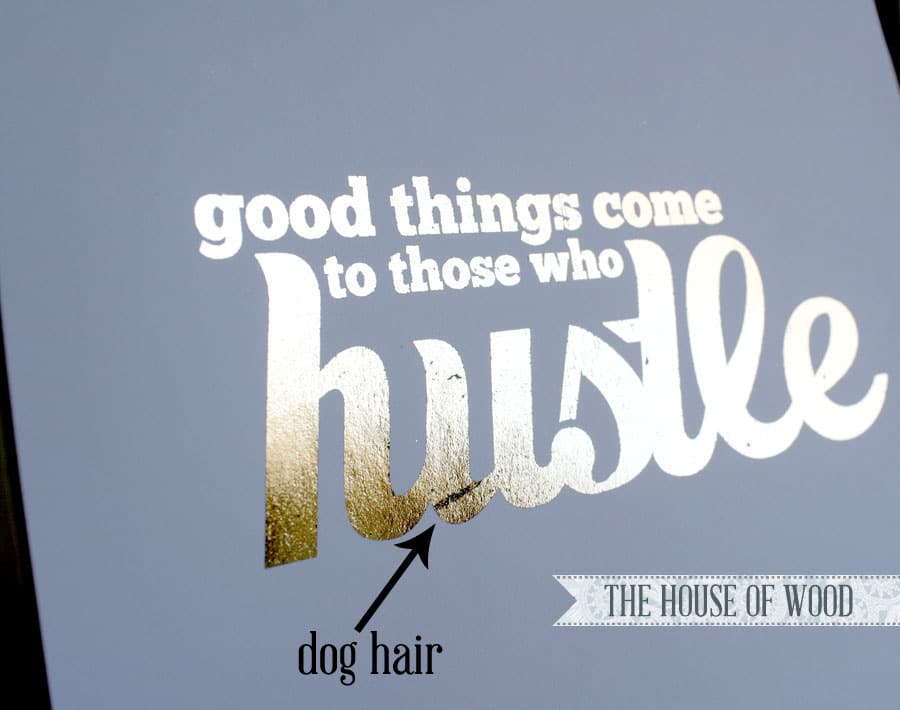
But overall, not a bad little DIY experiment, right? I imagine my DIY gold prints will look even better once they’re framed and hung; you might not even notice the dog hair and other little imperfections (crossing fingers). What do you think? Huzzah for DIY gold foil prints!


my mind is blown! you’re telling me it’s THAT EASY??! gah! As if I didn’t gold leaf everything already, it’s about to get insane over here.
I wonder if you could use a iron instead of a laminator?
I tried to do this on the popular brown craft paper and the laminator didn’t allow the gold to completely transfer so I tried my iron. It did not work either and my transfer folder did not like the iron heat. It did not melt my transfer sheet but it did wrinkle it. My laminator even had a “foil” setting on it. I think my problems may be a combination of the paper, my lazier ink and maybe even the foil.
real question, what kind of gold foil did you use?
Brittany! You are going to flip over this… you can buy foil by the yard (link in the post)! So many shiny pretty colors to choose from!
Did you buy the Chinese gold or the standard gold?
I bought the standard gold.
I’m so confused! The link goes to adhesive backed gold foil and that doesn’t work. Help!
Here is the foil to buy: http://amzn.to/1YgJHdB
Gah! I started looking at how to do my own gold foil projects and came across this! Checked to see the date and realized you’d written it today! How timely. And I’m so insanely excited, I haven’t even read it yet. BUT! I have to say thank yoooooou in advance. Haha. I can’t contain my excitement.
Now that I’ve read it this was definitely a great DIY project. Sadly, I don’t have a laminator so I need to figure out another way to do my gold foil projects. Thanks for sharing though!
Thanks for stopping by, Michelle! I’m glad you’re here! Another option would be to use a laser printer. Gold foil needs heat and pressure to adhere to the toner, so you could run it through a laser printer and do it that way. I’ve also seen where people have used an iron! Hope that helps… good luck!
Hmm, wonder if you can use a blow dryer as a heat source and go over your print (once you’ve secured the gold foil on your print, of course)
Well, you need a combination of heat and pressure, which is why a hot laminator works. I’d say try it and let us know how it goes! Thanks!
How/what is needed to use a laser printer? I ask because you specified toner NOT ink. Thanks!
I recently came across this technique and it is so worth the money in the long run. I have a laser printer. To me this was cost effective bc I wasn’t using the printer any longer since my kids went to college. The ink would dry up then. So with this I can use MSWord and type up any words or sentiments to glue into a card. It has to be black toner(laser) bc the foil sticks to the black toner. Regular ink will not stick to the foil. After printing I cut out the sentiment and do as above with any color foil (and they are beautiful!). I also purchased a heat laminator. Now this is all I do with crafting and designing cards. It is so beautiful it is worth it.
Try the sme technique and use an iron.
so beautiful! i’m loving all things gold these days as well!
I love this! I did a gold foil project this week too and am looking for ideas on what to do with the rest of my sheets of gold foil. Thanks for the inspiration!!! 🙂
NO. WAY. How did you see into my brain and know I’ve been trying to figure out how to do this for weeks?! Now to decide if I can justify buying a laminator for this one thing… but in reality, I will probably just gold-foil everything once I own it, right? So, smart purchase? 🙂 #LieToMe. Awesome tutorial, my friend!!
Confession: I bought the laminator for this one thing! But hey, I can still use it to actually laminate things! It’s a win-win. Do it!
What printer do you have?
I got them printed at the store, they used a laser printer.
Does it matter the amount of time between how freshly printed the toner is on the paper vs when you laminate it?
Hi Ashley,
No, not that I’ve found.
I don’t think it would matter how fresh it was because it is the heat from the laminator re-melting the plastics in the toner… so I’ve read elsewhere
These are so cool! I’ve always wondered how to accomplish this. Thanks for sharing! I hope to try your method out!
Hi Corinna, thanks for stopping by! I’d love to see your project when you’re done!
Thanks for sharing! So pretty! Did u use standard gold or Chinese gold? (Assuming u bought fr the web link u mentioned) And what brand of laminator did u buy? I’m not sure i’ll use the laminator much except for this purpose! Hahaha. I’m like u. Don’t want to spend that much.. 😉
Hi Winnie, Yes, I bought the standard gold – I didn’t want it super brassy-looking. The link for the laminator is in the post. It’s made by Apache and I got it from Amazon for about $30. Hope that helps!
Thanks Jen! Will go check it out. :))
If anyone is looking for a hot/cold laminator, I went out today and bought one from AC Moore on managers special for 24.99, down from 39.99 — if you miss the special, find their coupon printable — typically 40% or 50% off! Excited to try this out!
Awesome deal, Julia! Thanks for sharing!
Hi, I’m from Moldova, I like your blog, 🙂
Hello,
I really liked this little project and tip. Since it’s the June holidays in Singapore now, families get more time with their kids. I shared this post on my blog, hoping that more people would take up art and craft and spend quality time with their loved ones. The entry can be found here: http://www.lacedivory.com/blog/2014/06/06/link-love-lets-go-back-time/
Thank you once again for this post!
xoxo,
Roxanne
Thank you so much for sharing it, Roxanne!
Hey! Thanks for the great tutorial! 🙂
Just wondering what type of paper you had used! I’m not sure what kind of experimenting you’ve done with the gold foil but I was wondering if it would work well with thicker cardstock!
I used heavy card stock… 110 lb weight, I think. It worked great!
Greetings!
Just tried this technique on 4 different types of paper. 32lb (regular print paper), 65lb, 80lb, and 110lb. The best result was the 32lb since the others came out spotty. Any suggestions on why this is? Is it because the laminator is not getting hot enough? Purchased a Scotch advanced thermal laminator that goes up to 5 mil and I used the 5 mil setting.
This is too great. I want foiled invites for my 30th birthday party and this seems a thousand times better than paying someone else to do it! Now I just have to unearth my laminator from my teaching days and hope it still works!
Yay! Happy 30th!
I have been attempting this process with gold LEAF (don’t really know the difference) and an iron and it really doesn’t work too great, the edges are always messed up or some places don’t stick as well. SO I just bought the exact laminator and foil you recommended from the link and I’m crossing my fingers I didn’t just blow 40 bucks! Do you have any hints to make it turn out best? Should I wait for it all to cool or peel it while it’s hot? Is there a particular way you peel it you have found works better? Thanks!
As soon as it came out of the laminator, I just waited till I could handle it (cool enough to touch) and started slowly peeling back the foil. It’s best if your foil isn’t wrinkled, otherwise those wrinkles will be in your finished product. Also, make sure you don’t have lint (or in my case, dog hair) under the foil because it gets melted in there with everything! Good luck!
Hi there! Can you use any kind of craft foil or does it have to be a special kind in order for it to react properly with laser toner? Thank you!
It has to be toner-reactive foil. I linked the foil in the post.
LOVE this!
I did have one question though… I know you used a toner printer, but was wondering if you could tell me what kind? I saw that you used heavy cardstock, but when I tried to print it out at my office, I realized it only takes up to #20 lb paper for their toner printer 🙁
So now that I have a laminator and the foil, I’m worried I can’t find a place to print my projects with a toner printer without buying a printer too! What do you suggest?
You can try Staples or Kinkos – they should be able to print heavier card stock. Good luck!
I suggest you buy a printer because using office printers is actually stealing.. just because lots of people do it, does not make it right.