If you’ve kept up with me on Instagram, Facebook, or Pinterest, you’ll gather that I’m crushing on all things shiny and sparkly right now. Gold, crystal, mirrors… anything unapologetically girlie and glam has been my latest obsession. Gold, especially.
*This post contains affiliate links. To read my full disclosure policy, click here.
Last week, I shared a free printable that I made using Silhouette’s printable gold foil. Not satisfied with just sticking the gold foil stickers on the paper, I embarked upon a DIY gold foil tutorial hunt.
Surprisingly, there isn’t much information out there in the interwebs about how to DIY gold foil. I know, crazy, right? So I told myself, “Self, you will figure this out.” Luckily, I stumbled across this handy video tutorial. God bless you, YouTube. Unfortunately, the tutorial recommends a pricey laminator. Because I’m cheap not willing to spend that much time and money on a passing trend, I decided to try my gold foil experiment (*experiment being the key word here) using this basic laminator instead. If all else failed, I could use it as an actual laminator. Imagine that. I wanted one that was at least 13″ wide just in case I ever wanted to laminate (or hot foil) 12×12 scrapbook paper.
Okay, onto my DIY gold foil experiment! You guys are going to flip out over how easy this is!
Here are the players:
Alright! Let’s get started (and wish me luck)!
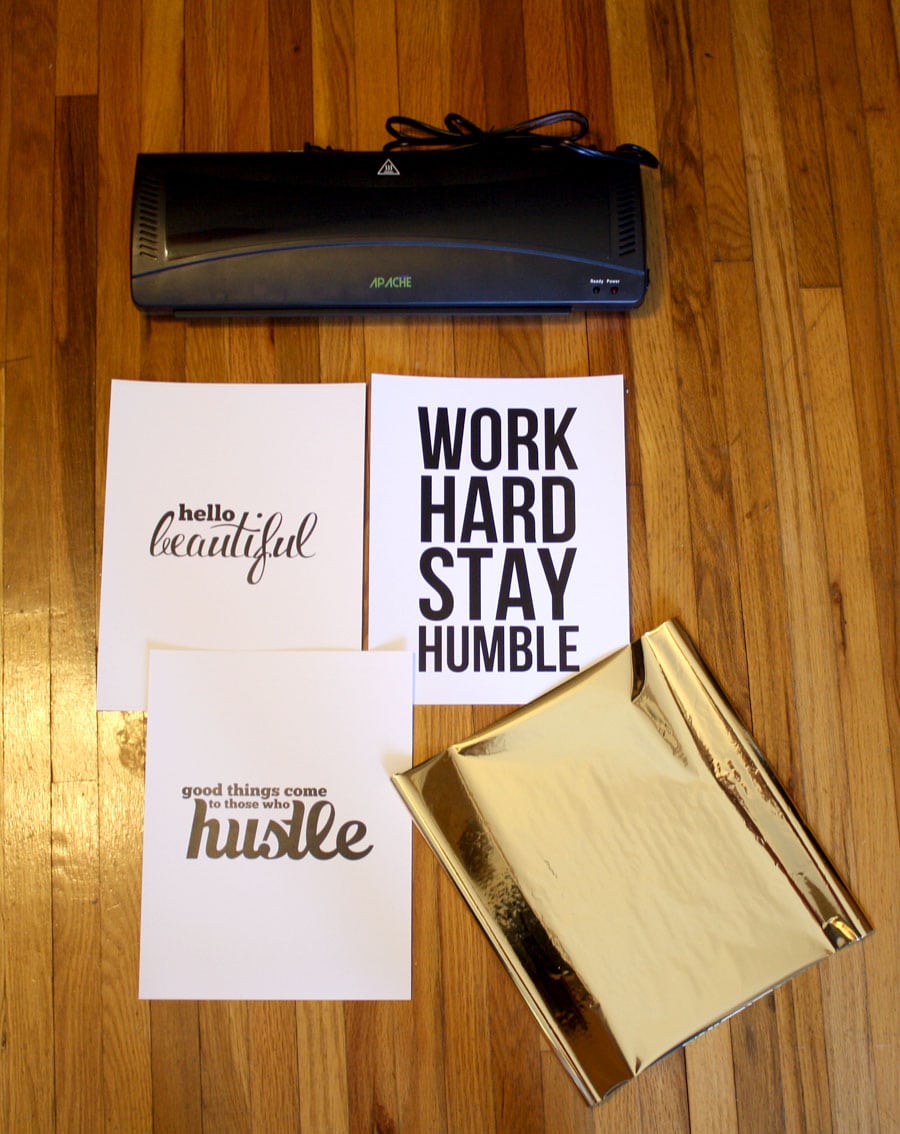
I created these black and white prints in Photoshop and printed them out on a laser printer. You should use a printer that prints with toner because it’s what the foil will react with. You can print your image using a laser printer, or even a photocopier. Just make sure it’s black and white and toner is what’s used (not ink).

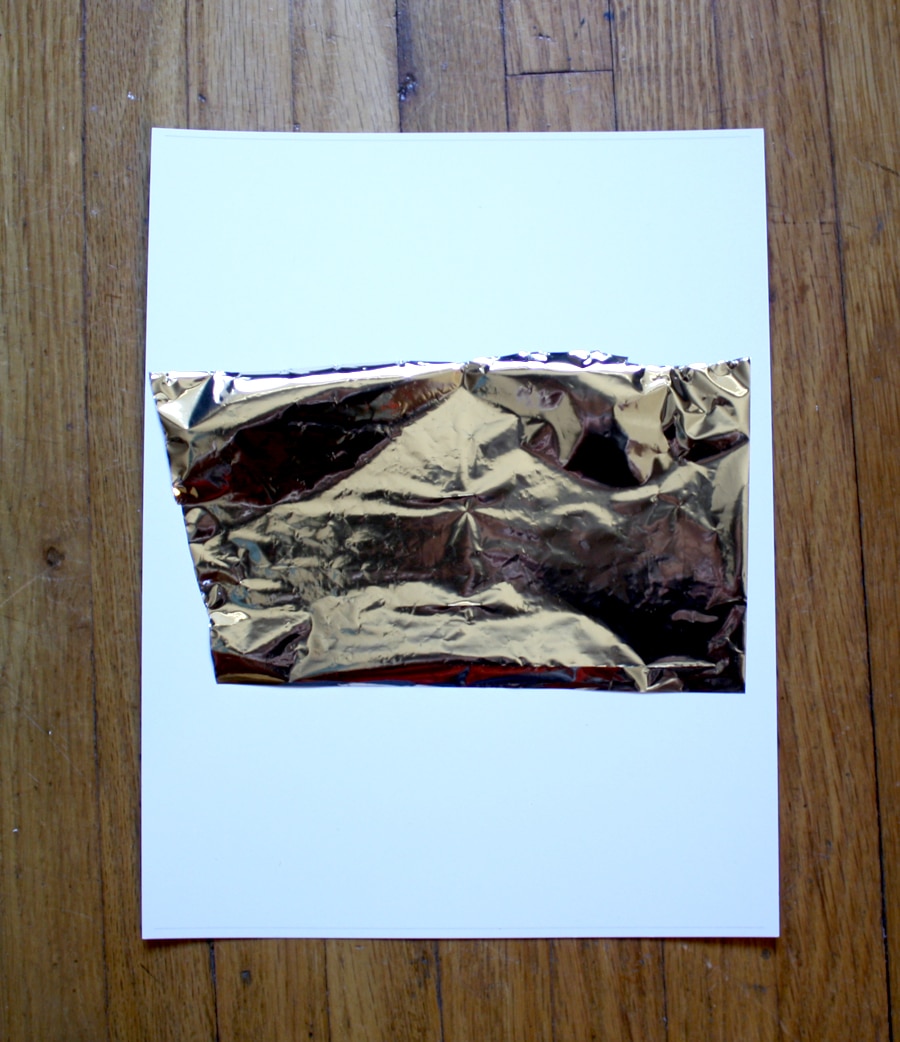
Next, I cut a piece of toner-reactive foil large enough to cover the image, gold side up, smoothed out any wrinkles in the foil, then put another sheet of paper on top, to hold everything in place (so that the foil is sandwiched between the two pieces of paper). Then I sent it through the laminator with my fingers crossed!
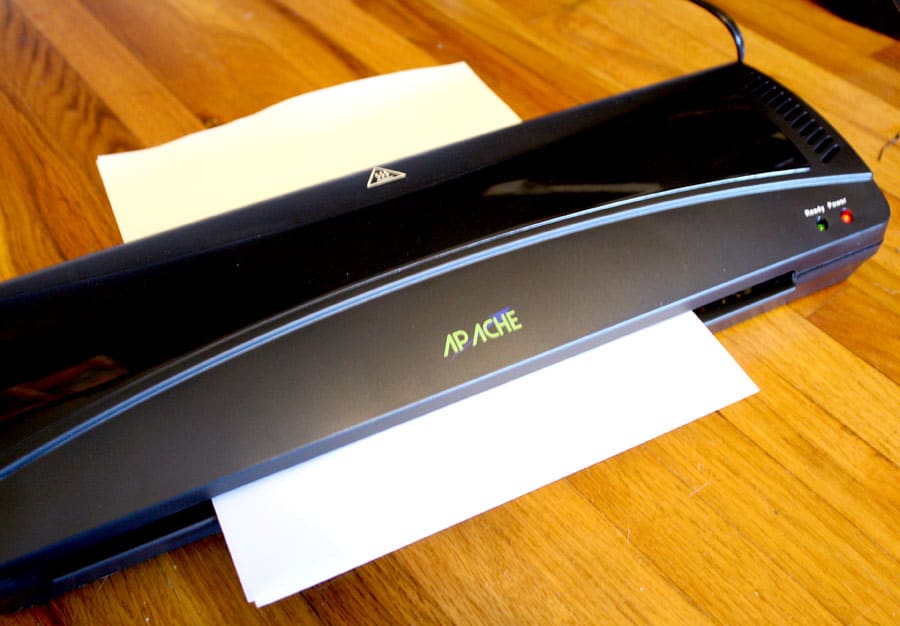
Once it came through the laminator, I peeled back the foil and this is what I found:
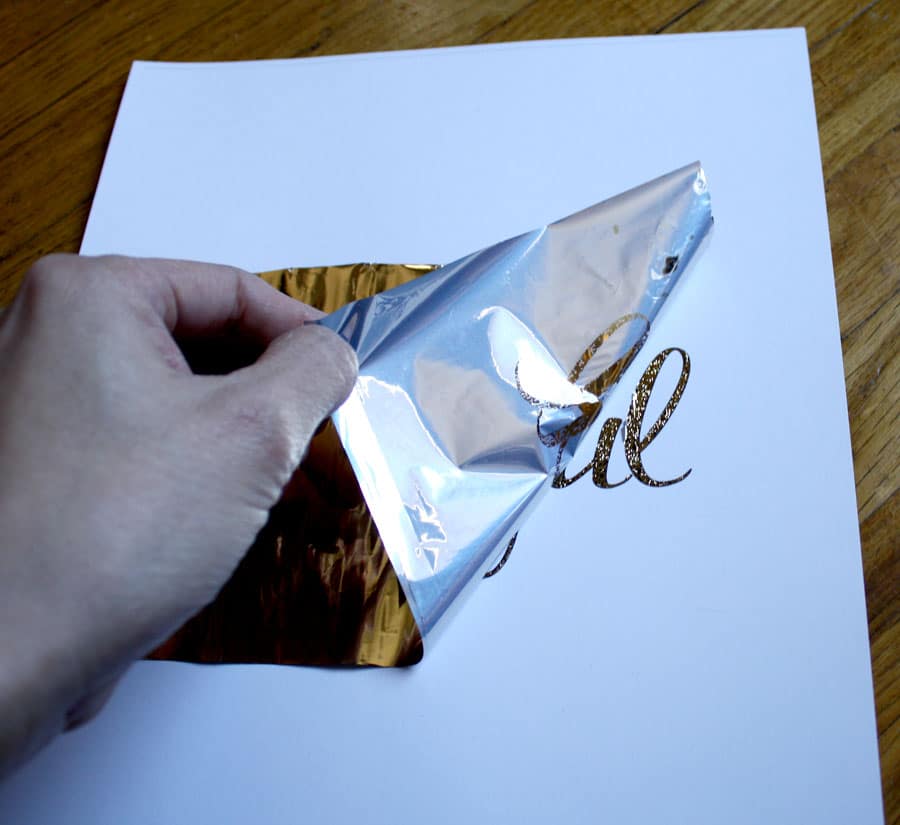

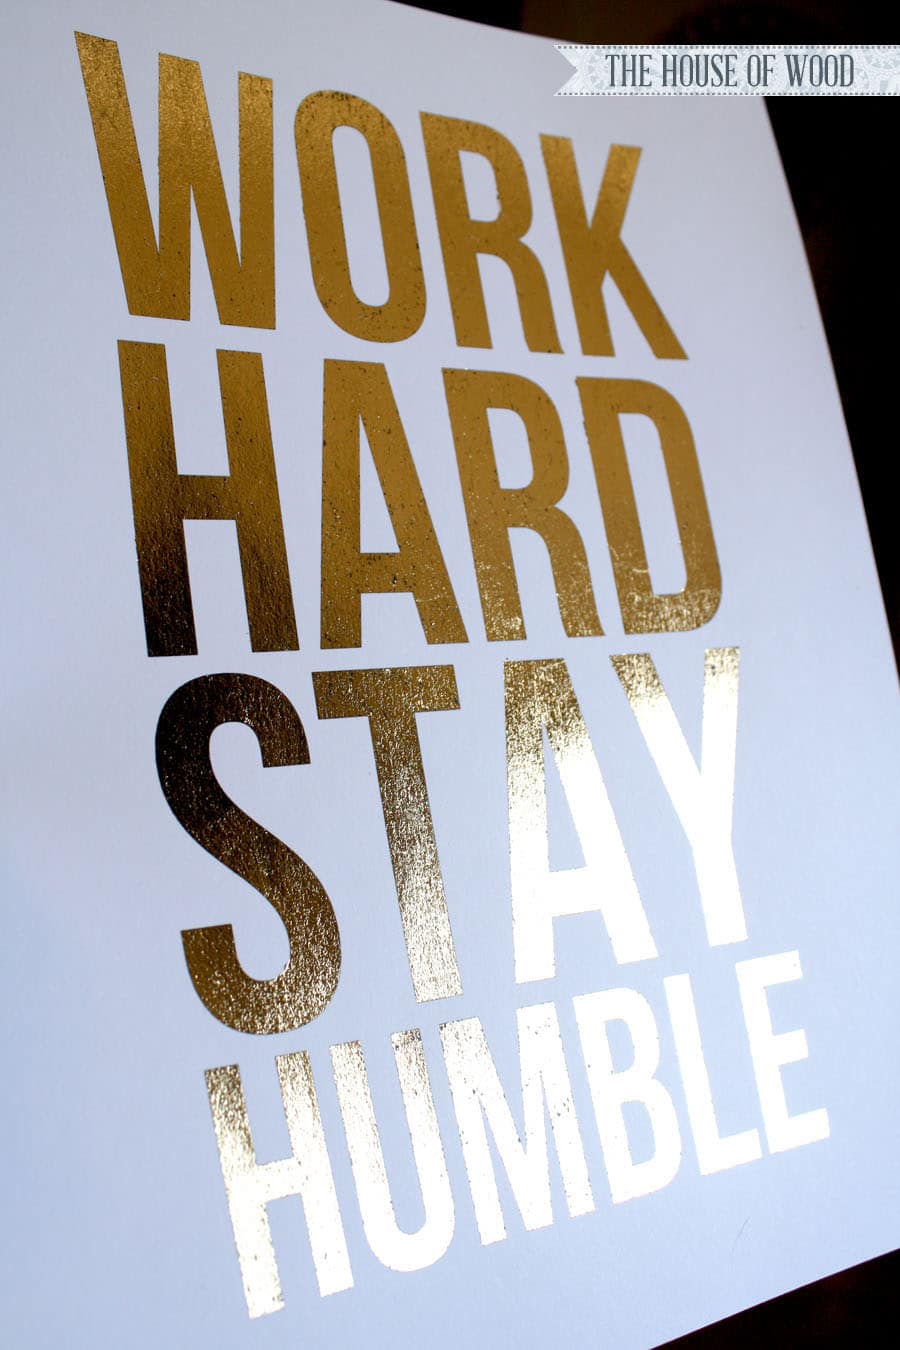
Me, oh, my! My very own DIY! (Gold foil print, that is.) It’s far from perfect, and it certainly won’t buy me a house on the hill if I were to sell them in my Etsy shop, but how neat, right? Here are my 2nd and 3rd attempts:

Ahhh, my preciousssss… so shiiiiiiny… And nothing says “Work Hard Stay Humble” quite like glam gold does, amiright? I mean, you can be hard-working, humble, and glamorous all at the same time. True story.
I also learned that lint and dust (or dog hair, in my case) is not good when hot stamping foil to paper. See exhibit A below:
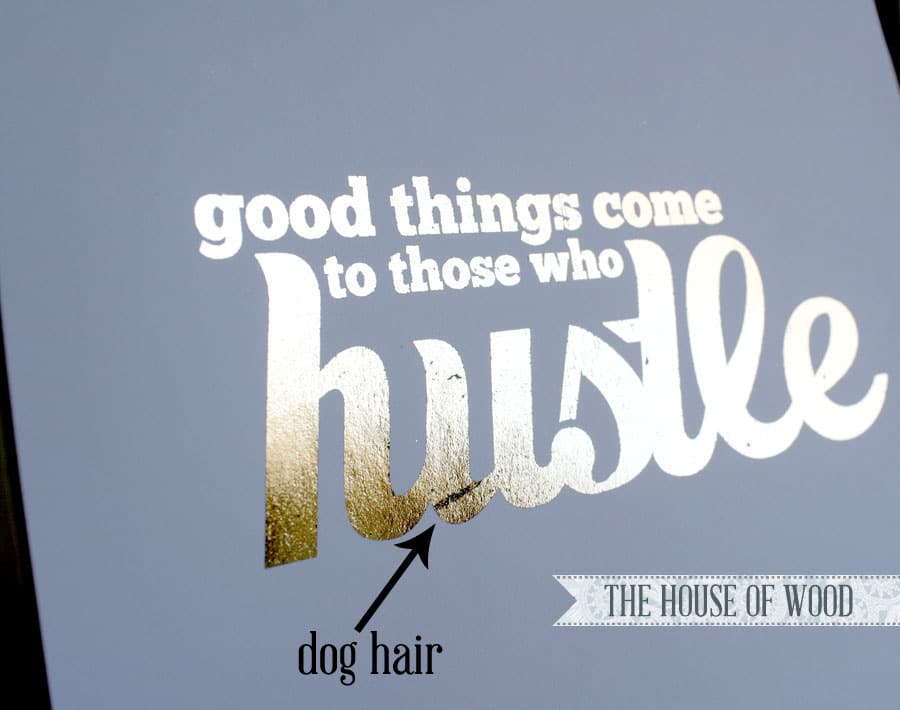
But overall, not a bad little DIY experiment, right? I imagine my DIY gold prints will look even better once they’re framed and hung; you might not even notice the dog hair and other little imperfections (crossing fingers). What do you think? Huzzah for DIY gold foil prints!


What font did you use for “Beautiful” and “Hustle” (the one with dog hair)?
Use that laminator to etch copper also. https://www.youtube.com/watch?v=B9LmE-H-SHU
Awesome! Thanks for the link, Jerry!
i was just wondering if the paper with the gold foil goes into a laminating pocket or not??
I did not use a laminating pocket.
I love the idea. Have any ideas on how i can put the print on say a planner cover that is leather? But will not fit through the laminator?
I’ve heard people have used an iron – but I don’t think you can iron leather without damaging it. :-/
hi! i loved this tutorial!! i want to do it already ! 😀
is it essencial to use the hot laminator or can i use an iron?
thank you,
Hi, do you have to use a laminator which takes 10ml pouches? That’s what the MyBinding.com tutorial said, but I have a 5ml laminator. The foil didn’t turn out that great, there were a lot of black spots where the foil didn’t transfer. Your pictures look great because it looks like the foil covered everything with toner.
This is the laminator I used: http://www.amazon.com/Apache-AL13-Thermal-Laminator-Pouches/dp/B0012UEXTQ/ref=sr_1_8?ie=UTF8&qid=1423717099&sr=8-8&keywords=laminator
I also bought the foil from mybinding.com
And my print outs were from a few hours before I transfered the foil.
Hi!
I tried this DIY project and it worked!!! However wanted to ask do you know if I can use color cardstock and will the gold foil still stick to the paper?
The toner-reactive foil sticks to wherever there is toner applied, so I don’t see why colored card stock wouldn’t work.
Hi, love your tutorial. Can you tell me if you have ever tried to gold foil vellum.
Hi Jen, thanks so much for sharing your process. Have you tried stamping onto letterpress paper? Are you using coated or uncoated stock for the template, and for the final product?
You’re welcome, Ann! No, I haven’t tried hot stamping onto letterpress – that would look beautiful though. I don’t know if the card stock was coated or uncoated – I just bought whatever was on the shelf at Staples. 🙂
Quick question. I lived this idea. I was thinking for table numbers at my wedding I could do this, then modgepod the paper into the inside of a vase. Can this work with thinner paper? Or just heavy card stock? I will be reading your blog more to get more ideas.
I just used card stock because I wanted my prints heftier. I don’t see why this wouldn’t work with thinner paper. Give it a try and let me know how it goes!
Do you think this would work for wedding invitations? Does it come off if you touch/scratch it?
No, I haven’t found that it comes off if you scratch or touch it.
If it works from heat do you think you could just use an iron?
I’ve never used an iron for this project, but have heard people have mixed results with it.
Would this work on other types of paper such as pearlescent, nettuno and silk? Also is it possible to emboss the gold foil letters? x
Hey Jen –
I’m working on some wedding invites for my sister and she is looking for this gold leaf look. Do you think that it would work if I printed in black on a navy paper? I noticed in the tutorial you said it needed to be black on white. I am thinking it would work because the toner would still be there to cause the reaction…any thoughts?
Thanks in advance!
I’m not sure, but it would make sense that it should work! Try it and let me know how it turns out for you! Good luck!