• Skip to primary navigation
  • Skip to content
  • Skip to primary sidebar
  • Skip to footer
  • Home
  • Blog
  • About
    • Meet Jen
    • Testimony
    • Meet the Team
  • Project Gallery
    • Furniture >>
      • Beds
      • Benches & Ottomans
      • Bookshelves
      • Desks
      • Dressers
      • Tables
    • Recipes
    • Crafts
    • Decorating
    • Kids
    • Lighting
    • Organization
    • Outdoor
    • Seasonal
  • Shop
    • Free Resources
    • Apparel
    • Custom Furniture
    • Home Decor
    • Building Plans
  • Contact
    • Email Jen
    • Sponsor/Advertise
    • Disclosure

The House of Wood

The DIY Life of a Military Wife

August 31, 2012

The Perfect End Table

Hello and happy Friday, everyone! I’m so excited to share my latest project with you! I got to work with the inimitable Ana White on this perfect end table. Ana pinned this simple end table to her “Make Me” Pinterest board and when I saw it, I fell in love. She quickly drew up the plans for it and I built it! I love the roomy top and extra storage underneath. And it fits perfectly at the end of my sectional.

*This post contains affiliate links. To read my full disclosure policy, click here.

Ana’s plans are so easy to follow, which makes for a super easy and quick build. I built it in about 45 minutes, though the finishing process took a few days since I chose to go two-toned with stain and paint (sand, prime, paint, stain, poly, dry time… you know the drill). I used Rustoleum’s Ultimate Wood Stain in American Walnut, Olympic’s flat latex paint in Heirloom Lace, and Rustoleum’s Ultimate Semi-gloss Polyurethane.

MY LATEST VIDEOS

I opted for a solid top and shelf (instead of planking several boards together) and chose 3/4″ birch hardwood plywood. The birch had a really gorgeous grain pattern on it, so I knew it would look so pretty stained. I used el cheapo furring strips for the supports, but wanted a more finished look for the legs, so I went with some poplar 2x2s for the legs. They’re the same legs I used for Evie’s play table. I would’ve liked to have been more cost-effective by using furring strips all around, but it’s next to impossible to find straight furring strips at my Lowe’s. Although the poplar 2x2s cost a bit more, I’d rather have a sturdier piece that won’t take a lot of sanding to look smooth and pretty.

Here are my cut pieces:

I used Gorilla Wood Glue on all my joints and built the 2 end frames with Kreg Jig pocket holes and screws:

Then I attached the 2×2 supports, joining the two end frames together:

I pre-drilled and countersunk pilot holes then screwed in the bottom shelf from underneath. Then I sanded, primed, and painted the base frame before attaching the top. I figured it would be easier than having to tape everything off, once it was built completely:

I brushed the stain on the tabletop with a foam brush and let it sit for about 3-5 minutes:

Then wiped off the excess stain with a clean rag, let it dry for a couple hours, sanded it very lightly with a 220 grit sanding block, then followed up with 3 coats of semi-gloss polyurethane:

Then, after allowing everything to dry overnight, I zipped in some screws to attach the top to the base frame:

And just for kicks, I brushed on a final coat of polyurethane over the whole thing:

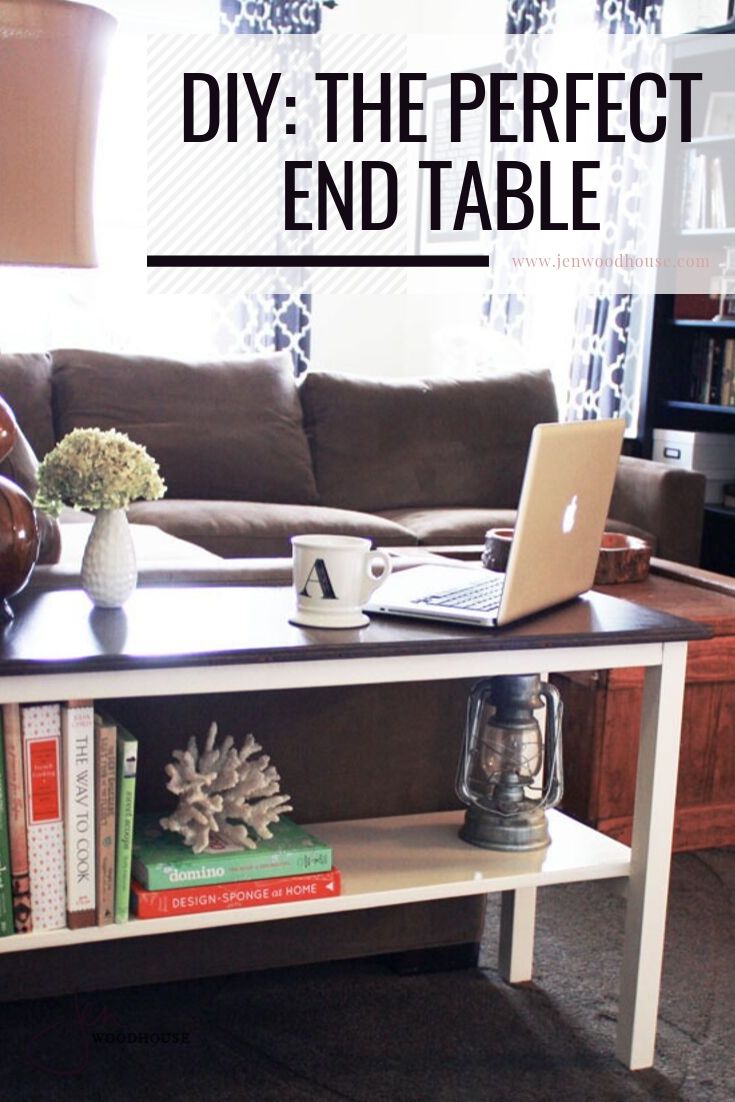
And just like that, she’s done! Ta-da!

And with the help of the wood glue and strong pocket hole joints, this thing is sturdy! As you can see, it’s been toddler-tested. Evie loves to climb all over it and camp out on the bottom shelf. What a cutie, she’s my favorite tiny person ever.

I love that this end table has more than enough space for my drink, laptop, and other miscellaneous stuff I want to have nearby me while I’m watching Breaking Bad.

If you’re timid about building furniture from scratch, this is the perfect starter project for you! Hop on over to Ana’s site for the complete step-by-step plan! Thank you so much, Ana! I LOVE my new perfect end table!

So, are you guys taking on any DIY projects this weekend? It would be the perfect weekend to take on this perfect end table project! Happy Labor Day, everyone!

You may also like:

  • Pottery Barn-Inspired Media ConsolePottery Barn-Inspired Media Console
  • Ballard Designs-Inspired NightstandsBallard Designs-Inspired Nightstands
  • Restoration Hardware-Inspired Finishing TutorialRestoration Hardware-Inspired Finishing Tutorial
  • Brainstorming A Bar Cabinet – The Grand Finale!Brainstorming A Bar Cabinet – The Grand Finale!
  • DIY Dining Table: When Movers Wreck Your StuffDIY Dining Table: When Movers Wreck Your Stuff
  • $2 Scrap Lap Desk$2 Scrap Lap Desk
  • Pottery Barn-Inspired Bedside TablePottery Barn-Inspired Bedside Table
  • Original Woodhouse NightstandsOriginal Woodhouse Nightstands

Filed Under: Design Plans, Furniture, Organization, Tables Tagged With: accent table, Ana White, carpentry, end table, furniture, living room, shelf, woodworking

Reader Interactions

Comments

  1. Ana says

    August 31, 2012 at 2:22 pm

    Beautiful table and room! I love those curtains too. Could you please provide some info on them? The pattern is lovely. Thanks

    Reply
    • Jen says

      August 31, 2012 at 4:27 pm

      Of course! I got them from West Elm, but when I went to their website to look for a link, it appears they don’t sell them anymore (or at least for the moment). They’re a charcoal grey color, with a white trellis pattern.

      Reply
  2. Roeshel says

    August 31, 2012 at 8:58 pm

    Okay, Jen – I see MORE pocket holes! 🙂

    I love it’s non-traditional size – perfect! And that gorgeous rich top is beautiful!

    Reply
    • Jen says

      September 1, 2012 at 7:41 am

      Yep! Time to break out that Kreg Jig, Roeshel!

      Reply
  3. Melissa @ Love Bug Living says

    August 31, 2012 at 9:11 pm

    That fits perfectly in your room. Turned out great. Love the colors you chose.

    Reply
    • Jen says

      September 1, 2012 at 7:42 am

      Thanks so much!

      Reply
  4. Erin @ DIY On the Cheap says

    August 31, 2012 at 9:17 pm

    I love this table! The whole room is beautiful. Found you on Hometalk. Great job!

    Reply
    • Jen says

      September 1, 2012 at 12:06 am

      Thanks, Erin! I just visited your blog… happy belated birthday! Thanks again for dropping by and for taking the time to comment!

      Reply
  5. stella g. says

    August 31, 2012 at 10:21 pm

    Love that sweet little model you have checking out your table. 🙂 She looks very proud of her mama!

    Reply
    • Jen says

      September 1, 2012 at 7:42 am

      She’s a cutie, she is.

      Reply
  6. Aisha says

    September 1, 2012 at 2:21 am

    Hello! Found you from over at Ana’s site. Just wondering what stain you used on your table?

    Reply
    • Jen says

      September 1, 2012 at 7:33 am

      Hi Aisha,
      Thanks for stopping by! I mentioned the stain in my post… I used Rustoleum’s Ultimate Wood Stain in American Walnut, followed up with Rustoleum’s Ultimate Semi-gloss Polyurethane.
      Hope that helps!

      Reply
  7. Renee - the Creative Orchard says

    September 1, 2012 at 8:31 am

    I really like the entire room! I would love for you link this up at my first LINK PARTY!

    http://www.thecreativeorchard.blogspot.com/2012/08/tutorial-link-party.html

    Reply
    • Jen says

      September 1, 2012 at 8:51 am

      Thanks for stopping by, Renee! Heading over to your blog now to link up… thanks again!

      Reply
  8. Janet @ Frugal & Focused says

    September 1, 2012 at 11:25 am

    Wow! That’s gorgeous and does look to be a fairly simple project. Nice work! Found you through the Creative Orchard link up.

    Reply
  9. Jamie @ Scattered Thoughts of a Crafty Mom says

    September 1, 2012 at 6:58 pm

    Love this! Sending it to my hubby right now!
    ~Jamie

    Reply
    • Jen says

      September 3, 2012 at 11:18 pm

      Yay!

      Reply
  10. Sarah says

    September 3, 2012 at 4:32 am

    Wow, I cant believe you made this is 45 minutes! It looks fantastic, I have a wee bit of Kreg envy….

    Reply
  11. Lynnette says

    September 3, 2012 at 5:40 pm

    Love this! Love your site!

    I am starting this table tonight, but it took me 3 trips to Lowe’s to get everything. First to buy the Kreg jig and scrap wood to practice, then back for more screws and paint, etc, and third trip to buy the wood on your cut list. (btw, my 11 year old stepson said “this is the first time I’ve been to the same place 3 days in a row that wasn’t school!)

    For anyone on the fence about the Kreg jig, buy the Master system. I practiced with scrap wood and couldn’t believe how professional it looks. Even my husband was impressed. The kit contains everything you need, except you will need to buy more screws. Ok…..enough of my Kreg commercial….

    My question is…..”How do I route the edges of the tabletop?” I bought the birch plywood just like you at 3/4″ thickness. I have the dremel trio, but it doesn’t seem strong enough or heavy duty enough to use as a router on such a thick piece of wood.

    Thanks for your posting. I’m making mine exactly like yours…same paint finish and dimensions. Love it!

    Reply
    • Jen says

      September 3, 2012 at 11:17 pm

      Hi Lynnette,
      Thanks for dropping by and for the kind words! I’m excited to see your end table once it’s finished! I used my palm sander with 60 grit sandpaper to sand down the edges, then worked my way up to the finer 220 grit to make everything smooth. I may decide to add on some veneer banding for the edges, because I don’t think I like how the plywood shows its layers there. I’m not sure yet… keep you posted!

      Reply
      • Lynnette says

        September 9, 2012 at 10:43 pm

        I built this! I used the same off white paint, and used Kona colored stain. I think it looks awesome. It took me a couple of days, but I spent a ton of time at Lowe’s “just looking”.

        My lessons learned: 1) buy the small sizes of paint, glue, stain if you can….not the gallon sized jug of wood glue like my husband said was “a better value” 2) print the plans…..I didn’t and kept skipping steps….so my table doesn’t have wood filler and I didn’t prime before painting….I was too excited to bother with directions, I guess…oh well…. 3) it took 2 trips to get the wood cut correctly…it was very crooked the first time….and have since been told that they can’t guarantee perfect cuts….good justification for me to buy a miter saw. 4) use clamps for an extra pair of hands… 5) Love that Kreg jig and also bought the palm sander….my other new favorite tool AND 6) if the bottom shelf is too big, don’t “force it” into place by STEPPING on it…thank you DH….no wonder this took me 2 days 🙂

        I did use my neighbor’s router for the table top, but it’s really not that noticeable once I stained it.

        Thanks again Jen….wonderful idea!

        Reply
        • Jen says

          September 10, 2012 at 9:02 am

          It can be so frustrating when the lumber guys don’t make accurate cuts – but they’re really just there to cut down your wood so it’ll fit into your vehicle. I actually ended up buying a table saw yesterday because they ripped my plywood incorrectly. Which is just as well, I’ve been needing one, and I’d rather do it myself anyway.

          Yay! I’m excited about your table! I’d love to see pictures!

          Reply
  12. Laurel@Ducks in a Row says

    September 4, 2012 at 3:51 pm

    I need one of these – thanks for the inspiration!

    Reply
  13. the cape on the corner says

    September 5, 2012 at 1:24 pm

    that looks amazing! and i’m having major sectional envy right now, but it isn’t in the cards for me and my basement reno…boo hiss. great job here!

    Reply
    • Jen says

      September 10, 2012 at 9:10 am

      Thanks! I bought the sectional from Crate & Barrel (it’s the Axis sectional, fyi) about 6-7 years ago and it’s held up beautifully to the wear and tear of a toddler and 100-pound puppy. It still looks and feels like new! Definitely recommend!

      Reply
  14. Lauren @ The Well Crafted Home says

    September 5, 2012 at 3:32 pm

    This is a really beautiful table! I love the white legs 🙂 I’m hosting a link party right now and I would love to have you join! You can find it here:

    http://thewellcraftedhome.blogspot.com/2012/09/well-crafted-wednesday-19-link-party.html

    Reply
    • Jen says

      September 5, 2012 at 10:17 pm

      Thanks, Lauren! Heading over to your blog now to link up! Thanks for the invite!

      Reply
  15. Dee says

    September 5, 2012 at 8:21 pm

    Wow! Your end table turned out fantastic. I love the stained top and painted bottom.

    Dee

    Reply
  16. angie@diyitnow says

    September 5, 2012 at 10:31 pm

    The table really looks nice. It seems so simple? So beautiful.

    Reply
    • Jen says

      September 5, 2012 at 10:40 pm

      It was super simple! Ana’s plans are great that way. The perfect starter project, for sure!

      Reply
  17. Beth @ BandBBuildALife says

    September 6, 2012 at 10:30 am

    So simple and clean! And I LOVE the way you styled it for the pin-worthy photo! Great Job, Jen! (We’re partial to the white-and-wood look too! Though I’m still putting together a few posts on our builds.)

    Reply
  18. Jaye @ Just Tryin' to Make Cents of it All says

    September 6, 2012 at 7:04 pm

    I love the SIZE of that table! Thanks for sharing! I’ve been looking for a thrift store table to re-do but I’d just as soon build one. I may router the edges of the table top if my son has a nice router bit, though! Great job!

    Reply
  19. Tricia Hicks says

    September 6, 2012 at 11:16 pm

    Hi Jen,
    I’m Nashville born & bred! I love your table, did you get cuts at the store? I’m glad to see the kreg recommendation. I want one so badly!! Best of luck with your music & I’m definitely going to follow you on fb.

    Tricia Hicks

    Reply
    • Jen says

      September 7, 2012 at 1:21 pm

      Thanks for stopping by, Tricia! You’re a rarity – I don’t find many Nashvillians who are actually born & bred in Nashville! Thanks for the kind words. No, I did all my cuts myself, though Lowe’s and Home Depot are able to cut your lumber for you, if you need. Definitely get the Kreg – all the hype is true!

      Reply
  20. Elizabeth@BlueClearSky says

    September 7, 2012 at 4:14 pm

    What a great table! I love that it is extra long to match the depth of your sofa and can hold everything you need, including your cute kiddo.

    Reply
  21. Meg Made Designs says

    September 7, 2012 at 5:04 pm

    I love the table, might just have to whip one up! Nice work!

    Reply
  22. Roeshel says

    September 7, 2012 at 9:00 pm

    Sharing a link back in tomorrow’s highlights, Jen. This is just so clever – the perfect shape. Love the rich stained top with the white too. Great job (as usual!)!

    Reply
    • Jen says

      September 7, 2012 at 10:52 pm

      Awesome! Thanks so much, Roeshel!

      Reply
  23. Meredith & Gwyneth says

    September 8, 2012 at 8:11 pm

    Jen! Saw your feature at DIY Showoff and had to see this for myself! Your end table is gorgeous, and I just love how you styled it!

    xoxo,
    Meredith & Gwyneth

    Reply
  24. Donna Allgaier-Lamberti says

    September 9, 2012 at 10:48 am

    I so admire bloggers who can actually BUILD! Love the dark stained top. A beautiful project!

    Small House / Bis Sky Donna
    http;//smallhouseunderabigsky.wordpress.com

    Reply
  25. Ayisha says

    September 10, 2012 at 5:24 pm

    Jen, I’m in the middle of building two of these tables. Its so awesome to have something that fits my really deep sofa. I found some Cedar square balusters at my Lowes that was 2×2 and only cost $2.25 each as opposed to the poplar or oak 2×2 that were more than double. I also am going to try and make with some Birch Iron On Veneer that I had lying around and hope that makes the edges look more finished. I am staining with the Rustomeum Ultimate in Kona Brown as I want it to look as close to black as possible. I’ll let you know how it turns out. Thanks to you and Ana for inspiring me.

    Reply
    • Jen says

      September 10, 2012 at 11:56 pm

      That’s awesome, Ayisha! My Lowe’s didn’t carry the Cedar… bummer! Let me know how the iron-on veneer turns out… I was thinking of doing the same thing with mine! Send pics! Good luck!

      Reply
  26. Jennifer says

    September 13, 2012 at 1:03 am

    Love love love it! Oh, and your little girl is ADORABLE too! I hope to stay connected!!
    xoxo

    Reply
    • Jen says

      September 13, 2012 at 3:34 pm

      Definitely! Thanks for dropping by!

      Reply
  27. Christine @ Let's Get Crafty! says

    September 13, 2012 at 9:52 am

    Your table is beautiful!!! I’m dying to build something too but I can’t find the Kreg Drill. As far as I know Home Depot doesn’t carry it….

    Reply
    • Jen says

      September 13, 2012 at 3:24 pm

      Thanks so much! You can get it from Amazon. I have the K4 model which runs about $100 – SO worth it!

      http://www.amazon.com/Kreg-K4-Pocket-Hole-System/dp/B001DYFISG/ref=sr_1_1?ie=UTF8&qid=1347564808&sr=8-1&keywords=kreg+jig+k4

      Hope that helps… Good luck!

      Reply
  28. Kristine says

    September 13, 2012 at 11:44 pm

    Okay, so the end table is fabulous, as is your gorgeous styling, though as a font nerd I also have to ask…what is the font used in the watermark on the photos? Love it.
    Thanks

    Reply
    • Jen says

      September 14, 2012 at 9:52 am

      Thanks, Kristine! The font is called “Abraham Lincoln” – it’s also the font I used in my header. Hope that helps!

      Reply
  29. latoya @ a peaceful crib says

    September 17, 2012 at 6:11 pm

    Man I love this, this is such a great idea. If I had a sectional I could easily do this and eliminate the need for the living room desk. Looks great, lovely job!

    Reply
  30. Linda says

    December 4, 2012 at 10:26 am

    Love it!!! I even love the mug. Where did u get it?

    Reply
    • Jen says

      December 4, 2012 at 4:51 pm

      Thanks! The mug is from Anthropologie.

      Reply

Trackbacks

  1. Next big project? | Callico Designs says:
    August 31, 2012 at 6:30 pm

    […] was scrolling through the blogs I follow and came across this beautiful end table that Jen over at The House of Wood built recently for her place. I have been looking for something similar for my condo as the couch […]

    Reply
  2. End Table with Shelf says:
    September 6, 2012 at 8:00 am

    […] Jen from The House of Wood is at it again with another fabulous furniture build. Equipped with Ana White’s step-by-step, easy-to-read plans, Jen built her “perfect end table” in 45 minutes. No joke! Jen says, “If you’re timid about building furniture from scratch, this is the perfect starter project for you!” […]

    Reply
  3. DIY Projects and InspirationDIY Show Off ™ – DIY Decorating and Home Improvement Blog says:
    September 8, 2012 at 8:00 am

    […] from The House of Wood is soooo good at building furniture. I love her most recent: how to build the perfect end table. Love the […]

    Reply
  4. Hookin Up with HoH #116 says:
    September 12, 2012 at 10:56 pm

    […] The House of Wood build this table and shares a great tutorial so you can make one too. It’s seriously the perfect size to put next to a sectional. […]

    Reply
  5. Furniture Feature Friday – Features & a Link Party says:
    September 13, 2012 at 10:00 pm

    […] from The House of Wood built an end table that was the perfect size, scale and shape for her sectional.  I love it when a […]

    Reply
  6. The Girls on the side says:
    September 25, 2012 at 1:17 am

    […] And no this is not some feministic remake of an old Drew Barrymore movie. This is about my brand new end tables that I built over the course of the last week. I used the plans a la Ana White’s awesome blog and additional tips from Jen Woodhouse. […]

    Reply
  7. making wood end tables | Woodworking Projects says:
    February 12, 2014 at 1:51 am

    […] The perfect end table | the house of wood […]

    Reply
  8. DIY End Tables That Look Stylish and Unique says:
    July 28, 2015 at 6:50 am

    […] The House of Wood made this elongated, rectangular piece that’s traditional in style, functional in use and also fits perfectly in this nook. We’re positive that this DIY can be done by all new and veteran crafters as well! […]

    Reply
  9. Awesome DIY End Tables - 12thBlog says:
    September 3, 2015 at 4:28 am

    […] The House of Wood […]

    Reply
  10. Stunning DIY End Tables says:
    October 27, 2015 at 2:32 pm

    […] The House of Wood […]

    Reply

Leave a Reply Cancel reply

Your email address will not be published. Required fields are marked *

Primary Sidebar

Welcome

WANT FREE PLANS SENT STRAIGHT TO YOUR INBOX?

Footer

WANT FREE PLANS SENT TO YOUR INBOX?

  • Facebook
  • Instagram
  • Pinterest
  • RSS
  • Twitter
  • YouTube
  • About
  • FAQs
  • Disclosure
  • Sponsor / Advertise
  • Contact
© 2007-2018 · Jen Woodhouse · Log in