Hi friends! If you follow me on Facebook or Instagram (thank you – you rock!), you would’ve already seen sneak peeks of this project. I’m super excited to finally share the plans and tutorial with you! If you’re just joining us, here’s the skinny: this Summer, myself, along with four other DIY bloggers have each tackled a different project inspired by an item in the West Elm catalog. Check out our June and July projects.
It’s the final month of our West Elm Knockoff Decor Series and I’m a little weepy about it because it was so much fun to be a part of. I’m grateful my beautiful friend Aniko of Place Of My Taste included me in this Summer series; she put together a stellar lineup. These girls are all DIY Rockstars and it was an honor to be among the very best.

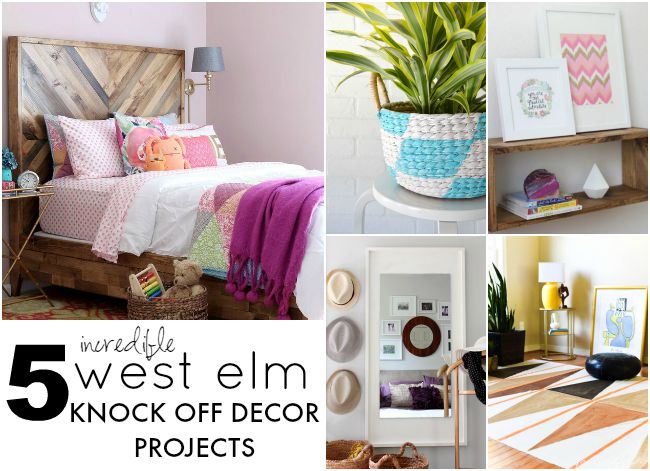
For this month’s challenge, we each chose to knock off either a piece of furniture or home decor item and this Alexa Reclaimed Wood Bed was my pick. West Elm’s version will set you back about $1,700. I built mine for under $200.
I knowwwww, right? Bananas!
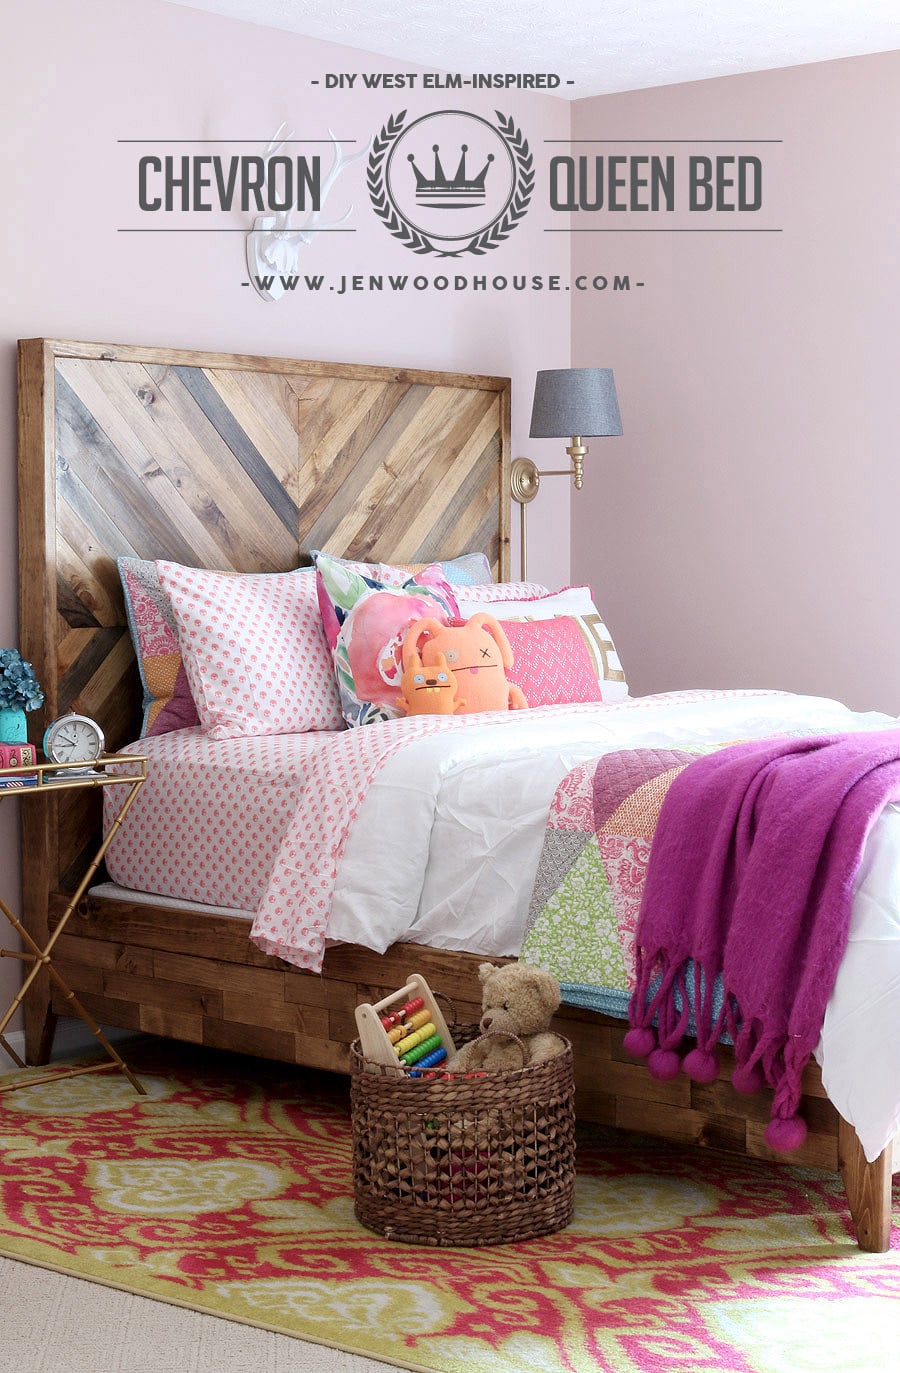
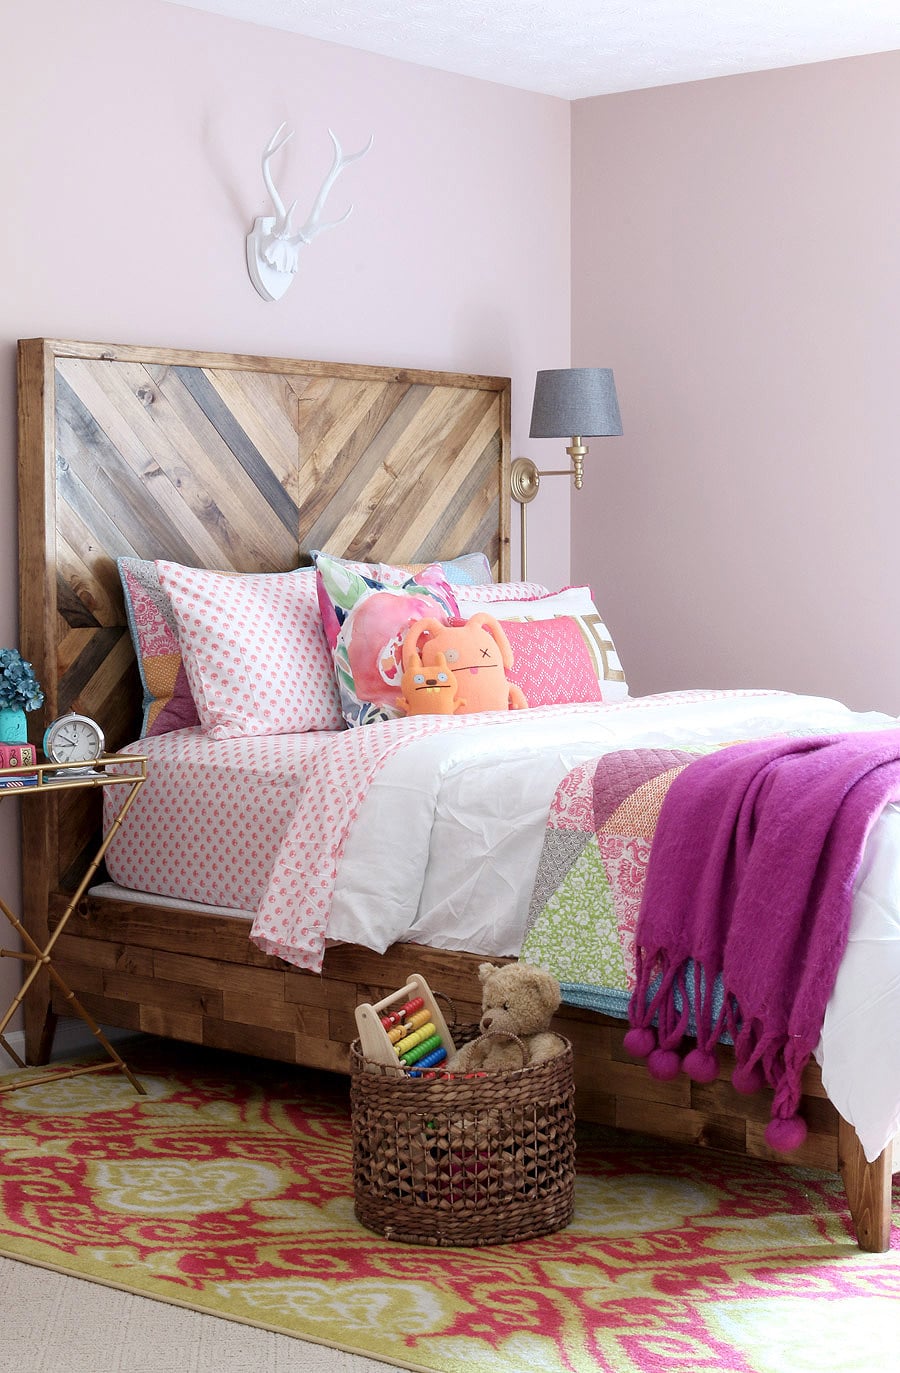
And because I built this bed for my daughter, I’m renaming it the Evelyn Chevron Queen Bed. This is the second bed I’ve built for my four-year-old sweet pea and she’s thrilled about her new ‘big girl bed.’
Check out the Restoration Hardware-Inspired Toddler Bed I built for her a couple of years ago. I love how her new bed turned out, but I’m getting a little teary-eyed about her growing up. She also started Kindergarten this month. You guys. I AM TRYING TO KEEP IT TOGETHER. The days are long but the years are wayyyyy too short, amiright?
*This post contains affiliate links. To read my full disclosure policy, click here.
If you’re wondering where to purchase her bedding or any other item in her room, I’ve included a complete source list at the end of this post.
Alright, so let’s get started.
HOW TO BUILD A WEST ELM-INSPIRED CHEVRON RECLAIMED WOOD BED
You can use any kind of plywood here because it will be hidden from view, but I used my favorite brand, Purebond Hardwood Plywood. Read about why Purebond is the healthier alternative here. The frame is built out of regular ‘ole Spruce 2×4 studs.
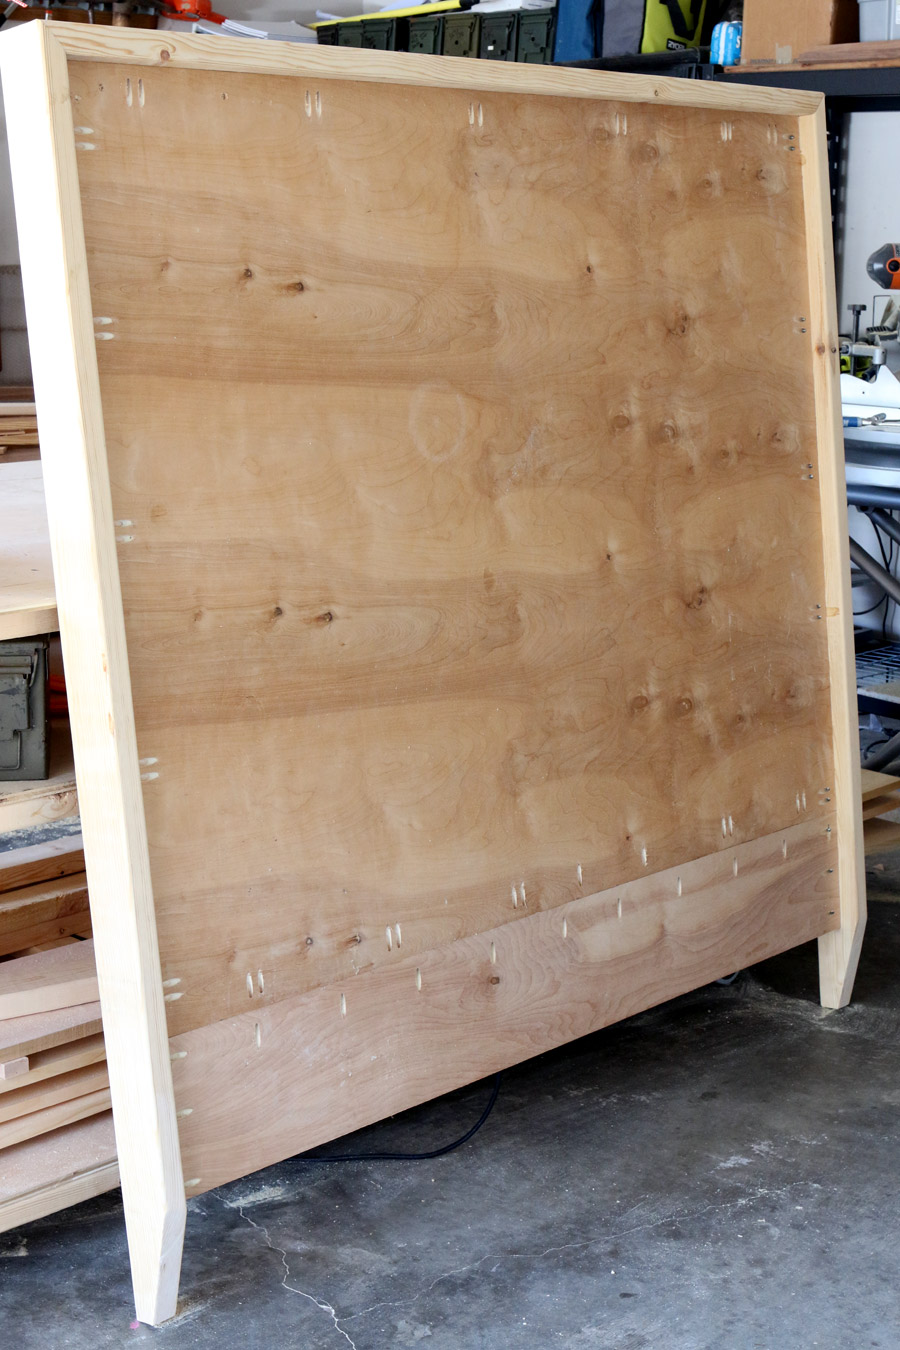
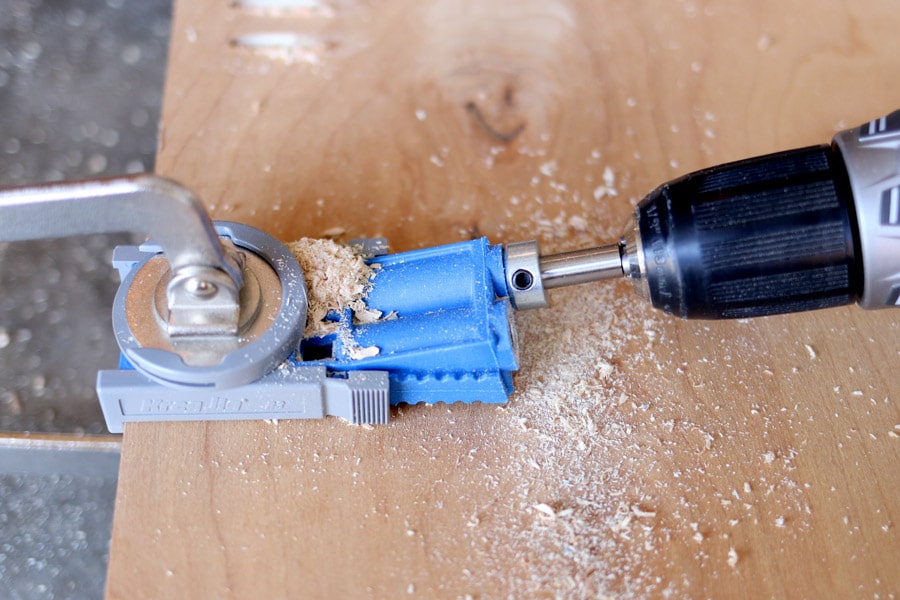
And check out all those pocket holes. If you’ve spent any time around here, you’ll know that I rarely build without my Kreg Jig. Well, this was the first time I used the R3 model. It was so much easier and more efficient to move the tiny R3 around the edges of the large sheet of plywood, rather than trying to wrestle this behemoth into the K4 or K5 model (which would’ve been impossible for me —> tiny Asian lady). #worksmarternotharder
Awww… will you just look at that adorable R3? It’s so cute, it’s like a little baby unicorn! #namethatmovie
Although I built a massive workbench, the headboard was just too heavy and cumbersome to hoist up there, so I had to build on the floor. I am now rethinking that decision because I did about 10 hours worth of squats going back and forth from the floor to the saw. Ouch!
Overall, this is a super simple project to tackle, albeit extremely tedious. You’ll need to hydrate, stretch out your quads, glutes, maybe chug a protein shake or something because it’s “leg day” at the workshop and YOU WILL BE SORE for the next three days.
You’re welcome. But hey, at least your backside will look spectacular.
Measure, mark, cut, sand, stain, glue, nail. That will be your mantra for the next 10 hours. Repeat after me: “measure, mark, cut, sand, stain, glue, nail.”
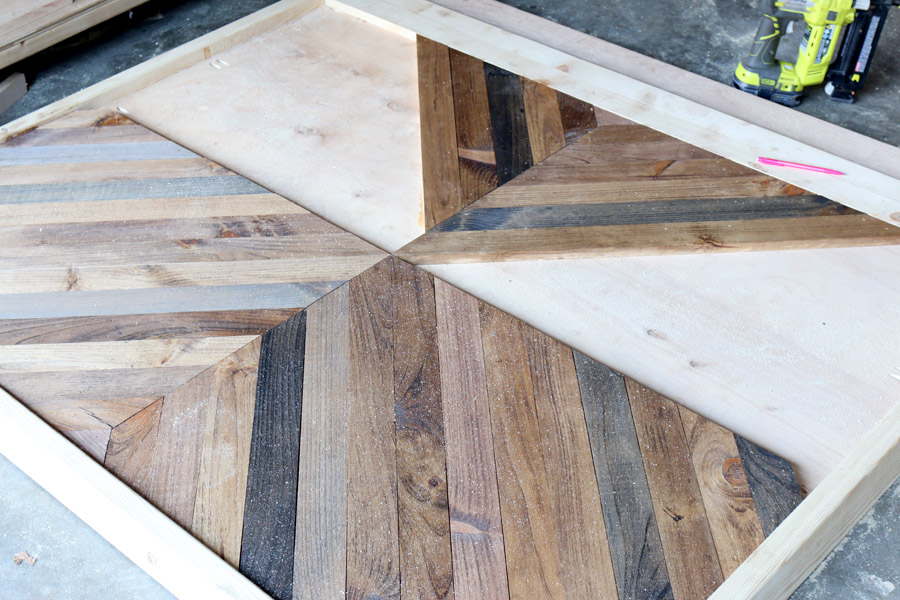
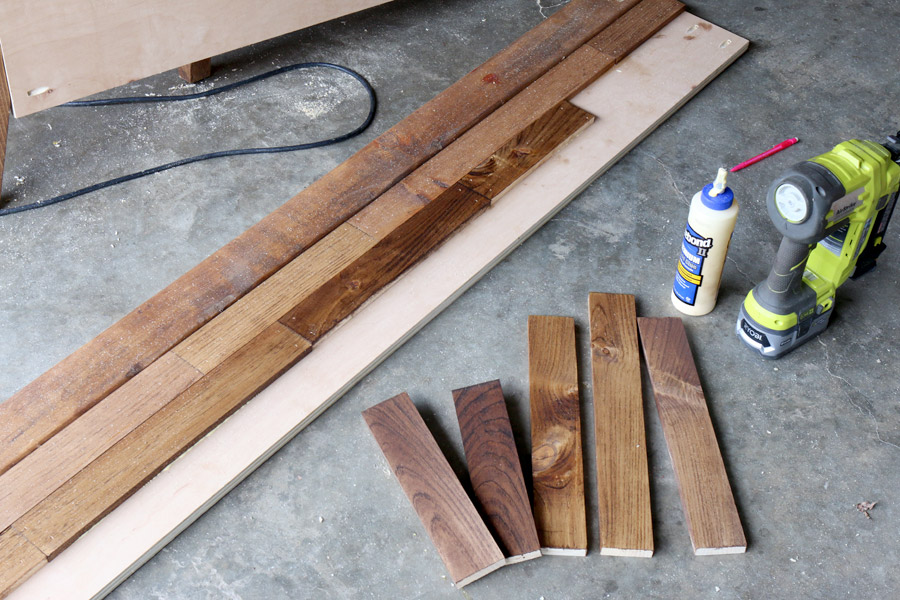
I started with the smallest triangle pieces on the top and bottom and worked my way towards the center.** I highly recommend holding your boards in place and marking them that way, instead of using a tape measure. Cut the boards about 1/4″ long then trim them down 1/16″ (about half a saw blade width) at a time to ensure the most precise fit. All of the ends are cut at a 45º angle. Notice that most pieces are trapezoids but a few are parallelograms.
You like that? Welcome back to 7th grade Geometry, aka my nemesis.
**Edit: In hindsight, I’d recommend starting in the center and working your way outward. Find the center of the headboard, lay down the center boards first, then work outwards toward the outside edge of the headboard.
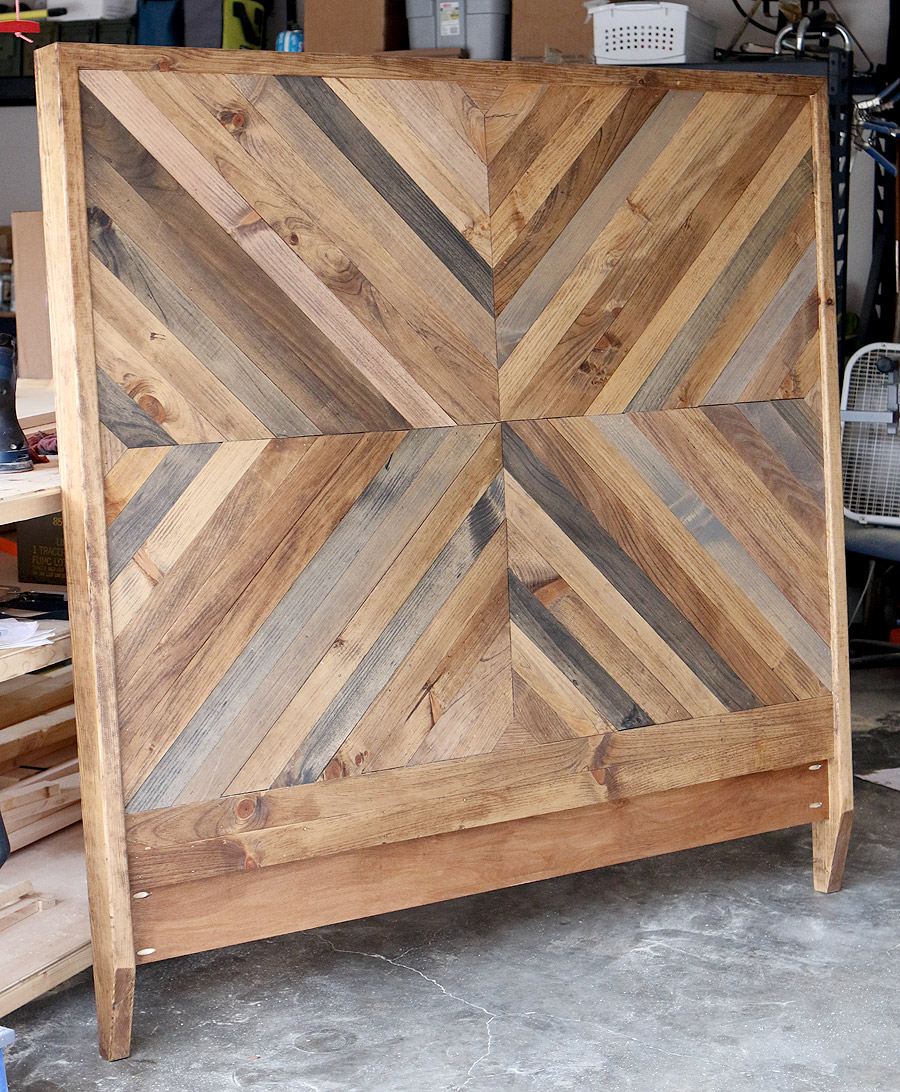
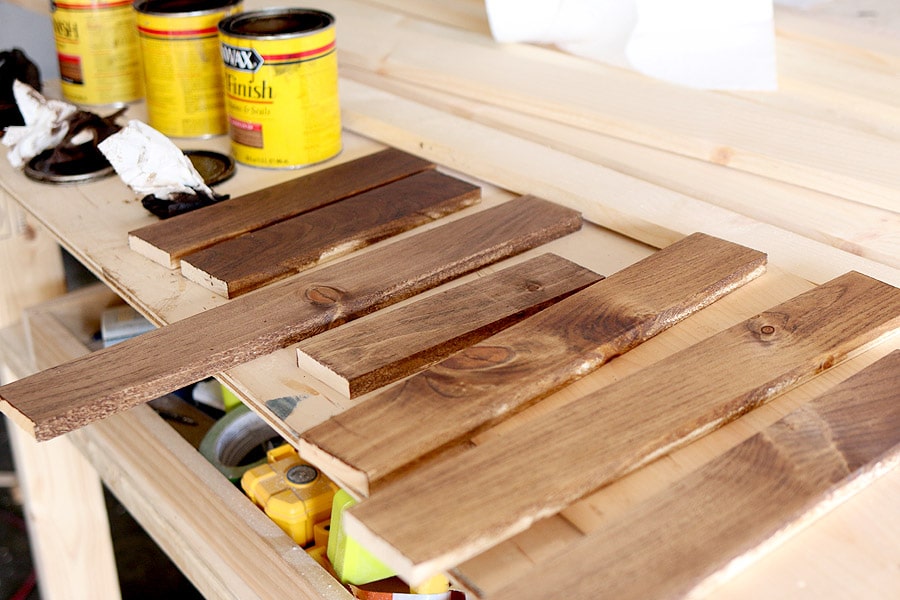
I used ordinary pine for the planks; I just stained the boards a variety of colors to achieve the ‘reclaimed wood’ look. Also, you’ll want to stain them before attaching them to the bed, so you don’t have to worry about taping each board off with the risk of bleed through.
I used several different stains: Provincial, Special Walnut, Early American, and Ebony. I also used a little Weathered Gray by Varathane. Honestly, there’s no method to my madness, no right or wrong, no rhyme or reason – I just stained the boards randomly, sometimes using one color, other times, layering on two or three different stains.
Here’s a helpful video on the basics of staining wood:
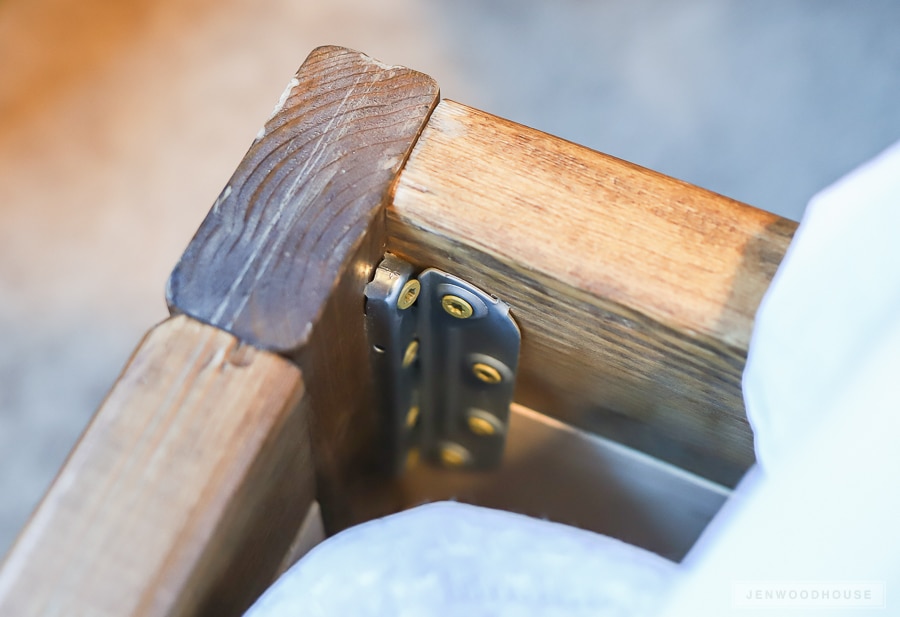
As a military family, we move around a lot, which means we need furniture that can easily be assembled and disassembled. After a bit of searching online, I found these metal bed rail brackets and they were a dream to install. You just screw them into the wood and the two pieces hook into each other. Easy peasy. I love that the headboard, footboard, and side rails all come apart. It’ll make the movers happy, I’m sure.
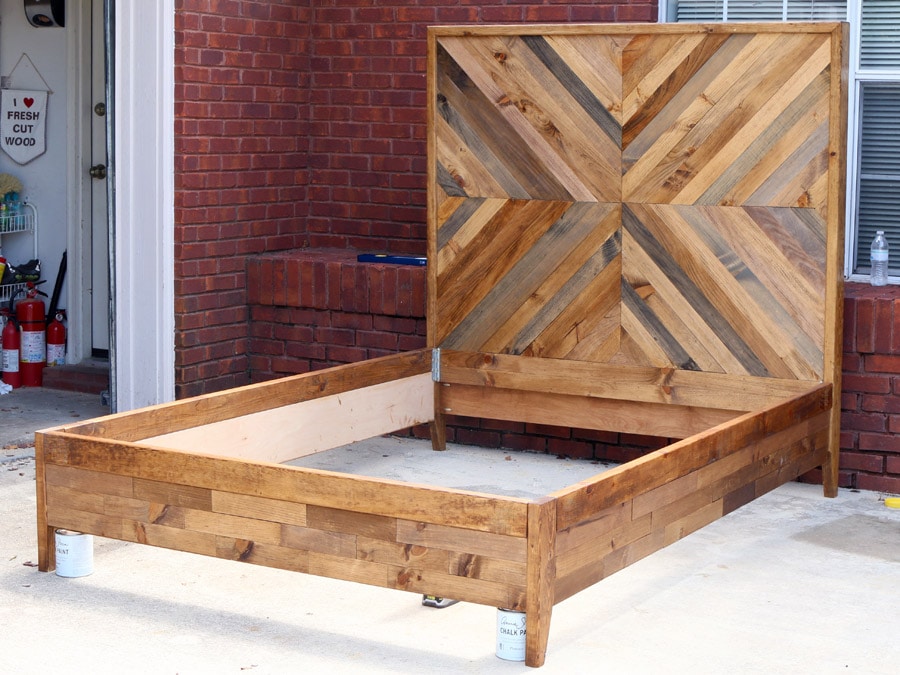
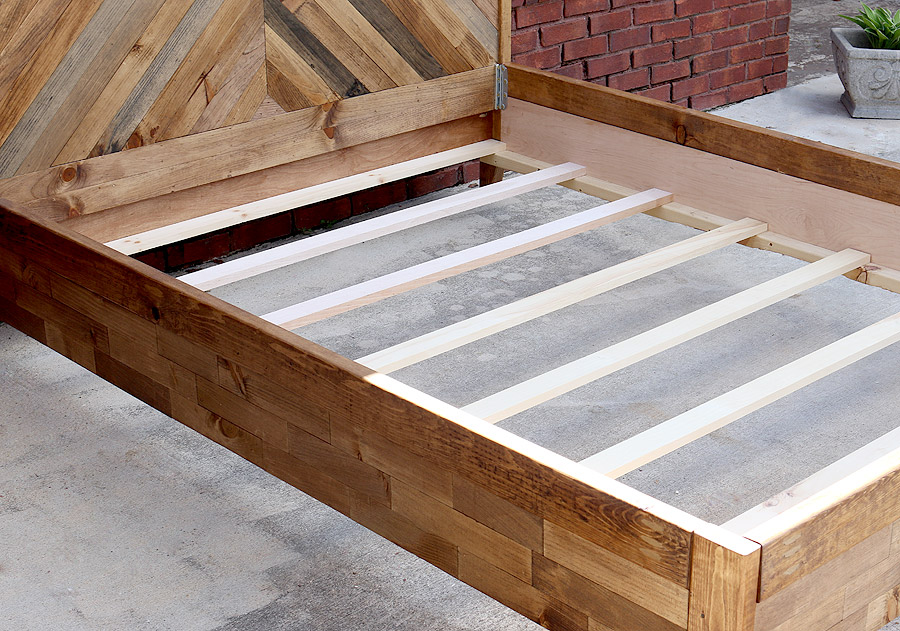
Yay! Now it’s smooth sailing from here on out! Just add the mattress slat supports and mattress slats and you’ve got yourself a queen-sized bed!
Below is a photo of how the bed rail bracket connects the footboard to the sides:
After finishing the whole thing off with several coats of Arm-R-Seal (my new favorite topcoat!), I got it all set up in her room. And by “I,” I mean, “my husband.” He’s the grunt labor around here. I just build it; he hauls it. We’ve got a great thing going.
SHOP MY DAUGHTER’S ROOM
- DIY West Elm-inspired Chevron Queen Bed
- Bedside Table – no longer available, similar
- Area Rug – no longer available, Joss & Main
- Round Basket – no longer available, similar
- Sheet Set / Duvet Cover / Quilt and Shams
- Pink Chevron Throw Pillow / Watercolor Floral Pillow / Evie Pillow
- Ugly Dolls
- Pom Pom Blanket – no longer available, World Market
- Swing-arm Lamp (came in chrome, I spray-painted it gold)
- Grey Linen Lampshade
- Antler Wall Decor
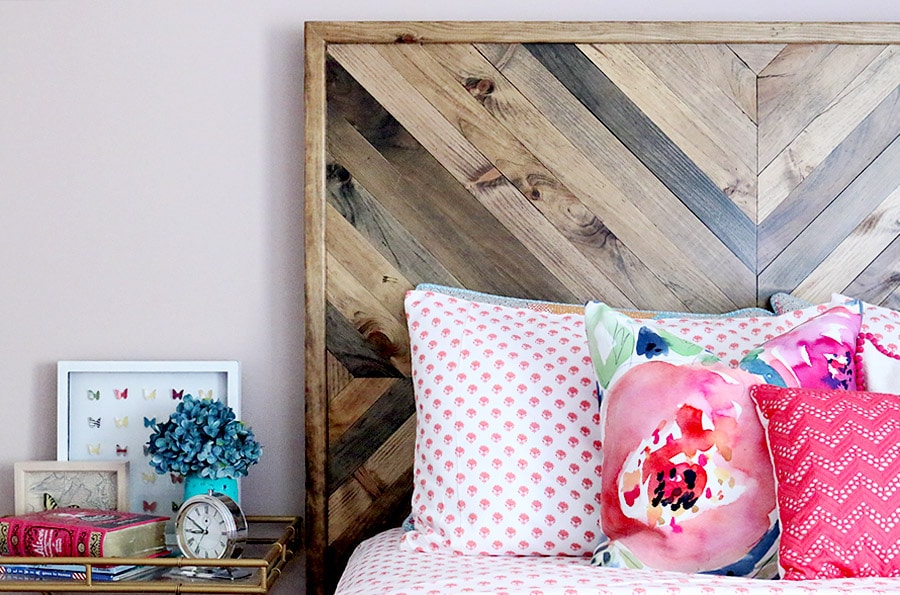
Yes, I realize there are a crap-ton of pillows on this bed for a four-year-old. My husband thinks so too – on our own bed, mind you. I mean, honestly, the absurdity of it all!
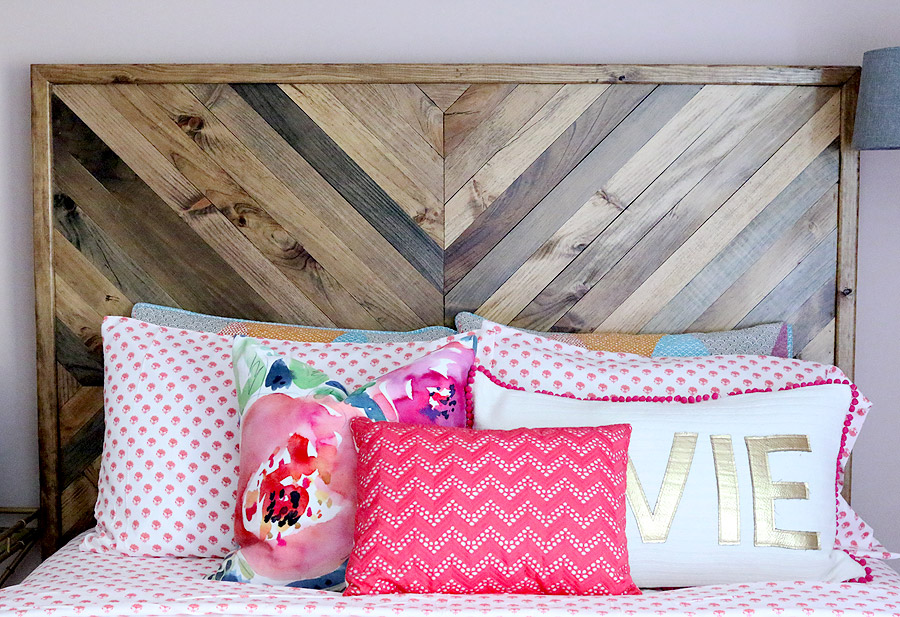
Okay, fine. I’ll take some of the pillows away so you can see more of that beautiful headboard.
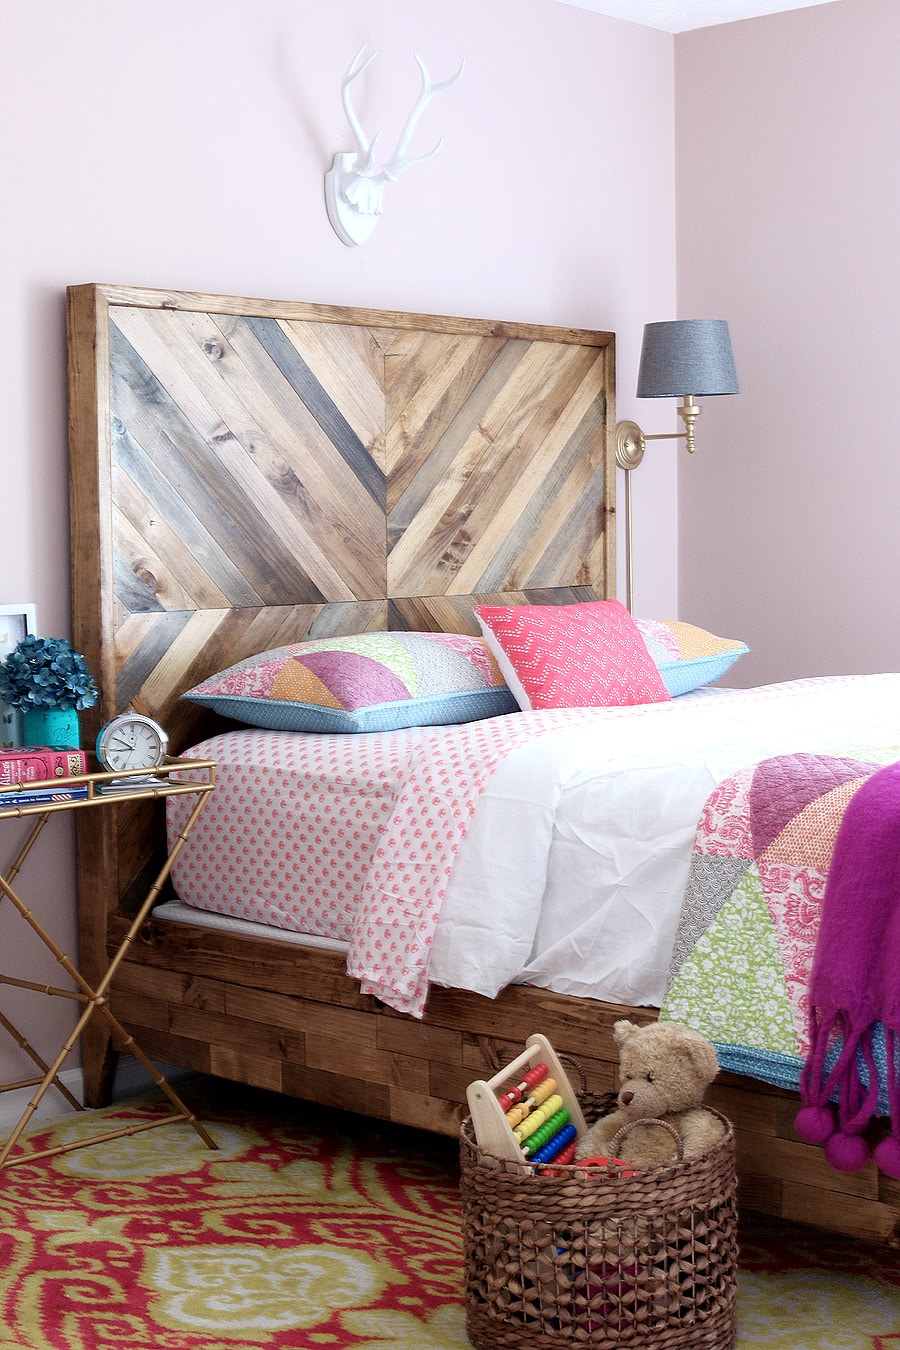
So what do you think? I think I have fallen in love with it. Mostly, because my butt looks fabulous now. #buildingismycardio
- Jen | The House of Wood | Chevron Reclaimed Wood Bed (you’re here!)
- Corey | Tiny Sidekick | Graphic Printed Basket
- Chelsea | Making Home Base | Reclaimed Pine Box Shelf
- Ursula | Homemade Carmona | Floating Wood Mirror
- Aniko | Place of my Taste | Painted Terrazzo Rug
If you enjoyed this project, I’d love for you to PIN IT so you don’t forget it!
Now go get your build on and be sure to tag me (@jenwoodhouse #jenwoodhouse #houseofwood) so I can see your handiwork! Did you miss our previous West Elm Knockoff projects? Take a peek here:
 SLAB BENCH | FLOATING WOOD MIRROR | ACRYLIC SIDED SHELF
 WOOD AND PIPE ENTRYWAY STAND | WOOD SLAT BENCH | RECLAIMED PINE BOX SHELF
 PAINTED TERRAZZO RUG | DEEP PICTURE LEDGE | HAND-PAINTED STRIPED POUF
 RECLAIMED PINE CUBBY SHELF | CHEVRON RECLAIMED WOOD BED | BUTLER STAND
 WOODEN PLANT STANDS | EXPERT NOTICE BOARD | GRAPHIC PRINTED BASKET





Hello – I am just building this bed – we are finished except for the seal/varnish. I really like the flat finish of the wood stained and am wanting to keep that. What kind of varnish or protecant would you recommend?
Hi Ashley,
I used General Finishes Arm-R-Seal and love it!
Hello! Love the post, but I can’t find where to get the free plans for this?
Thanks Erin! You can purchase the plans by clicking the gray “download plans” button.
Hi! I am getting ready to build this piece and I have one question for you! We love to use the underneath of our bed for storage. Do you think it would be okay to add a few inches to the leg height in order to make room for a bit of storage? Thanks!
Hi Maddie,
I don’t see a problem with that – good luck and happy building!
I know this post is like 3 years old, but WOW! I just found it an I’m so excited. I’ve wanted this bed for years
I know this is an older post but I just made the headboard in a king size, and I absolutely love it!! My question is about the brackets on the footboard. How do I attach the brackets without them being seen? I understand how they’re attached on the headboard but I’m confused about how they’re attached to the footboard.
I just built the headboard and I LOVE it! I’m working on the said rails and the footboard but I’m confused on how to attach the brackets on that end and can’t tell from the pictures. Can you please tell me how to attach the brackets to the footboard? Thank you!
Hi there! Attempting to build this and are having trouble getting started with the “small triangle”. We assumed it was was made of two 45 angles cuts, but when we do that the rest of the pieces don’t seem to line up in the middle of the headboard. Is there a trick to cutting this triangle so everything lines up? Thanks for the help!
Hi Katie,
All of the angles are cut at 45º – make sure your miter saw is set and doesn’t move in the course of your cuts, just a little variance can compound over repeated cuts. I’d actually recommend starting in the center and working your way outward. Hope that helps – good luck!
Thanks for the quick reply, Jen! We really appreciate the extra help! So start in the center, work our way out, and when we get to the triangle we’ll just make one to fit? Sounds like plan, thanks! 🙂
I love this design, and I haven’t found one person that doesn’t love it at first sight!
I bought the blueprints, and I’m done with all the cuts and 80% into the staining and I have one question that maybe Jen or someone else can help me with.
I took the advice and bought the side rail brackets, and connecting to the headboard makes perfect sense, and theres several pictures, but connecting to the footer is a mystery to me. I made my footer have the two legs permanently connected which structurally makes sense to me. I can’t figure out how to use the brackets there though because where the sideboard hits the leg, there’s 3+ inches until you reach the footer. Do I need to attach a small piece of 2×4 there?
Hi Joe,
In the plans, the feet are attached to the side boards. Here’s a photo of how the bed bracket attaches the footboard to the sides: https://jenwoodhouse.com/wp-content/uploads/2018/12/footboard-bracket.jpg
Hope that helps!
Hey there! Just bought the plans for the king bed and we were wondering, what color did you stain the majority of the bed? Couldn’t find that anywhere in the post and it looks like you used one stain mainly overall on most areas other than the chevrons. Thanks!
Hi Margaret! I stained the frame of the bed in Early American. Hope that helps and happy building!
Hey Jen. I like the looks of the bed and I’ve downloaded the plans and I have a question about the pocket holes at the seam where the larger and smaller pieces of plywood are joined for the headboard. Are the pocket holes there to attach the plywood to each other? I see in the next step that you install the 1X3’s over the seam and I can’t figure out what else those holes might be for. The screws that the plans recommend in that step are 11/4″ and I felt like they might go all the way through the plywood and come out the backside. Please share your insights with this inquiry so that I can get the bed built for my son and my daughter-in-law.
Thanks
Jim N
Hi Jim,
Thanks for writing! Yes, the plywood is joined together with pocket screws. The 1 1/4-inch pocket screws shouldn’t blow through.
Hi Jen! I love this plan and I will be purchasing for the King Size blueprints. My question however is this- can this be easily modified to JUST be the headboard? I need to use under the bed storage, so I would prefer to keep my current bed frame and just affix the beautiful headboard to the frame.Thank you!
Hi Margaret,
Thanks for your note! The bed is constructed in separate components, so yes, you can opt to build just the headboard. Hope that helps – happy building!
Hi Margaret,
I built just the headboard, and it came out great! You CAN do it! Enjoy!
Hi Jen,
Thanks for all of the wonderful material on your site (yes, I signed up for your newsletter)! Great projects, and practical tips for the DIYer. This bed was an inspiration – I built the headboard and put it on our Cal King bed. Looks really nice, and my wife is very happy. Of course, the just caused her to add to my Honey-do list, but I like building things, so it’s a good fit 🙂
Thanks again! I look forward to more inspiring projects and videos!
Beautiful bed! And I love that it can be taken apart for ease of moving.
*totally new to DIY question*
You mentioned nailing the boards as you create the pattern **where do you nail the board without it looking terrible**??
I have no skills and would love to take this on without my husband being roped into the project. Thank you so much!!
Hi Sara,
You can place the nails in the same place on the boards, so it’s all uniform, but after some wood putty, you barely see the nail holes! I actually didn’t both filling the nail holes because I think it adds to the whole ‘rustic reclaimed’ look of it all. You can totally do this – it’s a great beginner project. Good luck on your build!
Hi there! I’m curious to know what kind of mattress you have on this since the bed frame seems to sit low.
my wife and I love the bed and were wondering what size Kreg clamp did you use for the pocket hole jig? We are getting tools ready to purchase and just want to confirm we are getting the correct ones.
Lovely colors..
Hello Jen;
Absolutely gorgeous bed, I love it.
I would like to try to build a king size. So am I correct that it would be 80x 76”?
Could you please send me building plans for this bed?
Thank you so very much for your artistic talents, you are amazing,
Catherine
Oh my goodness, this bed looks incredible, you are so talented! Thanks so much for sharing how you did it.
And there are definitely not too many pillows on that bed 😉
I own a homestay somewhere in Himalayan region , a perfect place and close to nature . For homestay I actually was searching for wooden natural looking bedding stuff, thanks for sharing this craft with us.