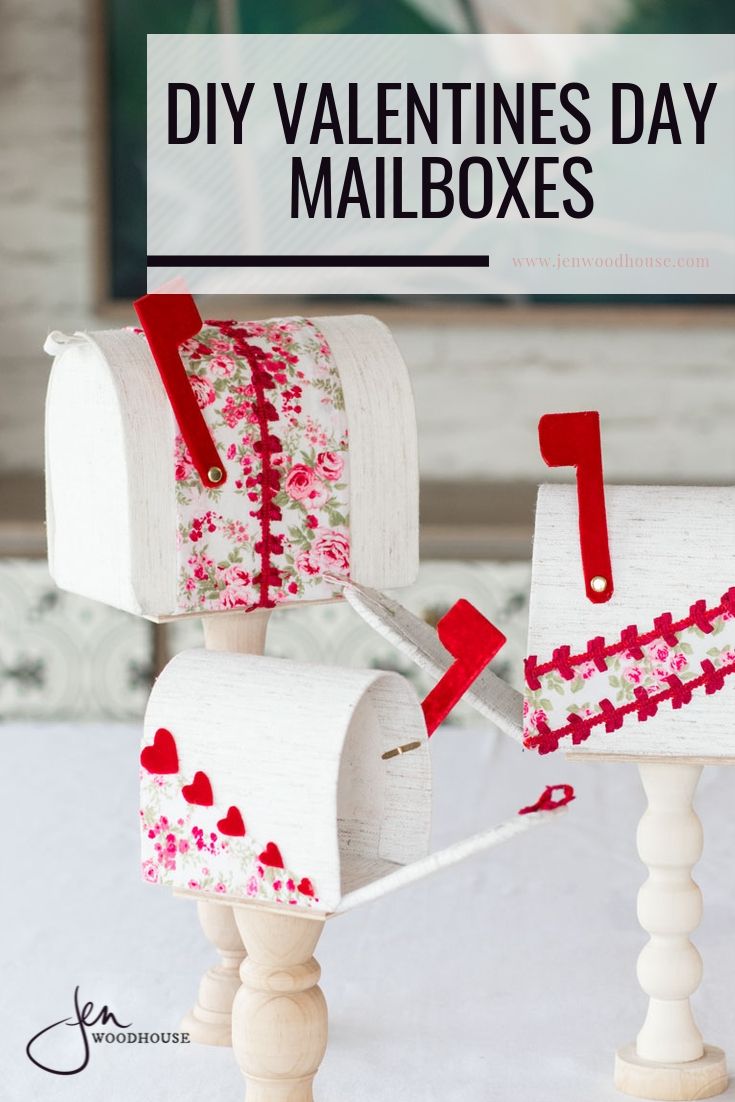
Easy DIY Valentine’s Mailboxes made from cardboard, fabric, and wooden candlesticks.
Hello House of Wood family! I’m Jenny from a little blog called Paint Yourself a Smile and I’m delighted to be sharing a few creative DIY projects with you this year.
I don’t know what life’s like in your house, but in my house of all boys, it’s sports, dirt, more sports, loud laughter, and mounds of dirty laundry. So, when Valentine’s day comes around, you bet I’m jumping at the opportunity to decorate the house in hearts and girly sweetness.
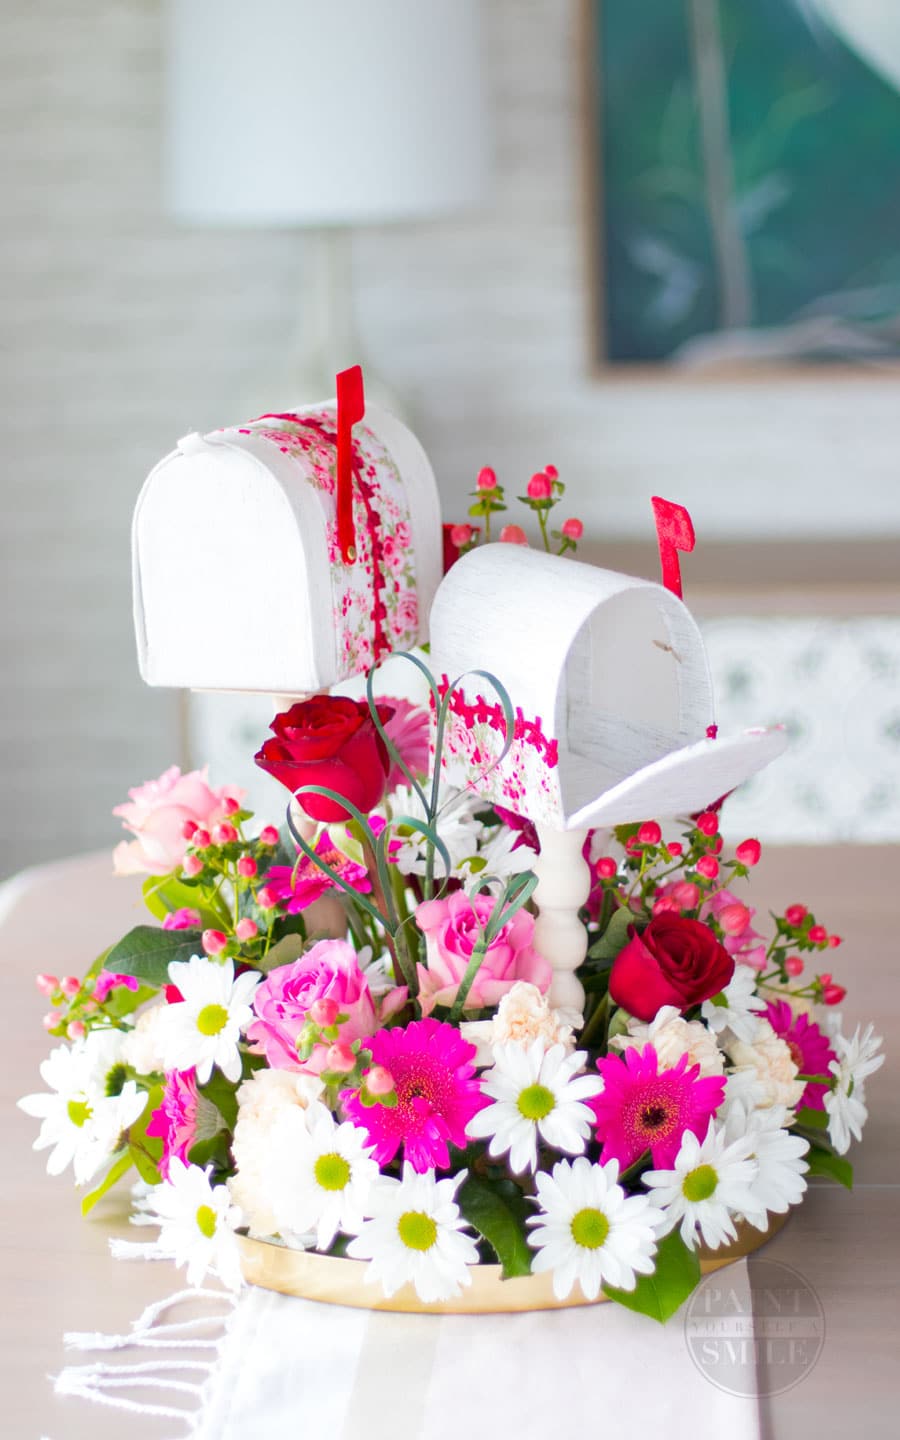
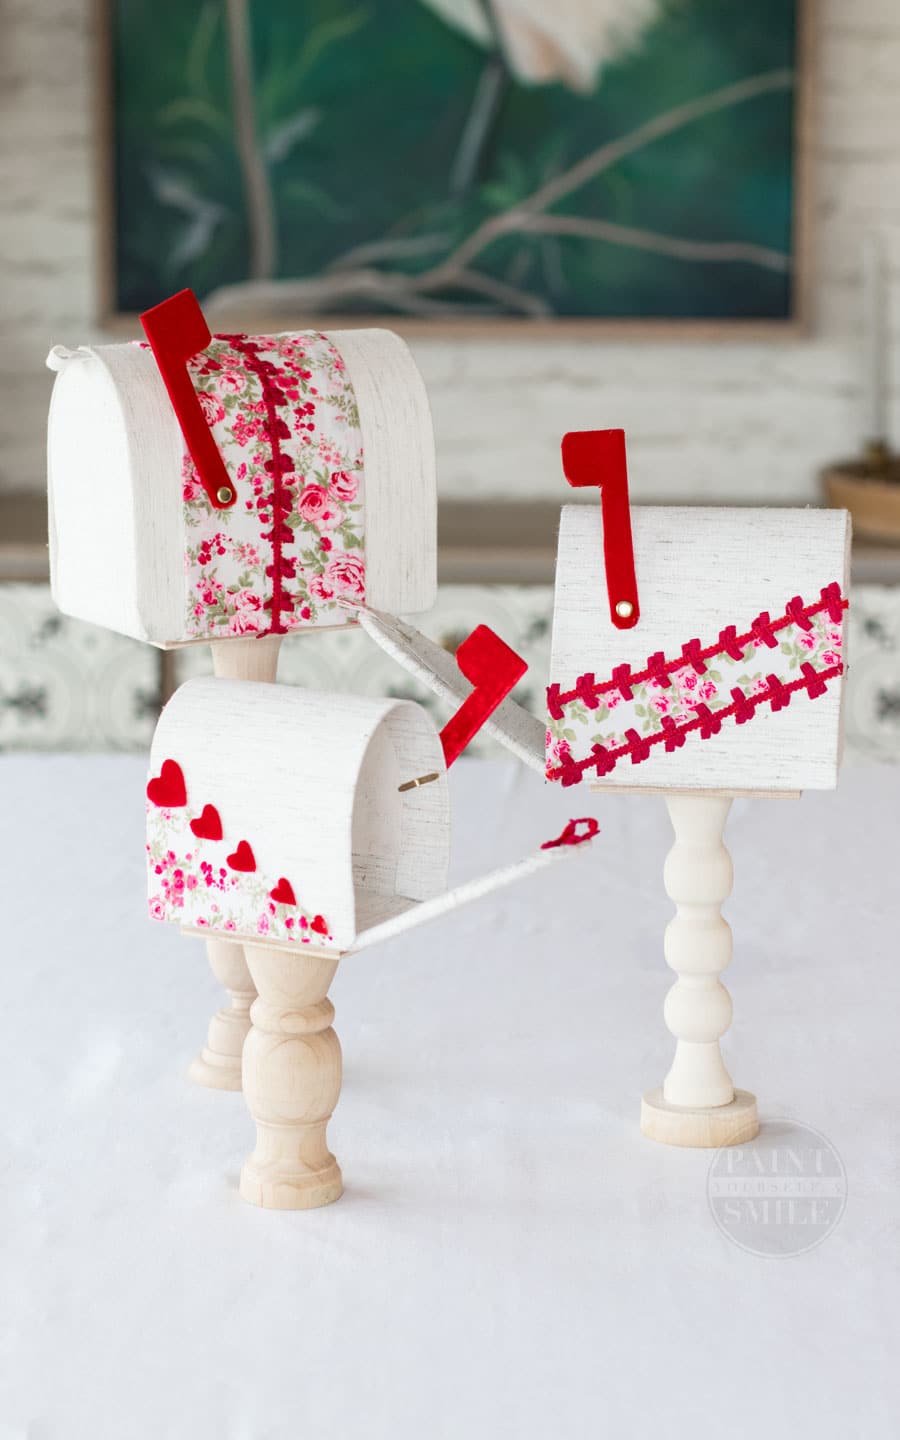
These easy DIY Valentine’s mailboxes do just the trick. And they’re easy and fun to make!
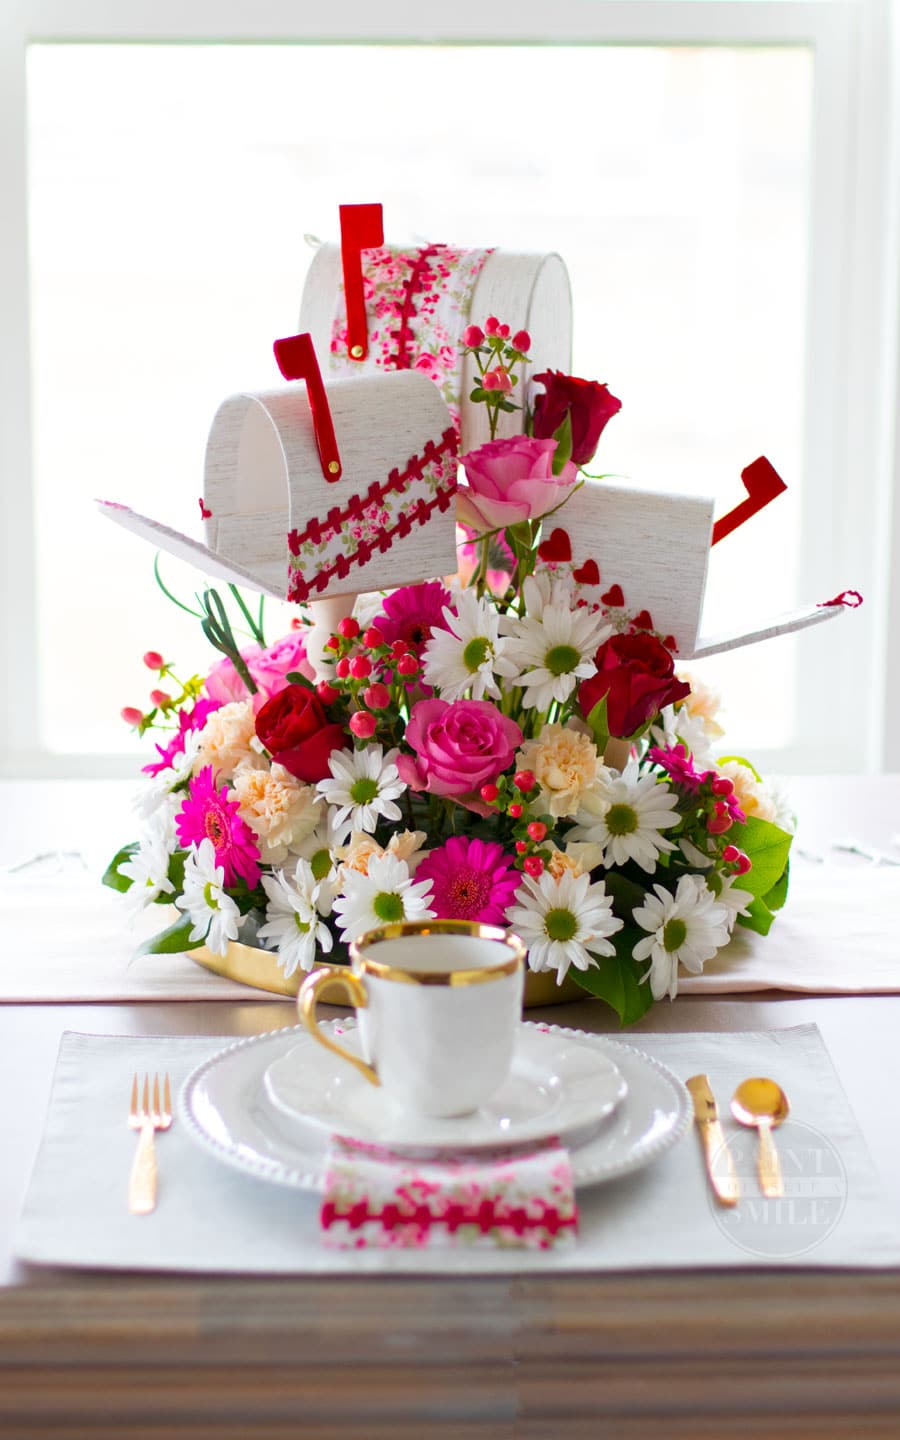
My original idea was to make 3 Valentine’s mailboxes and use them as a centerpiece at the dinner table or use them in a Valentine’s Day vignette. However, as I was creating, I began to think of many more ways I could use them!
For instance, I can see making several mini mailboxes and using them to hold the place cards at a luncheon or dinner party. I also thought about creating one for each family member and filling it with treats on Valentine’s Day. They’d be cute decorated for Easter or spring too. Once you make one, your brain will be buzzing with all sorts of excuses to make more.
Supplies:
- Poster Board or Heavy Weight Cardstock
- Foam Board or Sturdy Cardboard
- Mailbox Template (download)
- Glue (I used spray adhesive and hot glue)
- Craft Candlestick Holders
- Small Piece of Thin Scrap Plywood
- Fabric, Felt, Or Paper To Cover The Mailbox
- Decorative Notions and Embellishments
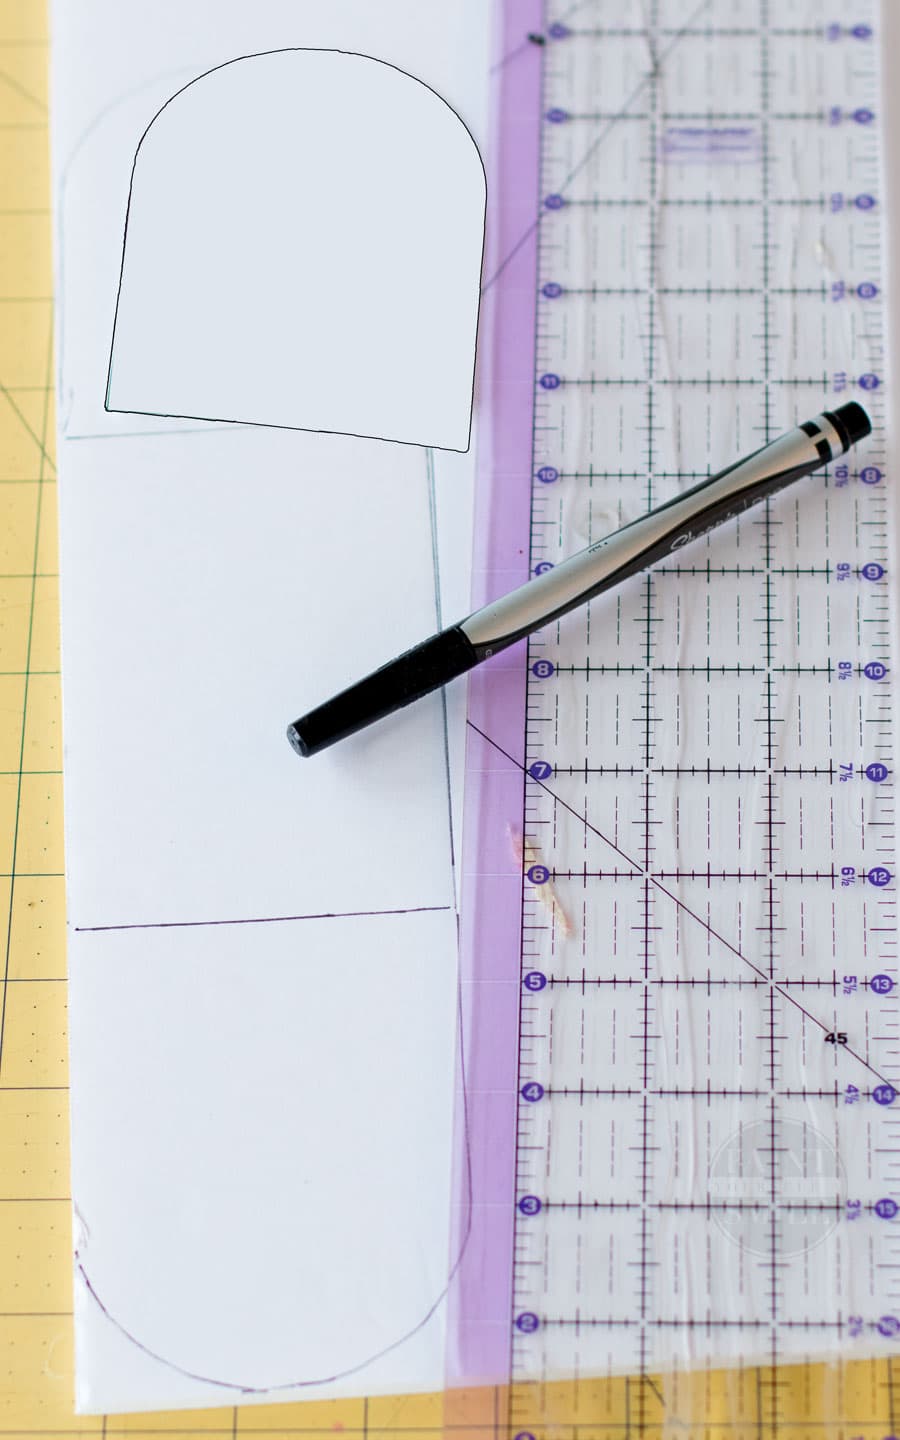
I started by creating an arched shape to use as a template. The mailbox is made of 2 pieces. The front, back, and bottom are one piece cut from sturdy cardboard or foam board and the cover of the mailbox is cut from a flexible material like poster board to give it the mailbox shape.
To create the mailbox base, cut out one of the arched shapes from the template and trace it on a piece of foam board (or cardboard).
Next, from the bottom edge of the arch, measure, and draw a rectangle about an inch longer than the arch shape.
The rectangle will determine the length of the mailbox and the arch will be the height.
To complete the template by tracing a second arch on the other side of the rectangle.
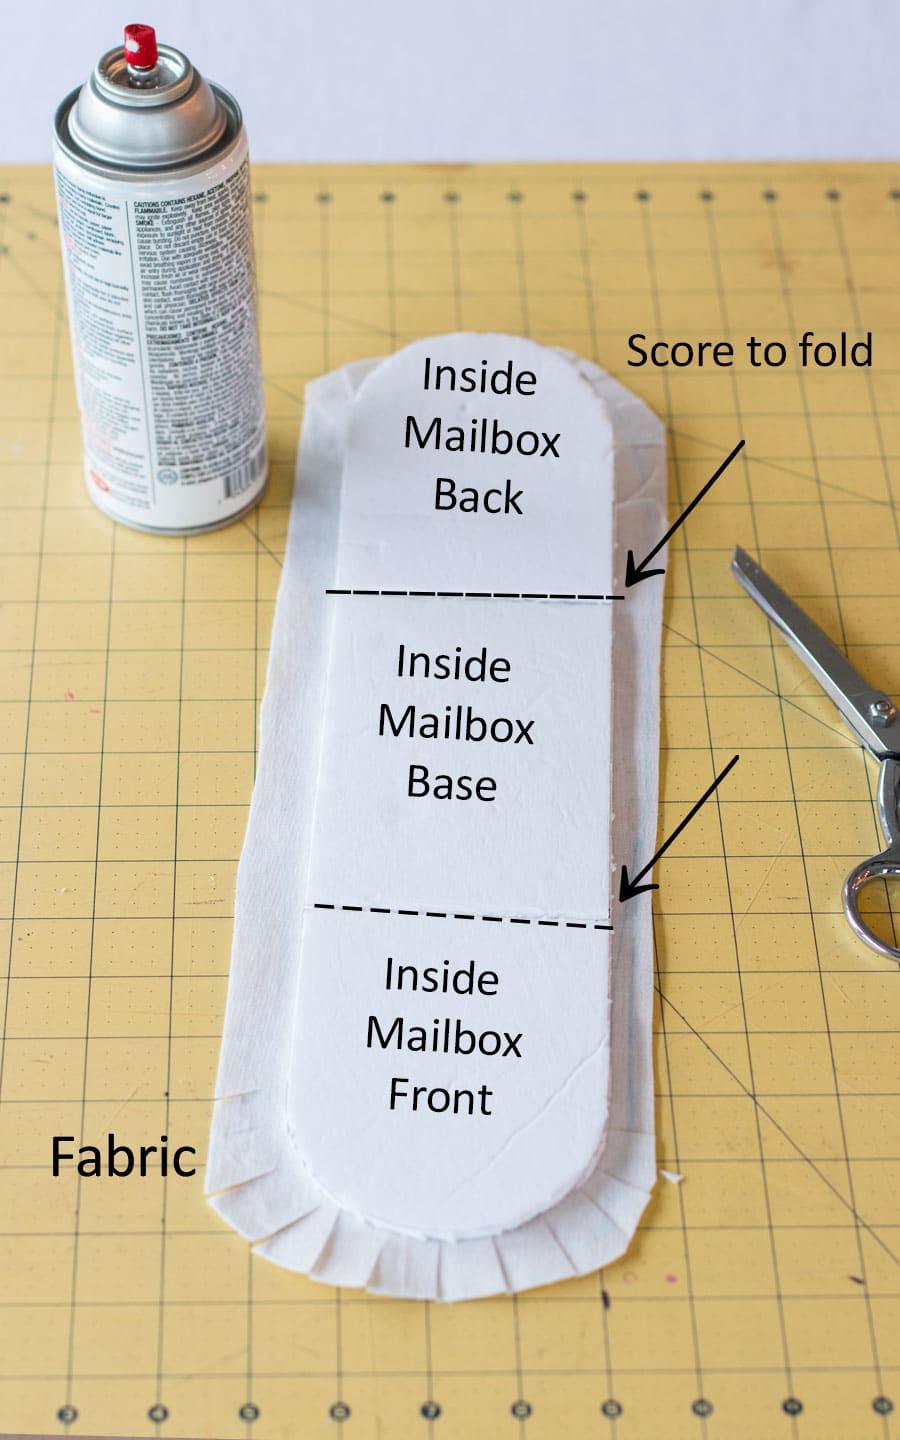
Cut out the first piece of the mailbox with a mat knife and then lightly score the center lines to fold up the sides.
The next step is to cover this base piece with felt, fabric, or scrapbook paper. I used fabric and cut two pieces. The first was about an inch wider than my mailbox base and the second was slightly smaller to cover the inside.
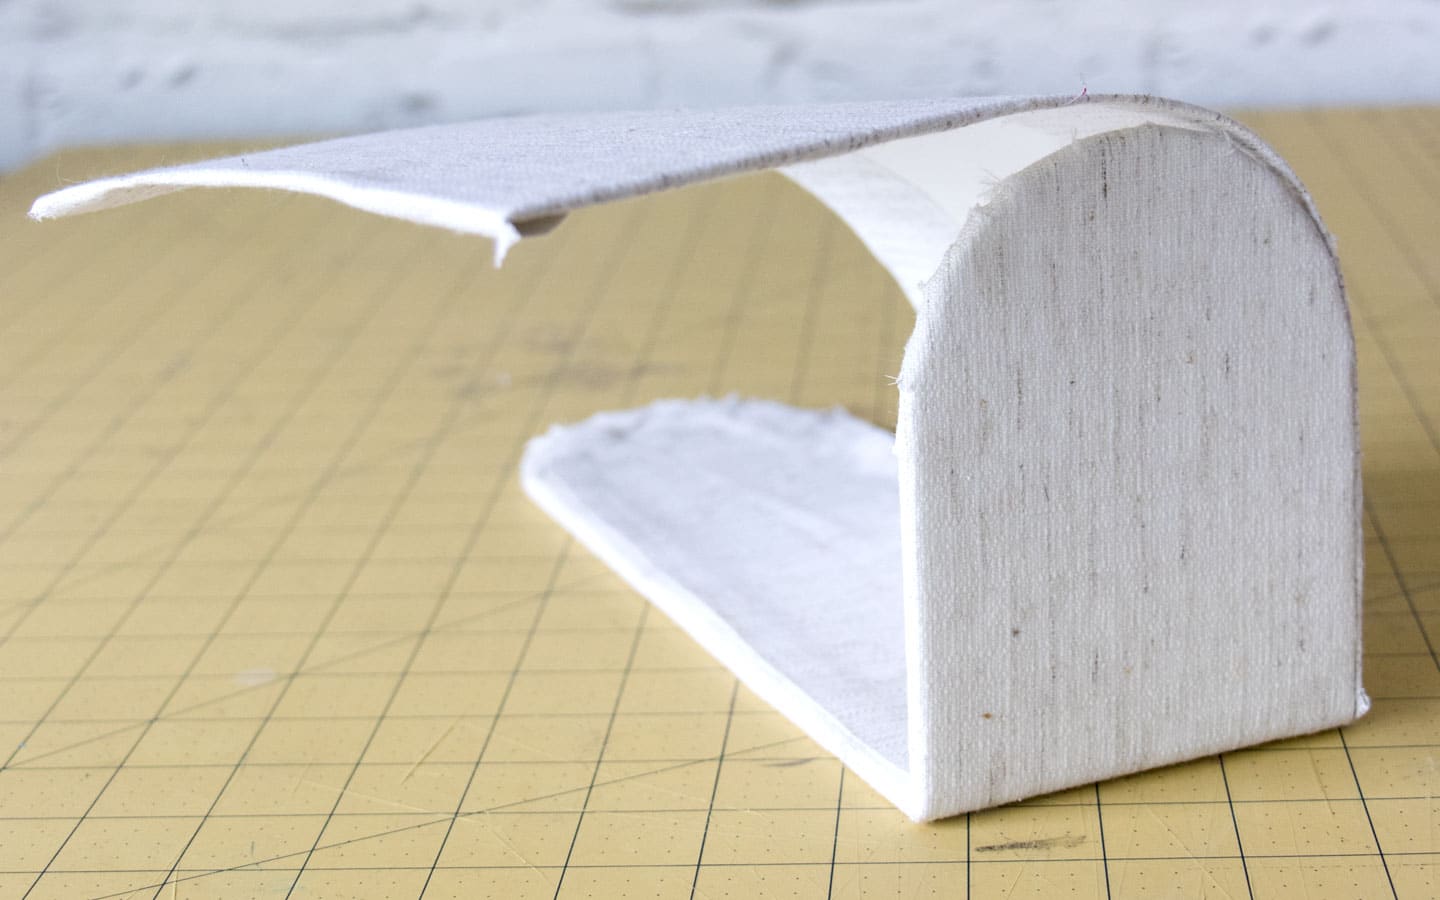
You can see in the photo below, when you fold up the sides it creates the back, front opening door and bottom.
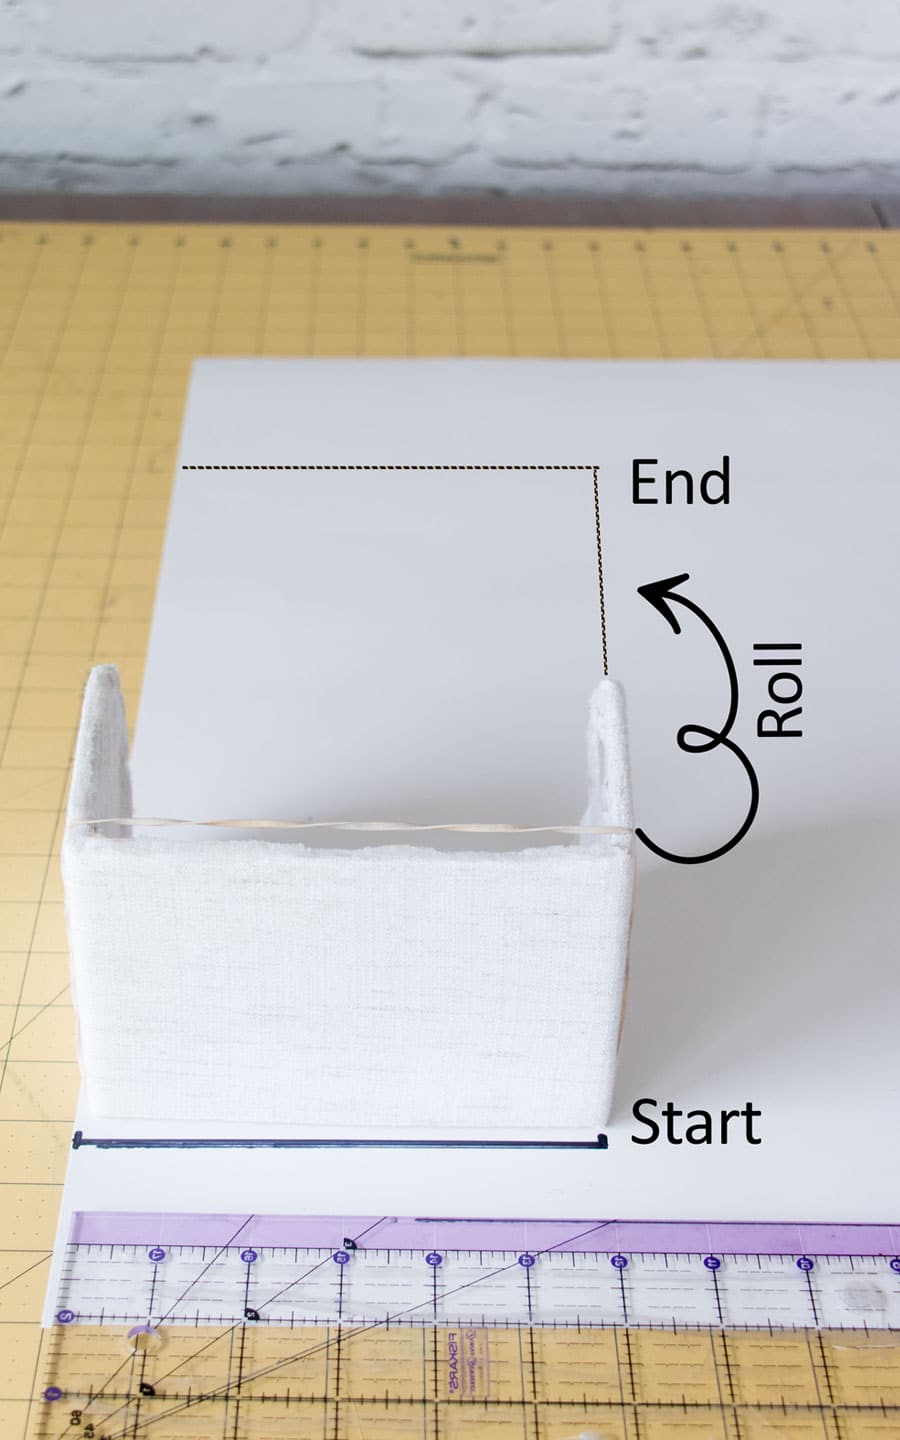
For the top of the mailbox, lay your 1st mailbox piece on poster board and measure the width. For the length, measure around the arch from the base bottom to the other side. I laid the base on my poster board and rolled it to get the measurement. I doubled up my poster board to increase the thickness.
(The rubber band is there to help hold its shape so I can measure for the top.)
Cut out the top and cover with fabric. Before you attach the top to the mailbox, double check to make sure it fits perfectly. If the top is too big, the door won’t close well. I had to remake my first one because my measurements were off, but once I got the hang of it, the next mailbox was easy to put together.
I used hot glue to attach the top, but be careful to only glue the top to the sides and back so the front of the mailbox will open.
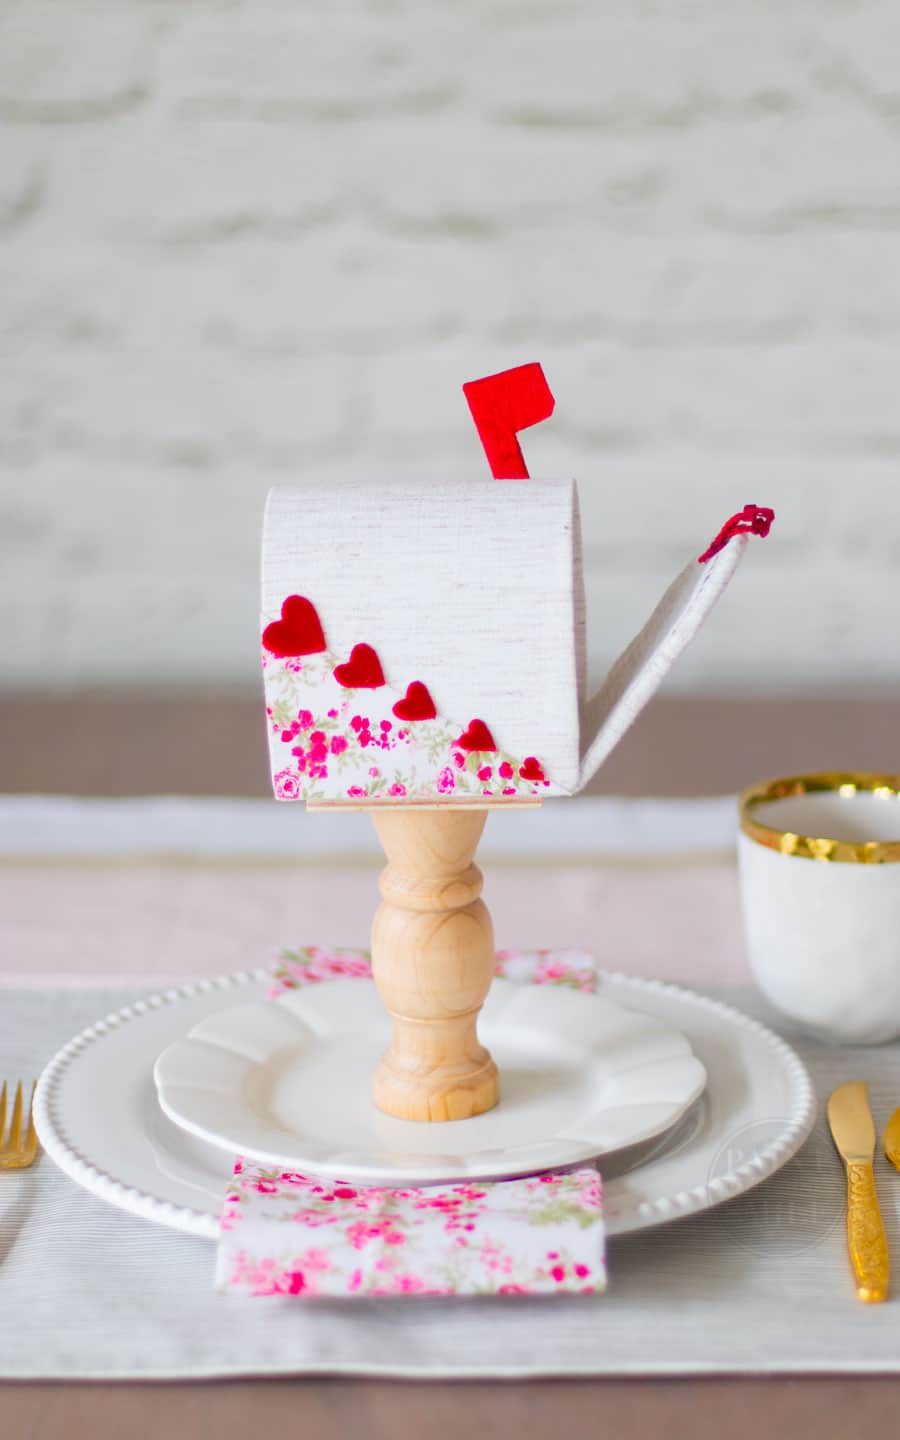
I used inexpensive wooden candle sticks that I purchased at the craft store as the mailbox posts.
Before I attached the mailbox with hot glue, I added a small piece of thin scrap plywood to the top of the candle stick to give the mailbox base more stability.
Now all that’s left to do is to decorate the Valentine’s mailboxes. You could use just about anything, but I stuck with ribbon and fabric to keep it simple. For the flags, I glued fabric to cardstock and attached the flag with a paper fastener. Easy Peasy.
I am thrilled with how cute they came out! These easy DIY Valentine’s mailboxes have been a bright spot in the middle of a grey winter. I hope you will give them a try!
For more artsy crafty décor, stop over to my blog and don’t forget to say hi!
Happy creating,
Jenny

These DIY Valentine’s mailboxes are adorable! I love how simple the instructions are, and I can’t wait to personalize them for my kids this year. Thanks for the inspiration!