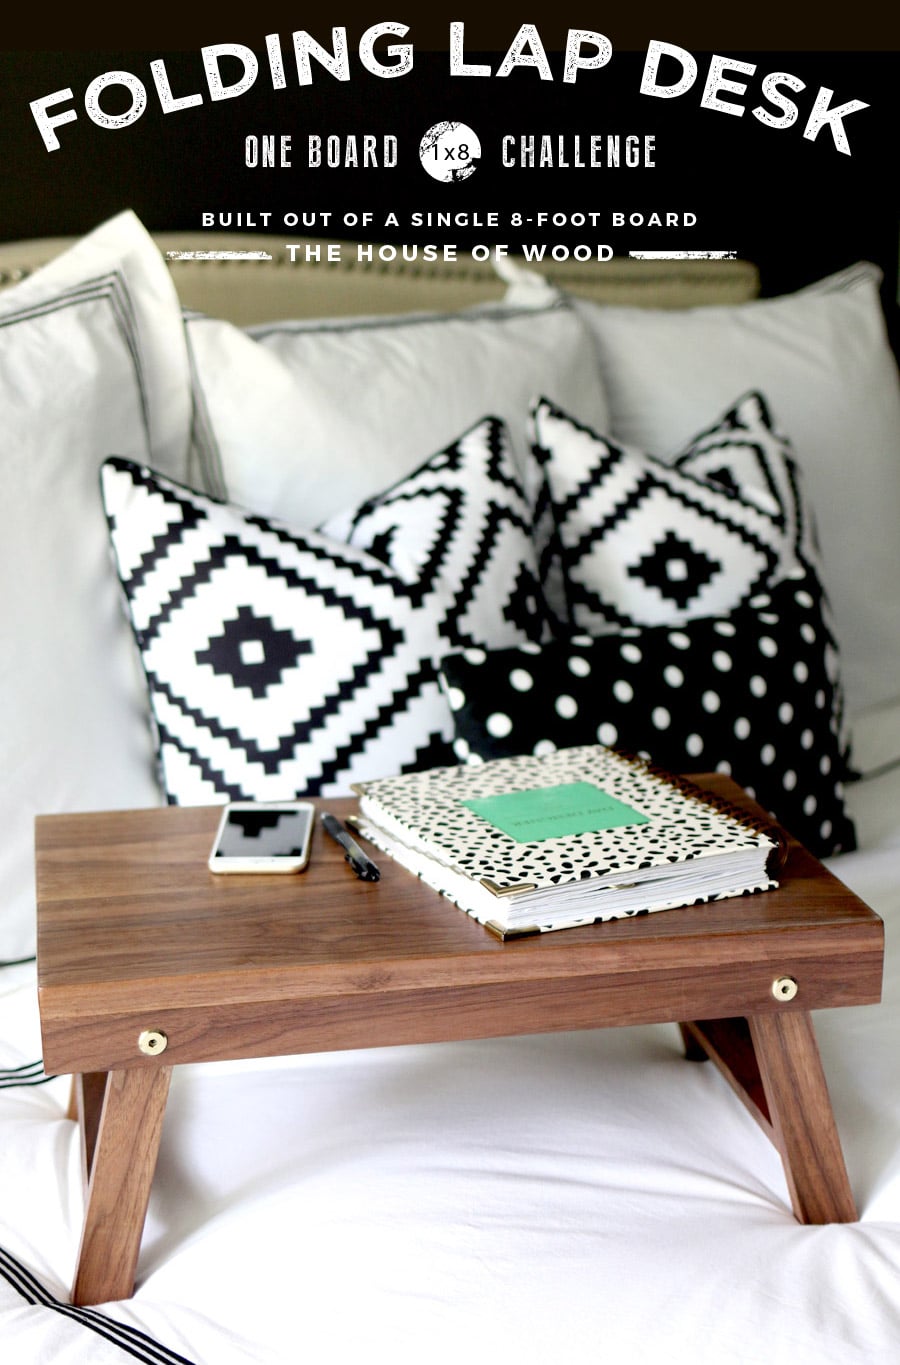
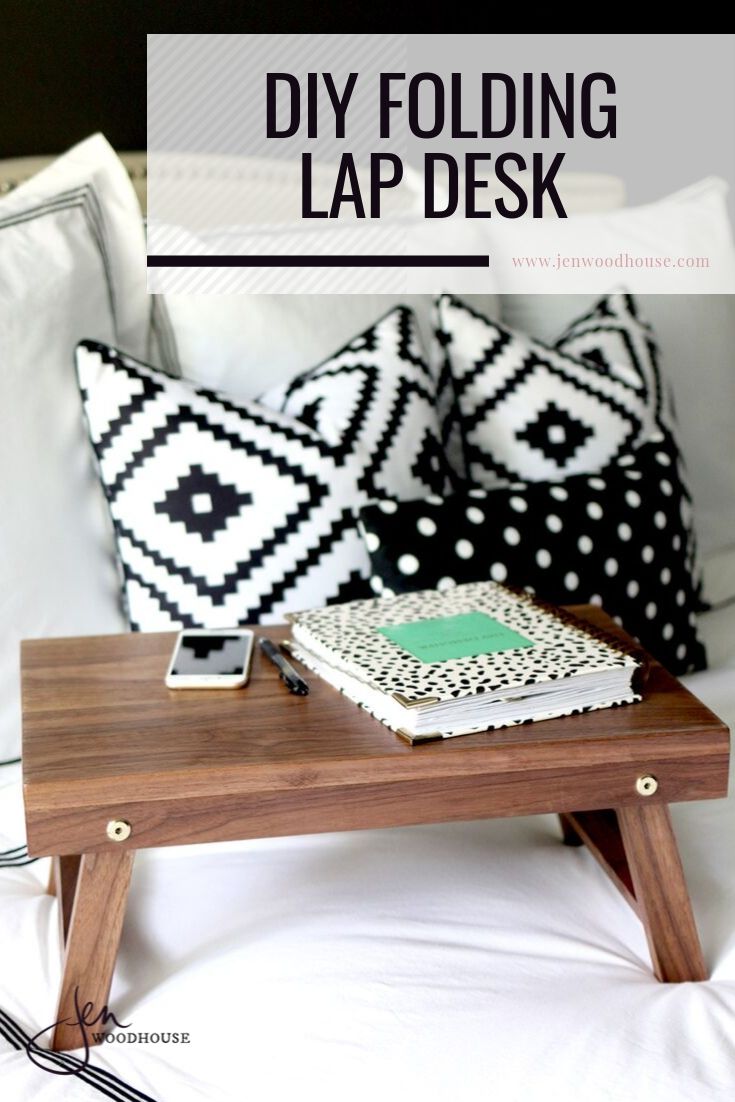
How’s this for full circle: I am writing this post as I sit in bed, with my laptop open on my newly-built folding lap desk. DIY just makes life better, amiright?! This folding lap desk is definitely making my life better rightthisverysecond. In short, my thighs aren’t EN FUEGO.
 Okay, so here’s the dealio, you guys: I challenged 16 of my builder blogger friends to build something awesome out of a single 1×8 8-foot board. It made for a fun blog hop and a challenge that made us all stretch our creative muscles and think outside of the box. Of course, I had to participate in this super fun project, right? Right!
Except for weeks and weeks, I racked my brain trying to come up with something to build and for weeks and weeks, I kept coming up empty. So I went back to where I always go when I find myself creatively parched: necessity. It always comes down to necessity, doesn’t it?
I asked myself, ‘what do I need? What area can I improve? What would make life just a little more convenient?’
Behold: this folding lap desk was the perfect solution.
 Despite my lack of ideas, there are so many awesome things you can build out of a single board. Don’t believe me? Check out these brilliant builds that have me saying, “now why couldn’t I think of that?!”:
Katie, Addicted 2 DIY – Rustic Step Stool / Jaime, That’s My Letter – Bench
Amy, Her Toolbelt – Kids Step Stool / Elisha, Pneumatic Addict Furniture – Modern 3-Leg End Table
Sandra, Sawdust Girl – Three Tiered Display Shelf / Brittany, Pretty Handy Girl – Cubby Storage Box
Karah, the space between – Wood Shelves / Brad, Fix This Build That – Kids Bookshelf
Jenn, Build-Basic – Round Mirror / Mindi, My Love 2 Create – Floating Nightstand
Pauline, My Altered State – Indoor Planter / Bethany, Sawdust & Embryos – Geometric Art
Kim, The Kim Six Fix – Flower Box / Sarah, The Ugly Duckling House – Modern Step Stool
Jessica, Decor Adventures – Hexagon Plant Stand / Emily, Merrypad – Floating Corner Shelf
Because I was purchasing just one board for this project, I decided to splurge a little so I picked up a drool-worthy piece of black walnut from a local lumber yard. It cost me a little over $40 which is steep, I know, but hey. It’s black freakin walnut. Please tell me you understand.

First, I cut all of my pieces out of the 8-foot board. The cut layout is included in the plans.
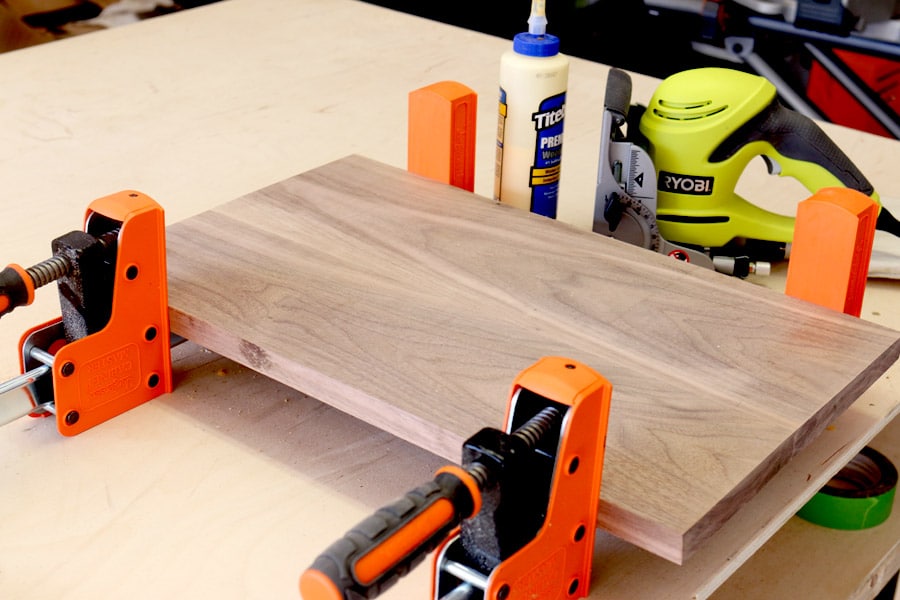
 For the top, I joined two pieces of the board using biscuit joints. You may notice the two boards aren’t the same width. I ended up ripping a little bit off one board because I wanted my top to be just 13″ wide, instead of the 14-1/2″ width that’s written in the plans.
If you don’t own a biscuit joiner, that’s totally fine. The biscuits just help with alignment. You can also just use wood glue when you’re joining long grain to long grain. You’ll just need to make sure all the surfaces are properly aligned, then glue and clamp the pieces together.
*This post contains affiliate links. To read my full disclosure policy, click here.
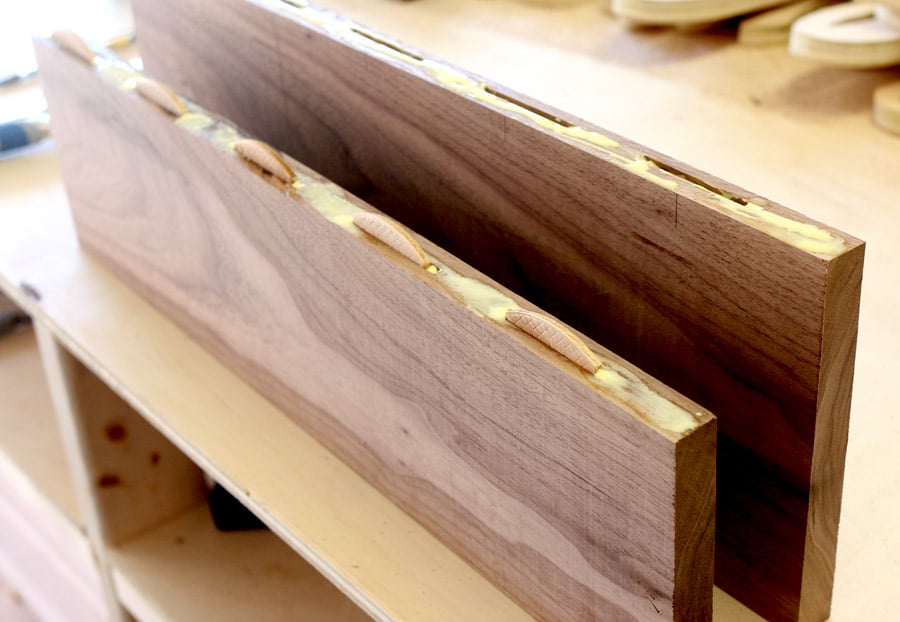 So after placing the biscuits, I glued, clamped, and waited…
This is the biscuit joiner I own. I use this wood glue and these parallel bar clamps.
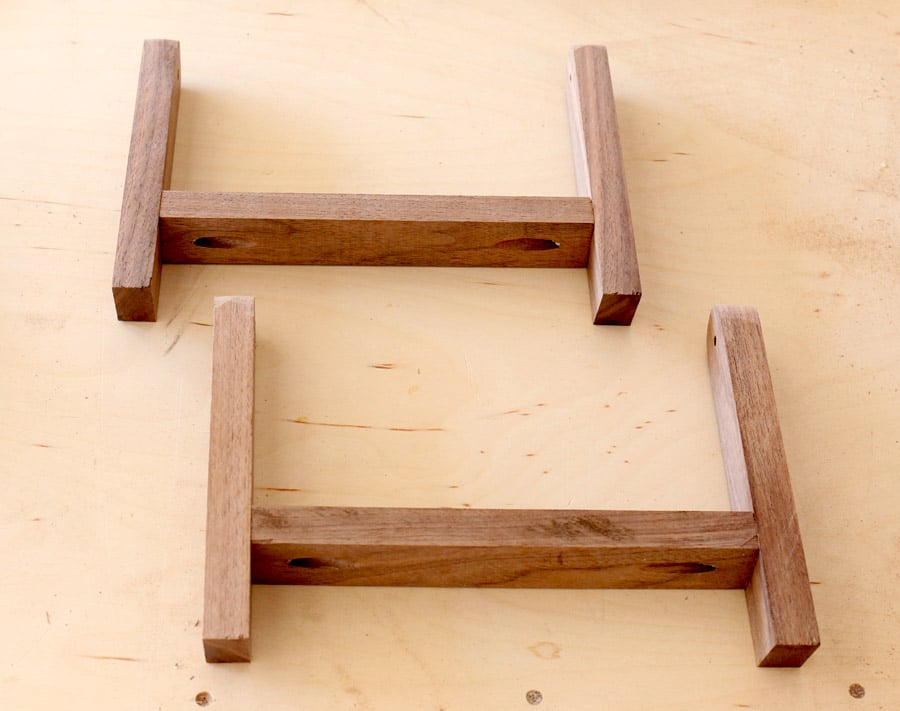
After the glue dried, I attached the aprons to form a tray. Again, I used biscuit joints, but pocket hole joinery would work well here too.
 Then, I constructed the legs. I rounded the legs at the top and cut the bottoms at a 15º angle then attached the stretcher with pocket hole screws.
This is the pocket hole jig I own.
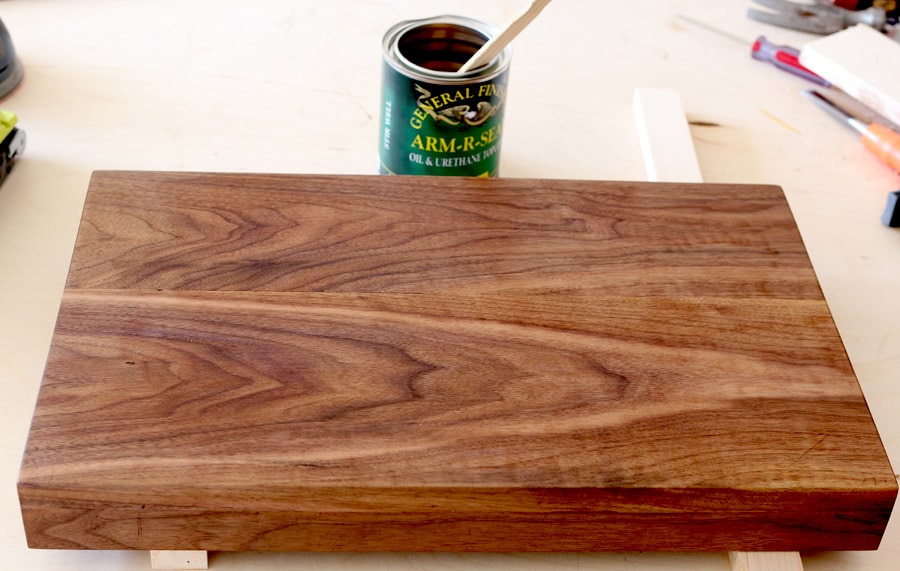
 Have you guys ever used this Arm-R-Seal stuff? I just discovered it, thanks to one of the woodworking friends I follow on Instagram and it’s heart eyes all over the place. I just love how it makes the wood grain come alive. After sanding with 180-, 220-, and 320-grit sandpaper, I wiped each coat on with a soft cloth, sanding with 400-grit sandpaper in between each coat. Here is a great finishing technique video.
Who am I? I’m the girl watching woodworking videos on Youtube. I’m the girl hanging out in woodworking forums, getting excited about wood grain, joinery, and different wood species. Oh my goodness, what in the world?!
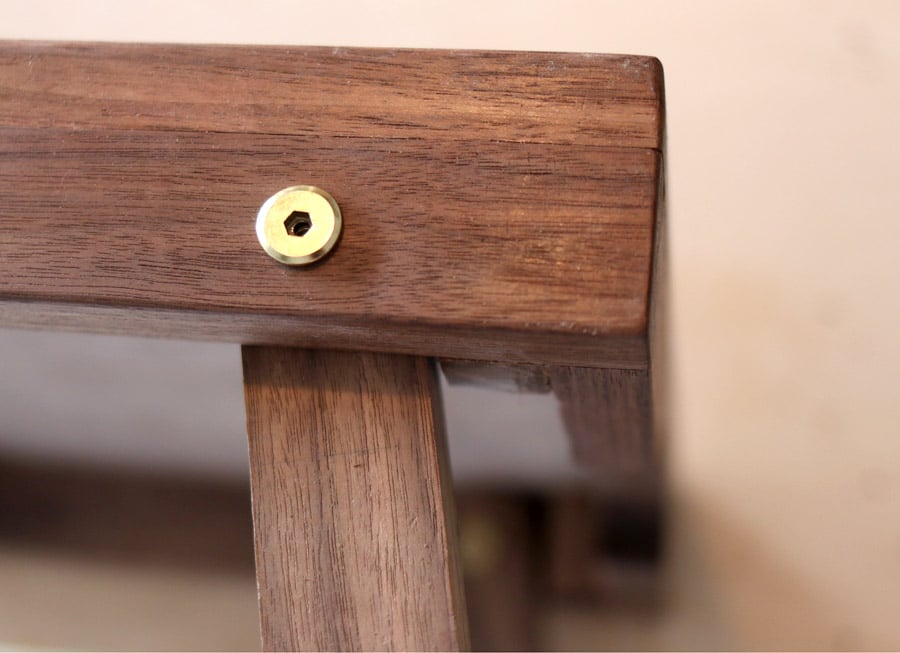
 Just as I did with my West Elm-inspired Butler Stand, I used these connecting bolts and caps to connect the legs to the top.
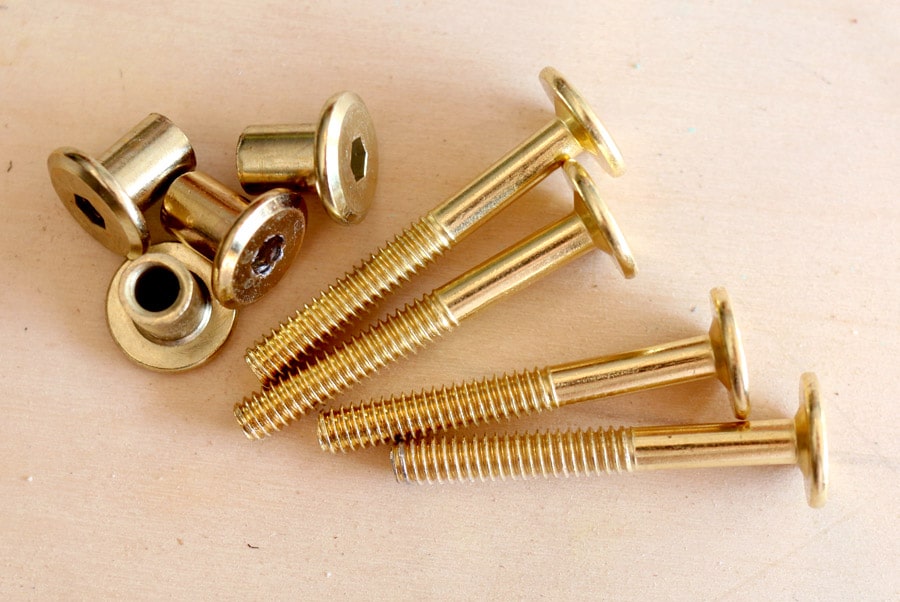 You’ll need to drill a hole big enough to fit both the cap and bolt. I used a forstner bit because I like how clean and precise the cuts are, but a spade bit will work here too. A spade bit will cause a bit of tear-out so I wasn’t taking any chances on marring this beautiful black walnut.
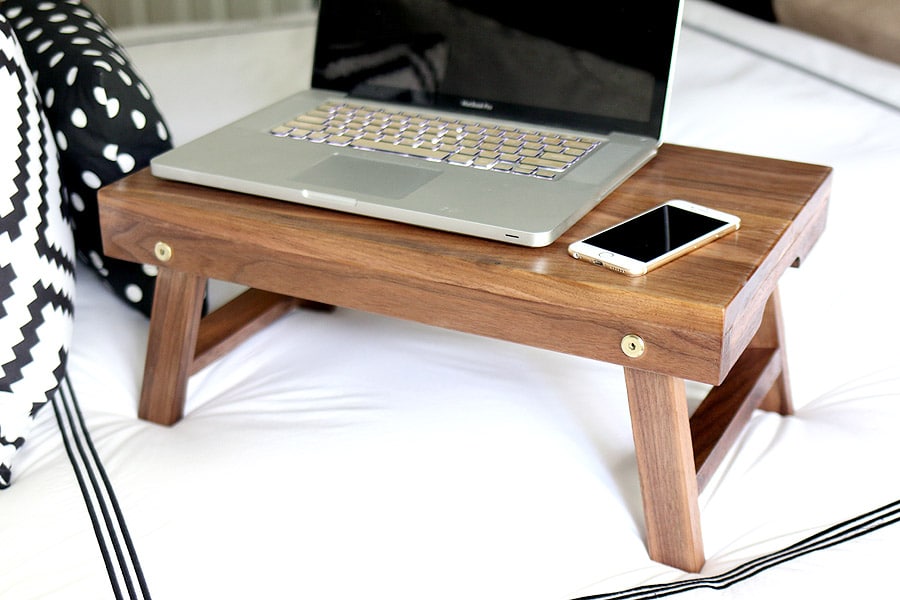
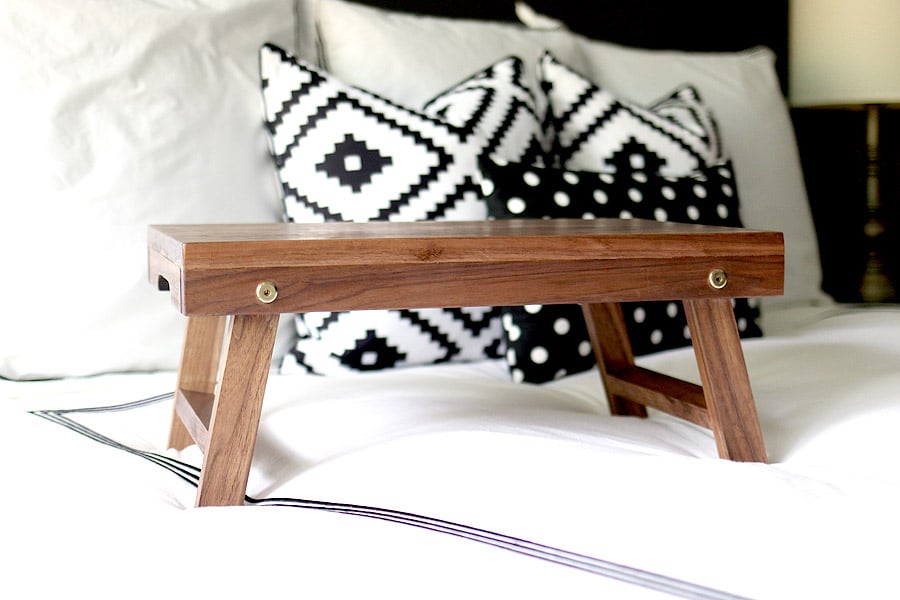
 Oh, I forgot to mention: to make this lap desk easier to manage, I used my jigsaw to cut out these curved pieces on the sides to serve as ‘handles.’
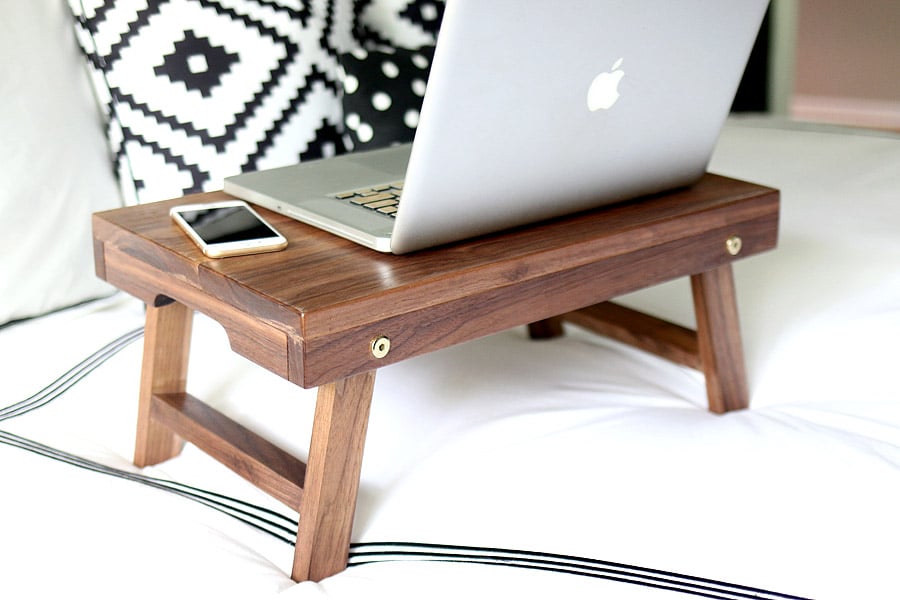 The legs neatly fold in for simple, space-saving storage.
 Well, this is embarrassing. I feel like you caught me with my pants down. Please excuse the unfinished underside of this folding desk. I’ll get around to finishing it one of these days.
Maybe.
But probably not.
Nothing to see here, folks. Move along, move along.
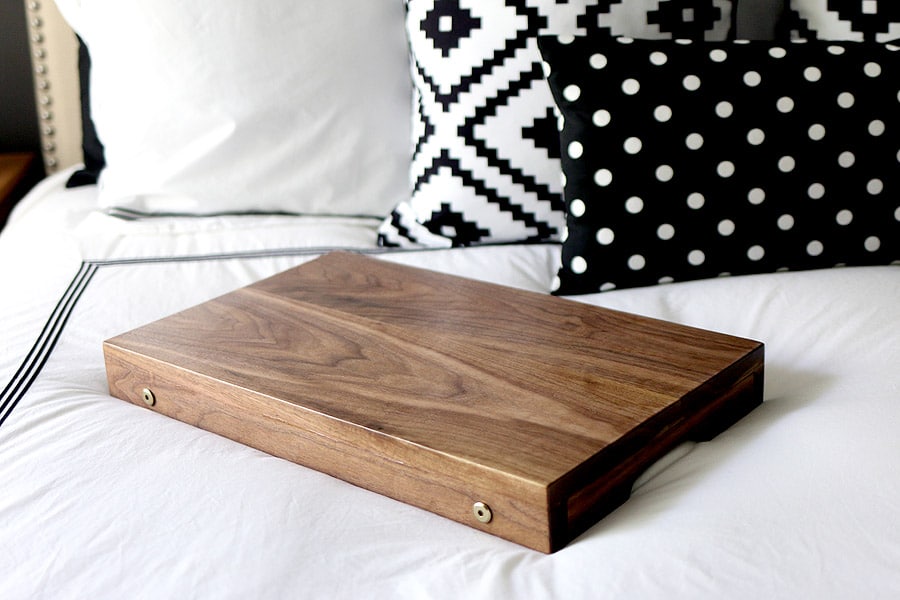 But seriously. Will you just look at this gorgeous black walnut?! Gahhhh… I’m drooling. Worth. Every. Red. Cent.
That is, if I’m only buying just one board. I’m not going to be building any dressers made entirely out of black walnut, that’s for sure.
Be sure to check out the other one board projects built by my builder blogger friends – they’re pretty stinkin’ amazing. Here are the links again, so you don’t have to scroll back up:
Katie, Addicted 2 DIY – Rustic Step Stool / Jaime, That’s My Letter – Bench
Amy, Her Toolbelt – Kids Step Stool / Elisha, Pneumatic Addict Furniture – Modern 3-Leg End Table
Sandra, Sawdust Girl – Three Tiered Display Shelf / Brittany, Pretty Handy Girl – Cubby Storage Box
Karah, the space between – Wood Shelves / Brad, Fix This Build That – Kids Bookshelf
Jenn, Build-Basic – Round Mirror / Mindi, My Love 2 Create – Floating Nightstand
Pauline, My Altered State – Indoor Planter / Bethany, Sawdust & Embryos – Geometric Art
Kim, The Kim Six Fix – Flower Box / Sarah, The Ugly Duckling House – Modern Step Stool
Jessica, Decor Adventures – Hexagon Plant Stand / Emily, Merrypad – Floating Corner Shelf
If you’d like to pin and share this project, feel free to use the image below. Thank you!
Pin for later!


")


great
Thanks! Did you just glue the top to the apron, or did you screw it together somehow? I didn’t see that part in the plans.
Also wondering this please!