Every once in awhile, I get to build vicariously through my friends, family, and readers. This DIY Square Farmhouse Table is one such project. My good friend, fellow singer/songwriter, Nashville neighbor, runner and yogi extraordinaire, Amy Courts reached out to me to help her modify Ana White’s famous farmhouse table plans to fit her needs and her space. In short, she wanted to build a square farmhouse table but didn’t feel comfortable enough modifying the existing plans on her own, so she asked me for help and I was thrilled to oblige.
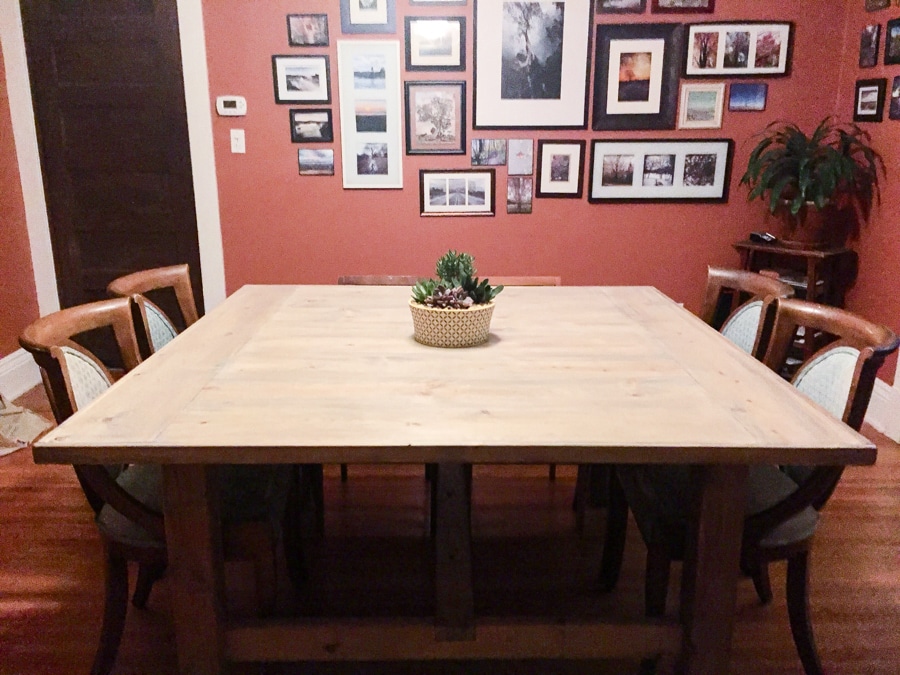
Check out what Amy built for her dining room:
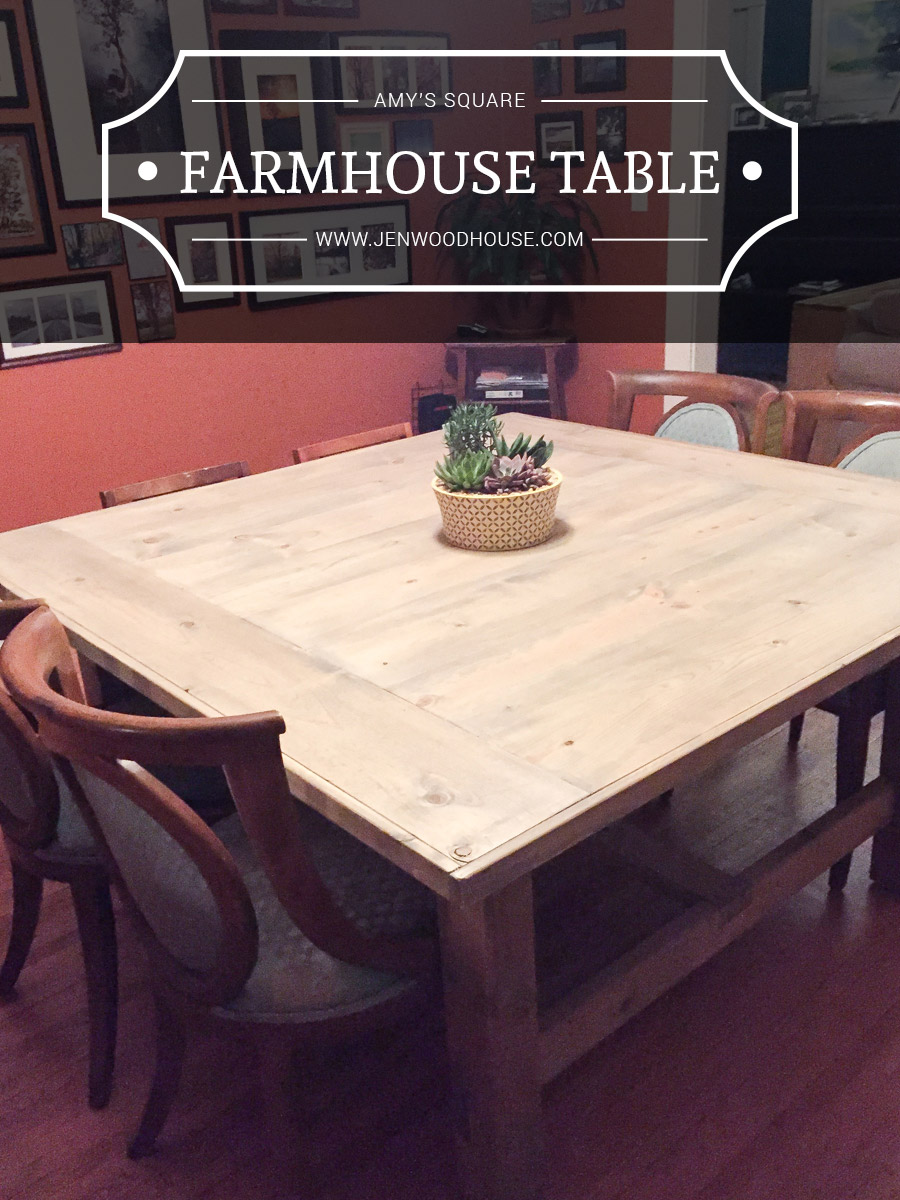
Pretty sweet build and finish, right?! Thanks to Amy and with Ana’s permission, I’m excited to be able to share the plans for this Square Farmhouse Table with you guys today.
Ever wonder how to get that weathered, farmhouse finish? Here’s a helpful video:
DOWNLOAD THE PLANS FOR AMY’S SQUARE FARMHOUSE TABLE HERE.
Materials:
- (2) 4 x 4 x 6 Ft. Boards
- (5) 2 x 4 x 8 Ft. Boards
- (6) 2 x 8 x 8 Ft. Boards
- 2 1/2-inch Pocket Hole Screws
- 3-inch Wood Screws
- Wood Glue
- Wood Plugs
Tools:
- Tape Measure
- Pencil
- Speed Square
- Drill with Countersink Drill Bit
- Circular Saw
- Pocket Hole Jig
- Chisel
- Safety Glasses
- Hearing Protection
Cut List:
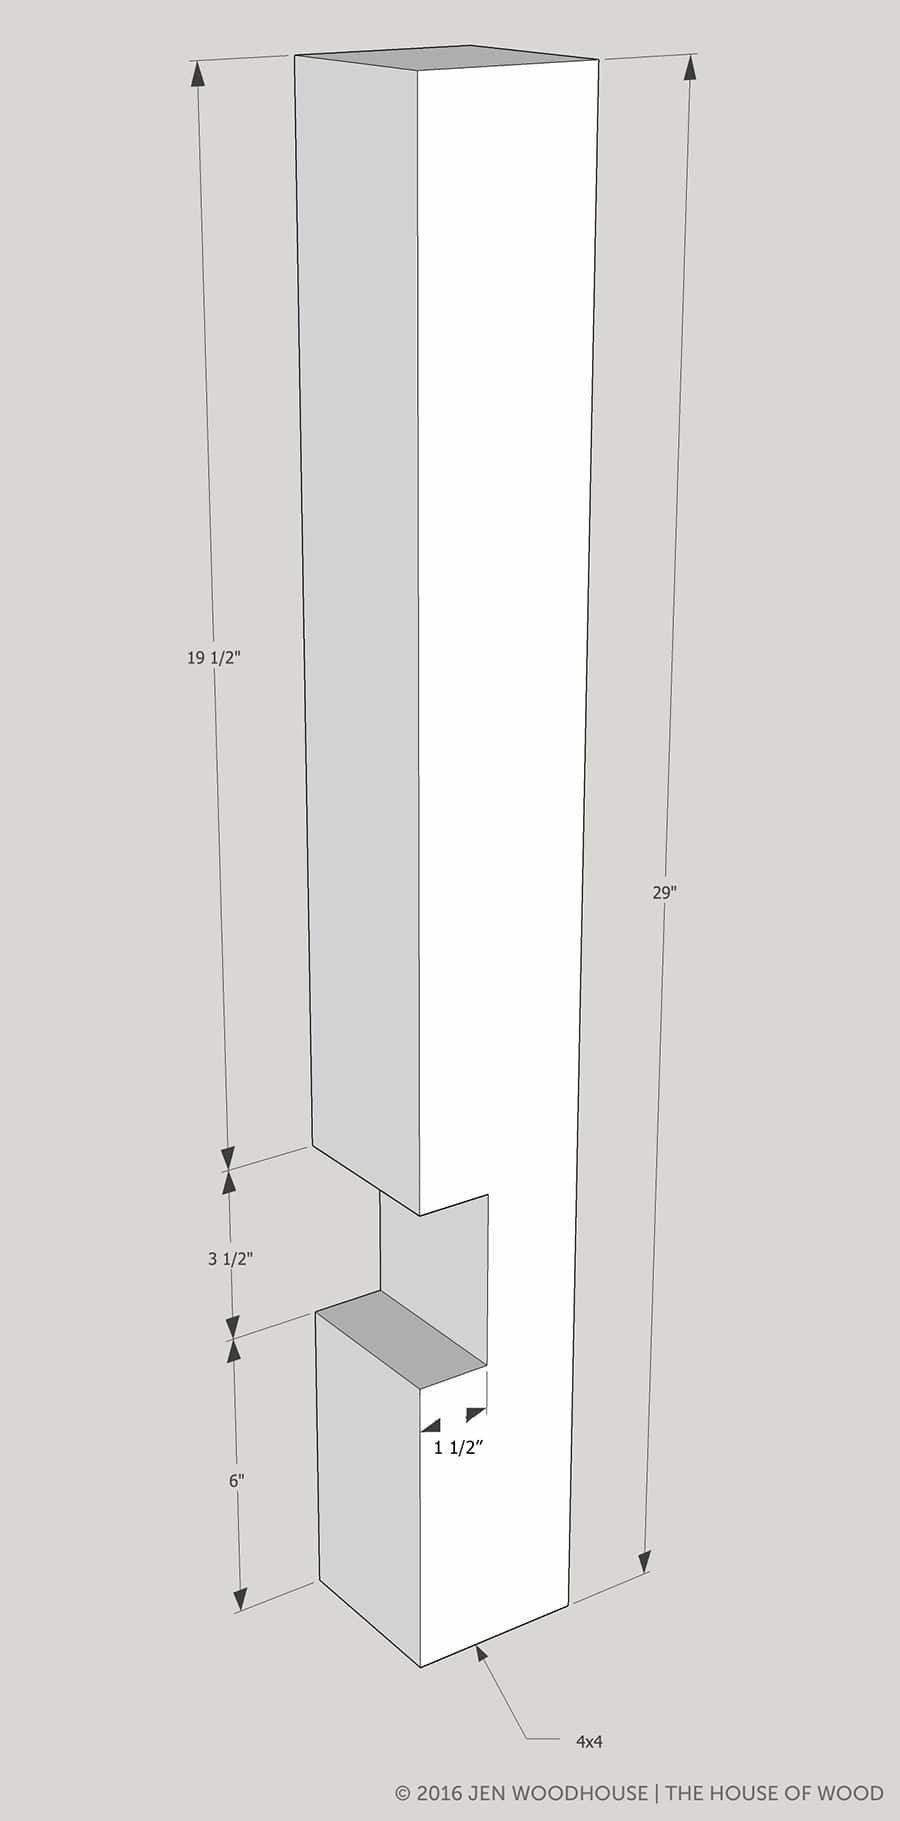
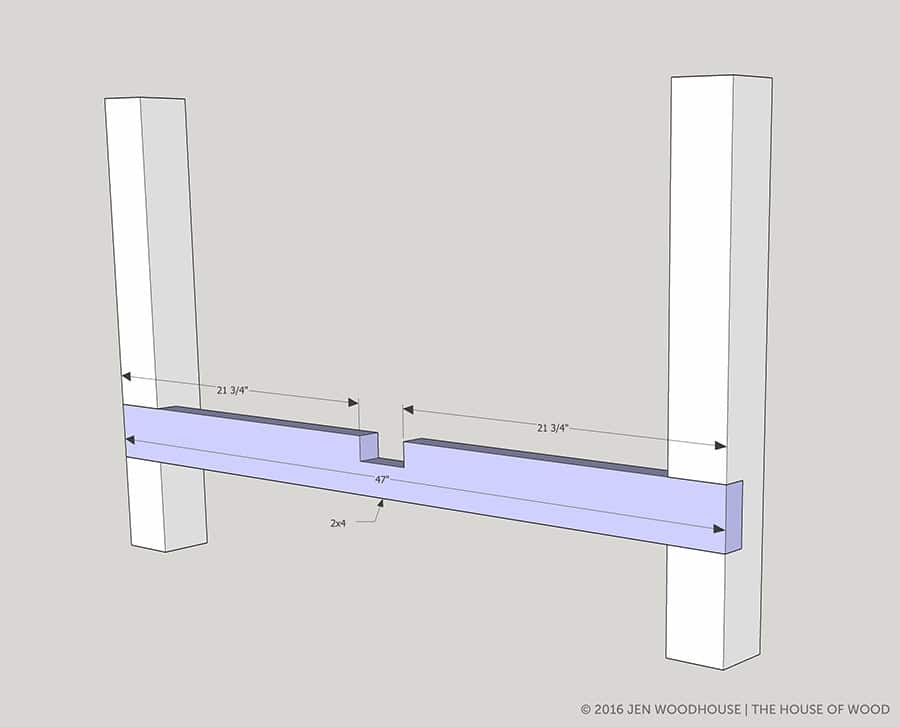
- (4) 4 x 4 @ 29 inches (legs)
- (2) 2 x 4 @ 47 inches (side stretchers)
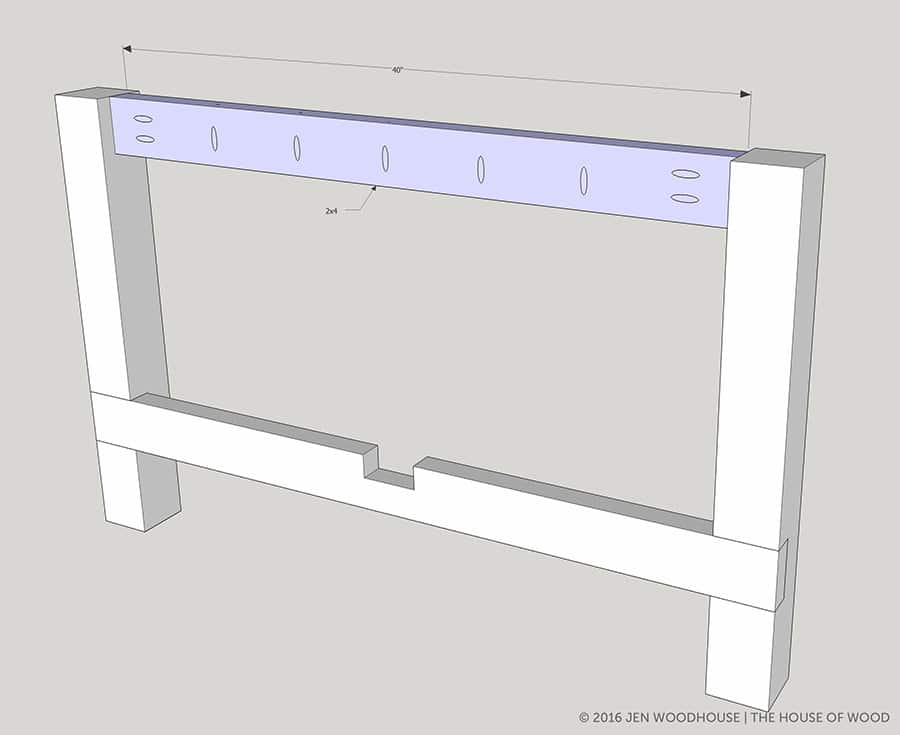
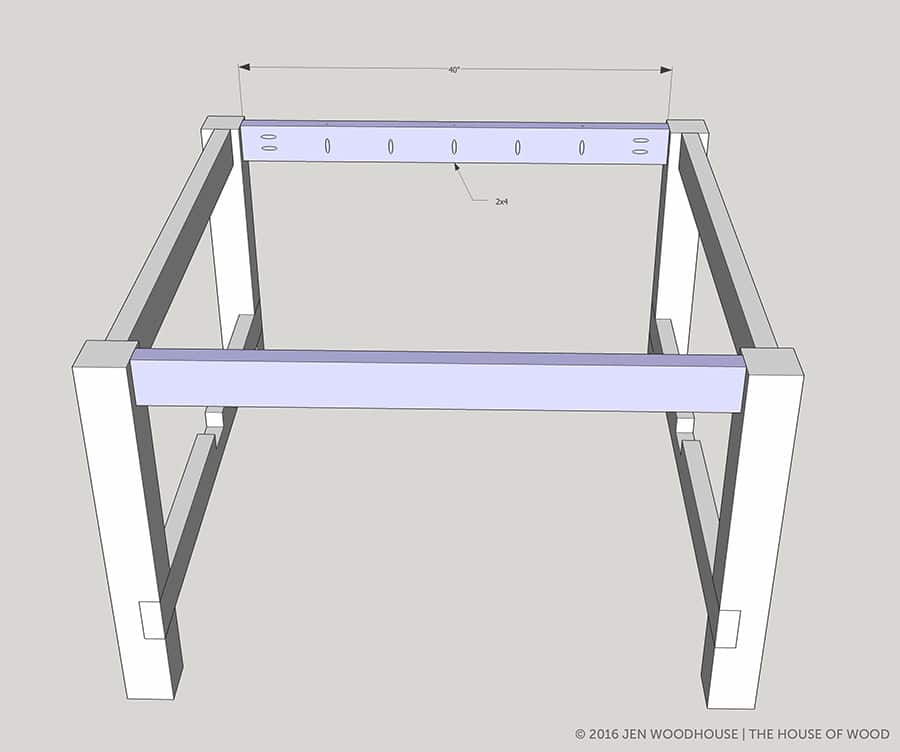
- (4) 2 x 4 @ 40 inches (aprons)
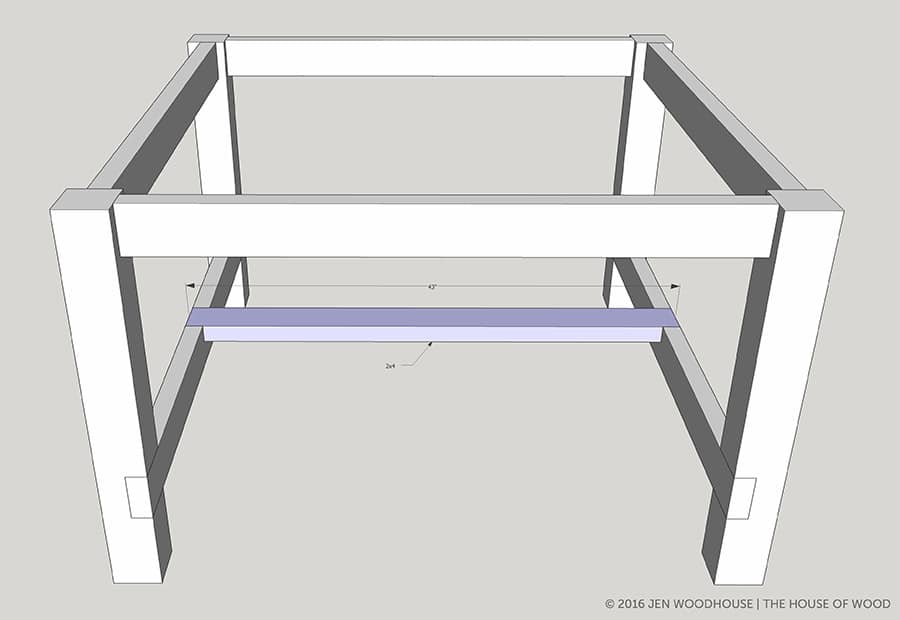
- (1) 2 x 4 @ 43 inches (middle stretcher)
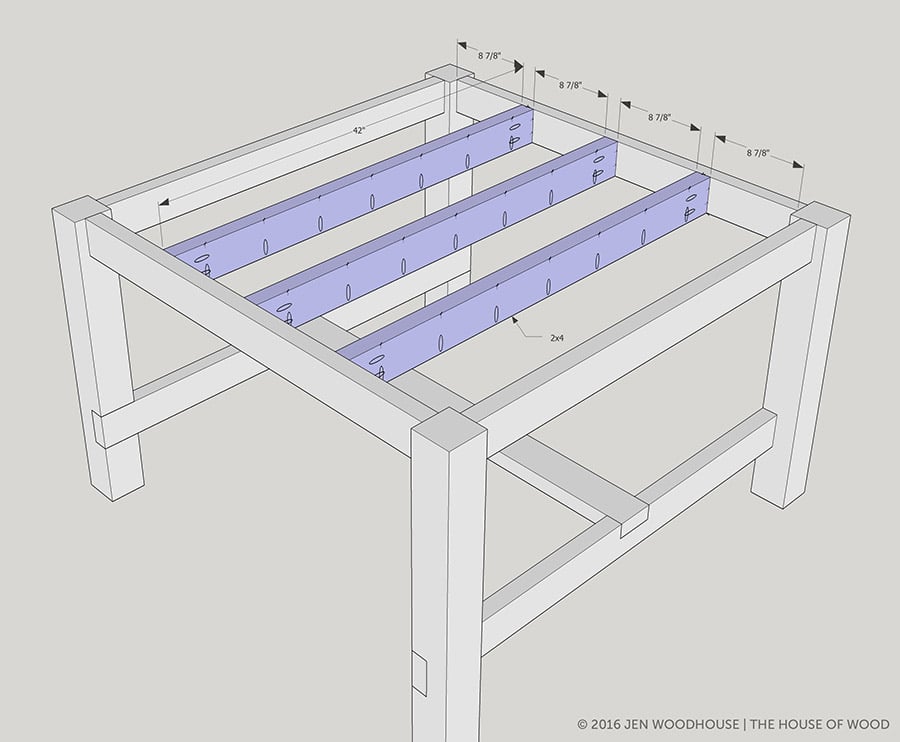
- (3) 2 x 4 @ 42 inches (tabletop supports)
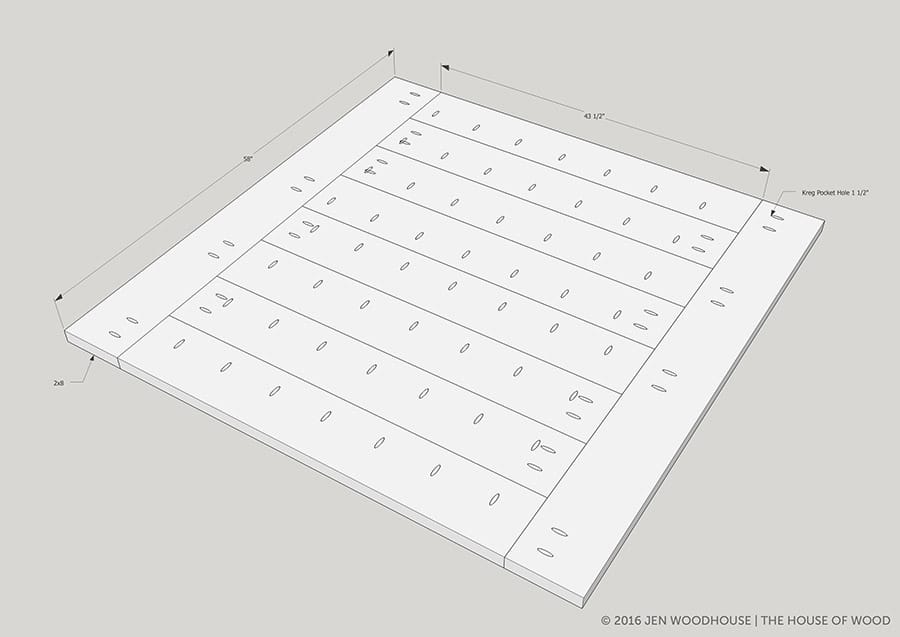
- (8) 2 x 8 @ 43 1/2 inches (tabletop)
- (2) 2 x 8 @ 58 inches (breadboards)
Step 1:
Cut and notch out the 4 x 4 legs. To notch out the stretcher joint as shown, set your circular saw to blade depth of 1 1/2-inches. Make the top and bottom cuts first, then cut every 1/4-inch with the saw. Use a chisel to remove the remaining material and clean up the notch. If you can, practice on a scrap piece of wood first.
Step 2:
Notch out the side stretchers as shown, then attach to the legs. Use 3” wood screws and wood glue. Countersink screw heads and use wood plugs to conceal. Do both ends.
Step 3:
Drill 1 ½” pocket holes into the aprons as shown. Attach to the legs with 2 ½” pocket hole screws and glue.
Step 4:
Build the carcass by drilling 1 ½” pocket holes into the remaining two aprons and attach to legs with 2 ½” pocket hole screws and glue.
Step 5:
Attach the stretcher with 3” wood screws. You may want to countersink these and use wood plugs to cover the screw heads.
Step 6:
Add the table top supports. Drill 1 ½” pocket holes into the 2x4s and attach to carcass with 2 ½” pocket hole screws and glue.
Step 7:
Build the table top. Drill 1 ½” pocket holes along one edge, spaced about 6-8” apart. Clamp joints as you attach with 2 ½” pocket hole screws. Measure and cut breadboards to fit and attach with 2 ½” pocket hole screws.
Step 8:
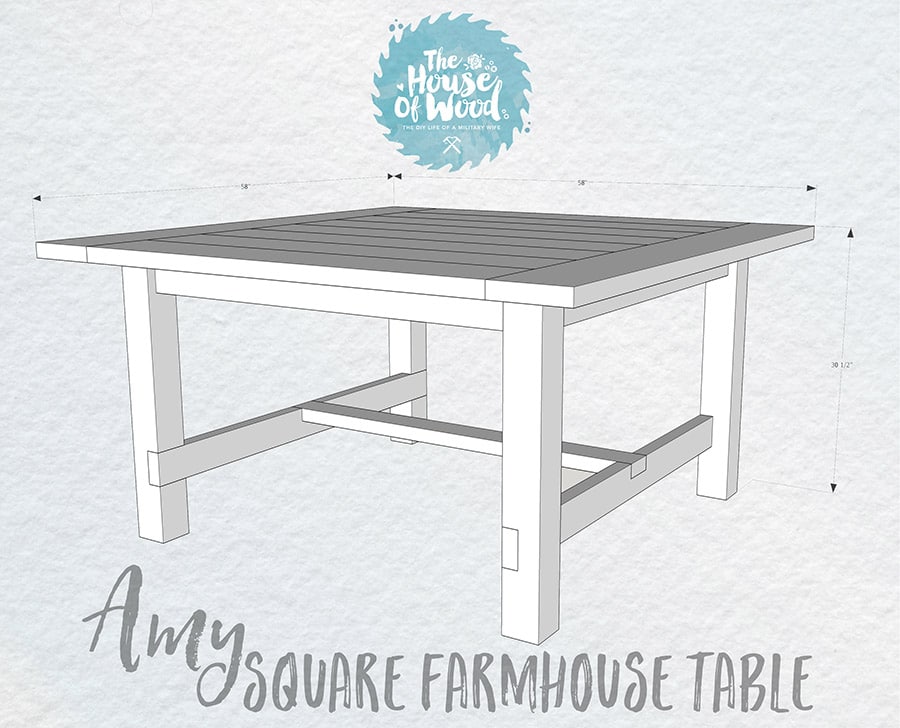
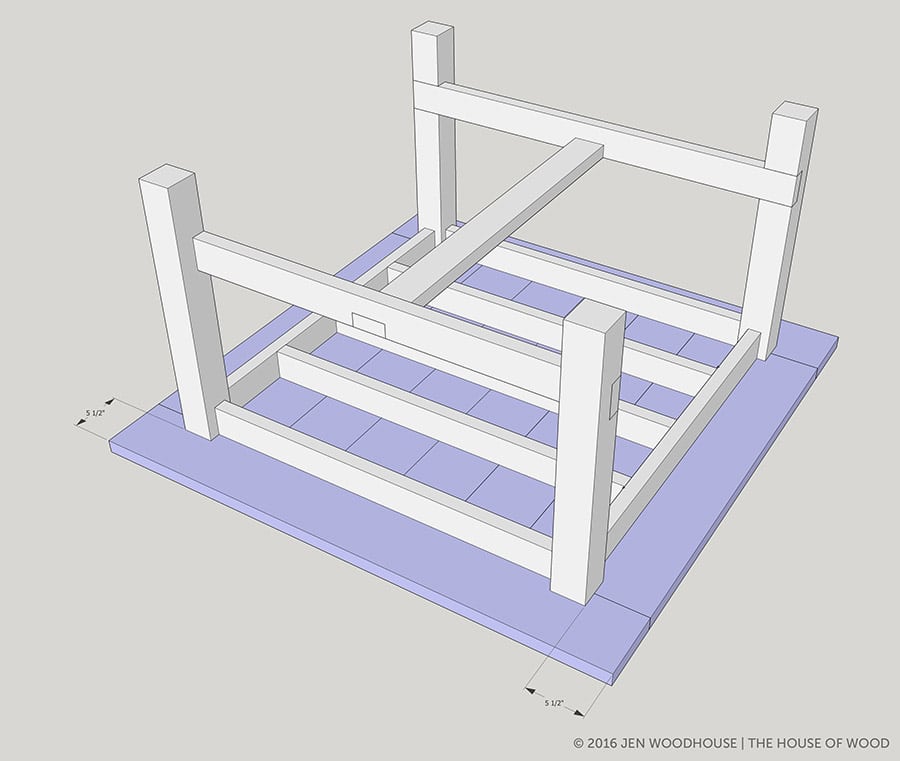
Attach table top by drilling 2 ½” pocket hole screws from aprons and supports to table top. There will be a 5 ½” overhang on all sides. Notice that the breadboard ends are on the same ends as the stretcher bars.
Please PIN and SHARE this DIY Square Farmhouse Table!



Can you please email the plans to build Amy’s square farmhouse table? Thank you!
Hello! We are looking around to DIY our own table and we think we found the one here! Your plans look easy to follow and a simple design that also looks sturdy and good support. My question is what kind of wood you are using as this is not specified in the plans. Also is there any prep work you suggest in advanced to certain woods? Thank you, I look forward to your response/advice!
Can you please email me the plans for the wide farmhouse table? Also would like to know if it is possible to omit the bottom support ?
Hi Martha,
You can download the plans here: https://jenwoodhouse.com/plans/square-farmhouse-table.pdf and yes, you can omit the bottom support if you’d like.
Can you give me plans for making a bench with this table?
I’m confused why so many folks are asking for the plans to build this. The author included the link to download it. My husband spend about $200 at Home Depot. That includes the lumber (untreated pine), screws and some tools. I now have a beautiful outdoor square table that comfortably seats 8, and possibly seats 10. It took him 1.5 days.
Can people actually sit comfortably on the sides that have the support bar at the bottom?
Hi Jen
Love the table. Was wondering the size?
We would love to modify for a 72×72 table. Do you have alternate plans for this size?
Thanks so much.
Tracey
If you wouldn’t mind sharing your CAD file for the project, I am going to modify it to make a folding version. I am very happy to share it if it works, and once it is finished.