As many planters as I’ve built, you’d think I had a green thumb. You’d think. I mean, there was this one, this one, this one, this one, this one, oh, and this one… (planters, not thumbs – I only have two of those.)
Six planters. SIX.
Countless plant deaths. It’s botanicide.
Maybe this is all just wishful thinking on my part.
If you build it, they will come.
Hahaha… nope.
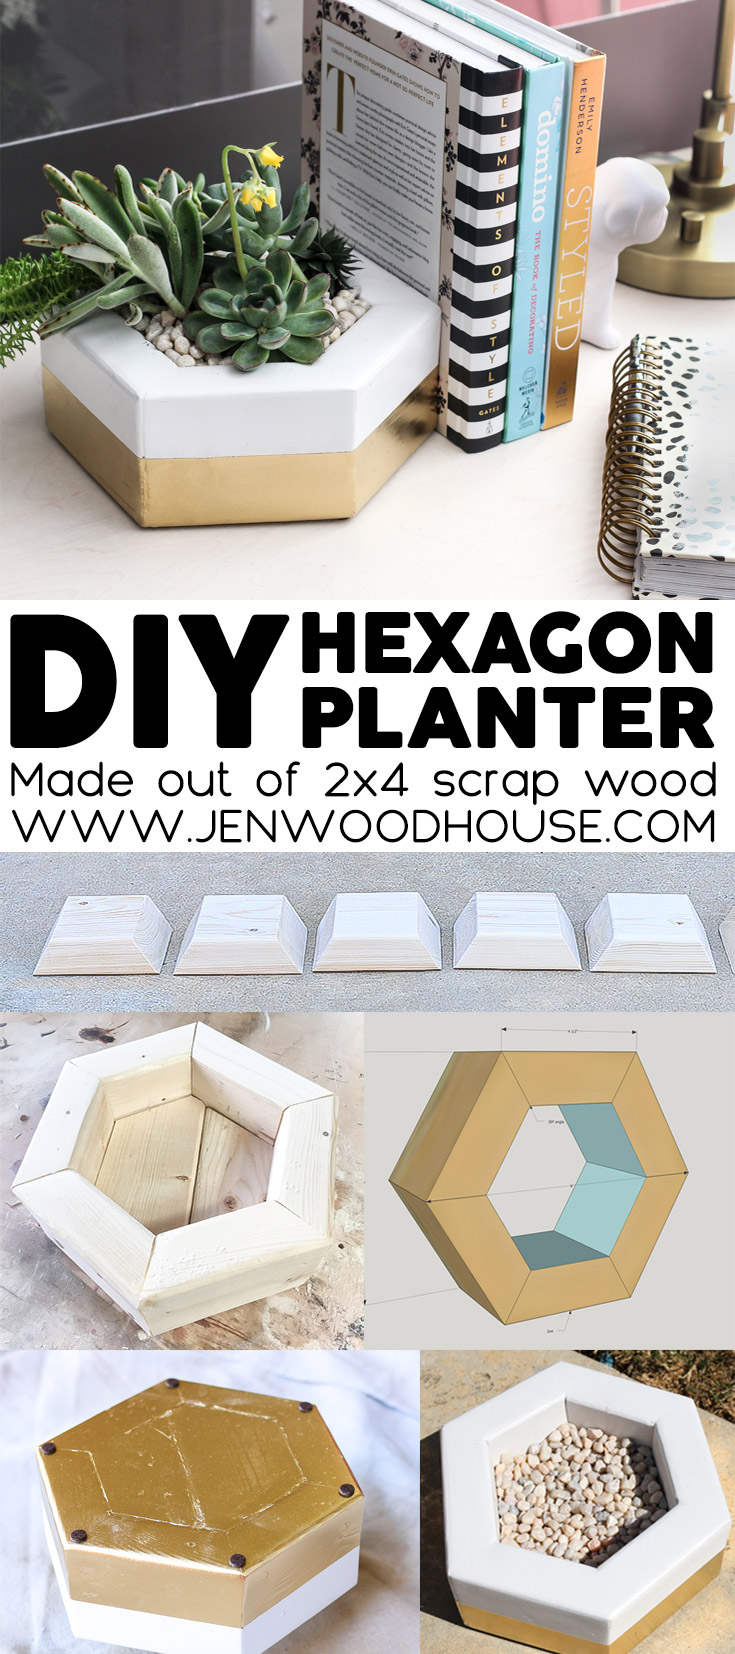
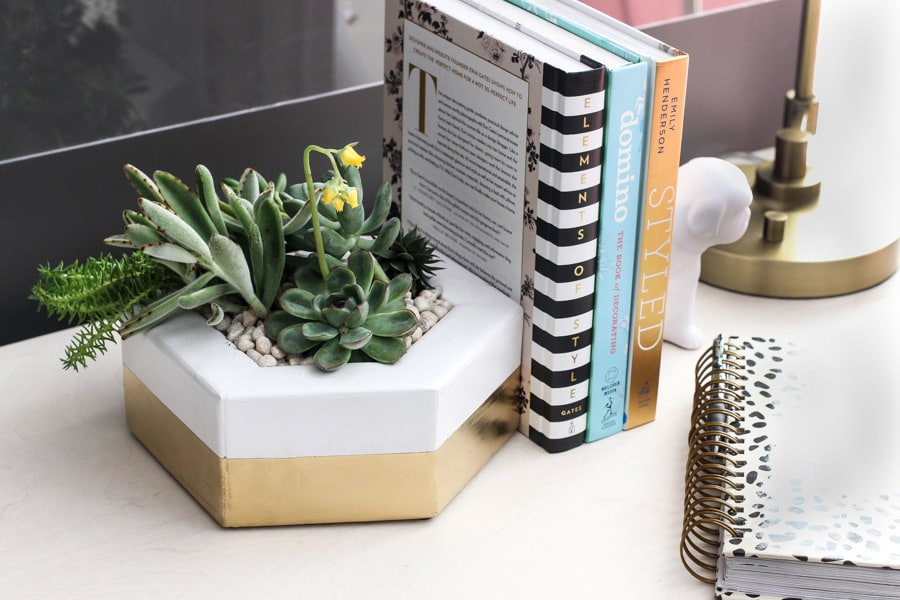 I guess I’ll never learn because here’s one more DIY planter to add to my ever-growing list. I don’t mean to brag, but I’m kind of an over-achiever in the plant-killing department. Although my planter collection seems to be growing wildly, my plants aren’t. Now that’s irony for you. #blackthumb
After building this bookshelf, I had a ton of 2×4 scrap wood left over. So let’s get started. Hexagons are so trendy right now. Let’s jump on this bandwagon while it’s still going strong. Here’s how to build a DIY hexagon planter out of 2×4 scrap wood:
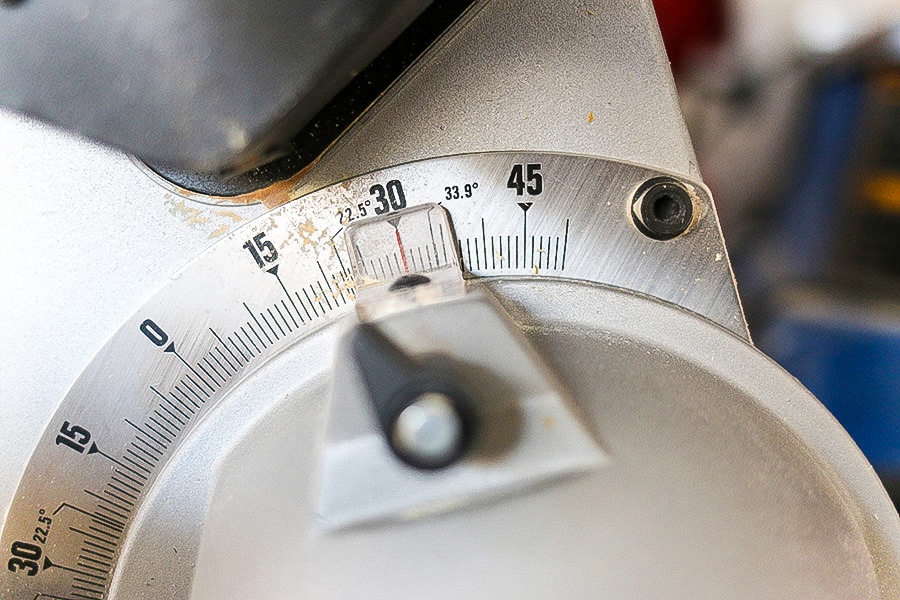
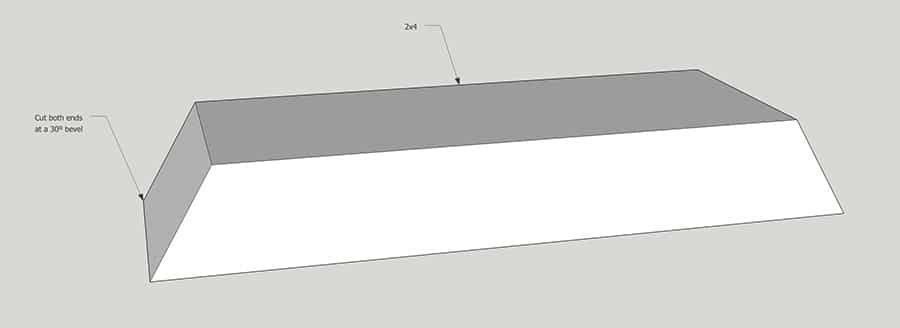
First, set the miter saw at 30º.
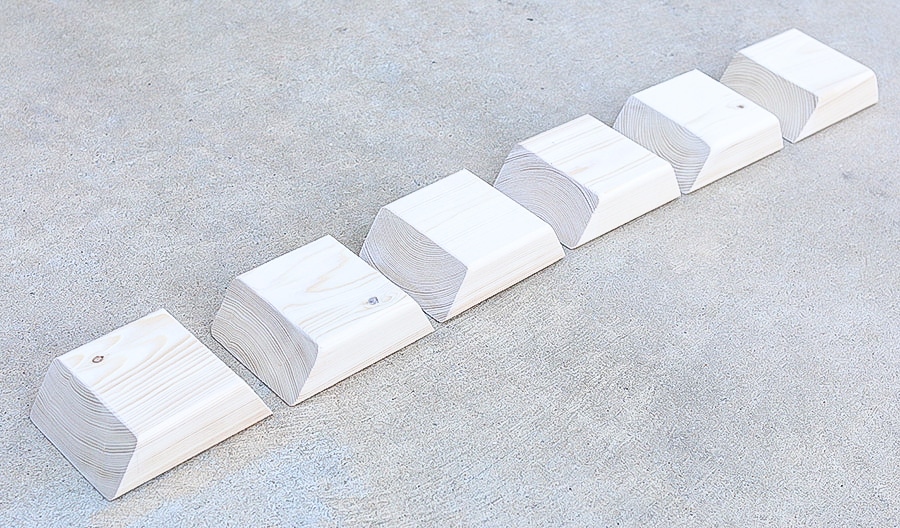
Cut out six pieces of 2×4 like so, ensuring that the angles are not parallel. The length doesn’t matter, as long as they’re all the same. Whatever size you’d like your planter to be, cut each piece to half that length. In other words, if you want a planter that’s 10 inches wide, cut each 2×4 piece 5 inches long.
Isn’t Math neat? I wish I were better at it.
Then a little bit of wood glue here, a few nails there, and voila!
I also cut out some scrap for the bottom. Ideally, 1/4″ plywood would work well here, but since I had a bunch of 2×4 scrap wood, I used what I had.
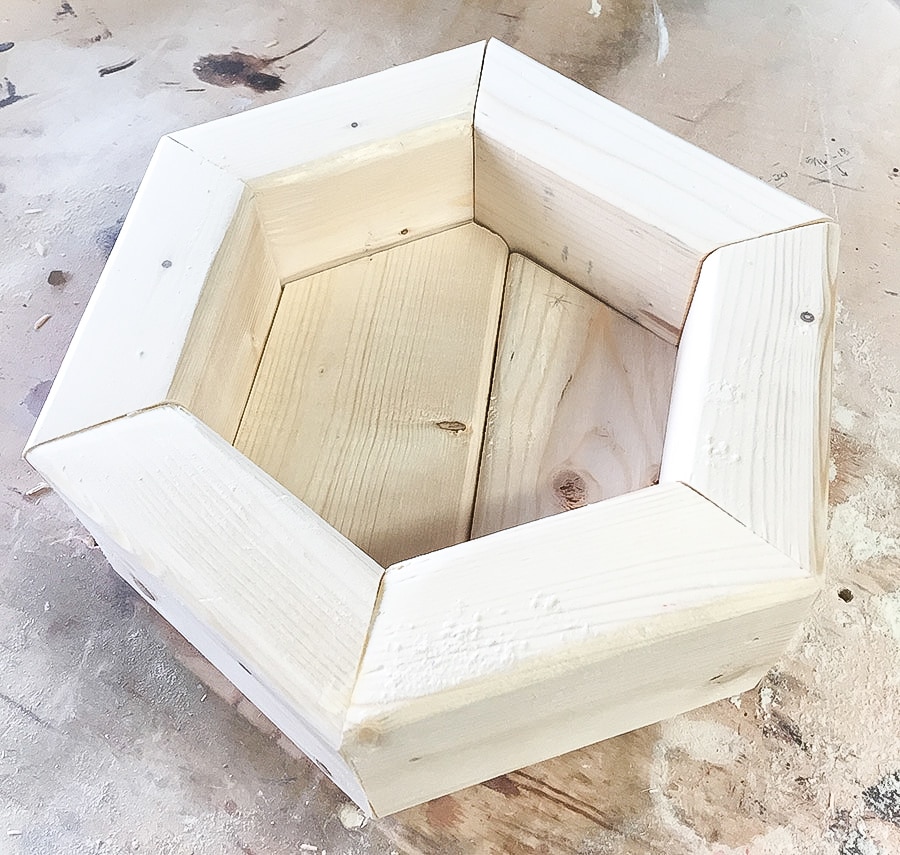
I did my best to puzzle-piece those suckers in there.
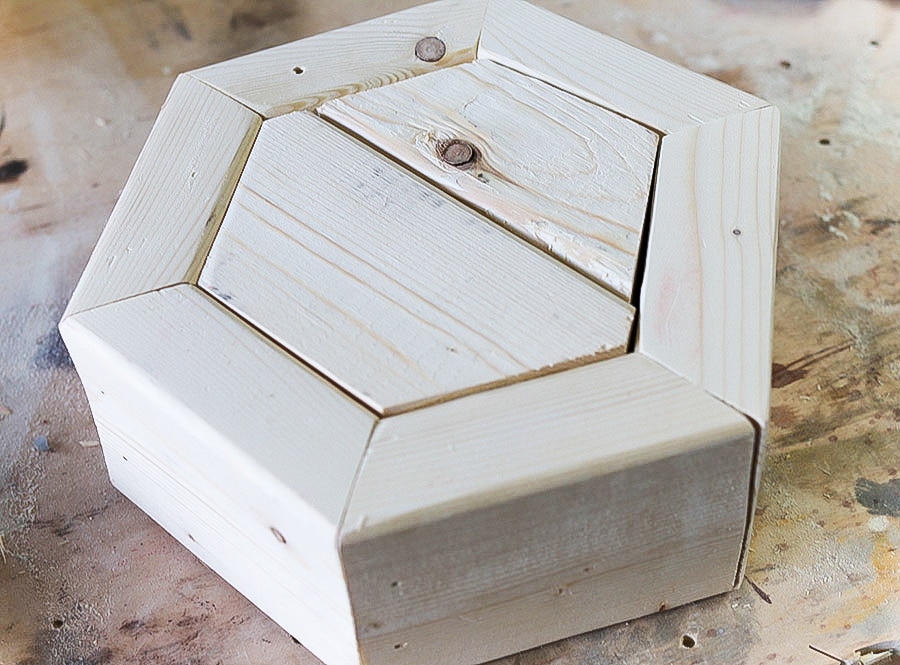
Then I filled all the gaps with paintable wood filler, then sanded everything so it was super smooth. I removed all the dust and sprayed a coat of primer on the planter. Primer will help seal the knots so they don’t bleed through the finish.
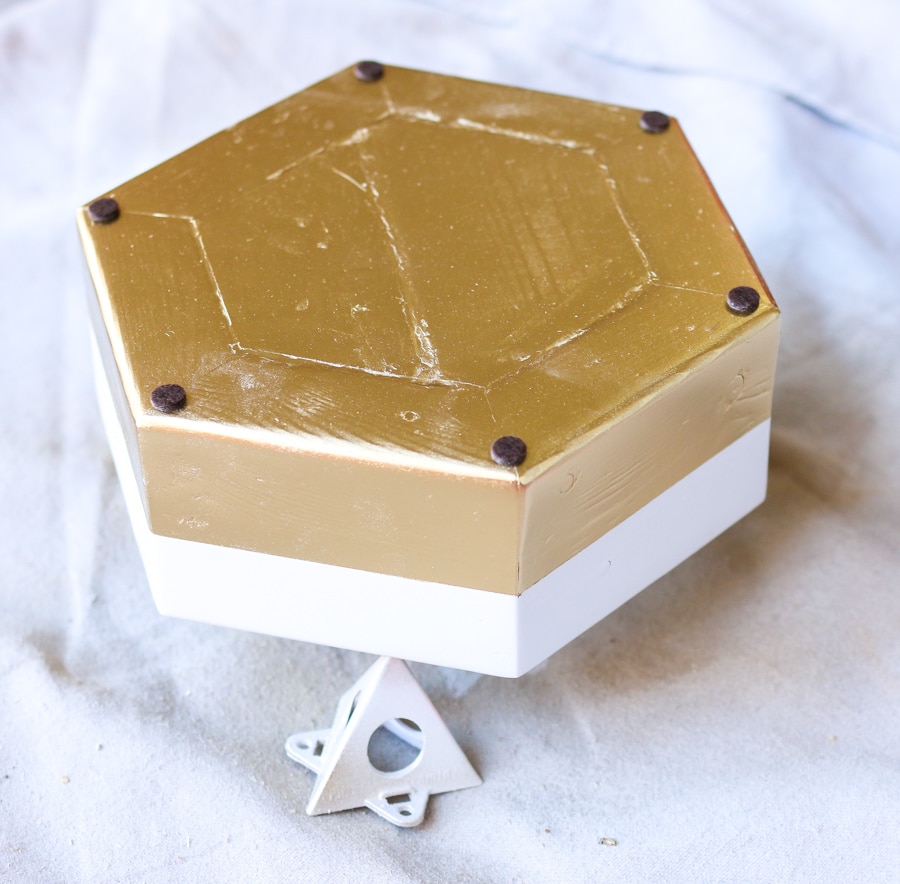
After the primer was dry, I sprayed white paint on it, let that dry, then taped off a section and sprayed it with metallic gold spray paint. Finally, after the gold paint was dry, I added little felt pads to the bottom of the planter.
*Affiliate link. Side note: these painter’s pyramids* are so helpful.
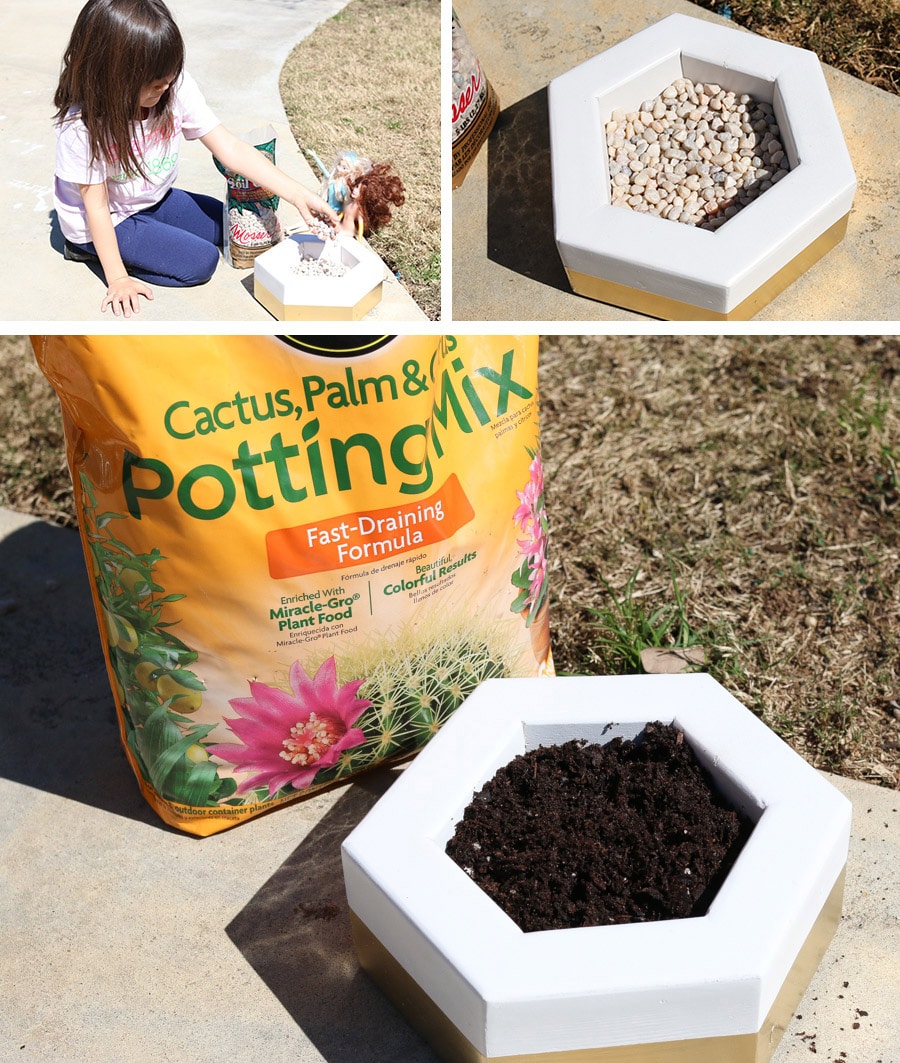
Now you probably don’t want to take plant advice from me, so here’s what The Google told me. First, you fill the vessel with pebbles, then use cactus potting mix to plant the succulents, then top it off with more pebbles.
As you can see, I had some tiny helpers. Elsa looks especially enthusiastic while her friend was so excited she literally lost her top. I blurred out her lady lumps to keep things G-rated around here.
Did you think 2×4 scrap wood could look so chic? And it makes a perfect bookend too!
Now here’s hoping my plants don’t die. I was told to water these succulents when the soil is dry. We’ll see how this all shakes out.
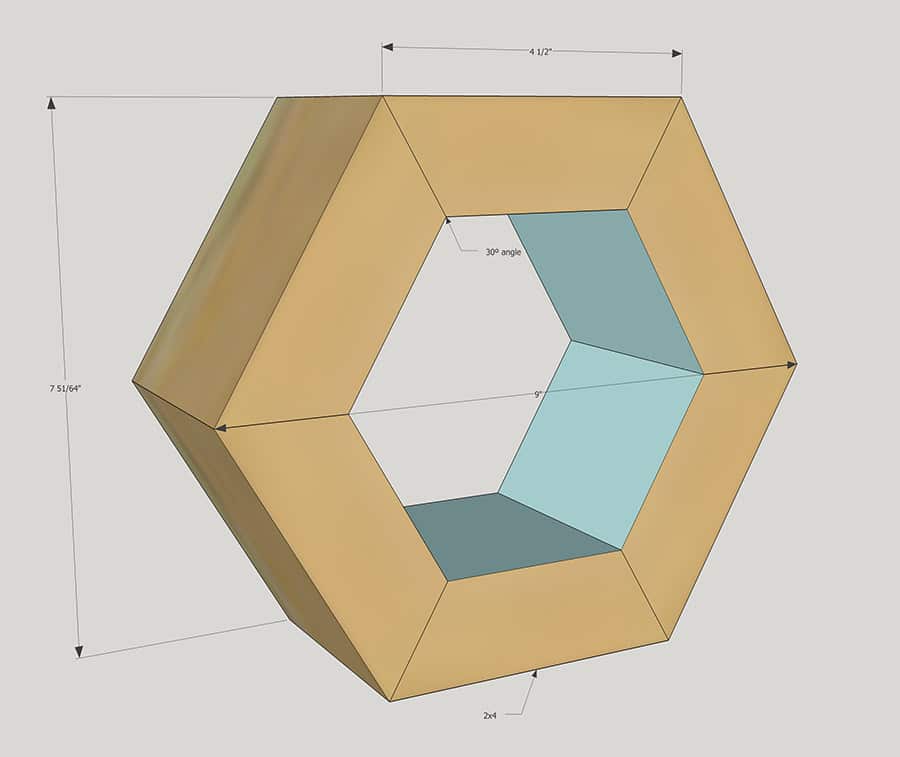
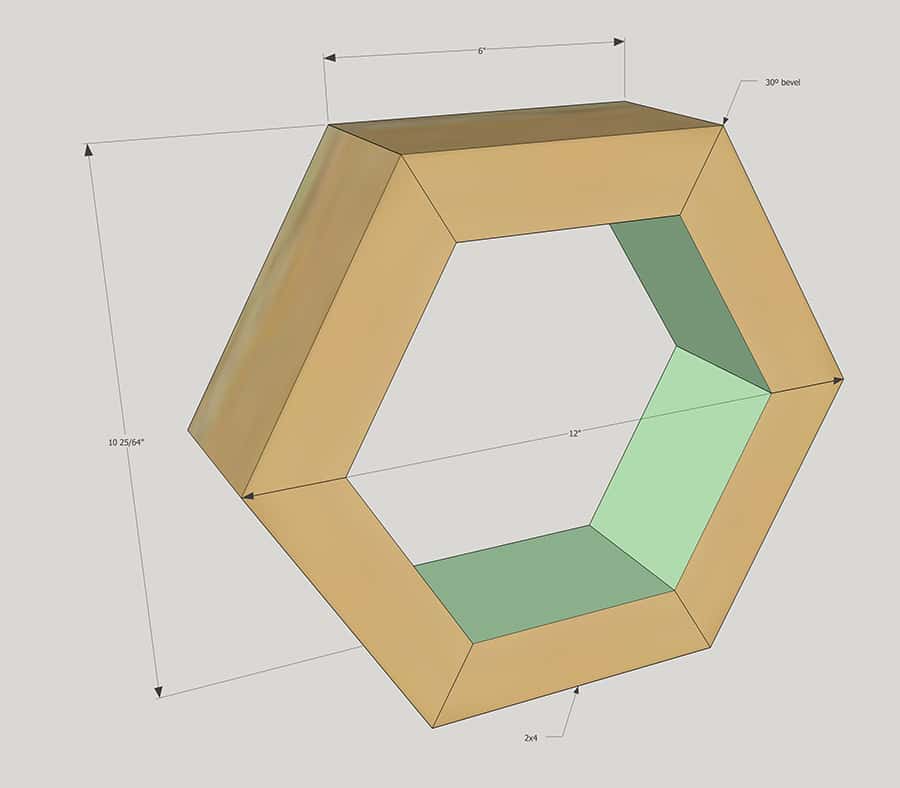
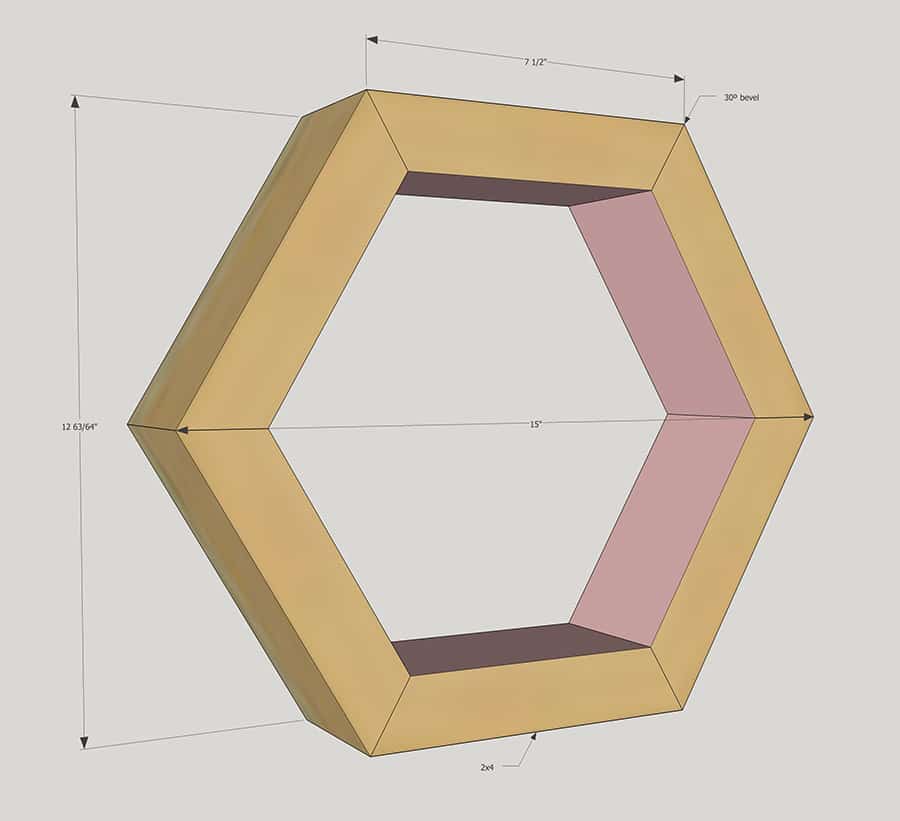
And because I love you, I drew up a quick little sketch so you can build your own DIY hexagon planter.
 SMALL
SMALL
 MEDIUM
 LARGE
LARGE
Thanks for reading, friends. Do you have a project that you’ve made entirely out of 2x4s?
Be sure to PIN IT so you don’t forget it!
These are AWESOME!!!!
Gorgeous! At least if the plants die, they die in a pretty container. 😉 Love it!
This is super cute!!! The gold bottom is perfection, gold is so hot right now!
Only you can make a lowly 2×4 into a must have glam project, Jen. GORGEOUS!
Love this Jen, so cute!
I love this! Hexagons are pretty cool shapes 🙂
Man…you have such a gift for turning ordinating supplies into chic and awesome things!!! Love this project!
Thanks so much, Megan. What a sweet compliment!