Alright you guys. I’m going to be splitting this tutorial into separate parts because I want to share all the blood (yes, there was blood – but it’s not what you think), sweat (buckets of it thanks to the brutal Southern summer heat and humidity), and tears (because I am a girl, after all) it took to build this beast of a dresser.
If you’re just joining us, I’m building a 9-drawer dresser for my brother-in-law. First of all, I must have drawn up 10 different plans for this thing in my quest to find the best, most efficient, and soundest way of building it. You may remember my first and second attempts at designing my brother-in-law’s dresser. Yeah. Oh, and don’t forget the matching nightstands.
Read the complete tutorial:
- Part One: Building the Carcass (you’re here!)
- Part Two: Building the Large Drawers
- Part Three: Building the Small Drawers
- Part Four: The Final Details
 As usual, I used my favorite plywood, Purebond Plywood for the sides and bottom. It’s the prettiest plywood at The Home Depot. I bought the 3/4″ maple species.
Oh, and here’s a first – I bought my lumber from a lumber distributor and ripped and planed my own boards! You guys. I googled “lumber distributor” or “lumber wholesaler” in my area and let me tell you: LIFE-CHANGING. Not only do they carry a wide array of wood species (maple, alder, cherry, mahogany, walnut, etc.), but the boards are nicer and usually half the cost of the big box stores! I know, RIGHT?! Heart eyes all over the place, y’all. And I love supporting local small businesses, don’t you?
Seriously, I was like a kid in a candy store at my local lumberyard. Now, the main difference is lumberyards will charge by the board foot and not the linear foot (like the big box stores), so I’d recommend you familiarize yourself with calculating board feet to figure out how much material you’ll need for your projects. But the short version is: one board foot = 12″ by 12″ by 1″. And the formula to calculate board feet is: length x width x thickness / 144.
So let’s say I want to buy a 1×8 8-foot board. The cost per board foot for maple is about $2.63 where I live so I’d calculate (I round up just to make things easier) length x width x thickness: 96 x 8 x 1 = 768, then divide that number by 144 = 5.3333333… so that board is approximately 5.3333333 board feet, right? Then I take 5.3333333… and multiply that by $2.63 (price per board foot) = $14.03. So I’ll pay about $14 for that 1x8x8 maple board. Make sense?
One day I’ll dedicate a whole post on this subject because there’s a lot to learn and consider when purchasing lumber from a lumberyard, but in the meantime, this video covers the basics.
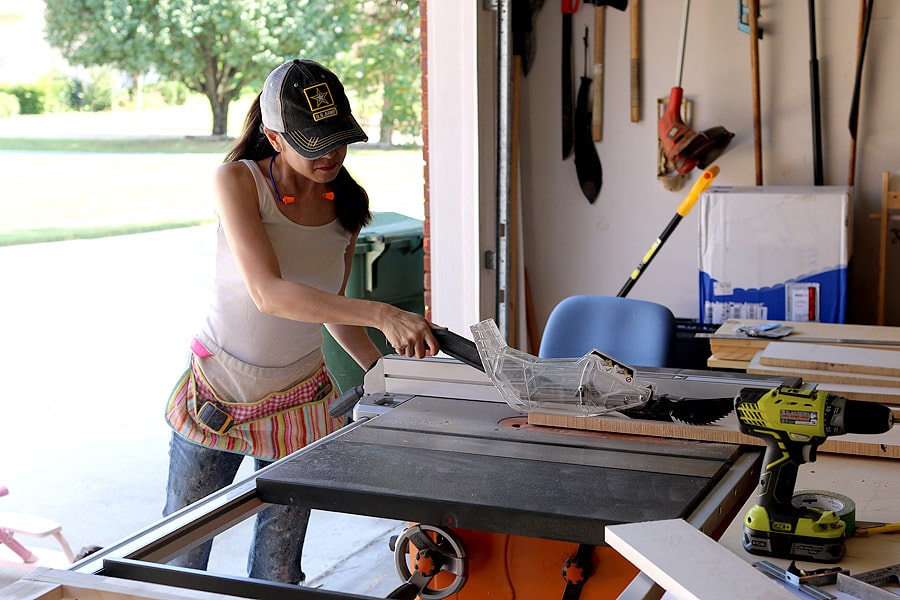 Also, if you don’t own a table saw or a planer, buying your lumber from a lumberyard won’t do you much good because you’ll need to prepare your stock before you build with it. Lumber sold in lumberyards usually come in random widths, so you’ll have to rip your boards on a table saw to whatever width you need for your project. Also, at my lumberyard, the boards are 1/16″ thicker than 3/4″ so I had to plane them down to a true 3/4″ thickness first. I chose to use maple for both my solid wood boards and plywood.
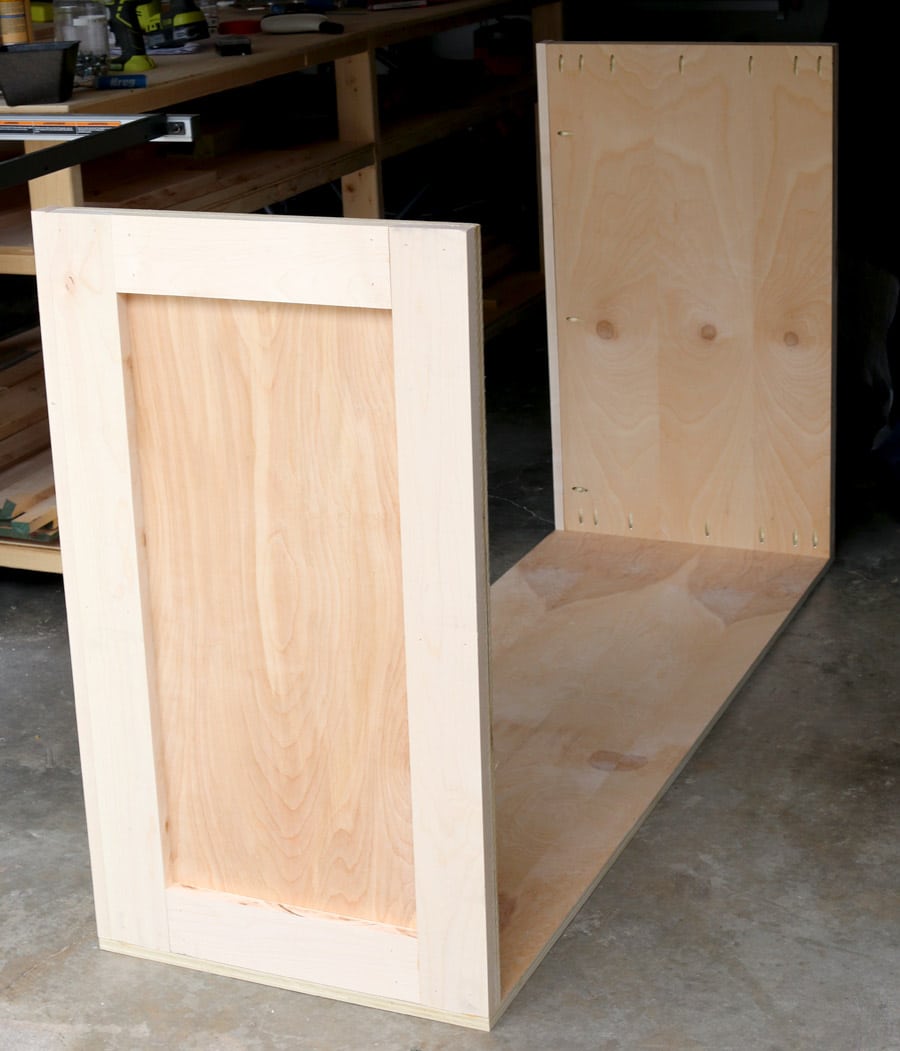
First, I cut my plywood side panels to size and drilled 3/4″ pocket holes facing up, down, and towards the front. I used a table saw to rip my plywood, but you can also use a circular saw with a straight edge. Then I attached the 1×4 “trim” to the plywood sides with wood glue and 1-1/4″ brad nails. Next I attached the trimmed out sides to the bottom with 1-1/4″ pocket hole screws and glue.
 So I talked about shedding blood earlier. This is why I belong in the workshop and not in the kitchen. One night, I was cutting up some tomatoes for dinner and sliced about 1/16″ off my thumb. Well, not all the way off. It was hanging by a thread, so I had this ‘flap’ of thumb just waving in the wind. Gross, I know, but hello?! Thank God it wasn’t a table saw or a compound miter saw, right?! Whew (for a second there)!
Kitchen knife. I know: shenaniganry.
And do you know how challenging it is to build with a gimpy thumb? Extremely.
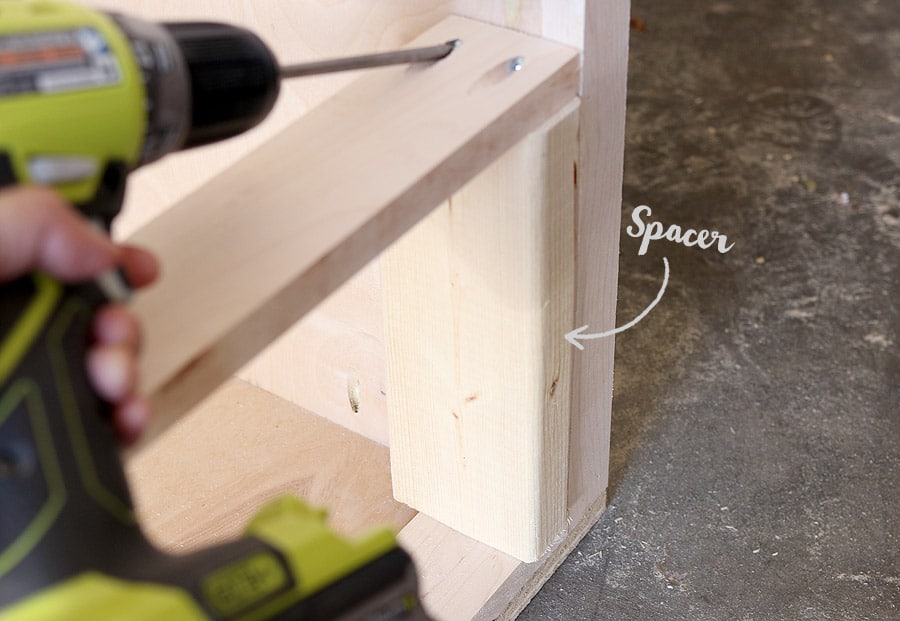
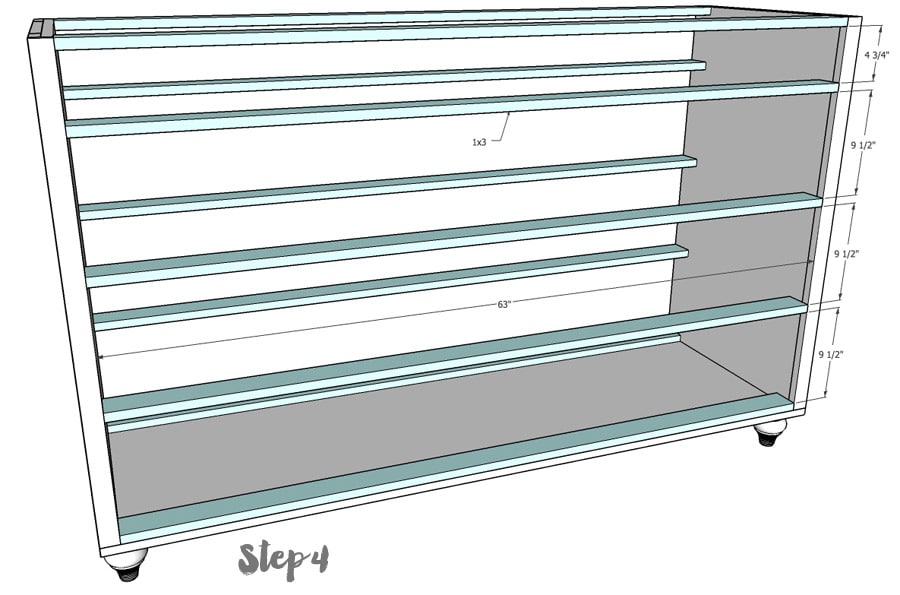 Now that I had my sides and bottom constructed, it was time to add the horizontal supports (i.e. build the carcass). I used 1×3 boards for these supports. I cut a couple of 2x4s to 9-1/2″ long to serve as spacers. They were really useful in holding my boards up while I drove the screws in.
Attach with 3/4″ pocket holes and 1-1/4″ pocket hole screws.
 And I also talked about sweat. Buckets of it, you guys. BUCKETS. Summer in the South. That’s all I’m going to say about that.
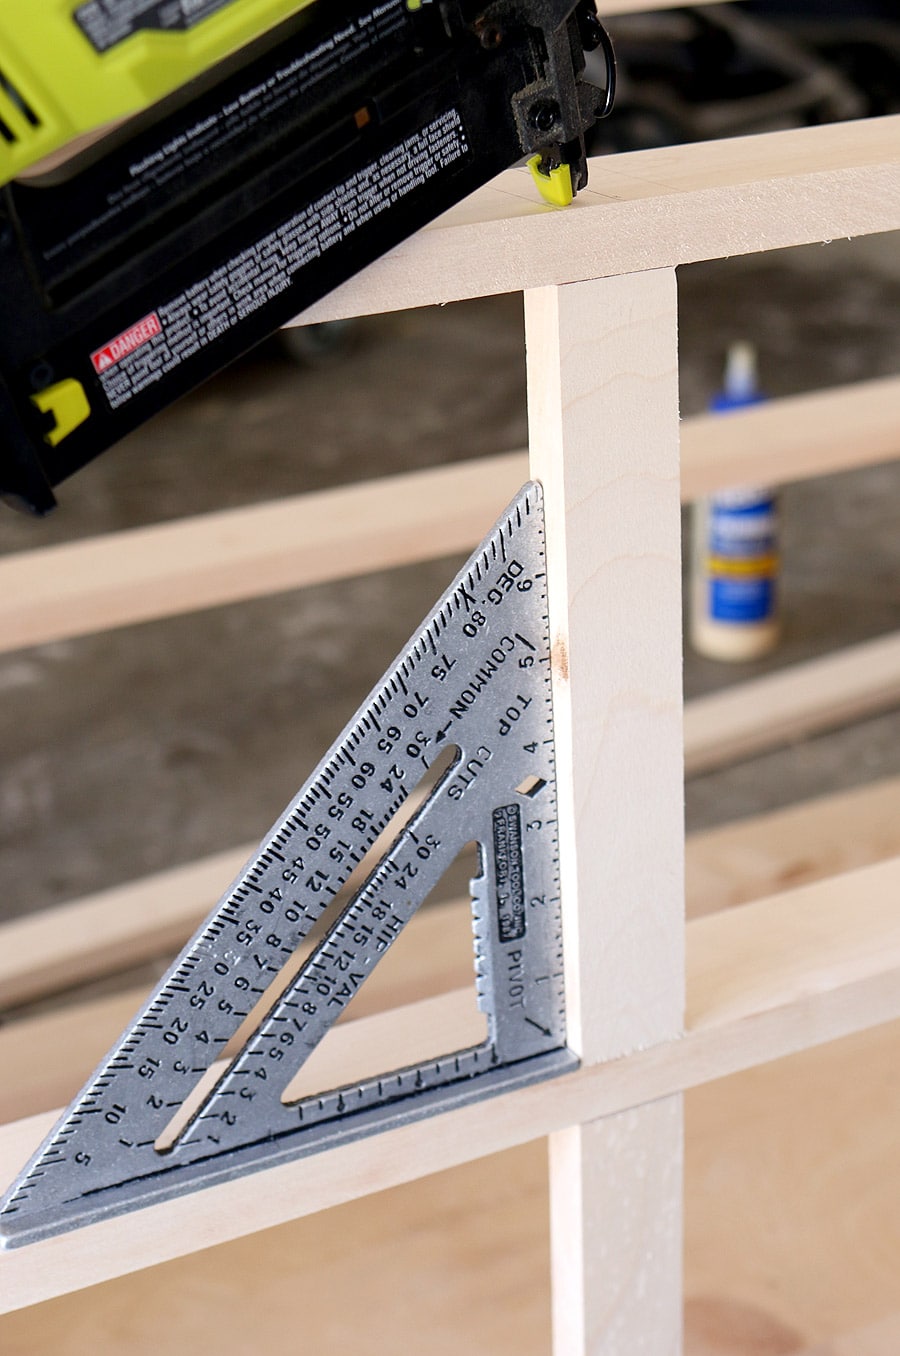
Next, I attached the 1×2 divider trim to the front. I used my brad nailer and nailed a couple nails to hold the 1x2s in place so that I could drive the screws in. The nails also keep the 1x2s from spinning. I used a speed square to make sure they were square.
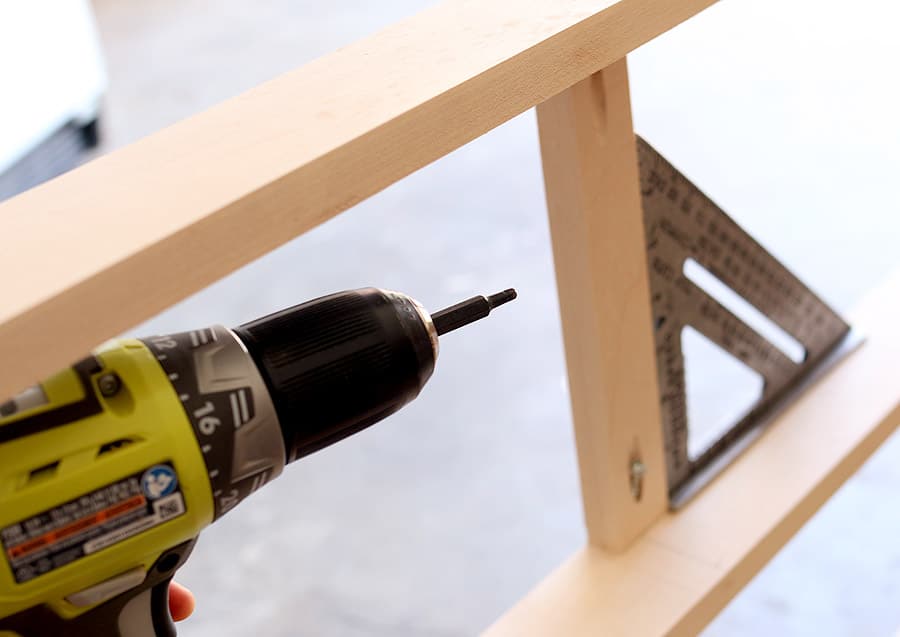
 Depending on what kind of drill you have, you may need to use a shorty pocket hole drill bit like this one. It might be a tight fit to get the drill in to screw the 1×2 trim pieces on.
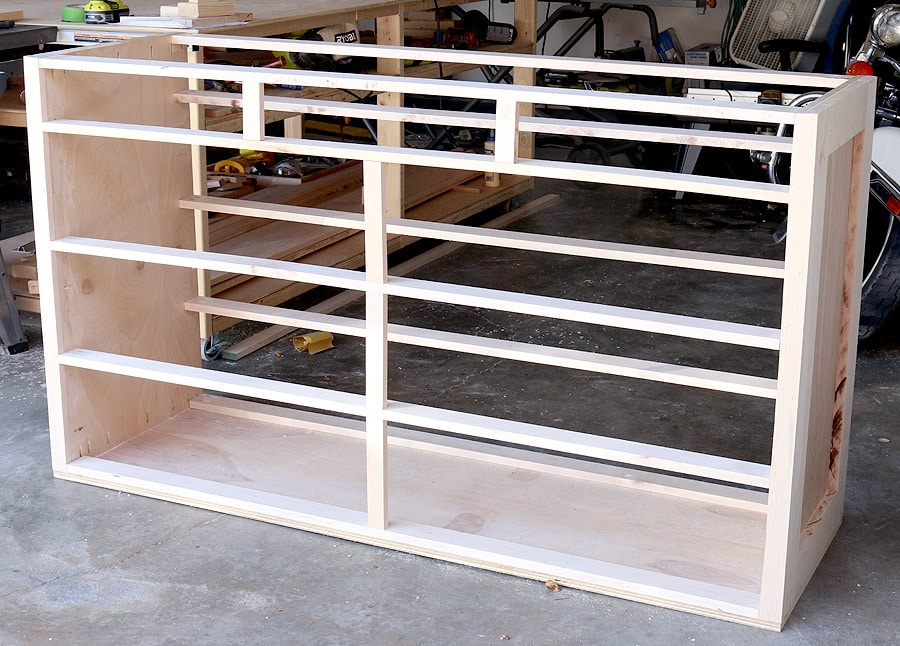
 Here’s the entire carcass constructed, with the front trim attached:
Don’t mind those burn marks on the sides. I did that with my saw blade. Good thing they’ll get covered up with some decorative cove moulding later.
Oh, and I also mentioned tears. Yep. They’re coming. But not now. Soon. Because the next step is to build the drawer boxes. I’ll be back to share that in part two so stay tuned!
Read the complete tutorial:
- Part One: Building the Carcass (you’re here!)
- Part Two: Building the Large Drawers
- Part Three: Building the Small Drawers
- Part Four: The Final Details
Pin it for later!


Hi Jen,
The 9 drawer dresser is a great look and I bought the plans because I am seriously design challenged when it comes to furniture and I look everywhere for the person(s) that do the math for me for my projects. THANK YOU so much for doing that. That said, I assumed (wrong thing to do, right?) all dimensions were absolute. That means when you say cut a board to 1″x2″ it means 1×2 not 3/4″ x 1 3/4″ . The first thing I noticed was the side panels rails are long by 1 inch. I assumed (there’s that word again) that was just an error and cutting off is way easier than making a board longer. I finally figured out that was due to buying lumber at Home Depot or similar instead of at a lumber yard where a 1xanything is a true 1x anything. I planed down the side trim pieces to 3/4″ because a 1 inch trim board was just a bit too big. Then I got to assembly. The plans call for a 1×2 trim board which I had cut to true size on the table saw. When I put it together there was a reveal of about a half inch over the trim boards and side plywood panel which together come to 1 1/2″ W. I figured that was intentional. OOOPS. When I put the 1×63″ horizntal stringers in, the only way a 63″ board fits is to go edge to edge and leave the space for the trim pieces and a reveal. OOPS again. By the time I figured it out, I had glued and screwed the trim pieces on. The only thing to do was to remove all of the front horizontal structure and notch the front edges to bring them flush with the trim boards.
My recommendation – FWIW – always put true dimensions on the plans. Most people doing this level project have the tools to plane and joint lumber from a dealer and will cut or plane to the dimensions on the plans. I’m an engineer and when I send designs to the machine shop, they do exactly what the prints say and that’s what I was doing. Still enjoy this project, but will scrutinize the math a little more closely going forward.