A tutorial on how to make a DIY Sandpaper Storage Organizer from scrap wood
If you’ve spent any amount of time around here, you’ll have heard me claim that organization is one of my love languages. I’m a textbook Enneagram Type 1 – order and purpose are my lifelines. A place for everything = everything in its place. I love that I could take a few scraps that would otherwise collect dust in my wood pile and turn it into something useful! The amount of joy this DIY Sandpaper Storage Organizer brings me is a little embarrassing.
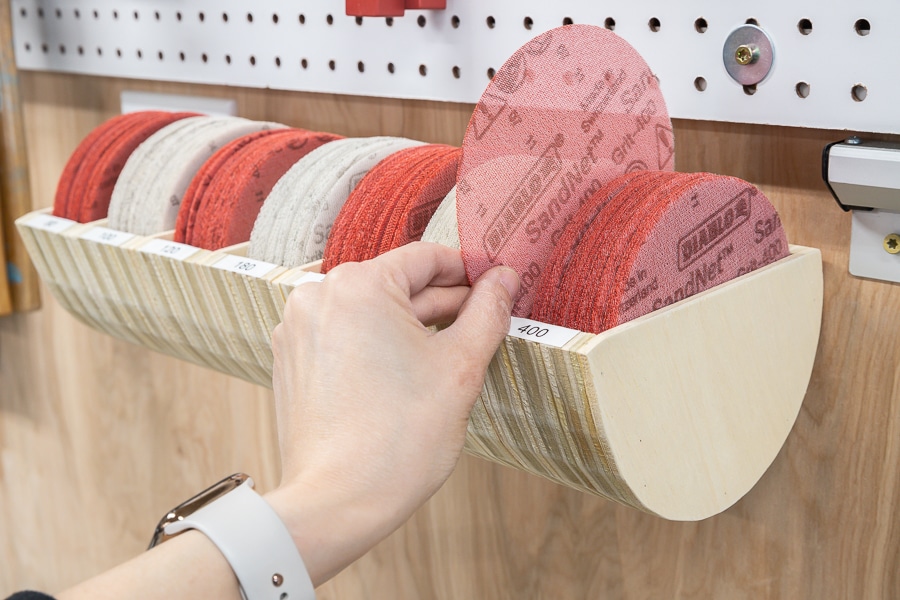
I recently moved into the #WoodhouseWorkshop and am focusing my attention on organizing everything. I searched high and low for sandpaper storage solutions, but everything I found online was pretty basic. Then, I stumbled across my friend Jeremy’s sandpaper storage solution on his Instagram account. Check out how he uses store-bought galvanized containers as his sanding disc storage. Genius! Sadly, these containers were out of stock, so I wracked my brain on how I could replicate the idea.
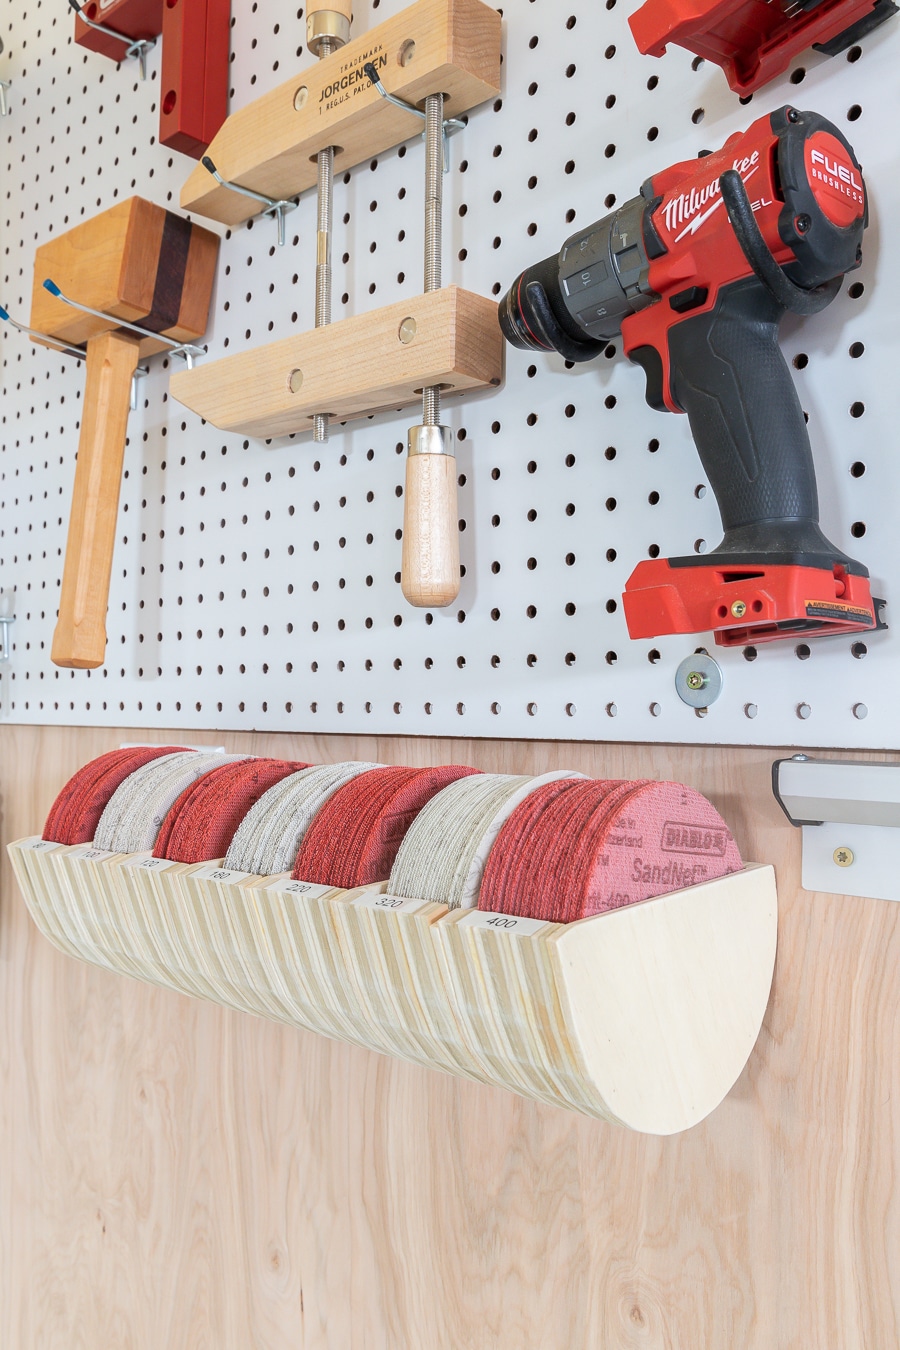
This is what I came up with and I am soooo happy with how this DIY sandpaper storage organizer turned out!

How To Make A DIY Sandpaper Storage Organizer
Supplies:
- Diablo SandNet™ discs
- 3/4-inch plywood
- 1/4-inch plywood
- wood glue
Tools:
- Bosch Jigsaw
- Bosch Random Orbital Sander
- Painter’s tape or clamps
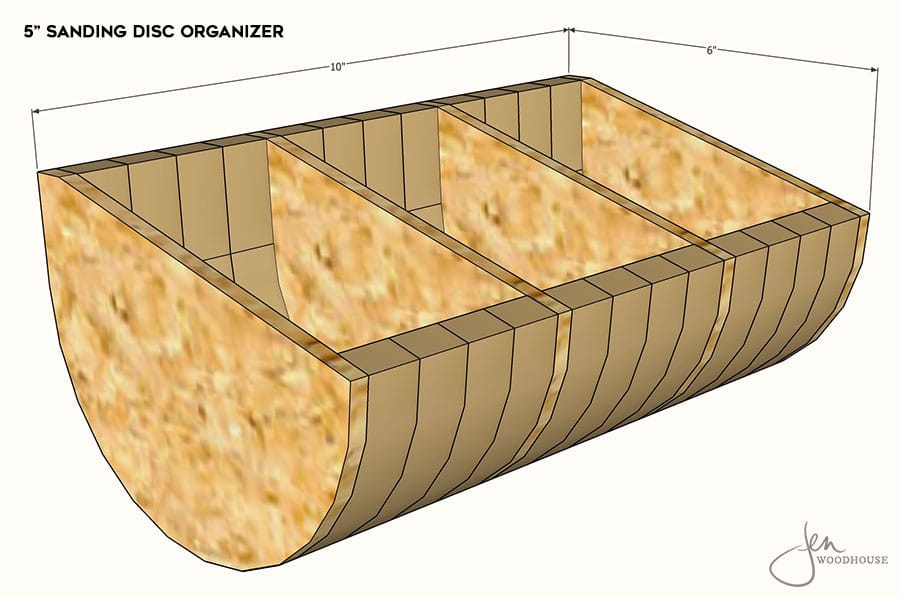
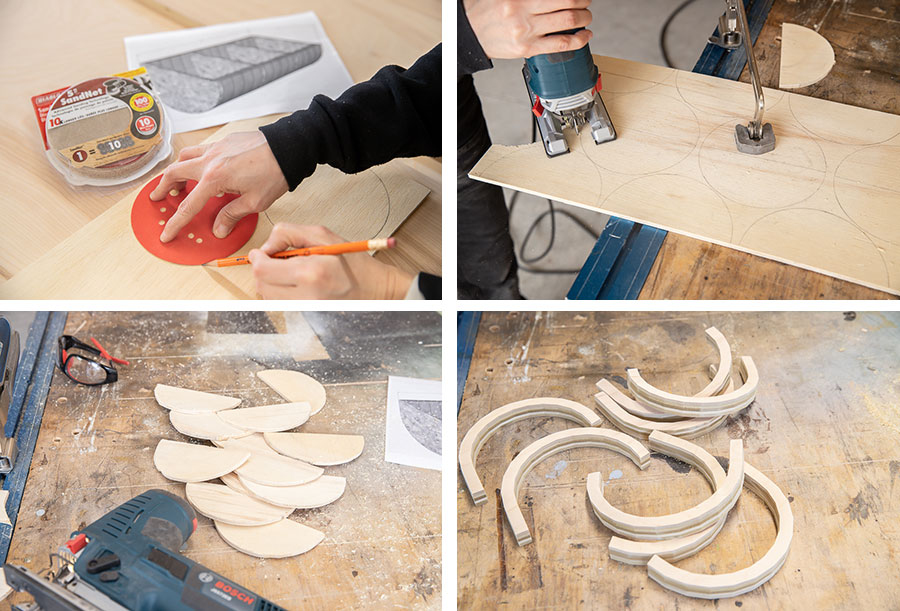
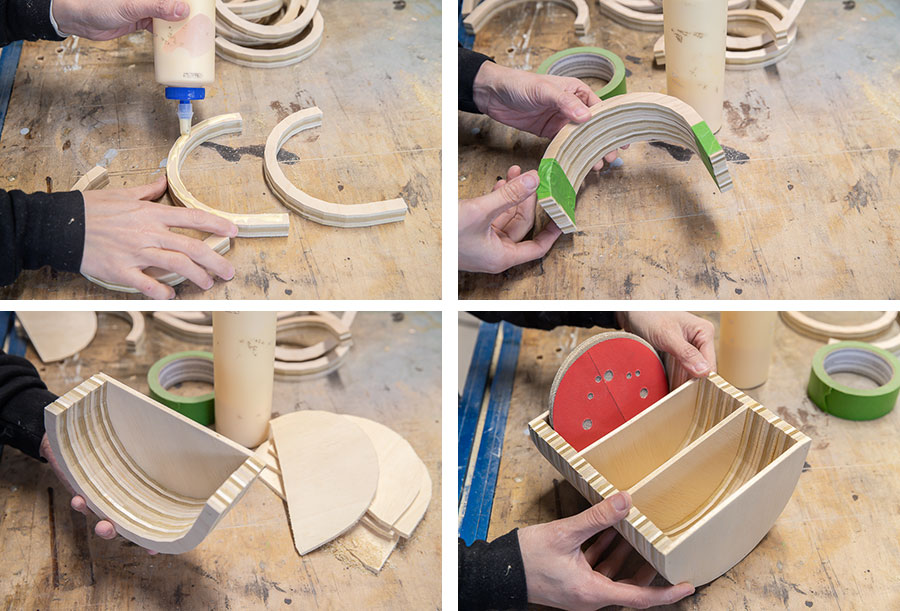
I stacked 3/4-inch plywood for the little cubbies and used 1/4-inch plywood as the dividers. Making this sandpaper holder is as easy as cutting out the parts and gluing them all together. To cut the plywood, you can use a jigsaw, bandsaw, scroll saw, router, or even a CNC if you have one. I recently got this Bosch jigsaw and was eager to try it out! There are 4 orbital-action settings for different blade strokes and a variable speed dial that lets you match the speed to whatever application you’re using – from smooth to aggressive to long, steady cuts. I also really liked the ergonomic handle, which was both comfortable and easy to maneuver.
First, I made a prototype that worked perfectly fine, but because my jig saw cuts weren’t absolutely identical, I wasn’t completely satisfied with it. The jigsaw itself was great, handled well, and gave me a lot of control and maneuverability, but anything short of perfection is irritating to us Type 1s so I quickly recreated the design digitally and brought it to my CNC to cut out. If you have a CNC, feel free to download the SVG file here.
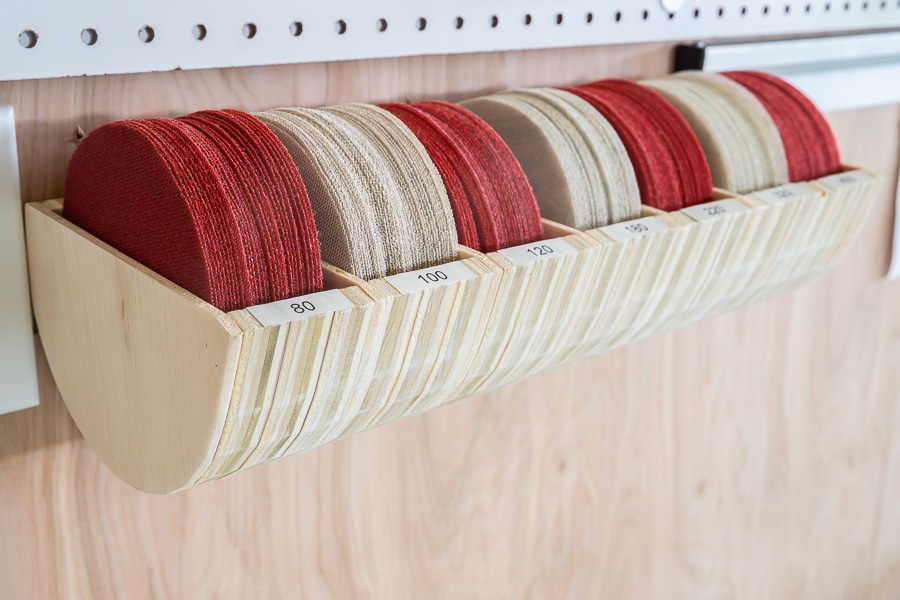
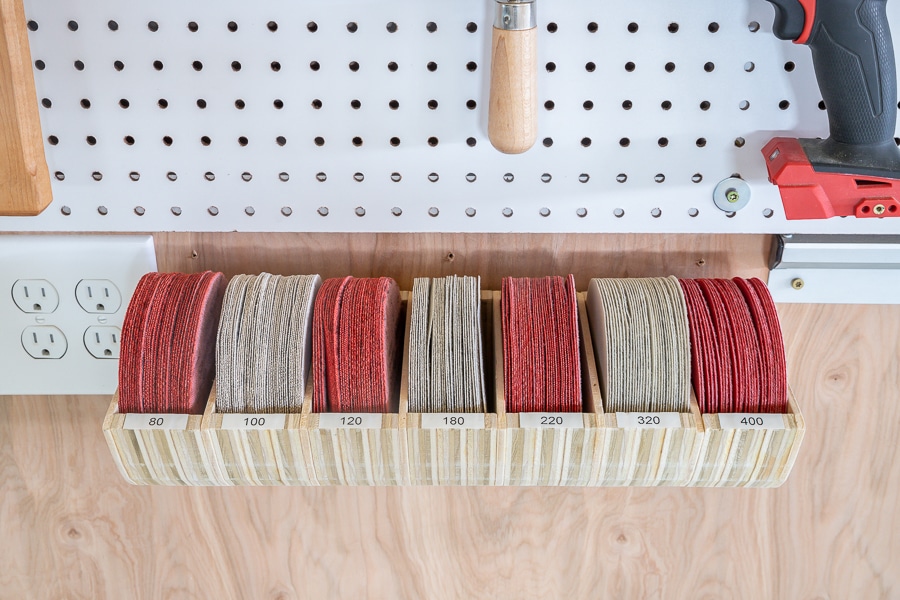
After all of the pieces were cut out, I glued them together and used painter’s tape to hold it until the glue dried. You can use clamps here if you have them. Each cubby is 3 stacks deep with a 1/4-inch divider in between. I made the organizer so that it had 7 cubbies total, holding my 80-, 100-, 120-, 180-, 220-, 320-, and 400-grit sanding discs. Of course, you can make this sandpaper organizer to fit your needs!
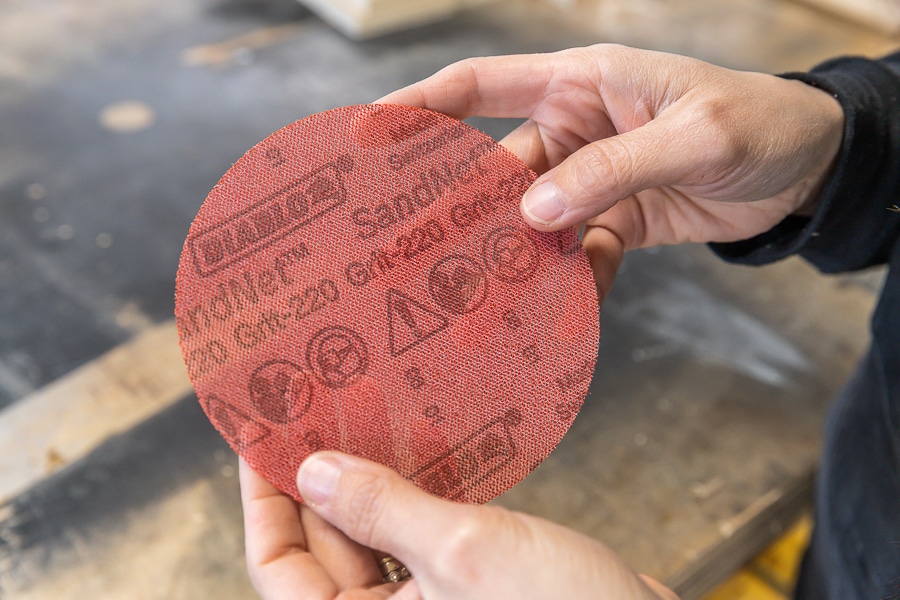
As a Diablo brand ambassador, I’m able to demo their new products before they hit the market. A few years ago, they introduced their SandNet™ sanding discs and they’ve been a staple in my workshop ever since. SandNet™ sanding discs last so much longer than a typical sanding disc because of Diablo’s revolutionary sanding technology. A typical sanding pad will lose its ability to sand because it gets ‘gunked up’ with dust and debris and the teeth get worn down. SandNet™ discs are literally a net so you can clear out that debris by shaking, rinsing, or vacuuming it out! Once cleaned, you can reuse them! So smart.
Once the glue was dry, I grabbed my random orbital sander, gave the organizer a good sanding (with Diablo SandNet™ discs of course!), and screwed it to the wall with wood screws. My new sander has vibration control – Bosch has created an exclusive suspension system that minimizes the vibration for better handling and comfort. There’s a 2-dust collection system: a micro-filter dust canister with a paper filter and a screw-off cap or vacuum hose connection. It definitely made the tedious task of sanding more palatable.
Finally, I labeled each cubby with a different grit sandpaper and loaded it up. I cannot tell you how happy this little scene makes me!
By the way, choosing Purebond plywood for the walls in my workshop was the best choice ever! I love seeing all that beautiful wood grain and everyone who comes in here comments on how great it smells! I also love that I’m able to screw things to the wall without having to locate a stud every time. For the really heavy stuff, I’ll screw into a stud, but for anything 30 lbs. or lighter, I can screw straight into the plywood without issue.
Want to see more workshop projects? Check out my DIY workbench with shelves, parallel clamp rack, workshop organization, and this quick and simple mobile workbench I built with my kids.
*Thank you for supporting the brands that support what we do! Big thanks to our sponsors, Diablo Tools and The Home Depot.


Hi! Love your geometric dining table. Great job!
Can you email me the plans? Appreciate it!
[email protected]
Your disc sandpaper organizer is much more user friendly than other horizontal shelf designs. NICE!
Just what I need
Hi! Would you share how and with what you attached the holder to the wall? Thanks
Hi! I just screwed it to the wall with wood screws.