A small and basic guest bathroom in the midst of a complete renovation gets a shower tray and pony wall installed and waterproofed.
Welcome back to our Guest Bathroom Renovation! If you’re just joining us, we’re in the middle of transforming our guest ensuite bathroom from BASIC to BEAUTIFUL (hopefully! Fingers crossed.) We’re mixing modern and traditional styles for a classic, timeless feel that features a stunning marble mosaic tile floor.
If you missed my previous posts on this guest bathroom renovation, catch up here:
- Part 1: Design Board
- Part 2: Demo Day!
- Part 3: Plumbing Rough-In and Floor Leveling
- Part 4: Insulation and Cement Board Installation
Here’s where we left off on our guest bathroom renovation:
So far, we’ve removed the toilet, sink, mirror, hardware, light fixture, shoe molding and baseboards, floor tile, shower stall, and insulation. Then we roughed in the plumbing, leveled the floor, hung insulation, and installed cement board on the floors and walls. You can watch the behind-the-scenes process on my Instagram stories.
TODAY’S TO DO LIST:
- Install shower tray, flange, and curb
- Waterproof shower tray and curb
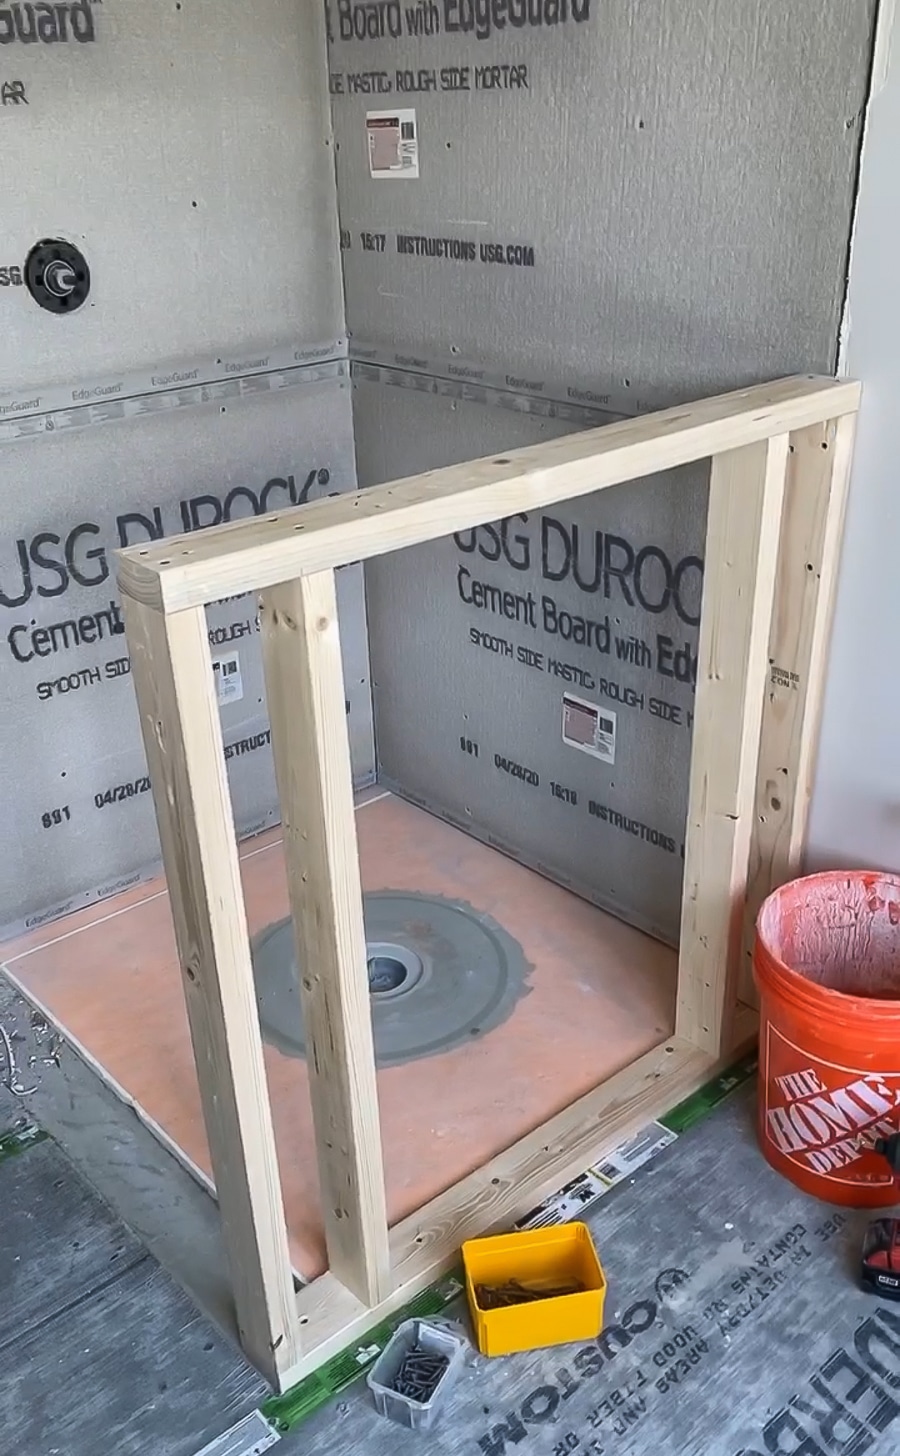
- Frame pony wall
- Don’t forget to add the toiletry niche (plan around tile size)
- 24-hour flood test
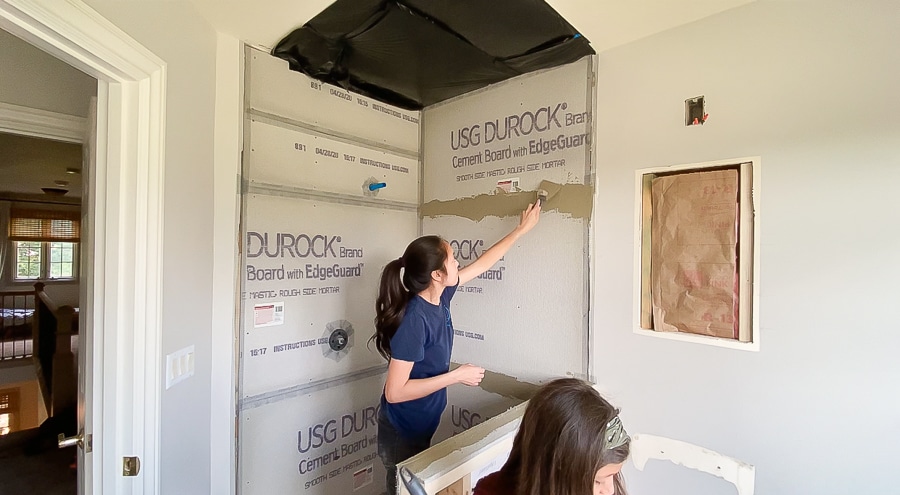
- Waterproof shower walls
Shower Tray, flange, and curb Installation
Tools and Supplies:
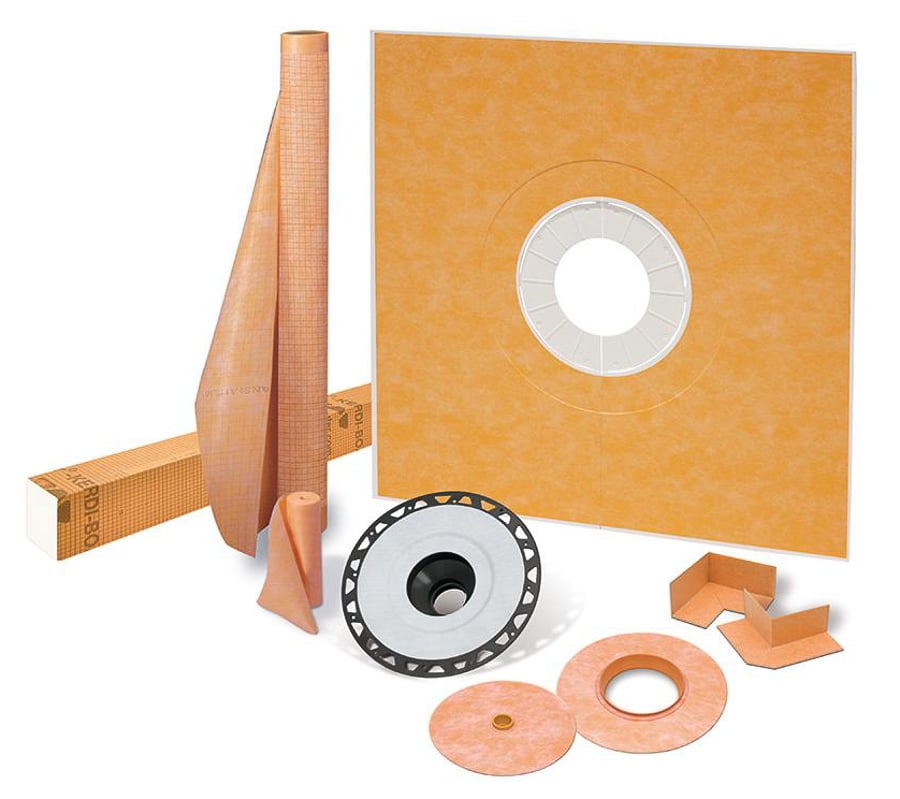
- Schluter Kerdi sloped shower tray
- Schluter Kerdi drain 2-inch flange
- Schluter Kerdi drain grate
- Schluter Kerdi waterproofing band
- Schluter Kerdi shower curb
- utility knife or pull saw
- 5-gallon bucket
- drill with mixing paddle attachment
- thinset mortar
- 1/4-inch x 3/8-inch square-notched trowel
- 1/4-inch x 3/16-inch V-notched trowel
- 4- or 6-inch drywall knife
After much research on countless shower pan options, I ultimately decided on using elements from the Schluter Kerdi shower system. There are some really great YouTube videos on how to build your own shower pan from scratch (like this one where my buddy Alex built a giant shower), but achieving the perfect slope to the drain intimidated me a bit. So then I looked into purchasing a store-bought shower pan like these, but since I wanted a tiled shower floor, that was a no-go for us.
I finally settled on using this shower tray by Schluter. It’s pre-sloped, comes in many different sizes, and can be cut to size or extended with dry pack mortar. The drawback to going this route was cost – the tray, flange, grate, waterproofing band, and curb was around $360 total. Definitely the more expensive option, but after weighing the cost savings vs. ease of installation, I felt that it was the right choice for me.
This tutorial video on how to install the Schluter Kerdi shower tray and flange was super helpful. I must have watched it a dozen times! Because Schluter’s video is so clear and my tutorial would be inferior and redundant, I won’t bore you with the details of my installation. I just followed the manufacturer’s directions and everything turned out great. I did find that this flush cut saw worked better than the utility knife, when cutting the curb and tray down to size.
To install the Kerdi flange, I had to cut a 5-inch diameter hole into our subfloor above the shower drain. Schluter provides a paper template for this, so I just traced the template and cut the hole out with my jigsaw. If you have a large enough hole saw, that would work even better. Then, my shower drain pipe had to be cut down in order to accommodate the Kerdi flange. I used this internal pipe cutter drill bit to cut the pipe from the inside. A Dremel rotary tool with a cutting wheel would have worked too.
After dry-fitting the shower tray and flange to ensure I had everything at the correct position and height, I was ready to install everything. I mixed up about 1/4 of the bag of thinset mortar, spread a thin layer on the subfloor with a square-notch trowel, and combed it with the notched side. Then I laid the shower tray down over the mortar and walked on it to embed it into the mortar. Finally, I installed the flange just as the tutorial video instructed and moved onto the shower curb.
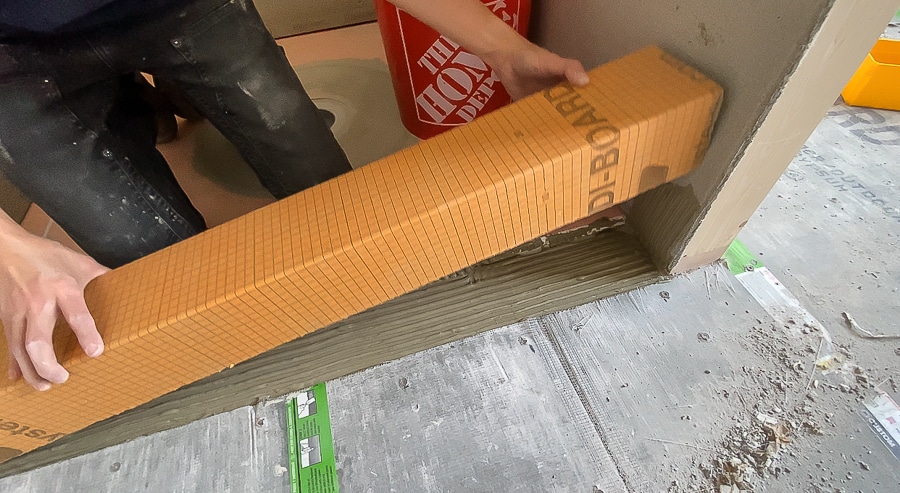
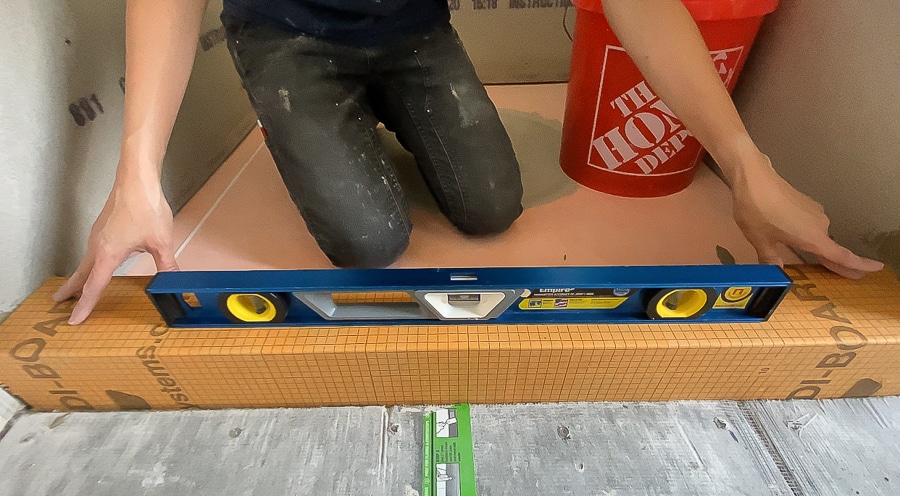
Again, I used the flush cut saw to cut down the shower curb to accommodate the size of our shower, then applied mortar to all points of connection, and embedded the curb into the mortar. Finally, I waterproofed the shower floor and curb with the Kerdi waterproofing corners and tape.
Framing the Pony Wall
It’s not uncommon to see a shower niche in the most visible area of a shower, but once you store shampoo bottles and other toiletries in there, I think it can look cluttered and messy. My buddy Jamison from Rogue Engineer built an incredible master bathroom and chose to hide their niche in a pony wall, which made so much sense! Why would you want your Head & Shoulders dandruff shampoo and crusty soap bar on full display?! Let’s keep those unmentionables neatly hidden away, thank you very much.
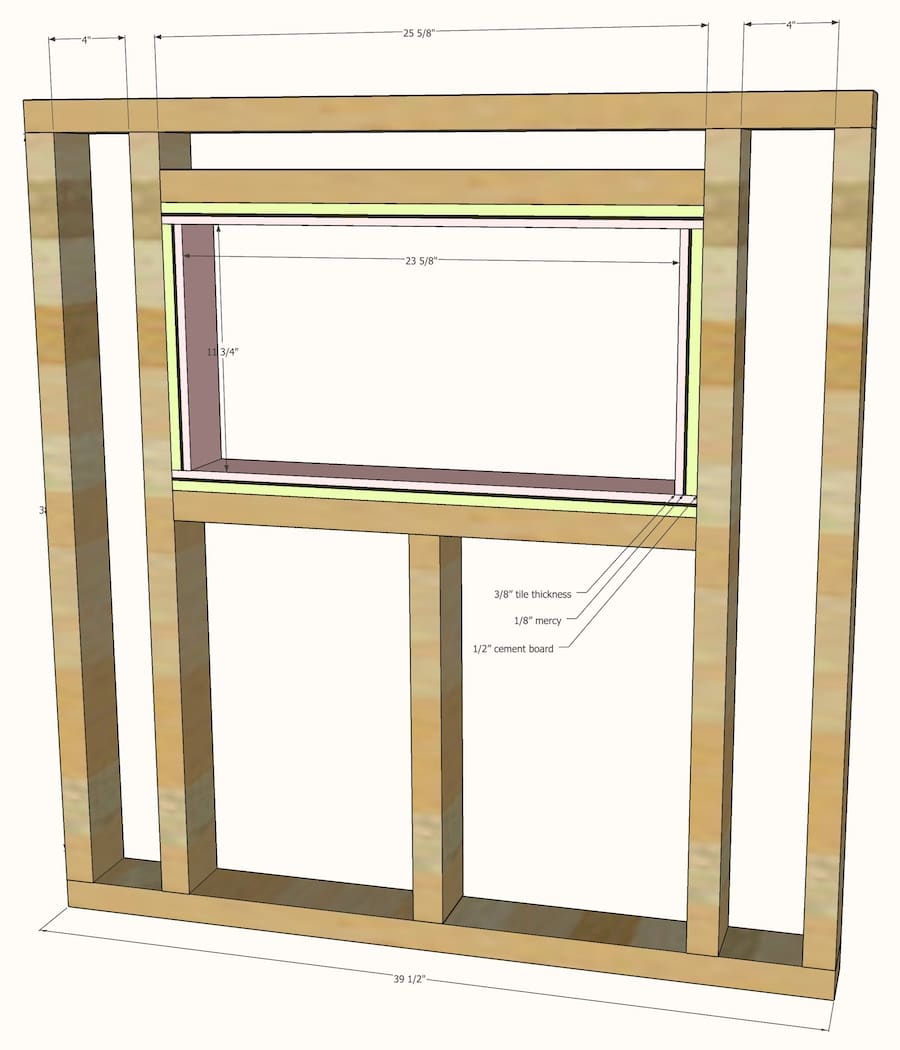
Because we’re using 12×24 large format tile for the shower walls, I wanted the back of the shower niche to accommodate one full tile, for a more seamless look. Our tile actually measures about 23 5/8 inches x 11 3/4 inches (it’s not actually 12×24) so I drew up a plan for our pony wall frame.
When planning for a shower niche, there are a few things to take into consideration: the thickness of the cement board (1/2″), the thickness for mortar and a little wiggle room (1/8″), and your tile thickness (ours is 3/8″).
Once the first two rows of wall tiles are installed, I’ll decide on the height of the shower niche so that all the grout lines line up. Also, the bottom of the shower niche framing should have a slight angle down, to allow for proper water diversion. Even though the sill will be sloped, water can still get behind the tile and pool, so you want to establish a little bit of a slope in the framework as well, to effectively divert the water down and into the drain.

Waterproofing the Shower Walls
Tools and Supplies:
- RedGard waterproofing membrane
- Paint tray, brush, and roller
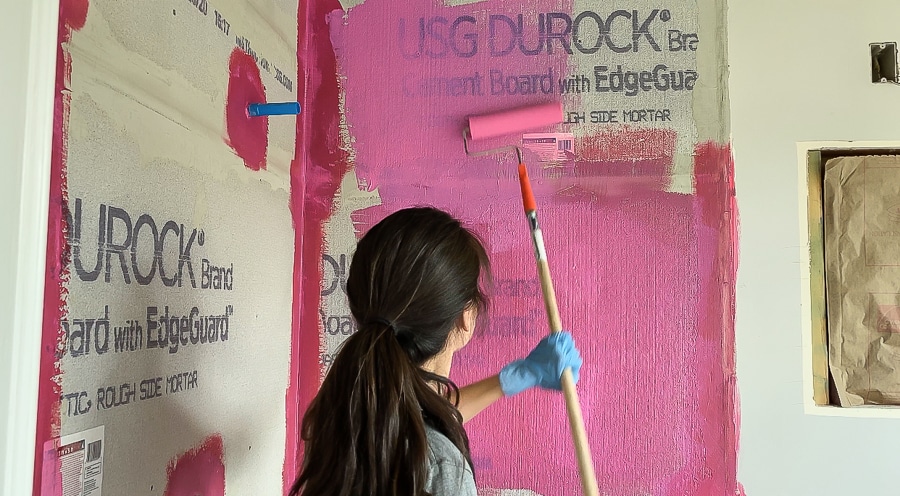
After the mortar had a day to set, it was time to waterproof the shower walls. I used RedGard waterproofing membrane, painting it on the shower walls with a brush and roller. I cut into the corners and edges with an angled brush, then used a paint roller to roll the membrane over the surface. After the first coat dried, I rolled another coat in the opposite direction (horizontal vs. vertical), filling any pin holes with a brush.
The fumes from this stuff is no joke! It was so bad, my eyes were stinging! I gave my only respirator to my friend working on the frontlines of the COVID-19 pandemic, so I just powered through the fumes with the windows open and fans blasting. Luckily, it didn’t take very long to roll on two coats. I ordered a new respirator, but sadly, it’s on backorder until 2021 due to the current shortage!
24-Hour Flood Test
I allowed the waterproofing membrane to dry overnight before conducting a 24-hour flood test. A flood test is done before tiles are laid, to help find any leaks that may appear in the shower installation. I plugged the shower drain, filled the shower pan with water, then marked the waterline. After letting the water sit overnight, I checked the water level.
Moment of truth…
The water level didn’t change! SUCCESS! Our shower pan is officially waterproof!
Next up: Electrical rough-in and TILING! Stay tuned and be sure to follow me on Instagram and Facebook for behind-the-scenes peeks.
Guest bathroom renovation MASTER CHECKLIST:
Demolition
Remove bathroom door temporarily to make room for demo?Turn off water and valves, empty pipes and tankRemove pedestal sink and toilet, plug holesRemove medicine cabinet, bathroom hardware, light fixtureRemove shoe molding and baseboardsDemo floor tile and cement boardDemo and remove shower stallRemove insulationClean up site
Plumbing Rough-In
Move shower valves to opposite wallsRepair shower drain- Install toilet
Electrical Rough-In
- Relocate outlet to adjacent wall, upgrade to 20-amp circuit?
- Replace overhead vanity light with wall sconces?
- Replace vent fan
- Add lighting in shower?
Framing
Demo shower wallsFrame pony wallDon’t forget to add the toiletry niche (plan around tile size)
Floors
Prime floors with underlayment primerLevel floors with self-leveling underlayment
Shower Installation
Check to ensure studs are plumb and even, shim if necessaryAdd insulationInstall cement board on floor and walls, tape and mud seamsInstall shower tray and curbWaterproof shower floor and curbWaterproof shower walls24-hour flood test
Walls
- Repair drywall where medicine cabinet used to be
- Molding?
- Paint
- Install baseboards and shoe molding
Tile
- Seal marble tiles
- Tile shower walls with 12×24 large format porcelain tiles
- Tile shower floor with marble basketweave tiles
- Tile bathroom floor with marble mosaic tiles
- Seal marble tiles again
- Grout and caulk
Vanity
- Install vanity (will it fit?)
- Order backup vanity?
- Install faucet and sink
- Hang mirror
Lighting
- Install wall sconces or overhead vanity light?
Miscellaneous
- Order and install glass shower door
- Install toilet paper holder, towel bar, towel ring, towel hook
- Add artwork and accessories




Very nice blog and interesting, thanks for sharing.
We are getting ready to do a shower with cement board walls and the Kerdi shower pan. A little nervous bc I’m only finding info on using the full Kerdi system so glad to see someone else that has used it with cement board.
Hi Debbie,
First, great job on the bathroom! I’m looking at re-doing my master bath, and I have a few questions when you have a minute.
1. Did you build the pony wall yourself, and, if so, how difficult was it?
2. What resource(s) did you use to get the tiling instructions.
3. Did you install the shower glass yourself? If so, how hard was it, and were there resources you used for those instructions.
Thanks, and again, the bathroom looks amazing!
Mike
Hi Mike,
Thanks for the questions and the kind words! Yes, we did everything ourselves, except plumbing, electrical and the shower glass installation. Building the pony wall was very easy! We learned everything via Google and YouTube university – ha! Here’s a video we made for this project: https://youtu.be/AhSJBXLuhjY. We also just published a brand new video on our recent master bathroom remodel on my YouTube channel here: https://youtu.be/kwxGRXjBVhc. Hope that helps!
We are getting ready to remodel our bathroom and are concerned about some comments about foam shower pans having an echoing sound? Any issues with this?
Thanks Kathy
I’m curious about the dimensions of the bath and shower. Do you have a floorplan that shows it?
Did you use glass on top of ponywall?