Electrical rough-in for a small bathroom undergoing a complete renovation. From basic to beautiful in just a few short weeks!
Welcome back to our Guest Bathroom Renovation! If you’re just joining us, we’re in the middle of transforming our guest ensuite bathroom from BASIC to BEAUTIFUL (hopefully! Fingers crossed.) We’re mixing modern and traditional styles for a classic, timeless feel that features a stunning marble mosaic tile floor.
If you missed my previous posts on this guest bathroom renovation, catch up here:
- Part 1: Design Board
- Part 2: Demo Day!
- Part 3: Plumbing Rough-In and Floor Leveling
- Part 4: Insulation and Cement Board Installation
- Part 5: Shower Tray, Pony Wall, and Waterproofing
Here’s where we left off:
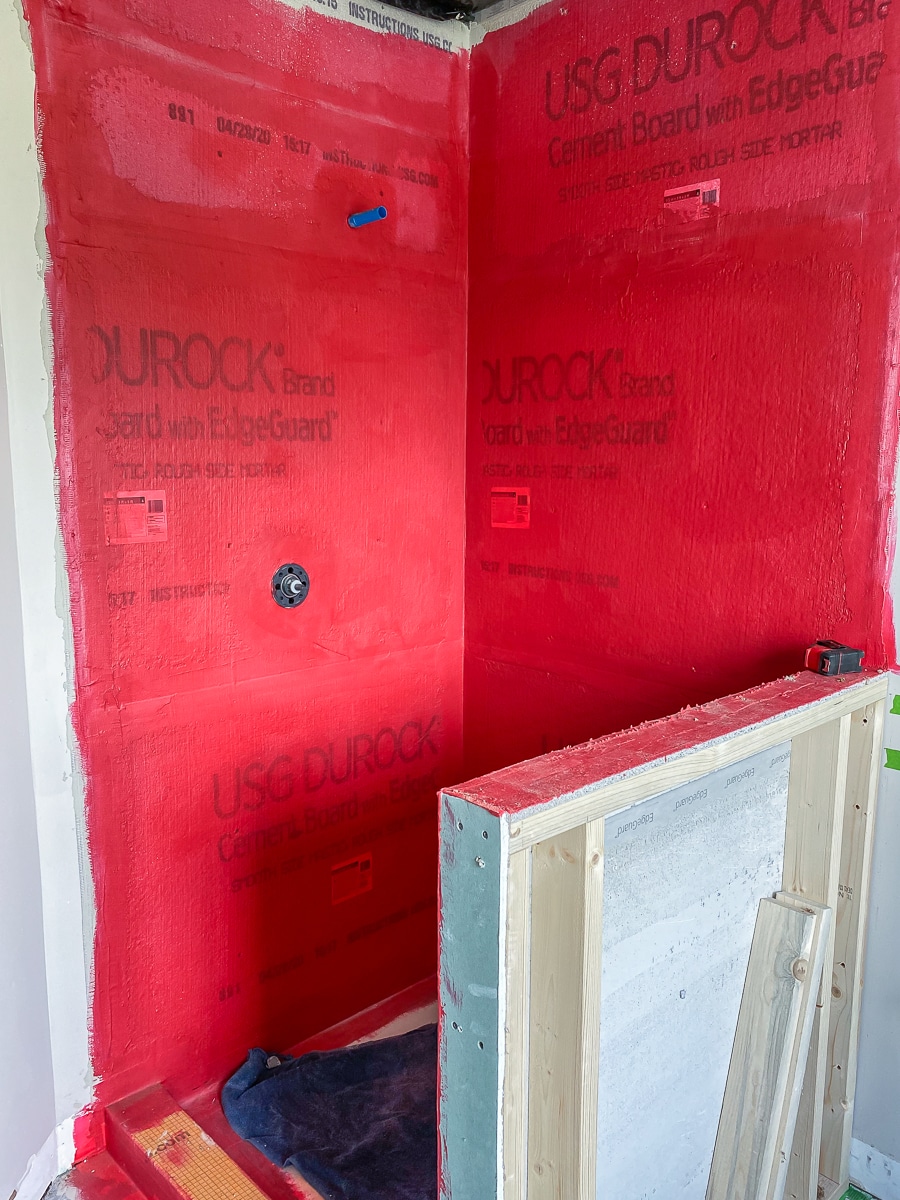
So far, we’ve removed the toilet, sink, mirror, hardware, light fixture, shoe molding and baseboards, floor tile, shower stall, and insulation. Then we roughed in the plumbing, leveled the floor, hung insulation, and installed cement board on the floors and walls. After that, we installed the shower tray, curb, and pony wall, and waterproofed the entire thing! You can watch the behind-the-scenes process on my Instagram stories.
TODAY’S TO DO LIST:
- Electrical rough-in
- Replace overhead vanity light with two sconces?
- Relocate the power outlet to the adjacent wall, upgrade to 20-amp circuit
- Replace the vent fan with a vent fan/light combo and move it above the shower
- Seal marble tiles
Electrical Rough-In
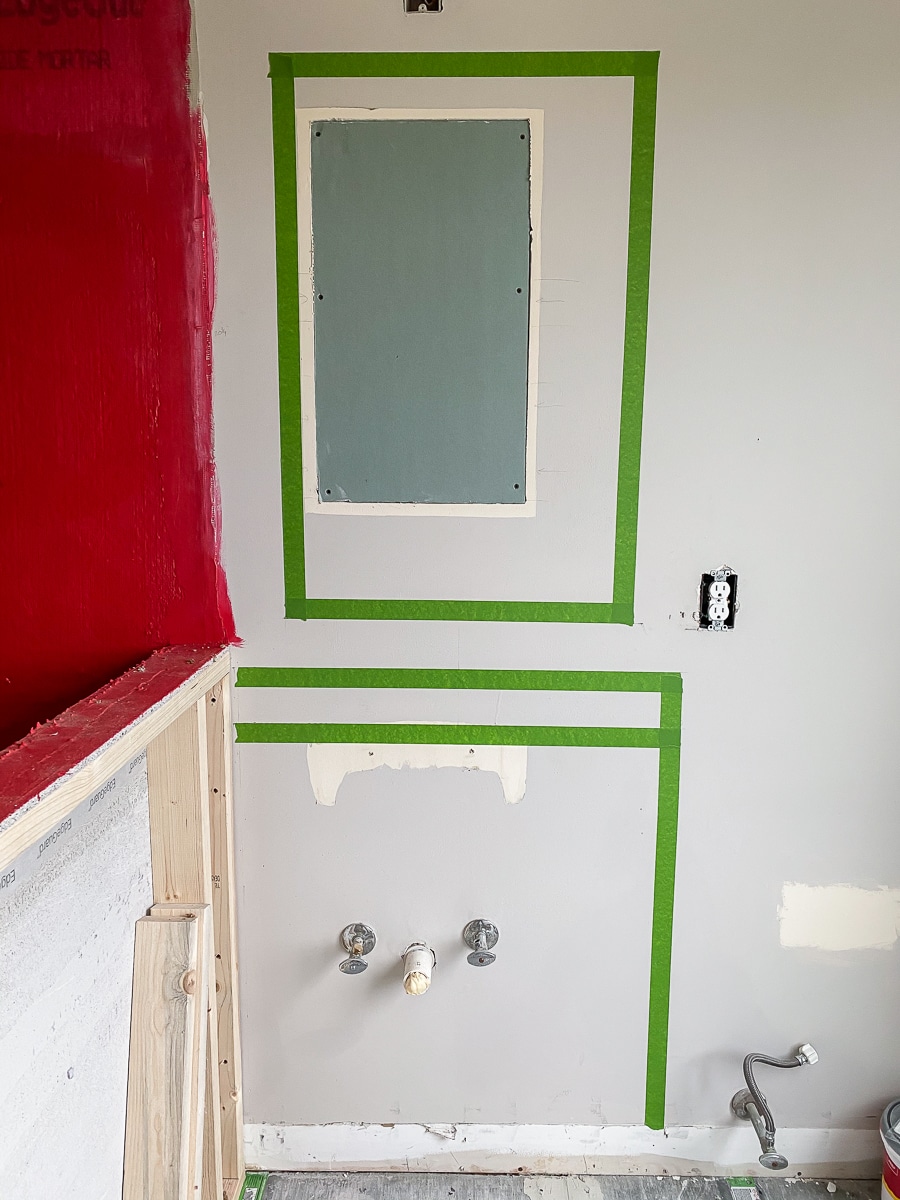
In my initial design board, I wanted to replace the overhead vanity light with a sconce on each side of the mirror. Directionally, I think the light is more flattering coming from both sides, rather than overhead. But I had a sneaking suspicion that I wouldn’t have enough room for the two sconces on the sides of the mirror, so I mapped it out after the shower tray and pony wall were installed. I used painter’s tape to help me visualize the size and location of the vanity sink and mirror.
Sadly, I realized (reluctantly) there just wouldn’t be enough space for two sconces, so I had to revert to my backup plan: stick with the overhead vanity light. Womp womp. I’d ordered this vanity light weeks ago, just in case the sconces didn’t pan out. Oh, well. You win some, you lose some.
There was a power outlet in the wall we demo’d, so I had our electrician move the outlet to the adjacent wall. I’m hoping the location of the outlet looks good – it’s hard to tell if the placement is awkward without seeing it in relation to the toilet, vanity, and mirror. It’s also entirely possible I’m overthinking things. We shall see…
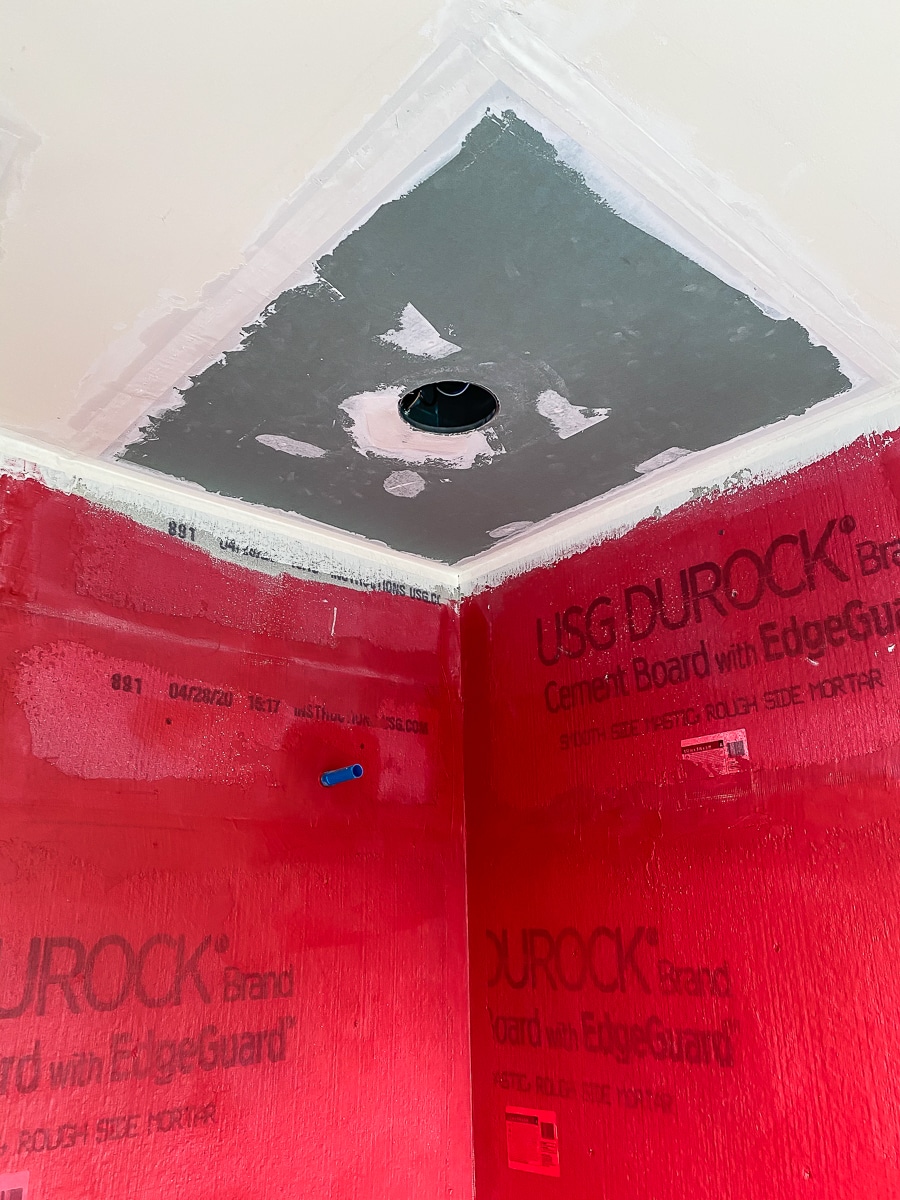
The exhaust fan was previously located outside of the shower stall, so I had our electrician move it directly above the shower. My friend Sherry from Young House Love swears by this vent fan + light combo (they’ve used it in every bathroom they’ve remodeled, I think) and it’s pretty stinkin’ awesome. It’s a vent fan with a recessed LED light, but it looks like a standard recessed light. You’d never know it was a vent! So cool, right?! Pretty sure, I’ve leveled up in adulthood, being this excited over a bathroom exhaust fan.
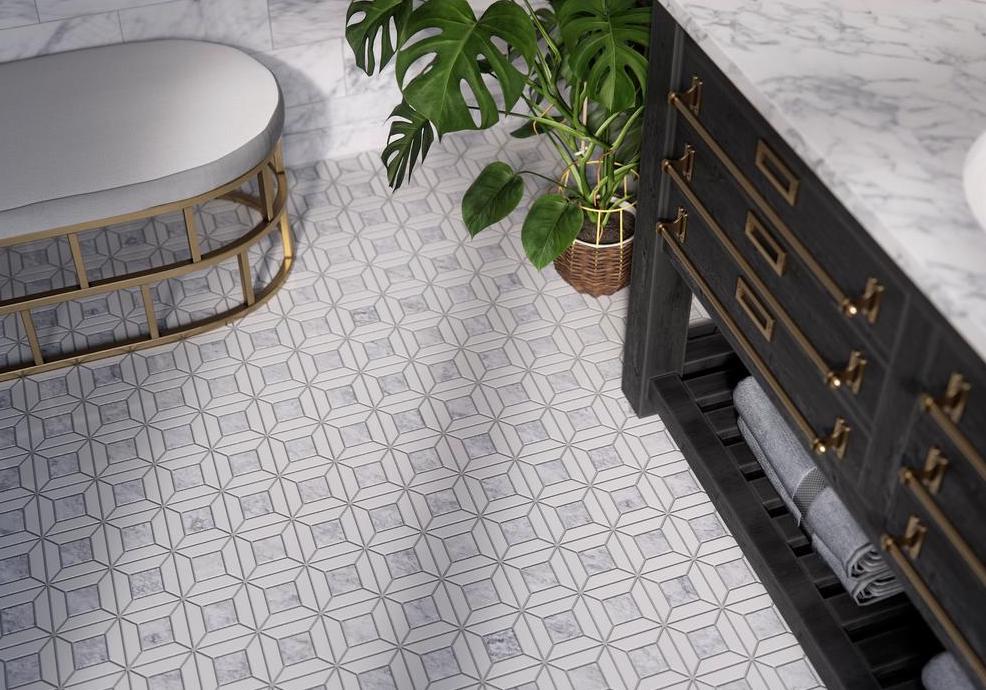
While the electricians were working in the bathroom, I was out in the workshop sealing all of the marble tiles. I spread out a plastic drop cloth and laid all of the tile on the workshop floor. The marble mosaic tile was such a splurge, but I just love it so much. I predict that I’ll use our guest bathroom more than our own master bathroom after all is said and done. I’m just SO. IN. LOVE with this stunning tile.
I used a small foam roller to apply the penetrating sealer. I just followed the directions on the back of the bottle: roll it liberally on the stone, let it sit and penetrate for 3-5 minutes, then wipe off the excess with a soft, white cloth. Easy peasy. After the tile is installed, I’ll seal it again, before I grout.
The Big Vanity Swap
In other news, I had to rethink my vanity choice as well – it was just too wide for the space. I was hoping I could ‘borrow’ space when we demo’d the old shower stall, but alas, no such luck. So it’s back to the drawing board!
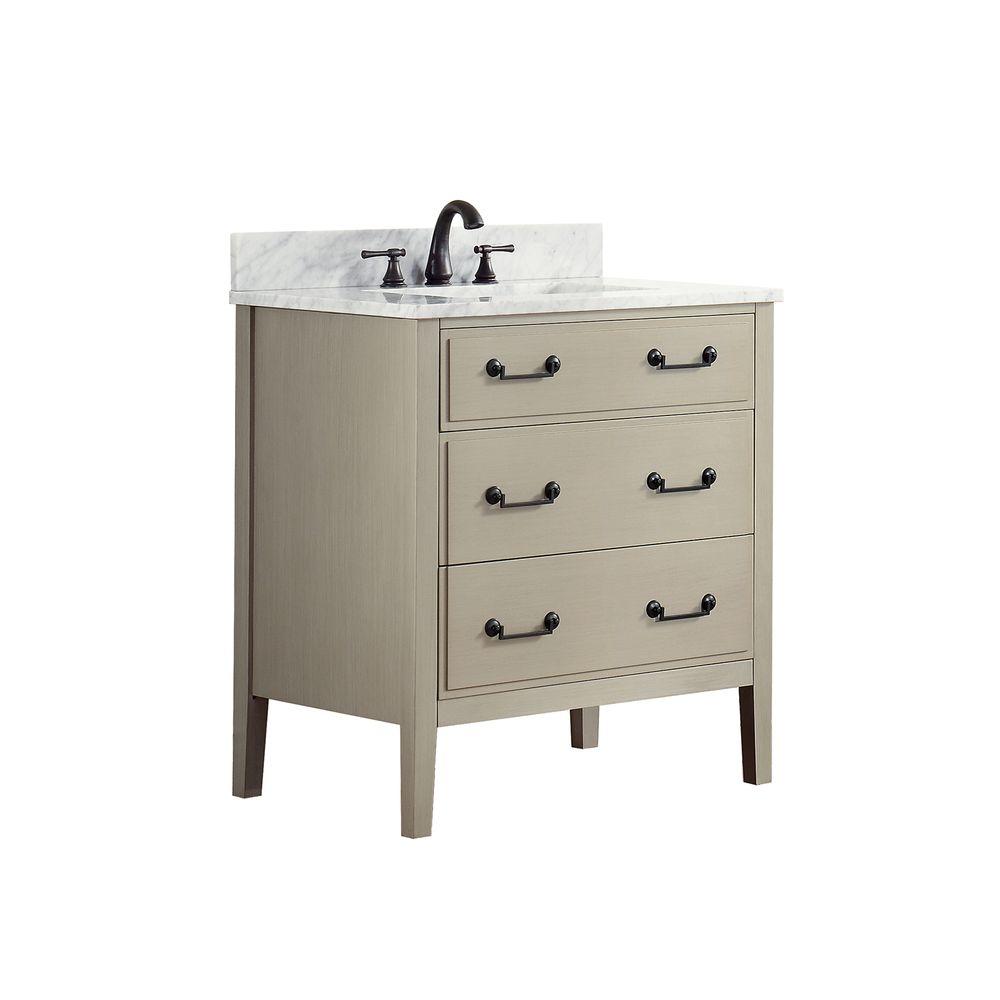
The too-wide vanity was actually a blessing in disguise because I found one that I liked even more! I knew I wanted a wood-toned vanity with pretty legs (as opposed to a built-in cabinet), as if it were a piece of furniture. Since it’s a guest bathroom, we didn’t need a ton of storage, but some storage for our guests would be appreciated. After weeks of searching, I found THE ONE.
Feast your eyes. Isn’t she beautiful?! I love the shape, the legs, the storage, the marble top, the warm, taupe color, and it’s the perfect size! I’ll have to change the finish on the drawer pulls, but it’s not a dealbreaker. And the holes in the vanity top will fit our vintage polished nickel widespread faucet perfectly. Success!
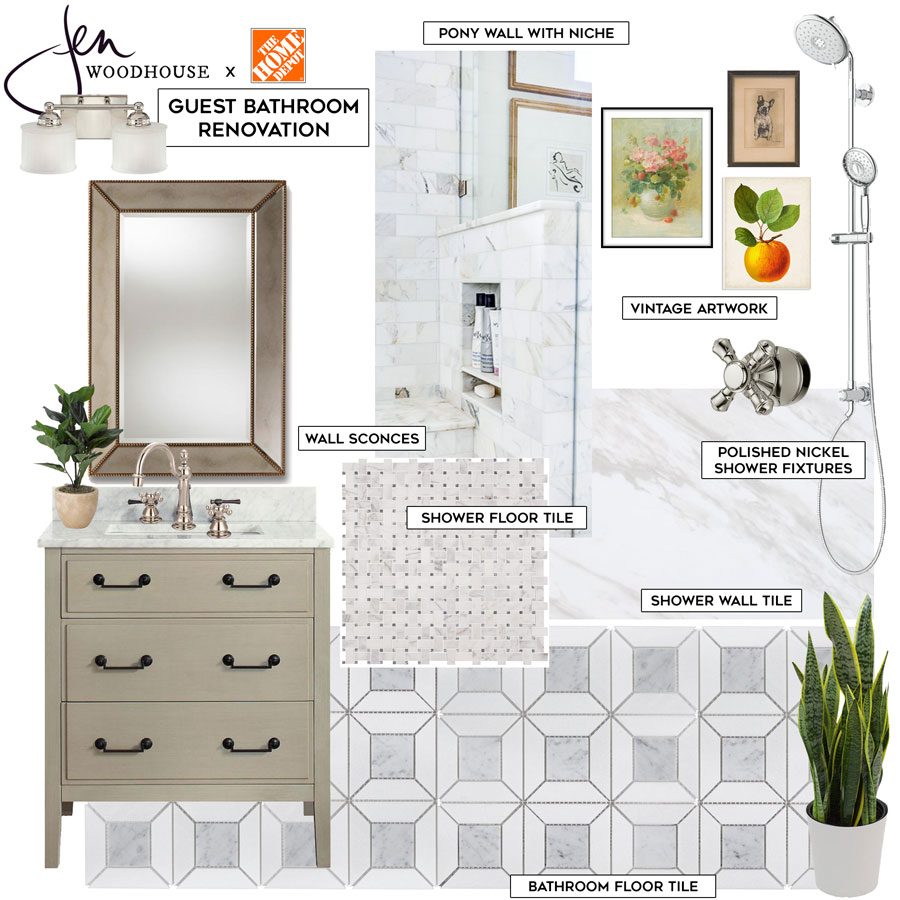
Since a couple of the elements in my original design has changed, I updated my design board to reflect those changes.

Upcoming To Dos
Today was pretty low-key on the renovation front, but it’s the calm before the storm. Next up is TILING! I’ll tile the shower wall with this porcelain tile, then build out the shower niche, and finish tiling the rest of the wall. Then I’ll move onto tiling the shower floor with this classic marble basketweave, and finally, the bathroom floor with my favorite marble tile ever.
Thanks for following along – see you again soon! After our tiling extravaganza, the end will soon be in sight! Stay with me, it’s gonna be good.
Guest bathroom renovation MASTER CHECKLIST:
Demolition
Remove bathroom door temporarily to make room for demo?Turn off water and valves, empty pipes and tankRemove pedestal sink and toilet, plug holesRemove medicine cabinet, bathroom hardware, light fixtureRemove shoe molding and baseboardsDemo floor tile and cement boardDemo and remove shower stallRemove insulationClean up site
Plumbing Rough-In
Move shower valves to opposite wallsRepair shower drain- Install toilet
Electrical Rough-In
Relocate outlet to adjacent wall, upgrade to 20-amp circuit?Replace overhead vanity light with wall sconces? No – kept overhead light.Replace vent fanAdd lighting in shower?
Framing
Demo shower wallsFrame pony wallDon’t forget to add the toiletry niche (plan around tile size)
Floors
Prime floors with underlayment primerLevel floors with self-leveling underlayment
Shower Installation
Check to ensure studs are plumb and even, shim if necessaryAdd insulationInstall cement board on floor and walls, tape and mud seamsInstall shower tray and curbWaterproof shower floor and curbWaterproof shower walls24-hour flood test
Walls
- Repair drywall where medicine cabinet used to be
- Molding?
- Paint
- Install baseboards and shoe molding
Tile
Seal marble tiles- Tile shower walls with 12×24 large format porcelain tiles
- Tile shower floor with marble basketweave tiles
- Tile bathroom floor with marble mosaic tiles
- Seal marble tiles again
- Grout and caulk
Vanity
Install vanity (will it fit?) No – ordered backup vanity- Install faucet and sink, switch out pulls
- Hang mirror
Lighting
- Install overhead vanity light
Miscellaneous
- Order and install glass shower door
- Install toilet paper holder, towel bar, towel ring, towel hook
- Add artwork and accessories


Thank you for sharing the step by step guest bathroom renovation with wood.
I found this today and sadly there were five other parts of the renovation process which i have already missed.
Thanks for the link so that i cam catch up with.
Your post is a great inspiration to me.
Let’s hope for the best.
Thank you for the showing your step by step bathroom renovation.. I need to do this to by bathroom. It looks like a lot of work, but looks good. I have inspiration now.
Wow! this is so inspired. I’m just getting into carpentry myself, i’ve made a dresser for myself and a bedside table over the quarantine. but now I think i’m ready to take on even more exciting and challenging wood work! wish me luck!
It is a beautiful article stating about the quest bathroom renovation electrical rough . Anyone searching for same topic may find their shelter here. I am sure many people will come to read this in future. Great blog indeed, will visit again future to read more!!
I loved your blog and thanks for publishing this content about guest bathroom renovation part-6 electrical rough in!! I am really happy to come across this exceptionally well written content. I like how you have researched and presented these exact points so clearly. Thanks for sharing and look for more in future!!
Your article is quite helpful! I have so many questions, and you have answered many. Thank you! Such a nice and superb article, we have been looking for this information about guest bathroom renovation part 6 electrical rough in . Indeed a great post about it!!
These are some great information that you have shared here about the bathroom renovation part 6 electrical rough. I really loved it and thank you very much for sharing this with us. You have a great visualization and you have really presented this content in a really good manner.
This is a brilliant post, thank you for sharing about guest bathroom renovation part 6 electrical rough and high rise homes. We always tend to change something or the other in our house, thanks for this great advice.
Thanks to the author for sharing such a great post. The article was very well written and providing great info about guest bathroom renovation part-6 electrical rough in. It can be really great for people like me who are looking for grabbing more knowledge about it.
This is a very informative blog, thanks for sharing about the guests bathroom renovation. It will help a lot, these types of content should get appreciated. I will bookmark your site; I hope to read more such informative contents in future
This is an awesome article stating about the bathroom renovation in detail. They are must read for many. This article is a good one to look at. I like how you have researched and presented these exact points so clearly.Lots of valuable information for everyone.
This is really appreciated that you have presented this data over here, I love all the information shared. It will be very helpful to understand the content on guest bathroom renovation part-6 electrical rough-in . Indeed a great post to share!! Loved it…