A quick and easy tutorial on how to hang batt insulation for beginners.
We’re in the midst of a guest bathroom renovation and the room is starting to come back together. It always gets worse before it gets better, right? That’s what I keep telling myself anyway. When we demo’d the walls and the shower stall, we tore out all the old insulation. Most of it was loose insulation that just fell out and made a mess everywhere, so today, it’s insulation day!
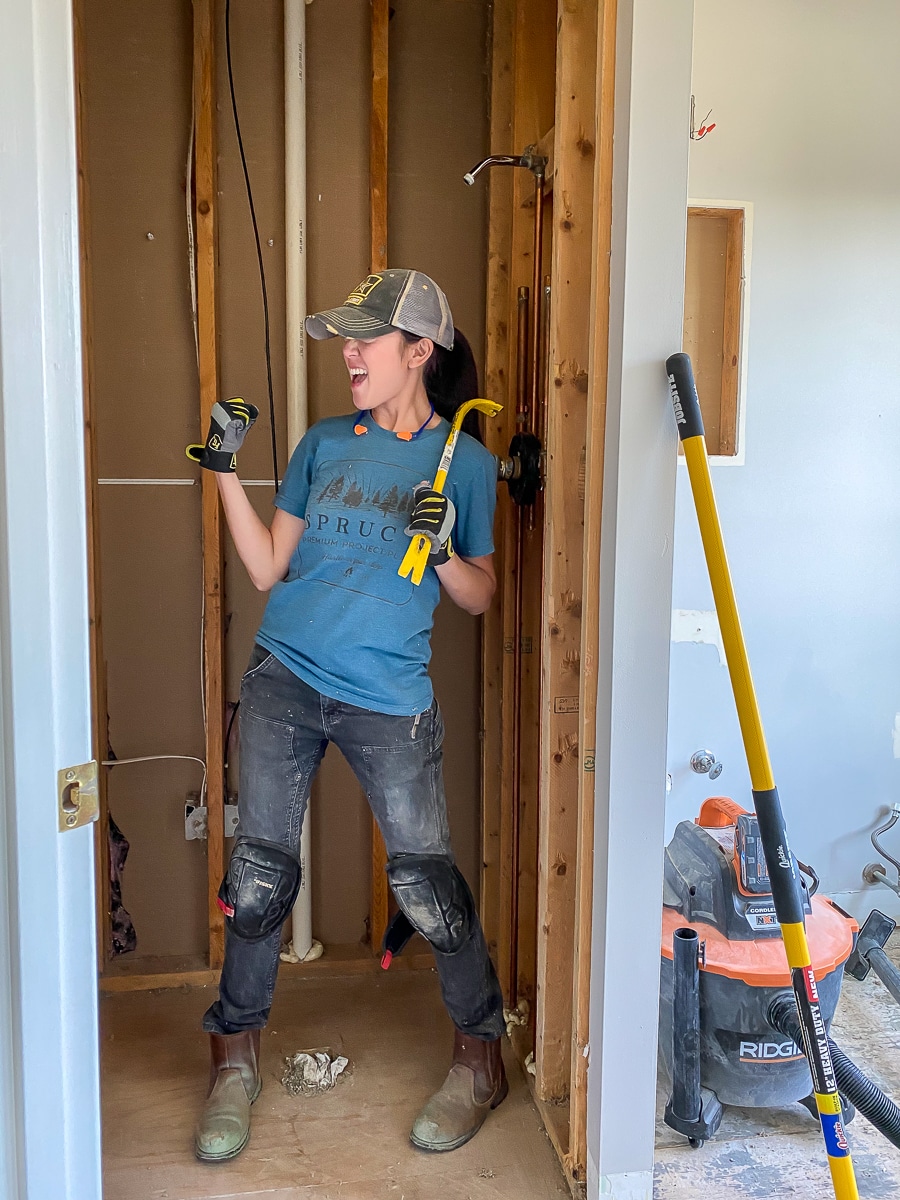
We’re hanging insulation the easy way with the help of Arrow Fasteners. If you recall, I’ve partnered with Arrow Fastener to bring you several DIY projects this year! Did you see the DIY Pin Board I made a few months ago? We even filmed a video!
 How to hang insulation
Tools:
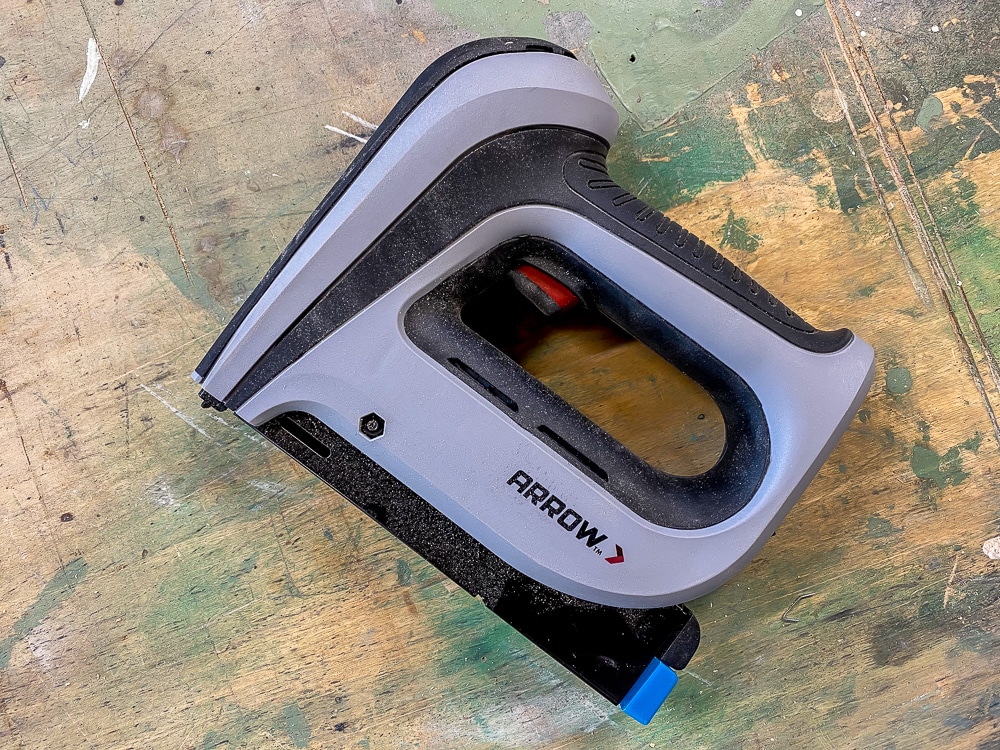
- Arrow cordless staple gun
- Arrow hammer tacker
- 1/4-inch staples
- Scissors or utility knife
- Safety glasses
- Dust mask
- Gloves
Supplies:
- R-13 batt insulation (for walls)
- R-38 batt insulation (for attics)
 If you’ve never hung insulation before, you’re going to be amazed at how easy it is! I tried out two different Arrow products for this project and am happy to report both worked beautifully! You really could get away with just using the staple gun, but the hammer tacker is nice when you need just a little more reach. I found that I had much more control with the staple gun, but for those harder to reach places, the hammer tacker was a great tool to have. And it was fun to use!
 Insulation R-Value: What Does It Mean?
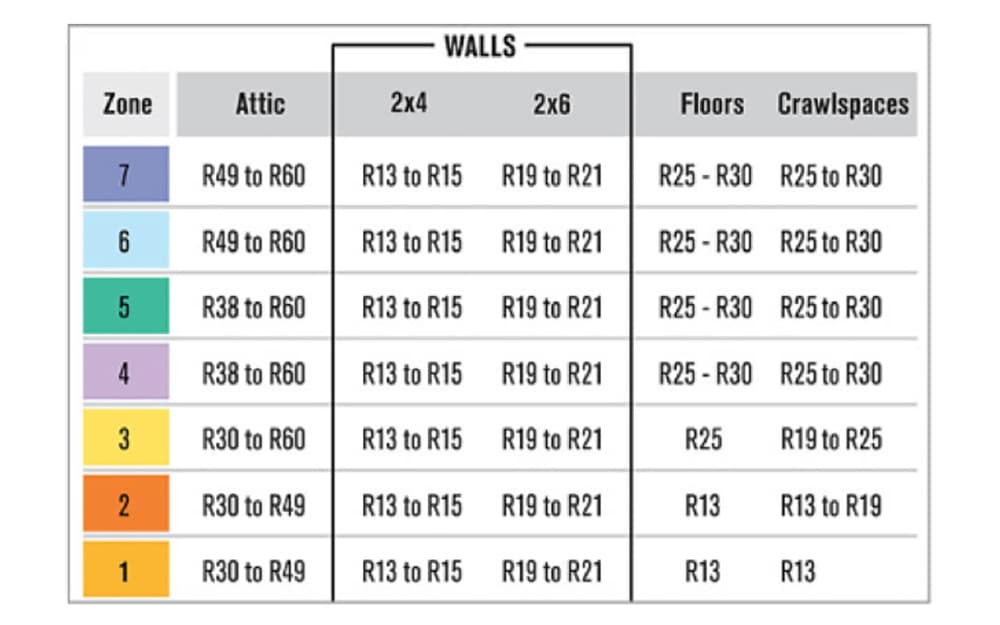
The R-value stands for “resistance to heat flow.” The higher the R-value, the greater the insulation performance. For our area, R-13 batt insulation is recommended for interior walls and R-38 for attics, since we need the extra shield from the extreme heat and cold coming from our attic. You’ll want to check your local code for the insulation recommendations in your zone. Here’s a handy chart.
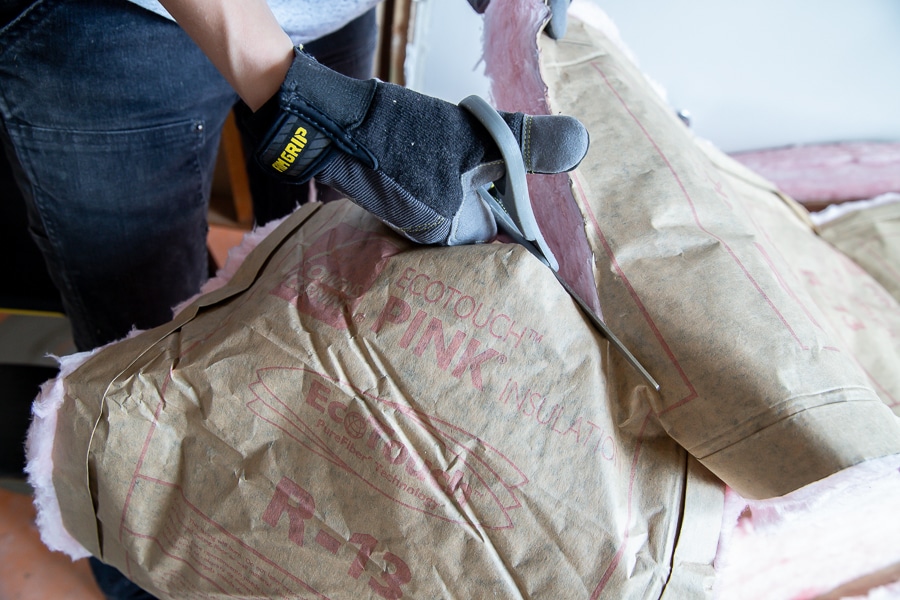
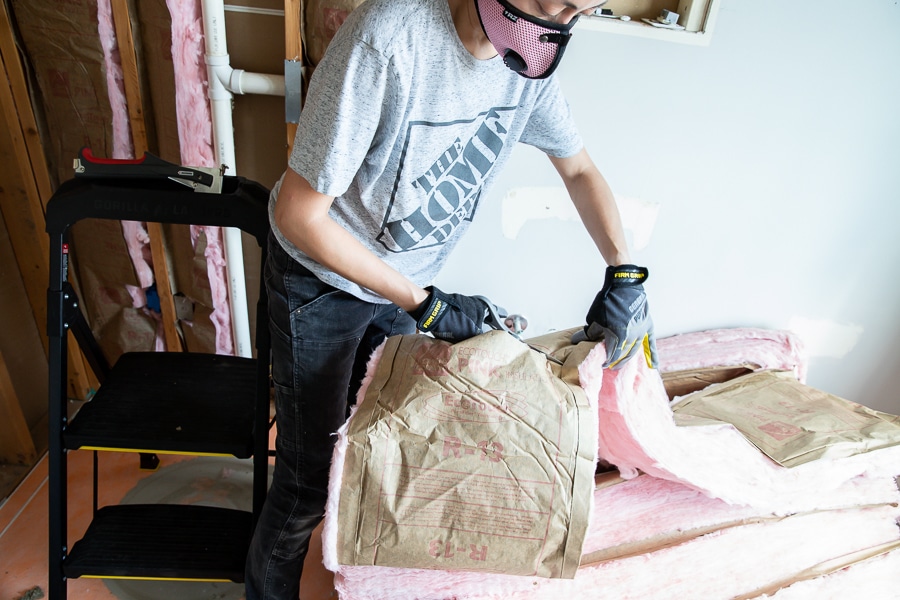 The insulation will fit into the empty cavity between the studs. You’ll want to cut it to fit, which is what I’m doing here. You can use a utility knife or scissors. This stuff looks and smells like cotton candy, it was the weirdest thing!
 Once you cut the panel to fit, carefully place it into the stud cavity. Try not to compress the insulation; you want it as fluffy as possible. Cut the insulation so that it fits around vents, outlets, and any other obstructions.
Let’s talk safety gear. When handling this material, you definitely want to wear a dust mask and gloves (which is what I’m doing here), as well as safety glasses and long-sleeves (those safety glasses are doing so much good on top of my head, aren’t they?) because this stuff can be itchy if it gets on your skin. Luckily, I didn’t have much insulation floating about that it irritated my eyes or skin, but if you’re sensitive to these things, a dust mask, gloves, long sleeves, and safety glasses are what’s recommended.
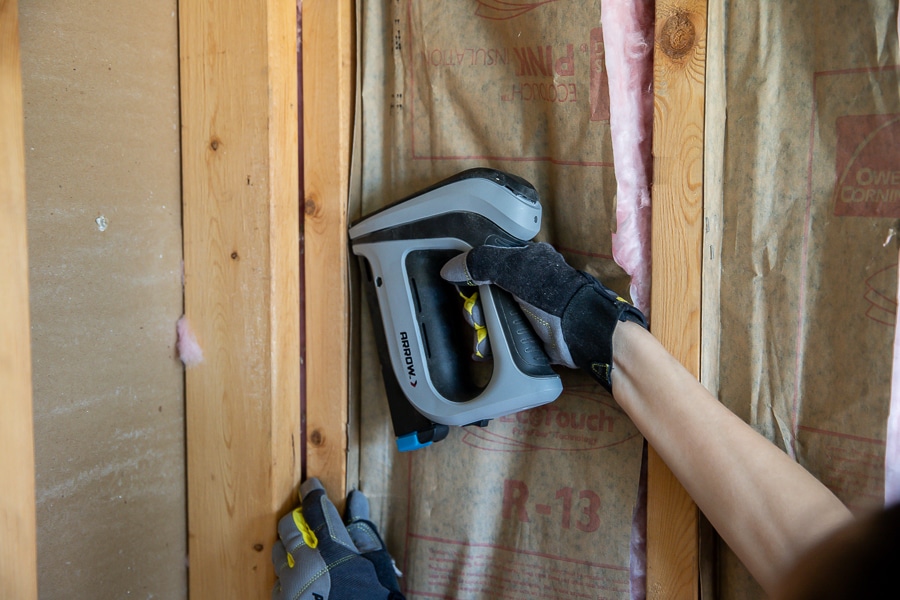
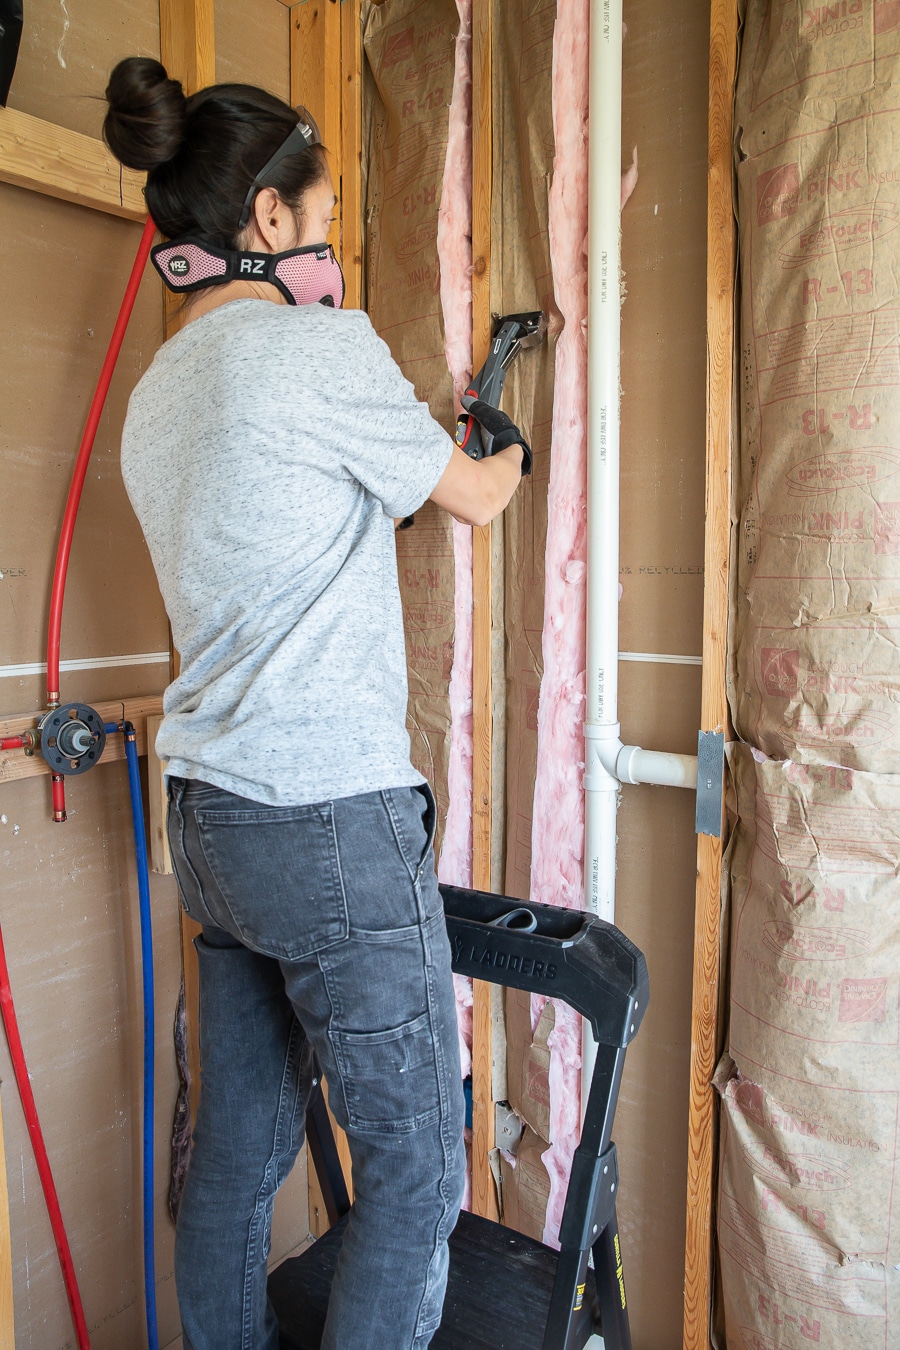 This insulation has a paper “staple strip” on both sides of the roll, so you can position the strip against the stud and staple it securely. You’ll want to staple the strip to the side of the stud, rather than the front. You can also friction fit the insulation, however I chose to secure it to the studs with staples.
 I love this cordless staple gun. It’s rechargeable and so easy to use! I prefer to use a power stapler, rather than a manual one because I have very little hand strength! I had a lot more control with the staple gun than with the hammer tacker.
 But the hammer tacker sure was fun to use – it’s great at getting a little aggression out! I used the hammer tacker for harder to reach areas – the length of the tool helps when you need just a little more wingspan. This tool is also ideal for fastening roofing underlayment because you can just hammer away across the field and get the job done in lightning fast speed.
 Since our attic is above this room, we also insulated the ceiling. We used the recommended R-38 insulation. We patched the drywall in the ceiling, then climbed into the attic and dropped the insulation in between the joists. And that’s all there is to it! Can you believe how easy that was? We’re one step closer to getting our bathroom back up and running! You can see all of our progress so far here:
Guest Bathroom Renovation
- Part 1: Design Board
- Part 2: Demo Day!
- Part 3: Plumbing Rough-In and Floor Leveling
- Part 4: Insulation and Cement Board Installation
If you’re in the market for either of these tools, be sure to check out ArrowFastener.com.
*This post is in partnership with Arrow Fastener and contains affiliate links. All efforts and opinions are my own. To read my full disclosure policy, please click here.


As a former homebuilder we always stapled insulation to the front of the studs. Then covered with clear plastic sheeting. Stapling on the inside of the studs compresses the insulation and reduces the R value. It’s a personal preference
Is there a code on which way side or front of stud I prefer the face of the stud we live in Virginia Beach Virginia
Staple the paper strip to the face of the stud facing the room, not to the inside of the stud as pictured