We’re rolling right along in our primary bathroom renovation. We’ve completed demo, framing, rough-in plumbing, and rough-in electrical so we’ve got tons of updates to share today! Also in this post, we’ll talk about what a curbless shower is and what its benefits are, so if you’re curious about them, read on!
If you’re just joining us, you can check out our master bath renovation design plans here, along with our timeline and bathroom remodel cost.
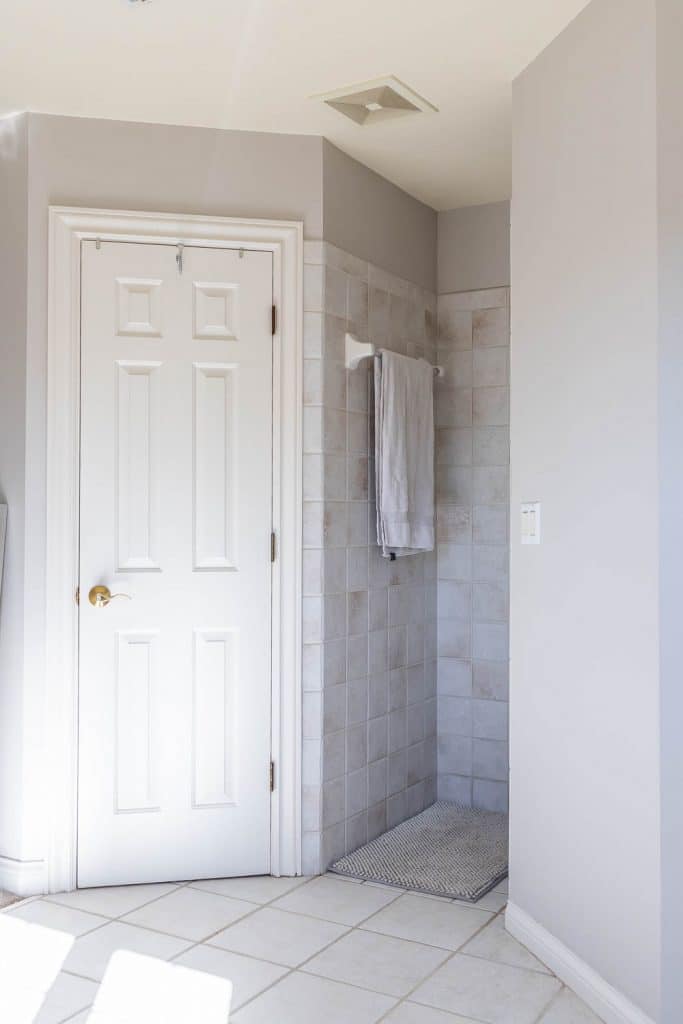
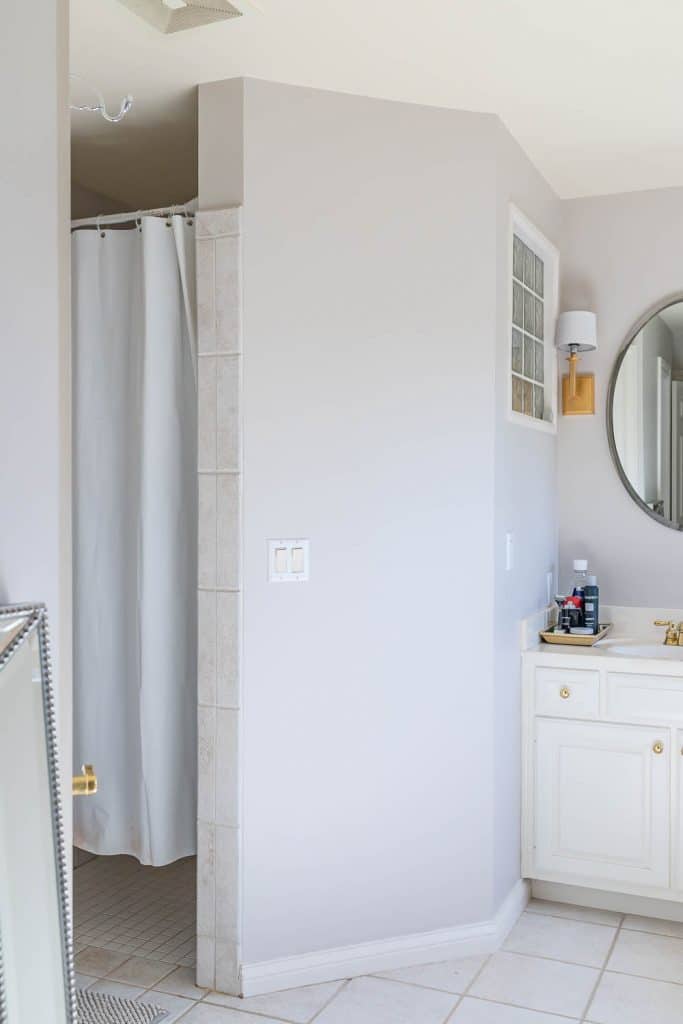
Before I show you what the bathroom looks like now, let’s take a look at what we started with:
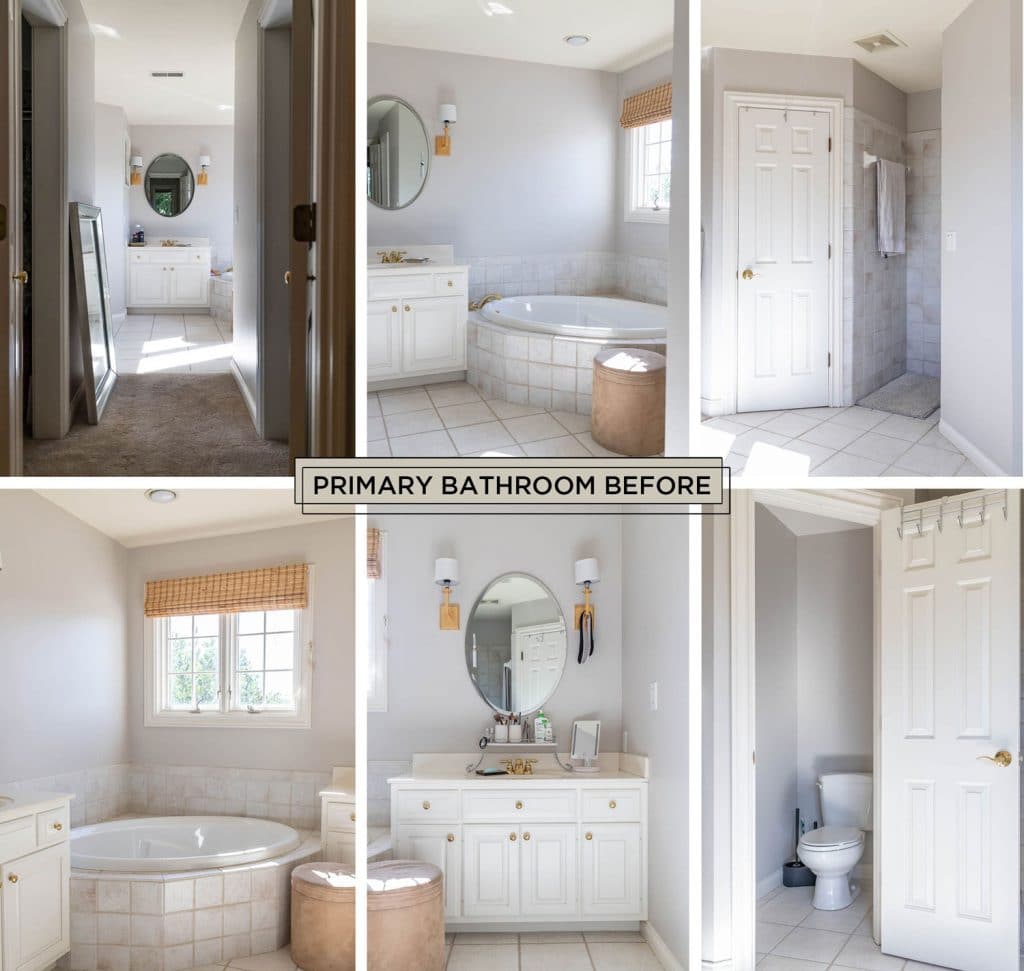
So many angled walls! Gotta love 90s design. Below is the view looking at the water closet and shower entrance:
Water closet, shower BEFORE Shower BEFORE
And here is what that same space looks like after demo. Taking down those angled walls really opened up and brightened the bathroom! I’m happy we’ll be able to take advantage of all that beautiful natural light now!
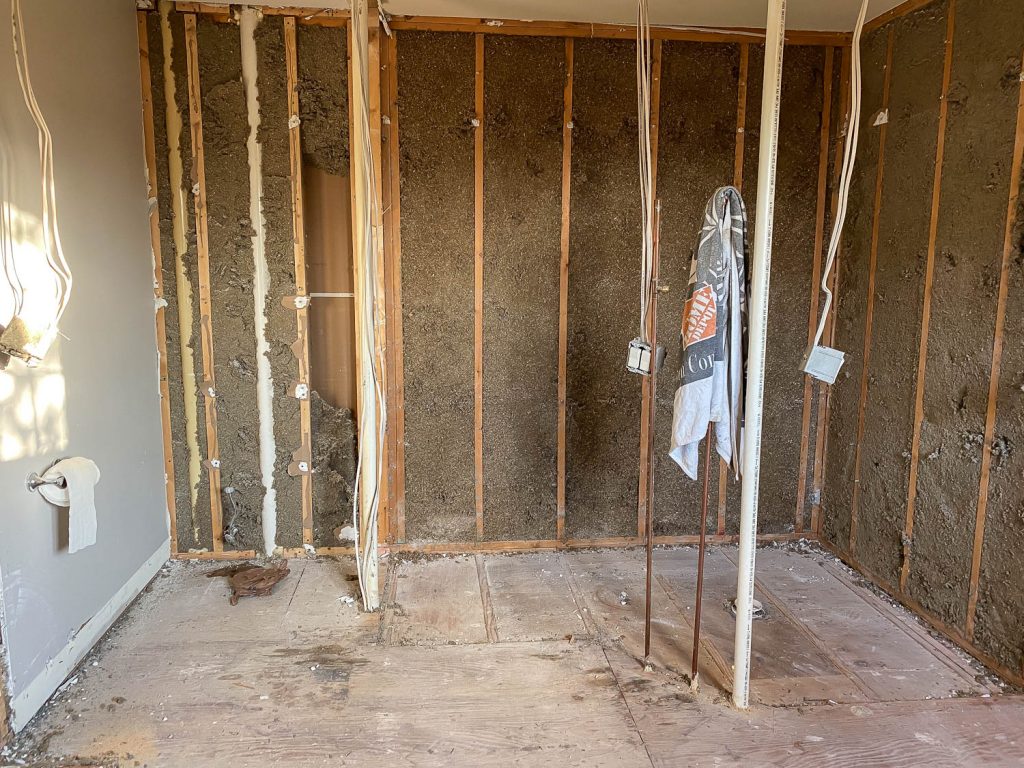
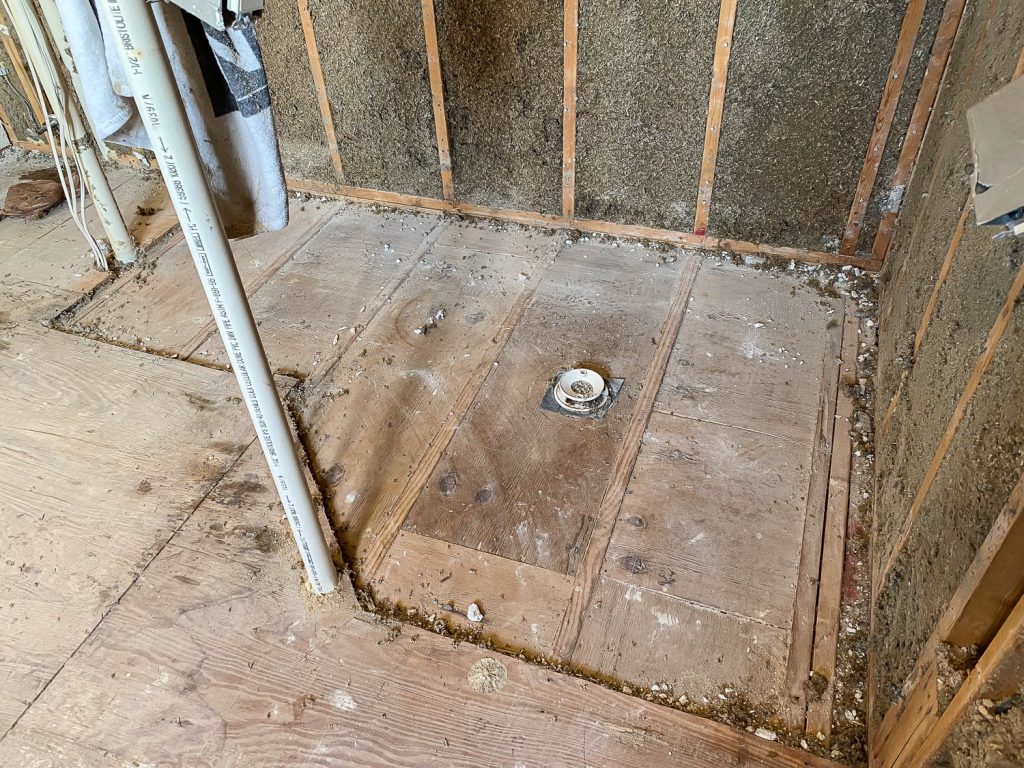
I want to bring your attention to how the original builders created the curbless shower. Notice how the subfloor in the shower area is recessed in between the floor joists, instead of laid on top of it? The shower floor needed to be recessed even more to account for the thickness of the tile, mortar, and mud bed, but instead of going further down, the builders built the floor up around it. Genius! I never knew that this is how it’s done.
What is a Curbless Shower?
So what is a “curbless” shower? A curbless shower (sometimes called a “zero-entry shower”) is a shower that doesn’t have a threshold or curb. Not only does the seamless design look beautiful, but there are a few practical benefits as well.
A curbless shower eliminates a tripping hazard, making it easily accessible for all ages. It’s a great idea to add a curbless shower when you need a home to age with you. Curbless showers are also easier to clean – there are less nooks and crannies where mildew or mold can grow. They can also make the room appear larger by allowing the floor tile to flow seamlessly throughout. There are no visual interruptions that can chop up a space. We’re thrilled that the original homeowners had the bathroom already set up with a curbless shower, so we’ll be sure to keep this upgrade in our master bathroom remodel.
The Quest for a Wet Room
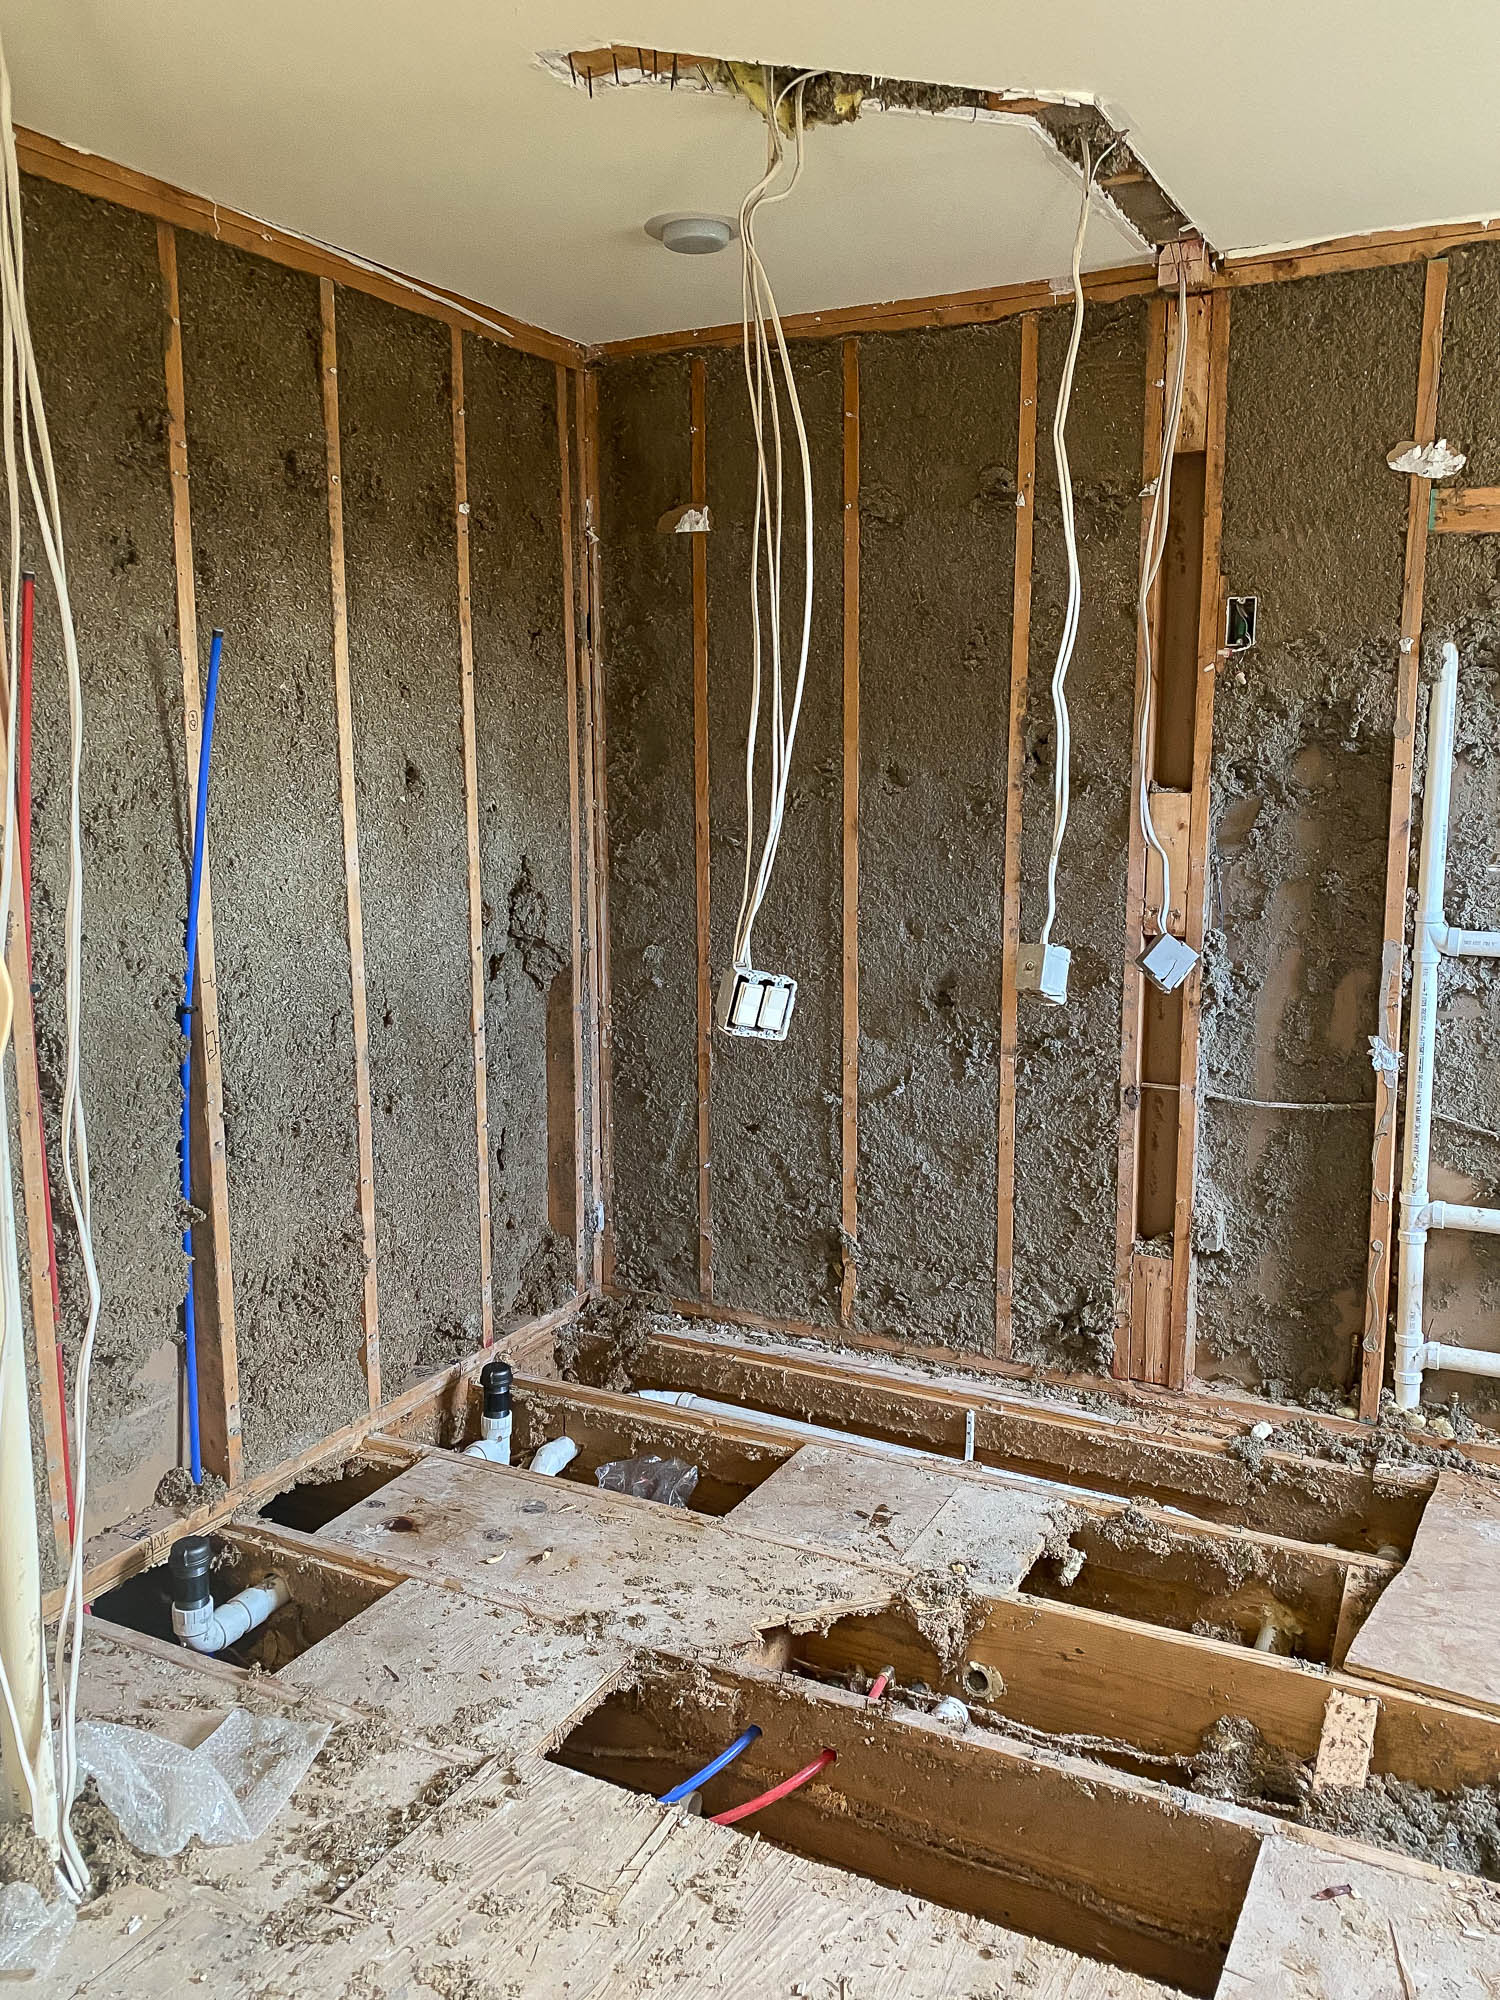
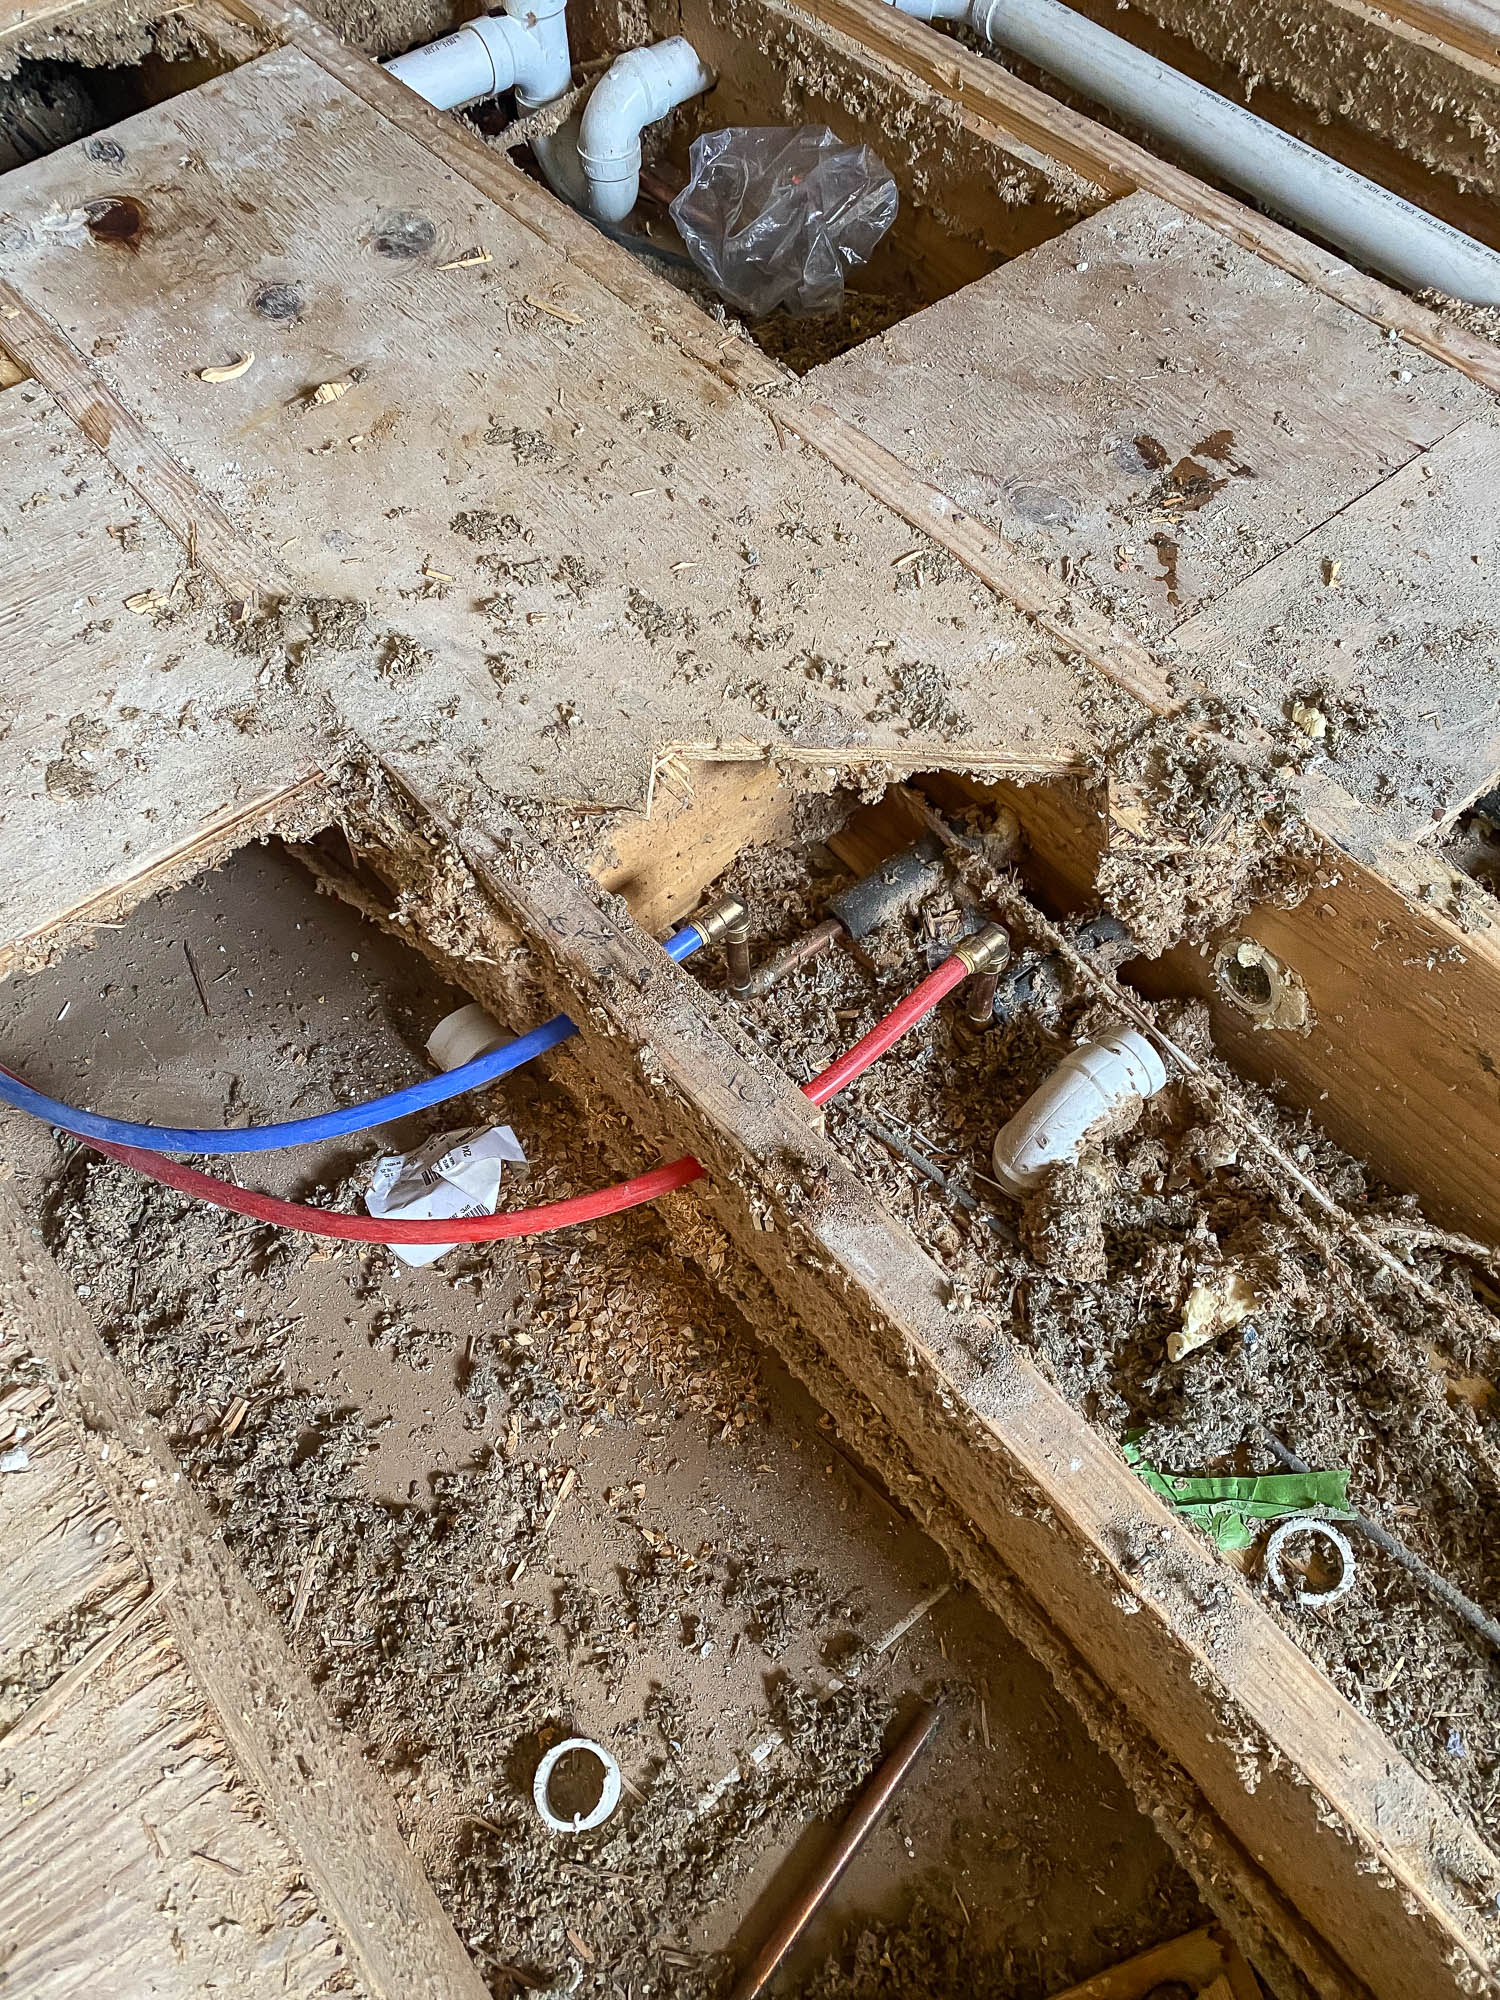
As I mentioned in the original bathroom design plan, one of my wishlist items was to have a wet room. I talk more in-depth about what a wet room is and why we want one in this post. Ideally, I wanted to have a bathtub and two showers in the wet room for a high-end, luxury designer bathroom look. To allow space for this, we planned to move the water closet across the room. However, moving waste lines can be incredibly difficult and time-consuming, so in order to ensure that it could even be done in our case, our contractors requested that we pull up the subfloor so that they could see if any obstructions would prevent the toilet relocation. The photo below shows the space after we tore up the subfloor. What a mess!
Alternate Layouts To Consider
After the floor was torn up, we reassessed the layout. As it turns out, moving the water closet to the opposite side of the room was going to prove to be more difficult than we expected. Also, once I was able to tape off the area, walk around in the space and really experience what it would physically feel like, building a wall for the water closet on the other side of the room would have made the entire bathroom feel cramped and small, which is exactly the opposite result I was hoping for! Now that we know we can’t move the toilet, this means there won’t be enough space for a tub and two showers, so I have a couple of new layouts to consider:
- Option 1: A wet room with a bathtub and just one shower
- Option 2: Remove the bathtub altogether in favor of a large double shower.
After much deliberation, we realized we wanted a double shower more than we wanted a bathtub. Though I love the idea of a wet room, in all the years Adam and I have been married, we’ve never actually used a bathtub for ourselves! When the kids were babies, we used a bathtub for them, but now that they’re older, they take showers. Fortunately, should the need for a tub ever arise, there’s still one in the kids’ bathroom. And so goes the story of how the soaking tub was sacrificed due to space constraints and our personal lifestyle.
Once that was decided, the plumbers tied in the new water lines to the old ones and replaced the copper pipes with PEX pipes. I talk more about why they choose to use PEX piping in this post.
Framing the Water Closet
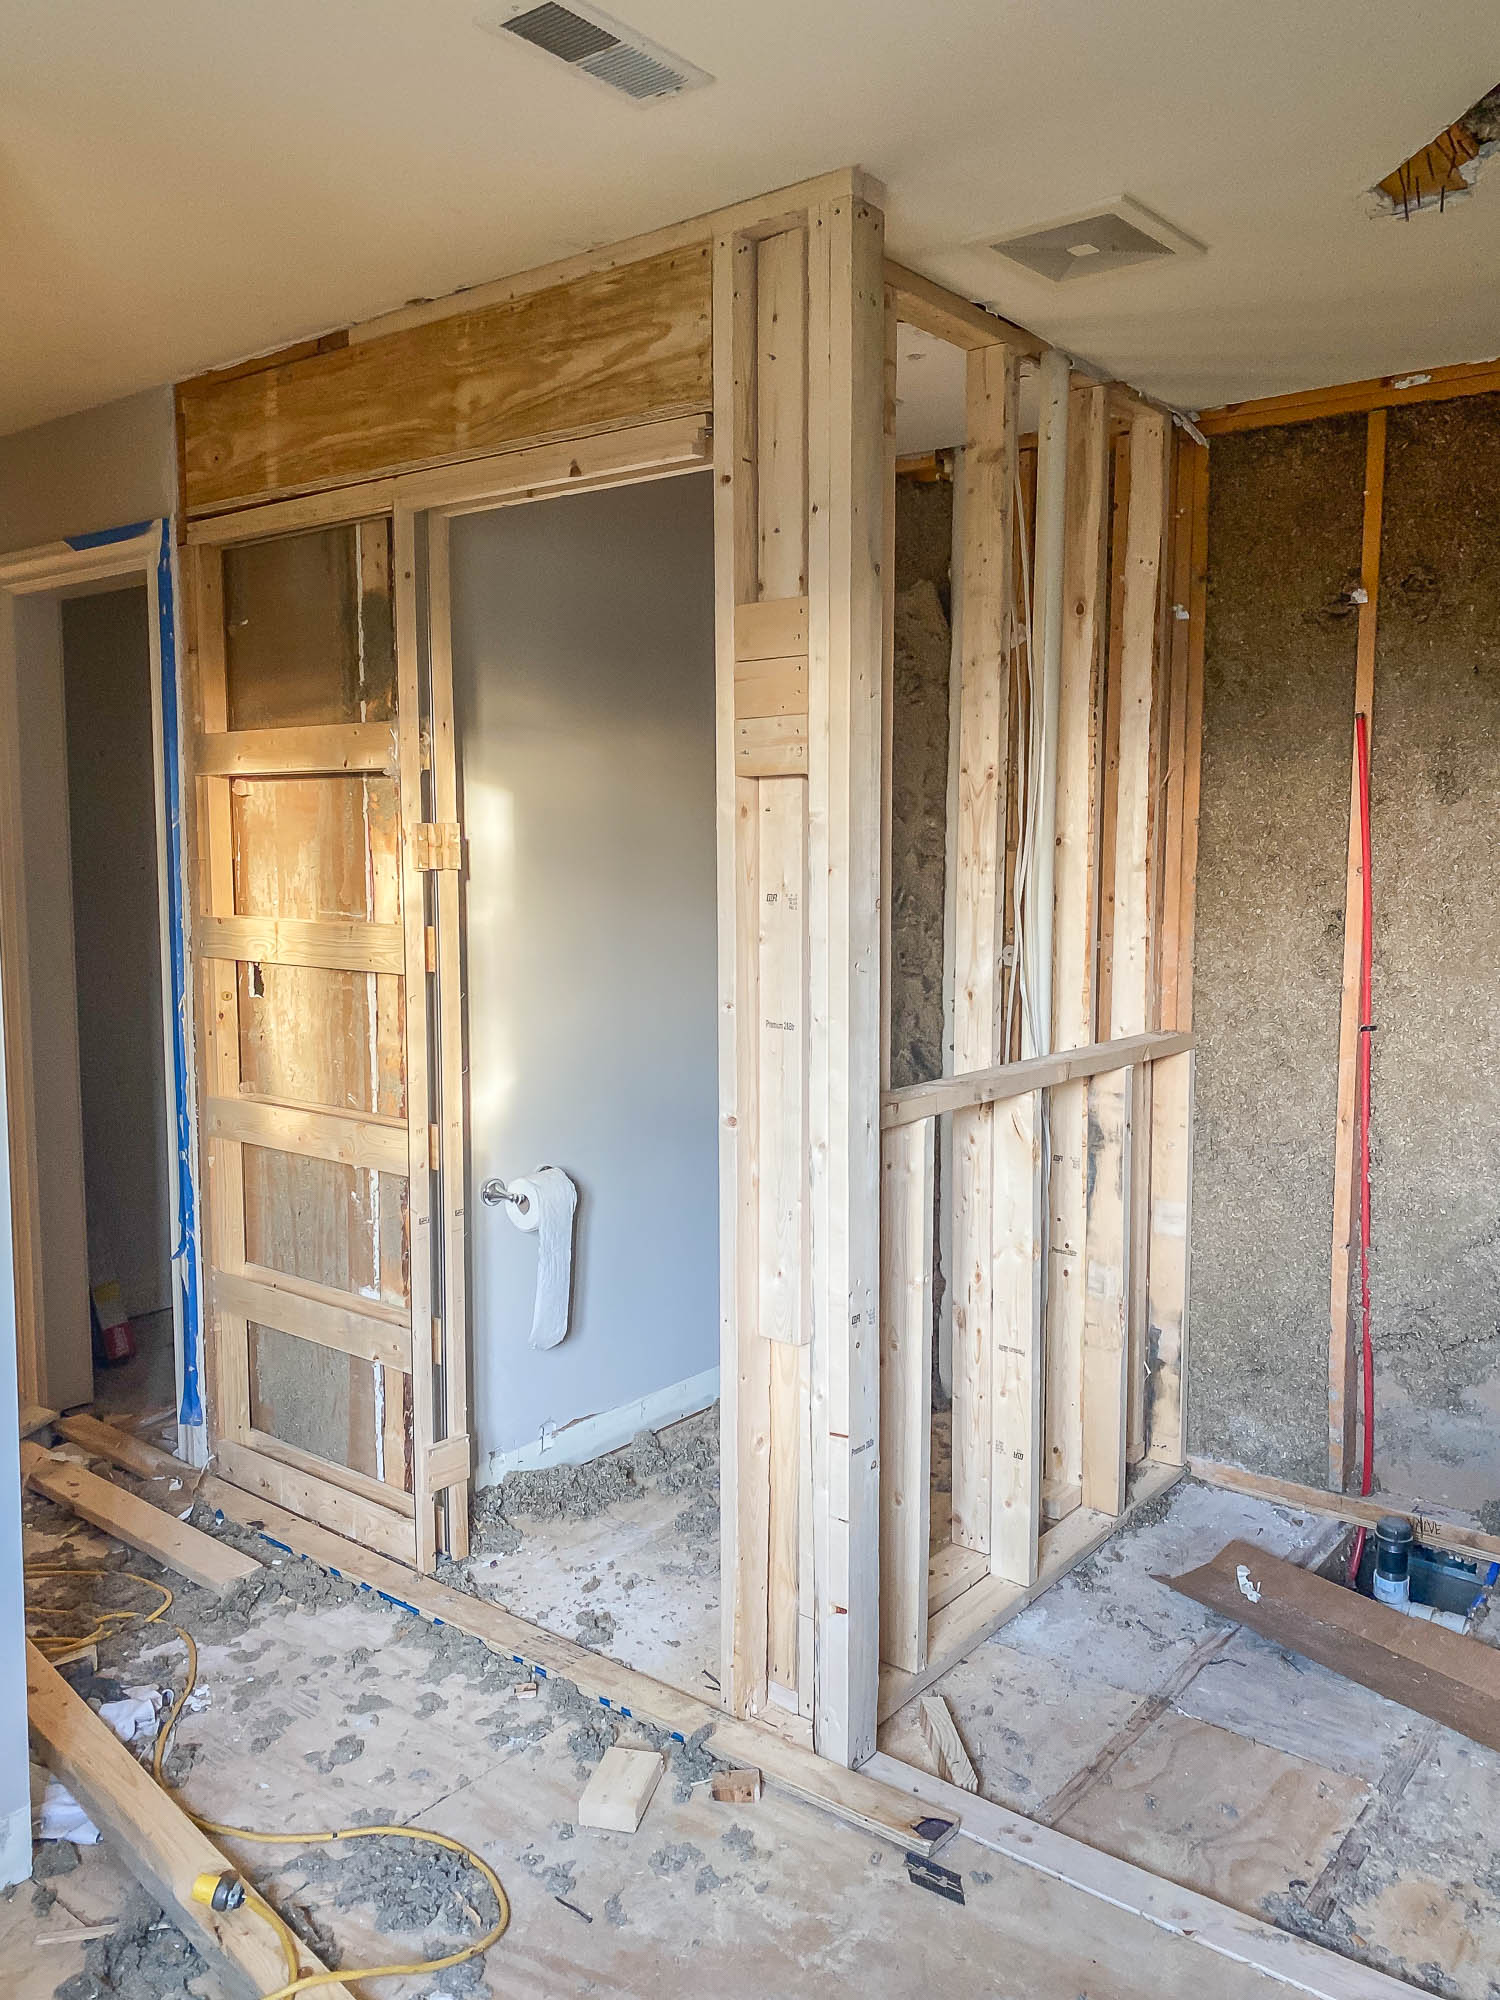
We were able to gain a bit more square feet in the water closet by squaring off the room. It’s surprising just how much that angled wall made the toilet room feel claustrophobic. Also, since we switched the out-swinging door with a pocket door, we’ll save even more precious real estate by not having a door swing into the room and block the pathway, like it did previously.
Installation for a pocket door is pretty straightforward. It made a lot of sense to install one here, just as we did in our powder room. We purchased this pocket door frame and simply set it in place, added a header above, made sure everything was level and plumb, then nailed the pocket door frame to the studs. Easy peasy. Pocket doors aren’t very expensive and I love that they’re a great space-saving solution.
Things To Consider During the Framing Stage
Another thing to consider during the framing stage is where you might need additional stud support for fixtures like shower grab bars, bars and hooks to hang towels, etc. It’s a good idea to map out where these things will go so you can add extra 2/4 blocking. In the photo below, notice the extra blocking we added in between the studs – these will be for the towel/robe hook and handheld shower slide bar hardware.
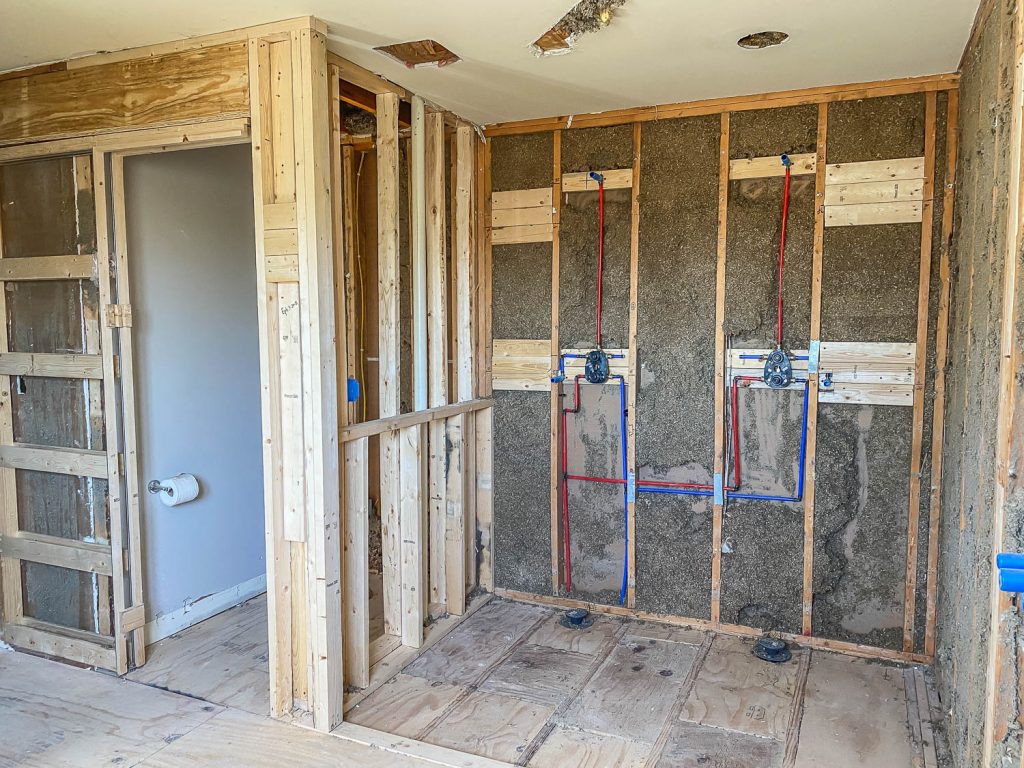
We also added extra blocking for the shower glass to securely anchor to. I need to remember to add blocking to hang the double vanity mirrors and light fixtures too. A little planning and foresight during the framing stage will go a long way in the end! I can’t wait to see this space covered in beautiful marble and glass! It’ll turn into such a beautiful spa-like retreat!
Rough-In Electrical
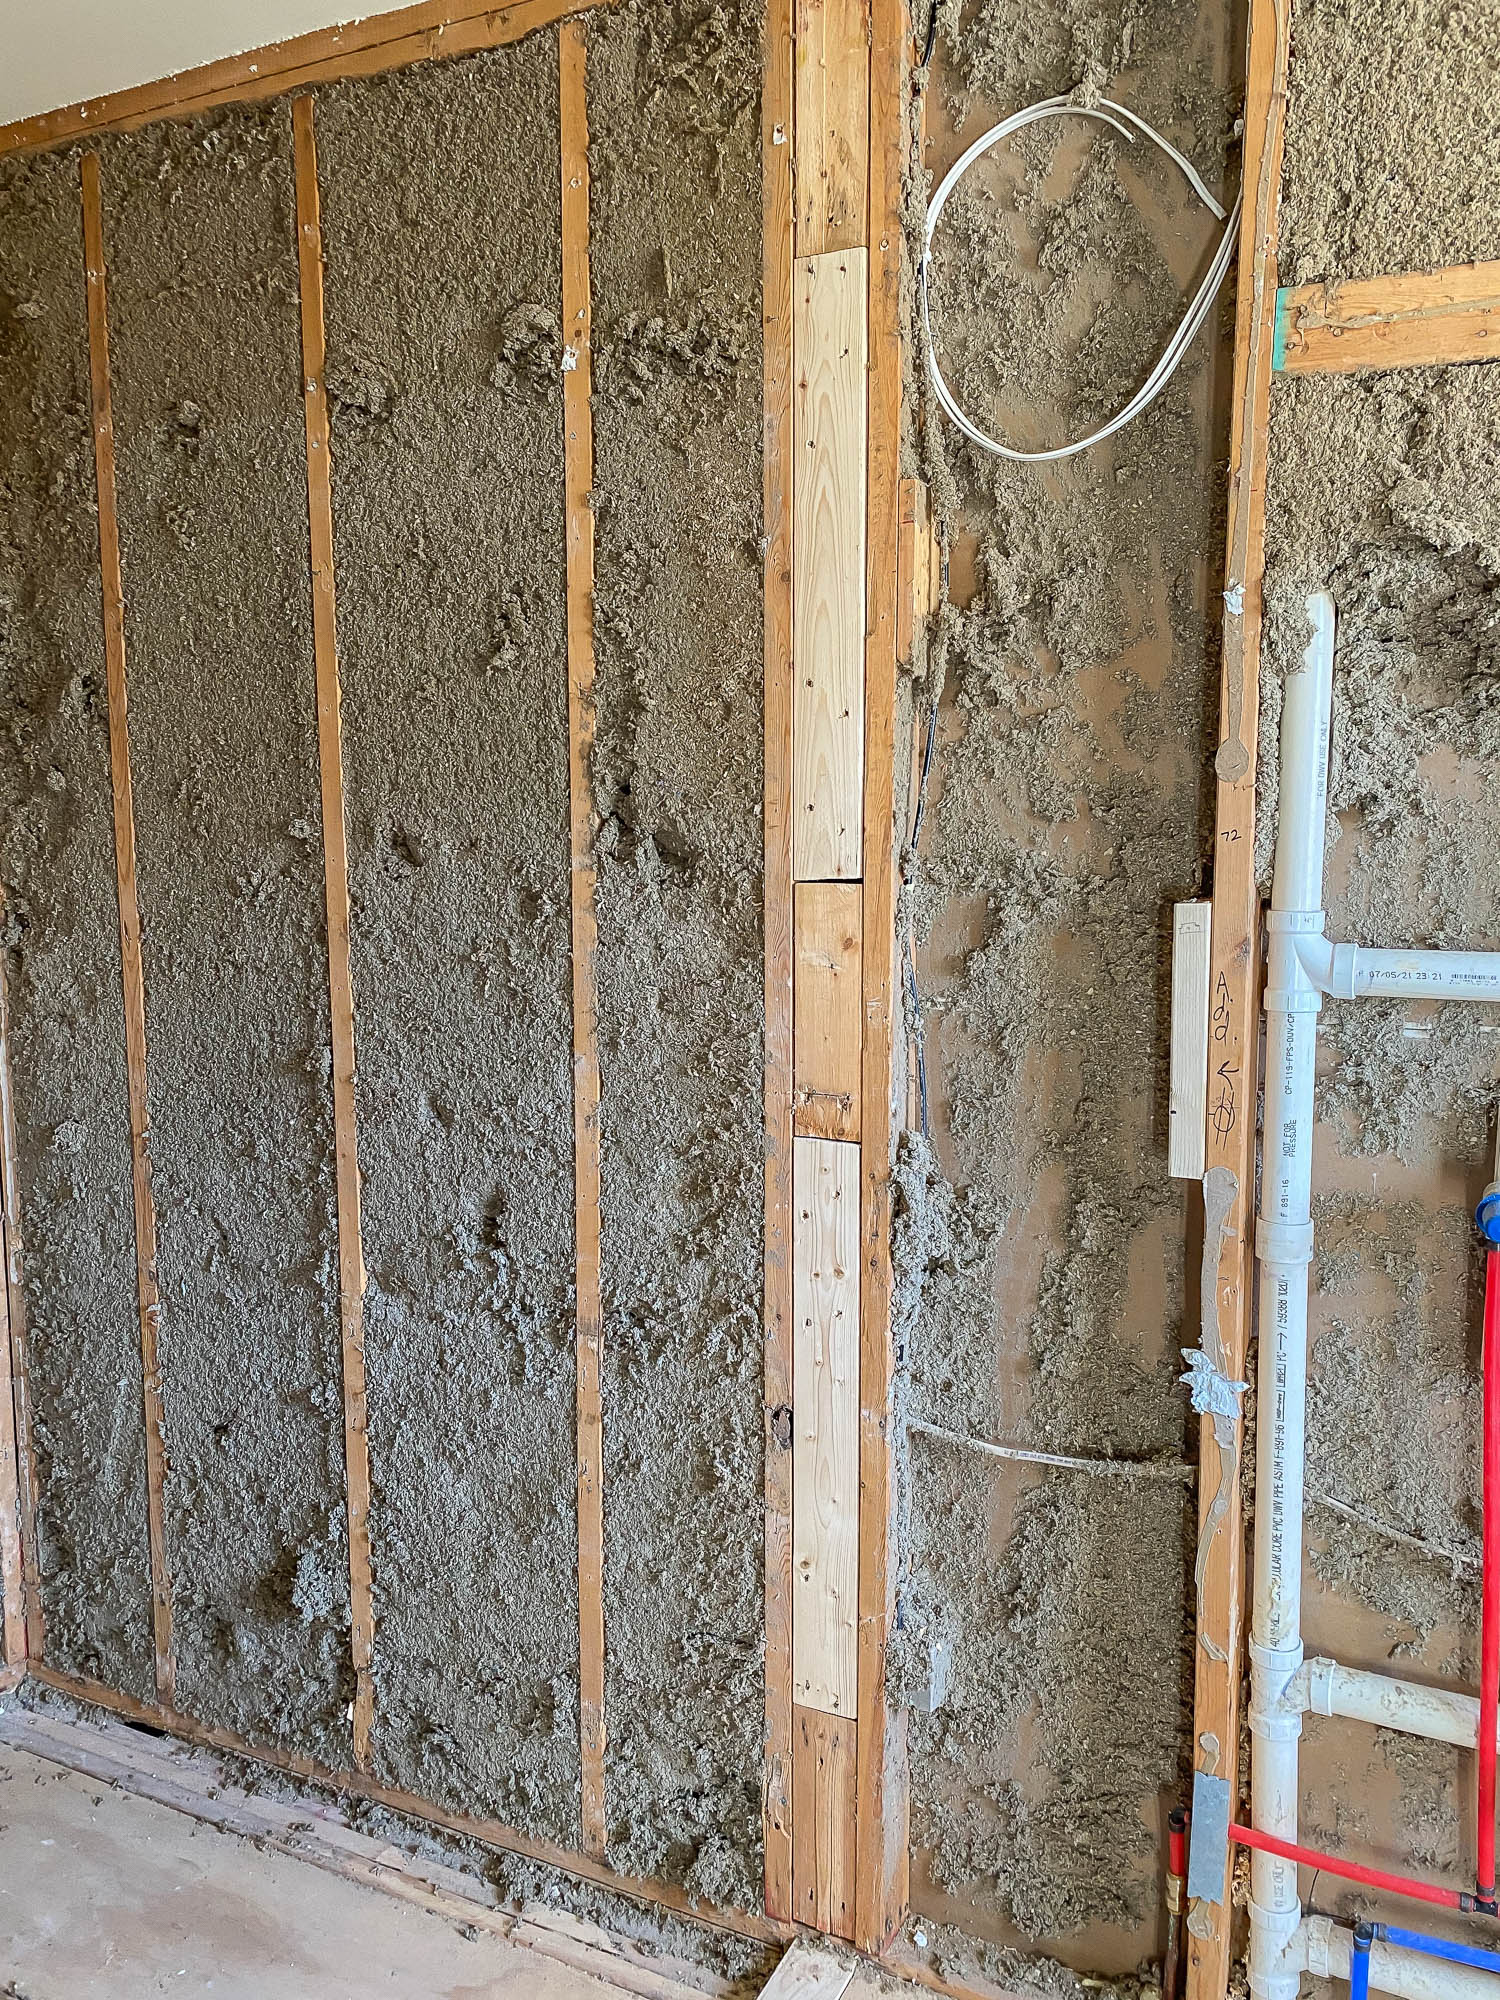
Our electricians spent a day and pulled the old wires up into the attic and rerouted the new wires. There’s an access door in the ceiling of Adam’s closet, so they were able to gain easy access to all the wiring. They plan on moving and adding few recessed lights so that the fixtures line up with our new layout. We’re also upgrading the exhaust vents in the space. In the water closet, we’ll install this exhaust fan/recessed light combo (it’s the same one we used in our guest bathroom renovation) and for the double shower, we’ll stick with the ultra-thin LED recessed lights and a separate exhaust fan. For the double vanity, I plan on using a natural stone counter with a decorative backsplash. I didn’t want to interrupt the beautiful view, so I’m asking the electricians to hide the power outlets in the vanity. I also asked them to install an outlet in the water closet (not only to power the bidet seat, but also so we can charge our phones!).
Makeup Vanity or Linen Storage?
Here’s the view of the other side of the room. And, after being in the space, I can now see that cramming a water closet in that corner would have made the whole bathroom feel cramped. I’m feeling good that we pivoted and chose to leave the water closet where it was. Even though I won’t get the wet room I’ve always dreamed of, keeping the toilet where it was saved my plumbers time and effort, which saved me money! I’ll put a pin in that whole wet room idea and hopefully we can make it happen in our “forever home.”
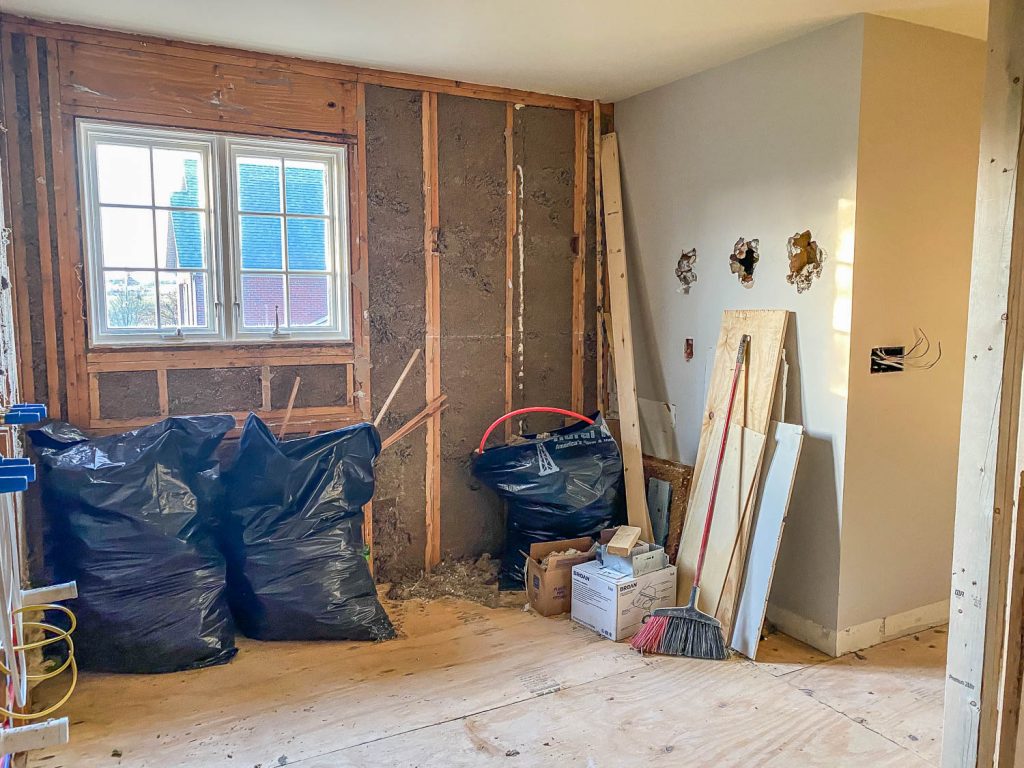
Now that we have all this open space, what shall we do with it? I can put a makeup vanity here or maybe some shelving or storage space for linens? We definitely need some kind of towel storage, so maybe a freestanding linen cabinet is the way to go. I’m envisioning an antique glass display cabinet, a beautiful piece of wood furniture that will add warmth and texture to the space. The hunt is on!
Now that demo, framing, rough-in plumbing, and electrical are done, it’s time for drywall! That’s scheduled for next week, so stay tuned! If you want to see more behind-the-scenes footage of this bathroom renovation, be sure to follow me on Facebook and Instagram.
To Do List + Timeline Breakdown
Design/planning: 1-2 weeksHire contractors: 1-2 weeksOrder products: 1-3 monthsDemolition: 2-3 daysFraming: 2 daysRough-in plumbing: 2 daysRough-in electrical: 2 days- Insulation, cement board, drywall installation: 3-5 days
- Waterproofing: 1 day
- Tile installation: 8-10 days
- Countertop fabrication: 1 week
- Cabinetry: 2-4 weeks
- Shower glass fabrication: 1-2 weeks
- Finish plumbing: 1 day
- Finish electrical: 1 day
- Finish carpentry: 1-2 days
- Painting: 3-5 days
- Inspection: 1 day


I can’t wait to see how it all goes and the end. I am enjoying the process and learning a lot. I need a zero entry shower for my daughters who utilize wheelchairs, so this will be VERY helpful to me. I would love to see how you frame the wall. A tutorial would be AWESOME!!! We’re in Florida and our quotes for an accessible bathroom is $65k-$85K. That’s just moving a wall 12 inches back into the living room, moving the toilet and plumbing for the zero entry shower. We are hoping to do some of it ourselves to bring down the cost. I leave the plumbing to the professionals but if I could frame it, we could do most of it. So, following you closely for all details on this bathroom remodel!!! 🙂
I keep chuckling how the toilet paper roll has stayed on the wall throughout the project – it just won’t let go! It’s a survivor!
Great Blog! Bathroom remodel updates on demo, framing, plumbing, and electrical rough-in are crucial stages that lay the foundation for a successful renovation. It’s fascinating to follow the progress and see how these essential steps transform the space. Can’t wait to see the final results!
Wow, this renovation update is so detailed and informative! The breakdown of demo, framing, plumbing, and electrical rough-in is incredibly helpful for anyone undertaking a similar project. Can’t wait to see the finished result—thanks for sharing this behind-the-scenes look!